We have progress!

Ive been busy obtaining materials and components as I couldn't get on with the CAD model until I knew what I had to play with. I have enough components now so its on with the show.
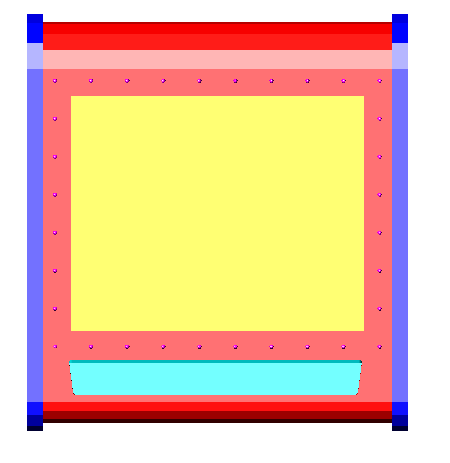
This is what I'm planning to make, ignore the colourscheme, Ive just coloured the parts so its easier to see and explain. The model isn't complete but I have managed to get enough data from it to start building.
Front View:
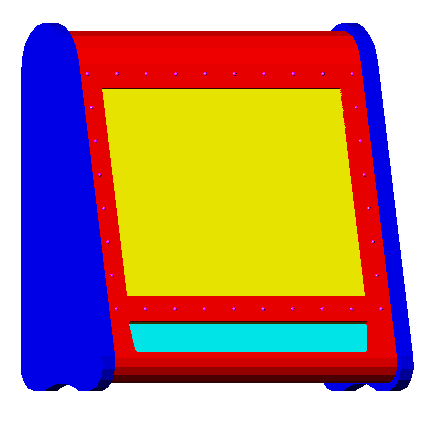
Side Profile:

I'm going for a table top juke with the screen set back at 15 degrees. I'm using a 17" so I wanted to keep the size of the juke down and have a relatively small foot print. The yellow section obv is the monitor, the green section is the Dell speaker bar (a la' mountain) and the blue sections are the end pieces/feet. The front and back of the juke are going to be faced with 5mm pink plexi and the rest will be pink polycarb overlay (CPO) or similar.
As far as colour scheme I'm going for pink with chrome t-moulding, some other chrome striping and a couple of stainless steel accents here and there. You can see an array of 32 pink dots around the screen. I'm planning on putting an LED Wiz in too to control some pink LEDs for fun.
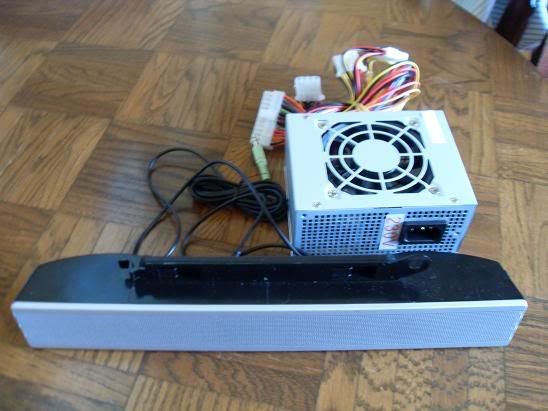
I picked up a [
300W Micro ATX Silent P4 PSU] for £14.53 from
www.microdirect.co.uk. The same PSU is £40 in Maplins so I thought that was a pretty good deal.
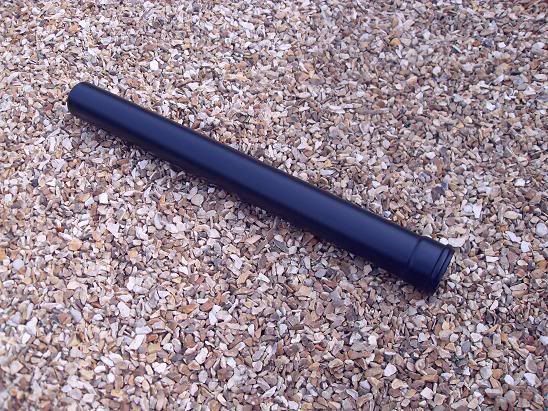
Okay, on with the construction. The jukes profile is basically a big wedge with a large radius at the top and two smaller radii at the bottom. All of the radii are too small to be able to bend 3mm MDF comfortably so I came up with another solution to create the radii.
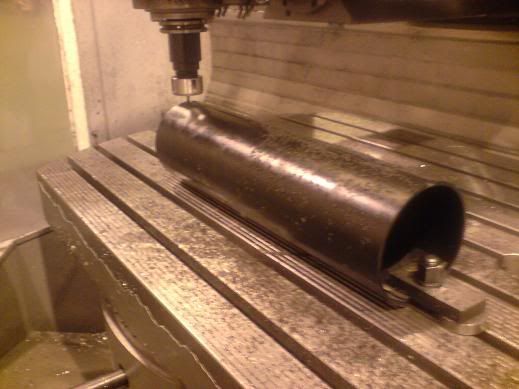
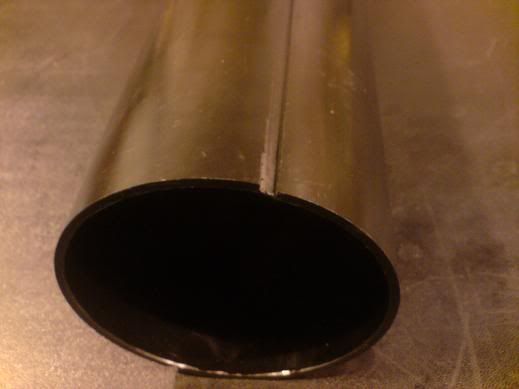
I picked up a section of 110mm OD soil pipe from B&Q:
I chopped a section out of it and took it to work. The first thing I did was to face it to length on a center lathe so it was the same length as the monitor (405mm):

(You will have to excuse me for some of these pics, I only had my camera phone on me and it doesn't always take the best pictures).
My screen will be set back at 15 degrees so the angle between the front section and the back of the juke is 165 degrees. I needed to cut a 165 degree section out of the pipe to form the top radius so I made a combined angle gauge, router template and drilling template:
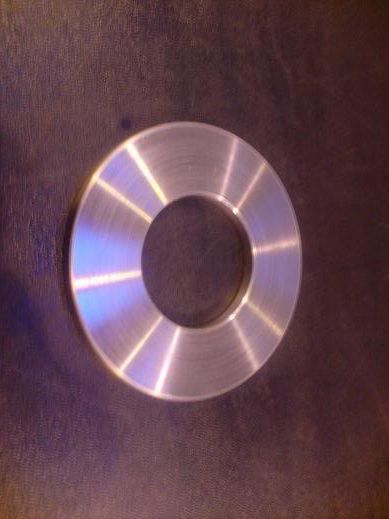
I turned a ring to match the inside diameter of the soil pipe (102.7mm):
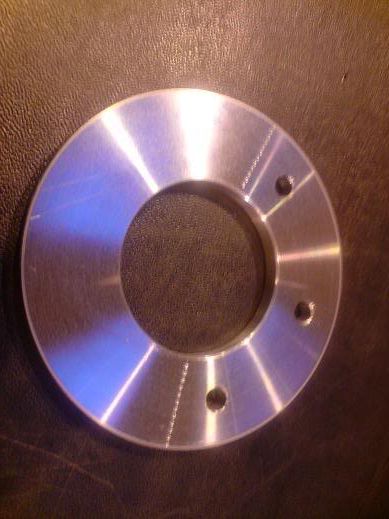
I then drilled and c/sunk holes for dowels and for fixing the template for routing (all will become clear later), I also spot marked out the 165 degree and using the CNC mill and a center drill:
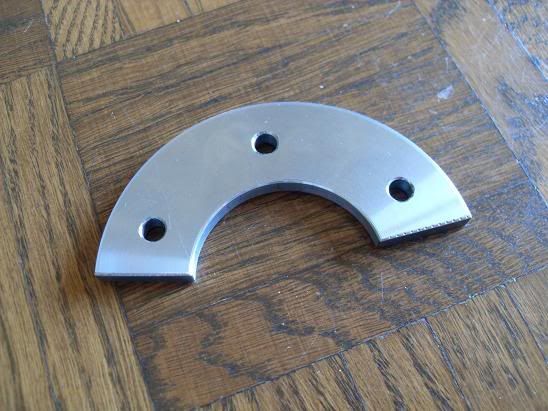
Finally I hacksawed the part of I didn't need and filed the gauge/template to size:
I clamped the pipe to the m/c table and clocked it true. I used a 3mm cutter and carefully milled a groove just over half way through the wall thickness:
I then rotated the tube and used a engineers square along with the gauge template I made to set the machine so that the next cut would leave me with a 165 degree section. I milled just over half way again and removed the pipe from the m/c:
All I had to do then was hacksaw the remaining material in the groove and file the excess to meet the milled line.
Here is a photo of the finished section with the gauge/template in it and also with the 1/4" stainless tube in using for dowels:
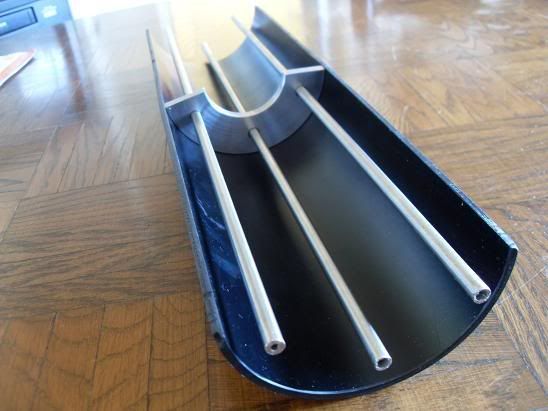
I'm going to use the template/gauge to template route three or four pieces of MDF (the same shape as the template) and then use the holes to align the pillar drill to drill the dowel holes so it all lines up nicely. The MDF cut outs will support the tube and help to keep it nice and strong.
For the bottom to radii I was going to do something similar with some 50mm OD tube but I called into B&Q on the way to work today and they have some 21x21 pine quadrant (42mm OD) that I'm going to use instead. I will have a 15 degree gap to fill but that wont be a problem.
Ive got the day off tomorrow so I'm hoping to get as much of the construction done as possible.


 Home
Home Help
Help Search
 Login
Login Register

 Send this topic
 Print
Print Topic: Pinky McJuke - Believe it or not, work continues =) (Read 61541 times)


