Main Restorations Software Audio/Jukebox/MP3 Everything Else Buy/Sell/Trade
Project Announcements Monitor/Video GroovyMAME Merit/JVL Touchscreen Meet Up Retail Vendors
Driving & Racing Woodworking Software Support Forums Consoles Project Arcade Reviews
Automated Projects Artwork Frontend Support Forums Pinball Forum Discussion Old Boards
Raspberry Pi & Dev Board controls.dat Linux Miscellaneous Arcade Wiki Discussion Old Archives
Lightguns Arcade1Up Try the site in https mode Site News

Unread posts | New Replies | Recent posts | Rules | Chatroom | Wiki | File Repository | RSS | Submit news


Author Topic: Aliens Themed Cab  (Read 152012 times)

0 Members and 1 Guest are viewing this topic.

Epyx

  • Trade Count: (+1)
  • Full Member
  • ***
  • Offline Offline
  • Posts: 1961
  • Last login:December 25, 2023, 07:56:36 pm
  • "You're an oddity"
Re: Aliens Neon Curvy Upright Horizontal Project *Coin Door* Feb 6 2010
« Reply #280 on: February 08, 2010, 09:12:26 pm »
Big update coming in a few days but until then here is a micro update.

As shown previously, I have 12 of the Green LED Novagems, 2 green and LED illuminated  JLW Joysticks, a green RGB trackball but my Turbo Twist 2 was blue (Big Blue knob) so I gave it a coat of UV green:


It's a UV paint so will glow a nice neon green when lit with a blacklight. I will have a blacklight just under the marquee.  I can't wait to see these all lit up against a nice pure black CP...I think the pure black will contrast nicely against the lighting...artwork on the CP would be too much.

Painting was done in 2 passes...first 2 coats were straight neon green for a base...then a UV reactive clear (blacklit neon green) coating overtop.

UV Product: http://www.xoxide.com/greenuvpaint.html


« Last Edit: February 08, 2010, 09:20:19 pm by Epyx »
Last Project


Epyx Tutorials:
Tutorials

Epyx

  • Trade Count: (+1)
  • Full Member
  • ***
  • Offline Offline
  • Posts: 1961
  • Last login:December 25, 2023, 07:56:36 pm
  • "You're an oddity"
Re: Aliens Neon Curvy Upright Horizontal Project *UV Green TT2* Feb 8 2010
« Reply #281 on: February 09, 2010, 12:37:13 pm »
Any ideas on how I can do the curve that connects coin door to CP?  I was thinking of the same plywood but it is almost impossible to get it to bend that extreme without cracking.  My two current options are:

- Some sort of half cut PVC pipe? Would need to be 8" or so in diameter to get the right angle
- Woodworking wizardry to have strips of MDF cut to form the semi circle required

Any other ideas?
Last Project


Epyx Tutorials:
Tutorials

Pixelhugger

  • Trade Count: (+8)
  • Full Member
  • ***
  • Offline Offline
  • Posts: 1865
  • Last login:May 25, 2024, 11:35:14 pm
Re: Aliens Neon Curvy Upright Horizontal Project *UV Green TT2* Feb 8 2010
« Reply #282 on: February 09, 2010, 12:55:58 pm »
Maybe benderboard. Can be a bendable plywood made flexible enough to roll up like a poster or an MDF material with pre cut kerfs. I've heard kerfing can telegraph through veneer, (but maybe not laminate??)

Here is some related info from http://www.joewoodworker.com/veneering/vacuumforming.htm

Quote
"What is the tightest curve I can pull in a vacuum bag?"

Tighter curves are made by using a thinner substrate. These are the bending radius limits, costs and sources for four kinds of thin ply I have used.

5.2mm Luan plywood with one face sanded off     $12  Most large hardware stores    MIN RADIUS: 4.5 inches
1/8” Whacky Wood Three ply Luan/aspen    $35      www.boulterplywood.com MIN RADIUS: 3 inches
1/8” Birch Bending plywood (two ply)        $35     www.theworkbench.com   www.boulterplywood.com  MIN RADIUS:1.5 inches
Birch Aircraft Plywood 1.5mm (1/16”)           $90       www.wicksaircraft.com         MIN RADIUS: ¾” inch
Project mega thread HERE

Pixelhugger

  • Trade Count: (+8)
  • Full Member
  • ***
  • Offline Offline
  • Posts: 1865
  • Last login:May 25, 2024, 11:35:14 pm
Re: Aliens Neon Curvy Upright Horizontal Project *UV Green TT2* Feb 8 2010
« Reply #283 on: February 09, 2010, 01:04:09 pm »
Or maybe a thin sheet of frosted (sanded?) acrylic backlit green with the Alien's name etched into it.  :dunno
Project mega thread HERE

Epyx

  • Trade Count: (+1)
  • Full Member
  • ***
  • Offline Offline
  • Posts: 1961
  • Last login:December 25, 2023, 07:56:36 pm
  • "You're an oddity"
Re: Aliens Neon Curvy Upright Horizontal Project *UV Green TT2* Feb 8 2010
« Reply #284 on: February 09, 2010, 01:09:03 pm »
Thanks Pixelhugger!  Some good links. I had thought of trying to find some bendable MDF locally...I wonder if routing MDF would produce similar results? IE routing strips along the 3/4" mdf to within 1/4" of the bottom...would that allow it bend similarly or would it just crack?

The vacuum option is pretty cool ill have to read that  more at lunch...and the acrylic is another possibility. Thanks!
« Last Edit: February 09, 2010, 01:11:39 pm by Epyx »
Last Project


Epyx Tutorials:
Tutorials

Nacimroc

  • Trade Count: (0)
  • Full Member
  • ***
  • Offline Offline
  • Posts: 303
  • Last login:October 20, 2015, 03:46:25 pm
Re: Aliens Neon Curvy Upright Horizontal Project *Coin Door* Feb 6 2010
« Reply #285 on: February 09, 2010, 01:15:09 pm »

Also Nacimroc...I think I mentioned it but just in case...yours turned out fantastic, I really like how you finished it  :cheers:


Thanks! If only it would sell now, I'd be even happier!  :lol

As regards bending wood, this thread from a few days ago might help.

http://forum.arcadecontrols.com/index.php?topic=99772.0

I used 3mm plywood and it bends very easy and should bend even more if steamed or even heated. 3mm Hardboard would be even better for you as you don't need anything structurally strong.

An alternative would be to use acrylic or lexan. Would be easier bend over a curve.
« Last Edit: February 09, 2010, 01:28:16 pm by Nacimroc »

Epyx

  • Trade Count: (+1)
  • Full Member
  • ***
  • Offline Offline
  • Posts: 1961
  • Last login:December 25, 2023, 07:56:36 pm
  • "You're an oddity"
Re: Aliens Neon Curvy Upright Horizontal Project *UV Green TT2* Feb 8 2010
« Reply #286 on: February 09, 2010, 01:39:14 pm »
Thanks Nacimroc. I actually read that thread but haven't found a place (yet) here in Vancouver that sells it...I know I can order it online and will if it is my last option.  It gave me the thought of routing regular MDF but I think the bendable stuff has a different surface to prevent if from easily splitting?

Either way...Ill leave it for last so whatever I end up with looks good. Ill have some updates of the marquee, sideart and bezel hopefully by this weekend.  I aim to have the cab done by the 21st as my buddy and I are having a birthday bash (hes 19th and im 21st) and want the cab there to play on with our other friends.
Last Project


Epyx Tutorials:
Tutorials

opt2not

  • Trade Count: (+15)
  • Full Member
  • ***
  • Offline Offline
  • Posts: 6173
  • Last login:April 02, 2024, 07:42:30 pm
Re: Aliens Neon Curvy Upright Horizontal Project *UV Green TT2* Feb 8 2010
« Reply #287 on: February 09, 2010, 02:01:58 pm »
Thanks Nacimroc. I actually read that thread but haven't found a place (yet) here in Vancouver that sells it...

If you're talking about Lexan or Acrylic, the Home Depot on Terminal & 1st has a bunch of them, in large and small sheets. That Home Depot also carries Formica, in case you need some.


Epyx

  • Trade Count: (+1)
  • Full Member
  • ***
  • Offline Offline
  • Posts: 1961
  • Last login:December 25, 2023, 07:56:36 pm
  • "You're an oddity"
Re: Aliens Neon Curvy Upright Horizontal Project *UV Green TT2* Feb 8 2010
« Reply #288 on: February 09, 2010, 02:24:43 pm »
Quote
If you're talking about Lexan or Acrylic, the Home Depot on Terminal & 1st has a bunch of them, in large and small sheets. That Home Depot also carries Formica, in case you need some
.

Lexan and acrylic are available here in Langley/Surrey no problem.  Im curious about the Formica at Terminal and 1st? It was my understanding HD in BC will no longer carry flat black formica...only other colours...do you recall seeing flat black there?

Last Project


Epyx Tutorials:
Tutorials

opt2not

  • Trade Count: (+15)
  • Full Member
  • ***
  • Offline Offline
  • Posts: 6173
  • Last login:April 02, 2024, 07:42:30 pm
Re: Aliens Neon Curvy Upright Horizontal Project *UV Green TT2* Feb 8 2010
« Reply #289 on: February 09, 2010, 02:53:53 pm »
Quote
If you're talking about Lexan or Acrylic, the Home Depot on Terminal & 1st has a bunch of them, in large and small sheets. That Home Depot also carries Formica, in case you need some
.

Lexan and acrylic are available here in Langley/Surrey no problem.  Im curious about the Formica at Terminal and 1st? It was my understanding HD in BC will no longer carry flat black formica...only other colours...do you recall seeing flat black there?


Yeah, that's where I usually buy my Formica.  Home Depot doesn't "officially" carry it, I was told that this Home Depot has some supplier bringing that stuff in, which operates outside of the corporate Home Depot office.  The last time I picked some up was probably over 6 months ago, but they had a bunch of colours, including flat black (which I usually buy) and the stock was pretty full. Perhaps they can let you know over the phone if they still have some.

edit:  Also, a sheet cost $60 CAD.  Hope this helps!

Epyx

  • Trade Count: (+1)
  • Full Member
  • ***
  • Offline Offline
  • Posts: 1961
  • Last login:December 25, 2023, 07:56:36 pm
  • "You're an oddity"
Re: Aliens Neon Curvy Upright Horizontal Project *UV Green TT2* Feb 8 2010
« Reply #290 on: February 09, 2010, 04:16:47 pm »
Cool thanks for the info opt2not, good to know we still have an option for black formica that doesn't cost an arm and a leg ($100+ vs $60).

Last Project


Epyx Tutorials:
Tutorials

saurian333

  • Trade Count: (+4)
  • Full Member
  • ***
  • Offline Offline
  • Posts: 284
  • Last login:June 10, 2014, 07:58:21 pm
  • "They must've spent tens of dollars on this."
    • My b(uild)log
Re: Aliens Neon Curvy Upright Horizontal Project *UV Green TT2* Feb 8 2010
« Reply #291 on: February 10, 2010, 06:54:16 pm »
Haven't checked up on this one in a while; looking very nice.  :applaud:

I love the UV-green spinner knob.  Can't wait to see that baby lit up!

Epyx

  • Trade Count: (+1)
  • Full Member
  • ***
  • Offline Offline
  • Posts: 1961
  • Last login:December 25, 2023, 07:56:36 pm
  • "You're an oddity"
Re: Aliens Neon Curvy Upright Horizontal Project *UV Green TT2* Feb 8 2010
« Reply #292 on: February 11, 2010, 01:09:35 pm »
Thanks Saurian333!

I can't wait either...It should look fairly nice. 

Last Project


Epyx Tutorials:
Tutorials

Epyx

  • Trade Count: (+1)
  • Full Member
  • ***
  • Offline Offline
  • Posts: 1961
  • Last login:December 25, 2023, 07:56:36 pm
  • "You're an oddity"
Re: Aliens Neon Curvy Upright Horizontal Project *UV Green TT2* Feb 8 2010
« Reply #293 on: February 13, 2010, 07:16:53 pm »
Today I mounted my side-art sandwiches ala the Knievel method.  Sandwich consists of the 15" Neon Ring, Plexi, artwork, hardboard backing.  I also completed the first coat of the Marquee retainers and couldn't resist putting them up to see what it will look like.  I can't wait to see these neon rings in action...right now they are still connected to a car lighter but once I have the computer in the cab I will connect them to the PS.


Going to finish a few more cuts right now (Bezel, speaker and bottom marquee retainer shelf). Tomorrow I will laminate them and get them mounted. I will then begin experimenting with the curved portion below the CP and see what I can come up with.

Last Project


Epyx Tutorials:
Tutorials

Gamester

  • Trade Count: (0)
  • Full Member
  • ***
  • Offline Offline
  • Posts: 483
  • Last login:March 01, 2019, 03:00:10 pm
Re: Aliens Neon Curvy Upright *Side Art Mounted* Feb 13 2010
« Reply #294 on: February 13, 2010, 11:15:42 pm »
Looks terrific Epyx!  Can't wait to see it finished.   :cheers:
« Last Edit: February 14, 2010, 07:52:36 pm by Gamester »
Current Project:                                                       First Project:
  

Ond

  • Trade Count: (0)
  • Full Member
  • ***
  • Offline Offline
  • Posts: 2294
  • Last login:June 13, 2024, 01:13:02 am
Re: Aliens Neon Curvy Upright Horizontal Project *UV Green TT2* Feb 8 2010
« Reply #295 on: February 13, 2010, 11:20:39 pm »
I can't wait to see these neon rings in action...


Me too, looking greaaat!  Are you still back lighting the artwork as well?  I'd light them just enough to back illuminate them so you can see it.

Epyx

  • Trade Count: (+1)
  • Full Member
  • ***
  • Offline Offline
  • Posts: 1961
  • Last login:December 25, 2023, 07:56:36 pm
  • "You're an oddity"
Re: Aliens Neon Curvy Upright *Side Art Mounted* Feb 13 2010
« Reply #296 on: February 13, 2010, 11:28:22 pm »
@Gamester

Thanks bud...your completed cab has certainly helped keep me focused on the finish line, considering we started about the same time and you have gotten a lot of playtime in already  :cheers:


Quote
I'd light them just enough to back illuminate them so you can see it.

@Ond

I was contemplating that, that was the original plan but given the space between the monitor sides opted to go just for the lighting of the ring...completely negating the point of making them backlit int he first place :(

I have 2 cathodes for this purpose...maybe even a slit cut in the hardboard so the cathode only lights up the middle where the two lines are...that would look good and wouldn't be drowned out by the neon rings which is what I think you were getting at as well?
Last Project


Epyx Tutorials:
Tutorials

Ond

  • Trade Count: (0)
  • Full Member
  • ***
  • Offline Offline
  • Posts: 2294
  • Last login:June 13, 2024, 01:13:02 am
Re: Aliens Neon Curvy Upright *Side Art Mounted* Feb 13 2010
« Reply #297 on: February 14, 2010, 12:44:46 am »

I have 2 cathodes for this purpose...maybe even a slit cut in the hardboard so the cathode only lights up the middle where the two lines are...that would look good and wouldn't be drowned out by the neon rings which is what I think you were getting at as well?

That could work, if you have the room, what about two cathodes per side in an inverted V shape behind cardboard with a slits cut that are wide enough to light the lines nicely? That would look awesome in combination with the neon rings.  Even without any back lighting I think the rings and art are gonna look great.  That extra snap added by the cathodes would be the icing on the cake.

Epyx

  • Trade Count: (+1)
  • Full Member
  • ***
  • Offline Offline
  • Posts: 1961
  • Last login:December 25, 2023, 07:56:36 pm
  • "You're an oddity"
Re: Aliens Neon Curvy Upright *Side Art Mounted* Feb 13 2010
« Reply #298 on: February 14, 2010, 12:48:18 am »
Quote
That extra snap added by the cathodes would be the icing on the cake.


Agreed. Ill take a few pics and see exactly how much space I have to work with.
Last Project


Epyx Tutorials:
Tutorials

saurian333

  • Trade Count: (+4)
  • Full Member
  • ***
  • Offline Offline
  • Posts: 284
  • Last login:June 10, 2014, 07:58:21 pm
  • "They must've spent tens of dollars on this."
    • My b(uild)log
Re: Aliens Neon Curvy Upright *Side Art Mounted* Feb 13 2010
« Reply #299 on: February 14, 2010, 02:42:58 pm »
That is looking very slick.  I love the artwork/cathode sandwich.  Mmm...sandwich...

Kman-Sweden

  • Trade Count: (+1)
  • Full Member
  • ***
  • Offline Offline
  • Posts: 526
  • Last login:October 23, 2015, 07:29:00 am
  • Up the Irons!
Re: Aliens Neon Curvy Upright *Side Art Mounted* Feb 13 2010
« Reply #300 on: February 14, 2010, 03:05:50 pm »
 :applaud: Keep it up. It looks fantastic.

Epyx

  • Trade Count: (+1)
  • Full Member
  • ***
  • Offline Offline
  • Posts: 1961
  • Last login:December 25, 2023, 07:56:36 pm
  • "You're an oddity"
Re: Aliens Neon Curvy Upright *Side Art Mounted* Feb 13 2010
« Reply #301 on: February 14, 2010, 10:53:49 pm »
Managed to finish the bezel today.

I used 1/2" MDF.  Bezel was cut to  26.5" x 24". I used my router to route the inner portion of the bezel, running along clamped straight edges.  Once cut, I painted the inner edge so it would match the laminate I put on after.
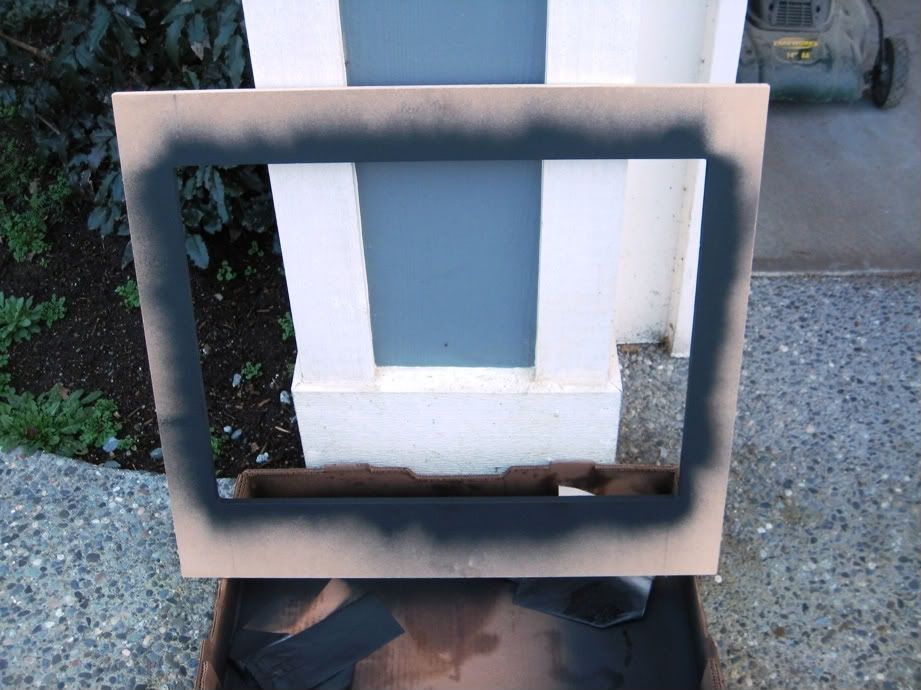


Once the 3 coatings had dried I traced out the bezel on the back of the laminate and then applied glue to both the mdf and the underside of the laminate. I let it dry for about 20 minutes before joining and trimming the laminate.
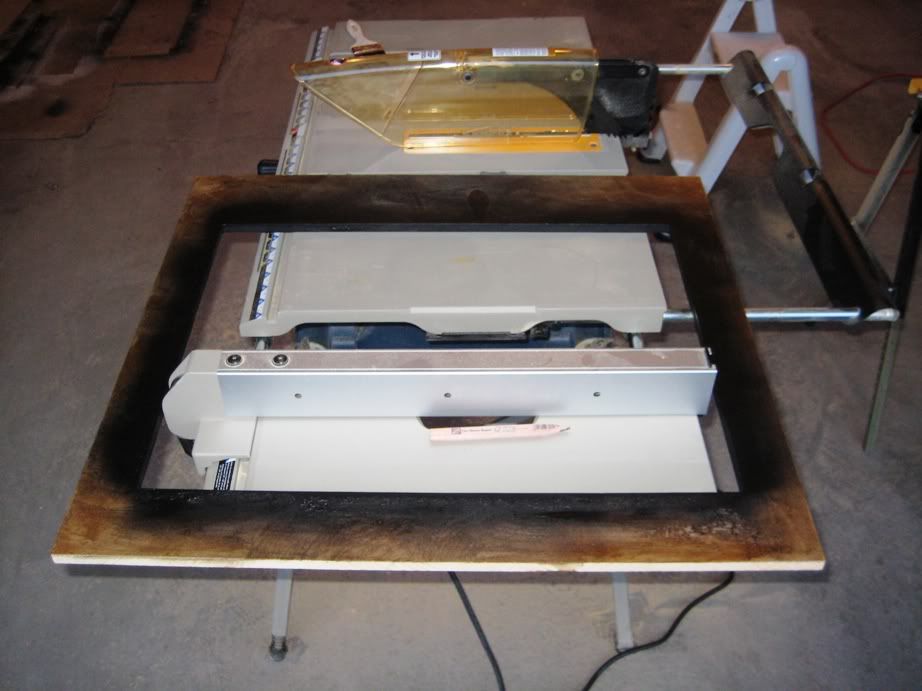
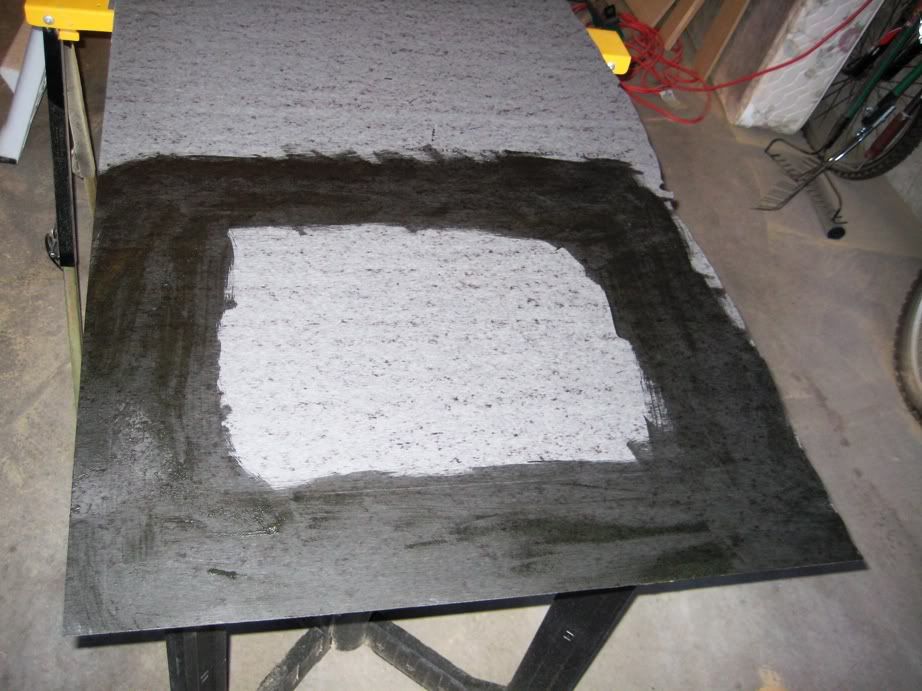


Once the laminate was trimmed, I taped it up and added another 2 coatings of black to the inner portion of the bezel.
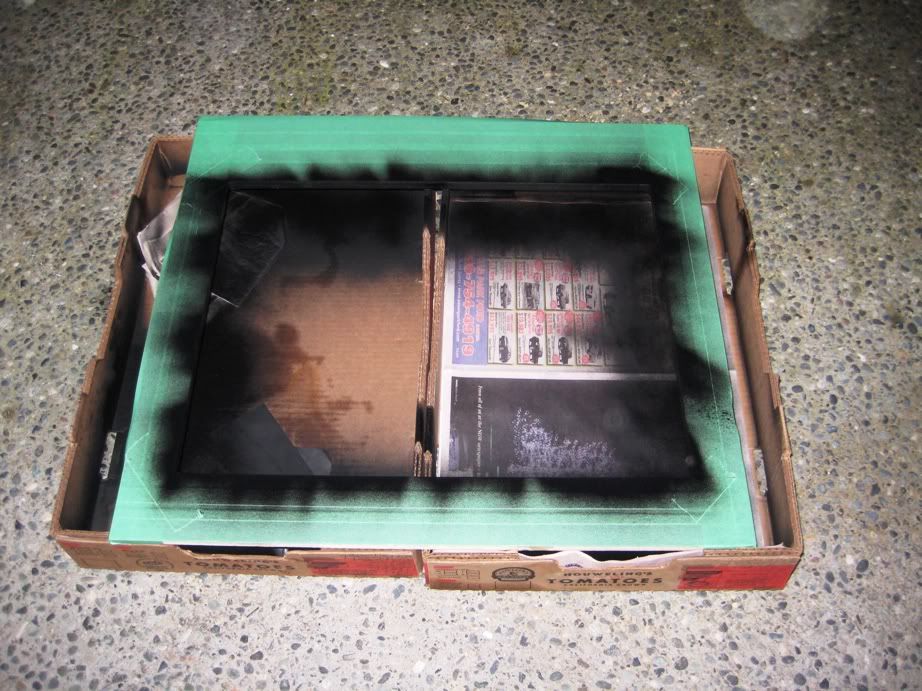


Once that dried I did a test fitting. I like the results and it's nice to see these smaller laminated pieces coming together as it really showcases the advantages of laminate imo.
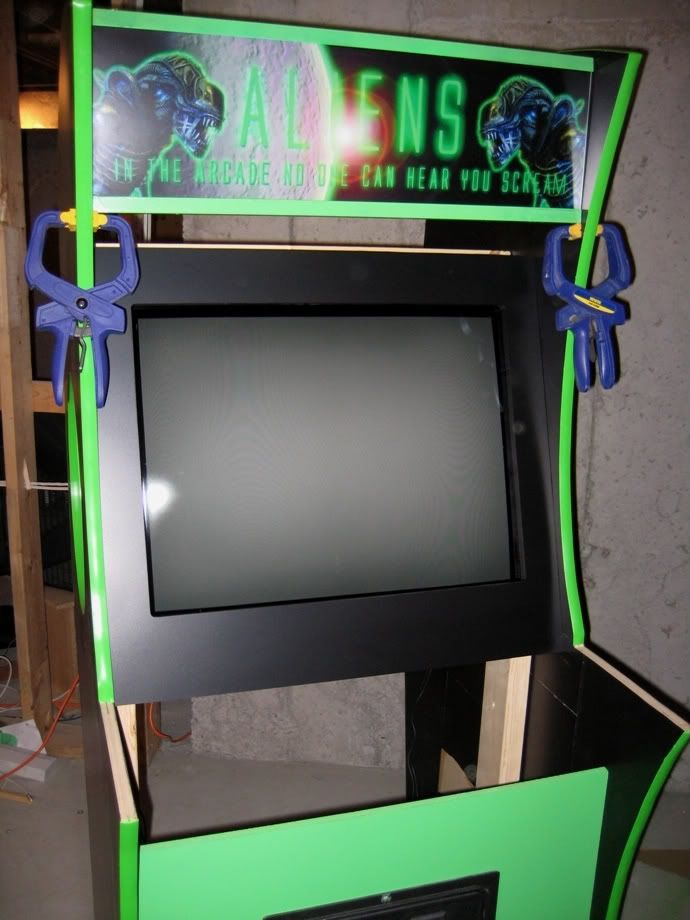
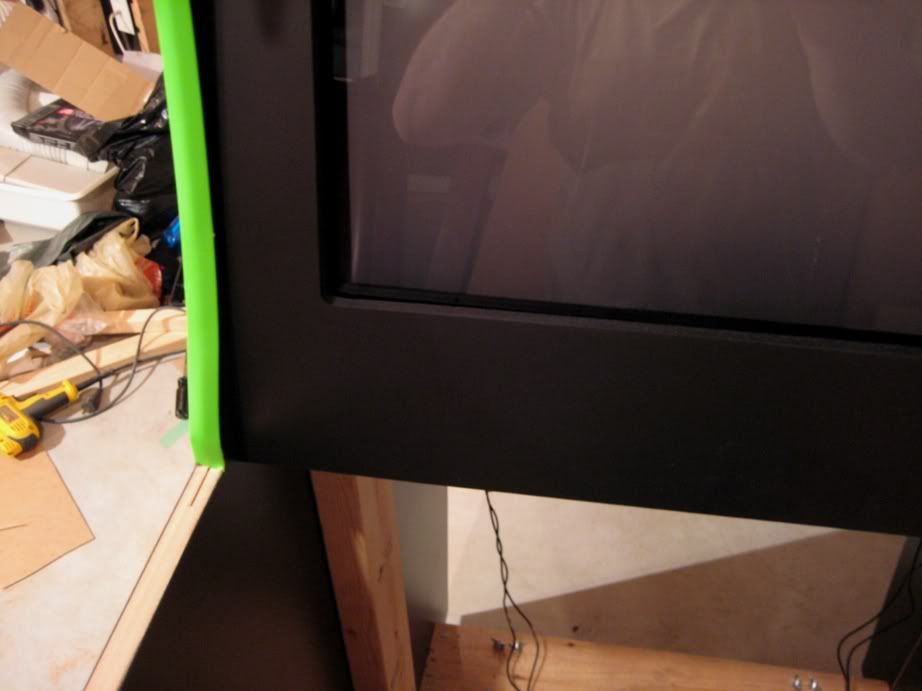


And finally a shot to update the comparison vs render:
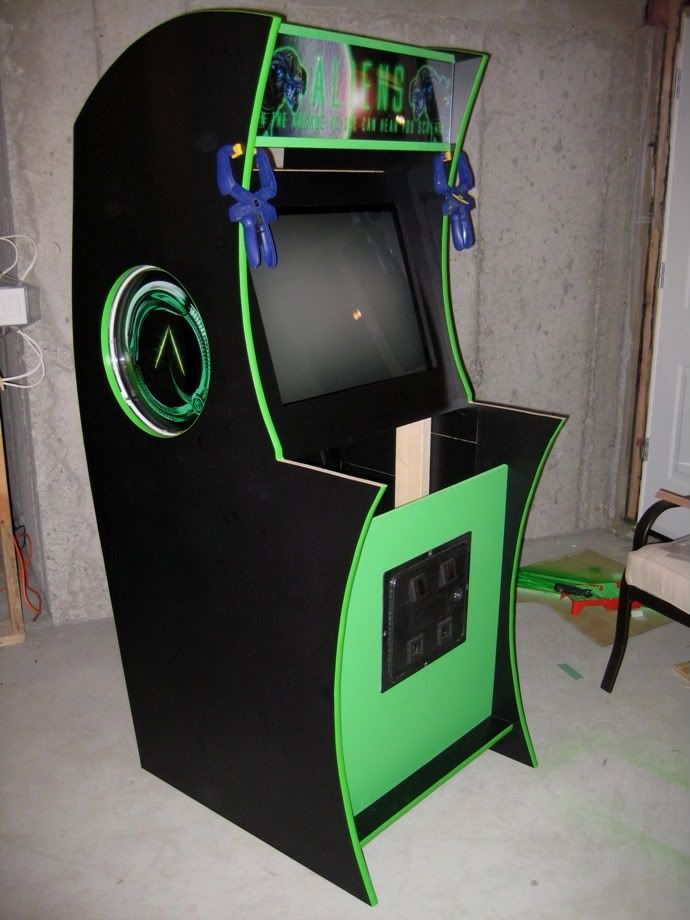


« Last Edit: February 14, 2010, 10:55:47 pm by Epyx »
Last Project


Epyx Tutorials:
Tutorials

Ryglore

  • Trade Count: (+1)
  • Full Member
  • ***
  • Offline Offline
  • Posts: 779
  • Last login:November 16, 2021, 05:49:39 pm
  • Likes to make things difficult.
    • The Brush Wizard
Re: Aliens Neon Curvy Upright *Bezel Completed* Feb 14 2010
« Reply #302 on: February 14, 2010, 11:02:23 pm »
Excellent! It's really coming together! Seeing it w/ the side and marquee art in place is awesome, Now once you finish this one you'll totally have to do the Wasteland cab to go alone with it!  ;)

 :cheers: :cheers:

Epyx

  • Trade Count: (+1)
  • Full Member
  • ***
  • Offline Offline
  • Posts: 1961
  • Last login:December 25, 2023, 07:56:36 pm
  • "You're an oddity"
Re: Aliens Neon Curvy Upright *Bezel Completed* Feb 14 2010
« Reply #303 on: February 14, 2010, 11:42:09 pm »
Thanks Kman and Ryglore...yes slowly but surely plodding ahead...might not have it finished for my birthday bash next weekend but ill keep on plugging away.  I have to admit to being excited to start on the CP...should be a lot of fun as it will be the first CP I have ever done with any kind of lighting etc.
Last Project


Epyx Tutorials:
Tutorials

emphatic

  • Trade Count: (0)
  • Full Member
  • ***
  • Offline Offline
  • Posts: 2013
  • Last login:Yesterday at 05:56:56 pm
  • -"Suck it, Donny!" -"No, YOU suck it.... more".
    • Emphatic's Video Game Collection
Re: Aliens Neon Curvy Upright *Bezel Completed* Feb 14 2010
« Reply #304 on: February 15, 2010, 08:43:29 am »
 :applaud: This will be so awesome when finished. You've really gone all the way with the concept.

Ryglore

  • Trade Count: (+1)
  • Full Member
  • ***
  • Offline Offline
  • Posts: 779
  • Last login:November 16, 2021, 05:49:39 pm
  • Likes to make things difficult.
    • The Brush Wizard
Re: Aliens Neon Curvy Upright *Bezel Completed* Feb 14 2010
« Reply #305 on: February 15, 2010, 08:51:32 am »
:applaud: This will be so awesome when finished. You've really gone all the way with the concept.

Agreed, I can't wait to see it completed and all lit up.  :D

Bender

  • Trade Count: (+1)
  • Full Member
  • ***
  • Offline Offline
  • Posts: 1919
  • Last login:November 28, 2016, 08:12:21 pm
    • Happ to Tron Conversion tutorial
Re: Aliens Neon Curvy Upright *Bezel Completed* Feb 14 2010
« Reply #306 on: February 15, 2010, 11:21:37 am »
Man this thing is smokin' :cheers:
Love the theme and execution, I too can't wait to see it all lit up!

Martijn

  • Trade Count: (0)
  • Full Member
  • ***
  • Offline Offline
  • Posts: 822
  • Last login:January 25, 2024, 10:34:36 am
  • Akira!
    • ModMyBox
Re: Aliens Neon Curvy Upright *Bezel Completed* Feb 14 2010
« Reply #307 on: February 15, 2010, 11:46:11 am »
nice work, its comming along nicely

how did the paint on the inside of the bezel hold while you took away the inside laminate?

i first laminated and then painted to avoid the bearing of the router


Epyx

  • Trade Count: (+1)
  • Full Member
  • ***
  • Offline Offline
  • Posts: 1961
  • Last login:December 25, 2023, 07:56:36 pm
  • "You're an oddity"
Re: Aliens Neon Curvy Upright *Bezel Completed* Feb 14 2010
« Reply #308 on: February 15, 2010, 11:55:59 am »
Quote
how did the paint on the inside of the bezel hold while you took away the inside laminate?

You are correct...it didn't hold up well in spots. That is why I had to tape it up again and repaint a few coats. I could have saved myself the time and just painted it after :)
Last Project


Epyx Tutorials:
Tutorials

saleem

  • Trade Count: (0)
  • Full Member
  • ***
  • Offline Offline
  • Posts: 437
  • Last login:February 07, 2012, 08:03:39 am
Re: Aliens Neon Curvy Upright *Bezel Completed* Feb 14 2010
« Reply #309 on: February 15, 2010, 05:36:45 pm »
what glue did you use for laminating the cabinet?

i am planning on laminating my cabinet and its coming on thursday so i need to get glue now.

i was wanting a glue that was not that goo stuff that is like what the aliens stuck the people to the walls with :laugh2:

was wanting spreadable stuff if that is possible.

thanks.
 :)

Epyx

  • Trade Count: (+1)
  • Full Member
  • ***
  • Offline Offline
  • Posts: 1961
  • Last login:December 25, 2023, 07:56:36 pm
  • "You're an oddity"
Re: Aliens Neon Curvy Upright *Bezel Completed* Feb 14 2010
« Reply #310 on: February 15, 2010, 05:45:13 pm »
Quote
what glue did you use for laminating the cabinet?

I use Lepage's blue contact cement from Home Depot...it looks like the alien slop but spreads on super easy with a disposable paint brush.  It also dries quickly but not too quickly...in other words it gives you enough time to apply glue on both sides before joining (15 to 20 mins).
Last Project


Epyx Tutorials:
Tutorials

saleem

  • Trade Count: (0)
  • Full Member
  • ***
  • Offline Offline
  • Posts: 437
  • Last login:February 07, 2012, 08:03:39 am
Re: Aliens Neon Curvy Upright *Bezel Completed* Feb 14 2010
« Reply #311 on: February 15, 2010, 05:56:05 pm »
ok,i am in united kingdom and all google realy threw up was Evo-Stik 528 so i bought 2.5ltr from screwfix,its supposed to be like butter in consistency.

thanks.
 :)

Epyx

  • Trade Count: (+1)
  • Full Member
  • ***
  • Offline Offline
  • Posts: 1961
  • Last login:December 25, 2023, 07:56:36 pm
  • "You're an oddity"
Re: Aliens Neon Curvy Upright *Bezel Completed* Feb 14 2010
« Reply #312 on: February 15, 2010, 06:05:07 pm »
Lol good stuff...ya this stuff is more like marmalade in consistency but once you spread it, it spreads nice...and aye, just checked its only available here in Canada.
Last Project


Epyx Tutorials:
Tutorials

rablack97

  • Trade Count: (+3)
  • Full Member
  • ***
  • Offline Offline
  • Posts: 2215
  • Last login:May 11, 2022, 06:50:10 pm
  • If you don't try, you have no chance at innovation
Re: Aliens Neon Curvy Upright *Bezel Completed* Feb 14 2010
« Reply #313 on: February 15, 2010, 09:22:08 pm »
Wow Epyx,

Looking good, that bezel is amazing, looks machined. :applaud:

Ready to see those rings fired up......I've finished all the the lights on my "beast"....It's all downhill now, control panel and configuration is all thats left....


Epyx

  • Trade Count: (+1)
  • Full Member
  • ***
  • Offline Offline
  • Posts: 1961
  • Last login:December 25, 2023, 07:56:36 pm
  • "You're an oddity"
Re: Aliens Neon Curvy Upright *Bezel Completed* Feb 14 2010
« Reply #314 on: February 15, 2010, 11:49:29 pm »
Quote
I've finished all the the lights on my "beast"....It's all downhill now, control panel and configuration is all thats left....

Nice!  :cheers:

Will be a relief to get to that part myself.   And yes, pleased with how the bezel turned out :)
Last Project


Epyx Tutorials:
Tutorials

Epyx

  • Trade Count: (+1)
  • Full Member
  • ***
  • Offline Offline
  • Posts: 1961
  • Last login:December 25, 2023, 07:56:36 pm
  • "You're an oddity"
Re: Aliens Themed Cab *Bezel Completed* Feb 14 2010
« Reply #315 on: February 20, 2010, 06:14:15 pm »
Lots of pics coming up for those who like pics...if you don't just skim! ;)

Today I began work on my speaker shelf which will also have the bottom portion of the marquee retainer attached. The bottom retainer is permanent unlike the top which can be screwed off as shown earlier in the thread.  To get the angle right I created an angled cut which will attach to the speaker shelf so that the retainer angles up to the top portion of the retainer. The bottom retainer will be glued on to the laminate (shown later below):


I also used my table saw to cut an angle on the edge that will sit on the angled bezel so it will be flush:


And drilled 2 speaker holes over which will sit two speaker covers:


Next step was to laminate the bottom of the shelf that will face the CP. I glued both sides. You may have seen it earlier in my thread or on other threads but a great way to line up your laminate and wood is to use small dowels.  I used 1/4" offcuts.


I then flush trimmed the speaker holes:


« Last Edit: February 21, 2010, 12:02:17 pm by Epyx »
Last Project


Epyx Tutorials:
Tutorials

Epyx

  • Trade Count: (+1)
  • Full Member
  • ***
  • Offline Offline
  • Posts: 1961
  • Last login:December 25, 2023, 07:56:36 pm
  • "You're an oddity"
Re: Aliens Themed Cab *Speaker Shelf/bottom retainer and CP start* Feb 20 2010
« Reply #316 on: February 20, 2010, 06:18:44 pm »
After this I test fitted the shelf and did the same angled cuts on the CP to allow it to sit flush with the Bezel.  I will finish the CP tomorrow or over the next few days and will angle the corners slightly so they aren't too squared off:


Note there is just enough space between the edge of the cab and the CP for the black T molding of the CP to fit.


The bezel will be covered with slightly tinted glass and I will likely have to take a bit extra off of the CP to have it rest on the glass:


« Last Edit: February 20, 2010, 06:28:43 pm by Epyx »
Last Project


Epyx Tutorials:
Tutorials

opt2not

  • Trade Count: (+15)
  • Full Member
  • ***
  • Offline Offline
  • Posts: 6173
  • Last login:April 02, 2024, 07:42:30 pm
Re: Aliens Themed Cab *Speaker Shelf/bottom retainer and CP start* Feb 20 2010
« Reply #317 on: February 20, 2010, 11:35:40 pm »
Lookin' hot Epyx!   :applaud:

RobbyMac

  • Trade Count: (0)
  • Full Member
  • ***
  • Offline Offline
  • Posts: 228
  • Last login:January 05, 2019, 06:48:50 pm
  • My New years Resolution is 1400 x 900.
    • My cabinet build
Re: Aliens Themed Cab *Speaker Shelf/bottom retainer and CP start* Feb 20 2010
« Reply #318 on: February 21, 2010, 12:13:59 am »
great build... am waiting anxiously to see the cp and finish!

Kurt

  • Trade Count: (0)
  • Full Member
  • ***
  • Offline Offline
  • Posts: 104
  • Last login:September 13, 2010, 10:53:22 pm
Re: Aliens Themed Cab *Speaker Shelf/bottom retainer and CP start* Feb 20 2010
« Reply #319 on: February 21, 2010, 12:18:24 am »
awesome build i love the sides, they turned out great.