Main Restorations Software Audio/Jukebox/MP3 Everything Else Buy/Sell/Trade
Project Announcements Monitor/Video GroovyMAME Merit/JVL Touchscreen Meet Up Retail Vendors
Driving & Racing Woodworking Software Support Forums Consoles Project Arcade Reviews
Automated Projects Artwork Frontend Support Forums Pinball Forum Discussion Old Boards
Raspberry Pi & Dev Board controls.dat Linux Miscellaneous Arcade Wiki Discussion Old Archives
Lightguns Arcade1Up Try the site in https mode Site News

Unread posts | New Replies | Recent posts | Rules | Chatroom | Wiki | File Repository | RSS | Submit news


Author Topic: Franco's Custom Cocktail (UPDATE: Wood cutting commences!! =) )  (Read 66006 times)

0 Members and 1 Guest are viewing this topic.

Franco

  • Guest
  • Trade Count: (0)
Franco's Custom Cocktail (UPDATE: Wood cutting commences!! =) )
« on: October 10, 2007, 02:23:31 pm »
Hey y'all.

I've been a bit quite round these parts of late, especially in the arcade side of things but I have been bitten by the cab building bud again!

I built a cab a couple of years ago for a college project (theres a couple of pics below) but I had to move to a place where I cannot fit my full size cab and I had it in storage collecting dust for ages. Ive decided to build a cocktail cab as I have room for one and so decided to part out my cab and sold some of the parts on ebay and I am going to recycle some of the parts. My once beautiful cab is now just a shell of happy memories  :'(

I have a few ideas so far but as of now im thinking of building a cab with two player head to head vertical controls (Joy and three buttons each probably) and also having two  players side by side on one of the horizontal sides (Joy and six buttons each).

I wanted to hinge the monitor/top near the horizontal side by side controls which would allow be to elevate the screen which would be a nice feature both for horizontal arcade gaming and also If I have any consoles or emulated consoles inside for which I could use the screen as a 'standard' screen. I think I am going to have to forget about tis tho as realistialy I would have to use an LCD for this and I dont think im going to be able to get a large (22"+) 4:3 LCD in my price range. I think viewing angles would also be a problem when looking down onto the cocktail top. I havent looked into LCD's for a while now though so I dont know how if the viewing angels are any better than they used to be.

I think i am going to have to go down the CRT monitor route, I already have a 22" CRT that I had in my cab so I will probably use that.

As for colour schemes I think im going to keep it simple and go for black melamine with chrome t-moulding and then alluminium joys, stainless feet and a other few stainless accents here and there. Im a CNC machinist by trade so I will be making alot of custom parts myself, just as I did my other cab. I have some clear FX buttons that I bought and never used so I think I am going to use those with some multicoloured LEDS. Last time i looked into it Buddabing was building a LED driver board but I dont know if this ever got produced? I think that there are some other products on the market for lighting LEDs, are there any that could light/control all 18 buttons? If I use three colour LEDs obviously that will greatly increase the amount of outputs required on the board.

What is the state of play as regards to controling the LEDs nowadays? Is it possible to have attract modes and also somehow light up the designated controls for the game being played (heres hoping!)

Im going to take plenty of photos this time. I didnt actuall realise this forum existed (doh) until I had completed 95% of my 1st cab, the only forum I knew of at the time was the mame.net hardware one.

Im just going to get cracking now and get some ideas down onto paper and CAD. Im sure ill be back with more info and will be asking for much more help too soon!

If anyone could answer my LED driver/conrtol questions then that would be great. Thanks for listening and heres a couple of pics of by old upright (R.I.P)  :'(


« Last Edit: December 27, 2007, 11:50:18 am by Franco »

polaris

  • You're a genius! Sheer genius!
  • Wiki Contributor
  • Trade Count: (+1)
  • Full Member
  • ***
  • Offline Offline
  • Posts: 1405
  • Last login:May 21, 2012, 05:18:59 pm
  • veni vidi congai
Re: 2nd Project - Its cocktail time!
« Reply #1 on: October 10, 2007, 03:06:30 pm »
look at randyt's stuff at groovygamegear, the ledwiz is what your'e looking for i believe.
got COLOR codes from projects, post them here

add stuff to the uk wiki section

WCBoudreaux

  • Trade Count: (+5)
  • Full Member
  • ***
  • Offline Offline
  • Posts: 202
  • Last login:February 15, 2022, 07:20:41 pm
Re: 2nd Project - Its cocktail time!
« Reply #2 on: October 10, 2007, 03:48:12 pm »
Ahhh Cool! Definately post many pics, as I too will be building a cocktail soon... I'm not really sure how soon I'll get started on mine, but trust me, it will be done...

It would be nice to have this thread to look back on when I start mine...

Good Luck!  :cheers:

rockin_rick

  • Trade Count: (+3)
  • Full Member
  • ***
  • Offline Offline
  • Posts: 495
  • Last login:May 27, 2017, 09:20:20 am
Re: 2nd Project - Its cocktail time!
« Reply #3 on: October 10, 2007, 10:44:07 pm »
What is the state of play as regards to controling the LEDs nowadays? Is it possible to have attract modes and also somehow light up the designated controls for the game being played (heres hoping!)

This is now possible.  Most common (and what I'd recommend) method is using a LEDwiz along with Mala front end.  Together you can light your buttons up so that only the used ones light up, and that they light up in the colour that the game originally had the button coloured.  It can also speak the button's label (function) on game start.  I believe that other front ends may also support this, but Mala also has very good cocktail features.

Rick
If I do not respond to your post in a timely manner, feel free to PM me.

Franco

  • Guest
  • Trade Count: (0)
Re: 2nd Project - Its cocktail time!
« Reply #4 on: October 11, 2007, 02:28:26 am »
Thanks for your help guys! Yeah it sounds like the LED WIZ is just what im after, its a shame the GGG site seems to be down at the moment but I managed to read the retroblast review. Are they still $45? Sounds like a bargain to me!

I was thinking about having RBG LEDs but I think im just going to stick with 'plain' blue other wise the amount of outputs im going to need is going to get silly.

What im thinking is having a LED in each control button (2x6 + 2x3 = 18 outputs). I would also like to have a ring of 8 LEDs around each joystick to show which joystick directions are used on each game (2 way, 4 way, 8way etc). Is this possible with Mala? If so that would be another 16 outputs for two joysticks (I would connect the 'vertical' and 'horizontal' 8 LED rings together to save on dedicated outputs.

This would give a total of 18 + 16 =34 outputs which is obviously more than the 32 that the LED WIZ supports. I think I will probably connect the three buttons of each player on the 'vertical' mini CPs to the first three buttons of each player on the 'horizontal' CPs. This would reduce the amount of dedicated LED WIZ outputs by 6 which would bring the total outputs required under 32 and also give me four spare (maybe for start buttons?? hmm)

I hope that lot makes sense and is possible!

I will be definitely be taking lots of photos on the way and will be documenting the build as much as possible. Its something I didnt do the first time around and im really looking forward to getting some advice and imput along the way  :)

Im not looking at rushing into builing this cab (even though I cant wait to get cracking!) as I wasnt to make sure its perfect (as possible) before I start. Im also going to take my time building it as I want to produce a cocktail that looks like it was 'shop bought'.

Right, im off to get sketching to start getting some ideas down on paper. Thanks for the help so far!

Green Giant

  • Trade Count: (0)
  • Full Member
  • ***
  • Offline Offline
  • Posts: 1124
  • Last login:September 29, 2016, 06:50:57 pm
Re: 2nd Project - Its cocktail time!
« Reply #5 on: October 11, 2007, 05:20:09 pm »
Try this link for GGG, http://groovygamegear.com/webstore/ .

Also, you seem to be getting back into this after a while, so you probably don't know about the U360 joysticks.  They are analog sticks that automatically switch through software to whatever the original game used.  You wouldn't need led's as the cab would auto set your sticks to 2/4/8/49/analog/etc.  They are sold here, http://www.ultimarc.com/ .

Mala is able to light each direction if you placed lights around the sticks, but I am not sure if it would show diagonals, just up down left right.

But the ledwiz is an amazing product, if you went all out and did the rgb buttons, then mala can light the original game controls in the original colors.
"He lives down there in his valley,
The cat stands tall and green,
Well, he ain't no prize, and there's no women his size,
And that's why the cat's so mean"
Toxic Arcade, my first build

Franco

  • Guest
  • Trade Count: (0)
Re: 2nd Project - Its cocktail time!
« Reply #6 on: October 12, 2007, 01:51:08 am »
Thanks for your post Green Giant.

I hadnt really heard about the U360's, thankyou for pointing me towards them. I think I am going to go with 'standard' joysticks though although im not sure which joys to use at present. I had T-sticks on my last cab but they were a little too stiff for me so I think im going to try something a bit lighter this time.

I do want to include the LED rings, for pure bling if nothing else. Even if Mala can only control the U,D,L+R LEDs I think I will still include the diagonals as I will be able to program some nice attract sequences with chasing rings etc.

I didnt know about Mala being able to replicate the original game colours, thats pretty cool! I think im going to stick with blue LEDs though.

I started designing the table in CAD last night. 3 hours into it it decided to crash on me and I lost all my work up to that point, that will teach me not to save regually! However a little help from my good friend Grolsch calmed me down and I got back to work again.  :cheers:  I was hoping to post some images last night but I didnt get enough done but im going to carry on tonght and Ill get something up for you guys to look at rather than posts and posts of words!

I have had a litte luck in the way of a PC to run things. I have been offered a Dell SX270 for £75 delivered to me. Its a 2.8ghz, 512mb ram small form factor PC which I think would be ideal for my project as I would be able to use it inside the cab without having to decase it. The only thing I am slightly concerned about is that they are known to run hot and pop capacitors. I was planning on having at least two fans sucking air in at the bottom and a couple sucking air out at the top and I think that this may keep the PC even cooler than it would be when used normally in an open space. Any thoughts on this?

EDIT: This is a picture of the PC in question.

« Last Edit: October 12, 2007, 01:55:24 am by Franco »

theCoder

  • Trade Count: (0)
  • Full Member
  • ***
  • Offline Offline
  • Posts: 1035
  • Last login:September 20, 2010, 10:48:47 pm
  • I'll clean up my mess, Honey, when I'm done...
Re: 2nd Project - Its cocktail time!
« Reply #7 on: October 12, 2007, 10:03:49 am »
I'm going LED crazy on my current project.  One component of which involves CNC.  Rather than buying GGG, I'm learning to make my own LED controllers.  You might get some ideas giving my TimeSink thread a read (referenced below).

You mentioned lighting the JS, indicating whether it is a 4 / 8 way game.  You could do this by inlaying Plexiglas in the CP.  I recently picked up a bunch of various diameter round Plexiglas stock to play with for a similar application.  It comes in 1/8" diameter increments.

Good luck on your project & welcome to the forum.

XyloSesame

  • Trade Count: (+10)
  • Full Member
  • ***
  • Offline Offline
  • Posts: 358
  • Last login:September 17, 2024, 05:57:04 pm
  • the creepy prince guy...
    • The Nightingale Theater
Re: 2nd Project - Its cocktail time!
« Reply #8 on: October 12, 2007, 10:27:13 am »
I have had a litte luck in the way of a PC to run things. I have been offered a Dell SX270 for £75 delivered to me. Its a 2.8ghz, 512mb ram small form factor PC which I think would be ideal for my project as I would be able to use it inside the cab without having to decase it. The only thing I am slightly concerned about is that they are known to run hot and pop capacitors. I was planning on having at least two fans sucking air in at the bottom and a couple sucking air out at the top and I think that this may keep the PC even cooler than it would be when used normally in an open space. Any thoughts on this?
My old company had a number of 270s in the small form chassis; they did run hot and, on occasion, fry a cap. The fans are a good idea...

Kaytrim

  • I'm too nice a guy
  • Trade Count: (+4)
  • Full Member
  • ***
  • Offline Offline
  • Posts: 2095
  • Last login:September 22, 2015, 04:11:30 pm
Re: 2nd Project - Its cocktail time!
« Reply #9 on: October 12, 2007, 10:49:12 am »
I would at least open the case once you put it in the cab.  That way the heat will be able to dissipate better.

TTFN

Franco

  • Guest
  • Trade Count: (0)
Re: 2nd Project - Its cocktail time!
« Reply #10 on: October 12, 2007, 11:50:57 am »
I'm going LED crazy on my current project.  One component of which involves CNC.  Rather than buying GGG, I'm learning to make my own LED controllers.  You might get some ideas giving my TimeSink thread a read (referenced below).

You mentioned lighting the JS, indicating whether it is a 4 / 8 way game.  You could do this by inlaying Plexiglas in the CP.  I recently picked up a bunch of various diameter round Plexiglas stock to play with for a similar application.  It comes in 1/8" diameter increments.

Good luck on your project & welcome to the forum.

Thanks for your input theCoder, I have seen your thread before and you are doing some awesome work. There is plenty of info that will be of great use to me.

I like your plexiglass idea but I think i know how im going to mount the LEDS, actually whilst typing this sentance I have had an idea which will incorperate my idea and yours, thanks!

Thanks for the welcome too, I have been around for a couple of years tho - Ive just been in hiding!  :)

My old company had a number of 270s in the small form chassis; they did run hot and, on occasion, fry a cap. The fans are a good idea...

I would at least open the case once you put it in the cab.  That way the heat will be able to dissipate better.

TTFN

Thanks for the advice too. Ive decided against the 270, I dont want to run the risk of overheating plus it will be hard to upgrade in regards to video etc. Not to worry though, the same guy has offered me a 3.1Ghz Dimension 4600 with 2GB DDR for the same price! (£75)  :D  It means I will have to decase but that isnt a problem.

Wooo, im getting really excited about this project now  :D Im going to stay in tonight and carry on with some CAD with help from mans best friend (the cold, fizzy kind) and I hope to get some preliminary designs up later on.

Thanks again all, watch this space....

XyloSesame

  • Trade Count: (+10)
  • Full Member
  • ***
  • Offline Offline
  • Posts: 358
  • Last login:September 17, 2024, 05:57:04 pm
  • the creepy prince guy...
    • The Nightingale Theater
Re: 2nd Project - Its cocktail time!
« Reply #11 on: October 12, 2007, 04:08:33 pm »
I would at least open the case once you put it in the cab.  That way the heat will be able to dissipate better.

TTFN
Be mindful of airflow, whether you decase or not. In most modern cases, airflow is designed to pass over heat-sensitive devices. Decasing and randomly placed fans do not, by themselves, guarantee heat dissipation; make sure airflow actually passes over your components...

Franco

  • Guest
  • Trade Count: (0)
Re: 2nd Project - Its cocktail time!
« Reply #12 on: October 12, 2007, 05:32:17 pm »
This has been taken in mind. The original motherboard has a 90 degree bend tunnel which draws air directly onto the CPU. I cannot easily recreate such direct airflow towards the CPU/motherboard but my plan is to posistion the fans so that they provide as much airflow as possible towards the CPU/motherboard.

Im still undecided whether to have four fans pulling in air around the CPU/monitor and have enough ventilation at the top of the enclosure to release the air or should I have two fans pulling air in around the CPU etc (at the bottom) and then have two fans to expel the air at the top. Any thoughts?

By the way the design is coming along a treat, its just taking longer than I expected it to.

Quote
Damn UCS positioning with polylines, i swear that should create a single line, what do you mean it wasnt drawn locked to the axis, i could swear there wasnt a gap before either!


 :D

EDIT: I seem to have noticed some kind or relationship between the amount of vino/grolsch drunk and the amount of CAd errors occuring!  :dizzy:  :D
« Last Edit: October 12, 2007, 05:36:36 pm by Franco »

Green Giant

  • Trade Count: (0)
  • Full Member
  • ***
  • Offline Offline
  • Posts: 1124
  • Last login:September 29, 2016, 06:50:57 pm
Re: 2nd Project - Its cocktail time!
« Reply #13 on: October 12, 2007, 08:29:38 pm »
A really simple thing for a fan to cool off the cpu is a cheap 10" vortex fans.  They push more air than any form of computer case fans, along with being quiet.  A duct from the outside to the back of the fan would suffice in creating plenty of air flow to the whole cab, hot air rising and all. 

If you are pulling in enough air from the bottom, you won't need much of anything at the top unless you are worried about your monitor warming up.
"He lives down there in his valley,
The cat stands tall and green,
Well, he ain't no prize, and there's no women his size,
And that's why the cat's so mean"
Toxic Arcade, my first build

Franco

  • Guest
  • Trade Count: (0)
Re: 2nd Project - Its cocktail time! (UPDATE: 1st CAD models)
« Reply #14 on: October 13, 2007, 05:05:43 pm »
Thanks for your post Green Giant. You will see from the models below that space is going to be at a premium so I dont think I will have enough room for ducting. Im pretty sure of what I am going to do cooling wise which I will post at a later date.

I have started to make a CAD model of the type of thing im looking to make. Ignore the colour scheme, im thinking of doing the whole thing in black vinyl (possibly textured) with chrome t-moulding and stainless other parts, I am quite liking the blue/chrome though! Ive diplayed it in blue as it is hard to make out alot of the image with black panels.

These are a couple of views of my design so far:


I have decided to have quite a chunky top on the cab. I quite like the profile as it looks almost space invader'ish. There will be chrome t-moulding around the top but I have not added it to the drawing so far. Also note I havent added the glass as yet (ive modeled it but it seems to mask the raster SF2 image).


This is a close up of the CP areas:


Im going to make some button bezels out of stainless steel to surround the control buttons as well as the buttons on the front of the CPs (Player start and credit). Im also going to make some stainless dustwashers to match.

The eight white dots around each joystick are going to be short cylinders of perspex laid into the CP with a LED mounted from the rear side to light them (thanks for some inspiration on that one theCoder!)

The CP buttons are all going to be clear with LEDs controlled by a LED WIZ and Mala.

Im also going to make some heavy duty stainless steel feet to raise the cab off the floor. Im going to turn some wheels and mount them in on of the legs so that one end of the cab can be lifted slightly to whell the cab around.

Im going to use a 22" flatscreen CRT monitor in the cab. I made a rough model of the monitor and based the cab around it. You can see from the picture below that there isnt going to be much spare space but this was planned as I want to have a large screen to cab size ratio.


The white/grey areas behind each CP are going to be made from some UV reactive perspex that I have and are going to be backlit with UV LEDs.

Please ignore the 1 and 2 on the front of the CPs, im going to have some 1 and 2 player 'man' images instead.

I think that there is plenty more that I have forgotten to post but im quite tired due to the amount of time I have soent on CAD this weekend. Ill update the thread tomorrow when I have remembered anything and when I have updtaed the models.

Any thoughts/suggestions etc so far?


« Last Edit: October 31, 2007, 07:41:58 am by Franco »

ARTIFACT

  • Trade Count: (0)
  • Full Member
  • ***
  • Offline Offline
  • Posts: 757
  • Last login:June 07, 2025, 01:02:12 pm
    • ARTIFACT - my scratch designed & built arcade cabinet
Re: 2nd Project - Its cocktail time! (UPDATE: 1st CAD models)
« Reply #15 on: October 13, 2007, 11:13:12 pm »
Are the joystick balltops to scale? they appear much bigger than I would think they'd be.

Looks great though!
I like the slopped shape.

It seems that the top panel may get "in the way" when moving the sticks and playing... what do you think?

Franco

  • Guest
  • Trade Count: (0)
Re: 2nd Project - Its cocktail time! (UPDATE: 1st CAD models)
« Reply #16 on: October 14, 2007, 01:33:38 am »
No, you are right the ball tops are not to scale. I didnt have any dimentions to hand when I modelled them and just guessed them and they do look on the large side. Ill get some propper dimentions today and update it.

You are also right about the top looking as though it will 'get in the way. Im going to lower the CP height and I may also make the CP deeper to give a little more room inside. Ill model the internals of the buttons and the joystick bases to see exactly what room I need.

On the subject of joysticks im not really sure what to use. I have a pair of T-sticks left over from my previous build and im thinking of using these for the smaller vertical panels. At least then I could switch to 4-way mode for the 4way games. They currently have blue bat tops but I think I will make some stainless or ally ball tops for them. Its the horizontal 'fighter' panel that Im not sure about what to do joystick wise. Ive heard alot of good things about Sanwa sticks and im thinking about using those. How stiff are they? I used t-sticks on my old cab and I liked the short throw of them but found them a little too stiff. Are the Sanwas any lighter? Once again whatever choice I do make I think i will make stome stainless/ally ball tops.

I think that is all for now. Its 6,30 in the morning here and im at work, i have 6 hours 'free' today whilst I am here so im going to crack on with some more modelling. Ill update later once I have made some more progress.

Franco

  • Guest
  • Trade Count: (0)
Re: 2nd Project - Its cocktail time! (UPDATE: 1st CAD models)
« Reply #17 on: October 15, 2007, 08:31:03 pm »
I have made some more progress, mainly with the modelling but I have actually done some physical work too  :)

This is the stage im at with the design/model:


As you can see I have added the glass, t-mouding around the top and the glass clips. I have also lowered the horizontal CP by 50mm to give a little more vertical hand clearance. I have left the vertical CPs how they were (although they will be the same height as the horizontal one) so you can see the difference.

This is a picture off one of the button bezels that I am going to mill out of 3mm stainless steel plate:


I have also modelled the feet which I am going to CNC mill from solid stainless steel bar:


Im going to mill two 12mm slots in one of the feet and mount two wheels on spindels to allow the cab to be lifted up at one end wheeled around. This is a closer view of the foot with the wheels in:


I had a little free time at work this evening so I produced the two wheels on a CNC lathe:


Im still undecided on the colour scheme at the moment. Im either thinking of black with chrome t-mouding, blue with chrome t-moulding or blue with white t-moulding. Any thoughts? Ill try and get some pictures up tomorrow of the different colour schemes.


« Last Edit: October 31, 2007, 07:40:19 am by Franco »

Franco

  • Guest
  • Trade Count: (0)
Re: Franco's Custom Cocktail (UPDATE: CAD Models + CNC Turned Wheels)
« Reply #18 on: October 31, 2007, 08:18:13 am »
Its been a while with no update purley because I dont have much more info to post. I dont know if its the same with you guys though but all the time whilst im planning building a cab there is normally something on my brain about how im going to solve a certain problem or what im going to do graphics wise etc etc, it seems to take over you (which isnt necessarily a bad thing  :) )

Anyway I will  update with a little info.

This is the monitor that I am going to me using:


Its a Dell 21" flatscreen CRT that i used in my old project. Its a bit on the large size and is freaking heavy but its also free :) I would like to use a LCD but you cant seem to get one over 19" or so thats 4:3.

Ive tried it on its back and it seems to work fine. I didnt want to get down the road after I had built the cab and find out that it didnt like being on its back. I wanted to test it on its back for a while but i was just a bit worried about it getting hot in the case on its back with no ventilation so I just gave it a ten minute test. The finished cocktail will have plenty of ventilation.


I dont really want to decase the monitor if I can help it as I have heard stories of the breaking so im going to try and keep it intact if possible. It does have rather a large stand/foot though which is going to have to come off for it to fit in the case. Im thinking that at least the section below the line will have to come off:


I was originally planning on having a black cocktail with chrome t-moulding and accents but I have been using blue for the panels as I have been modelling it as it is easier to see what is going on and the blue realy has grown on me so I think im going to go for blue with white t-moulding and stainless accents.

Im going to add some pinball buttons to the cocktail for Pinmame etc and I remembered that I had blue buttons with a white plastic bezel on my old cab and I thought these would compliment the colour scheme nicely. The buttons on the main CPs are going to have CNC lazer cut bezels around them so I thought I would make some mini bezels for these single buttons to match:


The ones on the left came off the machine with a polished turned finish and the ones on the right I used some 320 grit emery to give a brushed finsh. Im not sure which I am going to use yet.

Ive just finished the dimensioned drawing for the feet and Im going to take them to work later to get programmed ready to be CNC milled.

The only other updates are a few parts that I have bought. I got 100 Superbright LEDs with resistors from ebay for a bargain £10 delivered to me, Ive also bought 5mmx1M of clear plastic tube for the lights around the joys.

Im going to order my Sanwas from Gremlin Solutions today along with a couple more one and two player start buttons. Ive also had to get a credit card soley so I can purchase from the GGG site  ::) . Once it arrives im going to order two LED Wizs, 20 button diffusers and some microleaf switches.

Whilst im waiting for that lot to arrive im going to get some hardboard to do a mock up of the cab before I get stuck in to the main build.

I think thats about it for now!
« Last Edit: November 06, 2007, 11:17:34 am by Franco »

SithMaster

  • Lets see how happy you are when you need to use a lawn mower and it keeps turning off when you want to cut up zombies.
  • Trade Count: (+4)
  • Full Member
  • ***
  • Offline Offline
  • Posts: 1781
  • Last login:January 12, 2014, 03:52:59 pm
  • The brightest light casts the darkest shadow.
Re: Franco's Custom Cocktail (UPDATE: Few bits & Stainless button bezels)
« Reply #19 on: October 31, 2007, 02:46:14 pm »
So will Optimus be in your cocktail front end?

For my 21inch monitor i cut part of the case so i can drive a bolt through the mounting tabs but the other end screws into the back case.  This way its protected and securely fastened.  Not sure if it makes a difference but mine was for a galaxian setup (which i should work on).
Back in MY day we lived on the moon and we had to build a rocket ship from scratch to get to the Earth before we suffocated.

mccoy178

  • It's hard to work with a straight jacket on
  • Trade Count: (+9)
  • Full Member
  • ***
  • Offline Offline
  • Posts: 3127
  • Last login:September 03, 2021, 10:23:42 am
  • Go Bucks!
Re: Franco's Custom Cocktail (UPDATE: Few bits & Stainless button bezels)
« Reply #20 on: October 31, 2007, 02:53:07 pm »
Wow, I like those rings.  You wouldn't be willing to sell a few like the ones on the left wouldya? :)

Franco

  • Guest
  • Trade Count: (0)
Re: Franco's Custom Cocktail (UPDATE: Few bits & Stainless button bezels)
« Reply #21 on: October 31, 2007, 03:02:35 pm »
So will Optimus be in your cocktail front end?

For my 21inch monitor i cut part of the case so i can drive a bolt through the mounting tabs but the other end screws into the back case.  This way its protected and securely fastened.  Not sure if it makes a difference but mine was for a galaxian setup (which i should work on).

He he, im not sure what im doing yet graphics wise, that Transformers background is what I had on my old cab. I think im going to go for some kind of Spacies theme (got a few good ideas) so ill proably have some kind of Spacies FE theme too.

I do like your idea for the monitor mounting. This has been one of the aspects that has been troubling me. Do all monitors have mounting tabs? What part of the casing did you cut away? Is there any way you could take a picture for me?

Wow, I like those rings.  You wouldn't be willing to sell a few like the ones on the left wouldya? :)

I dont see why not. I cant make millions of them as I dont have much bar stock but I dont mind making a few for you. How many are you after?

mccoy178

  • It's hard to work with a straight jacket on
  • Trade Count: (+9)
  • Full Member
  • ***
  • Offline Offline
  • Posts: 3127
  • Last login:September 03, 2021, 10:23:42 am
  • Go Bucks!
Re: Franco's Custom Cocktail (UPDATE: Few bits & Stainless button bezels)
« Reply #22 on: October 31, 2007, 03:10:43 pm »
Probably in the neighborhood of a dozen. :cheers:

Franco

  • Guest
  • Trade Count: (0)
Re: Franco's Custom Cocktail (UPDATE: Few bits & Stainless button bezels)
« Reply #23 on: October 31, 2007, 03:26:05 pm »
Yeah shouldnt be a problem, PM incoming.  :)

SithMaster

  • Lets see how happy you are when you need to use a lawn mower and it keeps turning off when you want to cut up zombies.
  • Trade Count: (+4)
  • Full Member
  • ***
  • Offline Offline
  • Posts: 1781
  • Last login:January 12, 2014, 03:52:59 pm
  • The brightest light casts the darkest shadow.
Re: Franco's Custom Cocktail (UPDATE: Few bits & Stainless button bezels)
« Reply #24 on: October 31, 2007, 03:33:37 pm »
I can try and get a pic or two taken tonight of the monitor.  I used a hack saw to cut the case (after i removed it first) and cut the corners where the tabs are.  As far as i know all monitors have these tabs.

Those rings are pretty slick.  Mmm metal.
Back in MY day we lived on the moon and we had to build a rocket ship from scratch to get to the Earth before we suffocated.

Franco

  • Guest
  • Trade Count: (0)
Re: Franco's Custom Cocktail (UPDATE: Few bits & Stainless button bezels)
« Reply #25 on: October 31, 2007, 03:51:55 pm »
That would be great if you could take a couple of pictures, there is no rush though as it will be a while before I am at that stage, just whenever is a good time for you, thankyou.  :cheers:

Those rings are just to tie in with a few other stainless parts I have got planned, everyone likes a bit of metal bling  ;)

Franco

  • Guest
  • Trade Count: (0)
Re: Franco's Custom Cocktail (UPDATE: Few bits & Stainless button bezels)
« Reply #26 on: November 01, 2007, 06:08:56 am »
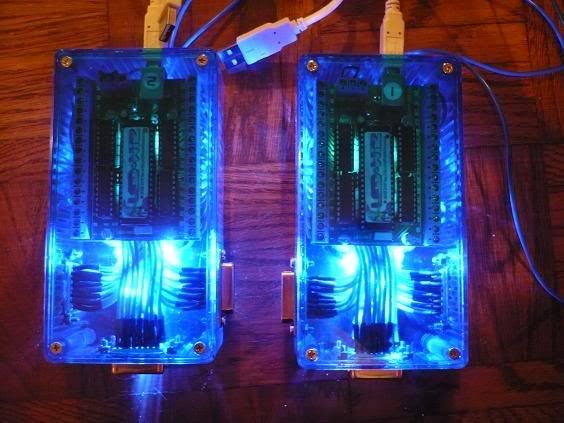
I made these console adapter plates (controller extesion to USB) a while a go which I would have liked to use but I cant see me playing many games using control pads due to the angle of the screen. This is one of the reasons I wanted to be able to flip the monitor up. Oh well, maybe for the next project...


Franco

  • Guest
  • Trade Count: (0)
Re: Franco's Custom Cocktail (UPDATE: CNC Milling Stainless Feet)
« Reply #27 on: November 06, 2007, 10:58:32 am »
I started making the stainless steel feet for the cocktail today.

I extracted the dimensions of the feet from my CAD model and got some stainless bar cut off to the right length.


The two sections were placed on top of each other and CNC milled. One was milled 10mm shorter than the other to give clearance for the wheels. The added height of the wheels when in place will make the table level.


Tomorrow I am going to mill the 12mm slots to house the wheels I turned and I also need to drill, ream and tap the hole that will hold the spindle which the wheels will run on. I am tapping the end of the hole as I have made some M12 grub screws to  hold the spindle in place.


SithMaster

  • Lets see how happy you are when you need to use a lawn mower and it keeps turning off when you want to cut up zombies.
  • Trade Count: (+4)
  • Full Member
  • ***
  • Offline Offline
  • Posts: 1781
  • Last login:January 12, 2014, 03:52:59 pm
  • The brightest light casts the darkest shadow.
Re: Franco's Custom Cocktail (UPDATE: CNC Milling Stainless Feet)
« Reply #28 on: November 06, 2007, 08:33:47 pm »
That looks expensive.

I checked my monitor and I now remember that i wasnt going to use the rear case since mine had a metal cage around it.  I still can if i use a harness or something to hold it onto the supports.

since your making a cocktail then you can just cut away the case from the metal tabs and have them rest on wooden supports.  the case can then remain around the monitor but it wont be attached and the monitor wont be resting on it for support.

ill try and get my monitor pics up tomorrow and also a paint diagram.

also i just looked over your design again and im wondering if maybe it would make things easier if you have a box shape on top with the tapered part under it.  kinda like a nintendo table but bigger.  it might make the cp mounting easier (90degree angles) and maybe some more space for internals (also in case replacement parts are larger).
Back in MY day we lived on the moon and we had to build a rocket ship from scratch to get to the Earth before we suffocated.

Franco

  • Guest
  • Trade Count: (0)
Re: Franco's Custom Cocktail (UPDATE: CNC Milling Stainless Feet)
« Reply #29 on: November 07, 2007, 01:28:59 am »
Thanks for the monitor help SithMaster. That seems to make sense. Really I need to get my dremel out and attack my monitor to see what im dealing with but I need to get a replacement monitor first. I should be able to pick up a free/v.cheap smaller CRT of ebay locally hopefully.

I see what you are saying about the case design and I think you may be right. Having a box shape on top would definitely give me more space which is one thing I was worried about in case I need to replace the monitor at a later date. Ill have another play with CAD later on.

The tapping of the holes in the legs didnt go quite so well as I managed to snap the M12 tap in one of the holes so I need to get it spark eroded out and get another tap. To be fair the tap I used was rather ancient and had seen better days but I thought I would try my luck. Oh well....

Franco

  • Guest
  • Trade Count: (0)
Re: Franco's Custom Cocktail (UPDATE: CNC Milling Stainless Feet)
« Reply #30 on: November 07, 2007, 02:41:55 pm »
Whohooo! Well I had a look on ebay this morning for a replacement monitor for the one going into my cocktail and I stumbled upon an auction for a pair of CRT monitors, one of which is the exact same model as mine but is in black. I thought it would be handy to have at the very least to store incase my current one dies in the future. This way I could just swap the monitors over without having to adjust any of the table.

Anyway I bidded in the last few minutes and won them both for £3.91 (about $8)  :D

Its going to cost me a little more to et them to me as they are 30kg and 500mm x 500mm x 500mm but Im really happy to have a spare.  :)


davieboynj

  • Trade Count: (0)
  • Full Member
  • ***
  • Offline Offline
  • Posts: 269
  • Last login:June 16, 2011, 01:32:09 am
  • Eating your legs solves lifes little problems.
Re: Franco's Custom Cocktail (UPDATE: CNC Milling Stainless Feet)
« Reply #31 on: November 07, 2007, 02:49:19 pm »
I'm bummed i didn't find this thread earlier.  my cocktail is very very similar to this (Dave's Not-So Classic Cocktail), down to the K (with the hole) shaped top, and running ultrastyle.  

but...  your metal work is really going to put this over the top, and the taper you have in the cabinet looks great, and hopefully will make it more comfortable to sit at.  


If you like, here are some things that you might find will make the unit more comfortable to play on:

- lower the monitor about an inch, and open up the hole on top significantly (and make a bezel), to help get better perspective on your screen.  I seriously regret not doing this, and it's too late for me.  The portal effect is much more impressive than the flush.  Trace the sight lines to make sure that nobody ever has to lean over.  The top will always look great as it all just looks black.  

- flip your monitor upside down, as the top of the monitor is thinner than the bottom.  this, along with dropping the monitor will make a huge difference when you're playing horizontal games.  any decent video card will be able to flip the image to accomplish this, and mame/daphne/zinc don't know the difference.  

- on the horizontal side, i would keep the CP height the same and just manufacture the clearance by using shorter sticks, and opening up the top more.  knee space is important!  :)

- make sure the side CP's are centered on the screen, not the monitor.  my earlier one was centered on the monitor and it just always looked wrong.  

-and whenever you can get away with not decasing a monitor...  don't (learned that one the hard way).  

SithMaster

  • Lets see how happy you are when you need to use a lawn mower and it keeps turning off when you want to cut up zombies.
  • Trade Count: (+4)
  • Full Member
  • ***
  • Offline Offline
  • Posts: 1781
  • Last login:January 12, 2014, 03:52:59 pm
  • The brightest light casts the darkest shadow.
Re: Franco's Custom Cocktail (UPDATE: CNC Milling Stainless Feet)
« Reply #32 on: November 07, 2007, 03:39:09 pm »


Heres a pic of what i did though the angle kinda sucks.  Nice score on the monitor (got mine for 10 dollars and got a ride to pick it up about 5 miles away).  Before cutting open the back and see how everything is placed.

What frontend did you use in the optimus pics?  Im using mala and i really like how the names curve like that.
Back in MY day we lived on the moon and we had to build a rocket ship from scratch to get to the Earth before we suffocated.

Franco

  • Guest
  • Trade Count: (0)
Re: Franco's Custom Cocktail (UPDATE: CNC Milling Stainless Feet)
« Reply #33 on: November 07, 2007, 03:41:01 pm »
I'm bummed i didn't find this thread earlier.  my cocktail is very very similar to this (Dave's Not-So Classic Cocktail), down to the K (with the hole) shaped top, and running ultrastyle. 

but...  your metal work is really going to put this over the top, and the taper you have in the cabinet looks great, and hopefully will make it more comfortable to sit at. 

Hi Davie, thanks very much for your input. Have you got a link to your cocktail? I would love to see it.

Im not actually going to be running Ultrastyle (even though I love it), Im going to use Mala for the LED WIZ support.


- lower the monitor about an inch, and open up the hole on top significantly (and make a bezel), to help get better perspective on your screen.  I seriously regret not doing this, and it's too late for me.  The portal effect is much more impressive than the flush.  Trace the sight lines to make sure that nobody ever has to lean over.  The top will always look great as it all just looks black. 

Hmmm, I like the idea of this, Ill have to have a little play around with it  :)


- flip your monitor upside down, as the top of the monitor is thinner than the bottom.  this, along with dropping the monitor will make a huge difference when you're playing horizontal games.  any decent video card will be able to flip the image to accomplish this, and mame/daphne/zinc don't know the difference. 

Im not sure if I am going to have room in my table to install a decent video card due to the height of them and am just planning on using on board video at the moment as im not intending on playing anything too intensive. At the same time though it would be a good idea to flip the monitor as suggested. Im receiving the PC for the build this week and im planning on doing a hardboard mockup so this will give me an idea of the space I have to play with. I would like to be able to get a video card in for future upgrades etc. I dont suppose it is possible to get a female AGP> male AGP 'extension' so that I could mount the video card at 90 degress if I am tight on space?


- on the horizontal side, i would keep the CP height the same and just manufacture the clearance by using shorter sticks, and opening up the top more.  knee space is important!  :)

Yeah this is another thing I am going to sort out with the mock-up, the CP heights are just at a random height that 'looked right' when I modelled it. Im going to machine some joystick shafts for the perfect height required for the panels though, I thought I would have to do this as I am rear mounting the sanwas from under the MDF CP (there is a reason for this rather than sinking them into the top of the CP, Ill get to this later).


- make sure the side CP's are centered on the screen, not the monitor.  my earlier one was centered on the monitor and it just always looked wrong. 

Thanks, ill make sure I do that, I dont know if I would have thought of that.


-and whenever you can get away with not decasing a monitor...  don't (learned that one the hard way). 

Can you tell me why you dont suggest decasing the monitor? I have heard some people have had problems but I havent heard what.

Thanks again for your input, its gave me some really good points to think about.  :cheers:

Franco

  • Guest
  • Trade Count: (0)
Re: Franco's Custom Cocktail (UPDATE: CNC Milling Stainless Feet)
« Reply #34 on: November 07, 2007, 03:44:11 pm »
Thanks for the pic SithMaster  :cheers:

The frontend is Ultrastyle, I really liked it and would carry on using it but I need the LED support from Mala.

I dont know what your requirements are but give it a go!  :)

davieboynj

  • Trade Count: (0)
  • Full Member
  • ***
  • Offline Offline
  • Posts: 269
  • Last login:June 16, 2011, 01:32:09 am
  • Eating your legs solves lifes little problems.
Re: Franco's Custom Cocktail (UPDATE: CNC Milling Stainless Feet)
« Reply #35 on: November 07, 2007, 04:37:38 pm »
I have ABSOLUTLEY nothing against mala, but if there is a command line tool for the ledwiz you can easily make ultrastyle work with it.  If you're interested, I can send you some scripts...  they make it so you can launch snes (Super Ghouls and Ghosts, anyone?) DAPHNE, and Zinc from Ultrastyle, and they could also light up controls for each game (by adding some lines).  I remember once HowardCasto said that ultrastyle was a one-trick pony - - he's right, but a couple scripts can make things manageable.  I just like toggling through the marquees, and never really was happy with many other frontends. 

Also, chances are, your onboard video card will support screen flipping (i would never suggest a full-size video card other than the ArcadeVGA, as onboard is more than adequate)  You'll want to check first, but anything made in the last few years, especially if by Nvidia or ATI will rotate just fine.  If you have an Nvidia, make sure you try a wide range of drivers, as they vary greatly based on date.  I found everything -mame- runs smoother on some of the older drivers.  ATI drivers are quite a bit less ornery. 

De-casing...  ugh.  I got shocked pretty good twice, and ultimately shorted out my first monitor by decasing.  I really had no choice with that particular monitor, the case was a lot of fluff and it got significantly smaller by removing it - - but i know the dell model you have, and it's pretty lean.  you won't save much space, and will always have to be super-careful.  I should have just used a different monitor.  I understand the temptation, especially with your taper, but try not to...  running the monitor upside down should help you get the taper you want, at least on the player's horizontal side.  I'm not opposed to taking off anthing plastic, but at some poing you're going to start having exposed circuitboard and glowing stuff.  that's where i draw the line now.  :)

Finally - - it is my great shame that i never put up a formal page for my arcade - - I may have to quickly put something up on photobucket. 


SithMaster

  • Lets see how happy you are when you need to use a lawn mower and it keeps turning off when you want to cut up zombies.
  • Trade Count: (+4)
  • Full Member
  • ***
  • Offline Offline
  • Posts: 1781
  • Last login:January 12, 2014, 03:52:59 pm
  • The brightest light casts the darkest shadow.
Re: Franco's Custom Cocktail (UPDATE: CNC Milling Stainless Feet)
« Reply #36 on: November 07, 2007, 09:04:12 pm »
I also appreciate the idea for lowering the monitor.  its going to come in handy when i get my own cocktail made.

So ultrastyle is capable of lighting up say volcano buttons as described in another thread on the forums?  someone wanted to have them light up when a credit was entered is this possible?

There is an adapter to have a video card at 90degrees dont know where to get it but i know they exist. :cheers:
Back in MY day we lived on the moon and we had to build a rocket ship from scratch to get to the Earth before we suffocated.

danny_galaga

  • Grand high prophet of the holy noodle.
  • Trade Count: (+1)
  • Full Member
  • ***
  • Offline Offline
  • Posts: 8522
  • Last login:July 08, 2025, 10:03:40 pm
  • because the mail never stops
    • dans cocktail lounge
Re: Franco's Custom Cocktail (UPDATE: CNC Milling Stainless Feet)
« Reply #37 on: November 08, 2007, 06:17:15 am »

wow, thats gonna be one heavy mofo! love the bits youve made so far  :)


ROUGHING UP THE SUSPECT SINCE 1981

Franco

  • Guest
  • Trade Count: (0)
Re: Franco's Custom Cocktail (UPDATE: CNC Milling Stainless Feet)
« Reply #38 on: November 08, 2007, 10:55:44 am »
I have ABSOLUTLEY nothing against mala, but if there is a command line tool for the ledwiz you can easily make ultrastyle work with it.  If you're interested, I can send you some scripts...  they make it so you can launch snes (Super Ghouls and Ghosts, anyone?) DAPHNE, and Zinc from Ultrastyle, and they could also light up controls for each game (by adding some lines).  I remember once HowardCasto said that ultrastyle was a one-trick pony - - he's right, but a couple scripts can make things manageable.  I just like toggling through the marquees, and never really was happy with many other frontends.

Thats good to know Davie. Im going to have a play with Mala as I havent checked it out yet but if I decide its not for me I may ask you for some help with the scripts for Ultrastyle if you dont mind.

Also, chances are, your onboard video card will support screen flipping (i would never suggest a full-size video card other than the ArcadeVGA, as onboard is more than adequate)  You'll want to check first, but anything made in the last few years, especially if by Nvidia or ATI will rotate just fine.  If you have an Nvidia, make sure you try a wide range of drivers, as they vary greatly based on date.  I found everything -mame- runs smoother on some of the older drivers.  ATI drivers are quite a bit less ornery. 

Fingers x'd I should be able to flip the screen then. Ill have a play once I recieve the PC im going to use, it was posted yesterday so it should be here in the next couple of days.

De-casing...  ugh.  I got shocked pretty good twice, and ultimately shorted out my first monitor by decasing.  I really had no choice with that particular monitor, the case was a lot of fluff and it got significantly smaller by removing it - - but i know the dell model you have, and it's pretty lean.  you won't save much space, and will always have to be super-careful.  I should have just used a different monitor.  I understand the temptation, especially with your taper, but try not to...  running the monitor upside down should help you get the taper you want, at least on the player's horizontal side.  I'm not opposed to taking off anthing plastic, but at some poing you're going to start having exposed circuitboard and glowing stuff.  that's where i draw the line now.  :)

Im thinking about leaving the case on now. You are right, there isnt much space to be gained by decasing it, I was just struggling with ideas of how to mount it and I thought It way be easier if it was decased but I had a good think last night and I think I have found a good solution.

Finally - - it is my great shame that i never put up a formal page for my arcade - - I may have to quickly put something up on photobucket. 

I saw the post you have put up, loving it mate  8)

-----------------------------------------------------------------------------------------------------------------------------

I also appreciate the idea for lowering the monitor.  its going to come in handy when i get my own cocktail made.

So ultrastyle is capable of lighting up say volcano buttons as described in another thread on the forums?  someone wanted to have them light up when a credit was entered is this possible?

There is an adapter to have a video card at 90degrees dont know where to get it but i know they exist. :cheers:

Im not sure about Ultrastlye and lighting buttons but I assume the question was aimed at Davie and im sure he will be able to answer.  :)

I had a look for the 90 degrees video card adapter things and found out that they are called AGP risers or AGP right angle extenders (you can also get them for PCI etc). They are only a few pounds so I will be able to get on if needs be but I am going to try the standard on board graphics for a start.


-------------------------------------------------------------------------------------------------


wow, thats gonna be one heavy mofo! love the bits youve made so far  :)

Yeah, is going to be heavy indeed! At least it should be nice and stable (depending on my cabinet building of course)  ;)

Ive decided to change the wheels I have made as I think there is going to be too much weight for such thin wheels and they may end up damaging the carpet or marking the laminate floor. The ones I have made already are 10mm wide, im going to make some wider ones at about 40mm wide to spead the load.


davieboynj

  • Trade Count: (0)
  • Full Member
  • ***
  • Offline Offline
  • Posts: 269
  • Last login:June 16, 2011, 01:32:09 am
  • Eating your legs solves lifes little problems.
Re: Franco's Custom Cocktail (UPDATE: CNC Milling Stainless Feet)
« Reply #39 on: November 08, 2007, 12:28:00 pm »
So ultrastyle is capable of lighting up say volcano buttons as described in another thread on the forums?  someone wanted to have them light up when a credit was entered is this possible?

Ultrastyle can't, but i feed it a mame.exe that silently runs a cmd script, which then sends the commands to the emulator that i want to use.  When you run "mame dlair", the script redirects to dapne.  when you run "mame sghouls" it redirects to zsnes.  when you run "mame mrdrillr" it redirects to zinc.   having it light up the correct buttons for each game would be easy as adding more lines to the script to light up the buttons used in the game.  This still assumes there is a command line for the LEDWiz. 

as far as making individual buttons blink when a credit is entered, i'd have no idea how to do that.   ???

Franco

  • Guest
  • Trade Count: (0)
Re: Franco's Custom Cocktail (UPDATE: New wheels made and graphics idea)
« Reply #40 on: November 10, 2007, 08:42:16 am »
Another hard day at the office this morning ;)

As I said I wasnt really happy with the wheels I made previously so I made some wider ones as well as the threaded shafts that will screw into one of the cabs feet:


(apologies for the picture quality, I had to use my camera phone for these)

I also milled the slot in the cab foot to suit the wheels. The foot here is as it came off the machine after the profiling etc, I still need to mill/grind the sides and file/emery finish it. They will be nicely polished when they are complete  :)


(Note the ghetto bic spindle in place here, smooth! lol)

Im much happier with the chunkier wheels, I think they will look much nicer as well as supporting the table better and sholdnt damage the floor as easily as the thin ones would have.

My PC arrived today that I am using in the table so I had a quick looksie inside before firing it up.


Its a 3Ghz P4 with 512MB DDR RAM and a 80GB HDD that I got off a friend for a bargain £75 :) It should be plenty powerful enough for my needs. The MB is fairly small and should fit in my cab nicely.

Ive also had a couple of ideas for some graphics. If you look at the picture below you can see the white area behind the CP (ignore the CP/joystick heights etc for the moment)


Im thinking of using some 5mm blue tinted acrylic similar to this for it:


Im then thinking of having some white vinyl stuck to it with space invaders cut out of the vinyl to reveal the blue tinted acrylic behind it, kind of like this:


I would use different spacies, I just used the same one for speed. The vertical CPs would also have a couple of spacies on each. Im also thinking of back lighting the acrylic with an rectangular array of LEDs, controlled by one of the LED WIZs im going to use. It would have been nice to be able to light each spacey independantly but I dont have enough free outputs, even with two LED WIZs.

I thik it would be pretty cool to have the spacies gradualy pulse on and off at the start of the attract sequence before the rest of the sequence kicks in.  8)

Ive also had an idea for the coin/start bezels. Im thinking of having a space invaders 'lazer turret' vinyl on each of the bezels with the player number (1 or 2) cut out of it, kind of like this (excuse the crappy paint drawing but you will get the idea)


It would almost look like that the turrets are in position ready to zap those damn spacies!!

Any thoughts on any of this?

I was hoping to get on with the mock up today but my work mate was meant to bring me some hardboard in to use but he didnt come in so that will have to wait until next week.

At least I have the PC now so I can have a tinker with that :)

Franco

  • Guest
  • Trade Count: (0)
Re: Franco's Custom Cocktail (UPDATE: Stainless feet finished)
« Reply #41 on: November 15, 2007, 08:06:49 pm »
Well Ive finally got the feet finished just about. Ended up being more work then expected though. As I said I managed to break a tap when I was tapping one of the spindle holes. I had used an old tap that had been in the draw for god knows how long and I only found out after that we had about a dozen or so coated machine helix taps in the consignment cabinet afterwards, doh!

As I had broken a tap inside the hole I needed to get it spark eroded out to remove it beofre I could re-tap the hole. The real problem came when I went to erode the tap and I found out that the foot was too long to fit on the spark eroder and I wouldnt be able to erode it out. This gave me two options, either make a new foot from scratch or cut the foot in half, spark erode the new smaller piece and weld it back together.

I decided to go for the latter as it took almost a shift to mill the original feet out.

I cut the foot in half using a radiac disc saw which gave a nice clean 90degee cut. I also filed a nice size weld prep on the edges of the foot pieces to be welded back together:


I then spark eroded the broken tap out of one of the ends and re-tapped the hole before test fitting one of the splindles. I faced the end of the spindle off until the end of the spindle was flush with the end of the foot:


Once both spindle adjustments was complete I laid both pieces on an inspection table and clamped them together using ground parallels and G clamp to make sure they were as straight as possible:


I then took it to be welded back together. I cannot take any credit for this part but one of my work colleges did a sterling welding job and perfectly welded them back together, completely filling the weld prep and just slightly over filling it as requested so that it could be milled off in the  next operation. This is a picture of the welded foot together with the original 'plain' foot just before they were finish milled:


I then did a finish milling operation by just taking the minimum amount of mateial off each side of the feet (0.2mm, 0.008" or so) so that they would clean up to a high finish (in terms of milling). This is a picture of the finish milled feet:


The feet were then just deburred before i couldnt take it anymore and I had to have a 'mock' test of the feet in 'posistion':  :D


The 10mm gap may seem fairly big but I wanted to be able to clear any deep pile carpet etc that I come across, tilting the table to lift it will also bring the end of the foot closer to the floor.

I still need to drill and counter bore the holes that will attach it to the cab but I thought I would wait to do those until I have at least built the main shell of the cabinet so that I knw exactly where to posistion the holes.

All i need to do now is to file finish the feet (oh yeah, I need to build the cab at some point or have i forgotten that  ::)  ;D) No seriously, im itching to get on with the main build, im just enjoying the whole planning aspect so much. I know last time I built a cab as soon as I started the actual build I spent all of my time on it and finished it (fairly) fast so im just trying to get my moneys worth out of this cab.  :)  I do promise an actual build post soon though! Im just waiting for that monitor to arrive (long story) so I can start the mockups, etc.

« Last Edit: November 15, 2007, 08:14:57 pm by Franco »

leapinlew

  • Some questionable things going on in this room with cheetos
  • Trade Count: (+4)
  • Full Member
  • ***
  • Offline Offline
  • Posts: 7919
  • Last login:Yesterday at 10:33:20 pm
Re: Franco's Custom Cocktail (UPDATE: Stainless feet finished)
« Reply #42 on: November 16, 2007, 01:12:34 pm »
awesome work! I'm in for some rings too - maybe I can share the shipping with McCoy - you have PM!

BobbyG66

  • Trade Count: (0)
  • Full Member
  • ***
  • Offline Offline
  • Posts: 588
  • Last login:November 13, 2016, 11:52:09 am
  • Current project: Dodgeball
Re: Franco's Custom Cocktail (UPDATE: Stainless feet finished)
« Reply #43 on: November 16, 2007, 03:06:25 pm »
Very nice skillz!
Half of the people you meet are below average.

Franco

  • Guest
  • Trade Count: (0)
Re: Franco's Custom Cocktail (UPDATE: Stainless feet finished)
« Reply #44 on: November 16, 2007, 06:47:51 pm »
awesome work! I'm in for some rings too - maybe I can share the shipping with McCoy - you have PM!

PM replied  :)

Very nice skillz!

Thankyou. I can't take all the credit though, I have had some help from some work collegues but thanks  :)

Franco

  • Guest
  • Trade Count: (0)
Re: Franco's Custom Cocktail (UPDATE: Concept Art Idea)
« Reply #45 on: November 18, 2007, 10:22:58 am »
Ive been thinking about what to do in regards for art on the top of the table and Ive had a couple of ideas.

I was going to go for a blue cab with white t-moulding btu I think im going to revert to my original plan of black with chrome moulding and some blue accents to complement the blue LEDs I will be using.

With that in mind and following the space indavers ideas so far im possibly thinking of having some thing similar to the following. (Plesse note that these are just rough paint pictures, I dont have any particular graphical skills!)


(I have left the CPs blue here just so you can see them seperate to the top)

As you can see I would like to have a big space invader monster on the right hand side with possibly a score card on the left. Im also thinking of having an array of space invades at an angle some where on the surface (or possibly taking up the rest of the space). By the angular array I mean something similar to this:


I also had an idea of possible inserting 5mm frosted acrylic tubes into the table top and back lighting them behind with LEDs (the same idea as what im doing to light the rings around the joysticks) to create a star field affect kind of like this:


I will already be on my 3rd LED WIZ with the other LEDs I have planned and will have a fair few spare which I could use to light up most of the 'stars' individualy during the attract sequence.

Any thoughts on these ideas?

Grasshopper

  • Trade Count: (+1)
  • Full Member
  • ***
  • Offline Offline
  • Posts: 2380
  • Last login:March 04, 2025, 07:13:36 pm
  • life, don't talk to me about life
Re: Franco's Custom Cocktail (UPDATE: Concept Art Idea)
« Reply #46 on: November 18, 2007, 11:09:53 am »
I like the graphics so far. Simple is almost always best IMHO. But personally I'd have control panels on all four sides of the table.

I know that strictly speaking you don't really need the 4th panel, and it would also add significantly to the cost, but I just think that a three sided cocktail table looks somehow unbalanced.

It also occurs to me that you could put rarely used controls like a trackball, spinner, or analogue joystick on the fourth panel. Or alternatively the fourth panel could be arranged in a Multi-Williams style layout.
"Patriotism is the last refuge of the scoundrel." - Samuel Johnson

Franco

  • Guest
  • Trade Count: (0)
Re: Franco's Custom Cocktail (UPDATE: Concept Art Idea)
« Reply #47 on: November 26, 2007, 08:12:57 pm »
Thanks for your input Grashopper, apoligies for replying late, I hadnt seen that anyone had replied to the post. Personaly I prefer the three sided look over the four. I wouldnt have a great deal of use for a fouth panel as I dont really play spinner or trackball games and the cab is going to be located against a wall which would stop it being readily used. Im hoping to make it so that the CPs can be easily removed for maintenance so I could always make another panel to swap over if needs be.

Ok, fairly big update now....

I received the monitor I bought off ebay last week. I asked the seller to package it carfully for me due to the weight of the thing and even payed him extra for packaging materials to make sure it arrived safe. I told him i wasnt too bothered about too much protection on the sides but make sure that the screen was well protected. Aparently his idea of packing a monitor is to wrap it in two layers of the smallest bubble wrap you can find, stick a couple of random pieces of thin cardboard on it and ship it with the monitor facing down!  :banghead:

Needless to say, this is how the monitor was when I unpacked it.


As you can see the screen has two lovely cracks it it :hissy: I spoke to the seller and he was very apologetic (for what good that does) and he offered to reimburse me of the item cost (a whole £4, woot!) I lost about £25 getting it
shipped to me but at least I can use it to practice on when test fitting the monitor and when removing the monitor stand etc before I let rip on the other identical monitor I have.

I have started to make a card board mock up of the cab but I havent uploaded the pictures yet but I will post them once I have.

Ive also purchased a few more parts for the project.

I couldnt decide between the Sanwa JLWs and the Sanwa JLFs so I bought a pair of each of them from Gremlin Solutions to compare.

Without having a CP to test them in they feel very similar just moving them in my hand apart from the JLW has a slightly longer stick. Im going to build a test CP to have a propper go with them but for the moment I think im going to use the JLWs in the vertical CPs and the JLFs in the horizontal CP. The JLWs are 4/8way adjustable so I will be able to swap them over for vertical 4way games even if it does mean i will have to remove the bottom of the CP to move the restrictor.

Ive also bought some clear Seimitsu ball tops from www.arcadeshop.de and I have made some hollow shafts for them to mount a blue LED in the top which will be controlled by one of the LED Wiz's. I have posted a 'how to' guide in the main forum of how to mod the shafts.


Ive bought some JBL 4" speakers for the cab. They are rated at 35w RMS and about 110 peak which should be plenty powerful enough for the cab. I also go a mini 12v amp off ebay rated at 30w RMS which will be ideal. They come ready wired with terminal blocks and Ill be able to run it off the PC PSU. I hooked it up to the speakers and a PSU and I must say they do give out decent sound for there size, im sure they will sound even better once mounted on the panel.


They came with some speaker grills but they dont exactly look authentic so I was thinking of putting some more plain grills on but ive kinda decided to go to the other extreme and make some space invaders grills for them.

This is just a quick mockup of what they may look like. Im going to use some 80mm case fans for cooling so I wil be able to use these as fan guards too. Im not really decided yet but im probably going to use a couple of 'spacies'
designs. Ive got some nice stainless mesh to go behind them which im planning on spraying blue.


The only other progess I have made is that I have finaly once and for al finished the feet off!  :)

I made some bolts and some nuts with an over sized flange on them to secure the feet to the cab:


I test fitted the to a piece of scrap wood to show you how they will fit (imagine the wood is the base of the table) I am going to route out the area of the flange so they sit flush with the top of the base:


I also counterbored the bottom of the hole to hide the bolts:


They have also had a nice emery finsh to give a brushed look and the wheels have been polished to make them stand out.

I also thought it would be a good idea to keep a record of the what I have spent. All the cost below include shipping/tax etc.

  • PC £90
  • Monitor (minus £4 back) £21
  • Amplifier £12.98
  • 100 LEDS+Resistors £10
  • JBL 4" Speakers £19.26
  • Joysticks (2x JLW, 2x JlF) £63.45
  • 4x Clear Balltops £16.23

Total = £232.92

I think thats about it for now, Ill update again once I have made some more progress....


metahacker

  • Trade Count: (0)
  • Full Member
  • ***
  • Offline Offline
  • Posts: 166
  • Last login:January 17, 2024, 03:09:39 am
Re: Franco's Custom Cocktail (UPDATE: LED Sanwas + more)
« Reply #48 on: November 26, 2007, 08:52:12 pm »
between the joysticks and base/wheel alone you are already well on your way to quite a magnificent product ;)

i really like the mini car amps with the jbl's.  do you have plans for a small sub?  that would round it out quite nicely... and it seems your small amp(s) have a cross over built in to facilitate this .... altho i'm sure the jbls will do just fine with those amps and no sub. 

im also curious to see whether power supply noise becomes an issue with the 12V line ... once hdd, vga, fans & an optical drive are added to the mix .. i think 12v car amps running off a pc psu are a great concept (something i'd like to do in my next build) , but i've seen some ppl have noise issues.


« Last Edit: November 26, 2007, 08:53:47 pm by metahacker »

Franco

  • Guest
  • Trade Count: (0)
Re: Franco's Custom Cocktail (UPDATE: LED Sanwas + more)
« Reply #49 on: November 26, 2007, 09:20:39 pm »
between the joysticks and base/wheel alone you are already well on your way to quite a magnificent product ;)

Thank you Sir  :)


i really like the mini car amps with the jbl's.  do you have plans for a small sub?  that would round it out quite nicely... and it seems your small amp(s) have a cross over built in to facilitate this .... altho i'm sure the jbls will do just fine with those amps and no sub

A sub would be nice but im pushing it space wise with those speakers as it is. For standalone speakers they should suffice quite nicely. If not then I already have planned a stainless I/O panel (RCA Audio/Video in/out, 'kettle' power plug, VGA in port for dreamcast, two/four usb ins for keyboard/mouse etc, two usb ports to connect the controls to xbox 360 pads inside the cab so I can use arcade contols but on the big screen, or even use the RCA audio video in and play xbox on the PC monitor, plus a couple of other I/O things im forgetting at this time) so I can always connect the table to the rest of my main sound system. Im quite liking the idea of the video out so people watching can watch the action on the cocktail relayed on the big screen TV  :)

im also curious to see whether power supply noise becomes an issue with the 12V line ... once hdd, vga, fans & an optical drive are added to the mix .. i think 12v car amps running off a pc psu are a great concept (something i'd like to do in my next build) , but i've seen some ppl have noise issues.

Sssssh! Dont tell me things like that!  ;)

No serioulsy I hope I wont have a problem, I had a big car amp and 6x9s in my last cab and didnt have a problem, saying that it was a much roomier cab so I may have problems on this one. Fingers x'd I wont but I will have to wait and see. Thanks for the heads up though.

theCoder

  • Trade Count: (0)
  • Full Member
  • ***
  • Offline Offline
  • Posts: 1035
  • Last login:September 20, 2010, 10:48:47 pm
  • I'll clean up my mess, Honey, when I'm done...
Re: Franco's Custom Cocktail (UPDATE: LED Sanwas + more)
« Reply #50 on: November 26, 2007, 10:58:28 pm »
You mentioned you are quickly running out of LED Wiz outputs.  Have you thought about putting two or three LEDs per line?  I think each output can handle at least 3 LEDs.

So you work in a shop that has an EDM machine?  Nice....

What about back lighting the monsters eyes with blue LEDs?

This is going to be cool.  Good luck with the build.

danny_galaga

  • Grand high prophet of the holy noodle.
  • Trade Count: (+1)
  • Full Member
  • ***
  • Offline Offline
  • Posts: 8522
  • Last login:July 08, 2025, 10:03:40 pm
  • because the mail never stops
    • dans cocktail lounge
Re: Franco's Custom Cocktail (UPDATE: Concept Art Idea)
« Reply #51 on: November 27, 2007, 02:19:17 am »


Needless to say, this is how the monitor was when I unpacked it.


personally i would never get something like a monitor on ebay, etc if it means being freighted. just too risky. there's normally something cheap to be found locally, but i guess that's what you'll be doing now  ;)


ROUGHING UP THE SUSPECT SINCE 1981

Franco

  • Guest
  • Trade Count: (0)
Re: Franco's Custom Cocktail (UPDATE: LED Sanwas + more)
« Reply #52 on: November 27, 2007, 04:04:43 am »
You mentioned you are quickly running out of LED Wiz outputs.  Have you thought about putting two or three LEDs per line?  I think each output can handle at least 3 LEDs.

So you work in a shop that has an EDM machine?  Nice....

What about back lighting the monsters eyes with blue LEDs?

This is going to be cool.  Good luck with the build.

I had thought about doubling some of the LEDs up but its not everyday im going to build a Cocktail table so I thought I would spend the extra, its only the price of four packs of cigarattes for a third one. Personally for me it will make all the difference for me to be able to light each LED independantly. I know if I did end up cutting back I would be annoyed at myself at the end for cheaping out. FYI the LED Wiz can handle 15+ LEDs per output  :o

We actually have quite a few EDMs on site, that one was just a couple of macines down from me. About 5 minutes after I had chopped the leg in half I found out we had a large one attached to a 3m radial arm drill that would have been able to errode it as i was, doh! There are 2000+ people that work at our place. Ive been there 9 years and im still finding out about what machines etc we have.

You probably wont beleive me but I did have that same idea about lighting the spacies eyes (I thought I had posted it). Great minds think alike eh?  :) The plan is to insert acrylic etc wedges in the table top and light them the same way I have my joys.  Ill program the Wiz's so that the monsters eyes throb on and off with the other spacies at the start of the attract sequence  8)


Needless to say, this is how the monitor was when I unpacked it.


personally i would never get something like a monitor on ebay, etc if it means being freighted. just too risky. there's normally something cheap to be found locally, but i guess that's what you'll be doing now  ;)

Yeah, you live and learn  :-\ I though it would be worth a punt as I won the auction at such a low price. I did actually buy my other (identical) monitor of ebay and that came shipped in a big double walled box with loads of polystyrene etc. It just depends whos packing it, personally I take pride when im packing things for people but some people either dont have a clue or dont give a ---steaming pile of meadow muffin---. They do seem to pop up fairly frequently though so im hoping to find one I can pick up locally.

Grasshopper

  • Trade Count: (+1)
  • Full Member
  • ***
  • Offline Offline
  • Posts: 2380
  • Last login:March 04, 2025, 07:13:36 pm
  • life, don't talk to me about life
Re: Franco's Custom Cocktail (UPDATE: LED Sanwas + more)
« Reply #53 on: November 27, 2007, 02:45:04 pm »
Incidentally Franco, have you ever seen GSXRMovistar’s concept pictures for his cocktail cabinet? Like you he went for the chrome and translucent buttons/joystick look.

http://forum.arcadecontrols.com/index.php?topic=11695.40

I'm not sure if he ever built it but it's been a major inspiration to me. It's a work of art. Probably the nicest looking cocktail I've ever seen.
"Patriotism is the last refuge of the scoundrel." - Samuel Johnson

Franco

  • Guest
  • Trade Count: (0)
Re: Franco's Custom Cocktail (UPDATE: LED Sanwas + more)
« Reply #54 on: November 27, 2007, 04:09:35 pm »
Wow, thats beautiful!  :o  :)

Thanks for the link, I hadnt seen it before. It gives me an idea of what mine should look like (colour wise).


Kaytrim

  • I'm too nice a guy
  • Trade Count: (+4)
  • Full Member
  • ***
  • Offline Offline
  • Posts: 2095
  • Last login:September 22, 2015, 04:11:30 pm
Re: Franco's Custom Cocktail (UPDATE: LED Sanwas + more)
« Reply #55 on: November 27, 2007, 04:39:37 pm »
Franco,

That is some serious metal work there.  :cheers:  Too bad about the monitor.  :cry:  Can't wait to see this thing get a case.

TTFN
Kaytrim

spacies

  • Trade Count: (0)
  • Full Member
  • ***
  • Offline Offline
  • Posts: 934
  • Last login:February 19, 2015, 03:40:49 am
Re: Franco's Custom Cocktail (UPDATE: LED Sanwas + more)
« Reply #56 on: November 27, 2007, 11:25:51 pm »
I agree Kaytrim.

Very nice.

From one metal guy to another, RESPECT!

I built something similar to the link posted by Grasshopper a couple of years ago.

Check it out here.: http://www.picturetrail.com/gallery/view?p=999&gid=5432451&uid=2715941

Its near the bottom.

Franco

  • Guest
  • Trade Count: (0)
Re: Franco's Custom Cocktail (UPDATE: LED Sanwas + more)
« Reply #57 on: November 28, 2007, 05:03:06 am »
Thanks for the kind words guys.  :)

Spacies, are they ALL your projects on that page?  :o If so, wow!  :applaud:

I think this is the table you are referring to:


I absolutely love this table, I came across it a couple of weeks ago somewhere but I didn't know who's it was, its beautiful. Mad props to you sir!  :cheers:

I definitely want some glass  clips off you if you are still doing them? I know you do them in 1 1/4" but I could probably do with some at about 1" if it is possible. Its just that im using 18mm MDF for the top and probably 6mm glass.

On another note, my DIY LED Joystick 'How to' has been picked up by Retroblast.  :)


spacies

  • Trade Count: (0)
  • Full Member
  • ***
  • Offline Offline
  • Posts: 934
  • Last login:February 19, 2015, 03:40:49 am
Re: Franco's Custom Cocktail (UPDATE: LED Sanwas + more)
« Reply #58 on: November 28, 2007, 02:11:33 pm »

LOL,

Yip those are all mine. And the worst thing, thats not all of them.

How about a deal on glass clips for some hollow shafts for the JLWs?

That was a nice table but I am kind of embarrassed to say so now. My machines have come a long way since I was building those. Those are actually covered with an upholstery vinyl and did look very classy.

I do have plans to do some more but I will change a few things.


Franco

  • Guest
  • Trade Count: (0)
Re: Franco's Custom Cocktail (UPDATE: LED Sanwas + more)
« Reply #59 on: November 28, 2007, 02:32:26 pm »
Your embarrassed about that cab  :o lol

Yeah im definitely going to use vinyl. I dont really know much about the different types so you may be able to help me out. How come you went for upholstery vinyl? Im guessing it has a matte finish which is what I think im going to go for. Is it self adheisive or do you need to glue it?

Yep, you have got a deal for the glass clips, ill shoot you a PM in a minute  :cheers:

spacies

  • Trade Count: (0)
  • Full Member
  • ***
  • Offline Offline
  • Posts: 934
  • Last login:February 19, 2015, 03:40:49 am
Re: Franco's Custom Cocktail (UPDATE: LED Sanwas + more)
« Reply #60 on: November 28, 2007, 02:58:17 pm »
LOL.

I shouldn't say embarressed but I used things that I shouldn't have used.
Like that crusty coin door, lol. And those glass clips  :dizzy:
Although I didn't have a decent solution back then.

I would now overhang the top a bit more and put in a step above the CP.


I used upholstery vinyl because it was a 'no paint' solution.
Its actually an fairly cheap way to do the finishing work and gives a great smooth leather look.

Like this: 


I used a spray-on contact glue to stick it down. Spray both surfaces, wait until its not sticky to touch and press them together. Job done.

For the CPs, I slotted them for T-Molding applied the contact again. Then used a heat gun to warm up the vinyl so it becomes stretchy and pulled it over the edges and stapled it down. The I ran a sharp knife along the t-molding slot for a nice straight edge. Hammer the t-molding in and she's all done. I was also doing the inside of the CPs like that but I ended up using some stick-on vinyl or painted in the end.

If you get stuck, give me a bell. Always happy to help.

Franco

  • Guest
  • Trade Count: (0)
Re: Franco's Custom Cocktail (UPDATE: LED Sanwas + more)
« Reply #61 on: November 28, 2007, 03:37:21 pm »
Thanks buddy, thats a great help. Im loving the textured look so im going to use some of that  :)

shock_

  • Wiki Contributor
  • Trade Count: (0)
  • Full Member
  • ***
  • Offline Offline
  • Posts: 354
  • Last login:January 30, 2020, 06:23:29 pm
  • In Brisbane, it's GMT+10 all the time.
Re: Franco's Custom Cocktail (UPDATE: LED Sanwas + more)
« Reply #62 on: November 28, 2007, 04:54:42 pm »
Your custom metalwork is just fantastic.  Well done.

And black/chrome for the win!!

Franco

  • Guest
  • Trade Count: (0)
Re: Franco's Custom Cocktail (UPDATE: *IPAC4 Enclosure*)
« Reply #63 on: December 08, 2007, 01:20:08 pm »
It's all about the black/chrome ;)  :D

Well, next mini update....

Apologies for not getting on with and actual cab building but I have booked 16 days off work over Crimbo so I'm planning on doing most of it then.

I have been busy for the past couple of days though.

I have been planning on using d subs to connect my controls and LEDs to my IPAC and LED wiz's and then I saw Namco's project where he had mounted his IPAC in a project box and I liked the look so I decided to mount my IPAC and LED Wiz's in project boxes too.

I picked up some of these blue project boxes from Maplins...


I had to get the largest box to fit the IPAC4 and it was a little taller than I would have liked but beggars cant be choosers. As the box was fairly tall I didn't want the IPAC to sit on the bottom with a lot of empty space above so I made some stainless steel PCB standoffs with nylon inserts....


The next task was to wire up the d subs. For the IPAC4 I'm using four 15 pin d subs. It works out quite nicely as there are 14 inputs per player and one ground which obviously equals 15. I wont be using all eight player buttons but I wired them up in case I add some crazy panel in the future where I need more inputs than I am going to use for a start. I bought a '3rd hands' soldering stand and its probably the best £10 I have ever spent, it makes it sooooo much easier to solder....


(All of the wires have 1/2" of heat shrink over the wires/solder buckets, I've just not put them on in that photo)

I then dremmeled the case to fit four 15 pin d subs, mounted the PCB standoffs, wired the d subs to each IPAC input, generally sweared a lot and then screwed the IPAC into the PCB standoffs. This is the finished result....


Gratuitous shot with the top off....


Just for some extra bling I mounted some LEDs to the standoffs. Why?... A) because I wanted to  :P and B) because people always ask to see inside the cab so it should look extra bling when I open her up. (Btw, the IPAC and LED Wiz housings are going to be mounted to the side panels which will be hinged at the bottom)


Pic of the LEDs on in the light....


and pic of them in the dark....


I'm really happy with how it came out. I would have liked the wiring to have been a little neater but I was struggling as it was. I tested continuity from the d sub pins to the IPAC terminals and some how they are all connected correctly :)

Only need to do another three now.....  ::)


waveryder

  • Trade Count: (+1)
  • Full Member
  • ***
  • Offline Offline
  • Posts: 585
  • Last login:July 14, 2011, 04:26:17 am
  • I Troop, therefore I am
    • BubbleGum Custom Art
Re: Franco's Custom Cocktail (UPDATE: *IPAC4 Enclosure*)
« Reply #64 on: December 08, 2007, 01:40:36 pm »
Holy C***  :notworthy:
I did a similar thing with my dreamcast padhack, but with clear perspex. I saw those maplins project boxes but could not find any PCB standoffs for em. When asked for em in maplins they didnt know what the hell I was talkin about! Lovin the Bling.
When pixelated clipart just wont do, just call for Betty

Franco

  • Guest
  • Trade Count: (0)
Re: Franco's Custom Cocktail (UPDATE: *IPAC4 Enclosure*)
« Reply #65 on: December 08, 2007, 01:51:54 pm »
Cheers fella  :)

By the way, I got your hollow Sanwa shafts done today, I meant to email you but I got carried away with the enclosure. Send me an email with your address and Ill get them sent out to you 1st class recorded delivery.

If you still want some standoffs give me a shout.

Franco

  • Guest
  • Trade Count: (0)
Re: Franco's Custom Cocktail (UPDATE: Power/Audio/Video In-Out Components)
« Reply #66 on: December 11, 2007, 07:08:58 pm »
All the components for my power/audio/video panel have come though so I can start planning the housing panel for them. These are the components that are going to be mounted in it:


From left to right....

Switched power block Switched fused Euro style 'kettle lead' power inlet. I am going to wire the terminals from this to a 4-way surge protected extension cable that will be inside the table.

USB Hub 4 way powered usb hub to connect any peripherals I may need. I was going to use this for the mouse/keyboard if needed for admin but I have picked up a cheap wireless mouse/keyboard combo.

Single USB Ports These will be used to connect my Xbox 360 to the cab using male>male USB cables. The cables on the inside of the cab will be connected to hacked 360 pads which will then be connected to the controls.

VGA Coupler To connect my Dreamcast (via VGA box) or 360 to the monitor. Luckily the monitor has dual VGA inputs and has a toggle switch to easily change between the two inputs.

Composite Video and Audio L/R RCA's One set of each for audio/video in and audio/video out. I have installed a PCI TV card which will take the composite video in. The audio in is for connecting the Dreamcast audio cables from the VGA box or from any other external sources. The video out will be connected to the composite video out from the PCI-e Video card I am putting in. I wanted video out so I can connect the cocktail to my big screen TV so people can watch the action from the cocktail on the big screen.

I have measured all of the components and Im just doing a CAD drawing so I can CNC mill a piece of 5mm thick aluminium to flush mount all of the components. The panel will then be located on the rear of the table.

I have also finally finished the table feet. I 'finished' them with 120 grade emery. I say 'finished' as 120 grit is normally far too rough but because of the size of the things it gave a nice brushed look which is what I was after rather than a polished finish which would have been a PITA to get spot on and would also bee an ass to keep clean.


No more feet pics now until they are mounted to the cab, i promise!  :)


Franco

  • Guest
  • Trade Count: (0)
Re: Franco's Custom Cocktail (UPDATE: Polished Aluminium Air Vents)
« Reply #67 on: December 12, 2007, 02:16:19 pm »
As normal I seem to have about 10 things on the go at once so I thought I would add another to the list  :)

Im going to use two 80mm PC case fans to draw air into the cab to keep it nice and cool. The fans will be located on the front panel of the machine, some where near the bottom. Obviously as there will be air drawn drawn in, there needs to be somewhere for it to escape. I was just going to drill some holes in the back for it to escape but I thought I would make some flanges to insert in the holes....


They are CNC machined from aluminium and polished up to 1200 grit emery before finish polishing with Brasso. They are about 60mm tall with a bore of about 35mm. There is a slight lip and the lower shoulder is 54mm (54mm is the largest Forstner bit I have so that decided the size of the flanges).

Once inserted into the cab the shoulder will butt up against the cabinet wall like so...


As for placement im thinking about something similar to below (this is the back of the cabinet)...


The motherboard is going to be located fairly centraly on the base of the cab  so I thought I had better have some vents around this area to expel heat from the CPU etc. I think im going to have the rest of them near the top of the cabinet to get rid of any heat that may accumulate near the top. The block in the bottom left is where I am intending on mounting the I/O panel.

Any thoughts on the vent placement?

quadmasta

  • Trade Count: (0)
  • Full Member
  • ***
  • Offline Offline
  • Posts: 214
  • Last login:May 18, 2022, 03:23:00 pm
    • Approximate Arcades
Re: Franco's Custom Cocktail (UPDATE: Polished Aluminium Air Vents)
« Reply #68 on: December 12, 2007, 03:16:36 pm »
I would mill pretty pieces
I could make joystick handles
If I only had a lathe..

patrickl

  • I cannot know for certain which will be tastiest
  • Trade Count: (+2)
  • Full Member
  • ***
  • Offline Offline
  • Posts: 4614
  • Last login:August 27, 2021, 09:25:30 am
  • Yo momma llama
    • PocketGalaga
Re: Franco's Custom Cocktail (UPDATE: Polished Aluminium Air Vents)
« Reply #69 on: December 12, 2007, 03:37:55 pm »
That's stunning  ...  again!
This signature is intentionally left blank

Franco

  • Guest
  • Trade Count: (0)
Re: Franco's Custom Cocktail (UPDATE: Polished Aluminium Air Vents)
« Reply #70 on: December 12, 2007, 03:46:27 pm »
Thanks  :) Luckily I have quite a few machine tools that I can use. Its one of the very few perks of being a CNC machinist. This is a picture of part of our shop. This is about a half of our department and our department is probably the smallest on site.


Franco

  • Guest
  • Trade Count: (0)
Re: Franco's Custom Cocktail (UPDATE: Enamel sprayed vent grilles)
« Reply #71 on: December 14, 2007, 12:27:05 pm »
I decided to add some mesh to the back of the air vents to stop any wandering fingers and also to make them look nicer.

I cut some mesh to size and spray painted it with Plasticote metalic blue enamel paint. This paint is really good as it dries really quickly (<15 mins) which is ideal for impatient people like me! Ive glued them to the back of the vents using Araldite.


I had thought about spraying a chrome spot in the center of the vents so I tried it out using a stencil but after confiring with my chief sounding board (Jimbo  :)) I decided to leave them blue.


I also noticed that the polished finish reflects the mesh nicely.  :)


KonkeyKong

  • Trade Count: (+5)
  • Full Member
  • ***
  • Offline Offline
  • Posts: 228
  • Last login:October 10, 2021, 09:57:07 pm
  • Monkey is my business and business is good.
Re: Franco's Custom Cocktail (UPDATE: Enamel sprayed vent grilles)
« Reply #72 on: December 14, 2007, 09:21:47 pm »
Do you even realize how high your pushing the bar on this one? Where will this madness end? Hopefully not too soon though, I'm enjoying being blown away by every update.

patrickl

  • I cannot know for certain which will be tastiest
  • Trade Count: (+2)
  • Full Member
  • ***
  • Offline Offline
  • Posts: 4614
  • Last login:August 27, 2021, 09:25:30 am
  • Yo momma llama
    • PocketGalaga
Re: Franco's Custom Cocktail (UPDATE: Enamel sprayed vent grilles)
« Reply #73 on: December 15, 2007, 06:12:45 am »
Yeah, these are great. About time you put them in that cocktail  :P
This signature is intentionally left blank

Franco

  • Guest
  • Trade Count: (0)
Re: Franco's Custom Cocktail (UPDATE: Enamel sprayed vent grilles)
« Reply #74 on: December 15, 2007, 08:41:52 am »
Sssssh!  :P

Thanks for the comments guys.

I actually picked up my MDF today  :D I got two sheets of 18mm 2.4x1.2M and one 12mm sheet of the same size. Should do me nicely for this build and a couple more projects ;)

Treated myself to a circular saw too  :)

patrickl

  • I cannot know for certain which will be tastiest
  • Trade Count: (+2)
  • Full Member
  • ***
  • Offline Offline
  • Posts: 4614
  • Last login:August 27, 2021, 09:25:30 am
  • Yo momma llama
    • PocketGalaga
Re: Franco's Custom Cocktail (UPDATE: Enamel sprayed vent grilles)
« Reply #75 on: December 15, 2007, 08:44:15 am »
must ... resist ... joke about how to transport MDF  :angel:
This signature is intentionally left blank

Franco

  • Guest
  • Trade Count: (0)
Re: Franco's Custom Cocktail (UPDATE: Aluminium I/O Panel Complete)
« Reply #76 on: December 20, 2007, 06:01:06 pm »
Managed to get the panel to house the I/O components finished tonight....


Really happy with how it came out, just a shame its going to be hidden on the back of the cab, although it could go on the side though I suppose, hmm.

The eagle eyed amongst you may notice that the top of the USB hub isn't parallel to the rest of the panel, this isn't a mistake (not on my behalf anyway), the hub actually tapers about 1.5mm along its length so I had to mill a trapezoid pocket to fit it. The main thing is that the components are a good fit (a little too good in places!) I was going to araldite the components in place but I think the only one that will need it will be the VGA port.

I also got my clear buttons drilled this week. I made a hexagonal split bush to hold them on the nut whilst they are being drilled as I am going to have a fair few buttons to drill in the near future ;).....


I have all of my wood now and Its my last morning at work tomorrow (16 days off, woot!) so I PROMISE the next pictures I post will be of some kind of wood construction.  :)

Timoe

  • Trade Count: (+2)
  • Full Member
  • ***
  • Offline Offline
  • Posts: 1662
  • Last login:July 14, 2009, 09:50:12 am
  • Team-Oh-tAy-Oh
    • Rattlin' Trash
Re: Franco's Custom Cocktail (UPDATE: Aluminium I/O Panel Complete)
« Reply #77 on: December 20, 2007, 07:09:49 pm »
Franco,

looks great as expected.  I have to find a USA distributor for those blue project boxes.

   :applaud:

polaris

  • You're a genius! Sheer genius!
  • Wiki Contributor
  • Trade Count: (+1)
  • Full Member
  • ***
  • Offline Offline
  • Posts: 1405
  • Last login:May 21, 2012, 05:18:59 pm
  • veni vidi congai
Re: Franco's Custom Cocktail (UPDATE: Aluminium I/O Panel Complete)
« Reply #78 on: December 20, 2007, 07:41:58 pm »
can someone delete this thread its really starting to piss me off now.
franco, mate , cant wait to see how this attention to detail manifests itself into a cab :cheers:
got COLOR codes from projects, post them here

add stuff to the uk wiki section

Namco

  • Trade Count: (0)
  • Full Member
  • ***
  • Offline Offline
  • Posts: 623
  • Last login:March 03, 2025, 10:40:32 pm
  • Now addicted to Williams pins... all of them.
    • Freddo Mame Project
Re: Franco's Custom Cocktail (UPDATE: Aluminium I/O Panel Complete)
« Reply #79 on: December 20, 2007, 09:18:49 pm »
Amazing work there Franco! It's an honor for me to be mentioned in a future Mamey winning project.  :applaud:

I'm inspired to add some gratuitous LEDs to my cabinet now, but milled aluminum is still a long ways off.  ;D

patrickl

  • I cannot know for certain which will be tastiest
  • Trade Count: (+2)
  • Full Member
  • ***
  • Offline Offline
  • Posts: 4614
  • Last login:August 27, 2021, 09:25:30 am
  • Yo momma llama
    • PocketGalaga
Re: Franco's Custom Cocktail (UPDATE: Aluminium I/O Panel Complete)
« Reply #80 on: December 20, 2007, 10:21:28 pm »
Yeah, really cool work as usual. I hope this isn't going to be another "Mission Control project" where the cool features keep on coming, but an actual cab is never really in sight  :P
This signature is intentionally left blank

Franco

  • Guest
  • Trade Count: (0)
Re: Franco's Custom Cocktail (UPDATE: Aluminium I/O Panel Complete)
« Reply #81 on: December 21, 2007, 01:03:58 pm »
Thank you for the kind words  :-[

Timoe, the company that make those enclosures are called Hammond Manufacturing. I think they are based in Canada but I know they have US stockists too, if we can get them here in blighty im sure you can get them anywhere else. This is the contact page for their company http://www.hammondmfg.com/contact.htm

Dont worry, I want this cab up and running asap, im hopefully hoping to have the main frame etc completed over xmas. I really want to get the CPs done too, I have done a mockup of the main 'body' of the cabinet so I know what size to make that, im going to make some mockup CPs to stick to the main body once I have done that to check my panel sizes and height etc.

One sticking point I am having is that ideally I want to use Ponyboys Leaf brackets but looking at my original CP 'length' I dont think I will be able to fit them in. I have messaged ponyboy about when some more are due in but I have had no answer. I need to get some dim's for them to work out what panel 'length' I will need. I think I will stick a post in the main forum to see if anyone has a Leaf bracket that they could measure for me so i can work out my CP sizes whilst I am still waiting. If its not possible to use the Leaf brackets I will use GGG Micro-Leafs.

The other part that is pissing me off (sorry that sounds harsh, I'm still loving the whole process, I just want to get on) is my GGG order. Of no fault of Randys at all I'm still waiting on my GGG order. I ordered it some time last week and it arrived in the UK on Monday (6 days ago from the tracking log) but I still dont have it (the tracking log hasn't changed either)

I really am hoping for a finish date of feb/march at the latest. Im soooo going to try hard and not fall into the trap of playing a 3/4 finish cab.

Thanks once again for the kind words and ill update once again once i have something worthy.

This may be the last time I post before Christmas so I hope you all have a very merry xmas. Mines a Grolsch if you are buying  :cheers:  :cheers:  :cheers:


patrickl

  • I cannot know for certain which will be tastiest
  • Trade Count: (+2)
  • Full Member
  • ***
  • Offline Offline
  • Posts: 4614
  • Last login:August 27, 2021, 09:25:30 am
  • Yo momma llama
    • PocketGalaga
Re: Franco's Custom Cocktail (UPDATE: Aluminium I/O Panel Complete)
« Reply #82 on: December 21, 2007, 02:39:01 pm »
Thank you for the kind words  :-[
Heh, come on just kidding :angel:  Can't wait to see it finished though.

Although I guess I have to wait till after christmas.
Quote
This may be the last time I post before Christmas so I hope you all have a very merry xmas. Mines a Grolsch if you are buying  :cheers:  :cheers:  :cheers:
Cheers to you too and may all your christmasses be white brushed aluminium  8)
This signature is intentionally left blank

Akuma

  • Trade Count: (0)
  • Full Member
  • ***
  • Offline Offline
  • Posts: 160
  • Last login:October 06, 2011, 07:51:30 am
  • lp, lp → lk, sp
Re: Franco's Custom Cocktail (UPDATE: Aluminium I/O Panel Complete)
« Reply #83 on: December 21, 2007, 03:09:14 pm »
Wow. The aluminium control panel and the enclosed I-Pac 4 with the D-Subs are cool ideas. Are they following NEO GEO standard? As a matter of fact, some weeks ago I tried myself at soldering some D-Sub 15's but I didn't get the job done as clean as you did. By the way - I thought this project was porn related (see pic)


(okay, no I didn't really think so, but including the screengrab was too much of a temptation ; )

Franco

  • Guest
  • Trade Count: (0)
Re: Franco's Custom Cocktail (UPDATE: Wood cutting commences!! =) )
« Reply #84 on: December 27, 2007, 12:31:58 pm »
Nah, not following any standard apart from the makeitupasyougoalong standard  :) I just started at the top left pin and connected the inputs from the IPAC going down the PCB (hopefully) making sure that all players controls match up on each d sub.

Ha ha, that screen grabs funny, my mate saw it and was pissing himself!

Well actually bit the bullet and (shock horror!) started cutting some wood.  :)

Before I got cutting the wood I took revenge on the broken monitor and chopped off the pedestal foot thing...


Luckily there was no wires close to where I was cutting and it came away relatively trouble free.

I made a bit of a cardboard mock up to make sure there was going to be enough room in the cabinet for the monitor. I adjusted the dimensions until I was happy with the clearance. The motherboard is going to be mounted on the bottom, hence the space for the video card etc. It looks a bit funny in this shot but I swear the sides taper in ten degrees....


Next came the start of the cutting!

Im not going to bore you with a load of pics (well just a couple) but I thought I would share what I did for a couple of parts.

I purchased a circular saw, mainly because I needed to cut some 10 degree cuts though the thickness of the MDF. The saw took a little while to get used to whilst I got hang of the feed rate etc but I found you can get fairly straight cuts with them. As stated in the manual I adjusted the height so that only a couple of mm of the blade broke through the wood which reduced the saw from ripping the material.

I found that clamping a piece of planed wood to the material allowed me to use it as a guide to make sure that the cuts were as straight as possible. I used the guide in conjunction with the lazer and I was quite happy with the results.


Franco's tip of the day™ would be to clamp the two pieces of wood together before you have completed the cut to take some of the weight of the material when it breaks through to reduce the material ripping as it breaks through. Obviously you don't need to do this if you have someone to hold the piece being cut off but it certainly helped me.


My marking and cutting must have been fairly accurate as the two side pieces were pretty much bang on same height when stood up next to each other.


This is where I am up to now, I have both square sides cut (with 10 degree angles on both ends) and I also have the bottom piece cut which also has matching angles. The widths of the pieces are probably a mm or two out but I cut the panels slightly oversize so I can flush route them to the same size.


In other breaking news I finally managed to get my hands on my GGG order. I was a bit concerned about the LED Wiz's fitting in the smaller project boxes I have but I tried one of them and its going to be a bit of a tight squeeze with the wires but they should go in nicely. I would rather them fit in snuggly than use the bigger boxes where they would look a bit lost.


Anywho's, thats it for today, im planning on having an early(ish) night tonight so I can hopefully get lots more done tomorrow  :)


SithMaster

  • Lets see how happy you are when you need to use a lawn mower and it keeps turning off when you want to cut up zombies.
  • Trade Count: (+4)
  • Full Member
  • ***
  • Offline Offline
  • Posts: 1781
  • Last login:January 12, 2014, 03:52:59 pm
  • The brightest light casts the darkest shadow.
Re: Franco's Custom Cocktail (UPDATE: Wood cutting commences!! =) )
« Reply #85 on: December 27, 2007, 01:52:38 pm »
Cant wait to see this finished.  Dont forget about the monitor cord lengths when your judging for spacing.  In an upright you have plenty of space for a power and vga cord but with the mobo being right underneath the monitor here it might be a tight fit when you plug things in.
Back in MY day we lived on the moon and we had to build a rocket ship from scratch to get to the Earth before we suffocated.

Franco

  • Guest
  • Trade Count: (0)
Re: Franco's Custom Cocktail (UPDATE: Wood cutting commences!! =) )
« Reply #86 on: December 27, 2007, 04:51:01 pm »
Thanks for the concern mate. There is about 6" or so space there so there should be room. I can mount the mobo at the other end to where the power cord comes to give it more space if need be.

Arrgh, I just want to get cracking on now! I even came home early from the poker night so I can get a nice early start tomorrow :)

mccoy178

  • It's hard to work with a straight jacket on
  • Trade Count: (+9)
  • Full Member
  • ***
  • Offline Offline
  • Posts: 3127
  • Last login:September 03, 2021, 10:23:42 am
  • Go Bucks!
Re: Franco's Custom Cocktail (UPDATE: Wood cutting commences!! =) )
« Reply #87 on: January 20, 2008, 12:05:42 am »
What the heck happened to Franco? :dunno

polaris

  • You're a genius! Sheer genius!
  • Wiki Contributor
  • Trade Count: (+1)
  • Full Member
  • ***
  • Offline Offline
  • Posts: 1405
  • Last login:May 21, 2012, 05:18:59 pm
  • veni vidi congai
Re: Franco's Custom Cocktail (UPDATE: Wood cutting commences!! =) )
« Reply #88 on: January 20, 2008, 12:13:13 am »
his account has screwed up. he's here under franco b
got COLOR codes from projects, post them here

add stuff to the uk wiki section

dmworking247

  • Trade Count: (0)
  • Full Member
  • ***
  • Offline Offline
  • Posts: 305
  • Last login:July 14, 2024, 01:30:59 pm
Re: Franco's Custom Cocktail (UPDATE: Polished Aluminium Air Vents)
« Reply #89 on: January 20, 2008, 07:16:50 am »


These things are amazing... I see so many things on this board I wish were commercial products. Seriously, you ought to bang out a thousand of those.

I'd love to see a version of this that could replace the bezel of a standard 'happ style' arcade button too... it might go nicely with a black/dark button.


Also, where did you get those wonderful single-USB plugs in their metal mounting? I've been looking for a source of easy-attach-to-cabinet USB plugs for AGES!

Pixelhugger

  • Trade Count: (+8)
  • Full Member
  • ***
  • Offline Offline
  • Posts: 1865
  • Last login:March 24, 2025, 05:45:13 pm
Project mega thread HERE

Franco B

  • Trade Count: (+10)
  • Full Member
  • ***
  • Offline Offline
  • Posts: 3766
  • Last login:February 15, 2024, 09:14:06 am
Re: Franco's Custom Cocktail (UPDATE: Wood cutting commences!! =) )
« Reply #91 on: January 23, 2008, 07:56:26 pm »
Hey guys. Sorry for my absence, for some reason my account got deleted as you may know so I will be posting from this account from now on.

dmworking247, I got the USB panel mounts from Maplin in the UK. This is the link to them. I had a look around and found they are supplied by Neutrik USA. The part code is NAUSB. This is the link to them on their site.  They also supply them in black too.

They are in fact a USB gender changer from A>B. I got round this by buying some A>B cables so they will plug into the USB ports on the PC.
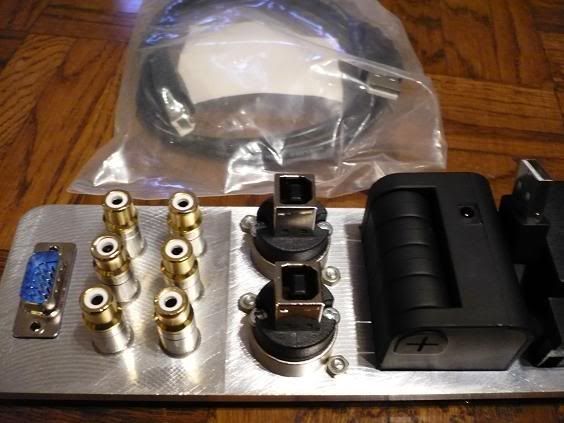


As for the stainless button bezels have you thought about spaying the bezels with chrome paint? I tried one quickly with some Plasticote enamel spray for you earlier and the result was quite good (I forgot to take a photo, sorry). I think with the correct surface prep and correct spaying they would look really nice, especially if lacquered afterwards.

Ok, now for the update, its fairly big as I haven't updated in a while. I haven't got a whole lot done on the main cabinet due to the weather (as anyone here in blighty will appreciate), I have also developed a rather acute Call of Duty 4 multiplayer addiction which I am trying to wean myself off! (My gamertag is Franimal 1 if anyone wants a kicking  ;))

I have managed to get some bits done where I can though (mainly at work where I seem to have more free time, or rather I haven't got an xbox, lol)

Ive got the three LED Wiz's mounted in the enclosures. They have been quite a slog but I'm really happy with the result. Here is a pic of them with their big bro IPAC4 enclosure:
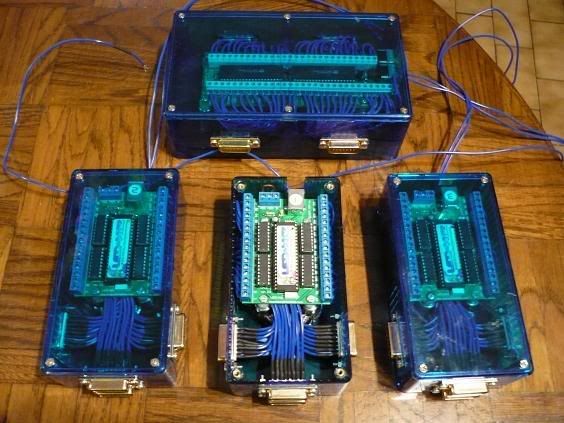


If anyone is doing this make sure you have a) Plenty of spare time, b) A dremel with lots of bits, c) small hands (no sausage fingers here!) and d) the patience of a saint!)

After discussing concerns of sending the daisy chained return from the cathodes through just one pin of the d subs I decided to bridge four spare contacts of each d sub together to increase the conductive area (thanks Daoldman, I believe I have you to thank for that idea, or possibly Unclet)
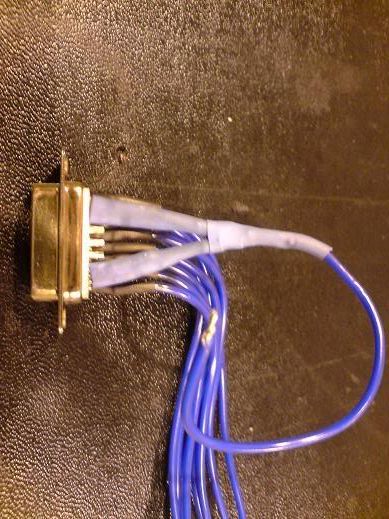


Ive got a gracious shot of a couple of them lit up too ;)


It has been a lot of work doing them but It should save me time in the future if I need to do any maintenance on any part of the wiring. It will also allow me to easily swap CPs if I decide to make any extra CPs in the future (for trackball/spinners etc).

It will also make it easier to test the enclosures before I add them to the cab, which leads me nicely on to the other part that I have been working on (since yesterday, we'll forget about the other 5 weeks since my last post  ;) lol)

I decided to make a test CP for a few reasons. Ill be able to use it to configure and test the LED Wiz's/enclosures and Ill also be able to use it as a wiring jig so I can wire each wire set up before transferring it to the final CPs. I thought it would also give me chance to try out a CP in case it brings up any problems which I can rectify before I build the final ones. I'm glad I did as it has already taught me one or two things.

Ok here's a few pics etc of the test CP build.

The first thing I did was to design a button array in Autocad. Once I was happy with how it looked I printed it out to 1:1 scale and then laid my fingers on it to test the spacing etc before tweaking it to suit. This is the array I finished with:


The offset profile around the buttons is the shape of the stainless button bezels I am going to make. They should look something like this when finished:
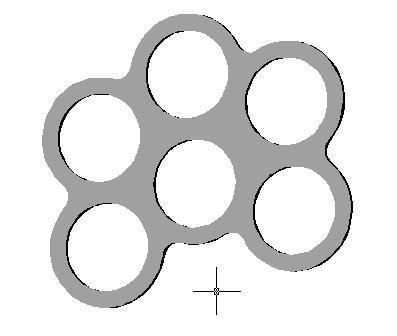


(Kinda looks like an alien knuckled duster! lol  :))

I originally planned to have fairly thin panels but after placing the printed out template on a work surface I wasn't happy as there would be no wrist support which could get both annoying after extended play, plus I think it would affect the game play. Cocktails are not the most comfortable things to play at the best of the time so I think its best to make it as comfortable as possible.

I placed the paper template on a work surface and adjusted it until I had enough wrist support. I then measured the distance and made a quick and dirty CP:
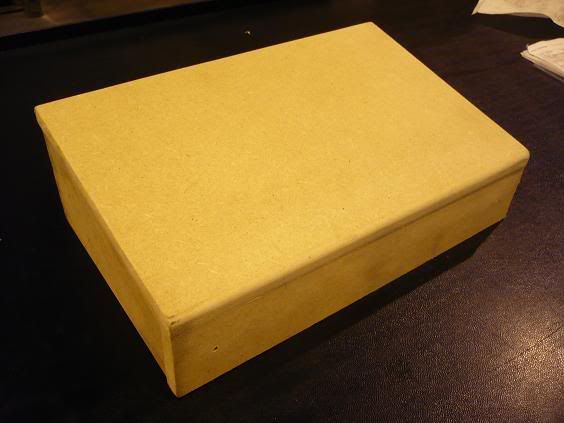


The panels are going to be bigger than first anticipated but the cab its self is going to be fairly big and should still look in proportion I think. Ill do a revised 3D model of the whole cab before I commit to anything.

The width of that panel is A4 sized, the horizontal CPs width will obviously be longer and I think the vertical CPS width will be slightly shorter, I just chose 'depth' A4 as some kind of happy medium. The button and joystick placement will still be the same so it will still function as a wring jig for all three panels.

I taped the 1:1 scale template to the CP and center punched the centers through the paper. I then drilled the holes on a pillar drill using some Forstner bits. I really am impressed with them, you get lovely clean cuts (especially for such a cheap set). The buttons are 27.8mm over the thread and so I used a 28mm (1/4" or thereabouts) cutter and the buttons slid in beautifully  :)


I also drilled the holes for the Plexiglas tubes (5mm or so length) to be backlit by LEDs. I was expecting the plexiglass rod to be somewhere close to 5mm in diameter but it turns out in fact that it is 5.25mm which is a pain in the ass as the diameter of the LEDs s 4.9mm and so there is no real viable option in between. I ended up drilling the holes 5.2mm and the plexiglass tapped in nicely but obviously the LEDs were baggy. I wanted both to be a nice tight fit (without glue etc) so I have come up with a better idea.

I am going to insert 10mm plexi rod into the CP but have a hole to push fit the LEDs from the other side of the CP, this cross section will give you an idea:
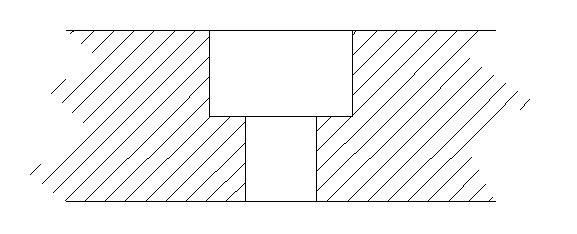


I am going to have vinyl overlay over the top of the CP. I am going to get arrows printed on the overlay and then I will cut them out of the vinyl, revealing the plexi beneath:



(Imagine the dotted line is the hidden plexi circumference and the arrrow is the cut out section)

It should then look something like this once arrayed round the joystick:



I'm quite happy the LEDs and plexi rod are different sizes, otherwise I don't thing I would have thought of this.

Don't sweat guys, nearly finished now!

This is a pic of the 'finished'  test CP:
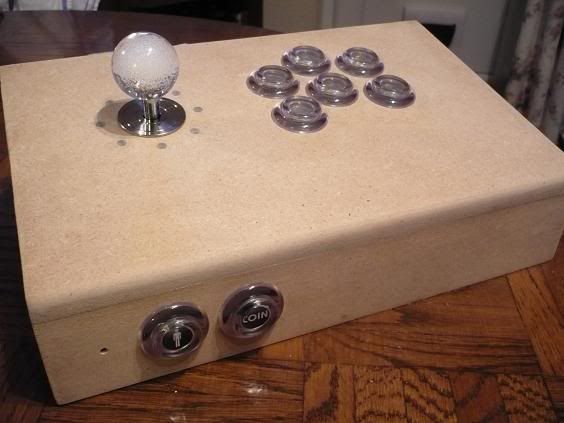


I also made some stainless dustwashers to replace the plastic fantastic stock ones:


Well I think that's about it, Ive probably forgotten something though. The only danger now is I will soon have a functional control panel which coud affect the progress of the rest of the build  :-\  ;D


patrickl

  • I cannot know for certain which will be tastiest
  • Trade Count: (+2)
  • Full Member
  • ***
  • Offline Offline
  • Posts: 4614
  • Last login:August 27, 2021, 09:25:30 am
  • Yo momma llama
    • PocketGalaga
Re: Franco's Custom Cocktail (UPDATE: Wood cutting commences!! =) )
« Reply #92 on: January 23, 2008, 08:40:28 pm »
Looks great again. Cool idea with the leds.
This signature is intentionally left blank

dmworking247

  • Trade Count: (0)
  • Full Member
  • ***
  • Offline Offline
  • Posts: 305
  • Last login:July 14, 2024, 01:30:59 pm
Re: Franco's Custom Cocktail (UPDATE: Wood cutting commences!! =) )
« Reply #93 on: January 23, 2008, 10:45:28 pm »
Thanks for the leads on the USB ports, they are great. I found an Australian distributor for them too (where I am).

In my searches though, I also found www.frontx.com which has modular ports that fit in a 'slotted enclosure' that fits in a 5 1/4" drive bay.   It just so happens that the 'admin panel area' I've put on my bartops is the exact dimensions of a 5 1/4" bay so I think I've found the perfect answer.

It even has a flip-down door to hide all your stuff, and come in white, beige or black.

However, its not the cheapest option (dual USB ports = $15 alone).. because all of the ports are nicely recessed. However my panel area on my bartops are already recessed so if I can go without the door I might just get the 'enclosure' itself and mount all my USB, audio, VGA out etc ports onto the blank bezels that come with it... It'll be more time consuming but save me $60+ (since I'm building two)

« Last Edit: March 31, 2008, 07:28:49 am by dmworking247 »

Franco B

  • Trade Count: (+10)
  • Full Member
  • ***
  • Offline Offline
  • Posts: 3766
  • Last login:February 15, 2024, 09:14:06 am
Re: Franco's Custom Cocktail (UPDATE: Wood cutting commences!! =) )
« Reply #94 on: January 27, 2008, 09:57:53 am »
Yeah I saw the frontex ones but I thought they are a bit expensive too that's why I decided to make my own.

Well I had some fun and games wiring the CP. I spent the good part of a day wiring the panel only to find I had done it completely wrong  :cry:

For some reason I had got it into my head that the LED WIZs run off a common cathode but infact they run of a common anode. This meant I had to scrap all of my wiring and start again  :hissy:

I thought I may have scrapped the enclosures to but luckily all I had to do was change the bridged 'ground' wire to the 5v USB terminals.

Anyway, enough of the moaning, time for some videos  :)

I hooked everything up to the PC and it detected and installed the LED WIZ's with no hassle. I then opened up the LEDblinky sequencer, created a quick layout and and turned all the LEDs on with the inbuilt ramp up/down feature of the LED Wiz, this was the result:

[youtube]http://uk.youtube.com/watch?v=bVVBy9DfG1o[/youtube]

Somehow everything worked ok!  :) I was worried that after all that work that something would go wrong but luckily all is good.  :)

I had a quick go today sequencing a few frames. This is the result:

[youtube]http://uk.youtube.com/watch?v=BDW28IG7RQM[/youtube]

I made a looped 32 frame sequence and tested a few things out. The joystick and start/credit buttons fade in/out in 7 levels of intensity (and off), the buttons just chase back and forth and I sequenced a chasing dot round the joystick and also a up/down fade. I dimmed the trailing LEDs to give the dot a 'tail' so to speak.

I'm trying to keep every sub-sequence in 8 frames, or so that a multiple of the sub-sequence equals a multiple of 8 so that every thing is 'in time'


leapinlew

  • Some questionable things going on in this room with cheetos
  • Trade Count: (+4)
  • Full Member
  • ***
  • Offline Offline
  • Posts: 7919
  • Last login:Yesterday at 10:33:20 pm
Re: Franco's Custom Cocktail (UPDATE: Wood cutting commences!! =) )
« Reply #95 on: January 27, 2008, 10:35:08 am »
Awesome work dude.

ex_directory

  • Trade Count: (0)
  • Full Member
  • ***
  • Offline Offline
  • Posts: 106
  • Last login:April 10, 2015, 08:54:20 am
  • The only game I ever completed... so far.
Re: Franco's Custom Cocktail (UPDATE: Wood cutting commences!! =) )
« Reply #96 on: February 07, 2008, 03:42:28 pm »
Franco, Franco, Franco, why did you not point me to this project when you replied about my light blue buttons   ;)

I am in awe of that test cp and have just changed my design -  :notworthy:

NB: I am trying to match my cab to the kitchen design which is retro 50's (cream, duck egg blue, dark brown - looks better than it sounds!) hence the question re light blue buttons.

My whole cab is vinyl cream (like a smeg fridge) with chrome t-molding. Was thinking picking up the blue on the cp but had been wondering about the clear buttons for a while. But you have answered my question, they look chrome-ish if you know what I mean and with the light blue led I am sold! Think I will pick up the light blue and clear bubble balls from arcadeshop.de as can't decide which to go for. Couple of q's if I may:

I see you used the Sanwa jlw into 3/4" mdf? Do you think this is too low? Did you find any shaft extensions on your travels? I also currently have the bat top t-stiks and also found it a little stiff hence want to go down the Sanwa joystick route.

Are the clear buttons the same as these http://www.arcadeshop.de/Action-Buttons-Pushbutton-clear-white_493.html?

Was it difficult to make up the stainless dust covers? Would it be reasonable of me to ask a local fabricator to make some do you think or will they charge me the earth?

And finally, not sure if you saw it, but I did find a stainless ball top on my travels http://groovygamegear.com/webstore/index.php?main_page=product_info&cPath=70&products_id=229, think the bubble with led is better but in case someone else is interested.

Ex
My kitchen cab is progressing here

Franco B

  • Trade Count: (+10)
  • Full Member
  • ***
  • Offline Offline
  • Posts: 3766
  • Last login:February 15, 2024, 09:14:06 am
Re: Franco's Custom Cocktail (UPDATE: Wood cutting commences!! =) )
« Reply #97 on: February 07, 2008, 05:35:26 pm »
Thanks for the kind words  :-[  :)

I didn't point you in the direction of this thread as I dont like to blow my own trumpet, well not all of the time anyway ;)

Liking the sound of your cab, 50s retro will be sweet :) I have actually got Waveryder working on some 50s retro arcade art for my cab top (think 50s sci fi movies vs Space invaders)  8)

The CPs (like the test one) are going to be made from 12mm (1/2") MDF. The joysticks dont feel too low, although they could be a litle higher ideally, I may end up making some longer shafts for mine if need be.

I believe those buttons are the same, I got mine from FX buttons a couple of years ago but they look the same. I need to order a few more myself so Im hoping they will be the same. If you do get some and are LED lighting them I can highly recommend the GGG diffuser inserts. They diffuse the light nicely and stop you getting blinded by the LED.

As for the dustwashers, they was easy to make but that is my job after all. If you want I can send you a CAD drawing of the washers and a CNC G code program if that helps. They may end up charging an arm and a leg after programming, tool setting and machining etc. Alternatively, I could make you some, say $10 a pair?

Ive managed to speed that LED sequence up in Mala, i think it looks much better at a faster frame rate :)

[youtube]http://uk.youtube.com/watch?v=GwPkp8YLPV4[/youtube]

Im hoping to get the CPs CNC milled next  week. One advantage being is that any CP artwork I have done will exactly match up with all of the holes etc.

ex_directory

  • Trade Count: (0)
  • Full Member
  • ***
  • Offline Offline
  • Posts: 106
  • Last login:April 10, 2015, 08:54:20 am
  • The only game I ever completed... so far.
Re: Franco's Custom Cocktail (UPDATE: Wood cutting commences!! =) )
« Reply #98 on: February 07, 2008, 07:26:25 pm »
Liking the sound of your cab, 50s retro will be sweet :) I have actually got Waveryder working on some 50s retro arcade art for my cab top (think 50s sci fi movies vs Space invaders)  8)

I hope so, once I have the smeg fridge effect complete will then be thinking about some retro side art.

The CPs (like the test one) are going to be made from 12mm (1/2") MDF. The joysticks dont feel too low, although they could be a litle higher ideally, I may end up making some longer shafts for mine if need be.

Hoping you weren't going to say that. Mine is 17mm thick and I have big hands but havine not found any extensions for those shafts anywhere. There are longer shafts out there but seemingly not for the sawna joy, and if I don't go for the sawna joy then I can't have the bubble ball!

I believe those buttons are the same, I got mine from FX buttons a couple of years ago but they look the same. I need to order a few more myself so Im hoping they will be the same. If you do get some and are LED lighting them I can highly recommend the GGG diffuser inserts. They diffuse the light nicely and stop you getting blinded by the LED.

Hmmm, buttons look very similar, but do you have the diffusers in in your cp picture? I thought the diffuser made the button look more white, whereas I want a more chrome look. With the clear you get various reflections which I think makes it look more chrome like plus presumably the spring inside reflects?

As for the dustwashers, they was easy to make but that is my job after all. If you want I can send you a CAD drawing of the washers and a CNC G code program if that helps. They may end up charging an arm and a leg after programming, tool setting and machining etc. Alternatively, I could make you some, say $10 a pair?

You have a deal, it will cost more than that in petrol to find a fabricator! I thought maybe you were in the UK? I am in Cambridge, UK.

Ex
My kitchen cab is progressing here

Franco B

  • Trade Count: (+10)
  • Full Member
  • ***
  • Offline Offline
  • Posts: 3766
  • Last login:February 15, 2024, 09:14:06 am
Re: Franco's Custom Cocktail (UPDATE: Wood cutting commences!! =) )
« Reply #99 on: February 07, 2008, 09:14:15 pm »

Hoping you weren't going to say that. Mine is 17mm thick and I have big hands but havine not found any extensions for those shafts anywhere. There are longer shafts out there but seemingly not for the sawna joy, and if I don't go for the sawna joy then I can't have the bubble ball!

Is it not 18mm MDF? Anyway, you could always route a relief in the bottom of the CP to raise the height of the joystick. If you dont want to do that or if you get stuck otherwise I could always make you some longer ones.

e] Hmmm, buttons look very similar, but do you have the diffusers in in your cp picture? I thought the diffuser made the button look more white, whereas I want a more chrome look. With the clear you get various reflections which I think makes it look more chrome like plus presumably the spring inside reflects?

Yeah the photos do have the diffusers installed, if you like I can take some photos over the weekend of them lit/unlit, with/without the diffusers if you like.

If you want to go for the chrome look, why dont you get some clear ones and then spray the outer bezel chrome? You can get some chrome enamal spray paint from B&Q, its called Plasticote. I have used it before and if you do good enough prep they would look really nice.


You have a deal, it will cost more than that in petrol to find a fabricator! I thought maybe you were in the UK? I am in Cambridge, UK.

Ex

No probs. Im in the UK too, I just tend to talk $$$ as most of the guys on here seem to be stateside.

ex_directory

  • Trade Count: (0)
  • Full Member
  • ***
  • Offline Offline
  • Posts: 106
  • Last login:April 10, 2015, 08:54:20 am
  • The only game I ever completed... so far.
Re: Franco's Custom Cocktail (UPDATE: Wood cutting commences!! =) )
« Reply #100 on: February 08, 2008, 06:09:31 am »
Is it not 18mm MDF?

Your right, from Travis Perkins I believe. That was a long time ago - I made the classic mistake of getting my cab working while half finished and have been playing on it ever since. 3 years later time to finish it - in style   8)

Anyway, you could always route a relief in the bottom of the CP to raise the height of the joystick. If you dont want to do that or if you get stuck otherwise I could always make you some longer ones.

Slightly nervous about routing a recess with a joystick, what would you say is the minimum width to be safe (e.g. re aggresive use of joysticks on occasion?)

I measured up my t-stik bat top, and it currently sits 70mm above the cp (flush mounted under cp). How high are yours (to top of the ball)?

If you end up making some longer ones for yourself then I will be interested, otherwise don't want to put you out.

Yeah the photos do have the diffusers installed, if you like I can take some photos over the weekend of them lit/unlit, with/without the diffusers if you like.

Yeah, that would be great. Although I think I am already convinced.

If you want to go for the chrome look, why dont you get some clear ones and then spray the outer bezel chrome? You can get some chrome enamal spray paint from B&Q, its called Plasticote. I have used it before and if you do good enough prep they would look really nice.

Got a feeling I have some plasticote around somewhere, although prob in black, used it to redo the outer of my coin door. Was concerned spraying would wear eventually and look a bit tatty. Had considered spraying the whole button. Also had considered spraying the inside and/or the diffuser to a light blue? I just need 10 test buttons to try all my ideas out!! When you say prep do you mean just giving it a key and possibly a primer spray coat?

No probs. Im in the UK too, I just tend to talk $$$ as most of the guys on here seem to be stateside.

Thought so, will PM re dust caps. Thanks again! :applaud:

Ex
My kitchen cab is progressing here

Franco B

  • Trade Count: (+10)
  • Full Member
  • ***
  • Offline Offline
  • Posts: 3766
  • Last login:February 15, 2024, 09:14:06 am
Re: Franco's Custom Cocktail (UPDATE: Wood cutting commences!! =) )
« Reply #101 on: February 12, 2008, 01:35:31 pm »
ex_directory, apologies I hadn't seen that you had replied.

That's the danger of playing a half finished cab, its soo hard to do anything when you can be playing on it  :)

I'm no expert but I think you would want at least 8mm of materail to support the joystick. It all depends how you are mounting them really.

I haven't got my CP to hand at the moment so I cant get the measurement for you, ill get it for you tomorrow.

As for prep, yeah just make sure the surface is keyed and dirt grease free. The buttons tend to have a slight seam on the highest point which would also want removing (although it should get rid of this when you key it)

Okies, update time :)

Shock horror, I have actually done some more woodwork :)

A combination of bad weather, a bad COD4 addiction and being nervous about a particular part of the build had put me off but on Monday we had a glorious sunny day which inspired me to get out in the sun and get cracking :)

Firstly, have a look at this (awfully compressed picture)


You can see that the side panels will hinge at the bottom to gain access to the internals. The LED Wiz and IPAC enclosures will also be mounted to these panels. The framing at the top of the cabinet will give sidewards support to the monitor as well as giving the cab strength and also providing enough room for the depth of the enclosures.

Soooo, as I had already cut the sloped side panels (many moons ago) the next thing to do was to cut the top framing with 10 degree angles to match the taper on the side of the cabs:


Next came the tricky part which I had been dreading. I needed to screw through the side panels at a 10 degree angle and them into the framing in two places on the two sides of each beam whilst getting the posistioning etc right.

After plenty of calculating, marking, checking and messing around I managed to drill and screw them into position :)


You can also see at the bottom some temporary brackets which were made from some scrap aluminium just to hold it together whilst I was working on some other parts.

Once that was complete I made a supported shelf for the monitor. I haven't got any pictures of the shelf but Ill take some tomorrow when its light, anywhoos, here is the monitor in position:


Its actually starting to look like a cocktail :)

Today, I made some strong brackets out of 2mm stainless steel to replace the temporary aluminium ones.

1) Mark out material and center punch the hole positions


2) Drill holes, hacksaw and file sides and radii to match   


(anyone for dominoes :))

3) Bend to 110 degrees using bending press,  grit blast and degrease to achieve a uniform surface to be sprayed.


4) Spray with enamel midnight blue paint


5) Check angle in cab after forgetting to do it after bending (although the angle should have been right after tweaking with a vernier protractor)


They have come out quite nicely and should give the cab some extra strength.

That's about it for now. I have cut the CP tops ready to be CNC milled this week but that about it.

I'm really happy with the progress so far, I've been working on the cab for the past three afternoons and I plan to carry on with it now as much as possible until it is finished now I have the tricky off putting  (imo) part out of the way.

Ill update later this week after I have some more done.


Kaytrim

  • I'm too nice a guy
  • Trade Count: (+4)
  • Full Member
  • ***
  • Offline Offline
  • Posts: 2095
  • Last login:September 22, 2015, 04:11:30 pm
Re: Franco's Custom Cocktail (UPDATE: Wood cutting commences!! =) )
« Reply #102 on: February 12, 2008, 02:33:29 pm »
About time you got 3D on the case. :applaud: Looking good, your metal working skills really show in the details.

TTFN
Kaytrim

mountain

  • Trade Count: (+9)
  • Full Member
  • ***
  • Offline Offline
  • Posts: 1205
  • Last login:January 29, 2025, 08:31:47 am
    • Mountain Jukeboxes
Re: Franco's Custom Cocktail (UPDATE: Wood cutting commences!! =) )
« Reply #103 on: February 12, 2008, 03:50:49 pm »
It looks like you are moving right along. This thing is going to be awesome.

email sent

Franco B

  • Trade Count: (+10)
  • Full Member
  • ***
  • Offline Offline
  • Posts: 3766
  • Last login:February 15, 2024, 09:14:06 am
Re: Franco's Custom Cocktail (UPDATE: Wood cutting commences!! =) )
« Reply #104 on: February 14, 2008, 02:19:42 pm »
Tell me about it being time! Its nice to be making some steady progress now though  :)

ArtsNFartsNCrafts asked me how I mounted the monitor so I will post it here.

I was scratching my head whilst planning the build as I wasn't sure exactly how to mount it. After coming up with various solutions I thought the easiest and most sturdy solution would be to fabricate a platform for the monitor to sit on:


I screwed four lengths of 32mm planned wood together with 7 screws to make it nice and strong. I intentionally made the platform slightly too small in case I had to decrease the height of the platform I then cut some supports  and screwed them into the side of the cab. The platform rests on the supports which take the weight of the monitor. I also screwed into the side of the platform to give the cab some more rigidity.

The two lower rows of screws are the ones holding the supports to the cab and the top row is the screws holding the platform. I haven't counter sunk or screwed the screws to full depth yet as I need to keep assembling and disassembling the cab so I'm not going to screw them all the way in until the final assembly.


I picked up some easy mount cabinet hinges from screwfix after receiving some help in this thread.


They are only about £1 each and are awesome. My only criticism is that the holes for the screws are slightly too small if you want to use some wider screws, they are made out of aluminium though and so are easy to open out.

I layed either side of the cab down onto MDF and traced the inner profile before cutting them out. This worked quite well as the panels are a perfect fit:


I intentionally left a slight lip when cutting the rectangular sides and when mounting the top beams so that I can flush route the excess once I had mounted the 'triangular sides.

Then it was just a case of screwing the hinges into position.....:


and bingo, I now have hinged sides :)


That's it again for today, Ive cut the CP tops out and should have them CNC milled tomorrow so Ill post some pics once I get them home.


ArtsNFartsNCrafts

  • Trade Count: (0)
  • Full Member
  • ***
  • Offline Offline
  • Posts: 221
  • Last login:October 12, 2020, 09:22:50 pm
Re: Franco's Custom Cocktail (UPDATE: Wood cutting commences!! =) )
« Reply #105 on: February 14, 2008, 07:12:46 pm »
ah, brilliant.  and simple at that!

i'm curious about your monitor:

is the actual monitor screen centered in your monitor's casing?  Mine isn't, so it looks like the hole I cut in my cocktail's top may have to be off center, so that the screen is actually centered (does that make sense?).  And of course, I'm crossing my fingers that a piece of smoked gray plexi glass will hide all that.

Franco B

  • Trade Count: (+10)
  • Full Member
  • ***
  • Offline Offline
  • Posts: 3766
  • Last login:February 15, 2024, 09:14:06 am
Re: Franco's Custom Cocktail (UPDATE: Wood cutting commences!! =) )
« Reply #106 on: February 15, 2008, 05:14:49 pm »
I left some extra room in mine so I can position the screen centrally.

If your monitor is the same as mine it will be wider on the bottom than the top. If you have cased it so that it is a near perfect fit then I think your screen will be be offset. I suppose you could make the table top bigger on one side to create the illusion that it is in the middle but then you would also have to move your controls to be central to the monitor which would mean they wont be central to the lower part of the cab.

Okies, next update,

I was hoping to get the CPs CNC milled today but I had an urgent job on so couldn't get on it, fingers crossed I will get chance to do it tomorrow.

I have had a productive day though  :)

As you can see from the previous update I hinged the sides to gain access to the internals. To secure the side panels in place in using two cam locks on either side. I marked out and milled a slot in the top beams for the locks cam to swivel into:


I then drilled the holes in the right positions to the slots and test fitted the locks:


I'm mounting the IO panel I made on the back of the panel so I drilled, jigsawed and routed the though hole and relief for the panel:


Its the first time I had used the router for anything but cutting t-slots or trimming edges and I'm quite happy with the result. You can see the (not so) deliberate mistake I made when routing the through hole but its no biggie as the panel will cover it up. When I milled the I/O panel I made sure the radii were the same as one of my router bits so that they would pair up once routed. There are a couple of slight gaps but nothing major, nothing that the vinyl wont cover once applied:


I learnt a few things about routing such things which will help me in the future.

I also drilled the holes for the ten grill vents I made:


I knew I had a 55mm Forstner bit so when I made the vents I turned the diameter that fits in the hole to about 54.8mm for a nice fit.

Here's a photo of the vents an I/O panel in place on the back panel:


and I really couldn't resist putting it back together to see what it looked like on the cab (with the feet too):


I'm really happy with the work and progress so far, if I keep this up I should be well on the way to finishing nearing completion soon :)


Franco B

  • Trade Count: (+10)
  • Full Member
  • ***
  • Offline Offline
  • Posts: 3766
  • Last login:February 15, 2024, 09:14:06 am
Re: Franco's Custom Cocktail (UPDATE: Wood cutting commences!! =) )
« Reply #107 on: February 16, 2008, 08:47:25 am »
Actually managed to get the CPs CNC milled this morning:


They came out quite well after getting the drill speeds/feeds right. I phoned a friend who works at a CNC wood shop and got some data from him. He suggested drilling in between 2000 - 10,000 RPM and a feet rate of 1000 - 5000 MMPM (MM per minute), I was quite shocked at the numbers considering when CNC turning metal I don't really drill above 1000RPM and 300MMPM. Any way I trusted him as let the machine go, ---fudgesicle--- me it was fast! It was quite amazing to watch, I wish I had taken some video thinking about it now.

I did however make a bit of a mistake, you can see on the small panels that there are six holes when there are only meant to be three as I forgot to delete three of the hole positions from the program. Its not a big deal though as I will make some aluminum inserts to mount from the bottom, ill leave a slight gap so I can use some filler to mask them.

I counterbored the holes for the carriage bolts so that they sit below the CP top and I'm going to fill over the top of them:


You can also see the holes for the LEDs and the counterbore for the plexiglass inserts. The plexi was meant to be 10mm diameter but it is actually 10.35 which was a pain as I couldn't just plunge with a 10mm Forstner bit. In the end I used a 10mm slot drill and circle interpolated the counterbore to 10.4mm.

That's it for this mini update, as you can see from the photos its a lovely day so I'm going to crack on and get some more done, ill update again this evening.


Franco B

  • Trade Count: (+10)
  • Full Member
  • ***
  • Offline Offline
  • Posts: 3766
  • Last login:February 15, 2024, 09:14:06 am
Re: Franco's Custom Cocktail (UPDATE: Wood cutting commences!! =) )
« Reply #108 on: February 18, 2008, 08:09:36 am »
Just a quick update as Im on my way to work.

Ive got the holes filled in the vertical CPs. I made some nylon plugs to insert in the CP from the bottom:


I left about 2mm to be filled with wood filler:


Filled and sanded:


Franco B

  • Trade Count: (+10)
  • Full Member
  • ***
  • Offline Offline
  • Posts: 3766
  • Last login:February 15, 2024, 09:14:06 am
Re: Franco's Custom Cocktail (UPDATE: Wood cutting commences!! =) )
« Reply #109 on: February 20, 2008, 07:13:01 am »
Been busy again the past couple of days :)

Ive started to make the rest of the CP panels etc. For the side panels I remodeled the CPs in AutoCAD and printed out the side profile to use as a template for cutting the side and also for positioning the other panels:


I picked up a load of aluminum bar and angle section from B&Q which was surprisingly cheap, the 15mm angle section is about £3/m and the 20x2x200mm strip is only about £4 for the 2m. I'm using the angle bar to make some long brackets out of to hold the CPs together and I'm using the strip to cover all of the edges that aren't covered by the t-molding:


I milled and drilled the angle section to make the brackets, as the CP has a 10 degree slope I used a mixture of 45 and 50 angles to make sure all of the corners meet nicely:


You can see some of the length are too long at the moment, I left them oversize so I can mark the position for them to be trimmed. Once complete I'm going to spray them blue and leave the screws silver.

Here is a picture of the test assembled CP, as you can see it is still very rough, I still need to file all of the radii and sand it etc but I wanted to make sure It all went together before I did any more:


I only have a few of the screws in but it is already solid.

I also had a couple of deliveries this morning :):


I picked up some twin 4" blue cold cathodes and Ive also got a PacDrive (although I need to order a second). The plan is to mount the cold cathodes inside the CPs as shown here:


There will be two sets in the long horizontal panel and a set in each of the vertical CPs.

I'm going to make some 5mm thick perspex bottoms for the CPs (with the space invaders monster or similar etched into it) so that the light will shine out from under the CP. The cathodes will be controlled by one of the PacDrives.

Ive been trying to find a decent textured vinyl to cover the rest of the cab in but I've been having trouble finding something suitable sooooo I think we are going to go with carbon fibre sheet  8)

One of my friends works as a sales rep for a company that produces CF sheet so hopefully I should be able to get a good deal, if I get it cheap enough I'm going to cover it inside and out. If not I will cover the exterior in CF and the interior in normal black vinyl. I think the CF will set off the stainless steel and ally parts nicely. I want to stay away from imitation CF vinyl as it will just look cheap. I'm also going to cover the internal beams etc of the cab in blue vinyl to tie in with some of the other blue parts of the cab.

That's it for today, off to do some more :)


Daniel B.

  • Trade Count: (+2)
  • Full Member
  • ***
  • Offline Offline
  • Posts: 251
  • Last login:May 10, 2024, 05:08:12 pm
  • Lightgun and Point Blank enthusiast
Re: Franco's Custom Cocktail (UPDATE: Wood cutting commences!! =) )
« Reply #110 on: February 20, 2008, 07:14:44 am »
Franco...

Have you received any of my emails? I've been trying to reach you for some time....
Namco Exceleena II (red) | Sega Astro City (needs ms9 monitor work)

Franco B

  • Trade Count: (+10)
  • Full Member
  • ***
  • Offline Offline
  • Posts: 3766
  • Last login:February 15, 2024, 09:14:06 am
Re: Franco's Custom Cocktail (UPDATE: Wood cutting commences!! =) )
« Reply #111 on: February 20, 2008, 07:37:56 am »
Hey bud,

Strange, dont think I have had any emails off you  ???

Let me go take a look.

Franco B

  • Trade Count: (+10)
  • Full Member
  • ***
  • Offline Offline
  • Posts: 3766
  • Last login:February 15, 2024, 09:14:06 am
Re: Franco's Custom Cocktail (UPDATE: Wood cutting commences!! =) )
« Reply #112 on: February 21, 2008, 06:36:58 am »
Hopefully thats got it sorted Daniel  :)

Whilst im here I thought I would mini update.

I got the rest of the ally brackets milled up last night, im going to take a CP into work this evening to file the radii and cut the brackets to size etc.

I always have a look in the scrap bins for any useful bits and bobs that get thrown away (its amazing what get thrown out). I had a look last night and found this:


Its a length of 3 core stainless steel armoured cable which should be perfect for the external power cable for the cab  :)

Good news, it looks like were expecting another member to the family too :):


For size comparison:


Thats it for today, ive gt the whole day off tomorrow so Im hoping to get plenty done then.

Daniel B.

  • Trade Count: (+2)
  • Full Member
  • ***
  • Offline Offline
  • Posts: 251
  • Last login:May 10, 2024, 05:08:12 pm
  • Lightgun and Point Blank enthusiast
Re: Franco's Custom Cocktail (UPDATE: Wood cutting commences!! =) )
« Reply #113 on: February 21, 2008, 07:15:26 am »
Hopefully thats got it sorted Daniel  :)

I didn't see anything from you Franco? Sorry to keep mucking up your thread! I did send you a pm yesterday, did you get it? I'm wondering if there is some kind of black hole between us, lol.
Namco Exceleena II (red) | Sega Astro City (needs ms9 monitor work)

Franco B

  • Trade Count: (+10)
  • Full Member
  • ***
  • Offline Offline
  • Posts: 3766
  • Last login:February 15, 2024, 09:14:06 am
Re: Franco's Custom Cocktail (UPDATE: Wood cutting commences!! =) )
« Reply #114 on: February 21, 2008, 08:09:27 am »
Check your email  ;)

mountain

  • Trade Count: (+9)
  • Full Member
  • ***
  • Offline Offline
  • Posts: 1205
  • Last login:January 29, 2025, 08:31:47 am
    • Mountain Jukeboxes
Re: Franco's Custom Cocktail (UPDATE: Wood cutting commences!! =) )
« Reply #115 on: February 21, 2008, 08:25:34 am »
Looking good Franco. Congratulations on the good news!

Franco B

  • Trade Count: (+10)
  • Full Member
  • ***
  • Offline Offline
  • Posts: 3766
  • Last login:February 15, 2024, 09:14:06 am
Re: Franco's Custom Cocktail (UPDATE: Wood cutting commences!! =) )
« Reply #116 on: March 16, 2008, 11:28:47 am »
Well, I guess you would all be expecting some kind of major update here, unfortunately not.

Ive been having a few problems as well as Real Life™ getting in the way as usual.

Ive been concentrating on the CPs mainly as before. I had a problem with that first CP I built as I routed the slot too deep in the ends and when I test fitted some t-moulding in it, it split the wood. I should now have solved this problem as I made some larger bushes for the arbour so the t-slot can only cut deep enough for the t-molding.

I then proceeded to make the other 6 CP ends with mixed success. I printed the profiles out full scale and used them as a simple template to mark out the profile on the wood before roughly cutting out with a jigsaw before routing to size. This work with mixed success, the first pair came out spot on, but the other pair of pairs for the vertical CPs came out slightly different. They probably would have done but I knew I would come up against alignment issues etc further down the road so I want to get them bang on.

The main problem is that the CPs are so small it is hard to work them with the router in regards to  clamping and edge clamping. To get round this I am going to CNC cut some 4mm thick aluminum templates and then screw these into a rough cut pliece of MDF. Im going to under mount my router in a piece of MDF to make a router table and then I should be able to use a flush trim bit to follow the profile like this:


If you can remember further back in my project you may remember me saying I was going to make some player button bezels that will be on the front of the CP. Heres a pic to remind you if you have forgotten:


(The CPs have changed alot since that picture but you get the idea)

Well I got the bezels made this weekend:


The bezels round all of the main player buttons are going to follow the profile of the buttons so I thought I would follow the profile round the start/credit buttons to match

Now I just need to get someone to design me some spacies gun turrets similar to these so I can get them printed out in in black vinyl:


Thats it for today, hopefully I will get the new CP templates made this week so I can get the CPs done. I need to get the CPs done as they are holding the rest of the project up.

Thanks for stopping by.

Sain

  • Trade Count: (0)
  • Full Member
  • ***
  • Offline Offline
  • Posts: 10
  • Last login:November 27, 2009, 03:28:02 pm
Re: Franco's Custom Cocktail (UPDATE: Wood cutting commences!! =) )
« Reply #117 on: March 16, 2008, 02:20:02 pm »
Awesome cab design, I look forward to seeing it finished.

Thy

  • Trade Count: (0)
  • Full Member
  • ***
  • Offline Offline
  • Posts: 20
  • Last login:November 02, 2012, 03:18:39 am
Re: Franco's Custom Cocktail (UPDATE: Wood cutting commences!! =) )
« Reply #118 on: March 16, 2008, 08:17:09 pm »
Amazing metal work Franco, it's absolutly stunning quality. Looking forward to seeing it finished.

On another note, you still making the hollow joysticks these days?

Looking forward to next update!

BradC

  • Trade Count: (+1)
  • Full Member
  • ***
  • Offline Offline
  • Posts: 182
  • Last login:December 22, 2010, 05:56:28 pm
    • My First Arcade Cabinet
Re: Franco's Custom Cocktail (UPDATE: Wood cutting commences!! =) )
« Reply #119 on: March 16, 2008, 10:05:40 pm »
This thread looks funny from the front page. :laugh2:

Franco B

  • Trade Count: (+10)
  • Full Member
  • ***
  • Offline Offline
  • Posts: 3766
  • Last login:February 15, 2024, 09:14:06 am
Re: Franco's Custom Cocktail (UPDATE: Wood cutting commences!! =) )
« Reply #120 on: March 17, 2008, 04:15:10 pm »
Awesome cab design, I look forward to seeing it finished.

Thanks, I cant wait to see it finished either. I don't want to rush though as I enjoy the build too much  :)

Amazing metal work Franco, it's absolutly stunning quality. Looking forward to seeing it finished.

On another note, you still making the hollow joysticks these days?

Looking forward to next update!

Cheers fella, you have PM.

This thread looks funny from the front page. :laugh2:

I know, someone commented on it before, I dont get it on mine, must be something to do with the wrapping on different resolutions etc. I cant actually change the title though as im no longer the author of the original post. Oh well, im sure it will give a few more giggles  :)

Franco B

  • Trade Count: (+10)
  • Full Member
  • ***
  • Offline Offline
  • Posts: 3766
  • Last login:February 15, 2024, 09:14:06 am
Re: Franco's Custom Cocktail (UPDATE: Wood cutting commences!! =) )
« Reply #121 on: March 21, 2008, 08:04:35 am »
Ive made the templates I was taking about before for routing the CP sides:


I milled them out of some 3mm aluminum sheet that I found, once again, in the scrap bin. They were quite easy to mill as I could just clamp the sheet to the machine table and mill the profile in one pass with the cutter 0.001" off the table. As the cutter was so close to the table it cut the shape out cleanly.


Im going to make the main button bezels next and they are going to be slightly more tricky to produce as they will be made from stainless steel and are more intricate. I have been having a bit of a think and this is how I intend to produce them:

First of all ill chop off and skim the faces of a some 250mm mild steel to make a jig base. Ill drill and tap M12 holes in the jig where the button centers are and also four holes for clamping:


Ill then cut out some 1.5mm stainless sheet slightly bigger than the finished bezel size and clamp it to the jig:


With the sheet clamped securely  Ill then be able to drill the 6 holes 10mm and then circle interpolate the holes to 28.5mm (0.5mm bigger than the button screw thread):


I will then clamp the milled sheet with some clamp washers using the M12 holes I drilled at the start:


I should then be able to mill the outer profile of the bezel:


Which should then leave me with something like this:


I will be able to use the same jig to make the bezels for the vertical CPs:


Ive actually got the jig base and clamp washers made, I should hopefully get them machined next week.


Ive got a few days off with it being Easter thank god (no pun intended!) so I should be able to get the CPs pretty much finished, well construction wise anyway.

Happy Easter y'all  :cheers:

Kaytrim

  • I'm too nice a guy
  • Trade Count: (+4)
  • Full Member
  • ***
  • Offline Offline
  • Posts: 2095
  • Last login:September 22, 2015, 04:11:30 pm
Re: Franco's Custom Cocktail (UPDATE: Wood cutting commences!! =) )
« Reply #122 on: March 21, 2008, 10:38:10 am »
That is quite the intricate process there Franco.  That template is all nice and shiny, you're gona need sunglasses as you work with it.   ;)

Franco B

  • Trade Count: (+10)
  • Full Member
  • ***
  • Offline Offline
  • Posts: 3766
  • Last login:February 15, 2024, 09:14:06 am
Re: Franco's Custom Cocktail (UPDATE: Wood cutting commences!! =) )
« Reply #123 on: March 21, 2008, 11:14:00 am »
Ha ha!

By the time its finished ill think ill need some sunglasses because of all the polished metal and some sun lotion for the 150 or so LEDs  ;D

By the way, have you got those shafts you drilled into any control panels yet?

Kaytrim

  • I'm too nice a guy
  • Trade Count: (+4)
  • Full Member
  • ***
  • Offline Offline
  • Posts: 2095
  • Last login:September 22, 2015, 04:11:30 pm
Re: Franco's Custom Cocktail (UPDATE: Wood cutting commences!! =) )
« Reply #124 on: March 21, 2008, 11:18:30 am »
Not yet but I have two in the works that may use them.  I also have some flashy bling coming up.  8)

Franco B

  • Trade Count: (+10)
  • Full Member
  • ***
  • Offline Offline
  • Posts: 3766
  • Last login:February 15, 2024, 09:14:06 am
Re: Franco's Custom Cocktail (UPDATE: Wood cutting commences!! =) )
« Reply #125 on: March 21, 2008, 11:25:37 am »
Oooo, cant wait to see :)

Franco B

  • Trade Count: (+10)
  • Full Member
  • ***
  • Offline Offline
  • Posts: 3766
  • Last login:February 15, 2024, 09:14:06 am
Re: Franco's Custom Cocktail (UPDATE: Wood cutting commences!! =) )
« Reply #126 on: March 27, 2008, 02:51:11 pm »
I made myself a router table fixture today to use with the templates I made.


You can commercially buy tables to mount your router to but in the spirit of things I though I would make my own  :)

I'm not saying anyone should build one as they could be potentially dangerous (like any power tool) but this is how I made mine.

I have an old B&D Workmate which I'm using to hold the fixture:


The bottom of my router has three M6 tapped holes so I made some large-head hex bolts to mount the router to the table:


I made the head oversize as the bolt will be taking the weight of the router and the whole thing needs to be really secure as you don't want the router falling/moving at 20,000 odd RPM.

I cut a piece of 12mm MDF to roughly the size of the workbench. The fixture is plenty big enough to route with the templates and should hopefully be big enough for any larger projects I have in the future. I'm using 12mm MDF rather than 18mm as the flush trim bit would not have been long enough to cut the 18mm MDF I will be cutting with the templates.

Luckily, the plastic base of my router was removable so I took it off and marked the mounting hole positions onto the MDF:


I then used a Forstner drill bit to counterbore the holes for the bolts so that they sit just below the level of the table. I also made sure the Forstner bit was large enough so that I could tighten the bolts with a socket.


I then drilled some 8mm holes using the Forster point as a center and then fitted the router to the fixture.

As 12mm MDF is fairly flexible I added a box section on the flip side of the fixture to keep the cutting area nice and flat. I'm also using the box section to clamp onto with the Workmate jaws:


This is the finished fixture:


It seems to have come out quite well and the router is held very securely.

Hopefully I should get the CP ends routed tomorrow night, ill let you know how I get on.

dmworking247

  • Trade Count: (0)
  • Full Member
  • ***
  • Offline Offline
  • Posts: 305
  • Last login:July 14, 2024, 01:30:59 pm
Re: Franco's Custom Cocktail (UPDATE: Wood cutting commences!! =) )
« Reply #127 on: March 27, 2008, 10:08:23 pm »
On behalf of myself and the 95% of the forum, could you kindly stop being so good at this stuff, especially this metal work bling... its making me feel so inadequate.   :hissy:

 :notworthy:

spacies

  • Trade Count: (0)
  • Full Member
  • ***
  • Offline Offline
  • Posts: 934
  • Last login:February 19, 2015, 03:40:49 am
Re: Franco's Custom Cocktail (UPDATE: Wood cutting commences!! =) )
« Reply #128 on: March 28, 2008, 12:21:17 am »
Man isn't this thing finished yet?

 :laugh2:

Franco B

  • Trade Count: (+10)
  • Full Member
  • ***
  • Offline Offline
  • Posts: 3766
  • Last login:February 15, 2024, 09:14:06 am
Re: Franco's Custom Cocktail (UPDATE: Wood cutting commences!! =) )
« Reply #129 on: March 28, 2008, 02:54:32 am »
Thanks dmworking247, my wood work isnt up to much compared to most of you guys but im trying and its all good experience  :)

 :laugh2: @ spacies. I know, I originally planned to be finished by about now  :-\ The thing is, im trying to do everything in the right order, even if it means the whole thing takes a little longer. I could possibly get it done a bit faster by doing things out of sequence but Ill only run into problems and regret it in the long run.

At least its keeping me out of trouble at the moment  :)

spacies

  • Trade Count: (0)
  • Full Member
  • ***
  • Offline Offline
  • Posts: 934
  • Last login:February 19, 2015, 03:40:49 am
Re: Franco's Custom Cocktail (UPDATE: Wood cutting commences!! =) )
« Reply #130 on: March 28, 2008, 03:42:36 am »

At least its keeping me out of trouble at the moment  :)

Well if its keeping you off the streets then thats ok by me.  :laugh2:

Looking very nice though mate.
BTW, did you come up with a solution with the wires twisting for the hollow shafts?
I have an idea about illuminating them and not having wires up the shafts. Will let you know if it works. If it doesn't work, you won't hear from me, bahahahahaaaaaaaa.  ;D


Franco B

  • Trade Count: (+10)
  • Full Member
  • ***
  • Offline Offline
  • Posts: 3766
  • Last login:February 15, 2024, 09:14:06 am
Re: Franco's Custom Cocktail (UPDATE: Wood cutting commences!! =) )
« Reply #131 on: March 28, 2008, 03:02:49 pm »
 :P  :)


Ive not given a lot of thought to the twisting wire issue. For me its not going to be much of a problem, I know all of my joints are going to be solid and it would take a lot of rotating the joystick to break the wires or joints and I can see anyone who will be playing on my cab twisting the joysticks like that. Even after rotating the joysticks many times the wires would eventually tighten up and it would take someone with little intelligence to keep twisting it.

If it does eventually happen I will just fix the damaged stick. If for some bizzare reason it happens more than once I will probably use the audio jack method as that seems the easiest and most logical solution.

What have you got in mind or is it under wraps?

Whilst im here......

I used the templates tonight and the CP ends have come out brilliantly!

Ive seen the future and its template shaped!  ;D


somunny

  • Trade Count: (+8)
  • Full Member
  • ***
  • Offline Offline
  • Posts: 1618
  • Last login:June 17, 2025, 02:49:55 pm
  • Is it hot in here?
Re: Franco's Custom Cocktail (UPDATE: Wood cutting commences!! =) )
« Reply #132 on: March 28, 2008, 07:30:58 pm »
How'd you do it, Franco?  I'm having a hard time cutting out small pieces with the router and a template.

btw - this project is really shaping up to be one-of-a-kind!  :applaud:

Kaytrim

  • I'm too nice a guy
  • Trade Count: (+4)
  • Full Member
  • ***
  • Offline Offline
  • Posts: 2095
  • Last login:September 22, 2015, 04:11:30 pm
Re: Franco's Custom Cocktail (UPDATE: Wood cutting commences!! =) )
« Reply #133 on: March 28, 2008, 07:48:17 pm »
To do the type of template routing that Franco is doing here you can use double sided tape to attach the template to the wood.  Use a flush cut bit with a bearing in the router and ride the bearing along the template.  As long as the template doesn't move each piece will be identical.

TTFN
Kaytrim

Kaytrim

  • I'm too nice a guy
  • Trade Count: (+4)
  • Full Member
  • ***
  • Offline Offline
  • Posts: 2095
  • Last login:September 22, 2015, 04:11:30 pm
Re: Franco's Custom Cocktail (UPDATE: Wood cutting commences!! =) )
« Reply #134 on: March 28, 2008, 07:49:18 pm »
Oooo, cant wait to see :)

BTW Franco, Bling, Bling, check my thread.  ;D

somunny

  • Trade Count: (+8)
  • Full Member
  • ***
  • Offline Offline
  • Posts: 1618
  • Last login:June 17, 2025, 02:49:55 pm
  • Is it hot in here?
Re: Franco's Custom Cocktail (UPDATE: Wood cutting commences!! =) )
« Reply #135 on: March 28, 2008, 08:24:25 pm »
To do the type of template routing that Franco is doing here you can use double sided tape to attach the template to the wood.  Use a flush cut bit with a bearing in the router and ride the bearing along the template.  As long as the template doesn't move each piece will be identical.

TTFN
Kaytrim

I used a template to cut the large pieces of the Ark out bu was having some trouble keeping the wood and templates for the cp ends clamped together and routing them because the size is so small.  The double sided tape sounds like a good idea.  I had also considered screwing the pieces together.  I'm going to laminate them so it wouldn't matter.  I'll give the tape a try.  Thanks!

Franco B

  • Trade Count: (+10)
  • Full Member
  • ***
  • Offline Offline
  • Posts: 3766
  • Last login:February 15, 2024, 09:14:06 am
Re: Franco's Custom Cocktail (UPDATE: Wood cutting commences!! =) )
« Reply #136 on: March 29, 2008, 03:06:06 am »
I had the same problems routing the CP ends before somunny, the pieces were just too small to work with. I didnt really know anything about template routing but I thought it may be the answer so I googled teplate routing and I can up with the following image.


Thats what gave me the idea to make the routing fixture. To hold the templates to the top of the material I screwed the two together. I screwed a piece of the 32mm planed wood (the same material I used to make the box section on the reverse side of the fixture) on top of the template and through into the 18mm MDF to make a bit of a handle to give me something solid to hold onto. In hindsight this probably wasnt necessary as the router cut the material with ease but having never done it before I wanted to make sure I could hold it securely.

I hadnt thought about double sided tape Kaytrim, thats a good idea. As long as you have a large enough surface area in contract that would be the best solution as you would not get the screw holes in your finished material. Im covering my CP ends in carbon fibre so you wont see the holes but ill keep that in mind for future projects, thanks for the tip.

Btw, checked your thread Kaytrim, awesomes  8)

Franco B

  • Trade Count: (+10)
  • Full Member
  • ***
  • Offline Offline
  • Posts: 3766
  • Last login:February 15, 2024, 09:14:06 am
Re: Franco's Custom Cocktail (UPDATE: Wood cutting commences!! =) )
« Reply #137 on: March 29, 2008, 12:23:01 pm »
Made a few modifications to my circular saw and the router fixture and it now doubles up as a saw table  :)


I drilled the holes to hold the circular saw to the table at work and whilst I was there I thought I would check the accuracy of the angle 'dial' as I have cut some angles with it before and i wasn't too sure that it was very accurate.

I set a vernier protractor to 10 degrees and set the saw blade to the protractor:


(you can also see the holes I drilled to bolt the circ saw to the fixture)

I then flipped the saw over and I could clearly see that the 'dial' is out by about two degrees over the ten:


The red line is the 10 degree mark. I scribed a line at the correct ten degree position for future cuts. In hindsight I should have marked the correct 10 degree position as I have some 45 cuts to make but ill just have to take it back into work.

I should hopefully be able to get some straight 10 degree cuts now.  :)

Franco B

  • Trade Count: (+10)
  • Full Member
  • ***
  • Offline Offline
  • Posts: 3766
  • Last login:February 15, 2024, 09:14:06 am
Re: Franco's Custom Cocktail (UPDATE: Wood cutting commences!! =) )
« Reply #138 on: April 21, 2008, 02:04:01 pm »
Well once again it has been a while with little progress. Ive had quite a busy schedule as of late. Ive been busy working on some parts for various people and I have just about cleared my current backlog and have made a (very) little more progress.

When I was using the router table I made to cut out the CP ends I didn't use a dust vacuum and the amount of dust created combined with the heat of the router being used caused the main bearing to seize. I managed to take the router apart and replace the bearing (this time with a steel enclosure rather than the stock rubber one) and it works as  good as new again :)

With the router fixed I could cut the slots for the t-moulding in the CP ends. I should have used a/some large bearings to stop the cutter from cutting full depth but they are expensive so I just made some steel spacers. They are not ideal but they did the job.


I picked up the vinyl that I am going to cover my cab in today. I bought 5 square meters of matte black, one of royal blue and 2 of carbon fibre effect. I was hoping to use real CF but after pricing it up it would have cost about £200. In comparison the CF vinyl was £6. The  CF is only for looks so it will serve its purpose in this application.

After slotting the CP ends I couldn't resist adding some chrome t-moulding and CF vinyl to see what it will look like.


Looks pretty  8) to me   :)

I'm just going to cover the CP ends in the CF vinyl as well as a couple of other places on the cab. The rest of the cab will be matte black (inside and out) and the internal beams etc will be covered in the royal blue vinyl.

After many hours of polishing I finally finished the button bezels:


It would have been sooo much easier to have used a lazer/watter cutter but I dint have one immediately at my disposal.

Well that's it again for now. Short but sweet I know but I'm planning (once again) on making plenty of progress this week. We have been forecast some awesome weather over the next week and I have also cleared some space in the garage for me to work if the weather turns bad.

mountain

  • Trade Count: (+9)
  • Full Member
  • ***
  • Offline Offline
  • Posts: 1205
  • Last login:January 29, 2025, 08:31:47 am
    • Mountain Jukeboxes
Re: Franco's Custom Cocktail (UPDATE: Wood cutting commences!! =) )
« Reply #139 on: April 21, 2008, 02:12:15 pm »
Franco, that CF and chrome T-molding look fantastic together!

This is going to be the nicest looking cocktail cabinet ever. Hurry up! Quit waisting your time on other members cabinets.  ;D

Franco B

  • Trade Count: (+10)
  • Full Member
  • ***
  • Offline Offline
  • Posts: 3766
  • Last login:February 15, 2024, 09:14:06 am
Re: Franco's Custom Cocktail (UPDATE: Wood cutting commences!! =) )
« Reply #140 on: April 21, 2008, 05:43:59 pm »
Thanks Mike  :)

I thought they would look good together but i never imagined they would look that good. I was thinking abut how to have the grain but I just cut the material as it was (at 90 degrees to the sheet) and I think that angle works really well.

I think 'nicest looking cocktail ever' may be stretching it but thanks, i do however still have a few tricks up my sleeve ;)

Now wheres that update of yours ;)


somunny

  • Trade Count: (+8)
  • Full Member
  • ***
  • Offline Offline
  • Posts: 1618
  • Last login:June 17, 2025, 02:49:55 pm
  • Is it hot in here?
Re: Franco's Custom Cocktail (UPDATE: Wood cutting commences!! =) )
« Reply #141 on: April 21, 2008, 07:36:53 pm »
Wow!  That cp end looks amazing!  :applaud:  Nice work as always.

mccoy178

  • It's hard to work with a straight jacket on
  • Trade Count: (+9)
  • Full Member
  • ***
  • Offline Offline
  • Posts: 3127
  • Last login:September 03, 2021, 10:23:42 am
  • Go Bucks!
Re: Franco's Custom Cocktail (UPDATE: Wood cutting commences!! =) )
« Reply #142 on: April 21, 2008, 10:40:23 pm »
Things are looking good man!  I wish I had that metal mill. :applaud:

Blanka

  • Trade Count: (+1)
  • Full Member
  • ***
  • Offline Offline
  • Posts: 2248
  • Last login:January 25, 2018, 03:19:28 pm
Re: Franco's Custom Cocktail (UPDATE: Wood cutting commences!! =) )
« Reply #143 on: April 25, 2008, 09:45:26 am »
I do not now if it is still relevant, but you said on the first page that there is no 19inch+ LCD monitor. Well, there are 21.3 inch 1600x1200 panels. You know what? These screens even happen to be the best in respect to viewing angles. Check out a Samsung 214T sometimes. An absolute marvel 4:3 screen. It even has a pivot function built in that sets Windows XP accordingly.

Franco B

  • Trade Count: (+10)
  • Full Member
  • ***
  • Offline Offline
  • Posts: 3766
  • Last login:February 15, 2024, 09:14:06 am
Re: Franco's Custom Cocktail (UPDATE: Wood cutting commences!! =) )
« Reply #144 on: April 26, 2008, 11:36:00 am »
Thanks for that Blanka.

Having a quick google I can see that that monitor is £450 over here  :o I have already built my cab around my 21" CRT and I have two spares (which cost me £10 each) but its good to know I may be able to pick one of those up in the future if these eventually die.

I 'did' plan on getting loads done this week but I have been 'entertaining'  so I haven't have much time on my build.

I have had a few hours this afternoon tho and I have completed a fairly major part of my build in terms of what it will allow me to carry on with now.

Ive managed to get the major CP contruction complete:


This has been a bit of a bottle neck in my project as I couldn't continue with various aspects until they were semi complete. Now that they are 'finished' I can now:

a) Get my table top cut out ( i didn't want to cut the profile in case anything changed in regards to the CP sizes)

b) Get the plexi cut to size for the bottom of the CPs (see above)

c) Get the CP graphics designed (ditto)

That's the next plan of action until I have completed those steps.

I have decided to add a spinner to my CP. I have made a couple of spinners but I'm not sure which design to use. These are the two candidates:


These are two pictures of the rough spinner location (at this moment in time). Which do you think would look better?


The grooved one would match my dustwashers but I really like the one with the brass insert. I'm thinking of maybe making a brushed stainless insert and getting it engraved with a spacie to match the general theme of my cab. I may even get a brass insert engraved instead as I really like the look of the brass in contrast to the stainless.

I'm really getting exited now I'm at this stage now I'm past the current bottleneck. Time for a shandy or two methinks ;)

Over and out....


somunny

  • Trade Count: (+8)
  • Full Member
  • ***
  • Offline Offline
  • Posts: 1618
  • Last login:June 17, 2025, 02:49:55 pm
  • Is it hot in here?
Re: Franco's Custom Cocktail (UPDATE: Wood cutting commences!! =) )
« Reply #145 on: April 26, 2008, 08:26:09 pm »
Whoa!  :o   Absolutely beautiful!

patrickl

  • I cannot know for certain which will be tastiest
  • Trade Count: (+2)
  • Full Member
  • ***
  • Offline Offline
  • Posts: 4614
  • Last login:August 27, 2021, 09:25:30 am
  • Yo momma llama
    • PocketGalaga
Re: Franco's Custom Cocktail (UPDATE: Wood cutting commences!! =) )
« Reply #146 on: April 27, 2008, 03:12:12 am »
I like the brass version best too. Both are very nice.
This signature is intentionally left blank

Franco B

  • Trade Count: (+10)
  • Full Member
  • ***
  • Offline Offline
  • Posts: 3766
  • Last login:February 15, 2024, 09:14:06 am
Re: Franco's Custom Cocktail (UPDATE: Wood cutting commences!! =) )
« Reply #147 on: April 27, 2008, 08:18:16 am »
Thanks guys.

Yeah I'm leaning towards the brass one, I think I'm going to go with that.

Well after yesterdays progress I was keen to get on with it today so I had a 6.30 am start. I tried to be quiet until about 9 before I got cracking with the power tools

The first thing I did was to get the CPs mounted to the cab. I have just screwed them from the inside at present but I'm going to make some brackets to hold them to the cab this week.


I also got the cabinet top cut out somewhere near size and I jigsawed the bulk of the material out before finishing it with my router.


You can just about see the top profile penciled on in the next picture. I may reduce the whole CP top slightly but I'm definitely going to trim some material off the back edge to reduce its size. I don't want to take too much off all around though as I want to keep a fair amount of area for the CP graphics and LED lit perspex inserts.


I haven't cut the table top profile as I'm going to make some templates at work for the large radii on the corners and also for the recess profiles as well as a template for the cutout so I can mount the tinted blue vinyl covered plexi with spacie cutouts behind the CPs. Its hard to explain but you will see soon enough.

You can also see that I have cut the monitor opening over size. I'm going to make a solid aluminium 45 degree bezel for the monitor. If it end up being too bright ill just cover it in black vinyl. Hopefully it should look nice under tinted glass.

All in all I'm happy for four hours work. I'm really happy with how its looking and I had a quick mock play on the cabinet to test the CP heights and viewing angle etc and I must say its come out exactly as planned in those respects. Its nice that things are going right for once :)

somunny

  • Trade Count: (+8)
  • Full Member
  • ***
  • Offline Offline
  • Posts: 1618
  • Last login:June 17, 2025, 02:49:55 pm
  • Is it hot in here?
Re: Franco's Custom Cocktail (UPDATE: Wood cutting commences!! =) )
« Reply #148 on: April 27, 2008, 12:16:22 pm »
Franco, out of curiosity, what are the dimensions of your small end cp's?

Franco B

  • Trade Count: (+10)
  • Full Member
  • ***
  • Offline Offline
  • Posts: 3766
  • Last login:February 15, 2024, 09:14:06 am
Re: Franco's Custom Cocktail (UPDATE: Wood cutting commences!! =) )
« Reply #149 on: April 27, 2008, 12:33:52 pm »
The 'horizontal' part of the smaller CPs (where the controls are) are 295x185mm, the vertical section is 295x65mm.

Franco B

  • Trade Count: (+10)
  • Full Member
  • ***
  • Offline Offline
  • Posts: 3766
  • Last login:February 15, 2024, 09:14:06 am
Re: Franco's Custom Cocktail (UPDATE: Wood cutting commences!! =) )
« Reply #150 on: April 30, 2008, 07:10:06 am »
Had another 6.30am start today  :)

Ive been getting on all morning. Im quite impressed myself seeing as I have GTA4 sat there and ive only had a couple of hours on it. Im really getting the build bug now im making some decent progess.

I made the three templates for the table top profile. One with a 100mm radius, one with the CP cut out profile and one with a 25mm radius for another part of the cab.


Quick pic of the templates in posistion. I jigsawed the bulk of the material out before using a flush trim bit to follow the shape of the templates.


Which left me with the semi finished table top.


I may trim a piece of the far side of the table top. It looks a little large to me and all it is doing is hanging over the backside of the table so its not serving a purpose. I think I may trim about 40mm off.

I also made some other progress but ill include that in the next update.

mountain

  • Trade Count: (+9)
  • Full Member
  • ***
  • Offline Offline
  • Posts: 1205
  • Last login:January 29, 2025, 08:31:47 am
    • Mountain Jukeboxes
Re: Franco's Custom Cocktail (UPDATE: Wood cutting commences!! =) )
« Reply #151 on: April 30, 2008, 07:18:41 am »
Very nice Franco, great idea using your metal skills to create the templates. I am sure it is spot on.

I can't wait for the update pics when you start to assemble everything with the CF and t-molding.  :cheers:

Franco B

  • Trade Count: (+10)
  • Full Member
  • ***
  • Offline Offline
  • Posts: 3766
  • Last login:February 15, 2024, 09:14:06 am
Re: Franco's Custom Cocktail (UPDATE: Wood cutting commences!! =) )
« Reply #152 on: May 01, 2008, 06:54:12 am »
Cheers Mike, I cant wait till I get to that stage too  :)

Well, its been another 6.30am start but Ive manged to get plenty done:

  • Disassembled the whole cab
  • Routed the 'straight' sides to length
  • Routed the 'triangular' ends to length for aluminum trim (more on that later)
  • Template routed the cutouts above the CPs
  • Cut the slots for the t-moulding in the 'straight' sides, CP cutouts and table top
  • Reassembled everything

Couple of pics:


(the second pic looks a bit wonky for some reason, i swear its all straight!  :P)

Really happy with how its looking :)

Im planning on having the admin buttons in the vertical sections either side of the long hoizontal CP. I have very kindly been traded some awesome kit for them but I wont post anything on them until they have been revealed by the originator.

The eagled eyed amongst you may have noticed a slight gap between the side panels and the front/back panels on the third photo. This is because I'm going to trim those sides with 1.5mm aluminum strip. I don't want to have any wooded edges showing, even when the cab is opened (top up, sides down). I'm trimming the CP tops and back edges with aluminum too, similar to this picture:


That's it for today again, I have the whole day off tomorrow so i should be able to get plenty more done. I think I'm going to run out of things to do tho before I get some artwork etc sorted out, I think I had better make that my next priority. I know what I want for it, I just need to find someone with better skills than my paint skills to work on it for me   :)

Bye for now!


ex_directory

  • Trade Count: (0)
  • Full Member
  • ***
  • Offline Offline
  • Posts: 106
  • Last login:April 10, 2015, 08:54:20 am
  • The only game I ever completed... so far.
Re: Franco's Custom Cocktail (UPDATE: Wood cutting commences!! =) )
« Reply #153 on: May 01, 2008, 08:54:19 am »
Hey Franco, cab suddenly coming together and looking very sweet indeed. Loving the fine detail, looking forward to seeing them admin buttons, you just know it is going to be lit and have a stainless bezel though 8)

Let me know if you need any help getting that artwork a bit more together. BTW, like the spinners!  ;)
Ex
My kitchen cab is progressing here

Franco B

  • Trade Count: (+10)
  • Full Member
  • ***
  • Offline Offline
  • Posts: 3766
  • Last login:February 15, 2024, 09:14:06 am
Re: Franco's Custom Cocktail (UPDATE: Wood cutting commences!! =) )
« Reply #154 on: May 01, 2008, 09:36:30 am »
Cheers bud

you just know it is going to be lit and have a stainless bezel though 8)

Am I that obvious?  ;D

Cheers mate, ill have to have a chat with you about the artwork.

somunny

  • Trade Count: (+8)
  • Full Member
  • ***
  • Offline Offline
  • Posts: 1618
  • Last login:June 17, 2025, 02:49:55 pm
  • Is it hot in here?
Re: Franco's Custom Cocktail (UPDATE: Wood cutting commences!! =) )
« Reply #155 on: May 10, 2008, 10:11:27 am »
Franco,

What are you going to do with the open spaces above each panel?

Franco B

  • Trade Count: (+10)
  • Full Member
  • ***
  • Offline Offline
  • Posts: 3766
  • Last login:February 15, 2024, 09:14:06 am
Re: Franco's Custom Cocktail (UPDATE: Wood cutting commences!! =) )
« Reply #156 on: May 10, 2008, 10:42:16 am »
All will be revealed soon ;)

Im just waiting on some materials. I can say it involves blue tinted plexi, clear polycarbonate, aluminum foil, printed vinyl and (of course) some LEDs.


somunny

  • Trade Count: (+8)
  • Full Member
  • ***
  • Offline Offline
  • Posts: 1618
  • Last login:June 17, 2025, 02:49:55 pm
  • Is it hot in here?
Re: Franco's Custom Cocktail (UPDATE: Wood cutting commences!! =) )
« Reply #157 on: May 10, 2008, 08:23:18 pm »
All will be revealed soon ;)

Im just waiting on some materials. I can say it involves blue tinted plexi, clear polycarbonate, aluminum foil, printed vinyl and (of course) some LEDs.


Well, you haven't disappointed me yet!  ;)

dmworking247

  • Trade Count: (0)
  • Full Member
  • ***
  • Offline Offline
  • Posts: 305
  • Last login:July 14, 2024, 01:30:59 pm
Re: Franco's Custom Cocktail (UPDATE: Wood cutting commences!! =) )
« Reply #158 on: May 11, 2008, 06:45:35 am »

The bottom of my router has three M6 tapped holes so I made some large-head hex bolts to mount the router to the table:


Wait, you MADE those?

Holy crap, they look perfect for the sharp-angled cocktail I'm planning, can you make me 8 of those with a thin head? :D

Thanks for the tip on the workbench/router table, I have a workbench just like that... I'm going to go and have a closer read :)

Edit: On second thoughts, seeing the progress of your cocktail I think I'll just give up now!   :-\
« Last Edit: May 11, 2008, 06:49:39 am by dmworking247 »

Franco B

  • Trade Count: (+10)
  • Full Member
  • ***
  • Offline Offline
  • Posts: 3766
  • Last login:February 15, 2024, 09:14:06 am
Re: Franco's Custom Cocktail (UPDATE: Wood cutting commences!! =) )
« Reply #159 on: May 12, 2008, 03:36:41 am »
Sure, I can make you some.

There just some 24mm AF (across flats) s/steel hex bar turned and screwcut.

I think thats the only hex stainless bar we have but we do have some other sizes of mild steel hex bar.

Shoot me a PM of what sizes you need (Hex size, head width, screw form/pitch and thread length) and Ill see what I can do.  ;)

Santoro

  • Purveyor of Shiny Arcade Goodness
  • Santoro
  • Trade Count: (+32)
  • Full Member
  • *
  • Offline Offline
  • Posts: 3054
  • Last login:July 11, 2025, 09:55:57 pm
  • Boycott Quarters!!!
    • ArcadeReplay!
Re: Franco's Custom Cocktail (UPDATE: Wood cutting commences!! =) )
« Reply #160 on: May 24, 2008, 07:49:55 pm »
This project is truly moving the bar up.  Holy Cow.

AWESOME.   :notworthy:

pinballwizard79

  • The above mentioned items do not expel strawberries & pretty girls
  • Trade Count: (0)
  • Full Member
  • ***
  • Offline Offline
  • Posts: 1524
  • Last login:May 04, 2014, 09:18:00 pm
  • I sleep by my arcade every Friday
Re: Franco's Custom Cocktail (UPDATE: Wood cutting commences!! =) )
« Reply #161 on: June 18, 2008, 09:50:49 pm »
OMG

If I could make a cab like that my bathrobe & towels would have the initials BMF monogrammed on the corners.

Seriously dude, I have a splash of diamond plate & chrome joysticks on my baby but you.....you.....Franco, you have have Alien technology on your hands!

"Chuck Norris does not build his own arcades, he has Franco build them"

http://www.chucknorrisjokes.net/

http://www.chucknorrisfacts.com/

Later


"George Bush doesn't care about arcade people"

My FrankenPanel: http://forum.arcadecontrols.com/index.php?topic=110312.0

My Game Room: http://forum.arcadecontrols.com/index.php?topic=81323.0

Franco B

  • Trade Count: (+10)
  • Full Member
  • ***
  • Offline Offline
  • Posts: 3766
  • Last login:February 15, 2024, 09:14:06 am
Re: Franco's Custom Cocktail (UPDATE: Wood cutting commences!! =) )
« Reply #162 on: June 19, 2008, 01:29:49 pm »
Thanks guys.

No alien technology pinballwizard79, I'm just lucky to work in a large machine shop and have a lot of spare time.

Do you have any more pictures of your cab pinballwizard? I loved the ones I saw in the Control Panel Database thread and I'm itching to see some more!

Seeing as I'm here ill do a little update.....

As you know I haven't updated for a while, this is mainly because I wanted to get the CP graphics at least sorted before I carried on. Well I can happily say they are 95% complete  :) I was hoping to post some results of them tonight but they will have to wait until tomorrow. I'm really stoked with them and ill give due credit to the artist who did them tomorrow ;)

I have been working on a couple of other bits in the mean time, this is one that I finished this week:


What the -smurf- is it I hear you ask? Well the top of my cab is going to hinge at the back and I wanted a way to keep the top up when swapping over CPs or anything like that so I thought I would make some kind of stay similar to a car bonnet. This is an early CAD model of it which shows how it works:


Its similar to a car bonnet support but the cabinet top will be supported at both sides. I didn't want to just have one support with the weight of the glass etc.

A couple of closeup pics:


The pivot/bar cups are made from stainless steel bar. The pockets were milled out and two counter sunk holes were drilled to mount the pivot/bar cups to the cabinet. I drilled and reamed a 1/4" hole for a dowel to locate in for the bars to pivot on.


The support bars were also made from stainless steel. One end was domed and the other was domed and then reamed 1/4" for the dowels. I also drilled and tapped an M4 hole for a grubscrew to secure the dowel in place. Its not really necessary as the dowel is a nice tight fit.


/\ Closeup of the assembled componets, The dowels were made from 1/4" silver steel. I tapped some M4 holes in the end of them to make it easier to remove them.

Ill make some locating cups for the support bars to sit in in the cabinet top when it is raised.

Ive been working on something else quite nice but Ill wait until its complete.

That's it for this evening, Ill hopefully post some artwork goodness tomorrow!  :)

mountain

  • Trade Count: (+9)
  • Full Member
  • ***
  • Offline Offline
  • Posts: 1205
  • Last login:January 29, 2025, 08:31:47 am
    • Mountain Jukeboxes
Re: Franco's Custom Cocktail (UPDATE: Wood cutting commences!! =) )
« Reply #163 on: June 19, 2008, 09:55:22 pm »
Damn Dude! Will the sweet updates ever end?! You are definitely approaching this project with the right attitude. You aren't rushing it, you are taking your time making sure everything is perfect, down to the last detail.

You have a great resource in your metal abilities...I wish we were neighbors!

Franco B

  • Trade Count: (+10)
  • Full Member
  • ***
  • Offline Offline
  • Posts: 3766
  • Last login:February 15, 2024, 09:14:06 am
Re: Franco's Custom Cocktail (UPDATE: Wood cutting commences!! =) )
« Reply #164 on: June 20, 2008, 08:52:22 am »
Thanks Mike :) I'm probably taking my time a little too much time to be honest but I have everything planned in sequence in my head  and I really don't want to stray from it if possible. (I even have the final showcase video planned in my head, with music, frame timing and everything, lol  :dizzy:)

Yeah It would be handy if we lived close, I'm sure we could come up with something fairly special between us! :)

Okay, here are the graphics for the control panels:

Long 'horizontal' panel (x1):


Short 'vertical' panels (x2):


(if you click each image you will get a slightly larger version if you wish)

uprightbass360 did all of the graphics for me and I'm over the moon with them. I gave him an idea of what I was after (space invaders array, space invaders monster, positioning etc) and I let him go to work on it and he has produced some amazing results IMHO, we have modified the drawings here and there and tweaked a few things but we are 95% there now.  uprightbass360 has been a pleasure to work with and I'm really looking forward to working with him for the rest of my projects graphics :) Thanks Sam if you are reading  :applaud:

Here's another pic of the CPs for reference.....


The artwork will cover the top of the panel and will also fold down over the front so the spacies will just be on the CP top. I'm going to get some vinyl decals cut out to stick on the player start/credit panels as shown below:


I sent Sam a PDF with the arrow and button placements on so that they can be included on the final vinyl. This will make it easy to cut the arrows out to reveal the LED backlit plexiglass and also to place the graphic accurately.

I think that's it for now, i know I have forgotten something but it will have to wait. Have a good weekend all  :cheers:


HaRuMaN

  • Supreme Solder King
  • Global Moderator
  • Trade Count: (+45)
  • Full Member
  • *****
  • Offline Offline
  • Posts: 10328
  • Last login:July 09, 2025, 01:34:12 pm
  • boom
    • Arcade Madness
Re: Franco's Custom Cocktail (UPDATE: Wood cutting commences!! =) )
« Reply #165 on: June 20, 2008, 10:55:58 am »
 :o :o :o :o

Ms Jersey

  • Trade Count: (0)
  • Newbie
  • *
  • Offline Offline
  • Posts: 1
  • Last login:June 20, 2008, 05:01:44 pm
Re: Franco's Custom Cocktail (UPDATE: Wood cutting commences!! =) )
« Reply #166 on: June 20, 2008, 05:01:44 pm »
The artwork reminds me of your first cabinet and that very cool cabinet by Johnnysmitch.


pinballwizard79

  • The above mentioned items do not expel strawberries & pretty girls
  • Trade Count: (0)
  • Full Member
  • ***
  • Offline Offline
  • Posts: 1524
  • Last login:May 04, 2014, 09:18:00 pm
  • I sleep by my arcade every Friday
Re: Franco's Custom Cocktail (UPDATE: Wood cutting commences!! =) )
« Reply #167 on: June 20, 2008, 10:55:57 pm »
Can I have this machine when you are finished?

"These aren’t the droids your'e looking for"

"George Bush doesn't care about arcade people"

My FrankenPanel: http://forum.arcadecontrols.com/index.php?topic=110312.0

My Game Room: http://forum.arcadecontrols.com/index.php?topic=81323.0

waveryder

  • Trade Count: (+1)
  • Full Member
  • ***
  • Offline Offline
  • Posts: 585
  • Last login:July 14, 2011, 04:26:17 am
  • I Troop, therefore I am
    • BubbleGum Custom Art
Re: Franco's Custom Cocktail (UPDATE: Wood cutting commences!! =) )
« Reply #168 on: June 21, 2008, 12:26:49 am »
Can I have this machine when you are finished?

You'll have to beat me to it!  :applaud:
When pixelated clipart just wont do, just call for Betty

pinballwizard79

  • The above mentioned items do not expel strawberries & pretty girls
  • Trade Count: (0)
  • Full Member
  • ***
  • Offline Offline
  • Posts: 1524
  • Last login:May 04, 2014, 09:18:00 pm
  • I sleep by my arcade every Friday
Re: Franco's Custom Cocktail (UPDATE: Wood cutting commences!! =) )
« Reply #169 on: June 23, 2008, 12:33:26 am »
Seeing little metal stuff made from bigger metal stuff makes me feel like I didnt do enough when making my own arcade.

Franco, tell the truth....did you make the screws & bolts you are using on this cab in a machine shop too? "Nails, we must be out....I will go & make some more".

 :laugh2: :laugh2: :laugh2:

Aw man, dont kill me, I couldnt resist.

I will PM you later regarding the dustwashers, peace.
"George Bush doesn't care about arcade people"

My FrankenPanel: http://forum.arcadecontrols.com/index.php?topic=110312.0

My Game Room: http://forum.arcadecontrols.com/index.php?topic=81323.0

Franco B

  • Trade Count: (+10)
  • Full Member
  • ***
  • Offline Offline
  • Posts: 3766
  • Last login:February 15, 2024, 09:14:06 am
Re: Franco's Custom Cocktail (UPDATE: Wood cutting commences!! =) )
« Reply #170 on: June 23, 2008, 06:36:14 am »
 :laugh:

Well I bought the screw and some of the nuts and bolts. Ive had to make a fair few special nuts/bolts etc purely because you cant get them off the shelf.  ;)

Yeah shoot me a PM about the dustwashers, I should have the time to get some done this week. Peace.

waldo

  • Trade Count: (0)
  • Full Member
  • ***
  • Offline Offline
  • Posts: 44
  • Last login:November 05, 2008, 01:44:00 am
Re: Franco's Custom Cocktail (UPDATE: Wood cutting commences!! =) )
« Reply #171 on: June 25, 2008, 01:10:33 am »
 :banghead: dammit now I have to go burn my cabinet and start again . I knew I shouldnt come back to these forums to see the amzing stuff some of you are doing......wtb girlfriend with father whos has access to cnc machines

AnthonyB

  • Trade Count: (0)
  • Full Member
  • ***
  • Offline Offline
  • Posts: 22
  • Last login:September 12, 2008, 09:42:43 pm
Re: Franco's Custom Cocktail (UPDATE: Wood cutting commences!! =) )
« Reply #172 on: July 08, 2008, 12:14:56 am »
this is amazing!

BASS!

  • Just have fun.
  • Trade Count: (+1)
  • Full Member
  • ***
  • Offline Offline
  • Posts: 837
  • Last login:August 10, 2013, 03:12:33 am
Re: Franco's Custom Cocktail (UPDATE: Wood cutting commences!! =) )
« Reply #173 on: July 08, 2008, 03:16:35 am »
Yup. Franco is the most thorough and detail oriented member that I have met here. This thing is going to be awesome:-) :cheers:

Franco B

  • Trade Count: (+10)
  • Full Member
  • ***
  • Offline Offline
  • Posts: 3766
  • Last login:February 15, 2024, 09:14:06 am
Re: Franco's Custom Cocktail (UPDATE: Wood cutting commences!! =) )
« Reply #174 on: July 08, 2008, 05:37:11 am »
Cheers guys. I had a quick look this morning and I can't believe its 10 months since I started the project. I thought I would be finished by about march time at the very latest! Oh well, its a good job I enjoy doing it. Anyone want to hire me as a Project Manager?  ;D

You guys may be able to help me whilst I'm here. As you know uprightbass360 very kindly designed my graphics for me. Before I get them printed out onto CPOs I wanted to check that the sizing/positioning etc of everything was OK.

I took the files to my local print center (Prontaprint) and asked them to print me the smaller image onto A3 (twice) and the larger one onto A2 so it would fit. They said they could do the A3s there and then but they would have to order the A2 as they don't have a printer large enough. Fair enough I thought and I asked them how much the A2 would be and they came back with £17 (~$35)  :o (keep in mind this is just for a colour print). I said I would leave the A2 copy and just get the two A3s thinking they would only be a couple of quid each. They printed them off for me and charged me £9.50 (~$20) for their 'trouble'  ::)

Not to worry I thought, at least I would get to see what the graphics would look like on the CP. But alas, no it wasn't to be as they managed to print the image out the wrong size  :'(


I'm not sure if it was my fault, theirs or some miscommunication about the formatting so I spoke to Sam (uprightbass360) and he kindly made me a basic line drawing of the image and saved it as A3 PDFs so I could print them out at work.

Sam cut the larger CP in half for me so I could print it on two sheets of A3 and then stick them together (this is only for the test positioning obviously).

Anyway, I printed them out and cut out the button holes and arrow holes etc and test fitted the printouts to my CPs:


As you can see they are not quite lining up. I lined up the 'arrow ring' on the left hand side of the long CP and you can see it gradually get more and more out of line as it goes to the right. I think we must be going wrong some where whilst converting the image to different formats or whilst printing.

This is the steps the image when through.

1) I drew the CP tops in AutoCAD including the button holes etc and this is the drawing I used to CNC cut the CP tops
2) I converted the image to A3 and A2 PDFs respectively using DWG TrueView 2009 and sent them to Sam
3) Sam did his magic in Illustrator(?) for me and converted the images back to A3 PDFs for me
4) I printed the images out using Adobe Acrobat on a A3 laser printer at work.

Does anyone know where we may be going wrong? Is there a better solution that we could use?

It seems strange though as the printout doesn't seem to be uniformly smaller that the CP, the height seems to be correct, its just the length.

Any ideas?
 
« Last Edit: July 10, 2008, 01:34:26 pm by Franco B »

thatitalian

  • Don't worry about the chicken, I feed my friends human all the time...
  • Trade Count: (0)
  • Full Member
  • ***
  • Offline Offline
  • Posts: 887
  • Last login:March 27, 2018, 10:52:37 am
  • The Revolution Is Coming...
Re: Franco's Custom Cocktail (UPDATE: Wood cutting commences!! =) )
« Reply #175 on: July 08, 2008, 05:58:34 am »
Go for a full print form the original file, that is the only way to really find out.

I hate prontaprint!

BTW, hows tricks? We still haven't played COD4! Probably this is eating your time up! Lol.

Love that artwork, everytime I see it.

Franco B

  • Trade Count: (+10)
  • Full Member
  • ***
  • Offline Offline
  • Posts: 3766
  • Last login:February 15, 2024, 09:14:06 am
Re: Franco's Custom Cocktail (UPDATE: Wood cutting commences!! =) )
« Reply #176 on: July 08, 2008, 06:38:21 am »
Yeah thats what I asked them to do, a full size print from the original JPEG  ::)

Ill ask Sam to do me another B&W line version JPEG and try to print that out myself.

Yeah tricks are good bud, we do need to have that COD4 game! You are right tho, it is taking up too much of my time. Im on prestige 9 rank 53 so im just a couple of rank ups off my Gold Cross now so I can stop caining it so much then (apart from the gold weapons challenges).  :dizzy:

BASS!

  • Just have fun.
  • Trade Count: (+1)
  • Full Member
  • ***
  • Offline Offline
  • Posts: 837
  • Last login:August 10, 2013, 03:12:33 am
Re: Franco's Custom Cocktail (UPDATE: Wood cutting commences!! =) )
« Reply #177 on: July 08, 2008, 04:29:31 pm »
Bleargh!!! Pm sent to work out the kinks (got some ideas as to the cause).
« Last Edit: July 08, 2008, 04:38:34 pm by uprightbass360 »

Franco B

  • Trade Count: (+10)
  • Full Member
  • ***
  • Offline Offline
  • Posts: 3766
  • Last login:February 15, 2024, 09:14:06 am
Re: Franco's Custom Cocktail (UPDATE: Wood cutting commences!! =) )
« Reply #178 on: July 09, 2008, 10:11:33 am »
Whilst we are sorting the artwork out I had an idea to midify one of the spinners I made.

This is the spinner I made that I was going to use previously:


It has a polished brass insert that I really like the spinner but I dont think it would really go with the rest of the cab. So I had a little think and came up with this:


My friend gave me a small piece of 0.6mm carbon fibre a while ago so I decided to cut a piece of that out the same size as the brass insert to replace it. I also made a Space Invaders laser turret out of some 0.75mm stainless. The CF is a  lot thinner than the brass insert was so the laser turret now sits flush with the top of the spinner.

Looks much better IMO, only took 30 mins too  :)

jeffhlewis

  • Trade Count: (0)
  • Full Member
  • ***
  • Offline Offline
  • Posts: 130
  • Last login:March 30, 2018, 06:15:57 pm
    • Lewisjeff.com
Re: Franco's Custom Cocktail (UPDATE: Wood cutting commences!! =) )
« Reply #179 on: July 09, 2008, 10:31:00 am »
Franco:

where did you find those singular USB terminal plates? That's exactly what I'm looking for!
 

Franco B

  • Trade Count: (+10)
  • Full Member
  • ***
  • Offline Offline
  • Posts: 3766
  • Last login:February 15, 2024, 09:14:06 am
Re: Franco's Custom Cocktail (UPDATE: Wood cutting commences!! =) )
« Reply #180 on: July 09, 2008, 10:48:42 am »
Jeff,

I got mine from Maplins in the UK [Product Link]

but you can also get them from Markertek in the US amongst other places [Product Link]

Bear in mind that they are gender changers as well as USB A>B/B>A changers.

Bender

  • Trade Count: (+1)
  • Full Member
  • ***
  • Offline Offline
  • Posts: 1919
  • Last login:November 28, 2016, 08:12:21 pm
    • Happ to Tron Conversion tutorial
Re: Franco's Custom Cocktail (UPDATE: Wood cutting commences!! =) )
« Reply #181 on: July 09, 2008, 05:24:31 pm »
Damn, every time you post a picture I think well he's outdone himself now, then.....
you do it again!

Man those are hands down the nicest spinner knobs I've ever seen! :cheers:

bvicarious

  • Trade Count: (0)
  • Full Member
  • ***
  • Offline Offline
  • Posts: 131
  • Last login:April 15, 2024, 09:43:14 am
Re: Franco's Custom Cocktail (UPDATE: Wood cutting commences!! =) )
« Reply #182 on: July 09, 2008, 07:40:06 pm »
It's weird that the button holes on the printout are the correct size, but their horizontal position is off? Would you mind posting the cad files you used to cut the control panel?

Franco B

  • Trade Count: (+10)
  • Full Member
  • ***
  • Offline Offline
  • Posts: 3766
  • Last login:February 15, 2024, 09:14:06 am
Re: Franco's Custom Cocktail (UPDATE: Wood cutting commences!! =) )
« Reply #183 on: July 10, 2008, 09:54:56 am »
Thanks Bender.

bivicarious, upon closer inspection the printout is smaller in width as well as height so it looks like there is a scaling problem either in format conversion or when printing the document.

The long CP should be 555mm x 253mm and the smaller CP should be 284 x 258mm

The long CP printout is approx 543 x 246mm.

I have attached the DWGs that I used to created the PDFs. I used the geometry in the same DWGs to drill the CPs.

I have also attached the PDFs that I created from the DWGs, could anyone tell me if they are the same size? Is it possible to measure the PDFs in illustrator or similar?

(I have zipped the files as the forum doesn't like DWGs and Ive already lost this post once  :timebomb:)

Thanks in advance.


bvicarious

  • Trade Count: (0)
  • Full Member
  • ***
  • Offline Offline
  • Posts: 131
  • Last login:April 15, 2024, 09:43:14 am
Re: Franco's Custom Cocktail (UPDATE: Wood cutting commences!! =) )
« Reply #184 on: July 10, 2008, 12:10:17 pm »
PDF in illustrator: 554.927 x 252.984mm
PDF in corel draw: 554.9266 x 252.984mm

DWG in illustrator: 554.76 x 252.891mm
DWG in corel draw: won't load
DWG->DXF in corel draw: 555.00002 x 253.00002mm
same DXF in illustrator: 554.76 x 252.891mm

loading the DWG in Autocad viewer shows the correct dimensions, obviously

DWG imported into maya: 555 x 253mm
DXF imported into maya: 555 x 253mm
PDF -> AI (via corel draw) -> imported into maya: 554.9138 x 252.9586mm


Illustrator likes to play fast and loose with measurements of non-AI files, as I've found out recently, even when that file translates correctly in other programs. So bringing anything -> Illustrator will introduce some error. Unfortunately I can't export PDF from corel draw, so I don't know if that introduces any error.

In any case, each file I loaded was only very slightly off, not the 10mm difference that the printers gave you. It seems like the problem is mostly printed related. What format did you send to get printed, the PDFs?

edit: I didn't see in your first post that you printed the outlines on your work printer.. was scaling turned off? can you print a 1" square or something and see if that measures accurately? is there any difference between the PDFs with the art outlines on them and the ones you attached?
« Last Edit: July 10, 2008, 12:37:35 pm by bvicarious »

Franco B

  • Trade Count: (+10)
  • Full Member
  • ***
  • Offline Offline
  • Posts: 3766
  • Last login:February 15, 2024, 09:14:06 am
Re: Franco's Custom Cocktail (UPDATE: Wood cutting commences!! =) )
« Reply #185 on: July 10, 2008, 01:33:28 pm »
Thank you for all of your  research for me, that's very kind  :cheers:

Yeah, I can appreciate/tolerate a 0.25mm difference but ~10mm is impossible to work with.

Sam is checking the artworks size for me although I really think it must be a printer issue.

The files that I gave to the printers was a PDF containing both images. I asked them to print the images out at 100% size but it looks to me like they fitted them to the paper as you can see the image completely fills the A3 paper up to the widest edge wheres the image should be slightly smaller.

When I printed the image at work I didn't see any scaling option within Adobe Acrobat (6.0), where abouts is the scaling option?

I will try and print a grid out to see how accurately it prints.

Could you do me another huge favour bvicarious? I'm going to attach the line drawings PDFs to this post, could you check their size for me? If they are somewhere near the correct size then I know its the printer that is the problem.

The longer image is split into two so I could print it on two A3 sheets, I don't know if you could splice them together to measure them?

If they are correct I think I am going to go back to the print shop tomorrow and get them to print off the line drawings as we will know the drawings are correct and they should print off correctly as their printer should be properly calibrated.

Thanks once again for all of your help. :notworthy:


bvicarious

  • Trade Count: (0)
  • Full Member
  • ***
  • Offline Offline
  • Posts: 131
  • Last login:April 15, 2024, 09:43:14 am
Re: Franco's Custom Cocktail (UPDATE: Wood cutting commences!! =) )
« Reply #186 on: July 10, 2008, 02:09:45 pm »
The pdfs you attached are rasterized so I can't get the exact measurements, but when I printed out the small CP the button holes are the correct size, 28mm. If those are correct, I would guess the rest of the thing is too.

I use FoxIt for PDF viewing but I think all the scaling options are in the print dialog which is usually controlled by the printer driver. Here's a pic of mine with page scaling set to "actual size"

It just occurred to me that there could've been confusion, if you said to print it "100% size" they might have mistaken that for 100% of the page. They should know better than that though, as 100% clearly means 1:1 scale.


Franco B

  • Trade Count: (+10)
  • Full Member
  • ***
  • Offline Offline
  • Posts: 3766
  • Last login:February 15, 2024, 09:14:06 am
Re: Franco's Custom Cocktail (UPDATE: Wood cutting commences!! =) )
« Reply #187 on: July 10, 2008, 02:28:08 pm »
Excellent. Thanks again for your help buddy  :cheers:

Ill take the images to the print shop tomorrow and Ill let you know how I get on, cheers.

Ill be taking my tape measure and a big knobbly stick with me incase they get it wrong again   :D

Twin-X

  • Trade Count: (0)
  • Full Member
  • ***
  • Offline Offline
  • Posts: 170
  • Last login:April 26, 2018, 05:59:44 pm
  • Yes this avatar was stolen too!!!
Re: Franco's Custom Cocktail (UPDATE: Wood cutting commences!! =) )
« Reply #188 on: July 10, 2008, 05:22:05 pm »
Franco,

Is it possible that you could make me a pair of stainless dustwashers like your's.
I really love them and they would fit my project well (although it will look like ---steaming pile of meadow muffin--- compared to your cocktail cab :D)

Oh and offcourse name your price.

Thanks,
Jeffry

nantom

  • Trade Count: (0)
  • Jr. Member
  • **
  • Offline Offline
  • Posts: 5
  • Last login:July 27, 2008, 11:02:25 pm
    • Nantom Arcade
Re: Franco's Custom Cocktail (UPDATE: Aluminium I/O Panel Complete)
« Reply #189 on: July 17, 2008, 04:34:48 pm »
Managed to get the panel to house the I/O components finished tonight....


Really happy with how it came out, just a shame its going to be hidden on the back of the cab, although it could go on the side though I suppose, hmm.

The eagle eyed amongst you may notice that the top of the USB hub isn't parallel to the rest of the panel, this isn't a mistake (not on my behalf anyway), the hub actually tapers about 1.5mm along its length so I had to mill a trapezoid pocket to fit it. The main thing is that the components are a good fit (a little too good in places!) I was going to araldite the components in place but I think the only one that will need it will be the VGA port.

I also got my clear buttons drilled this week. I made a hexagonal split bush to hold them on the nut whilst they are being drilled as I am going to have a fair few buttons to drill in the near future ;).....


I have all of my wood now and Its my last morning at work tomorrow (16 days off, woot!) so I PROMISE the next pictures I post will be of some kind of wood construction.  :)

Hey...kudos.  Metal working has always been a longing of mine! Looks great! Where did you get the power/switch combo?  I searched for hours looking for one just like you have!?! I had to make them separate.
« Last Edit: July 17, 2008, 04:36:44 pm by nantom »
Email me if interested in a wood cocktail cabinet

Franco B

  • Trade Count: (+10)
  • Full Member
  • ***
  • Offline Offline
  • Posts: 3766
  • Last login:February 15, 2024, 09:14:06 am
Re: Franco's Custom Cocktail (UPDATE: Wood cutting commences!! =) )
« Reply #190 on: July 18, 2008, 01:11:15 am »
Thanks. I got mine from Maplins in the UK, They have it listed as a [Fused Snap-In IEC Chassis Plug with Switch].

EDIT: Whilst I'm here, quick update.

Oh the joys of printing!  :laugh: How hard can it be to print an image out? Very hard apparently!  :dizzy:

I went back to Prontaprint (for the last time I may add) and they wanted £5 just to put my USB stick in their PC! I found a smaller print place and they only charged me a couple of quid. Once again it was a waste though as they managed to print the images the wrong size  :timebomb:

I have now found an online printing company that specialises in large format printing and they are currently printing the images for me. I have specified the exact dimensions that they need to be printed too so third forth ?? (I've lost count) time lucky!
« Last Edit: July 18, 2008, 01:18:06 am by Franco B »

BASS!

  • Just have fun.
  • Trade Count: (+1)
  • Full Member
  • ***
  • Offline Offline
  • Posts: 837
  • Last login:August 10, 2013, 03:12:33 am
Re: Franco's Custom Cocktail (UPDATE: Wood cutting commences!! =) )
« Reply #191 on: July 18, 2008, 04:26:06 pm »
Good luck buddy. I completely understand the stress of this part. I can't wait to see how this part comes along!

Sam:-)

Franco B

  • Trade Count: (+10)
  • Full Member
  • ***
  • Offline Offline
  • Posts: 3766
  • Last login:February 15, 2024, 09:14:06 am
Re: Franco's Custom Cocktail (UPDATE: Wood cutting commences!! =) )
« Reply #192 on: July 24, 2008, 10:01:58 am »
Success!!  :)


I got the images printed from www.copycentre.org and the print sizes are spot on. It cost about £7 for one A2 print and two A3 prints but that also included vat and next day recorded delivery.

The print sizes are spot on but my dimensions are a mm or two out here and there which is to be expected as the panel blanks were cut by hand. Now I know where the errors are I can correct them in AutoCAD, send Sam the changed PDFs and ask him to do his magic his end and then ill get some more B&W prints to check the corrections.

Its tempting just to get the final CPO prints from the 'corrected' drawings but I would rather spend another couple of hours + £7 to check the corrections than get it printed without checking them just for the finished CPOs not to line up correctly. At least if I know its 100% when I send it off I know it should be 100% when I get the CPOs.


javeryh

  • Trade Count: (+1)
  • Full Member
  • ***
  • Offline Offline
  • Posts: 7959
  • Last login:July 05, 2025, 03:01:54 pm
Re: Franco's Custom Cocktail (UPDATE: Wood cutting commences!! =) )
« Reply #193 on: July 24, 2008, 10:07:48 am »
Awesome!  I really love this thing.  Projects like this make me think I should start designing an "original" and see how it turns out.   :cheers:

bvicarious

  • Trade Count: (0)
  • Full Member
  • ***
  • Offline Offline
  • Posts: 131
  • Last login:April 15, 2024, 09:43:14 am
Re: Franco's Custom Cocktail (UPDATE: Wood cutting commences!! =) )
« Reply #194 on: July 24, 2008, 02:49:22 pm »
hooray

Neilyboy

  • Trade Count: (+3)
  • Full Member
  • ***
  • Offline Offline
  • Posts: 501
  • Last login:November 09, 2024, 08:46:40 am
  • what day is it...
Re: Franco's Custom Cocktail (UPDATE: Wood cutting commences!! =) )
« Reply #195 on: July 24, 2008, 03:57:13 pm »
hell yes franco this thing is flipping awesome!!! serious skill man.. wish i had axx to a machine shop that can machine metals like that.. I love the metal below the buttons..

neil

Franco B

  • Trade Count: (+10)
  • Full Member
  • ***
  • Offline Offline
  • Posts: 3766
  • Last login:February 15, 2024, 09:14:06 am
Re: Franco's Custom Cocktail (UPDATE: Wood cutting commences!! =) )
« Reply #196 on: July 24, 2008, 07:19:00 pm »
Thanks for the kind words guys.

I really do want to get at least one part 100% finished for the moment, hence trying to get the CPs finished. There still is one hundred and one things floating around my head to do to get them finished to the standard I want but we are slowly getting there. I don't know if I'm anal or lazy, or a mix between the two.

I really don't want to bump my own thread for the sake of it, thats why im trying to only post with an update. I dont want you guys to think im not replying. I will bump my thread if there is something to answer you guys but I dont want to post (and bump) for the sake of it.

Thanks for looking. I'm hoping to show something quite worthy soon.

Bender

  • Trade Count: (+1)
  • Full Member
  • ***
  • Offline Offline
  • Posts: 1919
  • Last login:November 28, 2016, 08:12:21 pm
    • Happ to Tron Conversion tutorial
Re: Franco's Custom Cocktail (UPDATE: Wood cutting commences!! =) )
« Reply #197 on: September 24, 2008, 10:22:58 am »
hi franco

do those hinges have a centered pivot point?
most of the hinges I've found for cabinets are off center pivots


Stub

  • Trade Count: (0)
  • Full Member
  • ***
  • Offline Offline
  • Posts: 155
  • Last login:July 08, 2024, 10:48:14 am
  • Sensory Overload
Re: Franco's Custom Cocktail (UPDATE: Wood cutting commences!! =) )
« Reply #198 on: September 24, 2008, 10:41:28 am »
I use the same ones. When he fully extends the hinge the door and the board its attached to will be in line with each other. Is that what you were asking?
« Last Edit: September 24, 2008, 10:44:54 am by Stub »

Franco B

  • Trade Count: (+10)
  • Full Member
  • ***
  • Offline Offline
  • Posts: 3766
  • Last login:February 15, 2024, 09:14:06 am
Re: Franco's Custom Cocktail (UPDATE: Wood cutting commences!! =) )
« Reply #199 on: September 24, 2008, 11:50:23 am »
What he said (if thats what you want to know).

By the way, this project is in no way, shape or form dead. Sam who was doing my artwork for me has been unable to carry on with the graphics due to work commitments but thatitalian has kindly offered to carry on with the CP graphics for me :)

Im not going to be doing a lot on this project whilst I get the juke finished but I want to get the graphics sent on for printing asap.

thatitalian

  • Don't worry about the chicken, I feed my friends human all the time...
  • Trade Count: (0)
  • Full Member
  • ***
  • Offline Offline
  • Posts: 887
  • Last login:March 27, 2018, 10:52:37 am
  • The Revolution Is Coming...
Re: Franco's Custom Cocktail (UPDATE: Wood cutting commences!! =) )
« Reply #200 on: September 24, 2008, 11:54:07 am »
I'm just happy to be a part of a MAMEY winning project! (you know this blatantly will win one when it is finished!) :cheers: :applaud: :notworthy:

venkman

  • Trade Count: (0)
  • Full Member
  • ***
  • Offline Offline
  • Posts: 145
  • Last login:January 28, 2013, 02:44:28 am
Re: Franco's Custom Cocktail (UPDATE: Wood cutting commences!! =) )
« Reply #201 on: October 07, 2008, 05:09:28 am »
this cabinet looks like it'll be pimp!

very impressive finishing already with the leds, metal and professional graphics.  :applaud:

Franco B

  • Trade Count: (+10)
  • Full Member
  • ***
  • Offline Offline
  • Posts: 3766
  • Last login:February 15, 2024, 09:14:06 am
Re: Franco's Custom Cocktail (UPDATE: Wood cutting commences!! =) )
« Reply #202 on: October 07, 2008, 05:54:13 am »
Thanks for the kind works. Not so sure about the mamey tho!!

I cant really take any credit for the artwork, I have Sam (uprightbass360) to thank for that. Im currently waiting for him to mail a DVD with the artwork on it to me so that I can send it on for thatitallain to finish.

I really am looking forward to getting on with this project, I just need to get pinky out the way first.

I have had an idea for a related project that I am REALLY excited about, mountain has kindly agreed to post some components over from the US to me for it. Ill probably get this secondary project finished before the cocktail as I really want to see what it (or should that be they ;)) look like.

I hope to have some progress pics of the cocktail before too long. I think im just going to do a reveal for the secondary project tho and then post build pics if people are interested.

bfauska

  • Trade Count: (+2)
  • Full Member
  • ***
  • Offline Offline
  • Posts: 1372
  • Last login:April 15, 2025, 10:49:31 pm
  • "You're not wrong Walter, you're just an @##hole!"
Re: Franco's Custom Cocktail (UPDATE: Wood cutting commences!! =) )
« Reply #203 on: December 11, 2008, 06:08:06 pm »
HEY!!! It's a lovely pink juke you have going and all, but what happened here? Some of us needy folk are feeling a little blue-balled. Such sexy progress for so long and then nothing. It's bad enough that we all hate you for your bad-ass skills, but now we can hate you for leaving us out in the cold too.


Ok, sorry about all the anger and hate speak, but this build is like a drug. We need our fix man. >:D


 ;)  :cheers:

Franco B

  • Trade Count: (+10)
  • Full Member
  • ***
  • Offline Offline
  • Posts: 3766
  • Last login:February 15, 2024, 09:14:06 am
Re: Franco's Custom Cocktail (UPDATE: Wood cutting commences!! =) )
« Reply #204 on: December 12, 2008, 04:10:38 am »
He, he  :)

Yeah Pinky is kinda holding me up at the moment, I can't wait to get cracking on it again in the new year. I probably wont be working on it until about February purely because I have even less space here now that my GF has moved in with me and my parents. Were  getting our own place in February so I'm probably going to be putting it on hold until then. I've learnt a few things since working on Pinky and I'm going to pretty much redo everything except from the CPs and table top.

I do have a relating smaller project that I will be revealing soon after Xmas though ;)

Thanks for the interest  :cheers:

Kaytrim

  • I'm too nice a guy
  • Trade Count: (+4)
  • Full Member
  • ***
  • Offline Offline
  • Posts: 2095
  • Last login:September 22, 2015, 04:11:30 pm
Re: Franco's Custom Cocktail (UPDATE: Wood cutting commences!! =) )
« Reply #205 on: February 10, 2009, 03:34:54 pm »
Looking for some progress updates.  Just love the metal working that is going into this case.

TTFN  :cheers:
Michael

Franco B

  • Trade Count: (+10)
  • Full Member
  • ***
  • Offline Offline
  • Posts: 3766
  • Last login:February 15, 2024, 09:14:06 am
Re: Franco's Custom Cocktail (UPDATE: Wood cutting commences!! =) )
« Reply #206 on: February 11, 2009, 01:55:05 am »
Nothing major to report I'm afraid bud. There's a couple of projects I need to get finished first before I start work again on her. Pinky is obv priority #1, The next thing I'm going to do is make those two wireless CPs for 360/MAME. I'm desperate to get some kind of controller done as I have been MAMEless for over two years now  :'(. When those are done I'm going to finish off a rather special relating project and then get back on with the cocktail.

As I said apart from the CPs and table top I'm pretty much going to redo the rest and use some laminate to protect what has become a rather expensive project in time and expense. I was originally going to use vinyl but it just wont be hard wearing enough to protect it over time.

I'm eager to get it finished though as our new place has a nice living room and it has the perfect space for the table.

Thanks for the interest  :cheers:


dkssprs

  • Trade Count: (0)
  • Full Member
  • ***
  • Offline Offline
  • Posts: 205
  • Last login:February 23, 2023, 01:32:26 pm
    • Bub & Bob's BARTOP
Re: Franco's Custom Cocktail (UPDATE: Wood cutting commences!! =) )
« Reply #207 on: February 11, 2009, 06:59:19 am »
This project cant be true!!!!!! I am really amazed of this projects precicion talking about the parts.I am amazed with all the custom metal parts especially with the custom metal panel (on/off usb). Really great work Franco. I am making my cab using only this
You must feel great having all those tools.Of course tools isnt everything....you must love what you are doing ...and i am sure you are.

Again really impressed and a little bit jelious (with the good way  :cry:)

Franco B

  • Trade Count: (+10)
  • Full Member
  • ***
  • Offline Offline
  • Posts: 3766
  • Last login:February 15, 2024, 09:14:06 am
Re: Franco's Custom Cocktail (UPDATE: Wood cutting commences!! =) )
« Reply #208 on: February 11, 2009, 08:32:13 am »
Thanks for the kind words :)

I'm just lucky that I have access to the machine tools at work. Everyone on the forum seems to have a talent that they can apply to their build. I'm seriously in awe of some of the projects that get built and I would love to have some of the woodwork, artwork, programming and other talents that I see applied.

One area I really want to concentrate on is my woodwork. Up to now I have only had a couple of basic tools and no real area to work in. Once I have moved into our new place I'm going to set up a workshop in the garage and invest in some decent tooling to play with. I've been planning some jigs, templates and fixtures so I can start knocking more projects out easier and to a higher standard. I also want to start to learn some artwork programs so I can start developing my own artwork.

So much to do, so little time to do it in! :)

Bender

  • Trade Count: (+1)
  • Full Member
  • ***
  • Offline Offline
  • Posts: 1919
  • Last login:November 28, 2016, 08:12:21 pm
    • Happ to Tron Conversion tutorial
Re: Franco's Custom Cocktail (UPDATE: Wood cutting commences!! =) )
« Reply #209 on: February 11, 2009, 12:35:58 pm »

So much to do, so little time to do it in! :)

Amen! Brother!

thatitalian

  • Don't worry about the chicken, I feed my friends human all the time...
  • Trade Count: (0)
  • Full Member
  • ***
  • Offline Offline
  • Posts: 887
  • Last login:March 27, 2018, 10:52:37 am
  • The Revolution Is Coming...
Re: Franco's Custom Cocktail (UPDATE: Wood cutting commences!! =) )
« Reply #210 on: February 11, 2009, 12:42:21 pm »
I also want to start to learn some artwork programs so I can start developing my own artwork.

Hey hey hey, wait a darn minute! We have enough artists in this place already, we don't need the likes of you coming in here and messing it up for the rest of us! >:D ;D :P :laugh2:

Are you planning on making your art out of metal?...............

Just a suggestion..... ;)

Franco B

  • Trade Count: (+10)
  • Full Member
  • ***
  • Offline Offline
  • Posts: 3766
  • Last login:February 15, 2024, 09:14:06 am
Re: Franco's Custom Cocktail (UPDATE: Wood cutting commences!! =) )
« Reply #211 on: May 20, 2009, 05:05:25 am »
Well, its been a while so I thought we had better have some kind of update.

We have finally moved into our new place and its so awesome to have our own place. The property has a single garage and I've put a fair bit of time setting up a workshop in there. Here's a couple of pics in case you are interested.


The garage was a right mess when I moved in. It was full of concrete dust and was a general state. It only had one light bulb and a single power point so I put in a couple of strip lights and two more double sockets. I also painted the floor to keep the dust down and make it it easier to sweep up. It was a nightmare when trying to sweep the floor as it just brought up more and more concrete dust which doesn't taste nice.

I've put in a workbench that my GF bought me for my birthday. I put a piece of kitchen worktop on it to give a more durable work surface and it also allowed me to over hang a vice on the end.

I installed my pillar drill on a platform to get it to a decent work height and also made a platform for my mitresaw and scroll saw.

Everyone needs some tunes whilst they work so I put up some speakers and attached an amp to the bottom of the workbench draw. I have an Ipod dock attached to the workbench and there is a radio too that I can hook up.

Ive also been working on my dual router table. Here's a couple of pics.


Its not fully finished yet but its operational for what I need right now. I still need to add a rear fence, front mitre fence and some storage draws. The two top pieces are hinged and the router swing upwards though a recess in the lower top piece for easy tool/height changing. I have a load of construction pics that I'm going to post in the BYO router table thread once I have a couple of more bits done on it.

Now for a little actual project update.

Ond came up with an awesome idea for button lighting, this is a pic from his awesome [Retro-Futuristic cab build]


I thought they looked awesome and I asked him if he minded if I had a go at some myself and he said that was cool so I thought I would try to make some similar ones.

Here's what I've been up to so far:


I thought a stainless button top and a stainless casing bezel would look pretty nice so I made a set. I also made a set out of brass and you can also see two brass/stainless variations.

I'm going to remove the casing bezel from some Happ buttons I have and swap if for the new ones. I'm also going to swap the center button part out a la' Ond and light a translucent disc.

Fingers crossed I should have some finished button pics later.

mountain

  • Trade Count: (+9)
  • Full Member
  • ***
  • Offline Offline
  • Posts: 1205
  • Last login:January 29, 2025, 08:31:47 am
    • Mountain Jukeboxes
Re: Franco's Custom Cocktail (UPDATE: Wood cutting commences!! =) )
« Reply #212 on: May 20, 2009, 09:27:15 am »
The garage looks good Franco. You should finally be able to turn out some good work.  >:D ;D

Seriously, those buttons look too damn cool. How do they feel when using them?

Kaytrim

  • I'm too nice a guy
  • Trade Count: (+4)
  • Full Member
  • ***
  • Offline Offline
  • Posts: 2095
  • Last login:September 22, 2015, 04:11:30 pm
Re: Franco's Custom Cocktail (UPDATE: Wood cutting commences!! =) )
« Reply #213 on: May 20, 2009, 09:43:04 am »
I was wondering how things were going for you Franco.  Nice little shop setup and it is even bigger then mine. :hissy:  Now that your shop is setup let's see some progress on your projects. :pics

Michael

drventure

  • Trade Count: (+2)
  • Full Member
  • ***
  • Offline Offline
  • Posts: 4152
  • Last login:April 23, 2024, 06:53:06 pm
  • Laser Death Ray Bargain Bin! Make me an offer!
Re: Franco's Custom Cocktail (UPDATE: Wood cutting commences!! =) )
« Reply #214 on: May 20, 2009, 10:21:25 am »
Wow. Those buttons look incredible!

Hmm, Wonder what they would look like with a very lightly etched pattern, or maybe laser engraved.....


Franco B

  • Trade Count: (+10)
  • Full Member
  • ***
  • Offline Offline
  • Posts: 3766
  • Last login:February 15, 2024, 09:14:06 am
Re: Franco's Custom Cocktail (UPDATE: Wood cutting commences!! =) )
« Reply #215 on: May 20, 2009, 03:46:36 pm »
The garage looks good Franco. You should finally be able to turn out some good work.  >:D ;D

Seriously, those buttons look too damn cool. How do they feel when using them?

Cheers bud. They feel stock to me although I haven't been able to have a good thrashing with them.  They do feel kinda more slinky though :)

I was wondering how things were going for you Franco.  Nice little shop setup and it is even bigger then mine. :hissy:  Now that your shop is setup let's see some progress on your projects. :pics

Michael

Hey buddy, long time no speak! I don't get much time to get on MSN anymore, I'm normally too busy in my home, cough, garage :P

I though all you guys had 17 acre garages over there? :P

I've got those button bezels we were talking about into production now. There are some pics etc [here] if you are still interested.

There should be lots of progress on all front now I have my garage set up, this latest addition has really spurred me on :)


Wow. Those buttons look incredible!

Hmm, Wonder what they would look like with a very lightly etched pattern, or maybe laser engraved.....

Cheers fella. I am planning on a little extra something for the buttons. I'm hoping to get Pongo to make me some vinyl space invader transfers for them. For the top row of each 3x3 array I'm thinking of having one spacie in its two frames of animation (up, down up) and then on the lower row have the next style of spacie but alternating its frames (down, up, down).

Lazer engraving would be pretty damn cool but its not something I can easily do on site, we I have a dot matrix machine available but its not suitable, I may look into it though, thanks.

Ok, I made a little more progress today....

The only 'Happ' style buttons I have are some clear Completions and some vertical blue Ultimates. I've started experimenting with these for now.

I used a lathe to face the existing casing bezel off the buttons to leave a nice flat and concentric face.


These are the resulting buttons:


As you can see I made two versions of each button, one with the casing bezel completely removed and one leaving ~1.5mm of the material.

This is a side view of the button with the stainless bezel and plunger insert in place:


Removing the materail completely will give a result similar to Onds with the inner part of the button lit. Leaving a slight shoulder will allow two things:

1) When using a solid colour it will give a contrasting band of colour when used in conjunction with the stainless/brass parts. These are a couple of examples of the mix and match styles that could be achieved:


2) When using a clear button the remaining shoulder should also light up giving a second outer ring of light (more of this in a minute)

I also faced ~6mm of the front of the stock buttons as the stainless/brass plunger inserts are 3mm thick and the mounting/diffuser disc I'm using will also be 3mm thick. I did have a photo of this but I seem to have lost it  :-\

Ok, onto the mounting etc:

To attach the SS/brass inserts to the stock plungers I made a mounting/refractind disc similar to Onds by making a SS tempate and then using that to template route the disc.


I only have clear Acrylic so I used some 320 grit emery to roughen up the edges and sides to give the light something to refract off.


I also gave the clear shouldered button some 320 treatment to help the light refract:


I used Araldyte to attach the disc to the plunger and then the inserts to the discs. Then it was play time :)

As the buttons are clear I would lose a lot of light so I wrapped some electrical tape round them for now, when I do the real thing I'll spray paint the inside of the buttons. (I realise I dint cover the bottom, I was just too eager to see how they looked ;D)

Ok, clear button, stainless casing bezel and stainless button and blue led:


That for me right there is the money shot ;D The pictures have come out a little funny but the blue light is a really rich blue and IMO it looks awesome with the stainless.

I also tried the brass parts with a yellow LED to see how it would look (cough, somunny, cough!)


I think I have red, green and pink LEDs, let me know if you want to see any other combos.

mountain

  • Trade Count: (+9)
  • Full Member
  • ***
  • Offline Offline
  • Posts: 1205
  • Last login:January 29, 2025, 08:31:47 am
    • Mountain Jukeboxes
Re: Franco's Custom Cocktail (UPDATE: Wood cutting commences!! =) )
« Reply #216 on: May 20, 2009, 04:09:02 pm »
Thats it! The Fantasy cab is officially back on because of those stainless/blue buttons  :angry:

Beautiful!

javeryh

  • Trade Count: (+1)
  • Full Member
  • ***
  • Offline Offline
  • Posts: 7959
  • Last login:July 05, 2025, 03:01:54 pm
Re: Franco's Custom Cocktail (UPDATE: Wood cutting commences!! =) )
« Reply #217 on: May 20, 2009, 04:31:47 pm »
Totally SICK.   :dizzy:  :dizzy:  :dizzy:

I wonder what a black Happs button would look like lit up like that.  The Woody cab I'm building (or, um, not building at the moment) is set to receive all black buttons on the CP.  I've always wanted to try some lighting - maybe something cool can be done?  Do they make "blacklight LEDS" or something like that?   :cheers:

Kaytrim

  • I'm too nice a guy
  • Trade Count: (+4)
  • Full Member
  • ***
  • Offline Offline
  • Posts: 2095
  • Last login:September 22, 2015, 04:11:30 pm
Re: Franco's Custom Cocktail (UPDATE: Wood cutting commences!! =) )
« Reply #218 on: May 20, 2009, 04:38:55 pm »
Totally SICK.   :dizzy:  :dizzy:  :dizzy:

I wonder what a black Happs button would look like lit up like that.  The Woody cab I'm building (or, um, not building at the moment) is set to receive all black buttons on the CP.  I've always wanted to try some lighting - maybe something cool can be done?  Do they make "blacklight LEDS" or something like that?   :cheers:

Yes there are UV LEDs available but they are not as bright as the normal LEDs.  If some UV reactive plastic could be used it would be really cool.

thatitalian

  • Don't worry about the chicken, I feed my friends human all the time...
  • Trade Count: (0)
  • Full Member
  • ***
  • Offline Offline
  • Posts: 887
  • Last login:March 27, 2018, 10:52:37 am
  • The Revolution Is Coming...
Re: Franco's Custom Cocktail (UPDATE: Wood cutting commences!! =) )
« Reply #219 on: May 20, 2009, 05:41:37 pm »
HOLY ---steaming pile of meadow muffin---!

drventure

  • Trade Count: (+2)
  • Full Member
  • ***
  • Offline Offline
  • Posts: 4152
  • Last login:April 23, 2024, 06:53:06 pm
  • Laser Death Ray Bargain Bin! Make me an offer!
Re: Franco's Custom Cocktail (UPDATE: Wood cutting commences!! =) )
« Reply #220 on: May 20, 2009, 06:06:14 pm »
Wow. Just Wow.  :applaud:

I like the blue, love the gold (or yellow, whatever)

You've totally put my little painted buttons to shame  :angry:

BASS!

  • Just have fun.
  • Trade Count: (+1)
  • Full Member
  • ***
  • Offline Offline
  • Posts: 837
  • Last login:August 10, 2013, 03:12:33 am
Re: Franco's Custom Cocktail (UPDATE: Wood cutting commences!! =) )
« Reply #221 on: May 20, 2009, 09:01:00 pm »
Ok, now I have something to work for. You still need some spacey art franco (I am switching jobs soon, and my girlfriend is finally able to help me do school. Free time is here!!!

Bender

  • Trade Count: (+1)
  • Full Member
  • ***
  • Offline Offline
  • Posts: 1919
  • Last login:November 28, 2016, 08:12:21 pm
    • Happ to Tron Conversion tutorial
Re: Franco's Custom Cocktail (UPDATE: Wood cutting commences!! =) )
« Reply #222 on: May 20, 2009, 09:18:46 pm »
Jeezzzzusssssss!!!!!!!  :cheers: :cheers: :cheers:

those are hands down the most bad a$* buttons I have ever seen!

and fast too Ond just posted that yesterday, DAMN!
« Last Edit: May 20, 2009, 09:30:46 pm by Bender »

Ond

  • Trade Count: (0)
  • Full Member
  • ***
  • Offline Offline
  • Posts: 2353
  • Last login:July 10, 2025, 08:06:51 am
Re: Franco's Custom Cocktail (UPDATE: Wood cutting commences!! =) )
« Reply #223 on: May 20, 2009, 10:02:24 pm »
Very nice!   :applaud:  These are definitely a very cool improvement on my idea, there's just something about metal and the LED glow/backlit look that really works. 

I have another idea involving optic fibre and stuff, but hey I’ve gotta have something up my sleeve!  ;D.

Franco your metal work skills are a real asset, not just for yourself but for the DIY cab hobby in general. 

 :cheers:

Ond

Franco B

  • Trade Count: (+10)
  • Full Member
  • ***
  • Offline Offline
  • Posts: 3766
  • Last login:February 15, 2024, 09:14:06 am
Re: Franco's Custom Cocktail (UPDATE: Wood cutting commences!! =) )
« Reply #224 on: May 21, 2009, 03:33:24 pm »
The garage looks good Franco. You should finally be able to turn out some good work.  >:D ;D

Seriously, those buttons look too damn cool. How do they feel when using them?

Cheers buddy. I gauged the actuation weight of the modified button compared to the stock one (using the same micro) and there is less than 9% difference between the two. You can't feel the difference in the button but somehow it feels a little more slinky ;)

That's it! The Fantasy cab is officially back on because of those stainless/blue buttons  :angry:

Beautiful!

Woot! That's great news, I was sooo hoping you didn't end up selling it.

Totally SICK.   :dizzy:  :dizzy:  :dizzy:

I wonder what a black Happs button would look like lit up like that.  The Woody cab I'm building (or, um, not building at the moment) is set to receive all black buttons on the CP.  I've always wanted to try some lighting - maybe something cool can be done?  Do they make "blacklight LEDS" or something like that?   :cheers:

I think black happs buttons would look awesome. Obv you wouldn't have the lower lit ring but they would look pretty damn nice with any colour. For some reason I'm thinking black buttons with white LEDs on a monochrome style cab would be pretty cool 8)

Wow. Just Wow.  :applaud:

I like the blue, love the gold (or yellow, whatever)

You've totally put my little painted buttons to shame  :angry:

Cheers fella. I have you and Ond to thank for the initial idea. I did think about making SS buttons a while ago but that's when I was thinking of solid SS buttons. It was only after seeing Onds pics that I got the idea for the SS plunger and casing bezel  :cheers:

Ok, now I have something to work for. You still need some spacey art franco (I am switching jobs soon, and my girlfriend is finally able to help me do school. Free time is here!!!

That's great news Sam, I know how busy you have been with things. We'll have to catch up soon :)

Jeezzzzusssssss!!!!!!!  :cheers: :cheers: :cheers:

those are hands down the most bad a$* buttons I have ever seen!

and fast too Ond just posted that yesterday, DAMN!

Ha! Cheers bud. No they didn't take long, I had the profiles done in CAD not long after Ond has posted and I got the prototypes done the next morning.  :laugh:

Very nice!   :applaud:  These are definitely a very cool improvement on my idea, there's just something about metal and the LED glow/backlit look that really works. 

I have another idea involving optic fibre and stuff, but hey I’ve gotta have something up my sleeve!  ;D.

Franco your metal work skills are a real asset, not just for yourself but for the DIY cab hobby in general. 

 :cheers:

Ond


Cheers dude. I'm a sucker for SS and LEDs and combining them to me just makes it 100x better :)

Keep up the good work  :cheers:

The Seimitsu PS-14-KN clears are next on my list to do. I have the 14-K's rather than the KN in this pic but they should both be moddable.


These have proved to be a bit of a pain and I nearly thought they would be impossible due to their small size and how they function but I think I have come up with a solution for them.

I've got the parts designs in CAD and I have written the programs in notepad so they are ready to transfer tomorrow. Fingers crossed if yesterdays progress is anything to go by I should have some finished pictures tomorrow  :cheers:

Kaytrim

  • I'm too nice a guy
  • Trade Count: (+4)
  • Full Member
  • ***
  • Offline Offline
  • Posts: 2095
  • Last login:September 22, 2015, 04:11:30 pm
Re: Franco's Custom Cocktail (UPDATE: Wood cutting commences!! =) )
« Reply #225 on: May 21, 2009, 04:07:40 pm »
Franco,

what would be really cool is if you could replace the inner plunger with a translucent version the same color as the button itself.  The stock inner plunger is opaque and blocks the light from the LED.

Michael

mahalos

  • Trade Count: (0)
  • Full Member
  • ***
  • Offline Offline
  • Posts: 63
  • Last login:May 29, 2017, 06:21:53 pm
Re: Franco's Custom Cocktail (UPDATE: Wood cutting commences!! =) )
« Reply #226 on: May 25, 2009, 09:53:05 pm »
Clearly there's a little bit too much skill and finesse going on here, so i thought i 'd show you all how to get things done.....with no skill, or finesse for that matter...

Behold the lit buttons!!!!


and behold the lack of skill and finesse!!!


truly stuff of legend Franco.....well done :applaud:

retrofuture

  • Trade Count: (0)
  • Full Member
  • ***
  • Offline Offline
  • Posts: 217
  • Last login:August 24, 2022, 12:41:44 pm
    • RetroFuture
Re: Franco's Custom Cocktail (UPDATE: Wood cutting commences!! =) )
« Reply #227 on: July 22, 2009, 06:33:09 pm »


I'm a likin' the Daft Punk frame.

The cocktail's looking absolutely fantastic. Well done  :notworthy:

Why does my garage look more like a bombsite than a beautifully crafted workspace? Oh, that would be my kids  :dizzy:
The future isn't what it used to be.

Xevious BartopRetroFuture

Franco B

  • Trade Count: (+10)
  • Full Member
  • ***
  • Offline Offline
  • Posts: 3766
  • Last login:February 15, 2024, 09:14:06 am
Re: Franco's Custom Cocktail (UPDATE: Wood cutting commences!! =) )
« Reply #228 on: July 23, 2009, 04:03:22 am »
He he, thanks.

I made them a few years ago using a program called [Rasterbater]. It takes a small picture and turns it into a raster image. You can then choose how big you want the image to be and it blows it up and creates a PDF for you to print out. Its generally used to make huge wall size posters etc but I quite like the effect and didnt want a huge picture so I just used it to make some 50mm squares and spaced them out slightly.


After we moved house we didn't really have anywhere to put them so I put them up in the garage.

Have a look at the [Rasterbator Gallery] for some other rasterbations :)

thatitalian

  • Don't worry about the chicken, I feed my friends human all the time...
  • Trade Count: (0)
  • Full Member
  • ***
  • Offline Offline
  • Posts: 887
  • Last login:March 27, 2018, 10:52:37 am
  • The Revolution Is Coming...
Re: Franco's Custom Cocktail (UPDATE: Wood cutting commences!! =) )
« Reply #229 on: July 23, 2009, 04:27:22 am »
I knew you were a rasterbater!!!  :D

retrofuture

  • Trade Count: (0)
  • Full Member
  • ***
  • Offline Offline
  • Posts: 217
  • Last login:August 24, 2022, 12:41:44 pm
    • RetroFuture
Re: Franco's Custom Cocktail (UPDATE: Polished Aluminium Air Vents)
« Reply #230 on: July 23, 2009, 05:25:12 pm »


Now, I want a garage like this  ;D

What line of business is your company in Franco?
The future isn't what it used to be.

Xevious BartopRetroFuture

Encryptor

  • Trade Count: (+34)
  • Full Member
  • ***
  • Offline Offline
  • Posts: 1287
  • Last login:December 21, 2023, 08:01:18 pm
Re: Franco's Custom Cocktail (UPDATE: Wood cutting commences!! =) )
« Reply #231 on: July 23, 2009, 05:48:29 pm »
Franco B,

What exactly is the purpose of your dual router? Just so you don't have to change bits on the router each time? Just curious.


Encryptor

spacies

  • Trade Count: (0)
  • Full Member
  • ***
  • Offline Offline
  • Posts: 934
  • Last login:February 19, 2015, 03:40:49 am
Re: Franco's Custom Cocktail (UPDATE: Wood cutting commences!! =) )
« Reply #232 on: July 30, 2009, 02:31:18 pm »
Tell me it ain't so!

Franco B

  • Trade Count: (+10)
  • Full Member
  • ***
  • Offline Offline
  • Posts: 3766
  • Last login:February 15, 2024, 09:14:06 am
Re: Franco's Custom Cocktail (UPDATE: Wood cutting commences!! =) )
« Reply #233 on: July 30, 2009, 02:54:36 pm »
Howdy spacies, long time no see bud! Hows things?  :)

Yeah its just to save swapping bits all of the time. A lot of the time I'm just using a 1/4" template bit and a 3.2mm roundover bit for a lot of the production stuff I make and its a pain having to swap bits and accurately set the tool height each time. I just had to do 175 dustwashers for an expo over here and It would have been a nightmare swapping bits for each one. It was much easier having the two set up as I could get them done much faster.

The table isnt quite finished as yet. I still have to make a micro adjustable rear fence and a front mitre fence guide but its serving its purpose at the moment.

spacies

  • Trade Count: (0)
  • Full Member
  • ***
  • Offline Offline
  • Posts: 934
  • Last login:February 19, 2015, 03:40:49 am
Re: Franco's Custom Cocktail (UPDATE: Wood cutting commences!! =) )
« Reply #234 on: July 31, 2009, 04:54:04 am »
Howdy spacies, long time no see bud! Hows things?  :)


Things is good bro. Those buttons are VERY SLICK man. I want!  :dizzy:
Had a little chuckle when I logged in and saw your thread. I was expecting to see you playing!  :P

Kaytrim

  • I'm too nice a guy
  • Trade Count: (+4)
  • Full Member
  • ***
  • Offline Offline
  • Posts: 2095
  • Last login:September 22, 2015, 04:11:30 pm
Re: Franco's Custom Cocktail (UPDATE: Wood cutting commences!! =) )
« Reply #235 on: September 01, 2009, 11:41:08 am »
One final necro bump.

Micahel

Franco B

  • Trade Count: (+10)
  • Full Member
  • ***
  • Offline Offline
  • Posts: 3766
  • Last login:February 15, 2024, 09:14:06 am
Re: Franco's Custom Cocktail (UPDATE: Wood cutting commences!! =) )
« Reply #236 on: September 01, 2009, 12:18:41 pm »
Damn you and your encouragement (x2)  :D

I've just come back to work today after two weeks on the sick with some severe dental pain but all is good now :)

Well I'm kinda stuck on this one at the moment as I don't really have anywhere to put it once its completed now after buying a few other cabs.

This one is on permanent hold for now  :'(

KissMyWookie

  • Trade Count: (0)
  • Full Member
  • ***
  • Offline Offline
  • Posts: 94
  • Last login:September 18, 2014, 04:57:34 pm
Re: Franco's Custom Cocktail (UPDATE: Wood cutting commences!! =) )
« Reply #237 on: September 02, 2009, 10:22:59 pm »
I'll do you a huge favor and let you keep it at my place ... just until you have some more room at home ;)

Seriously, it's a shame, because I love to see what new details you've been coming up with for this project. It's a work of art so far.

Franco B

  • Trade Count: (+10)
  • Full Member
  • ***
  • Offline Offline
  • Posts: 3766
  • Last login:February 15, 2024, 09:14:06 am
Re: Franco's Custom Cocktail (UPDATE: Wood cutting commences!! =) )
« Reply #238 on: September 03, 2009, 05:02:44 pm »
Thanks Wookie :)

Don't worry, it WILL get completed. Me and the GF have been thinking about building a gameroom onto the back of my garage and If we do it will take pride of place :)

I have tons more ideas planned for it that I haven't posted yet and I'm really keen to implement them.