Main Restorations Software Audio/Jukebox/MP3 Everything Else Buy/Sell/Trade
Project Announcements Monitor/Video GroovyMAME Merit/JVL Touchscreen Meet Up Retail Vendors
Driving & Racing Woodworking Software Support Forums Consoles Project Arcade Reviews
Automated Projects Artwork Frontend Support Forums Pinball Forum Discussion Old Boards
Raspberry Pi & Dev Board controls.dat Linux Miscellaneous Arcade Wiki Discussion Old Archives
Lightguns Arcade1Up Try the site in https mode Site News

Unread posts | New Replies | Recent posts | Rules | Chatroom | Wiki | File Repository | RSS | Submit news


Author Topic: The Avrus Arcade Project "Conquest" [4 player, 3 TB, 2 spinner] (WiP)  (Read 18041 times)

0 Members and 1 Guest are viewing this topic.

Avrus

  • Trade Count: (0)
  • Full Member
  • ***
  • Offline Offline
  • Posts: 400
  • Last login:September 07, 2011, 09:17:25 pm
  • Canada
    • The Avrus Arcade Project 'Conquest'
I couldn't come up with a decent title, so that seemed appropriate enough.

Basing most of this out of the Project Arcade book of course.

This is my first attempt at a cab, so far so good.

I've started up a project log at avrus.blogspot.com to detail the work and provide photos and costs along the way.  

The project will be a 4 player cab with three trackballs, 2 spinners, 1 dedicated 4 way.  I'm sure the first reaction of most people is to cringe at the thought of 3 trackballs, but Rampart was one of my favorite games (I'm probably one of the few people) and myself and 2 good friends spent a great deal of money playing it.

The 4 player because I have bi-weekly poker games at my house (for the past 2 years) and it'd be nice for those who get knocked out and may not want to buy in to get some classic arcade gaming going.

My one good friend is employed in the field of CAD so he's taken up the work on the CP so that it's organized and no finger breaking will occur.  The cabinet will be based on Lusid's design with some modifications.
« Last Edit: August 11, 2010, 07:30:17 pm by Avrus »
______________________________
'Conquest' upright 4 player arcade project log:
http://avrus.blogspot.com/

leapinlew

  • Some questionable things going on in this room with cheetos
  • Trade Count: (+4)
  • Full Member
  • ***
  • Offline Offline
  • Posts: 7919
  • Last login:Today at 11:06:50 am
Re: The Avrus Arcade Project
« Reply #1 on: August 29, 2007, 01:46:46 am »
Ouch... that price tag is hurting already.

So the joystick version of Rampart doesn't work for you?

Austin.Wolff

  • Trade Count: (+4)
  • Full Member
  • ***
  • Offline Offline
  • Posts: 210
  • Last login:February 04, 2011, 03:53:32 pm
Re: The Avrus Arcade Project
« Reply #2 on: August 29, 2007, 01:52:29 am »
Klipsch Promedia 2.1 THX speakers

O_O

Pacman will never be the same...

Avrus

  • Trade Count: (0)
  • Full Member
  • ***
  • Offline Offline
  • Posts: 400
  • Last login:September 07, 2011, 09:17:25 pm
  • Canada
    • The Avrus Arcade Project 'Conquest'
Re: The Avrus Arcade Project
« Reply #3 on: August 29, 2007, 02:08:03 am »
Ouch... that price tag is hurting already.

So the joystick version of Rampart doesn't work for you?

Well there's not much left on the price tag except for the LED lights for the coin door and the 3 trackballs.  Pretty much just need to assemble at this point. 

Joystick Rampart would be like using an 8 way for Pacman.  It's just not the same and those who know better, know better.

Also, joystick rampart is awful.  Keep in mind it's not "just" for Rampart.  The trackballs will be great for the many shooter games and sports games as well. 

Klipsch Promedia 2.1 THX speakers

O_O

Pacman will never be the same...

Lol.  Since I was investing so much time and money into it, it's going to double as a jukebox while poker is on.  The interface and trackball should add some nice nostalgia for scrolling through the songs.
« Last Edit: August 29, 2007, 02:09:42 am by Avrus »
______________________________
'Conquest' upright 4 player arcade project log:
http://avrus.blogspot.com/

leapinlew

  • Some questionable things going on in this room with cheetos
  • Trade Count: (+4)
  • Full Member
  • ***
  • Offline Offline
  • Posts: 7919
  • Last login:Today at 11:06:50 am
Re: The Avrus Arcade Project
« Reply #4 on: August 29, 2007, 02:25:03 am »
While not the arcade experience, me and my buddies loved Rampart on the NES. Good luck with your build, I'll be checking it out.

TheDriver

  • Trade Count: (0)
  • Full Member
  • ***
  • Offline Offline
  • Posts: 208
  • Last login:December 21, 2008, 04:08:37 pm
Re: The Avrus Arcade Project
« Reply #5 on: August 29, 2007, 03:04:09 am »
Good luck with the build. ;)

Kaytrim

  • I'm too nice a guy
  • Trade Count: (+4)
  • Full Member
  • ***
  • Offline Offline
  • Posts: 2095
  • Last login:September 22, 2015, 04:11:30 pm
Re: The Avrus Arcade Project
« Reply #6 on: August 29, 2007, 11:27:52 am »
Start posting some  :pics  here as you progress with the build.  Good Luck and Have Fun.  Wish I could join in on your poker games.

TTFN

Avrus

  • Trade Count: (0)
  • Full Member
  • ***
  • Offline Offline
  • Posts: 400
  • Last login:September 07, 2011, 09:17:25 pm
  • Canada
    • The Avrus Arcade Project 'Conquest'
Re: The Avrus Arcade Project
« Reply #7 on: August 29, 2007, 01:10:47 pm »
Start posting some  :pics  here as you progress with the build.  Good Luck and Have Fun.  Wish I could join in on your poker games.

TTFN


All I have so far is boxes.  As soon as I get the wood from Totem I can actually start accomplishing something picture worthy.
______________________________
'Conquest' upright 4 player arcade project log:
http://avrus.blogspot.com/

Avrus

  • Trade Count: (0)
  • Full Member
  • ***
  • Offline Offline
  • Posts: 400
  • Last login:September 07, 2011, 09:17:25 pm
  • Canada
    • The Avrus Arcade Project 'Conquest'
Re: The Avrus Arcade Project
« Reply #8 on: August 30, 2007, 02:46:55 pm »
I suppose I have to update this page as well as my blog.  Just waiting on the damn wood  :badmood:.   House full of parts and I can't really do anything until the wood arrives.

Hopefully my buddy will be as motivated as I am to start work when it arrives.


______________________________
'Conquest' upright 4 player arcade project log:
http://avrus.blogspot.com/

Avrus

  • Trade Count: (0)
  • Full Member
  • ***
  • Offline Offline
  • Posts: 400
  • Last login:September 07, 2011, 09:17:25 pm
  • Canada
    • The Avrus Arcade Project 'Conquest'
Re: The Avrus Arcade Project
« Reply #9 on: September 04, 2007, 12:18:11 am »
Nothing's more awesome than the forum deleting your post.

Anyhoo, typing it for a second time!

I managed to grab all the wood today with the help of a good friend and a loaner pickup truck.  Grabbed the 4 sheets of 3/4" black melamine after much humming and hawwing in the lumber yard as to where it might be (my friend J pointed it out as soon as we drove in).  Grabbed a sheet of 5/8" black melamine from the Home Depot as well as some peg board to do some mock layouts for the control panel.

Glad I got 4 sheets because one of the sheets is messed up on one side.


______________________________
'Conquest' upright 4 player arcade project log:
http://avrus.blogspot.com/

Avrus

  • Trade Count: (0)
  • Full Member
  • ***
  • Offline Offline
  • Posts: 400
  • Last login:September 07, 2011, 09:17:25 pm
  • Canada
    • The Avrus Arcade Project 'Conquest'
Re: The Avrus Arcade Project
« Reply #10 on: September 10, 2007, 02:41:55 pm »
Grabbed the lumber for the frame, and Rona had a sweet deal on a corded Dewalt 6 amp drill.


______________________________
'Conquest' upright 4 player arcade project log:
http://avrus.blogspot.com/

Avrus

  • Trade Count: (0)
  • Full Member
  • ***
  • Offline Offline
  • Posts: 400
  • Last login:September 07, 2011, 09:17:25 pm
  • Canada
    • The Avrus Arcade Project 'Conquest'
Re: The Avrus Arcade Project
« Reply #11 on: September 16, 2007, 01:57:12 pm »
______________________________
'Conquest' upright 4 player arcade project log:
http://avrus.blogspot.com/

BobA

  • Trade Count: (+14)
  • Full Member
  • ***
  • Offline Offline
  • Posts: 5943
  • Last login:July 11, 2018, 09:52:14 pm
  • What Me Worry?
Re: The Avrus Arcade Project
« Reply #12 on: September 16, 2007, 02:31:42 pm »
How are you going to hook up the 3 trackballs?   Looking at your parts list I saw only 1 minipac.


Avrus

  • Trade Count: (0)
  • Full Member
  • ***
  • Offline Offline
  • Posts: 400
  • Last login:September 07, 2011, 09:17:25 pm
  • Canada
    • The Avrus Arcade Project 'Conquest'
Re: The Avrus Arcade Project
« Reply #13 on: September 16, 2007, 09:02:59 pm »
How are you going to hook up the 3 trackballs?   Looking at your parts list I saw only 1 minipac.


No there's 3, my spreadsheet is just being difficult.
______________________________
'Conquest' upright 4 player arcade project log:
http://avrus.blogspot.com/

ARTIFACT

  • Trade Count: (0)
  • Full Member
  • ***
  • Offline Offline
  • Posts: 757
  • Last login:June 07, 2025, 01:02:12 pm
    • ARTIFACT - my scratch designed & built arcade cabinet
Re: The Avrus Arcade Project
« Reply #14 on: September 17, 2007, 09:18:16 am »
Nice progress! Congrats :) Looks like you are having fun

From my (short) experience here, it's really better to just use BYOAC "as" your blog... write it all up here, post pics here, etc... Not everyone clicks on the external blog links.

Good luck with the rest! I can't wait to see it built in all it's  3 trackballs glory! :)

theCoder

  • Trade Count: (0)
  • Full Member
  • ***
  • Offline Offline
  • Posts: 1035
  • Last login:September 20, 2010, 10:48:47 pm
  • I'll clean up my mess, Honey, when I'm done...
Re: The Avrus Arcade Project
« Reply #15 on: September 17, 2007, 09:50:19 am »
Looks like your thumb is leaking.  A little blood reminds you you're alive.  May that be the worst of your injuries.

Great progress. 

Avrus

  • Trade Count: (0)
  • Full Member
  • ***
  • Offline Offline
  • Posts: 400
  • Last login:September 07, 2011, 09:17:25 pm
  • Canada
    • The Avrus Arcade Project 'Conquest'
Re: The Avrus Arcade Project
« Reply #16 on: September 17, 2007, 02:39:34 pm »
Looks like your thumb is leaking.  A little blood reminds you you're alive.  May that be the worst of your injuries.

Great progress. 

That's my buddies thumb. :>
______________________________
'Conquest' upright 4 player arcade project log:
http://avrus.blogspot.com/

Avrus

  • Trade Count: (0)
  • Full Member
  • ***
  • Offline Offline
  • Posts: 400
  • Last login:September 07, 2011, 09:17:25 pm
  • Canada
    • The Avrus Arcade Project 'Conquest'
Re: The Avrus Arcade Project
« Reply #17 on: September 24, 2007, 10:43:23 pm »
It was a shorter work day on Sunday, but not any less productive. I can see how practice and experience with the tools and the melamine makes every session more efficient.

J was poking fun at me, because during the last work session I was almost OCD about checking the underside (the side that will face outwards from the cabinet) to ensure that we hadn't drilled through the wood and perforated the outside edge. It got to the point where I was doing it with every screw.

We didn't have a lot of time to work with, so the goal was to be as productive as possible.

The goal for the evening was to finish the major cuts for the cabinet. We did complete that goal, although there are some finishing cuts that will need to be done.

What remains now is to attach the top, top back, back and front pieces to the cabinet. We'll need to finish the internal framing and attach the sides to the bottom, as well as attaching the casters to the bottom. There will also be some routing to do on the top back, lower back and front sections to accommodated the fans and coin door respectively.

I took a couple days off work (Tuesday and Wednesday) to recharge and get some painting done around the house. Tuesday and Wednesday evening J and I will focus on completing the cabinet assembly so I can put my energy towards the control panel.


A nice side view of the frame attached, as well as the shelving and top piece that will be installed.


What the side piece will look from the outside view.


Nice view of the marquee cuts. J is concerned about the angle but I think once it's assembled that nice sweeping angle is going to look great.


These boards will serve to mount the top of the cabinet as well as the speaker shelving.


Me hard at work measuring, measuring again. Starting over when I realized I measured incorrectly.


Keeping the Project Arcade book close at hand helps me to visualize the cabinet in 3 dimensions.


Measuring out 26" sections.


All the pieces cut, set against the wall so J can park his car in his garage.
______________________________
'Conquest' upright 4 player arcade project log:
http://avrus.blogspot.com/

Avrus

  • Trade Count: (0)
  • Full Member
  • ***
  • Offline Offline
  • Posts: 400
  • Last login:September 07, 2011, 09:17:25 pm
  • Canada
    • The Avrus Arcade Project 'Conquest'
Re: The Avrus Arcade Project
« Reply #18 on: September 28, 2007, 03:06:09 pm »
Another productive evening.

J and I managed to complete all the major cutting we need to do for the cabinet. There will be some minor frame support pieces tomorrow night, but they shouldn't be more than a few minutes.

The top, back, front door with coin door cutout, speaker shelf with cutout and all the fan cutouts are complete.

The coin door was the most difficult piece, it required some careful routing to ensure that the coin door fit properly. J touched it up a few times and now the coin door fits nicely.

Tomorrow we bring all the pieces to my place for assembly.

From there, my focus will be the control panel.


Using the 200mm DC fans to get a sense of size for the cutout.


Close up picture of the Antec 200mm fan.
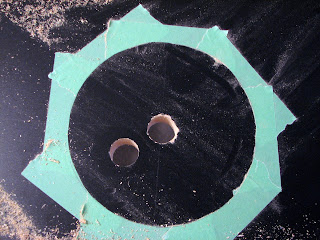

Used a 1 1/2" spade bit to cut a hole for the router to fit into. The spade bit made short work of the melamine.
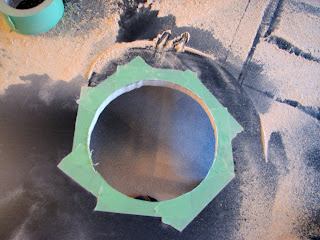

A few odd edges on the fan cutout, but it will be completely masked once the fan is mounted and the fan grills installed.


45 degree cut for the top back piece that sits at angle. Done with a circular saw, not a bad job.
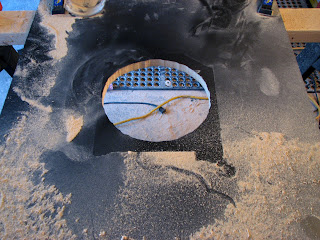

Same technique as above used for the back panel. Another Antec 200mm fan will be installed to provide air intake from the back.


The layout for the coin door cutout. We were a little sloppy when we used the spade bit to cut the corners. We should have used the router to cut the corners, or more carefully measured. In the end it worked out fine because we had a 1/2" of play on either side of the coin door.


Cutout completed. As you can see, it's not exactly precise. Luckily the coin door hides any ugliness on the cut job.
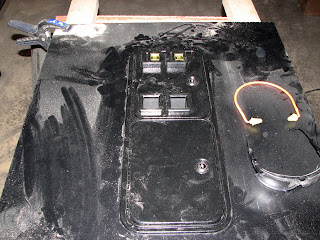

With the coin door installed, nice and snug.  As you can see the router kicks up tons of MDF dust.  Breathing protection is a must.
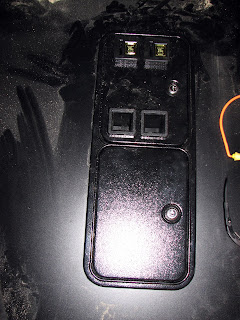

No traces of gaps around the outside edge.  It really looks great.


Speaker cutout.  The book wasn't exactly clear on the inside dimensions of the cutout.  In the end we used the dimensions of the Klipsch 2.1 speakers and simply subtracted 1/2" from either side to cut the inside dimensions.


Not exactly a thing of beauty, any imperfections here will be covered by the speaker grills.

The cabinet cutting, routing and fabricating is complete.  All the pieces were moved over to my house for assembly.  We'll likely be putting this beast together on Sunday.

That will pave the way for me to start focusing on the control panel.  With any luck the control panel will be a fraction of the work of the cabinet.

I completely underestimated the amount of hours and work that was involved in the cabinet construction.
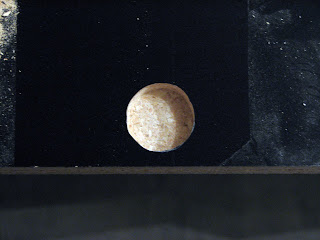

I didn't realize it at the time, but the European door hinges required a section to be routed out.  The space had to be 1/2", keeping in mind we only had 3/4" of material to work with in the first place.  To make matters more complicated, it was only 5mm from the edge, which we had already used a 3/32 bit on.  To say I was concerned about punching through the side of the cabinet would be a big understatement.


J did a great job.
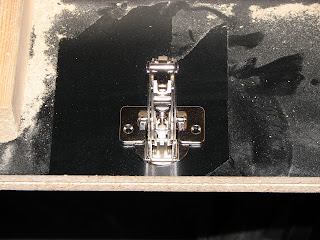

No wiggle room on the hinge at all, nice and snug.
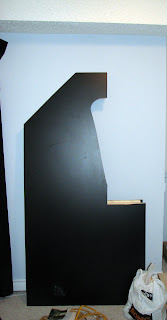

My house, now filled with pieces of arcade cabinet.
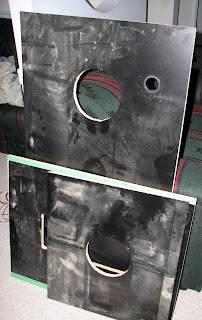

The back piece of the cabinet upside down, with the angled back piece and speaker shelf resting against it.  You can see the amount of MDF dust all over it.
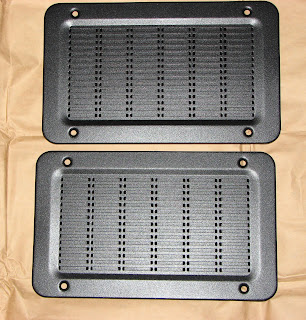

I had assumed the Midway speaker grills were plastic.  They are, in fact, some sort of aluminum.  The pictures don't do them justice, they look great.
______________________________
'Conquest' upright 4 player arcade project log:
http://avrus.blogspot.com/

Kaytrim

  • I'm too nice a guy
  • Trade Count: (+4)
  • Full Member
  • ***
  • Offline Offline
  • Posts: 2095
  • Last login:September 22, 2015, 04:11:30 pm
Re: The Avrus Arcade Project
« Reply #19 on: September 28, 2007, 03:58:57 pm »
Hey man looking good so far.  Two things, First I don't think you have MDF there.  It looks more like particle board.  That is typical for melamine coated boards.  Second it would be easier to use a Forster drill bit to cut the hole for the European hinges.  It would give you the perfect circle and flat bottom.  I will have to say that you had some serious control with your router for the hole, looks real good.


TTFN
Kaytrim

Avrus

  • Trade Count: (0)
  • Full Member
  • ***
  • Offline Offline
  • Posts: 400
  • Last login:September 07, 2011, 09:17:25 pm
  • Canada
    • The Avrus Arcade Project 'Conquest'
Re: The Avrus Arcade Project
« Reply #20 on: September 28, 2007, 07:45:44 pm »
Hey man looking good so far.  Two things, First I don't think you have MDF there.  It looks more like particle board.  That is typical for melamine coated boards.  Second it would be easier to use a Forster drill bit to cut the hole for the European hinges.  It would give you the perfect circle and flat bottom.  I will have to say that you had some serious control with your router for the hole, looks real good.


TTFN
Kaytrim

I'm pretty confident it is.  When I ordered it I specified melamine covered MDF and the grain matches the 5/8" MDF I picked up at Home Depot.
Edit: I'm actually 100% confident, just based on the weight alone.  Each sheet was about 110 lbs.  Also it was 49" by 97" which is MDF sheet sizing, not particle board.

Yah, Forsner bit is it?  By this point we had plenty of practice with the router, so what I did is used a 5/8" drill bit and pre drilled to a depth of 1/2" for the router, and then he routed out the area after taping it.

I'm glad it turned out well, thanks for the comments.
« Last Edit: September 28, 2007, 10:30:06 pm by Avrus »
______________________________
'Conquest' upright 4 player arcade project log:
http://avrus.blogspot.com/

Avrus

  • Trade Count: (0)
  • Full Member
  • ***
  • Offline Offline
  • Posts: 400
  • Last login:September 07, 2011, 09:17:25 pm
  • Canada
    • The Avrus Arcade Project 'Conquest'
Re: The Avrus Arcade Project
« Reply #21 on: September 30, 2007, 05:22:51 pm »
Well the cabinet is assembled and time to move on to the control panel.

My excitement was waning a bit with all the hard work on the cabinet, but now that the shell is sitting together in my living room I'm pretty excited again.

Had a small accident with the top angled back piece.  It fell while we were testing all the assembly and took a nice chunk out of the edge.  Nothing some enamel paint and wood fill didn't fix but it bothered me.

Pics later this afternoon, for now ... beer.
______________________________
'Conquest' upright 4 player arcade project log:
http://avrus.blogspot.com/

bfauska

  • Trade Count: (+2)
  • Full Member
  • ***
  • Offline Offline
  • Posts: 1372
  • Last login:April 15, 2025, 10:49:31 pm
  • "You're not wrong Walter, you're just an @##hole!"
Re: The Avrus Arcade Project
« Reply #22 on: September 30, 2007, 08:54:20 pm »
The project is looking good.  That is amazing router control if it is all being done free-hand.  Those grilles look nice.

I'd be interested to see a close-up of the wood.  MDF doesn't have much variation or speckled look to it, you really cant see the dust that it is compressed from.  Particle board looks like sawdust that has been formed into a board.  I don't want to sound like I don't believe you or think you know nothing about the material you are using, but I have spent hundreds of hours working with MDF and the boards in your pics don't look like MDF to me.  I also don't know why I care, I just am curious and think that it would be good for you to know more definitively which material you are working with.

Keep up the good work (with whatever material it is you are using) and thanks for sharing your progress with us.

Avrus

  • Trade Count: (0)
  • Full Member
  • ***
  • Offline Offline
  • Posts: 400
  • Last login:September 07, 2011, 09:17:25 pm
  • Canada
    • The Avrus Arcade Project 'Conquest'
Re: The Avrus Arcade Project
« Reply #23 on: September 30, 2007, 11:55:39 pm »
The project is looking good.  That is amazing router control if it is all being done free-hand.  Those grilles look nice.

I'd be interested to see a close-up of the wood.  MDF doesn't have much variation or speckled look to it, you really cant see the dust that it is compressed from.  Particle board looks like sawdust that has been formed into a board.  I don't want to sound like I don't believe you or think you know nothing about the material you are using, but I have spent hundreds of hours working with MDF and the boards in your pics don't look like MDF to me.  I also don't know why I care, I just am curious and think that it would be good for you to know more definitively which material you are working with.

Keep up the good work (with whatever material it is you are using) and thanks for sharing your progress with us.

If you click on the pictures on the blog site there's a few close up shots of the "grain".
______________________________
'Conquest' upright 4 player arcade project log:
http://avrus.blogspot.com/

Avrus

  • Trade Count: (0)
  • Full Member
  • ***
  • Offline Offline
  • Posts: 400
  • Last login:September 07, 2011, 09:17:25 pm
  • Canada
    • The Avrus Arcade Project 'Conquest'
Re: The Avrus Arcade Project
« Reply #24 on: October 01, 2007, 12:02:39 am »
The cabinet is finally assembled. Well, almost.

The speaker shelf needs to be assembled, and the base piece and casters need to be attached. Other than that, you are looking at a project well along it's way to completion.

Slight accident when insuring all the pieces fit snugly in the cabinet. The angled back piece fell with a tremendous crash, damaging the edges. Some wood filler and enamel paint touched it up nicely.

This week I'll be concentrating on the control panel mock up. By next weekend I should be good for the remaining cabinet pieces to be attached, and to start construction on the control panel.


The blotching at the back is the enamel paint seeping through the crack at the back. You can see the wood frame on the inside that provides more stability and will ultimately support the monitor.


The pieces sitting on the bottom are the corner protectors.


Side panel shot, nothing new here


Lower back with the fan installed. The edging will be covered by T-molding.


Top back fan. It will look much better with the 254mm fan grill installed.


This is the lower fan, again will look much better with the 254mm grill installed.
______________________________
'Conquest' upright 4 player arcade project log:
http://avrus.blogspot.com/

Avrus

  • Trade Count: (0)
  • Full Member
  • ***
  • Offline Offline
  • Posts: 400
  • Last login:September 07, 2011, 09:17:25 pm
  • Canada
    • The Avrus Arcade Project 'Conquest'
Re: The Avrus Arcade Project
« Reply #25 on: October 08, 2007, 10:22:03 pm »
I'm currently working through the control panel layout. J was gracious enough to lend his time to do a mock up in AutoCAD. I did a test layout and it looks like we're going to have to rework some things.

The trackballs aren't going to work in the layout my buddy came up with.  Ignoring the buttons at the top (because those are going to be completely reworked) you can't reach across the joysticks and use the trackballs.  The only way I can figure this is for the trackballs to be at the bottom of the panel.

My fan grills came in, after I decided to go with another company. I'll need to update my cost page to reflect the cost of the molex connectors for the power supply, the fan grills and the speaker covers.

I managed to mount the fan grills, as well as the speaker shelf. I think I'll need to mount the monitor to get a better sense of my control panel layout.

I won't be able to post pictures for a little bit, as I sold my camera. The intent was to replace my camera with the Nikon d40x. Unfortunately in that time span the project has left me a little cash deprived.
______________________________
'Conquest' upright 4 player arcade project log:
http://avrus.blogspot.com/

Avrus

  • Trade Count: (0)
  • Full Member
  • ***
  • Offline Offline
  • Posts: 400
  • Last login:September 07, 2011, 09:17:25 pm
  • Canada
    • The Avrus Arcade Project 'Conquest'
Re: The Avrus Arcade Project [4 player, 3 TB, 2 spinner]
« Reply #26 on: October 15, 2007, 07:49:59 pm »
Got the bottom attached, casters attached, coin door attached.  Control panel mock up is completed going to have a second set of eyes take a look before I cut it.

More pictures as soon as I can borrow a camera.
______________________________
'Conquest' upright 4 player arcade project log:
http://avrus.blogspot.com/

dmworking247

  • Trade Count: (0)
  • Full Member
  • ***
  • Offline Offline
  • Posts: 305
  • Last login:July 14, 2024, 01:30:59 pm
Re: The Avrus Arcade Project [4 player, 3 TB, 2 spinner]
« Reply #27 on: October 15, 2007, 08:44:39 pm »
Hi Avrus,

Your project is coming along nicely! well done.

I built similar style 2 player upright cabinet on the LuSid plans ( see here).

Another 'well done' from me on your manual routing. For future reference, I found this tool very handy for freehand routing. It also has an attachment that acts like a compass to route in perfect circles/arcs:


Question: Are your spinners going to hook up via your encoders too or are you doing a mouse hack? I've yet to find a reliable way to get two spinners out of a single mouse (using both axis)...

Avrus

  • Trade Count: (0)
  • Full Member
  • ***
  • Offline Offline
  • Posts: 400
  • Last login:September 07, 2011, 09:17:25 pm
  • Canada
    • The Avrus Arcade Project 'Conquest'
Re: The Avrus Arcade Project [4 player, 3 TB, 2 spinner]
« Reply #28 on: October 15, 2007, 09:34:54 pm »
Hi Avrus,

Your project is coming along nicely! well done.

I built similar style 2 player upright cabinet on the LuSid plans ( see here).

Another 'well done' from me on your manual routing. For future reference, I found this tool very handy for freehand routing. It also has an attachment that acts like a compass to route in perfect circles/arcs:


Question: Are your spinners going to hook up via your encoders too or are you doing a mouse hack? I've yet to find a reliable way to get two spinners out of a single mouse (using both axis)...

That tool looks fantastic.  The key for the 'freehand' routing was the prep work.  Laying out the desired area, taping it, and then using a utility knife to neatly edge the tape so that the desired area was cleaning mapped out.

Plus my friend has excellent router control.

I'm using 3 mini-pac's for the trackballs.  1 and 2 will control players 1 - 4, 2 spinners and 2 of the trackballs and the 3rd minipac for the last trackball
______________________________
'Conquest' upright 4 player arcade project log:
http://avrus.blogspot.com/

Avrus

  • Trade Count: (0)
  • Full Member
  • ***
  • Offline Offline
  • Posts: 400
  • Last login:September 07, 2011, 09:17:25 pm
  • Canada
    • The Avrus Arcade Project 'Conquest'
Re: The Avrus Arcade Project [4 player, 3 TB, 2 spinner]
« Reply #29 on: October 22, 2007, 07:51:08 pm »
Well I've managed to get quite a bit done since my last update. I mounted the speaker shelving, the front door, wired the speakers, wired the back and top fans, and wired the marquee light.

Tonight I'll likely be mounting the marquee light and the coin door, and spending the next few days wiring the coin door and control panel.

Once I get the monitor mounted I can start working through any play bugs, and polish up the software side of things. At that point I can also order up the smoked glass for the cabinet. Those are all minor details, however.

This weekend was very productive. J and I managed to get the control panel fabrication completed. On Saturday we spent the first part of the day looking at my layout, and then laying it out again to make it as consistent and clean as possible.

Once grid lines had been set out, finding the spots I needed to drill for the joystick holes and buttons was quite quick. We had a bit of a dilemma when it came to top mounting the joysticks, but in the end we solved it by using carriage bolts, and I'll simply remove the cherry switches from the bottom of the joystick prior to mounting. Otherwise we would have had to make the hole quite a bit larger to accommodate the switches sticking out. Doing so would have weakened our mounting points.

Sunday was largely spent finishing and routing. Several hours of routing the trackballs and joysticks left both of us covered in dust and exhausted. We had a small incident while routing the T-molding groove, but nothing that some silicon won't take care of.


Although it's a bit faint, you can see the angled lines we drew to lay out the joystick, button and trackball mounting points


Each of the intersections of the grid lines represent a point I need to drill for buttons. 1.5" spacing between the buttons and 3.5" from the center of the joystick hole to the center of the first button.


More pictures of the grid lines we used, it probably looks like a complex series of lines to anyone who wasn't involved in drawing it.


More examples of our layout.


The template was taped down to the melamine, which allowed me to drill every single joystick and button hole precisely. As you can see, there's not even 1/16" error on the holes.


A close up of player 1. The thumb button is offset 1 3/4". Originally I started with 1 1/2" like the rest of the buttons, but it left the thumb button too close to button 4. I played around with a few measurements but 1 3/4" ultimately seemed correct.


This is a close up of player 3. Player 3 and Player 4 are a 4 button configuration as that is the most number of buttons required.


This is a picture of me drilling what seemed like my millionth hole on the control panel. My Dewalt drill has a bubble on the back to ensure that my hole is going straight down. 1 1/8" spade bit was used for all the joystick and button holes.

"

Drilling all the holes created an enormous amount of dust.


This is a side shot of the Player 3 trackball. J routed out the center, where the trackball needs to fit up and through to point to the flush plate.


This is a correctly oriented shot of the player 2 trackball above the player 4 joystick.


This is a shot of the player 1 trackball, mounted to the left of the player 2 layout.


The end result. Everything is nicely lined up and symmetrical. Buttons are used for multiple controls wherever possible.


A nice perspective shot of the control panel.


A close up shot of J's fine routing skills. Each of the holes was taped, then traced around the required control, then a razor blade was used to cut the tape and provide a guide for the routing area.
______________________________
'Conquest' upright 4 player arcade project log:
http://avrus.blogspot.com/

superbigjay

  • Trade Count: (0)
  • Full Member
  • ***
  • Offline Offline
  • Posts: 667
  • Last login:October 22, 2023, 02:50:03 pm
  • I'll always be a kid...
    • superbigjay website
Re: The Avrus Arcade Project [4 player, 3 TB, 2 spinner]
« Reply #30 on: October 22, 2007, 08:59:25 pm »
Congrats Avrus,

this is a LOT of progress.

I bet you can't wait to install your controls on the CP  :applaud:

Jay  :cheers:

Avrus

  • Trade Count: (0)
  • Full Member
  • ***
  • Offline Offline
  • Posts: 400
  • Last login:September 07, 2011, 09:17:25 pm
  • Canada
    • The Avrus Arcade Project 'Conquest'
Re: The Avrus Arcade Project [4 player, 3 TB, 2 spinner]
« Reply #31 on: October 22, 2007, 09:15:12 pm »
Congrats Avrus,

this is a LOT of progress.

I bet you can't wait to install your controls on the CP  :applaud:

Jay  :cheers:

Thanks very much.  Well it occured to me that if I install the buttons, I'll have to pull them out when I put on the CPO.  That means a heck of a lot of work.

So I'm not sure whether people put on their CPO and then do the buttons, or play test it first, disassemble and then put on the CPO?

Edit: Incidentally, it is most definitely melamine over particle board.  Disappointing, but it seems solid so far.
« Last Edit: October 22, 2007, 09:19:35 pm by Avrus »
______________________________
'Conquest' upright 4 player arcade project log:
http://avrus.blogspot.com/

superbigjay

  • Trade Count: (0)
  • Full Member
  • ***
  • Offline Offline
  • Posts: 667
  • Last login:October 22, 2023, 02:50:03 pm
  • I'll always be a kid...
    • superbigjay website
Re: The Avrus Arcade Project [4 player, 3 TB, 2 spinner]
« Reply #32 on: October 22, 2007, 11:52:19 pm »
So I'm not sure whether people put on their CPO and then do the buttons, or play test it first, disassemble and then put on the CPO?

I wouldn't recommend testing it now, because this will likely delay your project for a while, because you'll be busy playing.
Resist the urge!!!

Jay

Avrus

  • Trade Count: (0)
  • Full Member
  • ***
  • Offline Offline
  • Posts: 400
  • Last login:September 07, 2011, 09:17:25 pm
  • Canada
    • The Avrus Arcade Project 'Conquest'
Re: The Avrus Arcade Project [4 player, 3 TB, 2 spinner]
« Reply #33 on: November 02, 2007, 10:18:25 pm »
Pictures should be posted tomorrow.  Managed to mount the monitor, marquee light and do some wiring.

Have a friend who does artwork as a profession doing the CP work for me for some beers.  I didn't realize until I had the CP up that I'd need the artwork in place before mounting the majority of my controls.

Also had a slight snag while mounting the monitor, ended up perforating the side of the Melamine.  Luckily it didn't buckle it just punched through so it should be covered neatly by the side art.

I'll likely be putting on T-molding this weekend.

We also had a snag with the CP box, the slope wasn't enough and the box put the CP at around 42" or so, so we had to cut that down.  The problem is the CP box was already assembled, so we had a series of angles.

We put our heads together to try and figure out the best way to take a circular saw across that and I came up with the idea of string.  You take the piece of string, measure out where the angle begins and then tighten it in the air so it falls down on the CP box.  Turns out it made a straighter line than when we were measuring with a square, we were within 1/8".  So now the CP sits nicely at 38" at the back.

Bezel is cut to fit (just used a circular blade used for cutting fabric).  Fan guards are installed.

Got my new camera this morning so I'll snap up a bunch of pics.

Always putting the cart before the horse, we cut the entire CP without a digital template, so I had to painstakingly convert the CP to a digital template in Corel.  Luckily I have many years of Corel experience drawing signage and advertising, and the measurements we used laying out the CP were exacting.  I'm going to print it off on a wide format printer before ordering the artwork ... just to make sure.
______________________________
'Conquest' upright 4 player arcade project log:
http://avrus.blogspot.com/

Avrus

  • Trade Count: (0)
  • Full Member
  • ***
  • Offline Offline
  • Posts: 400
  • Last login:September 07, 2011, 09:17:25 pm
  • Canada
    • The Avrus Arcade Project 'Conquest'
Re: The Avrus Arcade Project [4 player, 3 TB, 2 spinner]
« Reply #34 on: November 05, 2007, 05:07:30 pm »
Well it's been some time since my last update, and I've managed to do quite a bit of work. The first thing I did was to mount the fan grills. I ended up going with 254mm fan guards and they turned out fantastic.


After that was done I turned my attention to getting the marquee light mounted. I didn't think I'd have an opportunity to easily mount it and do the wiring if the monitor was in place.


Then my attention was turned to mounting the monitor. I used 2 1/2 inch bolts through some 2x4 spruce cut to 26 inches. The bottom part of the monitor was screwed into some blocks that were angled to get the correct position of the monitor.


The spruce was then attached to the cabinet with corner brackets.


Then on Saturday and Sunday I focused on getting the T molding installed. As we used a 3/32 inch slot cutting bit, I ended up using silicone to hold the T molding in place. J suggested this, and although it was a bit more work the results turned out well.


Then after the T molding was in place I installed the 4 corner protectors. The results are nice, and it adds a completed touch.


Now I'm waiting on the control panel artwork to be finalized, and I have a friend printing off the control panel template on a wide format printer so I can ensure all the holes line up.
______________________________
'Conquest' upright 4 player arcade project log:
http://avrus.blogspot.com/

Avrus

  • Trade Count: (0)
  • Full Member
  • ***
  • Offline Offline
  • Posts: 400
  • Last login:September 07, 2011, 09:17:25 pm
  • Canada
    • The Avrus Arcade Project 'Conquest'
Re: The Avrus Arcade Project [4 player, 3 TB, 2 spinner]
« Reply #35 on: November 13, 2007, 10:54:09 pm »
Managed to be productive on the cabinet. Installed the bezel, as the only things remaining now are the tinted glass, and coin door.

Bad news on the control panel overlay artwork, unfortunately the person I had in mind won't be able to do it for me. That means I'm left designing the artwork myself which means this could end in disaster.


I was at a bit of a loss of how to attach the bezel, as it sticks out slightly from the monitor and doesn't sit flush to any mounting surface. I settled on a 2x4 block cut length wise, and some industrial strength


The difference between regular velcro and industrial strength is night and day. I'd feel completely comfortable hanging 10 or 15 lbs off of this without it pulling loose.


Needless to say, pulling the bezel off the blocks and aligning it squarely was a challenging task.


The finished product neatly hides the mounting material behind it, and when the tinted glass is installed you won't be able to see the bezel at all. Some original arcade cabinets had artwork on the bezel as well, but given my difficulty with the marquee, side art and control panel overlay I'm not going to push my luck.


Once it's assembled, this should give you a pretty good sense of what it will look like. The t-molding on the control panel will go on after the overlay is applied giving it a nice finished look.


______________________________
'Conquest' upright 4 player arcade project log:
http://avrus.blogspot.com/

Avrus

  • Trade Count: (0)
  • Full Member
  • ***
  • Offline Offline
  • Posts: 400
  • Last login:September 07, 2011, 09:17:25 pm
  • Canada
    • The Avrus Arcade Project 'Conquest'
Re: The Avrus Arcade Project [4 player, 3 TB, 2 spinner]
« Reply #36 on: December 23, 2007, 01:09:01 pm »
Whelp, I lost my clips for the coin door, stalling me from assemlbing that.  I'm still lost for artwork too.  Ordered the clips through divemaster should be here in a little bit. :banghead:
______________________________
'Conquest' upright 4 player arcade project log:
http://avrus.blogspot.com/

Jdurg

  • Trade Count: (0)
  • Full Member
  • ***
  • Offline Offline
  • Posts: 1127
  • Last login:October 04, 2020, 09:26:27 pm
  • A young guy feeling older than sin......
Re: The Avrus Arcade Project [4 player, 3 TB, 2 spinner]
« Reply #37 on: December 23, 2007, 05:04:06 pm »
Definitely keep this thread updated.  The cabinet is looking great so far!!!   :cheers: 

I've actually got a similar reason for building my cabinet.  I'm in the process of also shopping for a poker table so that I can host my weekly poker game here every now and then.  (As well as the ad-hoc weekend game).  I figured that having an arcade cabinet in the poker room would completely rule and make it not so bad if your aces get cracked and lose all your money because of it.   :hissy:

Just a few moments ago I was able to get myself a translucent blue, 3" Happ Trackball with PS2/USB connectors as well as the mounting plate for only $100 on E-Bay.  I can't wait for it to arrive so I can lay it out on my control panel.  I've started doing the same thing as you and have penciled out my CP design onto the 2'x4' Poplar Plywood I'm using for the CP.  The only parts I still need are the trackball, the spinner, and the I-Pac/Opti-Pac (If I can't get a USB/PS2 Spinner setup as well). 

The only thing keeping me from going forward is that I don't have the power tools yet and with Christmas coming up soon I'd feel guilty buying myself the plunge router, jig-saw, or power drill that I asked for if a family member already bought it for me.
Donkey Kong High Scores:
1): 49,500
2): 35,600
3): 30,100
4): 29,400
5): 28,200

Avrus

  • Trade Count: (0)
  • Full Member
  • ***
  • Offline Offline
  • Posts: 400
  • Last login:September 07, 2011, 09:17:25 pm
  • Canada
    • The Avrus Arcade Project 'Conquest'
Re: The Avrus Arcade Project [4 player, 3 TB, 2 spinner]
« Reply #38 on: January 18, 2008, 01:09:48 am »
So it's been quite a while since my last update.  I was hoping against hope to get artwork completed, spent some money and a lot of time making sure the digital template for my control panel was correct.

Unfortunately artwork is not happening anytime soon.

So I started to continue assembly on the cabinet, and it turned out I misplaced the mounting equipment for the coin door.  (Whoops?)

Some paypal money to divemaster127 from the BYOAC forums, a few weeks of impatiently waiting and I'm back in business.


Hard to believe these little guys held me up a few weeks.


Installed some buttons, and the trackball mounting plates.


Coin door in the process of being installed.


Coin door installed, finally


Coin mechs in place.


You can see how the clips hold the coin door in place.


Unfortunately another snag when I attached the coin box.  Turns out one of the wood frame pieces blocks the door from closing with the coin box attached.   So I relocated the frame piece.


Red LED lights installed in place of the stock bulbs.  Wasn't sure which polarity to go with, turns out I got it correct on my first try.


12v power on the top (+) and ground on the bottom (-).  Since I'm just using a spool of yellow 18 gauge wire for various components, I put some black electrical tape to identify ground.


Without a tripod, it's difficult to take pictures of the coin door with the lights, but it looks sweet.


Trackballs, joysticks and buttons installed.  I have more pictures of more assembly, but it's late and I'm tired.
______________________________
'Conquest' upright 4 player arcade project log:
http://avrus.blogspot.com/

Avrus

  • Trade Count: (0)
  • Full Member
  • ***
  • Offline Offline
  • Posts: 400
  • Last login:September 07, 2011, 09:17:25 pm
  • Canada
    • The Avrus Arcade Project 'Conquest'
Re: The Avrus Arcade Project [4 player, 3 TB, 2 spinner]
« Reply #39 on: January 22, 2008, 09:10:51 pm »
Managed to get quite a bit accomplished. Sat down with a few bad movies and started wiring.


Player 1 buttons. The wiring won't be tidied up until the artwork is applied, as I need to take the entire thing apart to apply the artwork.


This is the Happ trackball X axis connector. They have a AMOA plug in place with a harness. You unplug the X axis connector and Y axis connector and the Mini-Pac plugs directly in.


These are the Mini-Pac trackball connectors. Y-axis on the left and X-axis on the right.


Spinners installed. Had to countersink the bolts for them to fit flush. I probably could have used a #6 screw, but I went with a #4 as the mounting holes seemed quite small.


Player 2 buttons.


A start and coin button. The coin button is black.


The control panel is a monster and I wasn't able to reach from the bottom of the panel to the top to attach the coin buttons. I purchased some male quick disconnects and used those to plug into the Mini-Pac wiring.


Here is a nice shot of the Mini-Pac wiring.
______________________________
'Conquest' upright 4 player arcade project log:
http://avrus.blogspot.com/