Hi everyone.
First post and first project as well. Stumbled upon this forum back in November (2014) when I was searching for materials for my build and been a regular visitor since then. I'm astonished at the wealth of information and level of knowledge sharing in these forums!

I named the project, PortaMAME. First name I thought was PortaCade but there's already a traffic barricade brand that uses the trademark so I settled with PortaMAME.
Project Name: PortaMAME - Arcade in a Briefcase 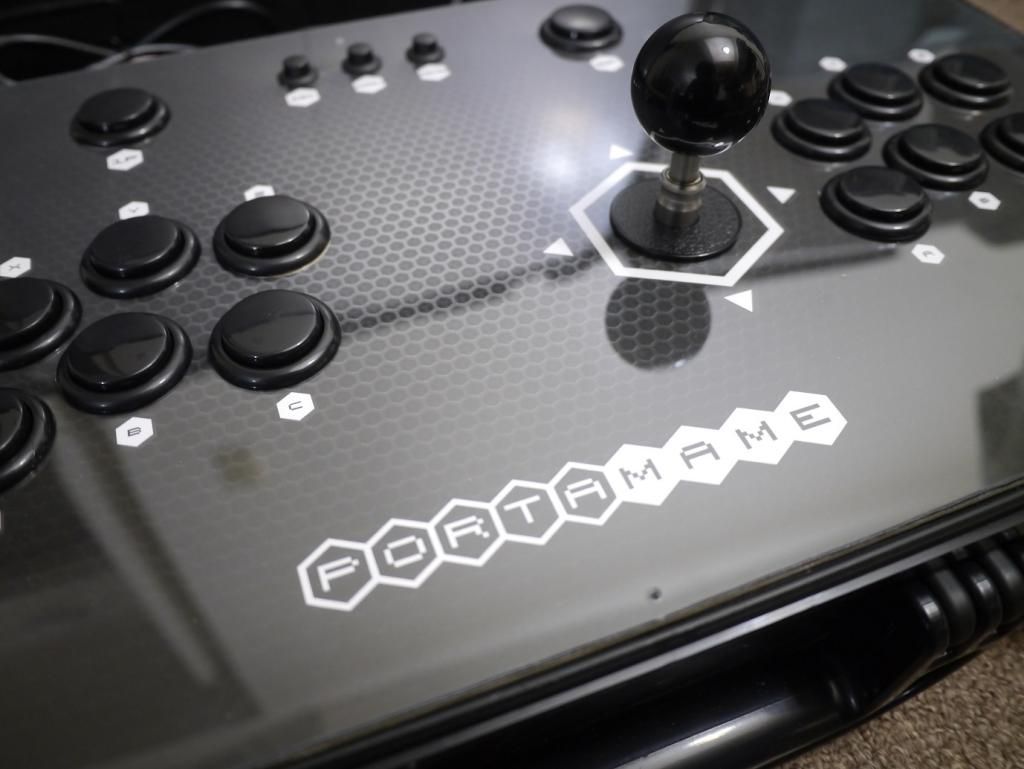
 Background:
 I first got the idea of building an arcade machine when I got an Injustice fight stick on sale and saw in the interwebs that a Raspberry Pi can power an arcade machine. For the proof of concept, I installed EmulationStation on the Pi and had the fight stick detected and I was playing some MAME games immediately.
I started planning and getting parts for integrating the Raspberry Pi into the fight stick when I saw Rasmus' and this website. I thought that even if I get the Pi and fight stick contraption, it would have to be connected to a TV/display when playing. Inspired by how folks here are building full size cabinets, bartops, etc., I decided to go all the way! I shelved the Pi and fight stick project and decided to build a machine powered by Windows instead.
I have never built an arcade machine before or any other similar furniture/machine/equipment. The closest experience I could relate to is scale modeling which I have not done in the last 6 years! My cost/benefit analysis convinced me that from the nostalgia value alone, this project is really worth investing time and money. Plus, it's a good way to put into use my recently acquired small set of power tools and a good excuse to acquire more tools as I build the machine.
Objective: Since we're only staying in one-bedroom apartment where we have limited space, building a full size cabinet is simply not an option. A bartop seemed to be the perfect solution, however, once built, it would still be a challenge stowing away the machine when not in use. That's when I thought of building an arcade in a briefcase.
Requirements: A. Must-haves - Must be portable
- Must be compact and have a small footprint
- Must have compartment for power cord, extension cable (optional), joystick handles, small keyboard, mouse (optional)
- Must have 15" or larger display and full sound for the best arcade experience
B. Good-to-haves - 2-player button layout
- ports for USB, LAN, earphones, etc.
- lit marquee
- lit buttons
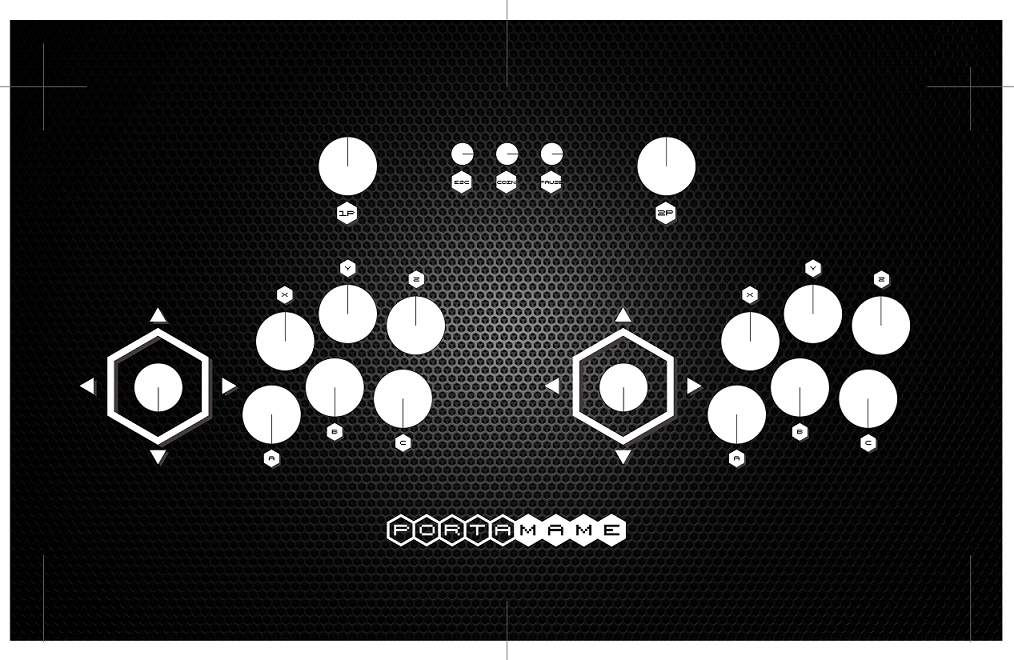
CP Layout:
Since the case is black I decided to keep it consistent and went with a black theme. I thought of making the panel look more like a high-tech scientific equipment rather than an arcade machine.

I considered getting a yellow version of the case and have a Pac-man theme for the control panel. However, since there isn't a space for the marquee, I felt that it won't be complete so I went the black theme route.
Here's the CP art. Too bad the reproduction didn't turn out as I imagined it here. The dark areas on the corners were printed as plain black areas losing the carbon fiber pattern detail.

 Challenges:
 I thought that since I didn't have to start with building a case from scratch, the build would be easier and will have few challenges. I was wrong. Due to the fact that I don't have a custom case made for the components but rather starting off with a pre-made case, fitting and mounting the components is more challenging! Below are the challenges and lessons learned along the way.
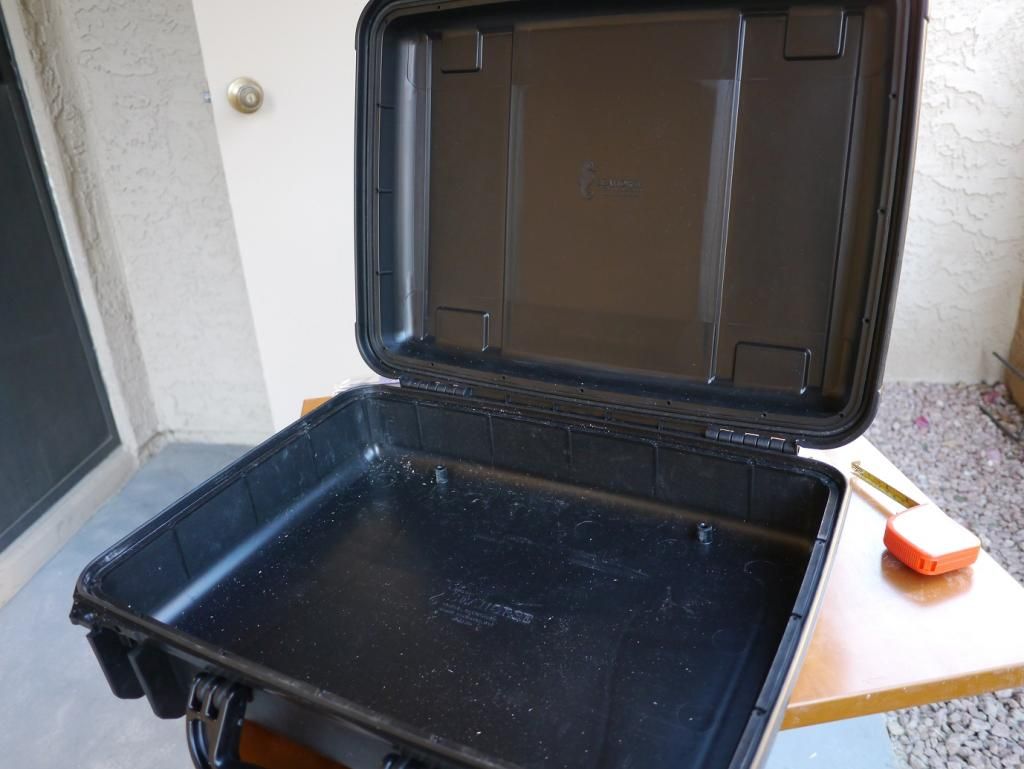
Challenge #1: Choosing the best briefcase for the project - SOLVED! I first thought of using an aluminum briefcase as this is what's commonly used today for transporting hobby kits, photography equipment, etc. However, I saw reviews that said these cases are thin, flimsy and not rigid enough for my needs. I want the machine I'm building to last for a long time as I'll be putting so much time, effort and money in the build.
In my search, I came across the Pelican cases. While it seemed to be the best case for the job as reviews say that the material is sturdy and durable, I feel it's too expensive. In my search for a cheaper alternative, I came across the Seahorse brand of cases which uses the same material as the Pelican but is cheaper. Both Pelican and Seahorse cases' lid fully opens to slightly over 90 degrees (approx. 110 degrees) which provides good viewing angle compared to regular briefcases which only opens up to 90 degrees max.
In addition, the Seahorse cases accommodates for custom panels as the sides of both the lid and bottom compartments already has screw holes to mount the panels! Not to mention that it's also waterproof as the Pelican cases. I don't intend to test if they're really waterproof but it's good to know that once built, my machine has some level of protection from water leaking in.
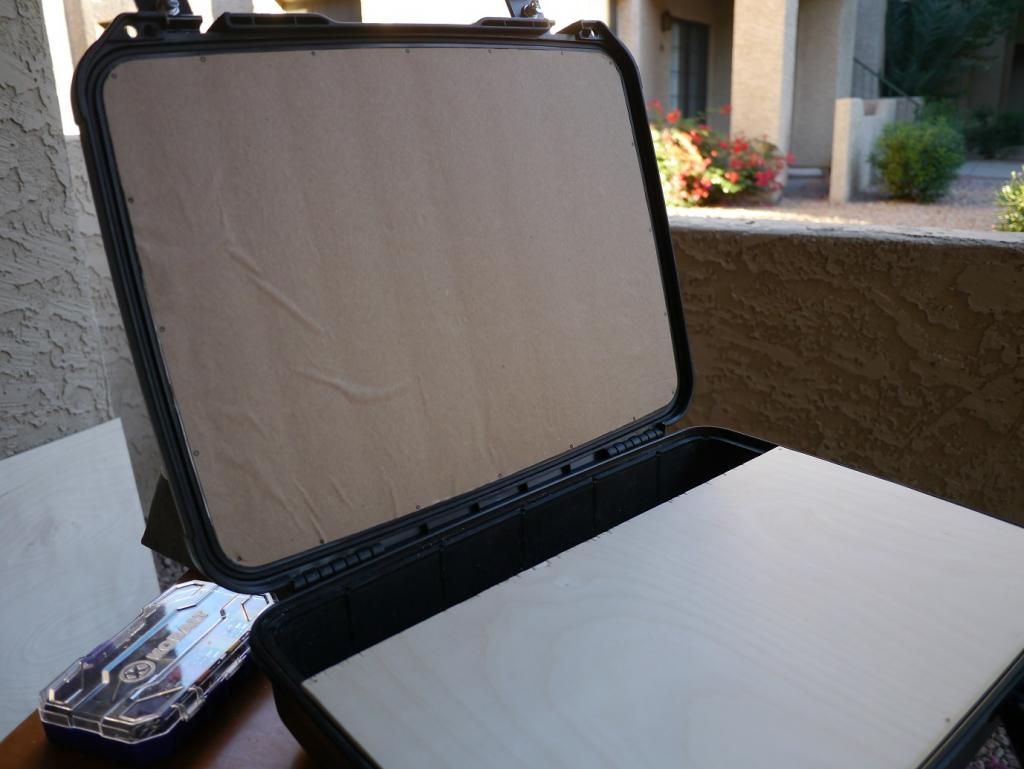
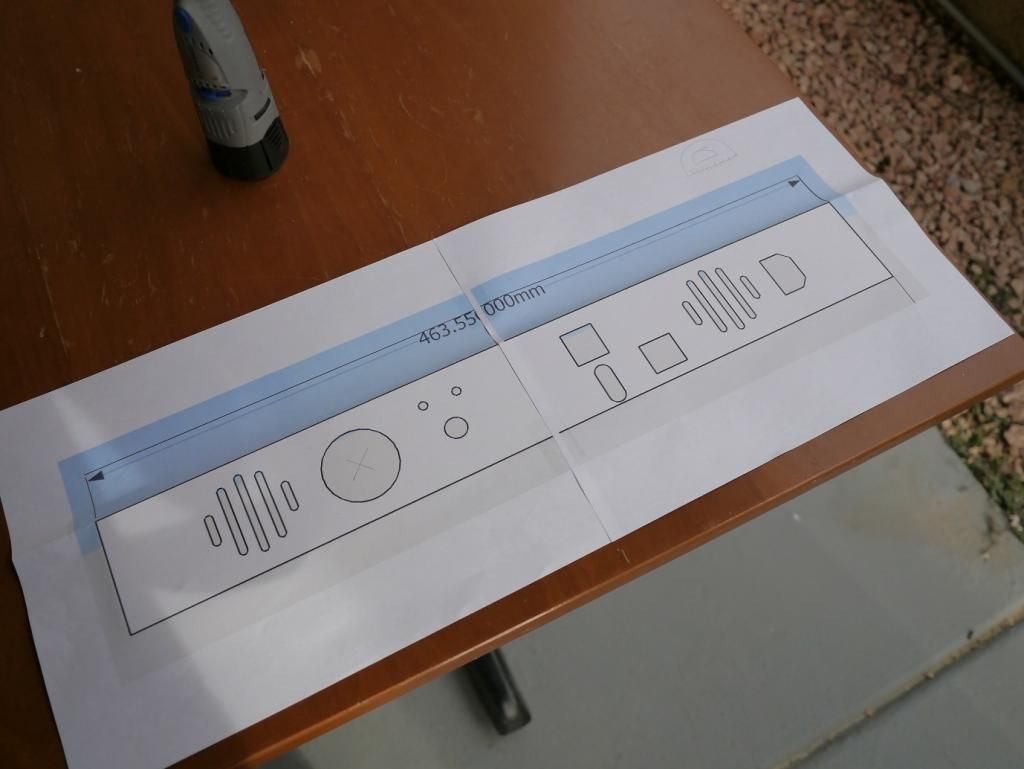
 Challenge #2: Getting the correct dimensions to get the panels fit - SOLVED!
Unlike regular briefcases and aluminum cases, the Seahorse case's edge isn't straight and has sharp corners. Instead, the corners are curved and the sides also has slight curves. I thought that it would be challenge getting the proper dimensions.
It's a good thing that the folks at Fuerte Cases where I ordered the case are very accommodating and they provided me paper templates of both the bottom and lid when I requested for one. The templates even have the screw holes already marked! Thanks Fuerte Cases! One challenge easily solved.
 Challenge #3: Choosing the motherboard, power supply, speakers and other components - SOLVED
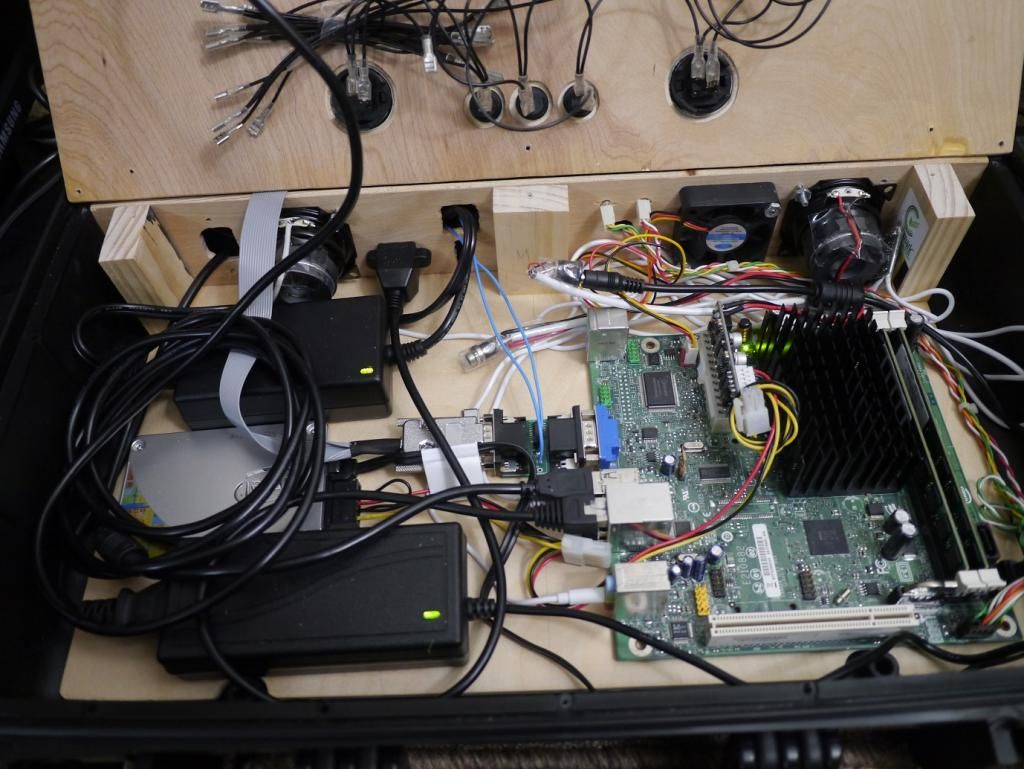
 Motherboard and PSU
If I settled on my initial hardware specs of using a Raspberry Pi to power this machine, I won't probably have challenge no. 3 as the Pi is so tiny and would only take a very small amount of space. However, I wanted the machine to have more processing power so I settled to using Windows instead. I thought of using a netbook but the motherboard would occupy a wide area. My next option is a mini-ITX desktop board -- more compact but takes more vertical space than a laptop motherboard. Since I went the mini-ITX route, I used a mini PSU rather than a full desktop PSU.
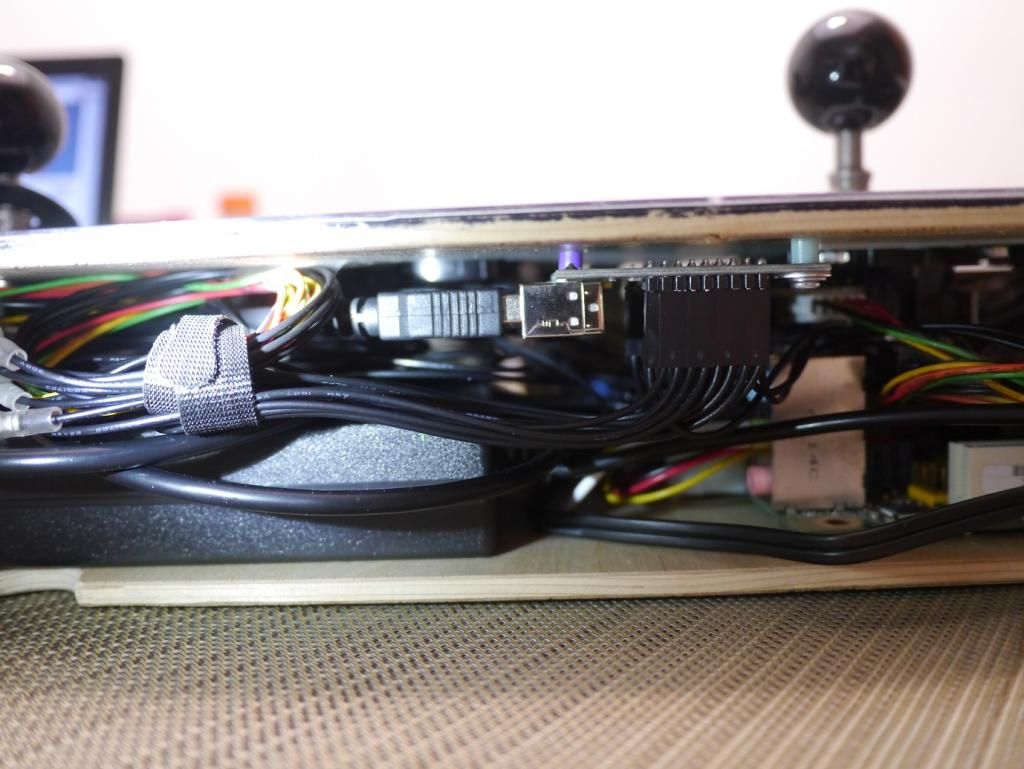
Here's how the components look so far... I'm yet to trim down and tidy up the wires.
Push Buttons
Choosing the buttons is also critical. I definitely cannot use the Happ-type buttons as it's too tall for this build I wanted the scew-on buttons but the shortest is still too tall for this build. In the end, I settled for the
Seimitsu PS-15 Low Profile buttons.
For the admin buttons, I chose the small push buttons so I can fit at least three (3) without taking so much CP real estate.
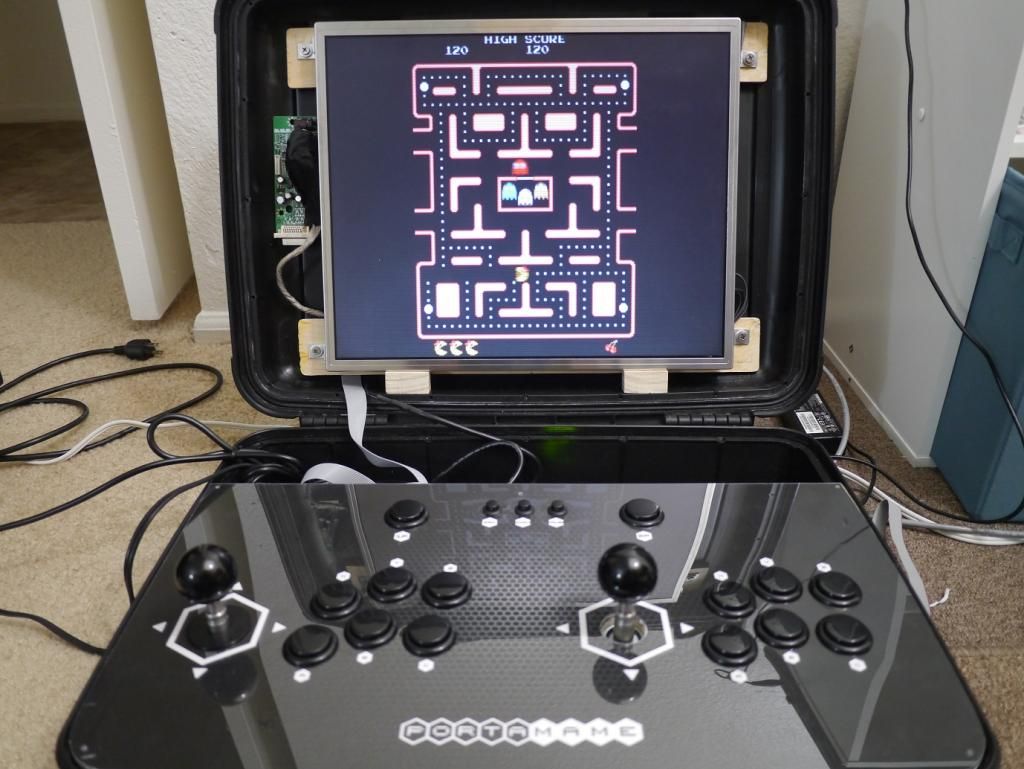
Here's how the CP panel looks underneath. I'm still yet to trim and tidy up the wirings.

Encoder
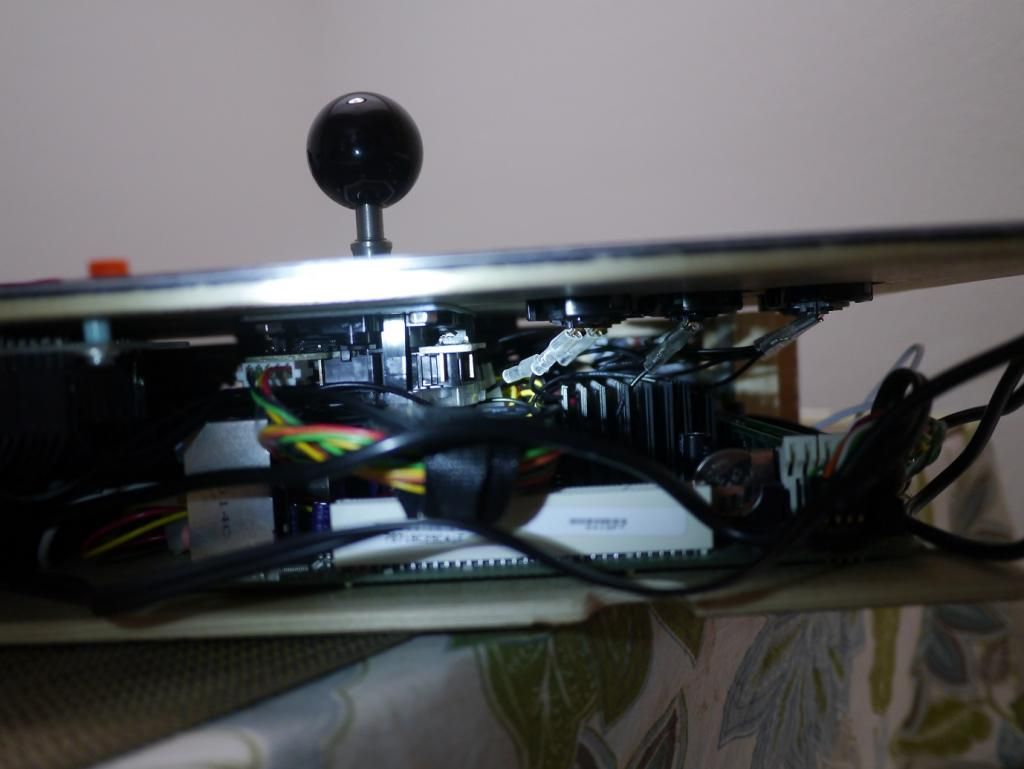
For the encoder, I used the Xin Mo 2-Player USB encoder. Initial testing with the Xin Mo encoder showed no lag whatsoever. I tested on Galaxian and Terra Cresta and I find it very responsive.
Here's how it looks like with the CP on top of the components. Really cramped! As you might noticed, instead of using PCB mounting feet which I find is still too high, I used
Perler Beads which quite works well and with really low footprint.
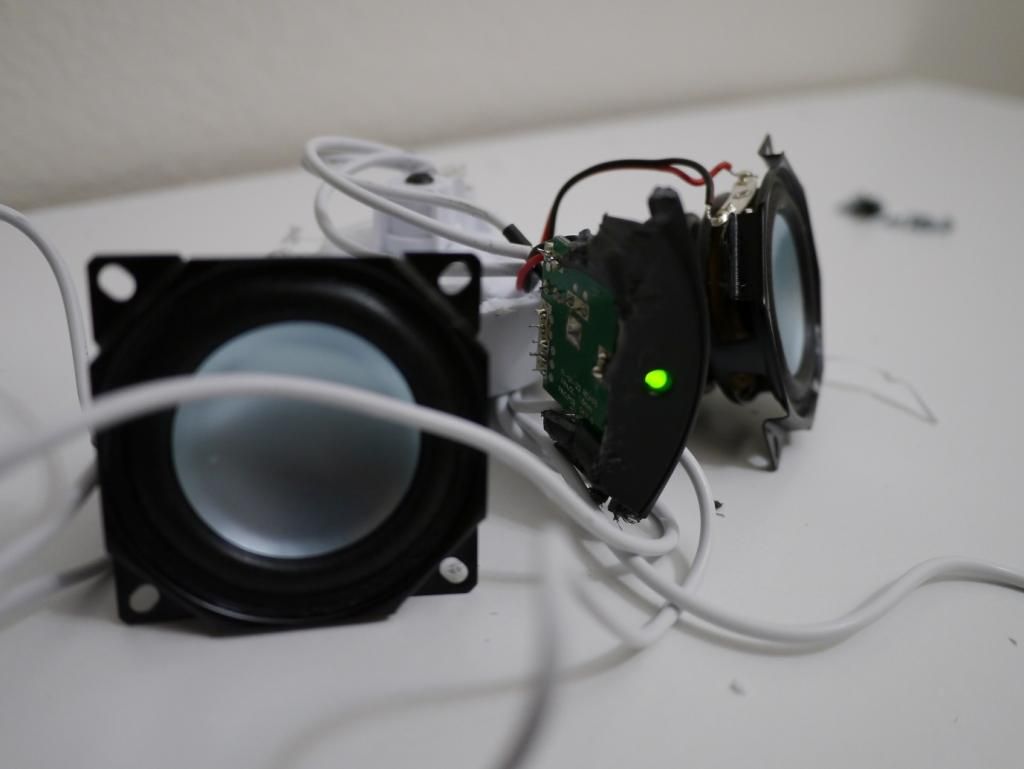
Speakers
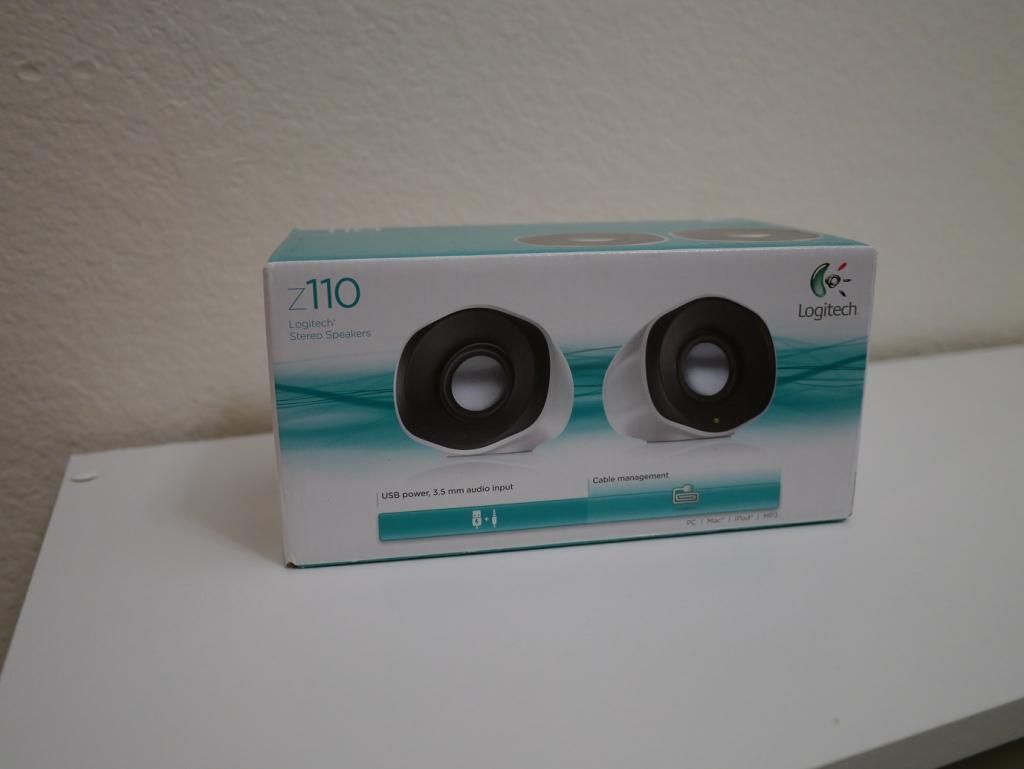
In choosing the speakers for the audio, I opted for USB-powered speakers. I thought that doing so will spare me the headache of finding for a small speaker that would fit and small amplifier to go with it. I saw Rasmus use a Logitech z110, which I find has ample sound power. It has good mids and highs but not too much bass. Still, it's a better speaker compared to other small speakers that I tried and owned.
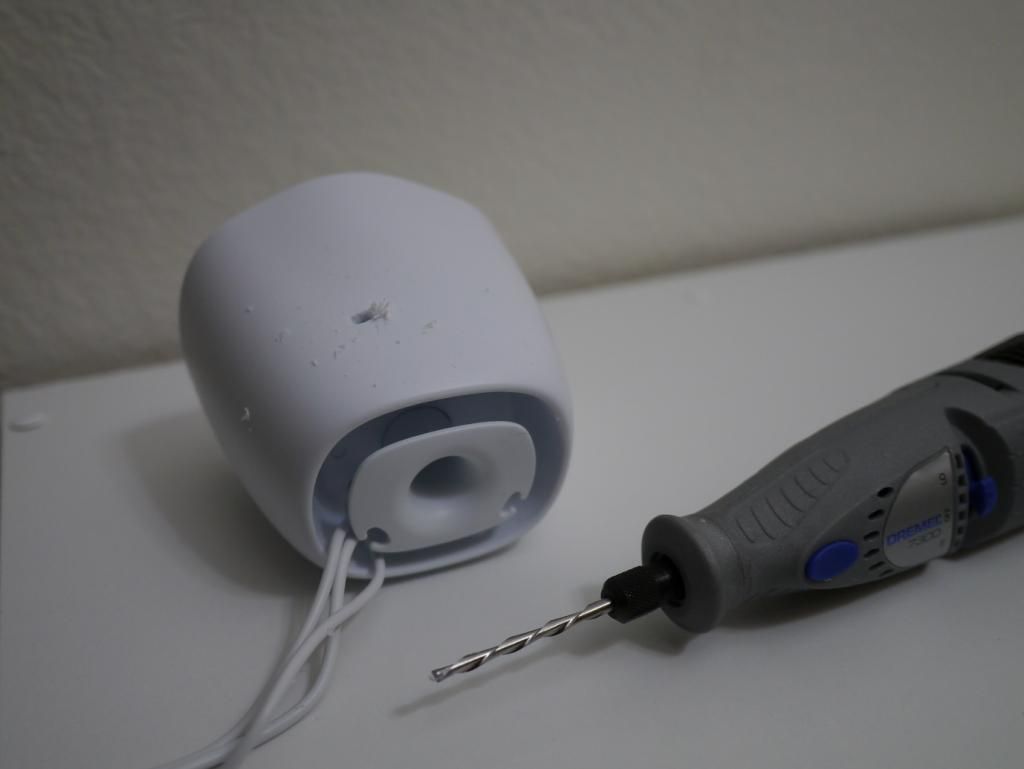
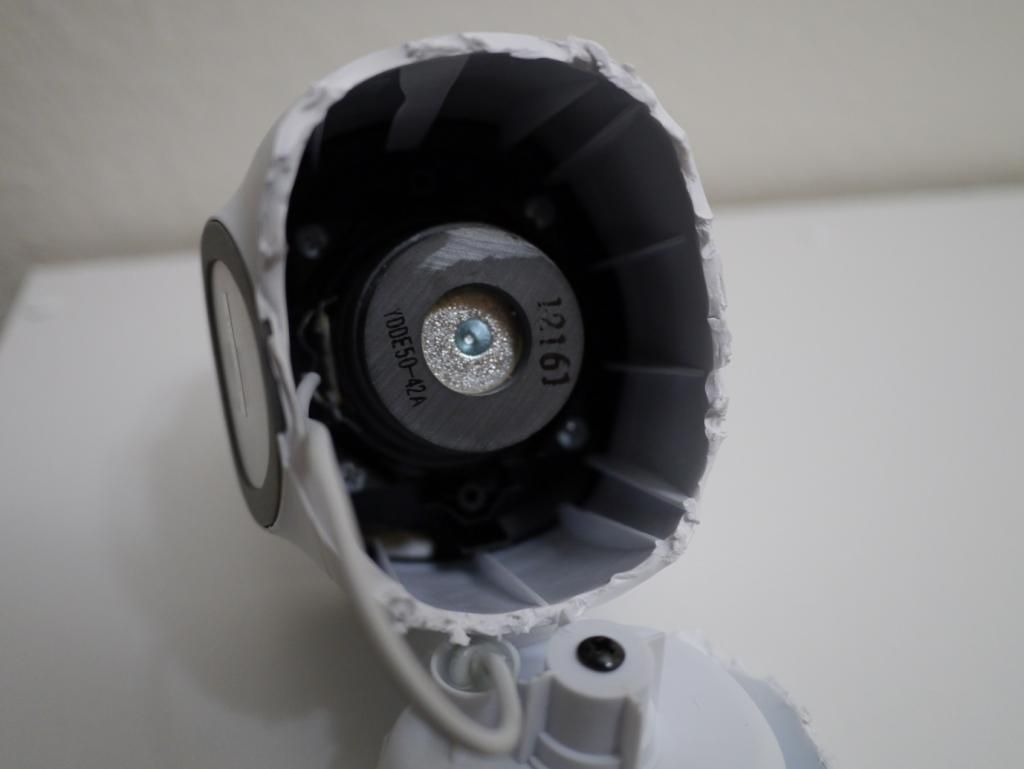
Rasmus' bartop has enough space to fit the z110 with the original housing -- he simply epoxied the speakers to his bartop. However, since I have very limited space, I had to take out the speakers out of the housing. Searched the net and I didn't find anybody who has disassembled the z110.
For lack of visible screws and openings on how to disassemble the speakers, I used a Dremel cutting bit to and drilled a small hole so I can peek at the insides before I continue drilling and cutting the housing. I drilled two (2) holes first -- one where I can peek inside while the other, for inserting through a small LED. After determining the "safe zone" for cutting, I cut the housing around the sides and successfully extracted the speakers and tiny amplifier.
 Challenge #4: Fitting and mounting the components and buttons with limited vertical space - PARTIALLY SOLVED
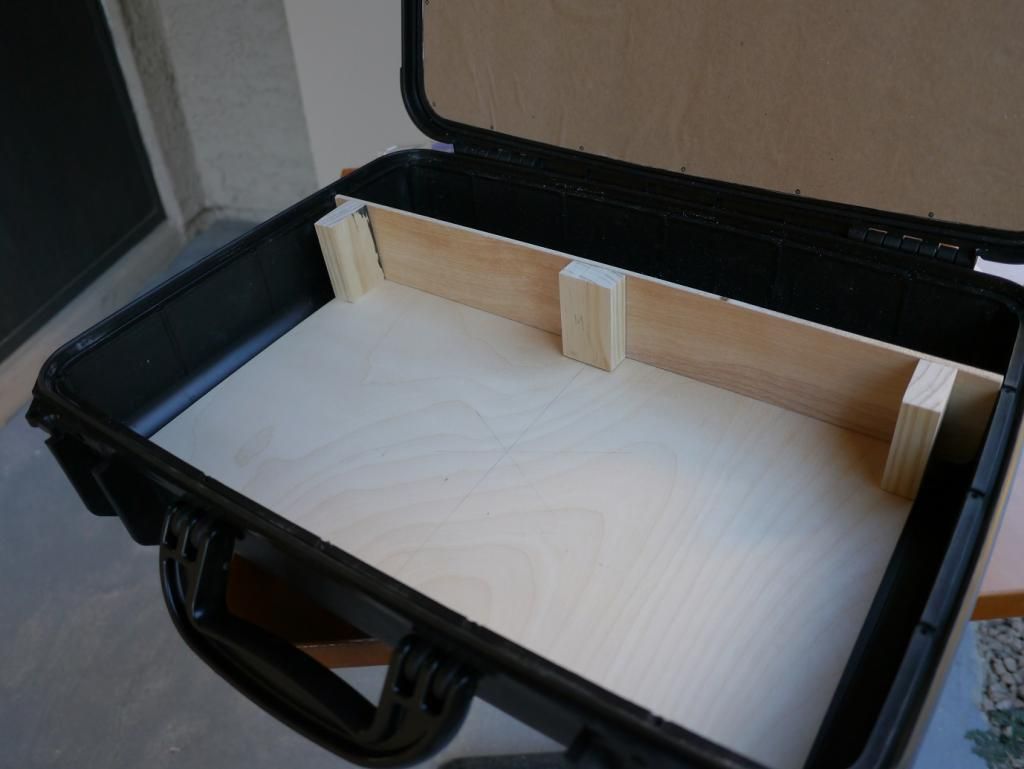
 Since I wanted not to damage the Seahorse case, I thought of using a thin plywood to act as base for screwing in the components on the bottom compartment. I will further secure and attach with Velcro underneath.
Here's how the base looked like initially without the components. It appears spacious but quickly got crowded when I started putting in each components.
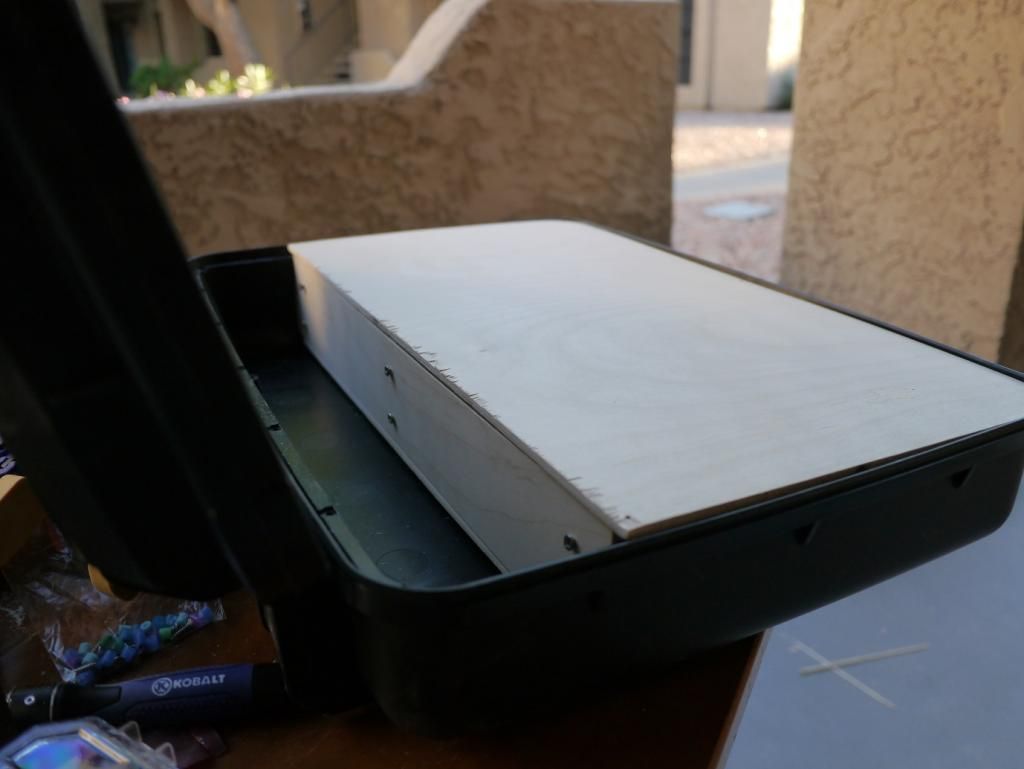
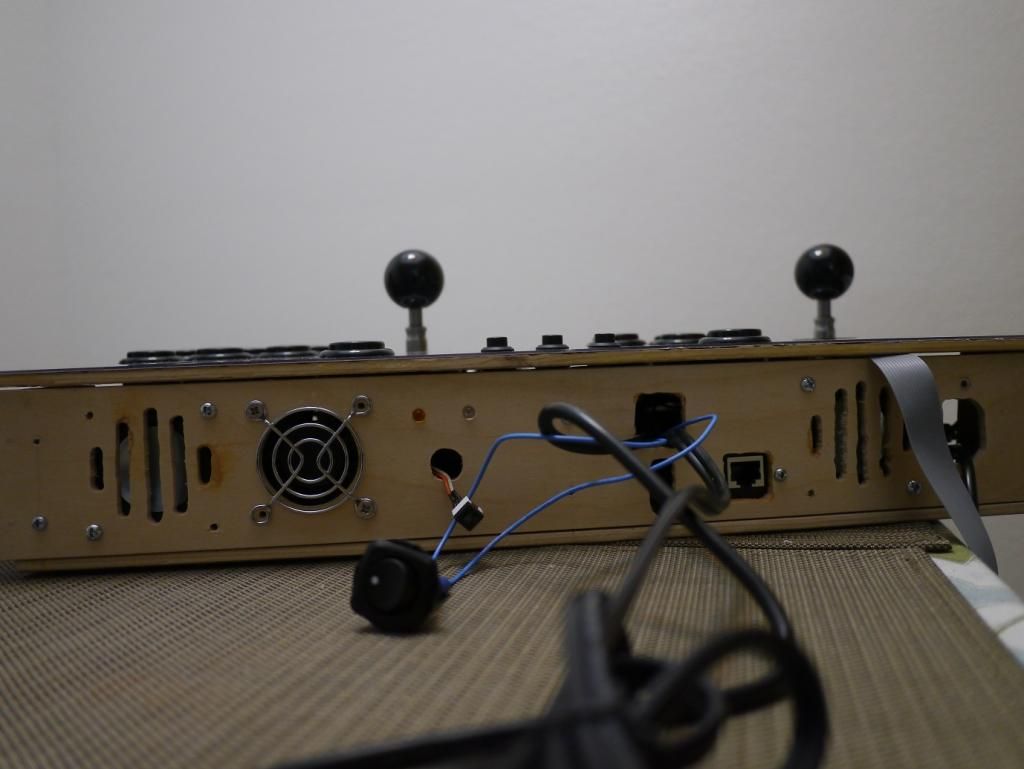
With the back panel and CP cover visible...
Back Panel
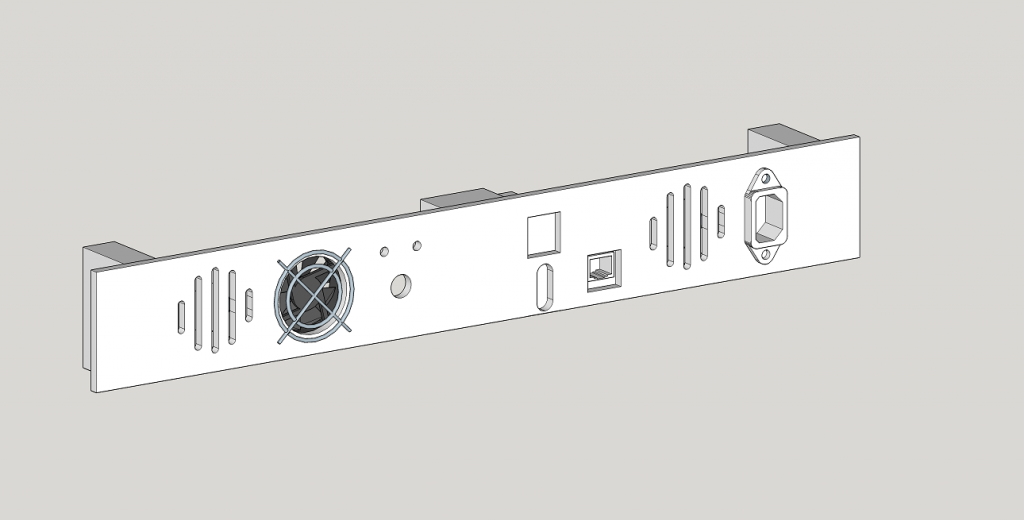
As I wanted the setup to be upgradeable as possible, and I figured that I would be tweaking the system often, I decided to make the back panel complete with all the necessary ports as any desktop computer would have.
Below is the back panel planned using Sketchup.
Sketchup template printed for cutting the holes into the plywood.
Here's how the back panel looks so far... Next is sanding/finishing, priming and I'll have it painted black as well.
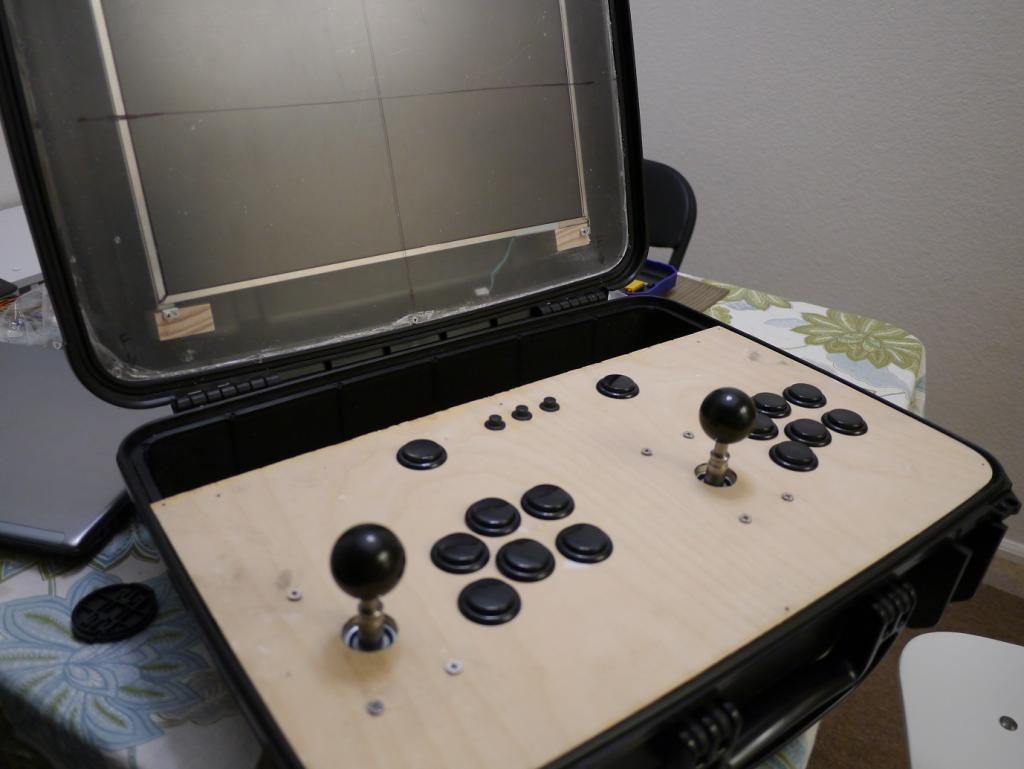
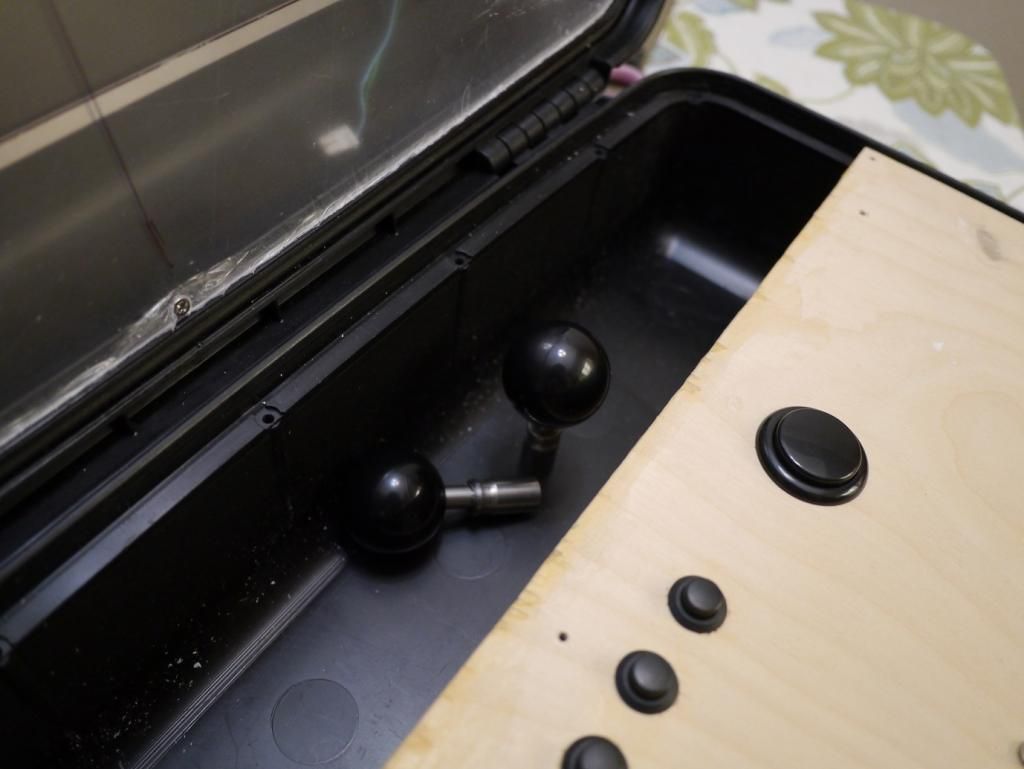
 Challenge #5: Closing the lid when the bottom compartment has joysticks sticking out - SOLVED
Perhaps anyone trying to build an arcade using a briefcase as the housing will come across the challenge of the joystick stabbing display/lid when closed.
Good thing I discovered early on about
The Link from Phreak Mods. A bit pricey if you ask me but it does the job well. You won't feel any difference from the stock shaft. I used the JLF version (The Link comes with a Seimitsu version too). The stock dust cover and shaft cover won't fit in the link though so I had to sand the stock JLF dust covers.
Joystick handles attached...
Joystick handles removed...
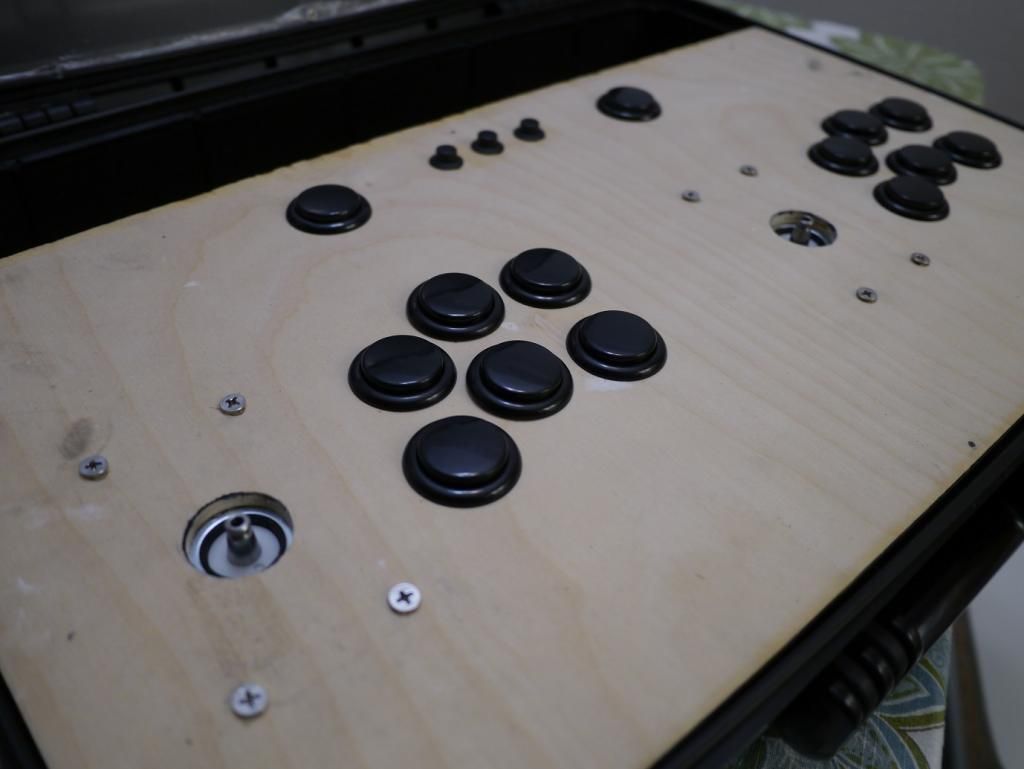
Handles stowed in the compartment...
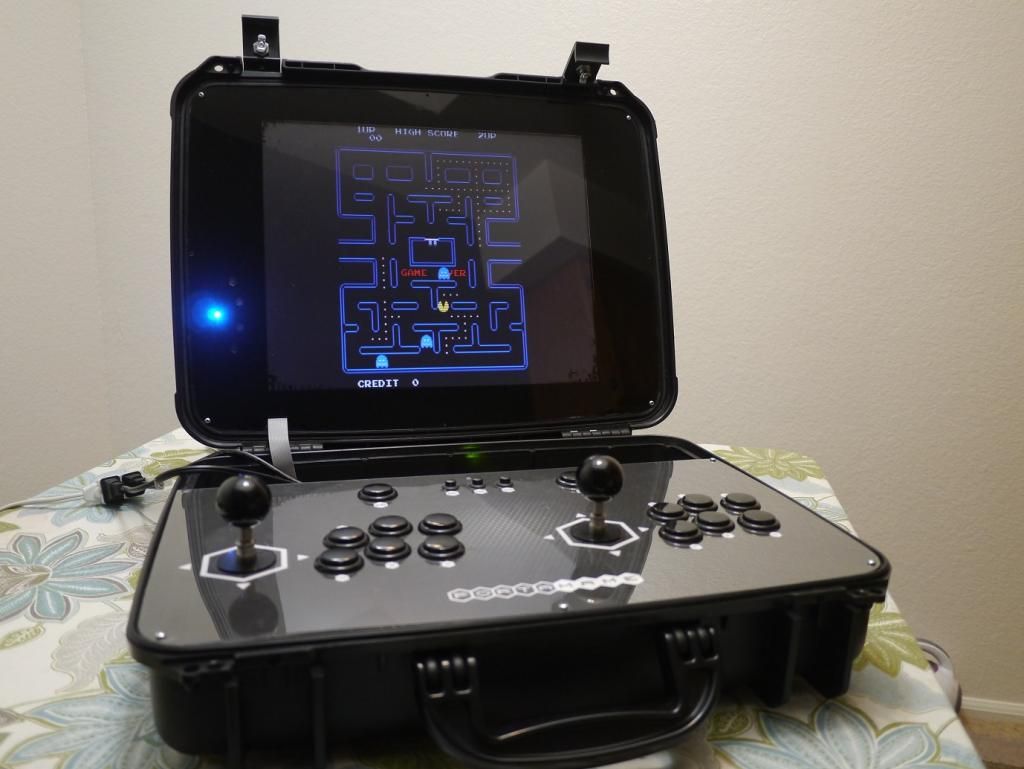
Test if the briefcase can be shut with the panels attached...
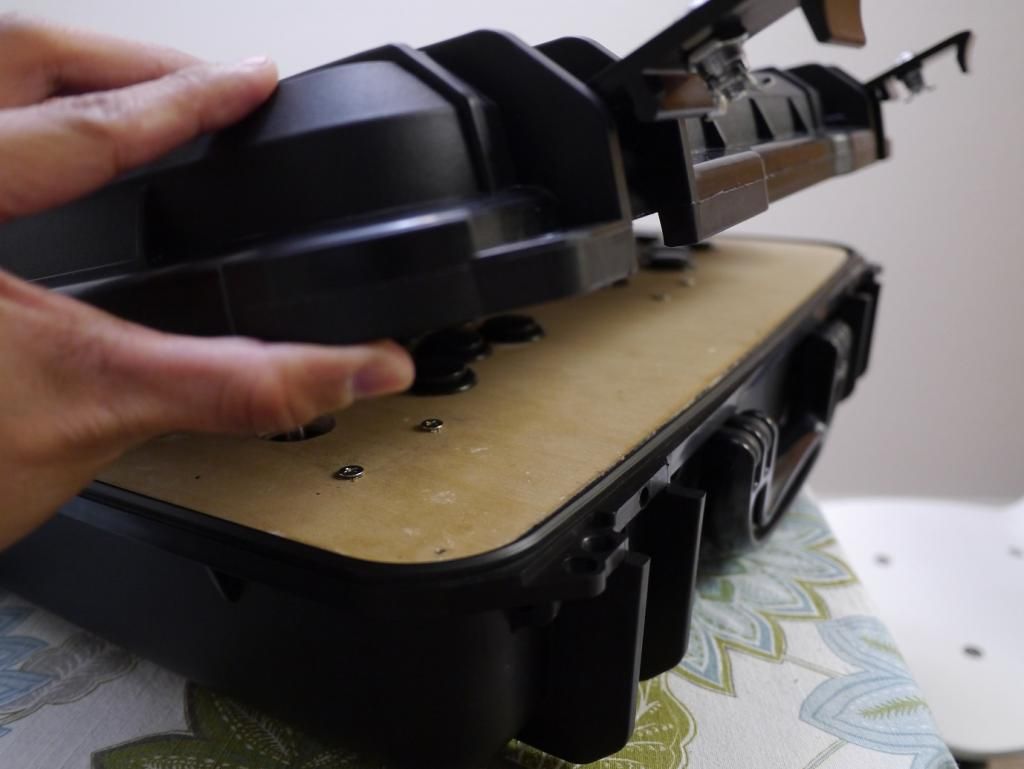
It does!
 Challenge #6: Mounting the display - IN PROGRESSChallenge #7: Getting the VGA, power and audio cables into the display/lid - PARTIALLY SOLVED
 More details to follow.


 Home
Home Help
Help Search
 Login
Login Register

 Send this topic
 Print
Print Topic: PortaMAME - Arcade in a Briefcase (Read 30757 times)


