Ha! I wouldn't go that far!

Okies, plenty of pics ahoy!

I used the MDF template I made to route out a piece of black 3mm acrylic to make a new CP:

Although its a perfect fit it sits just slightly too high so I'm going to get a CP CNC milled from 2mm aluminium.
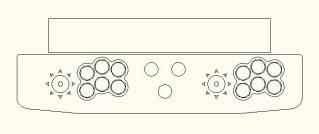
You can see the CP I am going to make here. I'm going to have RGB joysticks, RGB lit buttons and RGB lit arrows around each joystick. I seem to amassed eight LED Wiz's so I may as well put three to good use.
Pic of the modded RGB swivel JLF's I made:

You can also see the instruction panel above the CP. I'm going to use the SI graphics that BASS! kindly designed for me and I'm going to use the instruction space and the CP area for the graphics as the CP is fairly narrow and a lot of the graphics would be missed off.
Original graphics for reference:

BASS! is kindly tweaking the graphics for me to fit the new CP etc and is also designing a marquee and hopefully some art for the legs too
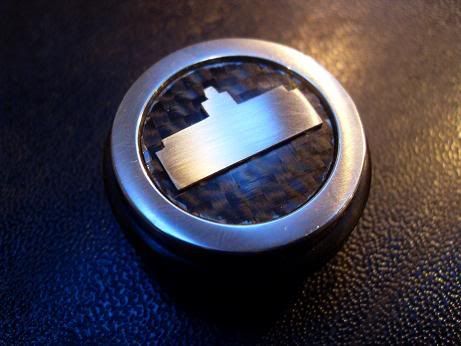
The two higher circles in the center will be player one and two start buttons and I'm thinking of installing the turbo twist spinner where the lower center circle is and using the SI spinner top I made:
Whilst I am getting the CP sorted I have been working on the stools some more. I made a template out of some scrap material I had at work to use as the template for the upper seat acrylic, lower seat acrylic and the base acrylic:

As you can see the spacies will fit inside nicely:

The black acrylic I ordered was six 300x300x10mm sheets. I needed to remove the excess material before template routing the rings. To do this I used the circle jig I made based of Javs design/how to.


Its basically the same as Javs, I just screwed it together instead of gluing it and made a knurled knob to fix the sliding block. I also added another t-nut with a long M6 bolt which acts as the pivot.
I marked the template out and drilled a 6mm center hole and countersunk holes in the corners to fix the material to my work bench.

In the end I attached the material to a scrap piece of MDF as the two surfaces of the work bench are not parallel and it was causing the acrylic to bend. It was then just a case of setting the cutting radii and cutting the rings out.

Just a safety reminder here, I had one of the bits break on me as I was routing. Always wear eye protection guys!

Pic of the routed out pieces:

Now I just need to attach the pieces to the template and route off the excess material. I have ordered some more flush trim bits which should be here tomorrow.
I have also had some luck on the monitor front. At the moment both candys have 31khz monitors. The one I am maming has some screen burn so I have been looking for a replacement. grantspain had some 29" (27" to you US guys) 15khz monitors shipped over from Spain and I bought two of them. This is one of them:

I have replaced the monitor in my Jamma woody with one of them and the picture on them is awesome! The monitor I had before had some serious colour issues which I couldn't fix so I replaced it with one of the 29"s and its loads better
This is the old monitor:

and this is the new one prior to decasing it and mounting it in the cab:

The best thing about them is they were only £50 each!

I plan to replace the burned 31khz monitor in the mame candidate with the other 29" 15hkz monitor. I just need to weigh up the best way to connect it to the PC. Either ArcadeVGA>JPAC or soft 15khz or JVS-PAC or whatever.
This means I should have mame running at 15khz and I should also be able to connect my Saturn. I will leave the 31khz in the other cab for Naomi carts, Xbox 360 and dreamcast which should leave most of the bases covered.
Whilst I'm on the subject of the other cab I have the DC and 360 hooked up to the monitor via a VGA switch:

The 360 has a VGA lead and the DC is connected though a VGA box. The DC looks awesome though VGA and me and the GF had a right 'blast' with some lightgun games last night. I played Confidential Mission for the first time and its great!

The candys also have some hooks on the back which are ideal to hang the DC guns as you can see in that pic.
Haruman is hacking me some DC pads and I'm going to add AMP connectors so the controls can be easily changed from Naomi>360>DC.


 Home
Home Help
Help Search
 Login
Login Register

 Send this topic
 Print
Print Topic: Naomi Projects - Update : PCB Holder (Read 55875 times)


