The garage looks good Franco. You should finally be able to turn out some good work. 

Seriously, those buttons look too damn cool. How do they feel when using them?
Cheers bud. They feel stock to me although I haven't been able to have a good thrashing with them. They do feel kinda more slinky though

I was wondering how things were going for you Franco. Nice little shop setup and it is even bigger then mine.  Now that your shop is setup let's see some progress on your projects.
Michael
Hey buddy, long time no speak! I don't get much time to get on MSN anymore, I'm normally too busy in my home, cough, garage

I though all you guys had 17 acre garages over there?
I've got those button bezels we were talking about into production now. There are some pics etc [
here] if you are still interested.
There should be lots of progress on all front now I have my garage set up, this latest addition has really spurred me on
Wow. Those buttons look incredible!
Hmm, Wonder what they would look like with a very lightly etched pattern, or maybe laser engraved.....
Cheers fella. I am planning on a little extra something for the buttons. I'm hoping to get Pongo to make me some vinyl space invader transfers for them. For the top row of each 3x3 array I'm thinking of having one spacie in its two frames of animation (up, down up) and then on the lower row have the next style of spacie but alternating its frames (down, up, down).
Lazer engraving would be pretty damn cool but its not something I can easily do on site, we I have a dot matrix machine available but its not suitable, I may look into it though, thanks.
Ok, I made a little more progress today....
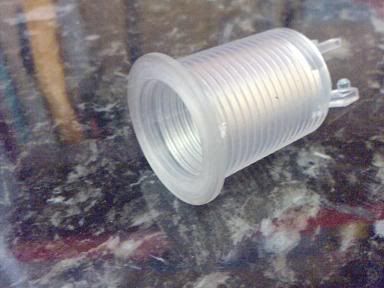
The only 'Happ' style buttons I have are some clear Completions and some vertical blue Ultimates. I've started experimenting with these for now.
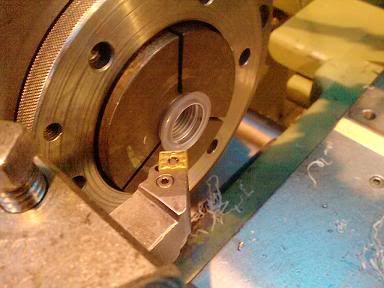
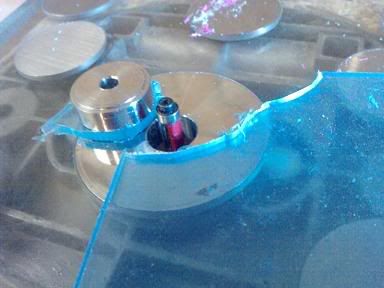
I used a lathe to face the existing casing bezel off the buttons to leave a nice flat and concentric face.
These are the resulting buttons:
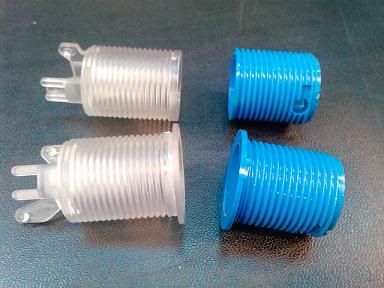
As you can see I made two versions of each button, one with the casing bezel completely removed and one leaving ~1.5mm of the material.
This is a side view of the button with the stainless bezel and plunger insert in place:

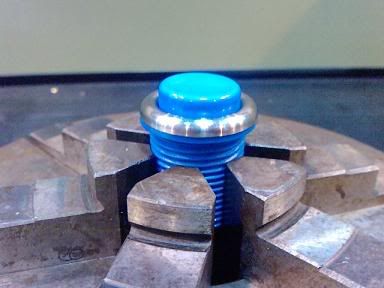
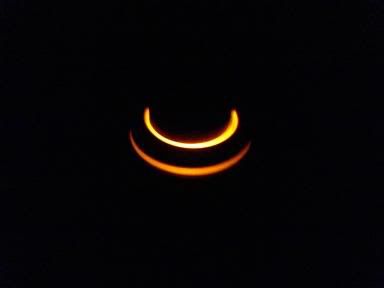
Removing the materail completely will give a result similar to Onds with the inner part of the button lit. Leaving a slight shoulder will allow two things:
1) When using a solid colour it will give a contrasting band of colour when used in conjunction with the stainless/brass parts. These are a couple of examples of the mix and match styles that could be achieved:
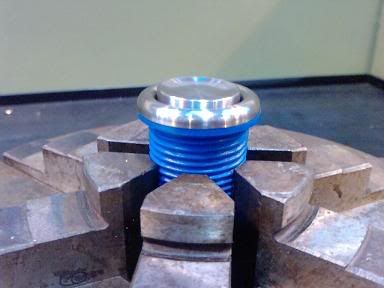
2) When using a clear button the remaining shoulder should also light up giving a second outer ring of light (more of this in a minute)
I also faced ~6mm of the front of the stock buttons as the stainless/brass plunger inserts are 3mm thick and the mounting/diffuser disc I'm using will also be 3mm thick. I did have a photo of this but I seem to have lost it

Ok, onto the mounting etc:
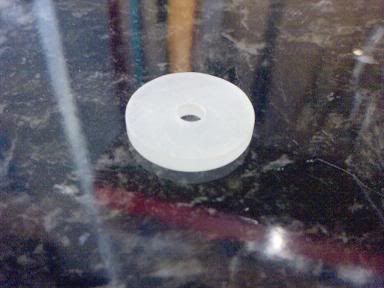
To attach the SS/brass inserts to the stock plungers I made a mounting/refractind disc similar to Onds by making a SS tempate and then using that to template route the disc.
I only have clear Acrylic so I used some 320 grit emery to roughen up the edges and sides to give the light something to refract off.
I also gave the clear shouldered button some 320 treatment to help the light refract:
I used Araldyte to attach the disc to the plunger and then the inserts to the discs. Then it was play time
As the buttons are clear I would lose a lot of light so I wrapped some electrical tape round them for now, when I do the real thing I'll spray paint the inside of the buttons. (I realise I dint cover the bottom, I was just too eager to see how they looked
)
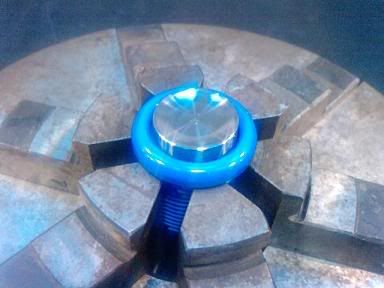
Ok, clear button, stainless casing bezel and stainless button and blue led:
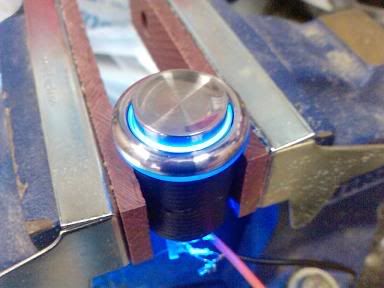

That for me right there is the money shot
The pictures have come out a little funny but the blue light is a really rich blue and IMO it looks awesome with the stainless.
I also tried the brass parts with a yellow LED to see how it would look (cough, somunny, cough!)
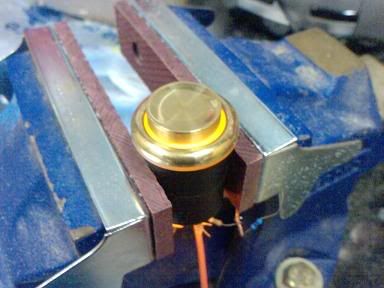
I think I have red, green and pink LEDs, let me know if you want to see any other combos.


 Home
Home Help
Help Search
 Login
Login Register

 Send this topic
 Print
Print Topic: Franco's Custom Cocktail (UPDATE: Wood cutting commences!! =) ) (Read 76425 times)


