Main Restorations Software Audio/Jukebox/MP3 Everything Else Buy/Sell/Trade
Project Announcements Monitor/Video GroovyMAME Merit/JVL Touchscreen Meet Up Retail Vendors
Driving & Racing Woodworking Software Support Forums Consoles Project Arcade Reviews
Automated Projects Artwork Frontend Support Forums Pinball Forum Discussion Old Boards
Raspberry Pi & Dev Board controls.dat Linux Miscellaneous Arcade Wiki Discussion Old Archives
Lightguns Arcade1Up Try the site in https mode Site News

Unread posts | New Replies | Recent posts | Rules | Chatroom | Wiki | File Repository | RSS | Submit news


Author Topic: 2nd project - 4:3 bartop  (Read 1567 times)

0 Members and 2 Guests are viewing this topic.

Extruder

  • Trade Count: (0)
  • Full Member
  • ***
  • Offline Offline
  • Posts: 15
  • Last login:March 04, 2026, 06:18:08 pm
2nd project - 4:3 bartop
« on: March 01, 2026, 06:24:52 pm »
I've had great fun with the Vigolix I built, but I've been meaning to build something larger. After procrastinating a while I stumbled across an item that sparked my interest and got the wheels moving again.

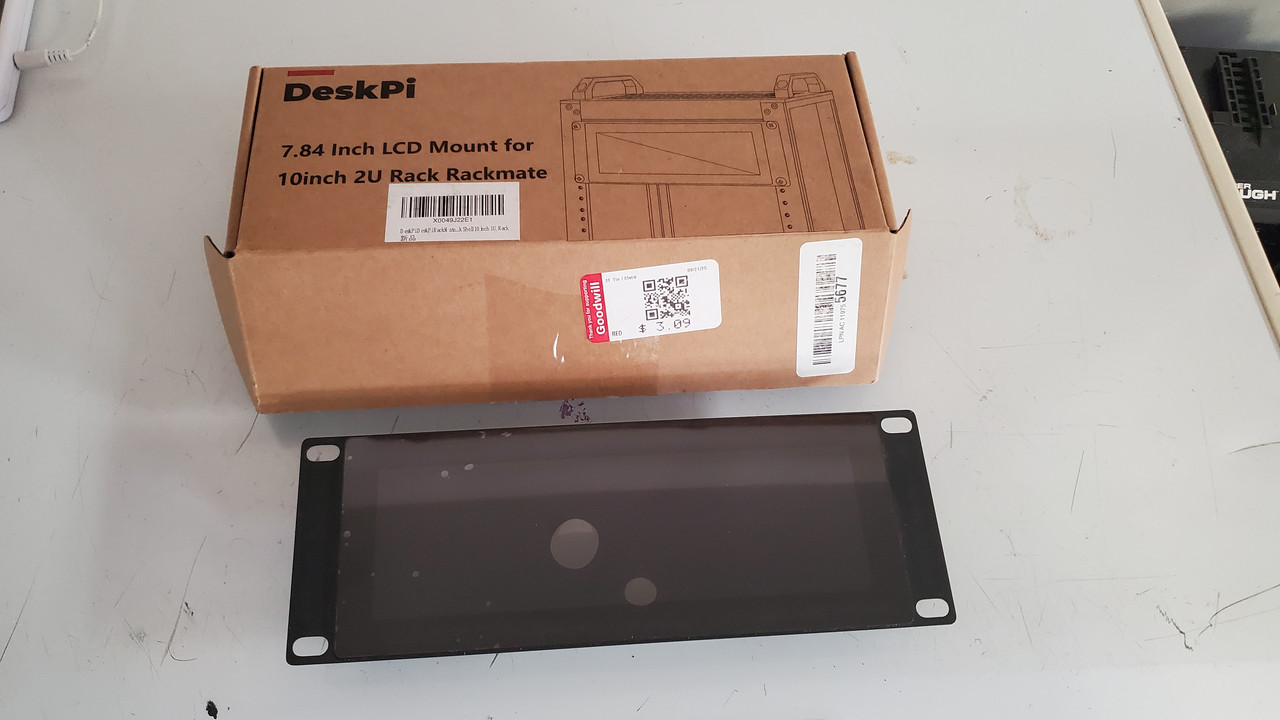
While trolling for treasure at the local Goodwill thrift shop I came upon this cool little 8" LCD panel. It is designed for some kind of Raspberry Pi rack mount server cluster. No idea how it got to this shelf, but for $3 I took it home. Nice little screen with HDMI in, powered by USB-C.


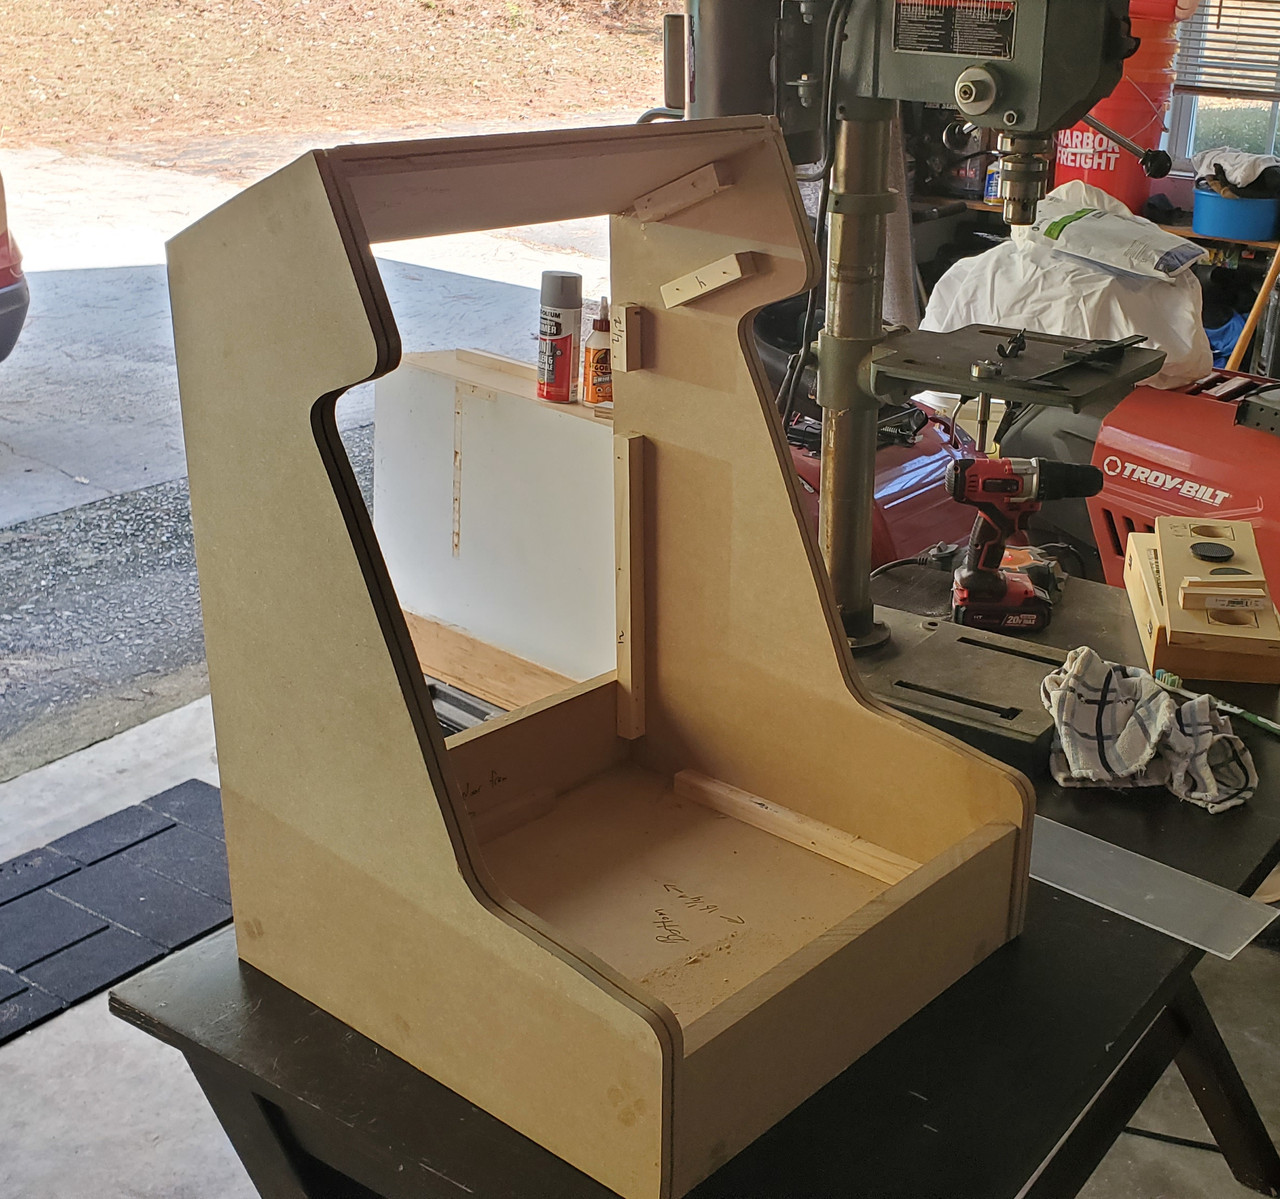
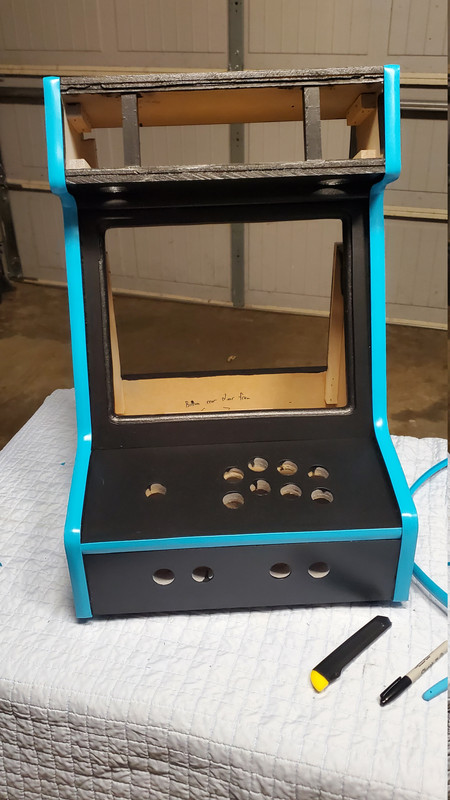
I took a basic bartop plan set from the Geek Pub and tweaked the measurements to fit both this little panel and a larger 4:3 monitor panel (also from a thrift shop, paid I think $4 for it.) and ended up with this as the basic design:


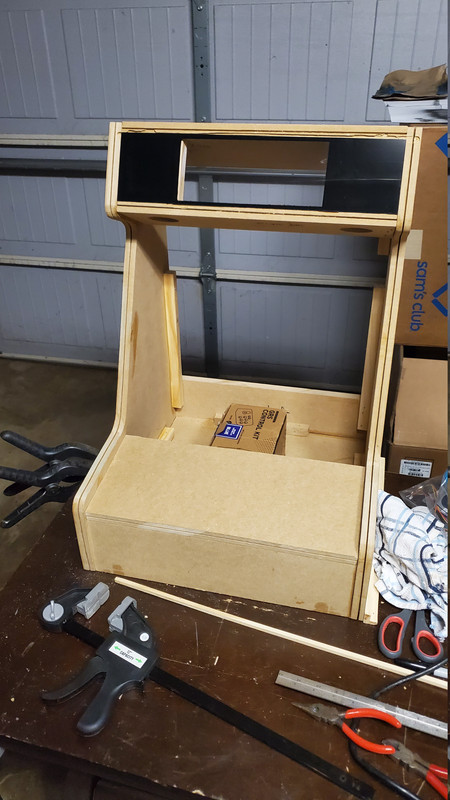
Fitted it for the marquee, cut and painted some plexi to go around the small LCD. Don't mind the awkward router scars :) Thankfully that will get covered later by t-molding.


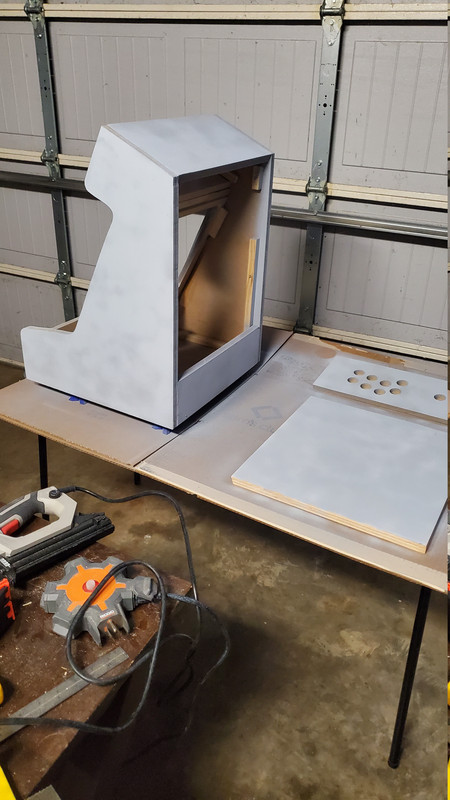
Primed, then painted. This turned out much better than my first project. I used a small foam roller to apply thin coats and sanded between. This resulted in a nice eggshell finish.


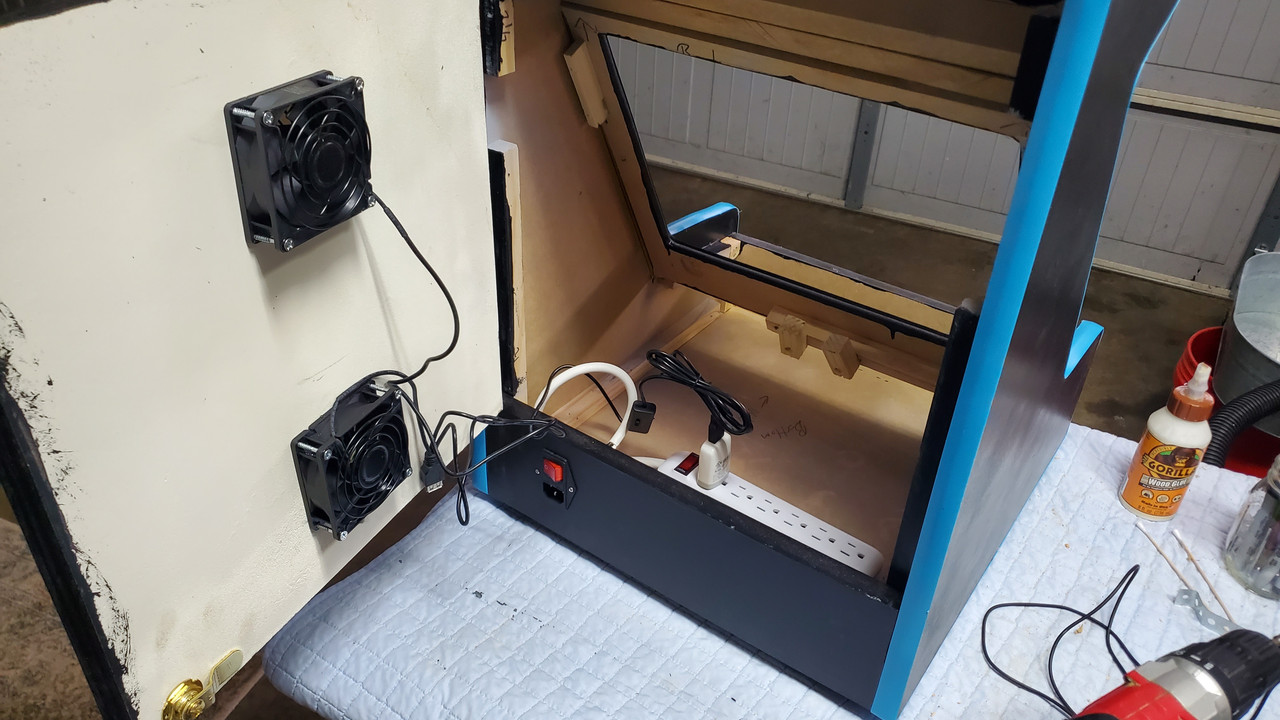
Installed a back door with my cooling solution. The lower fan brings air in, the upper blows it out. Powered by a USB adapter.


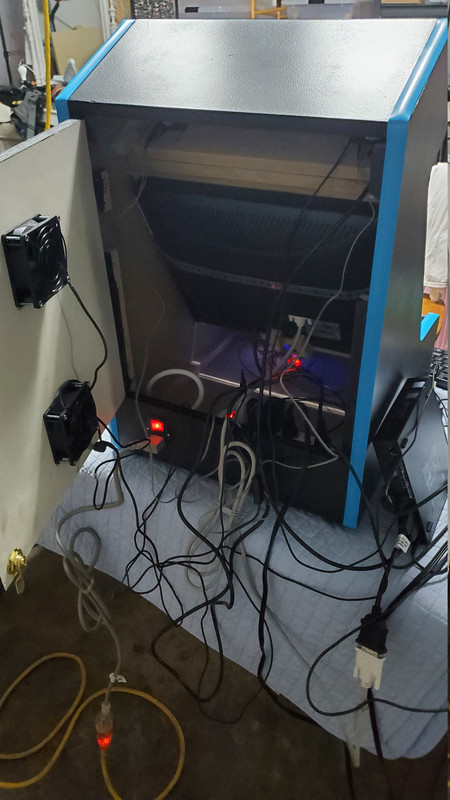
A test fit of the electronics. Still needs a ton of cable management and organization.
I was going to use a Pi4 but found difficulties getting the 2nd screen marquee working, so I switched to a used Optiplex mini off of Ebay. It was actually cheaper than buying another Pi, is a lot more powerful, and it does dual video-out by default.


The project is nearing completion. Running great, just needs some final configuration and to get the electronics organized and mounted inside the cabinet.
It's at the playable stage now, which is good and bad  ;D Instead of working to finish it I'm constantly distracted by "playtesting".


Extruder

  • Trade Count: (0)
  • Full Member
  • ***
  • Offline Offline
  • Posts: 15
  • Last login:March 04, 2026, 06:18:08 pm
Re: 2nd project - 4:3 bartop
« Reply #1 on: March 01, 2026, 06:53:13 pm »
I forgot to mention the sound system. I really wanted an external volume control. I've tried various software solutions, tray icons, hotkeys, etc and couldn't get it working reliably, so ended up doing this oldschool with a volume knob. Like the other aspects of this project, thrift shopping played a key role. I picked up a set of HP computer speakers for a few dollars and disassembled them to repurpose both speaker drivers and the little built-in amplifier board. The whole setup is USB-powered and was fairly easy to break down using a small pry bar and a dremel.

The speakers were placed in the usual location under the marquee:


I mounted the original amp board inside the cabinet after drilling a hole so the volume pot could be accessed from outside the cab. Ran new wires to connect the speakers back to the amplifier board, and after a little soldering it was good to go.


 I 3d-printed a shaft extension and knob (models obtained free from Thingiverse), which enabled me to have a knob on the outside of the cabinet without having to countersink holes, etc. The shaft extension made it easy to get an exact fit as I could scale the part in my 3d pinter's slicer software for a custom size.


The sound is surprisingly good, and this was much less expensive than one of those retail amp & speaker kits.

pbj

  • Trade Count: (+4)
  • Full Member
  • ***
  • Offline Offline
  • Posts: 11090
  • Last login:March 01, 2026, 08:00:13 pm
  • Obey.
    • The Chris Burke Band
Re: 2nd project - 4:3 bartop
« Reply #2 on: March 01, 2026, 07:59:02 pm »
My God, someone blew the dust off this forum.

Looks great!

 :cheers:

Mike A

  • Trade Count: (0)
  • Full Member
  • ***
  • Offline Offline
  • Posts: 5915
  • Last login:Today at 05:13:02 am
  • This plan is foolproof
Re: 2nd project - 4:3 bartop
« Reply #3 on: March 02, 2026, 08:12:59 am »
Nice little cab. Love it.

javeryh

  • Trade Count: (+1)
  • Full Member
  • ***
  • Offline Offline
  • Posts: 7996
  • Last login:Yesterday at 12:10:15 pm
Re: 2nd project - 4:3 bartop
« Reply #4 on: March 03, 2026, 11:40:28 am »
My God, someone blew the dust off this forum.

Looks great!

 :cheers:

It's so dusty in here.

Nice project! I didn't know you could output to a second monitor via retropie or whatever.

Extruder

  • Trade Count: (0)
  • Full Member
  • ***
  • Offline Offline
  • Posts: 15
  • Last login:March 04, 2026, 06:18:08 pm
Re: 2nd project - 4:3 bartop
« Reply #5 on: March 03, 2026, 08:27:43 pm »
Thanks all  ;D

Marquee screen support is much easier now than it used to be. Most of the major retrogaming frontend managers like Launchbox, Batocera, Hyperspin, CoinOps, Retrobat, etc support it with minimal configuration. I used CoinOps and it was literally just one click to enable the 2nd display.

I think we'd see a lot more of these dynamic marquee screens if they weren't so expensive. A stretched bar LCD and driver board to fit a full-size cab with a widescreen primary display can easily run >$300-400 just for the marquee. I got super lucky with this thrift shop find. Retail the little LCD I used goes for $100 on Amazon.

One way I have seen large marquees done well for less cost is by using a larger monitor but carefully mounting it to where the cab frame obscures parts of the display, kind of like letterboxed video. Then the screen resolution on the marquee is set to match this smaller viewing area using driver tricks and custom resolutions. There have been projects in this forum using this method, but I can't recall the project names at the moment. Some projects do this for the primary display too, to create a large 4:3 display by using the center section of a large TV and hiding the rest of the screen within the cabinet. It's a neat idea.

Planning my third project now, going for a full-sized cab with a trackball and spinner. I love this little bartop but there are some games it just won't play properly. I'm ready to play Tempest with a spinner, it's been way too long.
« Last Edit: March 03, 2026, 09:05:42 pm by Extruder »

Ond

  • Trade Count: (0)
  • Full Member
  • ***
  • Offline Offline
  • Posts: 2377
  • Last login:March 04, 2026, 05:36:57 pm
Re: 2nd project - 4:3 bartop
« Reply #6 on: March 04, 2026, 05:08:14 pm »
Nice work and does remind me of 'the good old days' of this forum.  Active builders need posts! Then it will be less dusty.

 :cheers:

DaOld Man

  • Trade Count: (+4)
  • Full Member
  • ***
  • Offline Offline
  • Posts: 5181
  • Last login:March 04, 2026, 09:31:59 pm
  • Wheres my coffee?
    • Skenny's Outpost
Re: 2nd project - 4:3 bartop
« Reply #7 on: March 04, 2026, 09:11:51 pm »
I agree with everyone else, nice work!