Thanks guys! I'll catch you up on what I've done for the build so far. I bought two pieces of cabinet grade birch plywood from Home Depot, and the rest of the cuts were going to be made from some pieces of leftover oak plywood I had in my garage. I figured they were both hardwood and it is all going to be painted so it didn't matter that they didn't match. I went with wood over MDF because I already had some wood I wanted to use, and because I'm doing so much of this by myself, 4x8 sheets of MDF are ridiculously heavy. In my mind hardwood plywood will also last longer/take more abuse, but that could just be in my mind.
Here are the build pics I have so far:
First, I drew out one of my side panels on the plywood, and using a combination of a table saw, circular saw, and jigsaw, I cut it out. The table saw is too difficult to use for the very large sheets of plywood, even with two people, so I've mostly stuck with using the circular saw and clamping straight edges to use as a guide, and it's worked well.
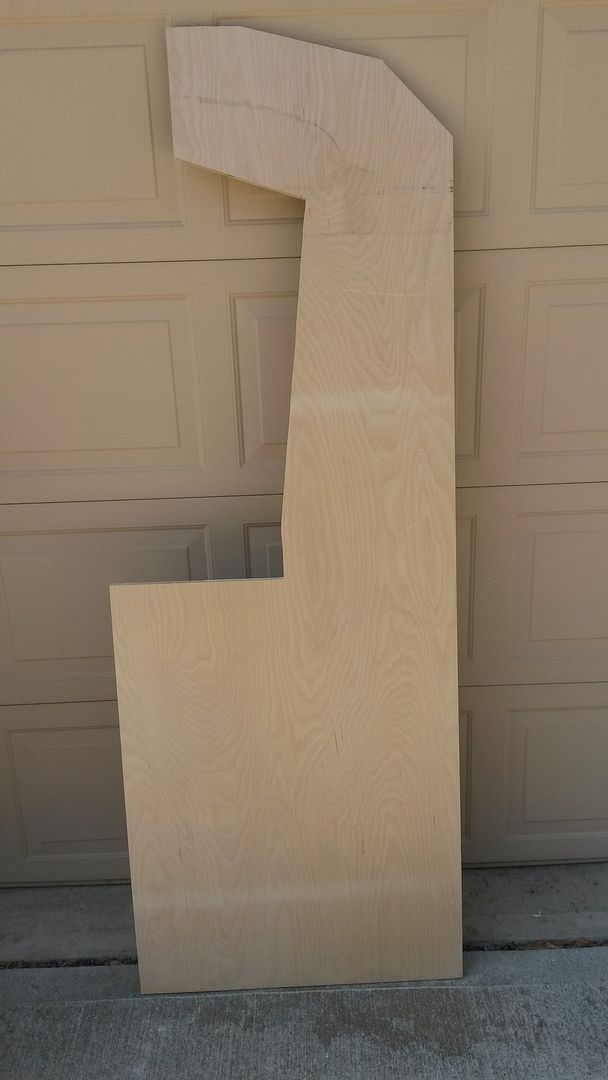
I was really happy with how that turned out, and following the guidance of other builders I bought myself a flush trim bit (or pattern bit) from Amazon
http://smile.amazon.com/dp/B0000225XQ for my router to cut out the second piece. I traced the first piece onto the plywood, and rough cut around that traced line with my jigsaw. I then used the flush trim bit (there are a lot of videos online that show you how to use it) to make an exact copy! This turned out way better than had I tried to cut this one out by hand again.
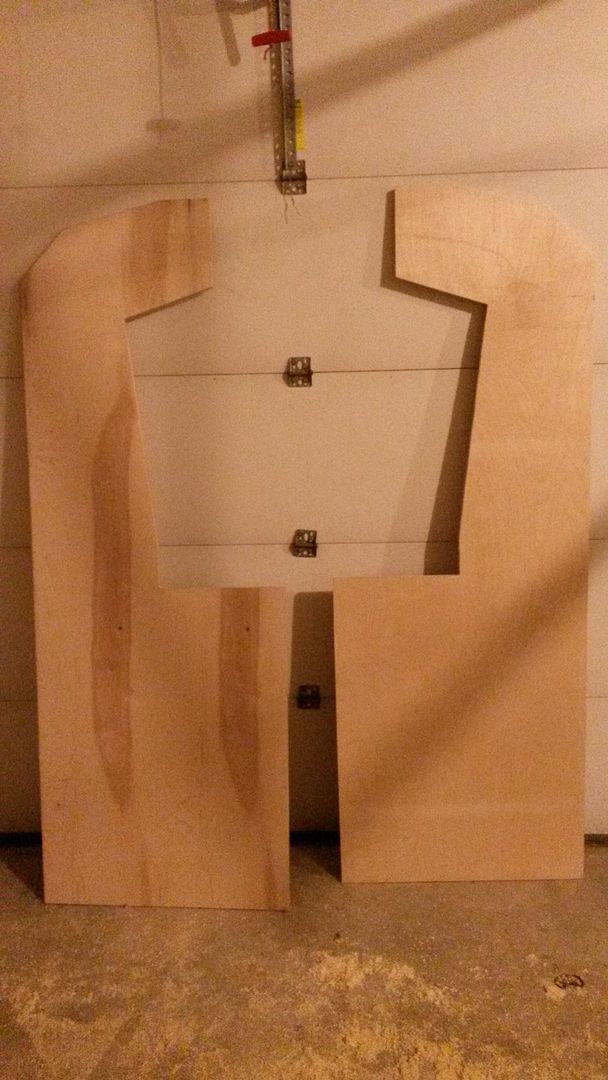
I then proceeded to cut out the top and bottom of the control panel. This was considerably easier than cutting out the side panels. Here is the top right after I cut it:

Now I was pretty sure I had all of the parts cut that would be receiving t-molding, so I went ahead and used my slot cutter (I got this one
http://smile.amazon.com/dp/B0002TUCRA) around all the edges. Adjusting this so that it lined up exactly in the middle of the plywood was a bit of a pain, but for the most part it went well:
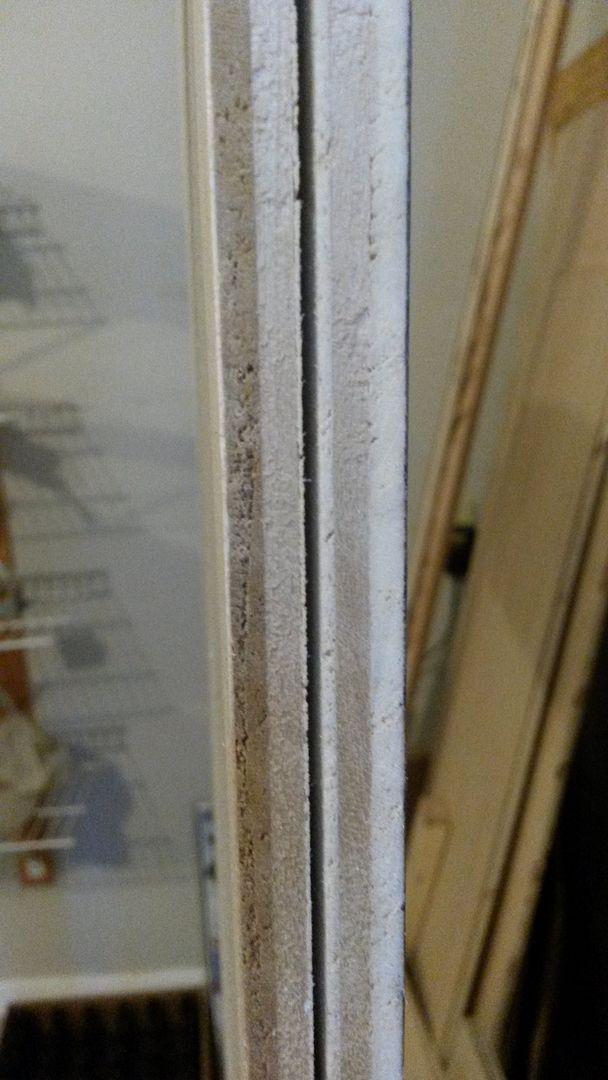
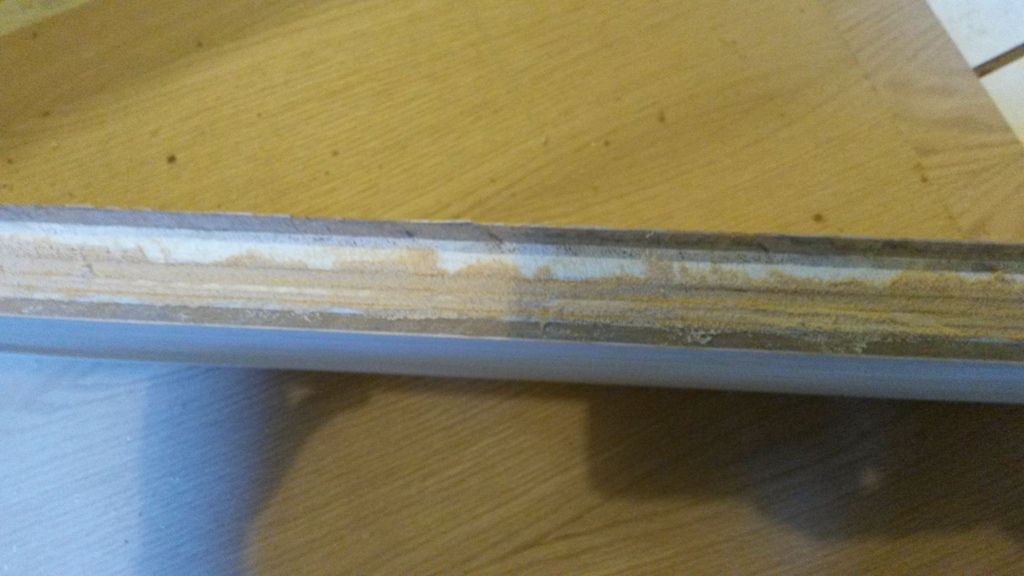
I did screw it up in a few places around the control panel, it apparently wasn't sitting flat, or i'd adjusted it wrong, or something. I ended up filling that slot back in with wood filler, and I'm going to re-cut it. Here is how the wood filler worked, I haven't re-cut it yet, I'll let you know how that goes when I do:
I also cut out a few of the front panels, I haven't taken any pictures of those yet as they aren't exciting, just some squares.
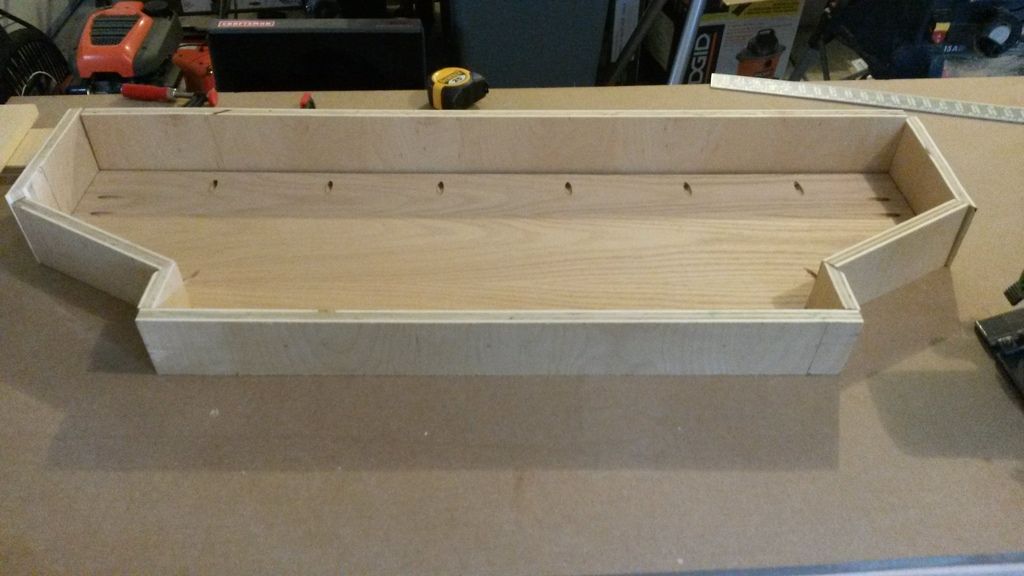
Next, I cut out the sides of the control panel. This was annoying because of the shape of my control panel, and the fact that I wanted a slight slope from back to front. The angles weren't perfect, and I had to remake a few pieces (I still have one to remake and I need to cut the slope onto one of the others I re-made as you can see), but it worked out as well as I could hope and it's not going to be glaringly visible. I've decided that I'm assembly this using pocket holes, so I've drilled all the pocket holes on to the inside of the bottom of the CP. Once I re-cut that final piece I'll screw these in.
That's as far as I've gotten on my build! After I finish the CP (aside from drilling holes), I'm going to cut out the rest of the large panels for the back, top, and bezel.


 Home
Home Help
Help Search
 Login
Login Register

 Send this topic
 Print
Print Topic: First Build - "ManorCade" Four Player Cab (Read 22218 times)


