Part 2.
Save the Jamma fo yo mamma.
I wanted a cleaner solution for the wiring, and I wanted the versatility of installing boards as well as mame. Jamma is the way to go for this. I also wanted to know more about the jamma converting...
First, prep the Jamma wiring loom.

I followed
Bob robert's guide on his site about bundling the connections so that the wires that are relevant to the area they're routing too. So here was my first mess-up, bundling the P2 start button with the P2 Controls instead of the P1 Controls is what forced me to add another connection to P1's CP. I didn't realize it till after the loom was installed and I went to connect the CP. Bob's guide is based around stand-up machines, not cocktails! *smacks forehead*
There are 6 bundles:
Power
Audio
Video
Coin Door
Player 1 Controls
Player 2 Controls
Like I said in Part 1, I want to wire this baby up properly, that means safety's first.

The power cord's lacking of a grounding pin needed to be addressed, so I disconnect the old one from the distribution block, and cut open a spare PC power cord I had and gave it the old connector. It's just a 3-pin molex.


We now have Earth Ground access <phew>.
After that was prep'd, I needed to gut out my old sloppy wiring and PC components out of the cab. Everything's got to go:

Earth Ground was then distributed throughout the cabinet's metal parts). Fan re-installed, the power switch, the Switching Power supply installed behind the cash box area, jamma loom installed and connections fastened to their respected areas. That bundle in the cash box is the coin-door I've yet to wire up. It has wires for the switches, the lighting, and the coin meter connections. PCB's or Mame hardware is going to be mounted on the side wall where my hand is closest to.

Here's the view of the CP's hooked up using Molex connectors. Nice and neat, easy to disconnect at the times of maintenance.


After all the wiring was settled, it was a manner of going around affixing connections, then it was time to power it up and check/adjust voltages. After that, I had to see this thing running so I plugged in a jamma board and gave it a test run.

Pretty cool, but I need a vertical game. Ahhhh Raiden II:
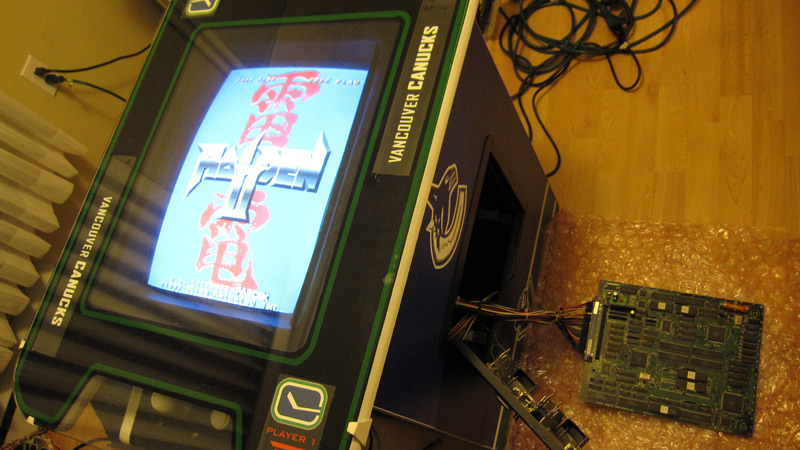
Even though Raiden II is not a cocktail game for two players, it's pretty darn good for one, and I still got to test the controls out for both. Everything works!

The monitor looks bright and crisp, and there's no more discolouration. Cap kits are such a huge bang for the buck and it's just what this monitor needed:


Next up is what I did to improve the audio, but it's late here and I'm going to crash now. Stay tuned for the next part of this Jamma Re-wire!


 Home
Home Help
Help Search
 Login
Login Register

 Send this topic
 Print
Print Topic: The Canucks Cocktail Cabinet (Read 74745 times)


