Main Restorations Software Audio/Jukebox/MP3 Everything Else Buy/Sell/Trade
Project Announcements Monitor/Video GroovyMAME Merit/JVL Touchscreen Meet Up Retail Vendors
Driving & Racing Woodworking Software Support Forums Consoles Project Arcade Reviews
Automated Projects Artwork Frontend Support Forums Pinball Forum Discussion Old Boards
Raspberry Pi & Dev Board controls.dat Linux Miscellaneous Arcade Wiki Discussion Old Archives
Lightguns Arcade1Up Try the site in https mode Site News

Unread posts | New Replies | Recent posts | Rules | Chatroom | Wiki | File Repository | RSS | Submit news


Author Topic: My sweet baby... GAME (top tier rebuild)  (Read 27910 times)

0 Members and 1 Guest are viewing this topic.

angryred

  • Trade Count: (0)
  • Full Member
  • ***
  • Offline Offline
  • Posts: 78
  • Last login:October 20, 2023, 12:46:57 am
Re: My sweet baby... GAME (new pics and tales)
« Reply #40 on: January 01, 2010, 05:20:23 pm »
...It's never really finished.

When I made my first set of homebrew Atari volcano buttons, I knew I was going to want to re-do them someday. Sculpey proved far easier to sand than I expected, and that accidentally resulted in a variety of sizes among the cones. I had also tried a mix of "metal" and black cones, and it just didn't work for me. So I ordered a couple of volcano cherry switches off of Ebay for five bucks, then set about casting a set of 12 from one of those cones.
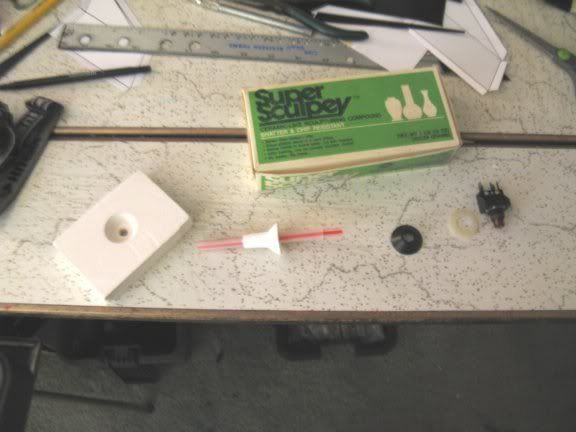

Left - the plaster cast; Middle Top - wonderful Sculpey; Middle Bottom - a funnel tip and thick plastic straw that was my original mold; Right - cherry switch, washer and cone.
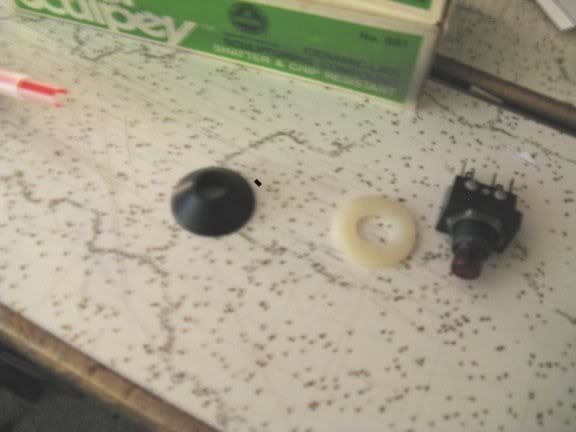


I only used the cone from the cherry switch assembly.  I already had an array of 12 switches installed, and it would have been a royal pain (and expensive) to replace them all with cherry switches. I actually got a pair off Ebay; one was perfect, the other was scarred with the familiar cigarette burn and so useless to me...

I filled the cone's center with Sculpey before casting-- otherwise it would have gotten stuck in the mold (it's threaded inside). Then I poked the straw through that center filling. The straw is the same size as the buttons in my panel, so having the straw in the center during casting made a proper sized hole in the top of the mold. I applied a light smear coating of Vaseline on the cone to keep it from bonding to the plaster, then poured the mold.
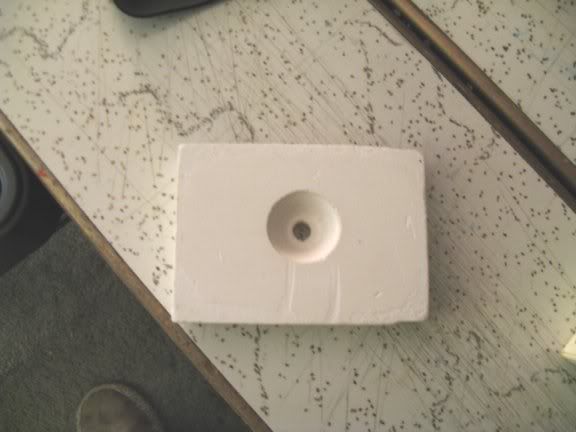

(underside of the mold)

After the mold hardened, then I pressed 12 wads of Sculpey into it, one at a time (making sure to smear the mold with a small dab of vaseline before each). Then I stuck the straw in from the top to punch out the hole, and also to help push the cone from the mold without distorting the shape.  Then I dropped the cones in a glass dish and baked them (about 25 minutes for something this size). After they cooled, I lightly sanded any rough edges, then applied a few coats of black rustoleum.
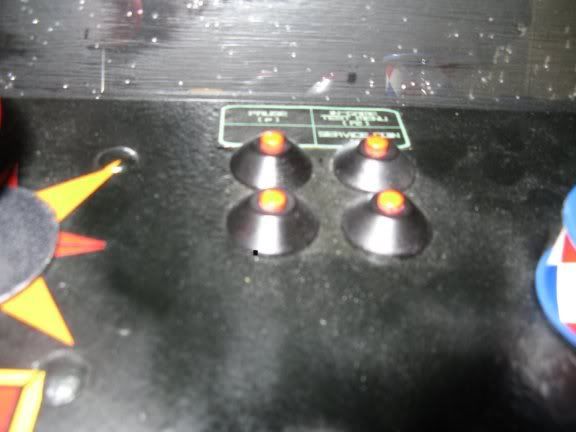


Voilŕ! 12 cones, uniform shape and color. I had all this stuff lying around, so it only cost me ten bucks total and that was just for ordering the original cone off Ebay.
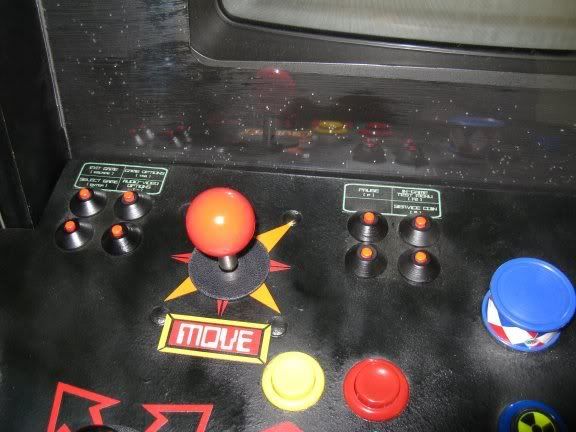


I was content with non-illuminated buttons, again considering the cost of accumulating 12 cherry switches and the prospect of some awkward router work. Then a light went on in my head: I had already installed a blacklight to kick on the glow in my Tron and Satan's Hollow sticks. So I got some red flourescent paint, painted all the red buttons, and once that dried I applied a generous amount of clear gloss coat; several layers, in fact, to last through many, many presses. I also got a sheet of flourescent yellow paper, and printed out the radioactive symbol as an insert for the center button on the top tier.
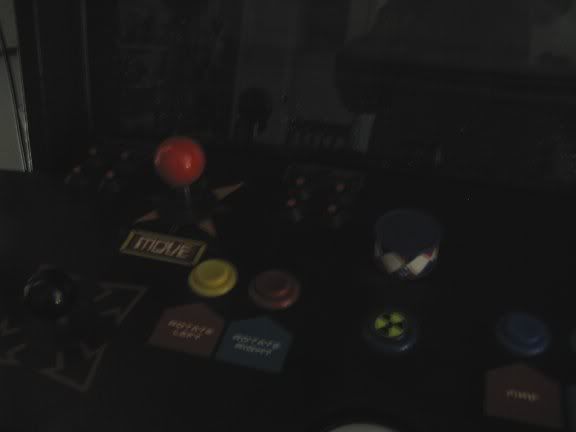


...Machine off...
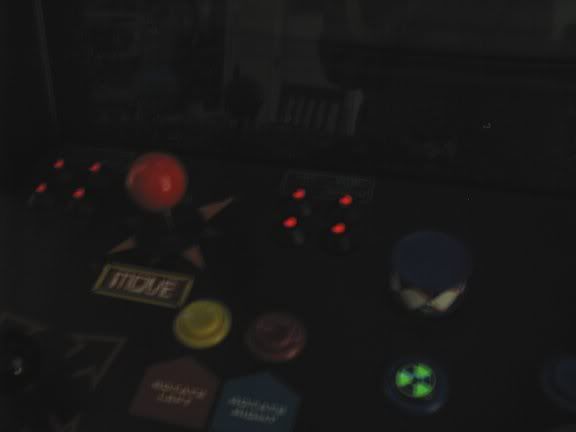


...Machine ON!
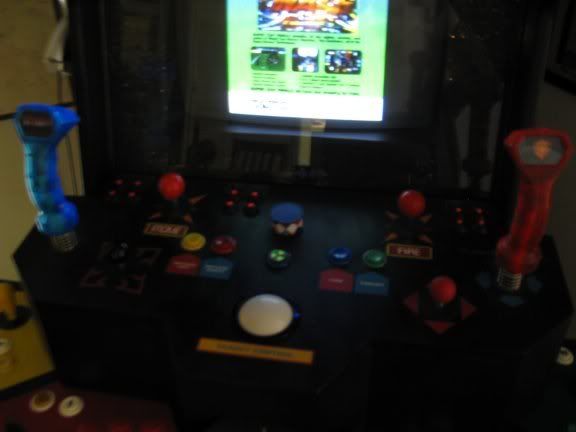


I'm much happier with the cone array now. The uniform shapes look so much better, but either way I should have gone with a single color for the entire array from the very start.

Moving on to the new Aimtrak! Below is the Aimtrak gun in its holster. I made the holster out of the black plastic cover from one of those narrow 3-ring binders-- the plastic is a single textured sheet, thin but sturdy.
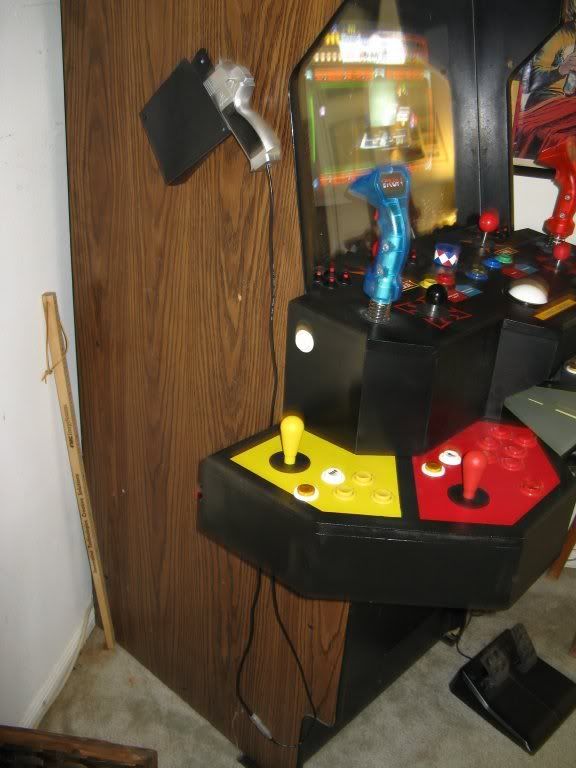


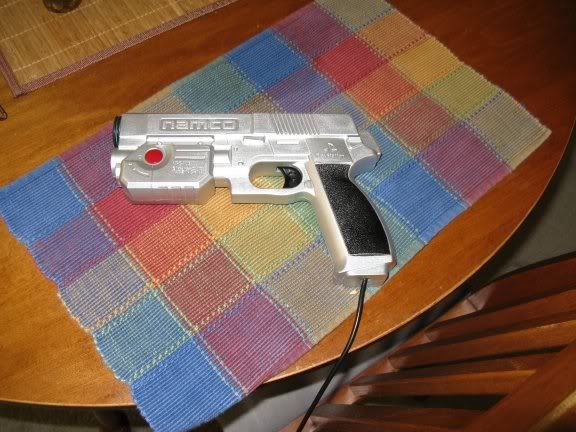
The gun is an old PS1 Guncon, gutted and repainted.


The following is a tale of espionage and intrigue.

It begins with installing the LED bar for the Aimtrak. I mounted the bar through the back of the cardboard bezel, then dropped the USB cable down into the cabinet. Per Andy's recommendations, the LED bar needed to be connected directly to a USB slot on the MB, and not through a hub.

Now, back when I put the PC in the cabinet, I didn't bother disassembling the PC; I just removed the case cover and bolted the open case to the inside of the cab, then ran a couple of USB cables to hubs accessible via the coin door. This lazy, boneheaded decision now put me in the position of having to bend my wrist, arm, and a certain portion of my torso into a most awkward and somewhat painful shape, all in order to reach that one remaining USB slot on the back of the PC case. It was one of those reaches that strips humans of their most powerful appendage, the opposable thumb; only the first and second fingers could clumsily pinch the plug in that remote, unseeable cranny, and the plug itself seemed mischievously determined to escape those fingers at every turn.

...And I could do another paragraph on how after all that, the plug would be flipped the wrong way, but I'll spare you.

It took me twenty frickin' minutes to get that frickin' plug in there. Roughly the same amount of time it would have taken to yank the PC case out, but whatever.

But now I've got it plugged in, and I'm ready to test out the Aimtrak! I hit the power switch--

*POP* *hissssssssss* (acidic smell)

HolyCRAPyankthepowerplugOUToftheWALL—

…Fried power supply. So now I have to pull out the PC case anyway.

Fortunately, I had an extra power supply in a junked PC; I was just hoping that nothing else got fried. It also gave me a reason to finally pull out that PC case and strip it down to just the MB, HD, PS and fans. It also gave me a reason to look into another nagging problem…

The PC was a hand-me-down, and ever since I’ve had it there has been a small but perpetual annoyance. The AOpen MB has a “Doctor Voice” feature that tells you why your PC isn’t starting; it says stuff like “your keyboard may have a problem” if the keyboard isn’t connected, for example. On this PC, every now and then when I would press the power button it would refuse to boot, and I would hear a small voice repeating “your CPU may have a problem. Your CPU may have a problem”. I’d unplug it and turn it on again, and after repeating this process a couple of times it would boot and work fine. No crashes, no problems at all, in fact, until I’d turn it on again next time.

So now that I’ve got the MB out, I decide I’m going to look into this problem. I might as well, since at this point I’m figuring I’m probably going to have to replace it anyway, so no harm in monkeying with it. Previous searches on this message told me that it had something to do with CPU temperature, most likely a heat-damaged CPU.  But I always got this message when the CPU was cold…(!)

Googling this message along with the MB specs, I kept coming across a strange tale. Back around 2003(?) a Chinese (Japanese?) electrical engineer stole a formula for an electrolytic solution from his employer, then ran off and sold it to a Taiwanese manufacturer, who in turn used the stolen formula to produce thousands of capacitors. Problem was, the formula he gave them was bad; copied incorrectly or something down the line. Electronics all over the place started failing, tainted by these capacitors bursting like teenage acne.

So I yank and toss the bad power supply, and now I can get a good look at the motherboard for the first time. And sure enough, right next to the CPU are two capacitors that look like ripe grapes. Fluid is gooping out the tops of both. Again, I’m thinking the MB is probably headed for the scrap heap, so no reason not to at least try to fix it—a couple of capacitors is a lot less than a new MB .

A few months back, my father, a former electrical engineer, came over to help me re-cap my monitor (in other words, after forty years I finally let my Dad teach me how to solder).  I took this lesson to my motherboard, and quickly realized that my Dad is a soldering frickin’ samurai.  In more time than it took his dancing hands to recap a whole monitor board, I smothered those two capacitors with enough expletives to make the crew of an aircraft carrier blush. But I finally got them in there, seated nice and low on the board and with no stray solder. As I mounted the board in the cab, I was still ruminating on where I was going to get a good motherboard with an AGP slot so I wouldn’t have to buy another ArcadeVGA…

No one was more surprised than I when it actually booted up. Well, no one really cared, but I did try to describe to my wife the event like unto a cosmic convergence that had just occurred, and she just gave me that smile that says “I don’t really get it, but good for you, Honey”. Then she said, “Good for you, Honey!”

…It’s been a couple of months now, and I haven’t heard “your CPU may have a problem” since.
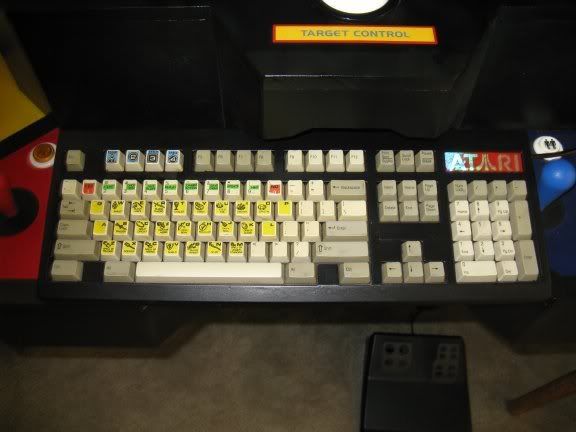

Some gussying-up of the Thayer’s Quest-labeled keyboard.  I layered several coats of clear gloss onto the keys, basically turning the paper stickers into plastic. I shaved the edges of the stickers with an exacto knife to make them nice and smooth and flush with the keys, and now you can rake your fingers across the keys without noticing the stickers at all. I had a few of these metallic Atari stickers that I have no idea from whence they came, and one of them fit quite nicely into an indentation in the upper right.
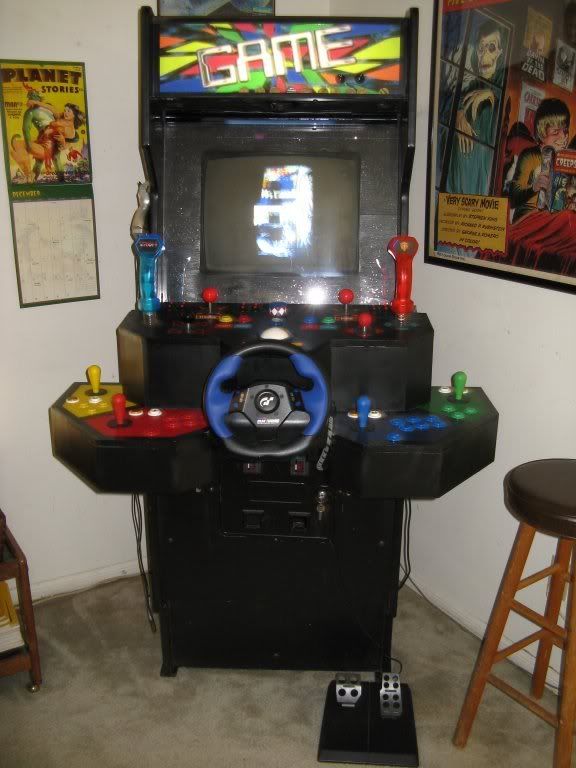


Steering wheel in place ‘cause my 5 year old nephew likes Spy Hunter.

Lastly, ever since this thing came to life around last Christmas, I have been slowly playing through every game in the “Available” list (v112 MAME32; about 2800 games filtering out non-working, clones, mahjong, etc.). This is mainly to check controls for all the games on the machine, choose the best looking resolution for each, and turn my Favorites list into a roster of all games that can be comfortably played on this machine.

Fortunately, using the default wiring configuration on the I-Pac results in the majority of games already being set up perfectly; I usually only have to tweak games with analog controls, for example. I like to rearrange the player order on 4-player games so that the onscreen player colors match the colors on the 4 player panel, if I can, and I also like to set up controls for single player games so they can be played either right or left handed; stuff like that. (Anybody come up with an easily accessible, competent substitute for those little metal spring-flicky joysticks used on late 80’s sports games like Quarterback?)

Most of the time, though, I just start up a game, give it a quick play, add it to the Favorites list and move on to the next. I sorted the list by year, then started with the newest game on the list, and ever since have been slowly going back in time; I figured working backwards toward the games of my childhood would keep me interested. The newest game was 2005 (IIRC), and now, a year later, I have traveled back to the year 1987—a little more than halfway through the list.

I’ve found a lot of cool games this way, ones I’d never heard of that stopped my time-traveling in its tracks and kept me occupied for a good while. There were also some rough patches—the mid-90’s Street-Fighter clone era was particularly arduous, and I’m still not free of the Japanese vertically scrolling shooters that require you to rapidly press the fire button through every nanosecond of play. But it’s a fun ride, I’m not done yet, and the nostalgia just keeps building.

So, Happy New Year all! Hopefully by this time next year, I’ll have made it to 1975.

IG-88

  • Trade Count: (+7)
  • Full Member
  • ***
  • Offline Offline
  • Posts: 2042
  • Last login:June 10, 2025, 09:51:23 pm
  • Posts: 48,764
Re: My sweet baby... GAME (new pics and tales)
« Reply #41 on: January 05, 2010, 10:43:31 pm »
Hey angryred,

Could you show me a close up of your Thayers Quest keyboard? I went thru your posts again and didn't see how you made the stickers. How did you do that?
"I know what a HAL 9000 is... I was wondering if HAL 7600 was his retarded cousin or something..."
-HarumaN

saurian333

  • Trade Count: (+4)
  • Full Member
  • ***
  • Offline Offline
  • Posts: 284
  • Last login:June 10, 2014, 07:58:21 pm
  • "They must've spent tens of dollars on this."
    • My b(uild)log
Re: My sweet baby... GAME (new pics and tales)
« Reply #42 on: January 06, 2010, 01:54:03 am »
Quote from: angryred
The following is a tale of espionage and intrigue.
...
It was one of those reaches that strips humans of their most powerful appendage, the opposable thumb...
...
In more time than it took his dancing hands to recap a whole monitor board, I smothered those two capacitors with enough expletives to make the crew of an aircraft carrier blush.

 :laugh2:

Great story.  I can't tell you how much I know how you feel, on several accounts.

Nice job.  Your cab is a great piece of work; it would be a shame to see it out of commission.

angryred

  • Trade Count: (0)
  • Full Member
  • ***
  • Offline Offline
  • Posts: 78
  • Last login:October 20, 2023, 12:46:57 am
Re: My sweet baby... GAME (new pics and tales)
« Reply #43 on: January 06, 2010, 06:39:38 pm »
Hey angryred,

Could you show me a close up of your Thayers Quest keyboard? I went thru your posts again and didn't see how you made the stickers. How did you do that?

Well, I started with this image...


...from the TQ DaphneWiki here:
 
https://www.daphne-emu.com/mediawiki/index.php?title=Input&printable=yes

...It was the best quality image I could find at the time; I still don't see any better in GIS, but who knows what's lurking out there.

I upped the resolution, and did my best to clean up the image, but going that route there's only so much I could do to it before I made the lettering illegible.  It really was more of a quick and dirty thing; if I had been more dedicated to this portion of the project, I would have either 1) searched out someone to take a nice, well-framed, high-res pic of an original TQ panel, or 2) just used the above image as a template for colors and positioning, and re-done all the lettering with vector text in PS, retaining only the item images.

Feel free to use the below image (click for full size, print out at 8"x10"):


...The panel is duplicated 3 times because I printed it on a sheet of Avery address labels; I was trying to get as many keys as possible on one sheet unbroken by the address label seams, so that each key was a single sticker. Even so, after I cut out as much of a whole set as I could, I still had to cook up the following image, as the keys below were all broken by label seams in the first image (click for full size, print out at 8"x10"):


...Again, quick & dirty.  I did it this way 'cause I had the labels lying around and didn't have to go out and buy anything, but if you were to print out the single image on a full sheet of unscored sticker paper, you wouldn't have to worry about the label seams at all. But for me, this was another one of those "wild hair" projects I took off on that I was determined to finish in a single afternoon or evening (not counting later tweaks).

I cut all the keys into small squares with an exacto knife, then stuck'em on.


Once they were all on there, I gave them several coats of this:


That stuff soaks right into the paper (but doesn't blur the images at all), and by the time they're dry, the labels have all but turned to plastic.  The only hink was that since I had cut the labels as little squares, the corners of the stickers stuck out past the rounded corners of the keys and needed to be trimmed down. I just ran an exacto knife alone the edges of all the keys; stiffened by the gloss coat, they were very easy to shave right off and return the keyboard to a very smooth feel.


Geez, dirty keyboard I see, now that I zoom in. Shoulda run it through the dishwasher before I started all this. That keyboard's been around the house since I had:


...I have a salvaged Sony Vaio keyboard-- small & flat-- that I envisioned for a someday redo of this project; that would probably come with the emergence of a nice high-res image.


Zooming in, I see I need to take the exacto to that "H" again...


If your arcade machine has to have a keyboard, what's more appropriate than a Thayer's Quest keyboard?

Quote from: angryred
The following is a tale of espionage and intrigue.
...
It was one of those reaches that strips humans of their most powerful appendage, the opposable thumb...
...
In more time than it took his dancing hands to recap a whole monitor board, I smothered those two capacitors with enough expletives to make the crew of an aircraft carrier blush.

 :laugh2:

Great story.  I can't tell you how much I know how you feel, on several accounts.

:) Thanks. Twisted like a serpent and pinching that USB plug between my first and second fingers, I could barely make out a small voice telling me that I was part of a grand tradition...

Quote
Nice job.  Your cab is a great piece of work; it would be a shame to see it out of commission.

Kind comments, thanks. It was actually down for less than 24 hours.  Right after it went *POP*, I sent out a distressed email to several interested parties bemoaning its demise, but I had the capacitors in by the next day (obsession overwhelmed me; I could not let this pass). Again, no one was more surprised than me when it actually turned on once again.  :o   :laugh:   ;D 

IG-88

  • Trade Count: (+7)
  • Full Member
  • ***
  • Offline Offline
  • Posts: 2042
  • Last login:June 10, 2025, 09:51:23 pm
  • Posts: 48,764
Re: My sweet baby... GAME (new pics and tales)
« Reply #44 on: January 06, 2010, 08:38:12 pm »
Thanks Red, Just what I needed. I don't know if I will be playing TQ any but it does give me ideas for the games I want to do. I guess the toughest part will be finding good images. Or just making my own.

I was wondering how I was going to find the right sized stickers too. Never thought of just printing them on blank sticker stock and cutting them out.   ::)

I'm wanting to do a cab with 5-8 old school RPG's on it and making swappable keyboards for each game. Maybe integrating a joy and trackball along with the keyboards too.... :dunno
"I know what a HAL 9000 is... I was wondering if HAL 7600 was his retarded cousin or something..."
-HarumaN

angryred

  • Trade Count: (0)
  • Full Member
  • ***
  • Offline Offline
  • Posts: 78
  • Last login:October 20, 2023, 12:46:57 am
Re: My sweet baby... GAME (upper tier redesign)
« Reply #45 on: September 05, 2012, 09:48:01 pm »
So, after a couple of years I decided that yeah, those two 4-way sticks DID get in the way more often than not, particularly when my hand slipped off the 8-ways while playing. So I set upon a rebuild of the upper tier of my control panel. The big difference this time: we're living in our own house now, and it's a LOT easier doing a project like this in your garage instead of on an upstairs apartment balcony.


I made another foam core model of the upper tier, and incorporated 2 angled panels to house the 4-ways. Space was pretty tight, but I managed to get everything in there, and also get rid of the "cliffs of doom" appearance that the height of the second tier used to have. And this time I cut SQUARE holes for the 4-ways-- finally, 4-way restrictors!


I also got to redo my volcano admin buttons (top row) so they're all nice, solid, and perfectly aligned; they were too much of an afterthought the first time, and came out looking a little sloppy. Of course, the spinner got rebuilt AGAIN...  ::) ...smaller footprint, and I finally built a solid adjusting arm for the mouse sensor board. I can adjust it quite precisely now, and tighten it into position. It was a little too "bendy" before.


Once again, the graphics are all adhesive vinyl labels, but that turned out to be a lot trickier this time. When I decided to get started on the rebuild, again I called up my buddy Rick at the sign shop and asked him if he still had the files we used the first time; he did, and would print more out soon.  Then he got fired two weeks later, before he got the stickers cut.

Fortunately Rick was smart the first time, as I remembered that we had cut multiples of many of the labels, and I also remembered where I had tucked them away. Almost all of the lettering existed, and most of the shapes.  With some extra thin colored adhesive vinyl I got at an art supply, I was able to cut replicas of the missing pieces (mostly simple angled geometric shapes).  I lost the Gorf "FLIGHT CONTROL" and its blue arrows, and I almost lost the Missile Command "TARGET CONTROL"; I gave up after one sign shop could only cut horribly mangled letters at that size, and still wanted to charge me for it. But despite the twisted condition of the original, dismantled, top tier, I was able to rescue the Missile Command label, crop and clean it up, and transfer it to the new panel successfully (that was a huge 'if' when I started).  Good Guy Rick was also kind enough to come over and do a professional application of the labels. They were his idea in the first place, and I couldn't bear to lose them in the rebuild. They really jump out at you.


And oh, yeah. Chrome headers, baby.

Nephasth

  • Guest
  • Trade Count: (0)
Re: My sweet baby... GAME (top tier rebuild)
« Reply #46 on: September 05, 2012, 11:10:24 pm »
 :o

sharpfork

  • Trade Count: (0)
  • Full Member
  • ***
  • Offline Offline
  • Posts: 618
  • Last login:January 30, 2025, 08:21:36 am
    • KADE
Re: My sweet baby... GAME (top tier rebuild)
« Reply #47 on: September 05, 2012, 11:56:35 pm »
The CP is not at all my style but I really appreciate the effort you put into it.  If you like it, :censored: the haters.

Play games, have fun.

yotsuya

  • Trade Count: (+21)
  • Full Member
  • ***
  • Offline Offline
  • Posts: 19959
  • Last login:June 16, 2025, 05:43:24 pm
  • 2014 UCA Winner, 2014, 2015, 2016 ZapCon Winner
    • forum.arcadecontrols.com/index.php/topic,137636.msg1420628.html
Re: My sweet baby... GAME (top tier rebuild)
« Reply #48 on: September 06, 2012, 12:07:20 am »
I need to go read this back from the beginning!
***Build what you dig, bro. Build what you dig.***

yotsuya

  • Trade Count: (+21)
  • Full Member
  • ***
  • Offline Offline
  • Posts: 19959
  • Last login:June 16, 2025, 05:43:24 pm
  • 2014 UCA Winner, 2014, 2015, 2016 ZapCon Winner
    • forum.arcadecontrols.com/index.php/topic,137636.msg1420628.html
Re: My sweet baby... GAME (top tier rebuild)
« Reply #49 on: September 06, 2012, 12:23:43 am »
Is it hard using the 4ways at that angle?
***Build what you dig, bro. Build what you dig.***

Unstupid

  • Trade Count: (+2)
  • Full Member
  • ***
  • Offline Offline
  • Posts: 997
  • Last login:September 08, 2021, 08:46:34 am
Re: My sweet baby... GAME (top tier rebuild)
« Reply #50 on: September 06, 2012, 12:41:33 am »
Wow!  How did I not see this cab before? :o

angryred

  • Trade Count: (0)
  • Full Member
  • ***
  • Offline Offline
  • Posts: 78
  • Last login:October 20, 2023, 12:46:57 am
Re: My sweet baby... GAME (top tier rebuild)
« Reply #51 on: September 06, 2012, 03:23:38 am »
Is it hard using the 4ways at that angle?

Nope. :)

griffindodd

  • Trade Count: (+1)
  • Full Member
  • ***
  • Offline Offline
  • Posts: 1536
  • Last login:April 15, 2025, 03:02:43 pm
  • Builds Stuff
Re: My sweet baby... GAME (top tier rebuild)
« Reply #52 on: September 06, 2012, 12:03:58 pm »
Can you play Pacman on this?
I drink and I know things.

angryred

  • Trade Count: (0)
  • Full Member
  • ***
  • Offline Offline
  • Posts: 78
  • Last login:October 20, 2023, 12:46:57 am
Re: My sweet baby... GAME (top tier rebuild)
« Reply #53 on: September 06, 2012, 02:43:20 pm »
Can you play Pacman on this?

Like a mother!@#$%^&.

But lately, I've been playing Pac Man Plus like a mother!@#$%^*.