Up big up of this topic.

Well, I plan to use a dedicated mame setup to play Spy Hunter ... into a real Spy Hunter cabinet (of course, in an non destructive way, don't worry!).
I've seen here many topics about driving the real Spy Hunter cabinet lamps with the help of the device LED Wiz / GP, combined with the LEDBlinky 'middleware' (bridge between mame & LED Wiz), and because I'll try to go with the LEDBlinky way to drive the cabinet lamps, I'm posting on this topic.
Here's my hardware :
LED Wiz / GP ver 3.0
1 led (the one provided with the LED Wiz)
Here's my software :
LED Wiz applications (with include LED-Wiz control panel icon)
LED Blinky 'suite' version 6.2.0.0
Mame 161b
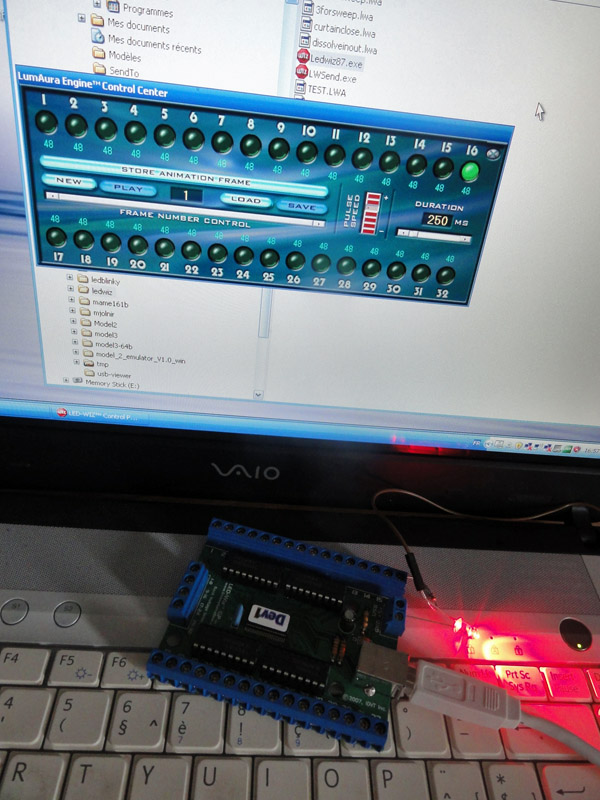
OK, so before everything, what I've done is to test if the only led I have so far (connected to the output 16) is well connected and if the led wiz board work. So far so good ->
I aslo check via the SimpleLEDTest.exe the led on position 16 :
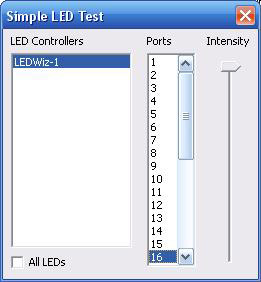
..and it works as expected, fine.
Now, it's time to configure LED Blinky itself. I won't use any front end, so I directly jump to the 'MAME Config' tab, and set everything like this :
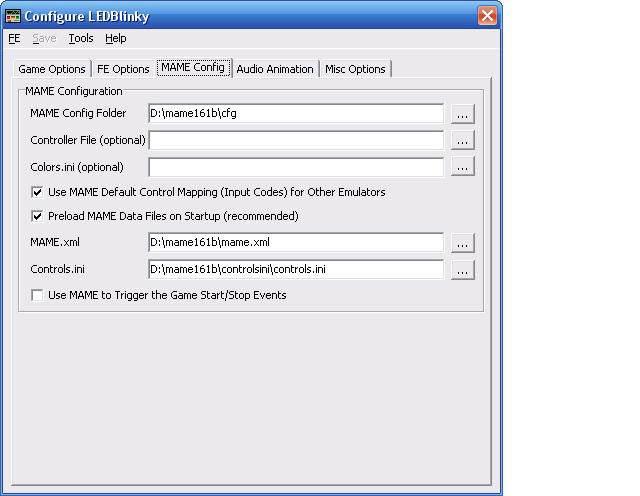
- note that the mame.xml file didn't exist, so I had to create one, like this mame.exe -listxml >mame.xml
- note that the control.ini file didn't exist, so I had to download it. I only found on Internet the 0.141 (
here) but my mame version is the 161b version. Could this be a first problem?
Anyway, I add this section to the end of that file :
[spyhunt]
gamename=Spy Hunter
numPlayers=2
alternating=1
mirrored=1
tilt=0
cocktail=0
usesService=0
miscDetails=
P1NumButtons=6
P1Controls=Gas Pedal+pedal|Steering Wheel+paddle
P1_BUTTON1=Machine Gun
P1_BUTTON2=Smoke Screen
P1_BUTTON3=Weapons Van
P1_BUTTON4=Oil Slick
P1_BUTTON5=Missile
!I had to add it, because they were NO [spyhunt] reference in that file before!
I also added this to the MameOutputs.ini file :
[spyhunt]
LAMP0=P1_BUTTON4
LAMP1=P1_BUTTON5
LAMP2=P1_BUTTON3
LAMP3=P1_BUTTON2
LAMP4=P1_BUTTON1
Because I want to use single LEDs (no RGB LED), I didn't do this in the Colors.ini file :
[spyhunt]
P1_BUTTON1=Red
P1_BUTTON2=Magenta
P1_BUTTON3=Yellow
P1_BUTTON4=Magenta
P1_BUTTON5=Red
P1_BUTTON6=Black
I've done this instead :
[spyhunt]
LAMP0=P1_BUTTON4
LAMP1=P1_BUTTON5
LAMP2=P1_BUTTON3
LAMP3=P1_BUTTON2
LAMP4=P1_BUTTON1
But there is something missing here, no? Because for the purpose of my test, I only have one single LED, connected to the output no 16 on the LED Wiz device.
So, for example, how to assign ..let's say the 'machine gun' LED to the ouput 16 from the LED Wiz device?
OK, I figure it's over the LEBBlinky Controls Edition panel? Because I see this ...and already an entry for Spy Hunter? ->
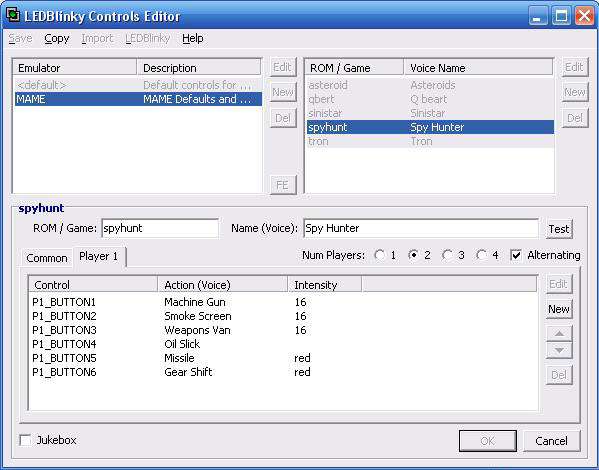
So as you can see in the picture, I believe I've assigned the port 16 for 'Machine Gun', 'Smoke Screen' and 'Weapon Van'... correct? (Yeah, I've selected THREE of them, just to be sure to have something to light very quickly when I start the game).
But... when I run Spy Hunter, the only LED I have (on port 16) doesn't light on, or even doesn't flash... it does nothing

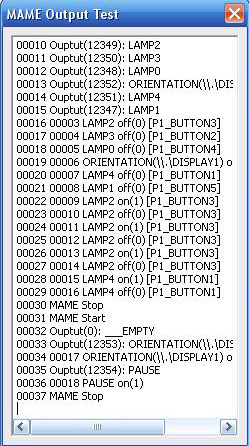
So let's check if LED Blinky can see what's coming from mame with the tool 'MAMEOutputTest.exe', and it seems ok ->
Do I have to change something in the mame setup? What could be the problem? Do you see some mistake in these configurations?
Thanks in advance for your support.


 Home
Home Help
Help Search
 Login
Login Register

 Send this topic
 Print
Print Topic: Spy Hunter controls and LEDBlinky (Read 4298 times)


