Main Restorations Software Audio/Jukebox/MP3 Everything Else Buy/Sell/Trade
Project Announcements Monitor/Video GroovyMAME Merit/JVL Touchscreen Meet Up Retail Vendors
Driving & Racing Woodworking Software Support Forums Consoles Project Arcade Reviews
Automated Projects Artwork Frontend Support Forums Pinball Forum Discussion Old Boards
Raspberry Pi & Dev Board controls.dat Linux Miscellaneous Arcade Wiki Discussion Old Archives
Lightguns Arcade1Up Try the site in https mode Site News

Unread posts | New Replies | Recent posts | Rules | Chatroom | Wiki | File Repository | RSS | Submit news


Author Topic: A noobs first project - Donkey Kong Bartop!  (Read 12764 times)

0 Members and 1 Guest are viewing this topic.

johncl

  • Trade Count: (0)
  • Full Member
  • ***
  • Offline Offline
  • Posts: 60
  • Last login:December 31, 2012, 10:08:00 am
A noobs first project - Donkey Kong Bartop!
« on: September 22, 2012, 01:33:11 pm »
Hi, I have been lurking on these forums now and then watching with great interest all the fantastic stuff people are building here. I had very little serious addiction to arcades back in the 80s, although my Nintendo Game and Watches were played a lot until my father brought home a Commodore 64 in 1983. I can recall playing some arcades now and then, some of the classics like Donkey Kong and Pacman. I also have recollections of spending a bit on a Gauntlet machine with a few of my buddies.

Anyway, I have always enjoyed Donkey Kong, playing a C64 conversion and later on in Mame, and figured this would be perfect as my first real arcade project. Basically I have no woodworking skills whatsoever, as I am mainly a software guy working fulltime as a programmer. At first I wanted to make a full real size replica but that would have to be parked in my garage which is no fun really so when I saw a half size replica bartop on R3Play 2010 in Blackpool I knew that was what I wanted to make. I later realised that its very likely this project by Leedsfan.

I have also read up on a few full size restoration and scratch build projects to give me enough confidence that I could embark on this myself. :)

At first I wanted this to be a perfect scaled down replica but have eventually decided to make it as close as possible without going crazy on measurements, mainly because I wanted to set some constraints based on being able to replicate all the art required on my own ink jet printer! Basically this means I want to print out my own side art stickers, make my own adjusted control panel based on the original art printed on normal photo paper, inkjet overhead/acetate film with opal tinted acrylic behind it and finally bezel art printed out myself. Basically this meant that my CP had to be maximum A4 size width and that allowed me to also get hold of A4 acrylics that I could cut (and one A3 sized one for the bezel).

I also had an old Via Epia CN13000 mini-itx computer that only collected dust that I hoped to be able to run mame on, and which I had read a few was doing already. I also bought a used 15" LCD for 200 NOK (about $30) a while ago that I had planned to use for something like this. Incidentally when turned vertical in portrait view the monitor is just about 300mm which is perfect as A4 width is 297mm. If I get in trouble I can always decase it to get rid of the frame which I would have to cover with a black cutout of something anyway (perhaps just black cardboard?).

My first challenge was finding appropriate material for building everything. I saw that a lot of people were using MDF just because it was so easy to work with, and considering my lack of skill in this area I chose MDF as well. :) - Now the problem (here in Norway) is finding the material. All the hardware stores around where I lived only had 19mm MDF if they had any at all, and that was way too big, I wanted 15mm MDF as that would be more than enough for a scaled down bartop. I also saw that I could get 15mm white t-molding from misc sites on the web. One time I was into a local hardware store here (Coop Bygg) I saw they had some thinner sheets of MDF that was used for transportation of other materials. I measured it at 11mm and though, hey perhaps that would be good enough? I asked them and was told I could take as much as I wanted for free! :D Cant really beat that price so I cut up a board to get it into my car and thought it would be excellent to practice on this in any case. There was just a lot of new skill to be aquired!

In the next followup I will talk a bit about shopping for required hardware and hopefully start providing some pictures.
« Last Edit: September 22, 2012, 01:36:17 pm by johncl »

johncl

  • Trade Count: (0)
  • Full Member
  • ***
  • Offline Offline
  • Posts: 60
  • Last login:December 31, 2012, 10:08:00 am
Re: A noobs first project - Donkey Kong Bartop!
« Reply #1 on: September 22, 2012, 02:00:37 pm »
Just wanted to post my first purchase from Mike's Arcade which consisted of a joystick with a red balltop and some buttons in the right colours! I have no idea how authentic these are, the joystick is microswitch clickety click but the buttons are not. Neither do I know how easy it will be to play Donkey Kong with these! :) - I did order a couple more buttons though, another orange one and two white ones which I had planned to use as extra button on CP (like LeedsFan did) and two control buttons for e.g. escaping into a menu. I decided I wanted to make this a 100% Donkey Kong at first and if I got bored of playing that I could always modify the cabinet later. :)

I also bought an Ipac from Ultimarc which was probably overkill for this project seeing later that some very cheap ones can be found on ebay that would probably do the trick. Anyway the Ipac gave me an advantage in case I got in trouble with USB support and would have to use PS2 connection instead.

I also cut up a piece of MDF to work as a prototype control panel and printed out (on normal paper) my first version of the modified control panel where the images have been scaled down and buttons and joystick position moved about a bit as well as the instructions sized down and printed directly on the CP. My main intention was to keep true to the elements of the original while making enough space for both left and right hands as the sides of the arcade would make it a bit cramped there.


At this point I couldnt wait to get started mounting the joystick and buttons, but I didnt have a big enough drill bit to get the necessary holes. I figured I could get away with one that would be big enough for the buttons since the joystick could be use the same, as the cp graphic and dust plastic thingy would cover it up.
« Last Edit: September 22, 2012, 03:12:43 pm by johncl »

johncl

  • Trade Count: (0)
  • Full Member
  • ***
  • Offline Offline
  • Posts: 60
  • Last login:December 31, 2012, 10:08:00 am
Re: A noobs first project - Donkey Kong Bartop!
« Reply #2 on: September 22, 2012, 02:18:26 pm »
A few more purchases was done in the meanwhile but I will get back to those later. A couple of days ago I mounted the joystick and buttons as well as making a new CP overlay with some minor adjustments. One I am still going back and forth about is if I should make the CP realistic in that it doesnt go all the way out but shows some of the black of the CP board. It also has a nice curve around the CP graphic and acrylic. I made the print a little bit smaller to give this effect and also tried to use some book cover plastic to see if that could seal it somehow, but I realise I wont use that but just print out on good photo paper and use 1-2mm acrylic on top.

Anyway this is how the CP came out (not painted black yet though):


I really wanted to get the ipac onto the CP as well but I realise now that its a bit tight there since it wont really fit the front part where the speaker and all is unless I cut grooves and all. Essentially I see the CP has to be a bit taller which isnt so bad since I can better fit the buttons and graphic there without having them overlapping. But revisiting LeedsFan's build I realised that he did something genious, fasten the front part to the CP and hinge that to the bottom. That would make it very simple to mount the Ipac to the front part where the speaker goes (which in my case would be exactly where the Ipac is now, probably making the speaker hard to fit). I knew this first one was just a prototype, but its still nice to get it all mounted and I also tested this in mame on my PC and it works great.

However I am having some problems with the Ipac on my Via board, it seems to consume a lot of resources or something, at least mame slows down to 70% speed when I press anything! This does not happen if I use a keyboard to control mame. Any idea what could be doing this? Perhaps its because I use the USB connection? I guess I could try to connect it to the PS2 port instead. The Via has been a lot of trouble really so I am beginning to think about swapping it out for an Atom board and get some more power out of it to avoid all these hassles. But more about the Via Epia computer in my next post.

As for the wireing I realised the joystick can at least be daisy chained to reduce clutter on the GND connector. Always something new to learn. :)
« Last Edit: September 22, 2012, 04:44:16 pm by johncl »

johncl

  • Trade Count: (0)
  • Full Member
  • ***
  • Offline Offline
  • Posts: 60
  • Last login:December 31, 2012, 10:08:00 am
Re: A noobs first project - Donkey Kong Bartop!
« Reply #3 on: September 22, 2012, 04:02:10 pm »
Ok many posts in a row today, but I have already gone a bit into this project so I want to share it all in a somewhat cronological order, as well as these posts keep me on my toes about actually finishing it since there might be people watching me here. Haha.  :laugh2:

Anyway, as I mentioned earlier I wanted to use this as the mame brain:


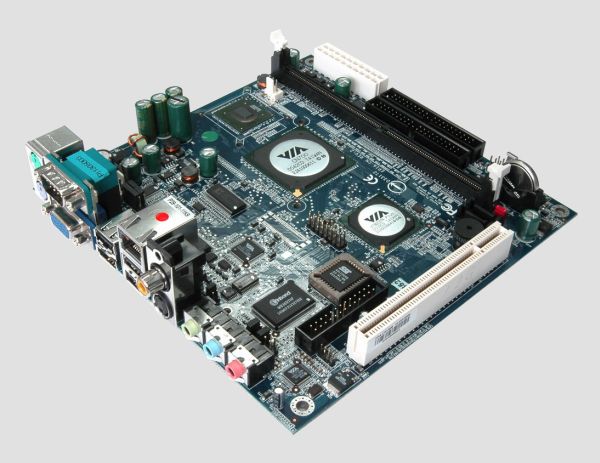
A Via Epia CN13000 which I originally had in a robot project I was doing but havent touched in a while. For that I decided the Via was just too slow so I got another mini-itx as the robot brain which worked much better. So the Via Epia was just lying around really, collecting dust. I really wanted to use that for this Donkey Kong project - surely this 1.3 GHz board should be able to emulate a 1981 game?!? Well, so far it has proved to be somewhat of a nightmare, and I have spent more time experimenting with mame for that than I have building my cabinet which I should be doing!

Anyway, the first issue was choosing an OS - I basically had three options, WinXp, Linux or DOS. WinXP I really wanted to avoid for two reasons, slow boot and unecessary big install as well as I had to get hold of a valid license unless I wanted to break laws. I wish MS had a free OS for embedded hobby stuff like this... alas they dont so Linux was really an option then to look at first. After some back and forth I was able to install xubuntu on a USB stick and boot from that - yay, got a nice desktop up and everything worked brilliantly. Installing that to hd and it would boot faster too. I then installed mame and tried to run it... blargh... complete and utter slideshow of a thing. Not playable at all. Obviously I would have to try to find an earlier build of mame but I felt the speed was really appaling so I had no real hopes. Perhaps it was using the wrong drivers for the via graphics? I had no idea, and I was unfortunately not skilled to figure out which graphics driver was running and if there was one for the via CN700 that would improve matters.

So I looked at another linux distro, one specifically made for gaming classics: Puppy Arcade 10. That also booted up brilliantly from a USB stick and I was pretty pleased with the presentation and how easy it was to use. So I tried mame and Donkey Kong... blarghhh again... only around 50% speed. If I changed the desktop to 640x480x16 I was able to get around 60%. It was using the vesa drivers and I saw there was some things about switching to xorg drivers, and according to some tips from others they should be faster too... perhaps... I havent gotten around to trying that yet though.

I wanted to try another option alltogheter: FreeDos. I used Rufus 1.1.7f which makes a bootable USB stick with FreeDos. That booted up just fine on the Via and it was very strange to be back in DOS land after all these years. Anyway my mission then was to find mame compiled for it, so I found mame for dos 0.90b and got that working fine after a failed attempt at getting advancemame for dos to work (it gave me a scrambled screen). I think perhaps it was a missing memory driver that broke advancemame, as I got a similar problem with mame for dos which at least gave me an error message that could be interpreted. Well, wouldnt you know, the game runs at 100%!!! YAY! I was so happy about this because even from a bog old slow 512kb USB stick this thing boots up quite fast and loads Donkey Kong just like that! I imagine a newer USB stick would work even better (the Via board has USB 2.0 ports actually).

Well, so then came the next challenge really, how to get sound working? I recall my old sound blaster times (and later a Gravis Ultrasound) that there were some BLASTER variable you could set and stuff. I googled up a bit and learned that some via boards actually had sound blaster emulation. I was very eager to try that out but realised that my bios didnt have the option I was supposed to look for, only to learn that for the CN13000, this feature was removed! GRRRR!! Oh well, and looking more closely around the internet it seems there is no good way to get mame with sound on the via board without a real soundblaster installed. So that is really the option I am considering, I might even find and old soundblaster in my boxes. I really enjoy this simple DOS solution so it would be a shame to have to go the WinXP route where I know the AC97 is well supported by drivers, and possibly even graphics accelleration.

The WinXP looks even more tempting now that I also have realised that hooking up the Ipac to a USB port can get erratic results in DOS - and I really experienced that since DK drops to 70% speed once I do anything on the controller (but not when I use the keyboard, even a USB one, very odd). Ultimarc mentions something about slow support in DOS and a better option is to use the PS2 plug then - I just have to get hold of a male-male PS2 cable then which I currently dont have. Anyone have a cheap WinXP license I can buy for a dollar? :)

So this has been a "little" introduction to my hardware woes, but generally I am very satisfied to see mame run fine under FreeDos but I really need sound and its tempting to just choose WinXP since I could then use the onboard AC97 and not hassle with an additional PCI card. I guess I could fix bootup speed a bit by nLite'ing XP a bit as well as getting a cheap 30GB china SSD. It might even make the system able to be used for more than Donkey Kong then as well... haha. :)

BTW, while I am at it, which mame would you run in dos? I am not sure if the 0.90b that I found (link above) is any good? Anything that might be faster? Or even fix my Ipac troubles?
« Last Edit: September 22, 2012, 04:13:12 pm by johncl »

johncl

  • Trade Count: (0)
  • Full Member
  • ***
  • Offline Offline
  • Posts: 60
  • Last login:December 31, 2012, 10:08:00 am
Re: A noobs first project - Donkey Kong Bartop!
« Reply #4 on: September 23, 2012, 03:34:24 pm »
Ok, been quite busy today with the project and things are starting to take shape. I started first with one side panel, approximately 50% scaled down version of jackobuds drawings excluding the bottom. I was only using a handsaw so I had to start out with pure angles and hope I could sand it into curvy shapes. I learned a hard lesson today, that hand sanding MDF takes ages, especially with 150 grain sanding paper which was the coarsest I had around. Anyway the first side panel took a shape a liked and somewhat like the original, I drew that as a template to another MDF piece and sawed out that too. I was afraid to cut too close to the penmarks and ended up cutting half a centimeter outside at places!!! Lets say it like this, I have spent hours just trying to sand this down to the other... MDF is nice to work with but I had no idea sanding it into shape would take this long. Here you can see halfway through the sanding process:


I am still not finished sanding them but eventually I will get there! I guess I need to buy and learn how to use a router for the next project! :)

Anyway I also started cutting up some pieces to the width of the cab as there would be many panels of that width. Sometimes you just have to stop and start "assembling" to get a feel for things:


Bottom and top is now ready, and I also started on the lower front panel where the speaker and coin button will be. I also had a 30 minutes session sanding the top edge where the control panel will be on an angle.


As you see I printed out a scaled down version of the speaker grille which I will try to drill top and bottom of each groove and use a smaller saw to cut out like others have done. Just need to be careful I guess. I also couldnt resist mounting the button for coin input which is one of these:


A very nice combo button and light there, just wonder where I should get power for it, I guess it needs just regular 5 volt? If so I can take it from the PSU to the computer ofc. The button can also be mounted further in and I wonder if I perhaps want to do that since it sticks out a bit like this. I would have to cut a square hole for that though.

Finally I couldnt resist trying to print out my own marquee on acetate film. I am holding it up to the sky with an opal tinted acrylic behind it:


The bottom (upside down one) is the unadjusted version, so I also tried darkening all colours which turned out great. I might have to go even darker though. The colours are nice and vivid but there is some crackelation here and there as I believe the inkjet is not really made for acetate prints. I guess a colour laserjet would get great results.

Finally I had to print out one of the side art stickers:


Its the perfect size really, A4 self adhesive inkjet sheets, the print came out clear and vivid. I will have to cut it out though, the blue area around naturally goes. Besides my cab will be red! :)

Ok until next time...

LeedsFan

  • Trade Count: (0)
  • Full Member
  • ***
  • Offline Offline
  • Posts: 1042
  • Last login:January 17, 2021, 06:14:23 am
Re: A noobs first project - Donkey Kong Bartop!
« Reply #5 on: September 24, 2012, 12:11:32 pm »
Looks like a decent start!   :applaud:

I can give a few pointers I learned on my own DK bartop. Firstly, tools! A jigsaw must be quite cheap to buy. Even if you don't buy a router yet. Now that you've cut the side panels out then maybe you can get away without one. All I know is I couldn't do without my jigsaw! If you are gonna fit T-molding then a router is a must.

I do like the grille template you are using. I did something very similar and drilled out the ends of each slot then used a jigsaw to join them up. If you do that with a handsaw it will take you ages.

I know I made my front panel flip forwards for access. But it also had the problem of sometimes flipping forward when I pulled the joystick into the down position. Bear this in mind when you decide how to lock the panel closed. I just used some roller ball clips which simply weren't strong enough under some enthusiastic play.

The speaker I used is a little USB speaker which I took out of its case to make it fit. But attaching the speaker directly behind the grille caused me to feel vibrations through the control panel when playing. It did annoy me! I relocated the speaker and I can still feel it a little, but it's nowhere near as bad.

johncl

  • Trade Count: (0)
  • Full Member
  • ***
  • Offline Offline
  • Posts: 60
  • Last login:December 31, 2012, 10:08:00 am
Re: A noobs first project - Donkey Kong Bartop!
« Reply #6 on: September 24, 2012, 12:27:12 pm »
Thank you for the comment and tips. Its basically your bartop which is the inspiration here, including the flip down which I will also have. I have a jigsaw but since its a "powertool" I am a bit afraid to use it since I might cut too far or it could shred the edges of the MDF. Possibly I should be getting a finer sawblade for it to get more control. And definitely a thinner one to cut the speaker grille. I am not after perfection here though, just something that looks fairly decent.

Handsawing isnt bad really and gives me straight cuts, although a little sanding is needed after always. I guess my biggest problem was cutting half a cm outside the line and spending ages sanding it. I will get som coarser sanding paper to make that part easier at least. I want to sand a more smoother curve by the CP also so it looks a bit like the original. Definitely also getting some clips or what they are called, to hold several boards together.

Will also use a little USB-powered speaker for mine (although has normal jack for sound), but I guess you could mount it on some rubber o-rings to reduce vibrations a bit?

I have ordered a PS2 male-male cable (cheaper to get that shipped from UK to me than buying in the local shops for sure) so I hope that might solve the Ipac controller lag issues I have in mame. I have also learned that I should perhaps try an even earlier mame build for dos also and not the 0.90b that I am using now. I guess Donkey Kong and many of the early verticals have been emulated well for along time?
« Last Edit: September 25, 2012, 08:13:12 am by johncl »

johncl

  • Trade Count: (0)
  • Full Member
  • ***
  • Offline Offline
  • Posts: 60
  • Last login:December 31, 2012, 10:08:00 am
Re: A noobs first project - Donkey Kong Bartop!
« Reply #7 on: September 25, 2012, 08:52:56 am »
Just a little question to you all. Do you think angle brackets would be safe to use here since my panels are only 11mm thick. I know I cant have very long screws (about 1cm). But at the same time there are so many supporting parts of the case so I guess it should be fairly safe and sturdy still? I could use a smaller 2x2 cm wood piece which could be glued as well as fastened with screws. I see case builders here seems to be split 50-50 on who uses angle brackets and those using normal wood blocks. Probably going a short trip to a shop today to pick up a few pieces (also looking for some small parts to hold marquee/bezel in place).

Also do you think its safe to use a router to cut a groove for t-molding on 11mm MDF? And is it easy to cut the excess edge of a 15mm t-molding once its mounted?

johncl

  • Trade Count: (0)
  • Full Member
  • ***
  • Offline Offline
  • Posts: 60
  • Last login:December 31, 2012, 10:08:00 am
Re: A noobs first project - Donkey Kong Bartop!
« Reply #8 on: September 26, 2012, 03:11:47 am »
I bought some angle brackets (each with 4 screws to fasten) and some furniture angle brackets in plastic (for holding smaller parts of the case). I also got some rather shallow screws, actually panel screws, but they seem to hold well in the MDF. Got a little hour of sanding with 80 grit to get the sides even and started mounting them as I really wanted to see how it looked. :) - Need some more angle brackets and I should have a picture up by the end of this week of it somewhat assembled. Really excited about this too so I also found a cheap key-twistlock for the back door as well as foam roller kit and primer paint for wood (was recommended that for MDF). Still dont know which paint to use though, should it be glossy or semiglossy?

I also manipulated the coin decal image to point to the right where my coin button will be instead of down as it does on the original. And finally I have done a small adjustment to my CP, making it 1cm taller and I want to have a white border around it like the original too.

Although I really wanted to have the CP and front on hinges like LeedsFan did, I am considering other options to fasten the CP on its own. A part of me just want to get that speaker/coin button front stable as a mounted support to the case, although I will have to fasten the Ipac to that front. I cut too short wires for the CP to be on its own if the Ipac is on the front part there so I have to do them over again, possibly buying some cable connectors that also fit the buttons (atm I am using big ones).

johncl

  • Trade Count: (0)
  • Full Member
  • ***
  • Offline Offline
  • Posts: 60
  • Last login:December 31, 2012, 10:08:00 am
Re: A noobs first project - Donkey Kong Bartop!
« Reply #9 on: September 27, 2012, 03:16:59 am »
Worked a bit more on it yesterday and was going to post a quick snapshot here today but my phones battery was dead on my way out to work. I have started on the marquee "box" and did a couple of mistakes which resulted in more cuts than planned and a whole lot of sanding. I also realized that putting nails into the edges of MDF means it will split. Drilling and screws work fine though if you can do 90 degree drills down into the plates you want to fasten them to (hard to explain but I don't have a stand for the drill so when hand drilling I got a nasty angle on my hole which was useless for fastening it to an edge). Its limited how much the marquee box will "move" so I will not put a lot of effort into fastening that everywhere, but I guess I have to fasten them on the inside of the box since below it should be a black "room" where the screen is and I don't want brackets and stuff into that area.

Hope to find some time today to get that mounted and test the led strips I had planned to use there (I might use a case modding cathode instead). I also bought some carpet edging metal which I will paint black and use as marquee/bezel retainer. The nice thing is that it only extends about 1 cm down on one side which is perfect for my case, and it probably will allow me to bed the metal a bit out to get the correct angle for the marquee. Very excited about this part as things will start to look like an arcade and not just a fancy MDF box. :)

TGov

  • Trade Count: (0)
  • Full Member
  • ***
  • Offline Offline
  • Posts: 223
  • Last login:March 21, 2017, 02:07:54 pm
  • I want to build my own arcade controls!
Re: A noobs first project - Donkey Kong Bartop!
« Reply #10 on: September 27, 2012, 02:12:07 pm »
looks like a fun project.  Have you figured out your OS yet?  I highly recommend TinyXP.  I have it installed on my MAME computer and it works great.  I just used an old XP code from a dead laptop I had lying around.

johncl

  • Trade Count: (0)
  • Full Member
  • ***
  • Offline Offline
  • Posts: 60
  • Last login:December 31, 2012, 10:08:00 am
Re: A noobs first project - Donkey Kong Bartop!
« Reply #11 on: September 28, 2012, 03:13:44 am »
At the moment my Via Epia CN13000 is booting into FreeDos from a USB stick and I run DOS Mame 0.90b - if you read my rather lengthy posts you see I have some troubles with both getting sound from the onboard AC97. And I have stutter when playing games via the the IPac connected to a USB port (although not when using a standard USB keyboard). I have just gotten a PS2 cable so I will try that out this weekend and see if that helps out. But for sound my only option seems to be installing a SoundBlaster PCI card and use the DOS drivers for that.

So yes I am tempted to use an nLited version of WinXP, if I can get hold of a cheap license (I hate that Win OS'es are so expensive). I am not so sure about the illegal TinyXP as I dont know any secure source for that - a lot of people report these to be riddled with trojans and all kind of bad stuff. But yes, WinXP would solve most of my driver problems as the AC97 sound is supported in Windows, and most likely I would get higher graphics performance too - although I would be running an earlier Mame (the one before they revamped the whole sound system is supposedly a good one).

Will post soon about latest developments... :)
« Last Edit: September 28, 2012, 03:35:58 am by johncl »

johncl

  • Trade Count: (0)
  • Full Member
  • ***
  • Offline Offline
  • Posts: 60
  • Last login:December 31, 2012, 10:08:00 am
Re: A noobs first project - Donkey Kong Bartop!
« Reply #12 on: September 28, 2012, 04:21:04 am »
Ok, time for a little update. I only get an hour or two in the evenings so I am looking forward to the weekend for some serious work. :)

I got a couple more brackets and mounted up the main frame, cut the marquee box, drilled a hole for wires and mounted that. Ofc I messed up and will probably have to redrill and fasten the marquee box because its about 2mm lower on one side...  :banghead:... This normally happens when I hurry stuff and dont measure that everything is ok. Since everything is hand sawed and sanded by hand, its rather tricky to get complete flat and even surfaces - this is coming back to haunt me all the time and I have spent way too much time sanding stuff. I guess a router would have simplified everything.

Anyway I spent some time the kitchen drilling and sawing out the small speaker holes, which also was rather tricky since I didnt bother to fasten the MDF piece to anything... haha... Again I had to sand quite a bit with a small file but I am still not satisfied with the results so a bit more filing is in store. I have also decided that I want to cut a square to make the coin door more flush with the surface which is an option for mounting this.

I also wanted to try to cut the opal acrylic piece for the maruqee but I realised a glass cutter cannot be used for this, so its back to the stores to find the tool I need - or I might even just try to hand saw it with a finer saw (I dont want to use a wood one as I am afraid it might crack/chip the plastic). It doesnt have to be completely even either since its going to be hidden by the metal retainer thingy.

Ok here are some pics. First a view of the current state of the project:


And then a test of the marquee light. I am using just two of the led lamps as you can see in the picture above. This works fine:


The CP and front is just resting there so these are not fastened yet. I will make a new CP that is a tad higher also, the Ipac will be fastened on the front instead of under the CP as I need the CP to stick out a bit over the front ofc.

This weekend I hope to mount the LCD which I have chosen to remove from the plastic frame. Will also cut the plexi for the marquee, cut the retainer metal brackets and testing mounting of marquee. Perhaps I will also saw the pieces for the back (top, door, bottom), although I have not decided how I want to do the power input and buttons there on the back. It would be cool to have just one plug for the power there and not a brick outside.

A question for you all, should the paint on the sides be glossy, semi glossy or flat? I have bought glossy black enameled paint which I had planned to use for the black parts of the cabinet now. I guess the original had a glossy shine to the surface of the sides?

TGov

  • Trade Count: (0)
  • Full Member
  • ***
  • Offline Offline
  • Posts: 223
  • Last login:March 21, 2017, 02:07:54 pm
  • I want to build my own arcade controls!
Re: A noobs first project - Donkey Kong Bartop!
« Reply #13 on: September 28, 2012, 07:38:51 am »
The original cabs at least in my experience had sort of a satin finish.  I bought oil based satin enamel to paint my DK cab with.

johncl

  • Trade Count: (0)
  • Full Member
  • ***
  • Offline Offline
  • Posts: 60
  • Last login:December 31, 2012, 10:08:00 am
Re: A noobs first project - Donkey Kong Bartop!
« Reply #14 on: September 28, 2012, 08:51:15 am »
Ah, so not quite semi-gloss either... Hmm so I should probably return that can of black glossy paint then and at maximum go for some semi-glossy paint. But at least enamel paint seems to be used by many. I asked around in a paint shop and he told that was normally used when painting metal and not wood. So I am a bit confused. ???

Also, what photo on the net do you think exemplifies best the red colour of the Donkey Kong cabinet, I will have to sample that for the CP colour and for getting a paint mixed for it. I doubt paint codes would help unless they use the same system worldwide? I am in Europe btw.

johncl

  • Trade Count: (0)
  • Full Member
  • ***
  • Offline Offline
  • Posts: 60
  • Last login:December 31, 2012, 10:08:00 am
Re: A noobs first project - Donkey Kong Bartop!
« Reply #15 on: September 30, 2012, 02:39:46 pm »
Ok, weekend is almost over and I got a bit of work done on the project. Created the bezel support bar and had fairly good success making the groove for the bezel by handsawing. Still needs a bit more work though to make sure the bezel is secure. Also decased the LCD and made the two bars that will support that on the top and bottom (still not quite finished). Also polished some more on the speaker holes as well as cutting a square for the coin button so its mounted more flush. Also sawed the aluminium angle to three lenghts that is used to support marquee and bezel, and mounted the marquee. Finally I sawed the pieces to be used for the back door, mounted the turn key lock and some parts for support (missing some inside still). Whew, quite a bit done.

I had to assemble the hardware to test this out ofc, and had a short game of Donkey Kong, although with no sound yet (and coin button not working yet):


And the back with the lid taken off (wires and all coming out now because the PC is outside on the table there):


And another closeup of the marquee mounted (will make a new one though):


I was really happy to realize that the full height of the LCD image is not used when DK is in correct aspect ratio as I was afraid the bezel graphic would obscure parts of the view for the player since the screen is really quite big inside there at 15" (just perfect imo). I guess I will make the bezel with a prototype of the art printed out just to test that though (will possibly have to adjust height a bit).

Next up is fastening the speaker to the front, and fasten the front to the case (will not use hinges like LeedsFan does), and wire up and test the coin button ofc. Then I need some support for the control panel and figure out how I should attach it while still being able to take it off whenever I feel like (although I couldnt say when that would be necessary anyway once its all up and running). LCD screen support needs the last few finishing touches and I think I should mount the LCD controls to the side wall. Then I really need to cut the plexi for the bezel, and print out bezel art on stickers (I will join two, hoping that wont be too visible). I will make a real CP printout on photo paper as well and get the CP complete with plexi. Just wonder if I should let the plexi go all the way out or cut it in shape to the CP art which wont cover the whole CP). I will also print out a new marquee as this one got a bit of water on it and color came off! I will probably print it mirrored so I can turn it the other way and possibly add a layer of clear plastic as extra protection so it doesnt colour off on the opal acrylic behind there. The side walls need some more sanding though as well to make that DK shape stand out a bit, need more curve by the CP there. Hope to get all this done during this week if time permits. :)

Oh and yes, I need to dig out an old SoundBlaster if I got it and see if I can get sound working! Btw, good news, the PS2 cable for the Ipac solved my laggy issues in DOS mame! Had a smooth game and everything felt very right, although its been ages since I have played a real DK machine.

Until next time...

Jigenjuke

  • Trade Count: (0)
  • Full Member
  • ***
  • Offline Offline
  • Posts: 482
  • Last login:October 02, 2016, 12:00:50 am
Re: A noobs first project - Donkey Kong Bartop!
« Reply #16 on: September 30, 2012, 06:59:20 pm »
Lookin' good there johncl!  Keep up the good work!  At what angle are you mounting the monitor in this baby.  I am not quite sure what the angle is in original cabinets but you could do some research.  I think that a little bit of an angle gives these replica bartops a little more depth.

Also you said that you will be painting this red.  I think that you will be very happy with the red cabinet over the blue.  I know I love mine.  Hope to see more soon.

Jigenjuke

pinballjim

  • Guest
  • Trade Count: (0)
Re: A noobs first project - Donkey Kong Bartop!
« Reply #17 on: September 30, 2012, 08:50:09 pm »
This is looking very nice.  I'd round off those top back corners, though.  It'd give it a more finished look.

johncl

  • Trade Count: (0)
  • Full Member
  • ***
  • Offline Offline
  • Posts: 60
  • Last login:December 31, 2012, 10:08:00 am
Re: A noobs first project - Donkey Kong Bartop!
« Reply #18 on: October 01, 2012, 02:58:58 am »
Thanks. I am not quite sure about the screen, but its not quite 45 degrees as the cabinet is not really deep enough for that. I can mount the screen a bit further towards the player to tilt it a bit more down but I was/am afraid the bezel art will make it so that the player have to move his head up and down to see everything inside. I think now it sits just about right for a bartop viewing, but as I said in my post I need to make that bezel ready so that I can test this thoroughly.

As for rounding off the back there I was going to do that, but saw that the original cabinet doesnt do that. I might grab some artistic freedom though and do it anyway. :) - I am not satisfied with the shape of the sides yet though so I have some more sanding to do, and there is still some handsaw blade marks around there. I might not be able to fit any t-molding on this 11mm MDF so in that case I ether have to find some flat plastic trimming to glue on around the edge there or just paint it white (many layers) and hope that works out. If I paint then I need to have a smooth surface there as there is nothing to hide the imperfections. Not familiar with the wood putty though so perhaps I need to look into that, there are some parts with some small MDF flakes came off (its almost like paper).

I also ditched the idea of the 1cm taller CP since I felt it was deep enough like it was. I will have to cut a 2mm groove in the front speaker part though since the joystick base sticks out there a bit (in my picture its just resting on top there). I know it will be a bit exciting to complete the CP, especially cutting that plexi. I used a handsaw with a finer blade for metal cutting when I cut the opal acrylic for the marquee as I hoped that would make it less likely to chip. It did work out fine and a little sanding made the side smooth. For the CP plexi, if I want to make it like the original I see I need rounded corners on it too so that would be a challenge although perhaps the 80 grit sandpaper will work wonders there too?

The original also had a smaller 30mm black balltop - so I might have to get one of those, although the red one will probably also suit the red cabinet fine. Good to hear you like the red cabinet, for some reason I felt that colour suited better for the DK cabinet than the powder blue one.

BTW, have you noticed that the DK cabinet on the wikipedia page for Donkey Kong is not the real arcade but a miniature replica? I had to make an commentary there to inform people about it and also edited the picture subtitle for the article. Surely such a classic should get a real photo - so if anyone feel called to get their real DK cabinet up there now is your chance to submit your photo to public domain. I dunno why a big company like Nintendo dont submit photos and stuff to wiki, as it would at least picture the real arcades in question.

Edit: Does anyone have highres scans of the original Promotional Flyer for Donkey Kong? I'd like to make one. :)
« Last Edit: October 01, 2012, 06:33:36 am by johncl »

LeedsFan

  • Trade Count: (0)
  • Full Member
  • ***
  • Offline Offline
  • Posts: 1042
  • Last login:January 17, 2021, 06:14:23 am
Re: A noobs first project - Donkey Kong Bartop!
« Reply #19 on: October 01, 2012, 11:11:05 am »
This is looking nice!   :applaud:

The screen looks OK too but if you want to resize it you can. If it's a later version of Mame press TAB and then go into the slider section. There you can resize the image to whatever suits then you can make a bezel to surround it. You might already know of this feature but some people don't. Just resize the horizontal and vertical the same amount to keep same aspect ratio. This means you can make your bezel suit the rest of the cab and then make the image fit, rather than vice versa.

On my project I also used a 15" monitor but the full screen image was waaaaaay too big. I shrunk it down to the equivalent of 9.5". You can also shift the picture about a bit too in those menus to get it centred correctly. You can then get it absolutely spot on regardless of the positioning of the monitor itself.

johncl

  • Trade Count: (0)
  • Full Member
  • ***
  • Offline Offline
  • Posts: 60
  • Last login:December 31, 2012, 10:08:00 am
Re: A noobs first project - Donkey Kong Bartop!
« Reply #20 on: October 02, 2012, 02:25:12 am »
Yes I assumed Mame had a bit of adjustment features for the output, although I am not sure how much the DOS version 0.90b I use have. I will look into the mame.ini and see what can be adjusted. I still have to get sound on this thing so if I am unsuccessful with that I might go with WinXP and use version 0.106 which I hear is the last version before they changed the sound part into something requiring more CPU. The LCD I am using is very old btw, its from 2002 so it has probably cost a fortune back then, haha. Its not a very bright screen but it works very well inside the DK cabinet. I assume its 1024x768 (or 768x1024 in portrait) which were a common resolution back then, so if I want some pixel scaled res I guess I could go with a 3x resolution at 672x768, preferably with some raster lines as well if I can make them look ok on 3xscale (easy to get them perfect on 2x but then I think the screen would be very small at 448x512 (approximately same as a 7").

Didnt have much time yesterday but I was able to drill and mount the alu-angle used to hold the bezel as well as sawing the bezel plexi to fit perfectly. I made the groove in the bezel support bar a bit deeper (and cut my finger in the process) so now it holds the bezel firmly in place when pushed up to the bezel retainer. My only problem now is really how I can fasten the last screws in the bezel support bar, haha. ::) - I guess I could fasten them from the inside but then I need to take out the LCD and remount that after, but then I will get in trouble mounting the black frame around the LCD when that is ready. Its a bit cramped as you can imagine for this 50% bartop.

Today I hope to print out the bezel art stickers (first some tests to check size) and apply them. I might have to scale parts of it a bit since my bezel might not be completely the same aspect ratio as the original although it is wider than its tall which the original is also (20-1/4" H x 22-7/16" W according to Mikes Arcade). I dont think mine is too far off. At one point in this project I ditched perfect measurements and just improvised a bit with the lengths while trying to fit the parts and make it as equal as I possibly could with my few hand tools.
« Last Edit: October 02, 2012, 02:39:05 am by johncl »

johncl

  • Trade Count: (0)
  • Full Member
  • ***
  • Offline Offline
  • Posts: 60
  • Last login:December 31, 2012, 10:08:00 am
Re: A noobs first project - Donkey Kong Bartop!
« Reply #21 on: October 09, 2012, 06:57:34 am »
Ok, a week has passed and I am still tinkering on with the project whenever I have some spare time. Since the last update I cut out holes for ventilation on the upper back, similar to the original arcade as well as a hole on the bottom back for the panel with the power button, power cable and speaker volume control. I also dismantled a speaker and mounted that to the front for a short test as well as making the wires to the speaker longer so that the actual amplifier part can be on the back as I need the volume pot to stick out the back there. Dunno how to fasten this but I guess I will improvise. :) - I will use a standard game button for the power although I wish I had a black one and not a white one as I do now.

I also created some bars for the front so the control panel can rest on that and I used small wooden pegs which I plan to drill holes under the CP so it secures it in place there. I will most likely add a turning lock thingy so that you cant drag the CP up although I will still be able to take it off by lifting the front part. I think it should work fine. In the process I also noticed my front was 2 mm taller on one side than the other so a fair bit of sanding was in place, as well as the joystick mounting panel sticking out a bit so I had to sand a groove in the front for that too. Its not visible anyway for a player.

I then sanded the sides a bit to make the curve a bit better down by the CP as well as some more sanding to make the speaker holes a bit better although I am not really satisfied with the end result there. I guess that's what you get when working without a router or other sophisticated tools. :) - I also sanded some more for the two bars that hold the LCD in place and fastened those so the LCD now sits very tight between these (but will fall out if you turn the arcade on its head so I will most likely use some wire to hold it in place as well perhaps).

Next up was the bezel acrylic which I cut to fit perfectly and I manipulated the original marquee image so its a bit wider by spreading out the parts in the bottom part of it (without messing with the aspect ratio of the graphics). I still think the art sort of steals a lot of the visible area inside there so I am seriously considering making the whole bezel art smaller. I really don't want to resize the 15" image down to 9" or something - it sort of defeats the purpose of having the 15" there in the first place.

I also sawed the acrylic for the control panel but haven't started making that yet with the new high quality printout and all. Hope to start that tonight perhaps. I did however get my white 1/2" t-molding in the mail (from t-molding.com) and hand sawed a groove in my CP for that which worked perfectly! It looks fantastic. I have no idea how I should go about doing this for the whole side... I don't have a router, and neither the slot cutting bit needed, as well as I am very afraid I might break the 11 mm MDF while doing it. I am seriously considering trying my Dremel and a saw blade for that, going slowly in many passes. Perhaps with a small home built piece so that I always have the blade at the same distance. I know I need to be careful, some friends of mine say the saw blade easily get broken and even fly off the thing if you are not careful.

Ok, finally - yesterday I applied the first layer of primer on the whole cabinet:


I am beginning to feel its getting very close to finished now with the first layer or primer, and I am very excited about how it will all look in the end when all is painted and assembled. :)

I learned the hard way that my primer was obviously not water based as I got seriously white on my hands as I tried washing it in water. :angry: - I am a complete noob about these things, so I spent probably the same amount of time as painting just washing my hands with white spirit and I hope the roller can spend its time in water to the next layer of primer. I also applied primer inside as many places as possible as even the parts that will not be painted will now be white instead of MDF-brown which might be handy when I mount all the electronics inside.

A question for you all. Do I sand the surface smooth after this first primer layer? And do I sand the second as well before the paint goes on? I see that the primer has a certain texture which I'd prefer not to have so  I assume I have to sand it a bit to get that even again.

Sorry for not providing more photos, I haven't really been taking much pictures in the process although i hope to do so now with the remaining part.

johncl

  • Trade Count: (0)
  • Full Member
  • ***
  • Offline Offline
  • Posts: 60
  • Last login:December 31, 2012, 10:08:00 am
Re: A noobs first project - Donkey Kong Bartop!
« Reply #22 on: October 10, 2012, 03:33:09 am »
Ok, instead of sanding and applying the second coat of primer I printed out a new CP image on real photo paper and cut the acrylic to go on top. I surely could have used an X-ACTO knife as I was only using a packing knife to open boxes (the one that you can slide out and break off parts of the tip). I wasnt completely satisfied with the results but hey, its good enough for me really. Here is a quick snapshot I did using my rather terrible mobile phone camera:


I have also applied the t-molding here as well. I will cut the edge arcs on the image as well later and trim one side which was a bit too tall.

The dust washer is really too big and I cannot place it under the art either since it would bulge up then unless I cut a big round groove in the cp board. Perhaps a smaller dust washer could work, or even one made myself from acrylic if I am able to cut a nice circle somehow. The joystick hole is really a tad too big as I am using the same sized hole as the buttons but I didnt feel like buying yet another drill part for that.

Next up is priming and painting it black as well as finding some suitable nails to hold the CP and art down.

johncl

  • Trade Count: (0)
  • Full Member
  • ***
  • Offline Offline
  • Posts: 60
  • Last login:December 31, 2012, 10:08:00 am
Re: A noobs first project - Donkey Kong Bartop!
« Reply #23 on: October 17, 2012, 02:42:36 am »
So its been a while now but I have been steadily working on getting the cab painted. It takes time as I need to apply at least 3 layers it seems, and it seems if I put the cab up so that the painted surface is vertical, the paint will run down and make lumps of paint here and there. So this naturally makes the painting process rather slow. I am not at all satisfied with the results, I feel the enamel paint I use (which is oil based) is tricky to work with. I used a brush for all of it since cleaning a roller in between layers would probably be a pain to do, and a brush is easier to clean at least. The red enamel paint (actually red base color) also lumps up a bit if you go over with the brush too many times so you have to be rather quick about it, even with temperatures around 10 degrees celsius which I had in my garage.

Anyway here are some pics:


This is the paint I used. The seller in the shop said they did not have the yellow/orange base which would normally be used for mixing a the red code which I settled on, and the only red base they had was for "bengalakk" which is a pure oil based (smells terrible) enamel paint. So its not really DK red which looks like it should have a bit of yellow in it, but just red colour - hoping that it will be good enough.  I know a lot of people here like to use enamel paint, probably as it gives a very durable surface, and possibly when applied correctly you can get an almost laminated straight surface as the oil paint evens out on the surface. Well I didnt have much luck with that and the paint gives me an uneven surface.


This is shortly after I applied a layer. Its a bit wobbly, although not that bad when you view it other ways, the shinyness of the enamel paint ofc makes imperfections like these stand out. I am not going to worry too much about this as its really a learning project for me, and I know that when I do another one I will be more prepared to learn what I did wrong knowing these are the results I get from not being very well prepared. I did not have much luck in sanding surfaces either, I dont know how deep I should sand down, and the second layer after that still had a wobbly look when it dried so I did not see the point really as the end layer would have the same appearance as the first really. Obviously I was doing something wrong, although I have no idea what I should be doing really. The smell of the paint is also quite horrible and stingy so I really wanted to finish the painting as fast as possible also, which has quite likely affected the results. :)


A photo of the last layer of paint applied - which has dried today and the cab is quite ready for assembling now! I am really looking forward to this, although a few bits and bobs are still missing like some pieces of wood/mdf to stop the back door from falling into the case, some nails for the CP (although the buttons are actually holding it all down firmly now), black screws for the marquee top retainer, a power cable and brick  for the inside cab (I will have to make my own to get the wires into a hole in the back panel). And ofc it will be exciting to see how cramped it will become in the back there with all the stuff in place. Finally I still dont have sound in my DOS Mame so I might have to look into WinXP again for this project as I am unsure if I can fit a SoundBlaster in there.

KeithPuetz

  • Trade Count: (0)
  • Full Member
  • ***
  • Offline Offline
  • Posts: 207
  • Last login:May 27, 2017, 04:26:21 pm
  • I want to build my own arcade controls!
Re: A noobs first project - Donkey Kong Bartop!
« Reply #24 on: October 17, 2012, 07:12:48 am »
Looks good. I love red DKs.

I painted my MBs and had the same problem with the enamel, it points out all flaws.

Jigenjuke

  • Trade Count: (0)
  • Full Member
  • ***
  • Offline Offline
  • Posts: 482
  • Last login:October 02, 2016, 12:00:50 am
Re: A noobs first project - Donkey Kong Bartop!
« Reply #25 on: October 17, 2012, 09:14:10 am »
Hey there JohnCL,

looking pretty good.  Typically when I paint I use a roller (would love to have a compressor and a paint gun but they are too expensive) and then sand with really fine sand paper and then go on to my next coat but I don't know what to do with enamal based paints.  I think that maybe the same premis will apply but I am not sure.  I think that the paint may gum up the sandpapaer too quickly.  Maybe some of the guys here have some ideas for ya. 

Again looking real good.  I can't wait for the end result.  Finally someone else will have a Red DK bartop!

Jigenjuke

johncl

  • Trade Count: (0)
  • Full Member
  • ***
  • Offline Offline
  • Posts: 60
  • Last login:December 31, 2012, 10:08:00 am
Re: A noobs first project - Donkey Kong Bartop!
« Reply #26 on: October 22, 2012, 07:51:45 am »
Yeah I wanted to use a roller actually and I did use that for the primer and learned that it would be a pain to clean that foam roller afterwards in between the layers. What do you do to reuse it during a project? It just sounds so wasted to throw it away and use a new one for every layer (and I had about 8 painting sessions since I wanted the cab to lie down so that the paint would even out horizontally).

I added two stopper bars inside for the back door and cut out a frame for the LCD inside which I will paint black (I had some 3-4mm thick material I could use for the frame).

When doing a test assembly I realised that the joystick on the CP sticks too deep down for me to have the speaker mounted at the speaker grille! I feel so stupid that I didnt think about this, so now I have to make some kind of sound funnel and mount the speaker inside a bit.

I also couldnt resist and had to apply one side art sticker as well! :P - But I still need to print out the remaining stickers which I will do this week and get everything mounted. Photos coming soon... :)

Jigenjuke

  • Trade Count: (0)
  • Full Member
  • ***
  • Offline Offline
  • Posts: 482
  • Last login:October 02, 2016, 12:00:50 am
Re: A noobs first project - Donkey Kong Bartop!
« Reply #27 on: October 24, 2012, 10:21:19 pm »
Yeah I wanted to use a roller actually and I did use that for the primer and learned that it would be a pain to clean that foam roller afterwards in between the layers. What do you do to reuse it during a project? It just sounds so wasted to throw it away and use a new one for every layer (and I had about 8 painting sessions since I wanted the cab to lie down so that the paint would even out horizontally).

I added two stopper bars inside for the back door and cut out a frame for the LCD inside which I will paint black (I had some 3-4mm thick material I could use for the frame).

When doing a test assembly I realised that the joystick on the CP sticks too deep down for me to have the speaker mounted at the speaker grille! I feel so stupid that I didnt think about this, so now I have to make some kind of sound funnel and mount the speaker inside a bit.

I also couldnt resist and had to apply one side art sticker as well! :P - But I still need to print out the remaining stickers which I will do this week and get everything mounted. Photos coming soon... :)

Hmmm yeah as I look back on all of the projects I have done in the past I realized that cleaning the paint rollers was a pain in the A**, but cleaning them in paint thinner and drying them for a day or two worked best for me.  It also helps that here in Japan the 100 yen shops sell 4 paint rollers in a pack for 100 yen.  YEAH!  I also realized recently that I had used enamal paint on our Mario Bros. 3/4 scale bartop.  For the show we did it worked pretty well but the decals later started to peel off.  I will be stripping the Mario Bros. cabinet and repainting with Latex. 

As for the speakers maybe you could use a router to set the speaker deeper into the front of the cabinet.  We didn't cut the vertical speaker lines in our nintendo replica cabinets and just mounted the speakers behind the marquee light.  It sounded just fine! 

Hope this helps and I apologize for not getting abck to you sooner.

Jigenjuke

johncl

  • Trade Count: (0)
  • Full Member
  • ***
  • Offline Offline
  • Posts: 60
  • Last login:December 31, 2012, 10:08:00 am
Re: A noobs first project - Donkey Kong Bartop!
« Reply #28 on: October 25, 2012, 04:36:44 am »
No worries about replying sooner, I never expect people to be replying at all in fact! :) - About the speaker issue, I am afraid my MDF is only 11mm thick and the speaker sticks out more than 1cm. I just didnt think about this at all. I have placed the speaker a bit in the back behind the joystick and I have also gotten sound working recently, and it sounds just fine. I found an old SB Audigy card I had in the attic, got some DOS sound driver for it (and a newer freedos emm386 driver) and it worked on first try! Sound works fine with no lag in gameplay, although at first I wondered about some sound effects which was missing, only to learn that the original DK board has a mix of sampled sound and analog generated ones! The earlier mame does not emulate the analogue sounds but supports sample packs which worked just fine.

So basically I am just about to assemble it all inside the cab which will be an interesting challenge due to the soundcard also jutting up and taking space. The buttons and volume button + amp steals a bit of space there too but I have found a position for the 17x17cm mini-itx board to fit, with the soundcard just behind the back door. I guess I need to find a way to fasten the sound card a bit since it would wobble a lot if the cabinet is carried around. I also wished I had only one PSU inside but I need to fit two PSU bricks, one for the screen and another for the board, even though both takes 12 volt. In the future I might look into replacing them both, perhaps even with an external brick giving 12 volt with enough amps for both the LCD and board (which is btw powered by a small powerboard giving 12v and 5v). I also have room for a small shelf above the motherboard which I could probably stack the PSU bricks for now. There is one fan inside on the CPU, although its a low voltage CPU and doesnt get very warm. Hoping my two vents in the top will be enough for gaming sessions. :)

steveh

  • Trade Count: (0)
  • Full Member
  • ***
  • Offline Offline
  • Posts: 340
  • Last login:January 29, 2024, 09:33:42 am
    • thecrazysteve.com
Re: A noobs first project - Donkey Kong Bartop!
« Reply #29 on: November 07, 2012, 05:09:38 pm »
I dont know if this applys to oil based paint, but in my house, when i was painting the walls with a roller, my GF recommended putting the roller in a ziplock, and in the fridge, while we waited for coats to dry.  this worked out perfectly.

Ive tried cleaning rollers before, and my new motto is throw it out and buy a new one :-)

SpaceHedgehog

  • Trade Count: (0)
  • Full Member
  • ***
  • Offline Offline
  • Posts: 937
  • Last login:October 29, 2024, 02:02:07 pm
  • Almost done ...
Re: A noobs first project - Donkey Kong Bartop!
« Reply #30 on: November 07, 2012, 05:21:45 pm »
Ive tried cleaning rollers before, and my new motto is throw it out and buy a new one :-)

+1

Sound advice, especially when you spend so much effort to get everything just right.
Click a pic for a video tour 

mike boss

  • Trade Count: (+1)
  • Full Member
  • ***
  • Offline Offline
  • Posts: 2645
  • Last login:October 22, 2021, 01:19:45 pm
Re: A noobs first project - Donkey Kong Bartop!
« Reply #31 on: October 16, 2013, 10:48:40 am »
Just saw this project.
Great project.
Do you have any close up views of what you used to do the marquee/bezel brackets (retainer) ?

mike boss

  • Trade Count: (+1)
  • Full Member
  • ***
  • Offline Offline
  • Posts: 2645
  • Last login:October 22, 2021, 01:19:45 pm
Re: A noobs first project - Donkey Kong Bartop!
« Reply #32 on: October 31, 2013, 11:45:43 am »
Just noticed the original poster has not been on for quite some time.
Anyone have a good idea on how to make Nintendo looking brackets for the marquee and bezel ?
IE - something with stuff easily found @ home depot ?