Main Restorations Software Audio/Jukebox/MP3 Everything Else Buy/Sell/Trade
Project Announcements Monitor/Video GroovyMAME Merit/JVL Touchscreen Meet Up Retail Vendors
Driving & Racing Woodworking Software Support Forums Consoles Project Arcade Reviews
Automated Projects Artwork Frontend Support Forums Pinball Forum Discussion Old Boards
Raspberry Pi & Dev Board controls.dat Linux Miscellaneous Arcade Wiki Discussion Old Archives
Lightguns Arcade1Up Try the site in https mode Site News

Unread posts | New Replies | Recent posts | Rules | Chatroom | Wiki | File Repository | RSS | Submit news


Author Topic: Kim Possible Cabinet (Full size from scratch) [2015 illuminated bat-tops update]  (Read 14282 times)

0 Members and 1 Guest are viewing this topic.

MacGyver

  • Trade Count: (0)
  • Full Member
  • ***
  • Offline Offline
  • Posts: 317
  • Last login:December 18, 2023, 12:49:00 am
    • Project Build
So I have been working on this thing for forever, mostly due to procrastination, but also due to the fact that the woodshop I have available is only open one day a week (It was also closed for a long time).
So I figure I have only two weeks (2 days) left before it's done. That's funny in hindsight. :laugh2:

So, some background.  I live in Germany, and I'm building this for my daughter.  The problem is that her room is on the third floor, and the stairwell is much too narrow to bring a full cabinet up the stairs.  So I came up with a design in which the cabinet can come apart and be moved one segment at a time.  There is a base segment, a control-panel/motherboard segment, a monitor/marquee segment, the back, and the two sides.  It will all bolt together with eye-bolts (tool less), and (should) appear like it doesn't come apart at all (no visible bolts on the outside).

I am still researching where to get the artwork printed, so some input on that would be nice.
I still need to make some side art, but here is what I have so far:


Now remember that I'm not Bob Villa, so be nice.  You can't see it in the pictures, but that is the left side clamped to the table, with a dead router sitting on it.  It's about halfway done, but the router died, I hope to finish it the next day it's open.


I painted the bolts so I would know where to cut the threads.

Forgive the mess in the bottom, I have to make everything fit in/on the cabinet at the end of the day.
As you can see, it's way overbuilt but we move a lot, and I wanted the individual segments to not be flimsy but durable on their own.


That light colored circle is a wood plug for the T-nut holes.

You can't tell, but the front has forward/back only wheels, and the back has fully rotatable lockable casters.

That's all the pictures for now, oh I also finished the CPO (a while back).


I'll put the exact controls here later, but for now:
2 -JLF joysticks with hollow shafts and Red and Blue LEDs in each balltop. (Magstiks shown)
2 -Turbo Twists with Angle Eyes LEDs under the CPO.
1 -Trackball - illuminated green.
12 -translucent IL pushbuttons -illuminated Red and Blue.
2 -player select buttons -illuminated green.
2 -Area51 Lightgun shells with Aimtraks in them.
1 -Ledwiz
1 -ipac
1 -28" HannsG 16:10 LCD monitor
1 -i7 2500K Intel CPU
1 -64gb SSD
1 -8gb RAM
Win7, MAME, DICE, and Sega M2,M3, Daphne, and Hyperspin.

I'll post more as I go. :)  Soon will be the black pica vinyl, Bondo, rear door, and Pacman grills.

BTW it's dimensions are 6' x 30.5" x 30-34"
« Last Edit: May 13, 2015, 12:41:56 pm by MacGyver »

MacGyver

  • Trade Count: (0)
  • Full Member
  • ***
  • Offline Offline
  • Posts: 317
  • Last login:December 18, 2023, 12:49:00 am
    • Project Build
Re: Kim Possible Project - Almost done
« Reply #1 on: July 30, 2012, 05:19:23 pm »
Here is the rough idea for the side art.


I mean rough.  ;D
« Last Edit: July 31, 2012, 01:29:50 am by MacGyver »

Well Fed Games

  • Trade Count: (+6)
  • Full Member
  • ***
  • Offline Offline
  • Posts: 1884
  • Last login:January 07, 2025, 04:42:47 pm
  • Delicious!
Re: Kim Possible Project - Almost done
« Reply #2 on: July 30, 2012, 11:47:34 pm »
Ha, nice. Your daughter is very lucky! KP is a great theme, and I particularly like the bezel!  :cheers:
Completed projects: Pac bartop (Plug & Play), 30th Anniversary Pac cab (MAME), Point Blank (PS1), Centipede (arcade hardware- light restore), VS. Super Mario Bros (arcade hardware- light restore) Tetris Cocktail (SNES), Arcade Classics upright (60-in-1, then MAME), Multi-Raiden (arcade hardware). Pac Man vs.(Gamecube),

Working on: Pinball Re-theme, Homebrew arcade arena shooter

MacGyver

  • Trade Count: (0)
  • Full Member
  • ***
  • Offline Offline
  • Posts: 317
  • Last login:December 18, 2023, 12:49:00 am
    • Project Build
Re: Kim Possible Project - Almost done
« Reply #3 on: July 31, 2012, 05:01:05 am »
Thanks WF  :)

I am interested in where you would go to get all that art printed if you were me.  I've read some threads, some are old, some are good, some are bad, some only print this or that but not everything.  I was wanting to have the same place do all of it at the same time so the colors would be the same (after I make them match myself ;D).  I would lean toward quality over speed and price, but not if the prices are so crazy that no one here would pay it.

Seith

  • Trade Count: (0)
  • Full Member
  • ***
  • Offline Offline
  • Posts: 402
  • Last login:September 08, 2018, 10:50:41 am
Re: Kim Possible Project - Almost done
« Reply #4 on: July 31, 2012, 01:44:25 pm »
http://www.gameongrafix.com/ is widely recommended around here.  Their prices seem reasonable.

yaksplat

  • Trade Count: (0)
  • Full Member
  • ***
  • Offline Offline
  • Posts: 551
  • Last login:March 13, 2021, 03:50:10 pm
    • Random Projects
Re: Kim Possible Project - Almost done
« Reply #5 on: July 31, 2012, 02:02:28 pm »
I love it!

Great theme.  Too bad the show isn't on disney anymore though.

If i wasn't so far on my Mystery Inc. themed cab I'd be doing Gravity Falls.
Check out my current 3 machine build:
http://yaksplat.wordpress.com

Custom Control Panels: http://forum.arcadecontrols.com/index.php?topic=121245

MacGyver

  • Trade Count: (0)
  • Full Member
  • ***
  • Offline Offline
  • Posts: 317
  • Last login:December 18, 2023, 12:49:00 am
    • Project Build
Re: Kim Possible Project - Almost done
« Reply #6 on: July 31, 2012, 03:06:53 pm »
Thanks yaksplat.  She's older now than when I started, so when I couldn't find the KP artwork files, she wanted me to change it to "Journey to the Center of Hawkthorne" from Community, I started doing the art, but found the KP artwork again and decided to stick with it.


Seith, their prices seem fine, my only question is how well does the art hold up over time and to things like cleaners or water.  Also, how dark is the black on the marquee with it blacklit?  How does it compare to emdkays Duratrans marquees?
« Last Edit: July 31, 2012, 03:08:36 pm by MacGyver »

MacGyver

  • Trade Count: (0)
  • Full Member
  • ***
  • Offline Offline
  • Posts: 317
  • Last login:December 18, 2023, 12:49:00 am
    • Project Build
Re: Kim Possible Project - Almost done
« Reply #7 on: August 04, 2012, 04:21:54 pm »
So today was Saturday, woodshop day.
I got some stuff done, mounted the monitor, mounted the 6x9s and Pacman grills, installed the coin-door (for testing purposes, they'll be removed to put on the vinyl),  cut the bezel, mounted the bezel retaining strips (just marquee retaining strips).  I installed the bolts that connect all the pieces together, they are the ones with the wingnuts.

Next week I hope to get the back done (3 pieces, 1 piece has a door with a piano hinge, the other 2 have the air intake holes at the top and bottom).
I'll try to get the monitor hole cut in the bezel, and start the mount for the CPO.

Here are the 3 middle pieces with the bezel in its retainers.


Here are 3 of the 6 pieces without the bezel so you can see the monitor (I had to finagle the sides a bit to get it in).


In the end it will be the 3 pieces you see above with 2 sides and 1 back (so it can be carried up and down the stairs easier). 


I would really appreciate if some one shared how they were holding their bezel and plexiglass in (or an example of how its done commercially), I have looked at hundreds of pictures, and no one ever shows a close up of that area.
« Last Edit: August 04, 2012, 04:24:41 pm by MacGyver »

PL1

  • Global Moderator
  • Trade Count: (+1)
  • Full Member
  • *****
  • Offline Offline
  • Posts: 9669
  • Last login:Today at 04:54:08 am
  • Designated spam hunter
Re: Kim Possible Project - Almost done
« Reply #8 on: August 04, 2012, 06:10:58 pm »
I would really appreciate if some one shared how they were holding their bezel and plexiglass in (or an example of how its done commercially), I have looked at hundreds of pictures, and no one ever shows a close up of that area.

Here's a thread on marquee retainer options.  As long as the materials you choose are the correct thickness and strength for your bezel and glass, these methods should work fine. 

Also have you thought about a painted bezel on the inside of your glass?

DrChek's Spike before:


And after:


Scott

darthpaul

  • Trade Count: (0)
  • Full Member
  • ***
  • Offline Offline
  • Posts: 449
  • Last login:July 08, 2025, 08:50:10 pm
  • Join, It's your duty
Re: Kim Possible Project - Almost done
« Reply #9 on: August 04, 2012, 11:33:47 pm »
Also, how dark is the black on the marquee with it blacklit?  How does it compare to emdkays Duratrans marquees?
Blacks are really tough to make look good on a backlit Marquee, it looks more gray than black when lit. I ultimately redid my marquee for that very reason.
"You don't know the power of the Dark Side"
Automated Cabinet
Nintendo Pi
PiCubed

TheShaner

  • Trade Count: (0)
  • Full Member
  • ***
  • Offline Offline
  • Posts: 451
  • Last login:December 23, 2017, 10:42:25 pm
  • Shut your noise tube filthy Taco Human!
Re: Kim Possible Project - Almost done
« Reply #10 on: August 04, 2012, 11:41:39 pm »
I used gameongraphix for mine as well, the marquee is heavily black, and the end result looks really good.  I dont think it looks gray at all.  I will say though, I ended up using the LED marquee lights from groovy games, if that makes any difference.

MacGyver

  • Trade Count: (0)
  • Full Member
  • ***
  • Offline Offline
  • Posts: 317
  • Last login:December 18, 2023, 12:49:00 am
    • Project Build
Re: Kim Possible Project - Almost done
« Reply #11 on: August 05, 2012, 04:15:42 am »
PL1, I was undecided about whether or not to have the bezel graphics printed on the plexi or not.  My original idea was to have it printed on card stock and just sandwich it between the 3mm Medite and clear plexi.  I'm curious as to how happy people are with their printed-on-plexi bezels.   I entertained the idea of just using tinted plexi and no bezel or artwork, but I think it would be too dark (not just the screen, but the whole area).  I also was concerned about the looks people would give me if I tried to check if it was IR invisible (for the Aimtrak IR strip).  I think they would be worried about a man with a wired device (IR LED hooked to a battery) using a modified web cam (stripped of the IR filter) hooked to a laptop, playing with various tinted plexiglass sheets.  :dunno

I have decided based on the posts I've read and user recommendations to have gameongraphix do the printing.  Thanks guys.  :)


mgb

  • Trade Count: (0)
  • Full Member
  • ***
  • Offline Offline
  • Posts: 3500
  • Last login:January 06, 2025, 09:39:00 pm
  • North East, US
Re: Kim Possible Project - Almost done
« Reply #12 on: August 05, 2012, 09:20:20 pm »
Very nice.
I think the KP theme is a great theme.

MacGyver

  • Trade Count: (0)
  • Full Member
  • ***
  • Offline Offline
  • Posts: 317
  • Last login:December 18, 2023, 12:49:00 am
    • Project Build
Re: Kim Possible Project - Almost done
« Reply #13 on: August 06, 2012, 04:05:40 pm »
Thanks mgb.

Oh in case anyone out there was wondering or looking; on that HannsG monitor, the VESA mount screws are M4.  They are not real common and I only had 2 laying around on Saturday so I had to go buy some more today.

apfelanni

  • Trade Count: (0)
  • Full Member
  • ***
  • Offline Offline
  • Posts: 362
  • Last login:February 18, 2019, 01:55:28 pm
Re: Kim Possible Project - Almost done
« Reply #14 on: August 07, 2012, 12:12:47 pm »
a rock solid build , looks very promising . i hope u dont ruin it with a crappy " goodname " china screen . hannsg is a brand i will definetely never buy again . a cab project taking 100 reds of bucks and countless hours deserves a good ips panel ( or a crt , of coz).

MacGyver

  • Trade Count: (0)
  • Full Member
  • ***
  • Offline Offline
  • Posts: 317
  • Last login:December 18, 2023, 12:49:00 am
    • Project Build
Re: Kim Possible Project - Almost done
« Reply #15 on: August 07, 2012, 02:22:50 pm »
I know, but my options were limited at the time.  If you know of a nice IPS screen that is as square or more square than a 16:10 and is 28" I'm all ears.  I didn't de-case it because I didn't think it would last very long.

MacGyver

  • Trade Count: (0)
  • Full Member
  • ***
  • Offline Offline
  • Posts: 317
  • Last login:December 18, 2023, 12:49:00 am
    • Project Build
Re: Kim Possible Project - Almost done
« Reply #16 on: August 08, 2012, 02:23:15 pm »
So I was working on the side art, I think I should stick with the oval from the rough mock-up not the current upsidedown Donkey Kong circle thing.

I was entertaining the idea of adding the new ServoStiks and my Sanwa JLK-GF2-AT analog flight stick to my control panel (I have to take it all apart anyway, and a third joystick change would degrade the panel severely, so if I have to cut a new one, I might as well shoe horn in the analog stick I already have).

Here is the panel with the technical diagrams as an overlay, making sure everything fits underneath.


Here is what it would look like as a template.


The one below is the current one sans flight-stick.


So what do you think?  Do you think it would be too crowded?  I hate to let the analog stick go to waste, but I also don't want any more of Franken-panel then I already have.

MacGyver

  • Trade Count: (0)
  • Full Member
  • ***
  • Offline Offline
  • Posts: 317
  • Last login:December 18, 2023, 12:49:00 am
    • Project Build
Re: Kim Possible Project - Getting done [edited to fit reality]
« Reply #17 on: August 13, 2012, 05:41:31 am »
So it was another Saturday, and that means the woodshop was open, so updates.
I had a huge list of things I wanted to accomplish, but sadly, the router was still dead, so that nixed about half of the things I wanted to do.

First, I got the new control panel built (sans parts of course), although after hearing mcseforsale talk about his issues with the same hinges, I wonder if maybe I shouldn't switch to a piano hinge.


You can also see I got the bezel cut without a router (jigsaw, rasp, and one hour of my life gone).


This gives you a good idea of the CPO size I have to work with for the question I ask in the post above.


The hinges I might replace now. (especially if the screws rip out)
Also note my over-done VESA mount.  And is that a left-side template clamped to the table in the background? :angry:


CPO opened.


You can now see the 6x9s and their framing in all their glory. :P

I did get the back top and bottom vents cut, and the lower grills put on. (really just a big waste of time to do this with a drill-press and a jig saw, and 2 hours worth of filing with a rasp because I had no router)

Here are some closeups of the possible problem hinges.


You can barely see the CPO clasps in the back


It is taking a lot longer than I hoped, mostly due to my inexperience in building arcade cabinets, and also due to the holdup from a lack of a working router (doing some of the things I did this weekend without a router added easily 4-5 hours more work, mostly from needing to clear a 2" holesaw 8 times, and rasping and filing and sanding wonky jigsawed cuts).

I checked that the flight-stick would not obstruct the view of the screen in the test location from the post above.  I also plugged everything in and checked where the placement of the Aimtrak emitter would fit (and work).

Time to make a work wish list for next week,  hopefully the Area51 holsters I ordered will come in by then.  Until then I will work on the software at home. (I need to scrub that list REALLY well, I found a game named "Funny Bubble" still in there, it appears to not have the correct "mature" description in romlister. :o)
« Last Edit: August 13, 2012, 09:11:36 am by MacGyver »

MacGyver

  • Trade Count: (0)
  • Full Member
  • ***
  • Offline Offline
  • Posts: 317
  • Last login:December 18, 2023, 12:49:00 am
    • Project Build
Re: Kim Possible Project - Getting done [edited to fit reality]
« Reply #18 on: August 18, 2012, 04:53:24 pm »
Well Saturday again.  The router got fixed, and I was able to give the cabinet something it has been missing, the left side.

Replaced the marquee retainers I used as bezel retainers with aluminum ceramic tile retainers.

Added the screens to the vents, and the power button and the volume knob, it connects to a Pyle 30 watt amp.
Is that a left side?  :D

Notice the color-coded eye-bolts, there are 4 different thicknesses of support frame, so this was the only way to keep them separate.

Added the power plug and master power switch. (Yes I know it's upside-down, I'll fix it later)


It looks pretty ugly, but soon it will be time for Bondo, slot cutting and vinyl and T-molding.  (In reality I have a much bigger list.)
« Last Edit: August 19, 2012, 03:22:27 am by MacGyver »

Well Fed Games

  • Trade Count: (+6)
  • Full Member
  • ***
  • Offline Offline
  • Posts: 1884
  • Last login:January 07, 2025, 04:42:47 pm
  • Delicious!
Re: Kim Possible Project - Getting done [edited to fit reality]
« Reply #19 on: August 18, 2012, 11:26:33 pm »
Looking good. As someone who has always savaged existing cabs, I am always impressed by you guys who build from scratch.  :cheers:
« Last Edit: August 20, 2012, 12:15:35 am by Well Fed Games »
Completed projects: Pac bartop (Plug & Play), 30th Anniversary Pac cab (MAME), Point Blank (PS1), Centipede (arcade hardware- light restore), VS. Super Mario Bros (arcade hardware- light restore) Tetris Cocktail (SNES), Arcade Classics upright (60-in-1, then MAME), Multi-Raiden (arcade hardware). Pac Man vs.(Gamecube),

Working on: Pinball Re-theme, Homebrew arcade arena shooter

MacGyver

  • Trade Count: (0)
  • Full Member
  • ***
  • Offline Offline
  • Posts: 317
  • Last login:December 18, 2023, 12:49:00 am
    • Project Build
Re: Kim Possible Project - Getting done [edited to fit reality]
« Reply #20 on: August 19, 2012, 03:06:23 am »
Thanks WFG,  but know that if I were back in the States I would have done the same as you.  I had to build it due to the lack 80s and 90s cabs available here in Germany. I also would have built it like a real one if it didn't have to come apart to make it up 3 flights of stairs, crazy narrow stairs. 

I envy you guys back there, you have so many options, everything I buy I have to append with "I guess I can make that work."  :)

MacGyver

  • Trade Count: (0)
  • Full Member
  • ***
  • Offline Offline
  • Posts: 317
  • Last login:December 18, 2023, 12:49:00 am
    • Project Build
Re: Kim Possible Project - Getting done [edited to fit reality]
« Reply #21 on: August 19, 2012, 07:38:46 pm »
Finished fixing the colors and errors in some of the graphics, and placed the order to GameonGraphics to the tune of about $105.
Here's what they looked like.  I'm still working on the sideart.


« Last Edit: August 19, 2012, 07:41:09 pm by MacGyver »

yotsuya

  • Trade Count: (+21)
  • Full Member
  • ***
  • Offline Offline
  • Posts: 19960
  • Last login:Yesterday at 10:00:30 pm
  • 2014 UCA Winner, 2014, 2015, 2016 ZapCon Winner
    • forum.arcadecontrols.com/index.php/topic,137636.msg1420628.html
Re: Kim Possible Project - Almost done
« Reply #22 on: August 20, 2012, 02:15:39 am »
Thanks yaksplat.  She's older now than when I started, so when I couldn't find the KP artwork files, she wanted me to change it to "Journey to the Center of Hawkthorne" from Community, I started doing the art, but found the KP artwork again and decided to stick with it.


Seith, their prices seem fine, my only question is how well does the art hold up over time and to things like cleaners or water.  Also, how dark is the black on the marquee with it blacklit?  How does it compare to emdkays Duratrans marquees?

That would be an AWESOME theme!
***Build what you dig, bro. Build what you dig.***

MacGyver

  • Trade Count: (0)
  • Full Member
  • ***
  • Offline Offline
  • Posts: 317
  • Last login:December 18, 2023, 12:49:00 am
    • Project Build
Re: Kim Possible Project - Getting done [edited to fit reality]
« Reply #23 on: August 21, 2012, 04:06:26 pm »
So I finished up the side art, I can't decide what size to get printed, but I created them at 30 inches by 20 inches at 300 dpi, so any size up to that should be fine.  What is a standard size for side art on a 6' tall 33" wide monster?

Left side


Right side


A bit better quality from the rough ones I post earlier, eh.  Remember these are 800 pixels wide jpegs and not the 6000 pixels wide originals so forgive any artifacts.

Still working on a 300dpi re-do of the bezel.

MacGyver

  • Trade Count: (0)
  • Full Member
  • ***
  • Offline Offline
  • Posts: 317
  • Last login:December 18, 2023, 12:49:00 am
    • Project Build
Re: Kim Possible Project - Getting done [edited to fit reality]
« Reply #24 on: August 22, 2012, 05:09:34 am »
Finished redoing the bezel, it's now300dpi and 24.5" x 29" ready for printing.

...Unless I can find a to scale technical drawing of the Aimtrak emitter board, then I'll make some sort of camouflage artwork on the bezel where the LEDs will need to peak out from.


yaksplat

  • Trade Count: (0)
  • Full Member
  • ***
  • Offline Offline
  • Posts: 551
  • Last login:March 13, 2021, 03:50:10 pm
    • Random Projects
Re: Kim Possible Project - Getting done [edited to fit reality]
« Reply #25 on: August 22, 2012, 07:53:00 am »
Clever bezel, I like it.
Check out my current 3 machine build:
http://yaksplat.wordpress.com

Custom Control Panels: http://forum.arcadecontrols.com/index.php?topic=121245

MacGyver

  • Trade Count: (0)
  • Full Member
  • ***
  • Offline Offline
  • Posts: 317
  • Last login:December 18, 2023, 12:49:00 am
    • Project Build
Re: Kim Possible Project - Getting done [edited to fit reality]
« Reply #26 on: August 22, 2012, 10:18:54 am »
Thanks yaksplat.

MacGyver

  • Trade Count: (0)
  • Full Member
  • ***
  • Offline Offline
  • Posts: 317
  • Last login:December 18, 2023, 12:49:00 am
    • Project Build
Re: Kim Possible Project - Getting done [edited to fit reality]
« Reply #27 on: August 23, 2012, 08:31:17 am »
So I added some graphics in an attempt to hide the IR LEDs from the Aimtrak emitter.

I'm no artist, so if it looks bad, let me know. 


Here's a close-up of the camouflage.

griffindodd

  • Trade Count: (+1)
  • Full Member
  • ***
  • Offline Offline
  • Posts: 1536
  • Last login:July 07, 2025, 09:44:51 am
  • Builds Stuff
Re: Kim Possible Project - Getting done [edited to fit reality]
« Reply #28 on: August 23, 2012, 12:24:48 pm »
I think the artwork looks great, that's an awesome bezel.  :applaud:
I drink and I know things.

MacGyver

  • Trade Count: (0)
  • Full Member
  • ***
  • Offline Offline
  • Posts: 317
  • Last login:December 18, 2023, 12:49:00 am
    • Project Build
Re: Kim Possible Project - Getting done [edited to fit reality]
« Reply #29 on: August 24, 2012, 04:10:11 pm »
So it comes down to the sideart to have printed.

The first one I did:


Or the new one:


I'm pretty sure I'm going with the new one, it seems less busy.

I also got the email from GameonGraphics, the Marquee and CPO are on the way.

griffindodd

  • Trade Count: (+1)
  • Full Member
  • ***
  • Offline Offline
  • Posts: 1536
  • Last login:July 07, 2025, 09:44:51 am
  • Builds Stuff
Re: Kim Possible Project - Getting done [edited to fit reality]
« Reply #30 on: August 24, 2012, 10:20:42 pm »
Agree I think the second one is more Arcadey (yeah it's a word  :-\ )
I drink and I know things.

yaksplat

  • Trade Count: (0)
  • Full Member
  • ***
  • Offline Offline
  • Posts: 551
  • Last login:March 13, 2021, 03:50:10 pm
    • Random Projects
Re: Kim Possible Project - Getting done [edited to fit reality]
« Reply #31 on: August 25, 2012, 12:12:59 am »
Something about the thickness of shego's green lines bothers me.  I think it's her eyes.....
Check out my current 3 machine build:
http://yaksplat.wordpress.com

Custom Control Panels: http://forum.arcadecontrols.com/index.php?topic=121245

darthpaul

  • Trade Count: (0)
  • Full Member
  • ***
  • Offline Offline
  • Posts: 449
  • Last login:July 08, 2025, 08:50:10 pm
  • Join, It's your duty
Re: Kim Possible Project - Getting done [edited to fit reality]
« Reply #32 on: August 25, 2012, 04:25:14 pm »
I agree but other than that the artwork is great.
"You don't know the power of the Dark Side"
Automated Cabinet
Nintendo Pi
PiCubed

DaOld Man

  • Trade Count: (+4)
  • Full Member
  • ***
  • Offline Offline
  • Posts: 5158
  • Last login:May 24, 2025, 09:57:44 pm
  • Wheres my coffee?
    • Skenny's Outpost
Re: Kim Possible Project - Getting done [edited to fit reality]
« Reply #33 on: August 25, 2012, 05:05:41 pm »
This project is looking great!
I bought a couple of those same hinges you show on your CP. I agree, I think they are way too stiff and may pull the bolts out of the MDF.
HOWEVER: I found that you can remove the cylinder in the center and then it becomes a regular hinge (open/close force wise anyway.)
The cylinder is actually two cylinders with a strong spring inside, pushing them apart.
A well placed screw driver will pry them right out.

MacGyver

  • Trade Count: (0)
  • Full Member
  • ***
  • Offline Offline
  • Posts: 317
  • Last login:December 18, 2023, 12:49:00 am
    • Project Build
Re: Kim Possible Project - Getting done [edited to fit reality]
« Reply #34 on: August 26, 2012, 04:51:22 am »
Thanks guys.

I worked on it again (only open on Saturday), but this time there were no lights on in the shop so I pretty much just used hand-tools.
I Gorilla-Glued all the T-nuts in (all 28), and GG'ed the 10 back T-nuts in as well (I got glue inside a few of them  :banghead:).
That stuff is crazy, and when they say it expands, they really should show a picture, as I was unprepared for that level of expansion.
I tried my hand at Bondo (or the German equivalent), I think I'll stick with my day job.   I got it in the holes, but it took getting a lot outside of them as well.
I fixed some other minor things like replaced the coin door locks, re-centered the bezel retainers, and glued and screwed the back sub pieces.

Here you see the t-nuts drying (and Gorilla Glue oozing)


Re-centered retainers, the t-nuts for the back, and how I deal with Germany's aversion to black bolts and screws (I can find sold titanium, but not powder-coated black  :dunno)


New locks, my lack of Bondo skills, and some soon to be cut eye-bolts.


Notice the lack of lights.


I still have a laundry list of things to do:
finish top
cut eye-bolts
fill all 28 side holes with bondo
drill wire holes in CPO section
make holes for guns?
route both sides for t-molding
cut holster holes, build holster mounting shelf inside
cut new CPO for controls
paint all edges black
sand everything smooth
clean surfaces
apply cabinet vinyl and new CPO vinyl
install t-molding
install speaker and volume knob plug(s)
mount amp
install marquee lighting (and plugs)
wire coin door (plugs)
wire power plug
install new bezel graphics
install side art
get tinted glass
fix software (missing cfgs, broken stuff)


Until next week...
 

MacGyver

  • Trade Count: (0)
  • Full Member
  • ***
  • Offline Offline
  • Posts: 317
  • Last login:December 18, 2023, 12:49:00 am
    • Project Build
Re: Kim Possible Project (Full size cabinet from scratch)
« Reply #35 on: August 27, 2012, 03:55:40 pm »
Here is an example of how long it takes to boot from the bios screen to playable (and my custom Kim Possible Win 7 startup animation).


And just a general lighting test before I rip this test panel apart to build the final one.

Slippyblade

  • Trade Count: (+2)
  • Full Member
  • ***
  • Offline Offline
  • Posts: 3167
  • Last login:June 05, 2024, 10:30:57 am
  • And to the death god we say, "Not today!"
Re: Kim Possible Project (Full size cabinet from scratch)
« Reply #36 on: August 27, 2012, 07:05:13 pm »
14 seconds for a boot, dang, that's quick.  Any chance you got links to help me do that?

MacGyver

  • Trade Count: (0)
  • Full Member
  • ***
  • Offline Offline
  • Posts: 317
  • Last login:December 18, 2023, 12:49:00 am
    • Project Build
Re: Kim Possible Project (Full size cabinet from scratch)
« Reply #37 on: August 28, 2012, 12:36:44 am »
Not really any tricks, pretty much brute force.  It's a i5 3.3ghz, with an SSD for a harddrive.  I did turn off mostly every service except those that let it boot, and the ones needed for networking.  It could be a little faster if I replaced the Win 7 shell with Hyerspin, but I'm still working on the software so I still want the shell to be explorer for a bit.  I'm pretty sure it's mostly the SSD.  It took a while to acquire all the parts, but it was worth it.  I did modify Win 7 to not have a lot of its normal software, but that was really just to reduce its footprint.

Here is the SSD I used:
http://www.amazon.com/gp/product/B004W2JKZI

MacGyver

  • Trade Count: (0)
  • Full Member
  • ***
  • Offline Offline
  • Posts: 317
  • Last login:December 18, 2023, 12:49:00 am
    • Project Build
Re: Kim Possible Cabinet(Full size from scratch, Almost done)
« Reply #38 on: September 16, 2012, 07:08:37 pm »
I had a problem with my camera/phone, namely, I dropped it and it broke, so no pictures.  I did borrow my wife's phone, and snapped an update picture.

I hope to have it finished in the next few days, and I'll steal her phone and post some detailed pictures.

Until then.

MacGyver

  • Trade Count: (0)
  • Full Member
  • ***
  • Offline Offline
  • Posts: 317
  • Last login:December 18, 2023, 12:49:00 am
    • Project Build
Re: Kim Possible Cabinet (Full size from scratch, Almost done)
« Reply #39 on: September 17, 2012, 03:41:05 pm »
So I spent some time wiring the control panel.  You would think it would look better after 5 hours worth of work, almost done in this photo.

I wired up the LEDs for the joysticks even though I don't have hollow JLW shafts yet, in fact they don't even exist yet.  I have money saved for them, I just can't buy something that doesn't exist.


I made such a huge mess. 

Everything worked perfect the first time, but the TurboTwists need to be swapped around for Hyperspin.


MacGyver

  • Trade Count: (0)
  • Full Member
  • ***
  • Offline Offline
  • Posts: 317
  • Last login:December 18, 2023, 12:49:00 am
    • Project Build
Re: Kim Possible Cabinet (Full size from scratch, Almost done)
« Reply #40 on: September 19, 2012, 04:23:33 pm »
Well I enlisted the help of my wife and got the pica-vinyl and t-molding installed.  I can only offer one real piece of advice, do not try to install vinyl by yourself that's all.  I did one side by myself (twice) and it was a nightmare, having her help made it 20 times easier. 

I still need to get the tinted glass cut, and about a gagillion other things, but at least it finally looks like a proper arcade cabinet.

I promise to post a whole bunch of photos and a video, and detail how it all comes apart into 6 pieces without tools when its done.

griffindodd

  • Trade Count: (+1)
  • Full Member
  • ***
  • Offline Offline
  • Posts: 1536
  • Last login:July 07, 2025, 09:44:51 am
  • Builds Stuff
Re: Kim Possible Cabinet (Full size from scratch, Almost done)
« Reply #41 on: September 19, 2012, 05:28:46 pm »
It's looking great, I likey a lot, it's almost like a cartoon character itself  ;D
I drink and I know things.

UncleArgyle

  • Trade Count: (0)
  • Full Member
  • ***
  • Offline Offline
  • Posts: 35
  • Last login:September 23, 2019, 12:45:36 pm
Re: Kim Possible Cabinet (Full size from scratch, Almost done)
« Reply #42 on: September 20, 2012, 05:33:32 pm »
Real nice! The spinners and trackball don't get in the way when using the joysticks?

Mike.

MacGyver

  • Trade Count: (0)
  • Full Member
  • ***
  • Offline Offline
  • Posts: 317
  • Last login:December 18, 2023, 12:49:00 am
    • Project Build
Re: Kim Possible Cabinet (Full size from scratch, Almost done)
« Reply #43 on: September 21, 2012, 12:45:47 am »
Real nice! The spinners and trackball don't get in the way when using the joysticks?

Mike.

No, I checked before putting it all in wood, and even the analog flightstick isn't really in the way of the trackball (unless you are reeaallly following through.
The lip on the left side is slightly a bother (no lip on the test panel).
Getting it all to fit was the real issue, and I can thank Photoshop for all the help. I basically created the panel in PS with perfectly scaled technical drawings as layers, and then created the art over them, and left the center crosses for guides to drill,  and hid the tech layers.  So when I got my CPO printed, I taped it to my panel, then pushed thumbtacks through the crosses into the wood below, then drilled everything after with the vinyl was removed.

Thanks again for all the kind words, I am still working on it, last night I put in the guns, only to discover that my camouflage artwork for the Aimtrak emitter is upside down  :banghead:

MacGyver

  • Trade Count: (0)
  • Full Member
  • ***
  • Offline Offline
  • Posts: 317
  • Last login:December 18, 2023, 12:49:00 am
    • Project Build
So I looked everywhere but couldn't find a translucent bat-top (ok, I did find a clear Sanwa bat-top, but I wanted a red and blue set).  I could find solid red, blue, black, white, and every color of aluminum, and even some trippy marbled and wooden ones, but none in translucent red and blue.  (http://arcadeshock.com/products/sanwa-denshi-lb-30n-cw-clear-bat-top, http://www.creativecircuits.net/new-lighted-custom-tops---bruce-lee-bat-top.html , and http://www.paradisearcadeshop.com/591-bat-tops)

So I looked into making them, and found one guy that did make a set of semi-translucent opaque white ones.  He had used a drill press (of which I did not have at the time) but I figured I could do the same thing without one.  I tried a bunch of different ways, but in the end a drill press was the easiest way, so I borrowed one from a friend.  (http://forums.shoryuken.com/discussion/comment/3138504/#Comment_3138504)

So I started with a coke bottle (something narrow to save on the amount of mold material needed.


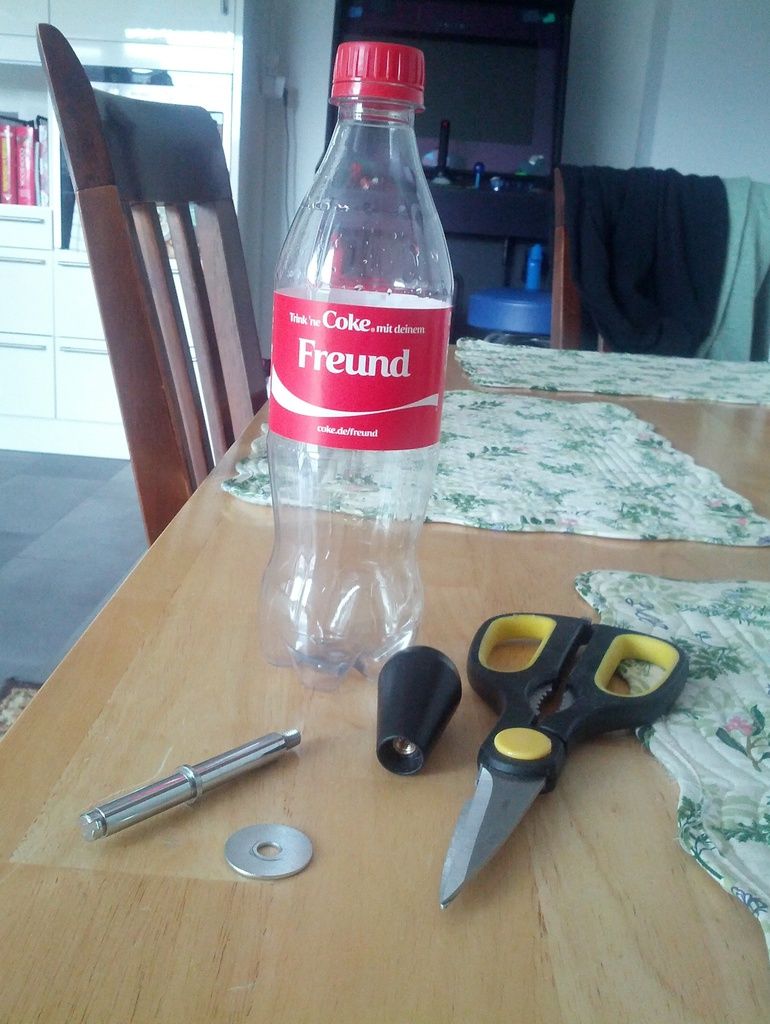
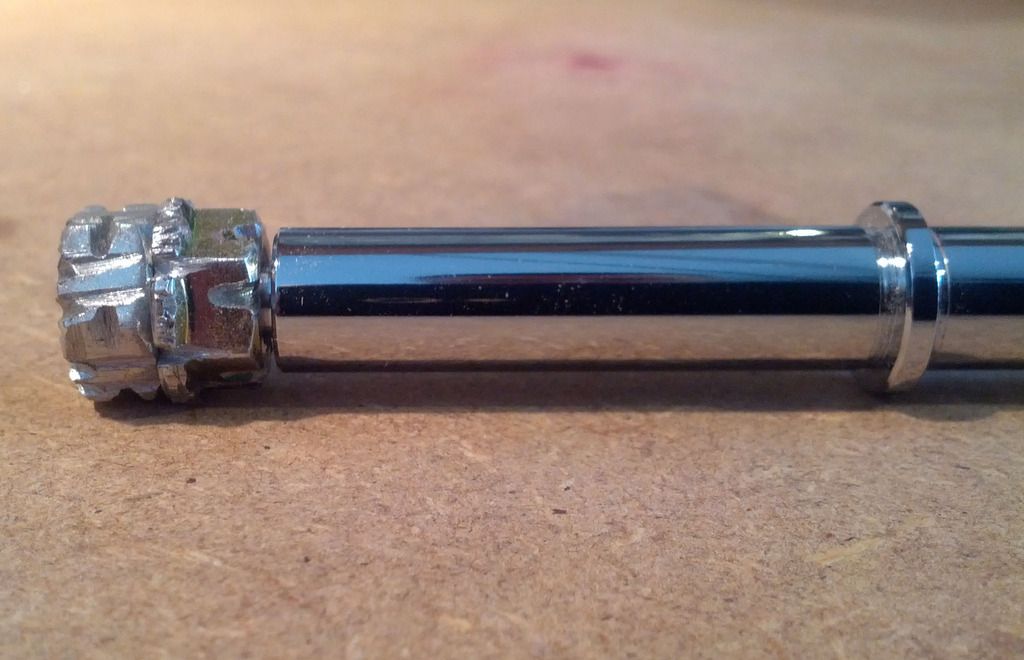
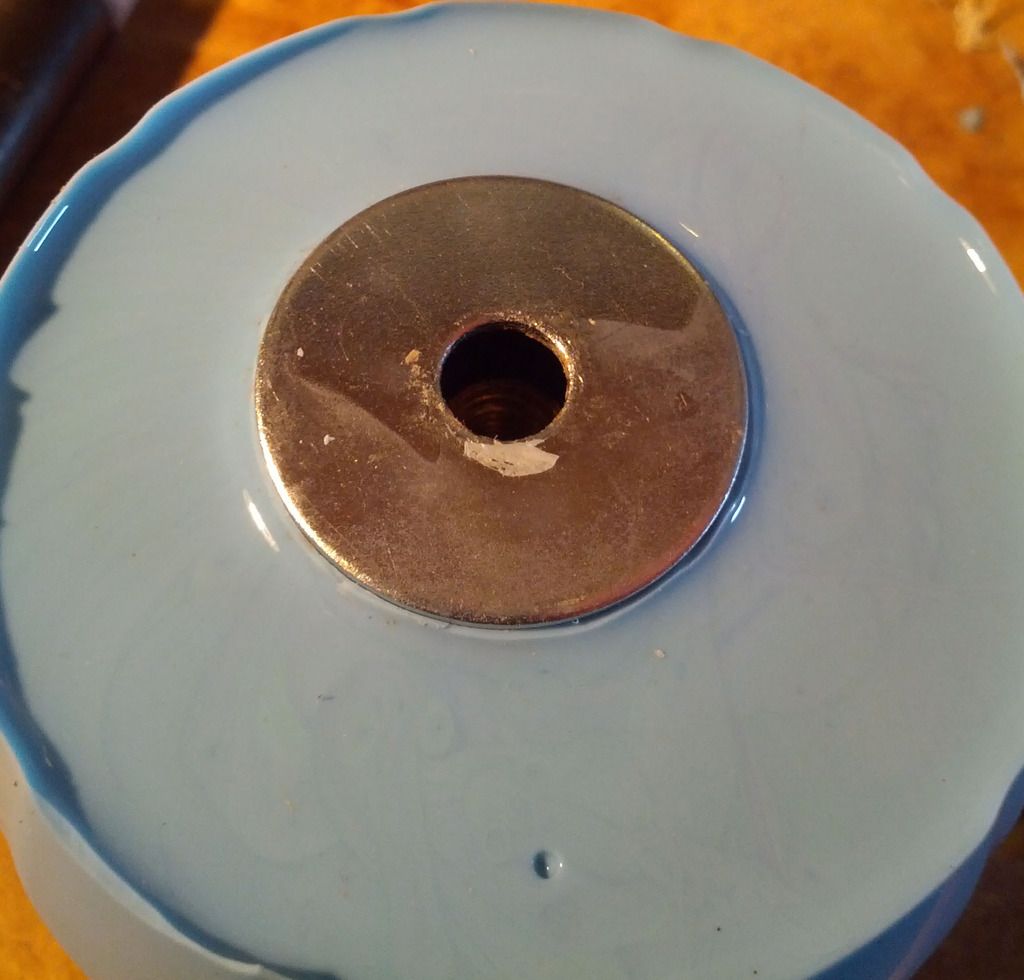
I attached the only bat-top handle I had to a shaft with a washer in-between (to make a better defined lip on the mold)


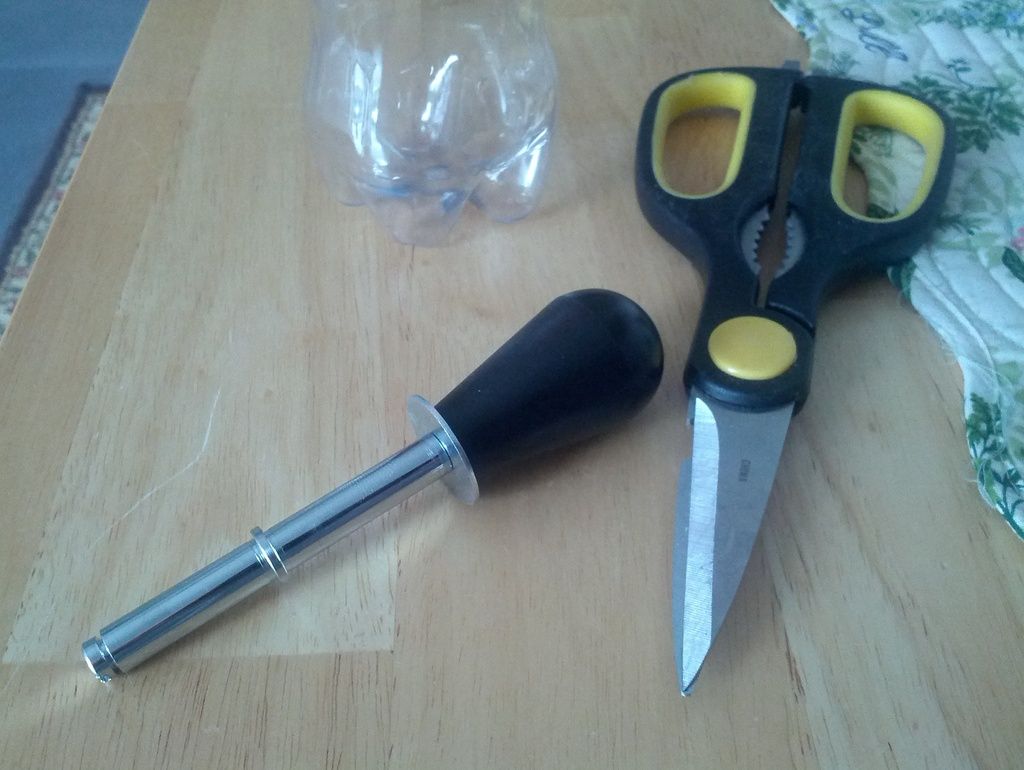
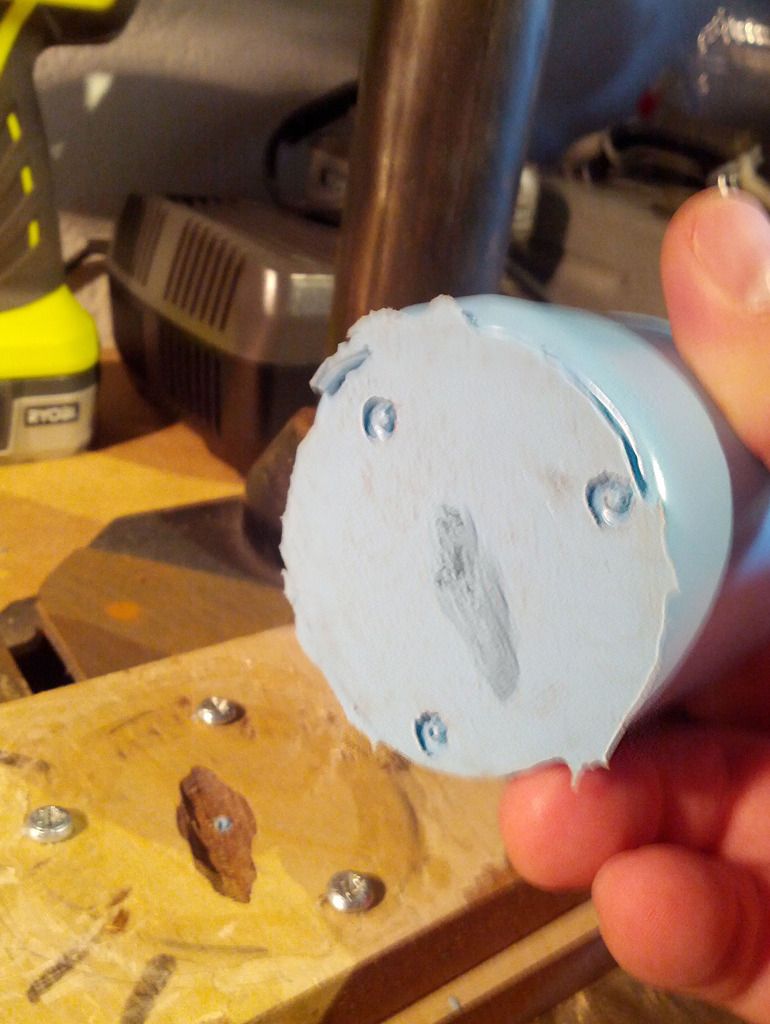
Cut the top off far enough down to allow for the bat-top to be removed through the top opening.


Made a note of where I needed to make the lower cut (low enough to have about three quarters of an inch worth of mold below the bottom of the bat-top)


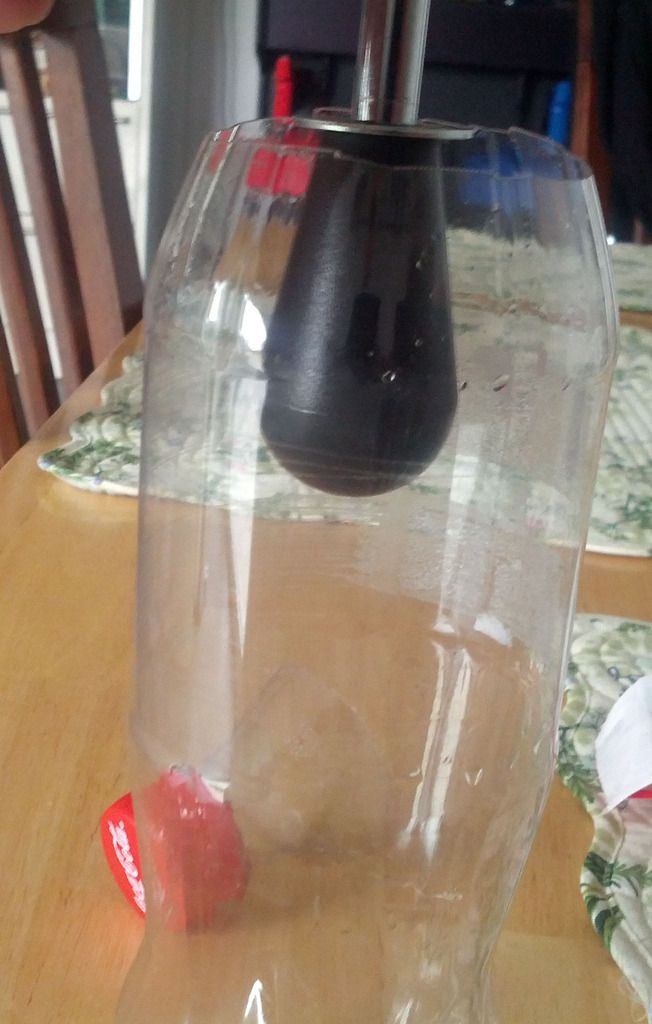
Added 3 small screws to use as guides for my mold later.


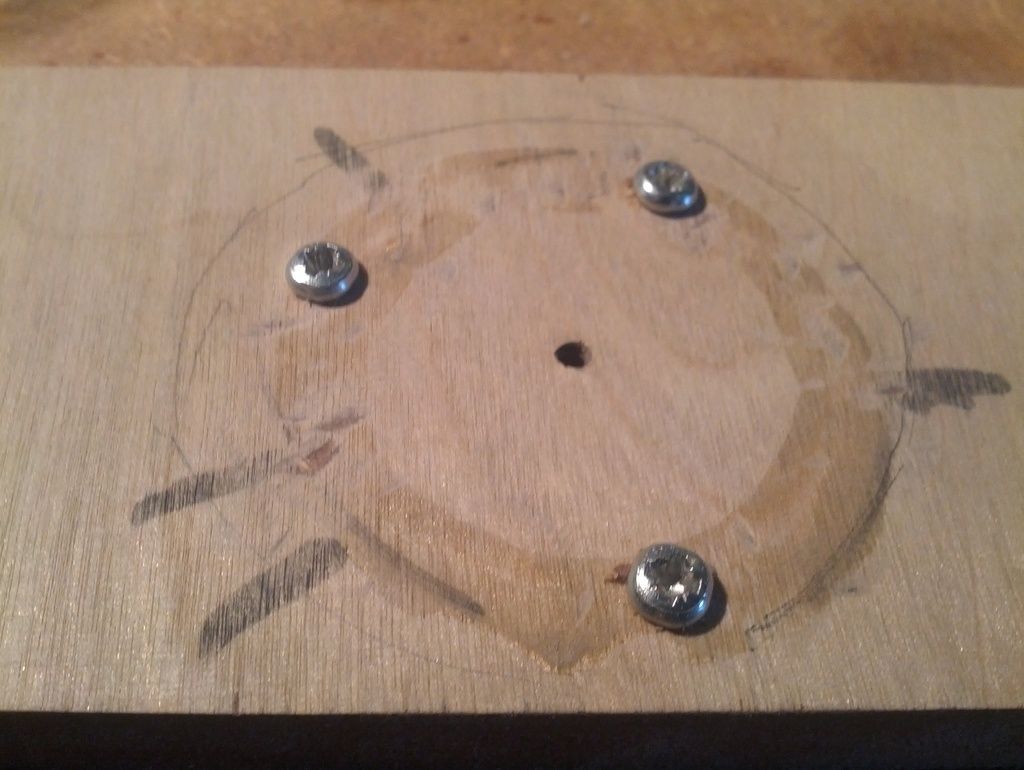
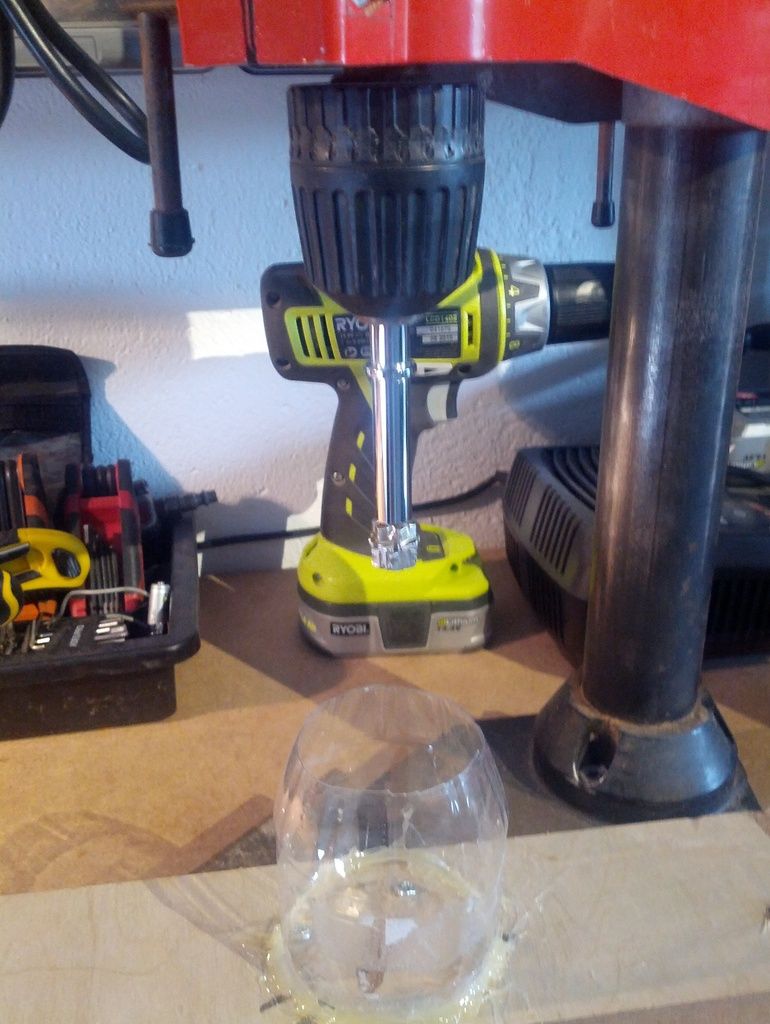
I then hot-glued the coke bottle to my board with the three screws inside. (note: hot glue is hot and curls the coke bottle, this is annoying but doesn't impact it too badly)


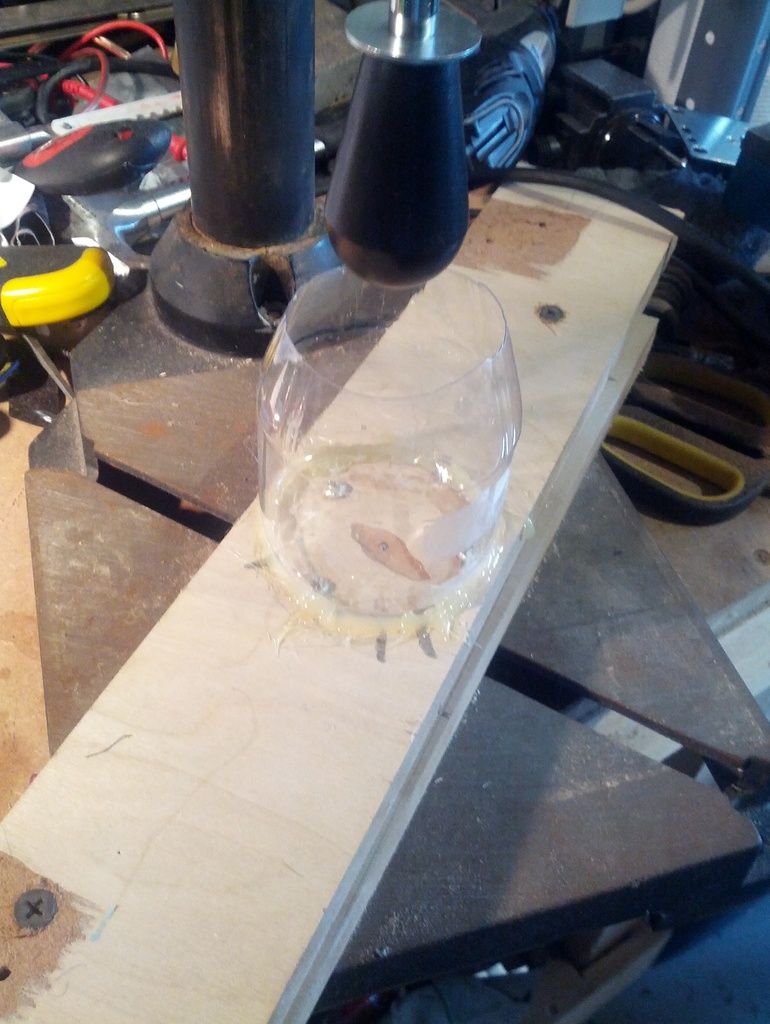
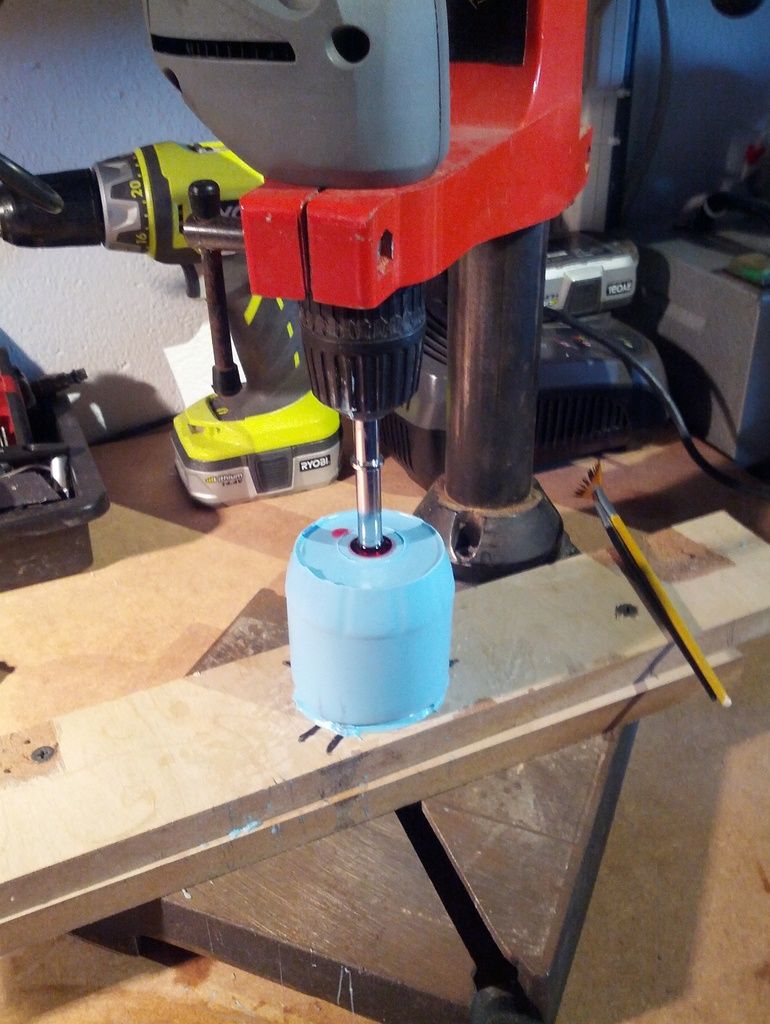
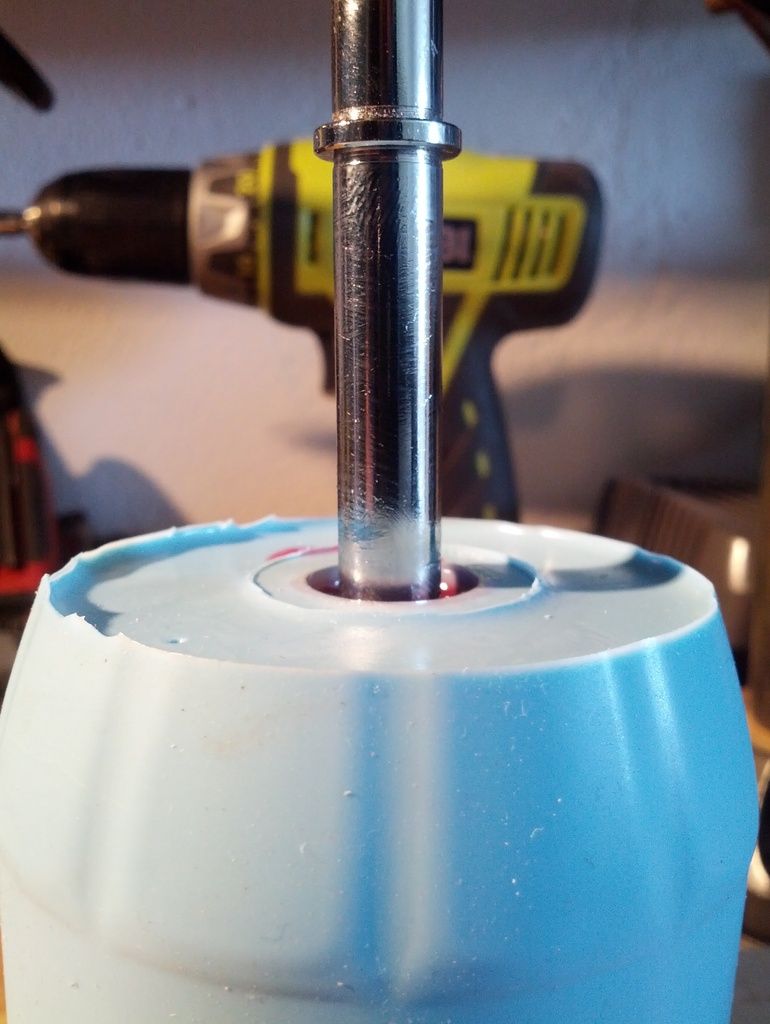
FYI:  The drill in the press is never turned on, or used in any way.  It is just to hold the shaft.
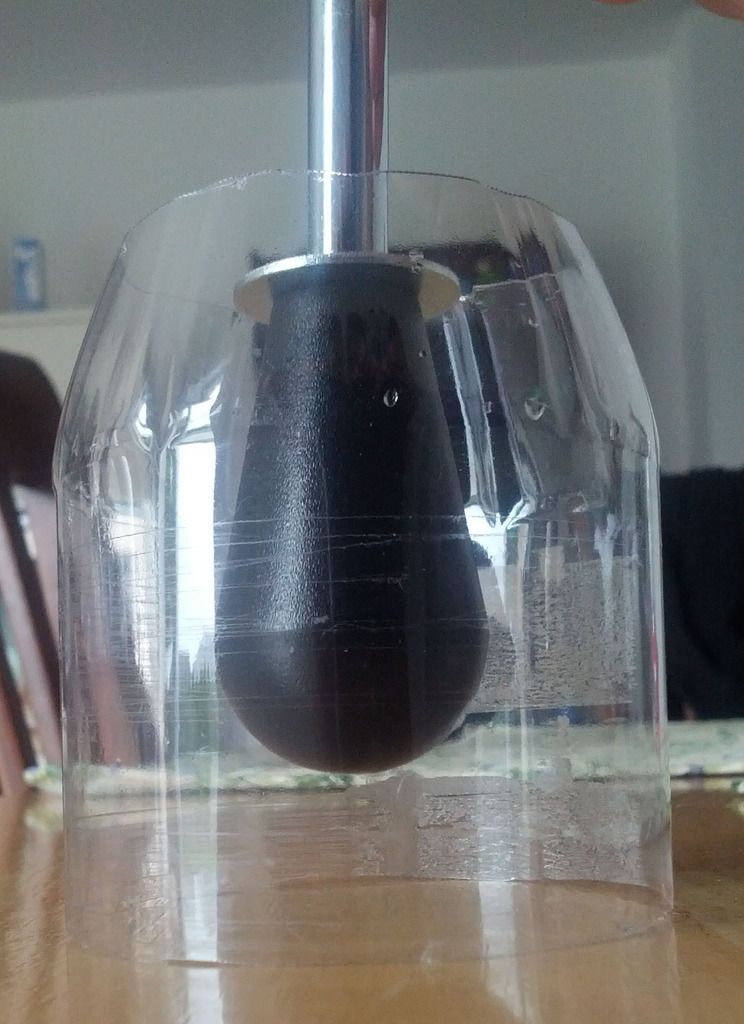
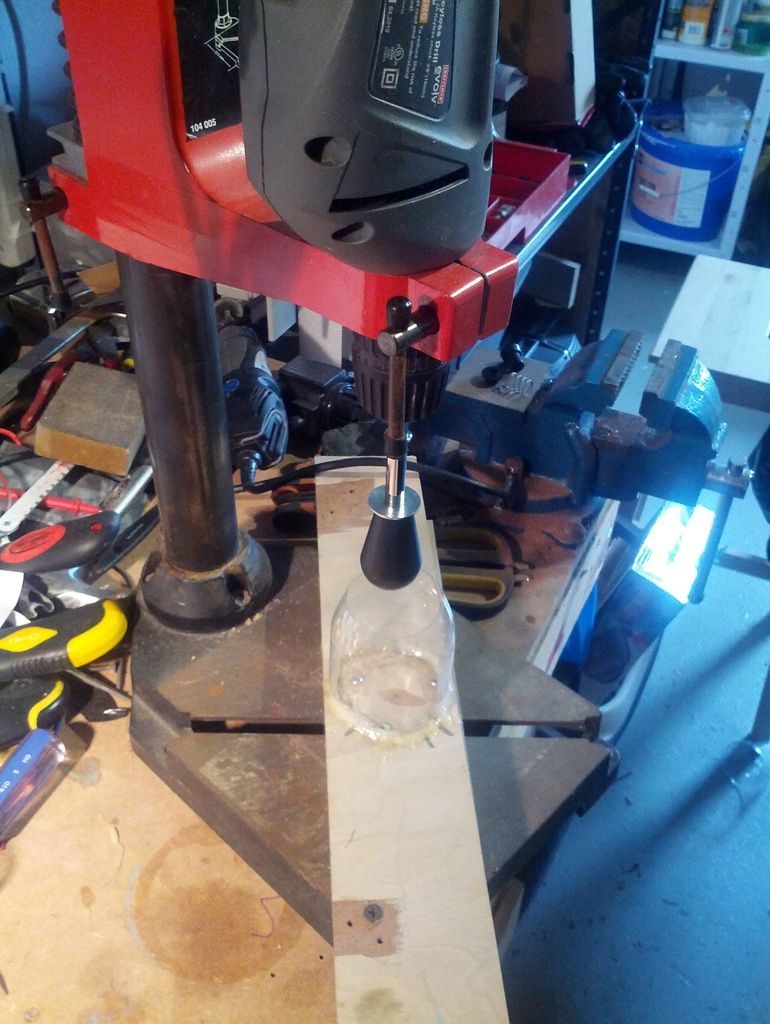
Test fit the handle assembly into the drill chuck, and aligned (and screwed)  my board so that it was properly centered under it.


Adjusted the press so that all the way down is right where I wanted it


This is called quick-release.


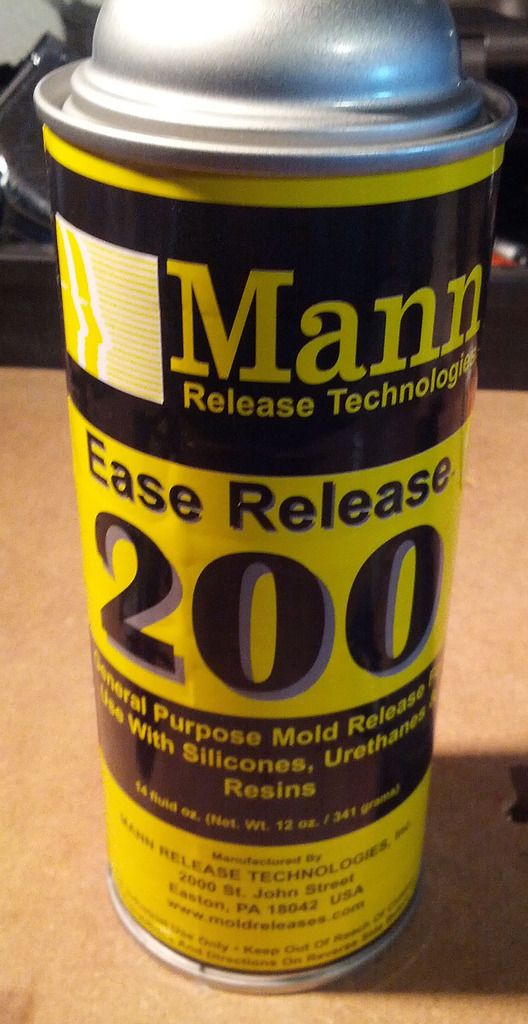
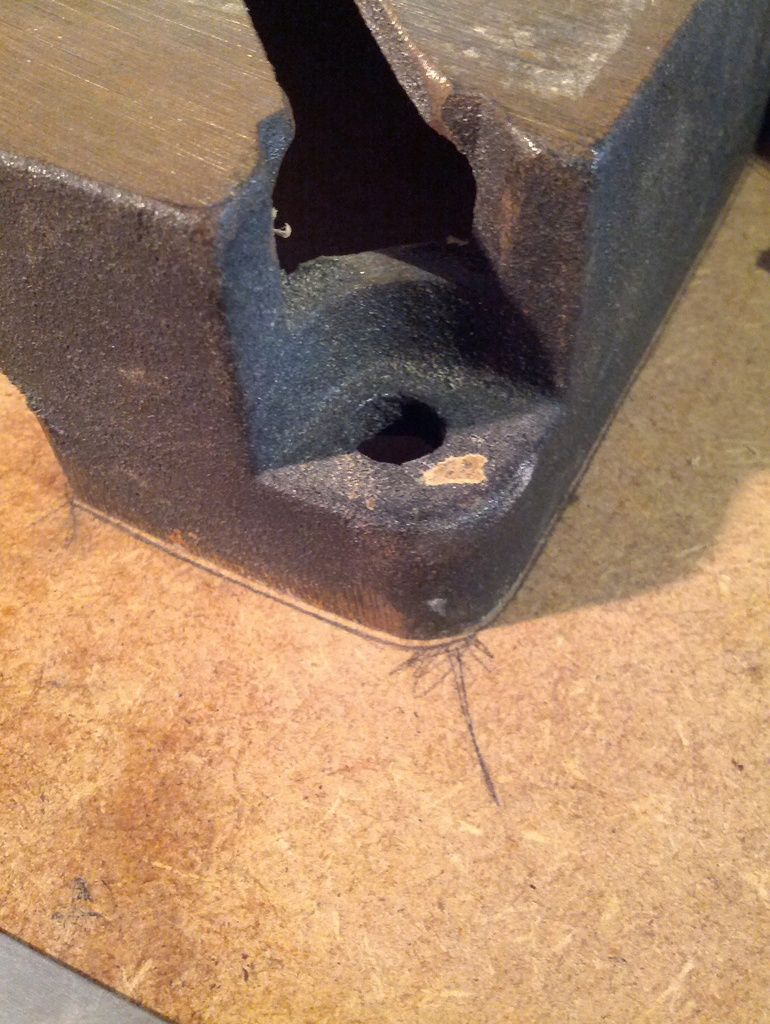
If you don't use it, things will stick, and you will end up with molds like this.


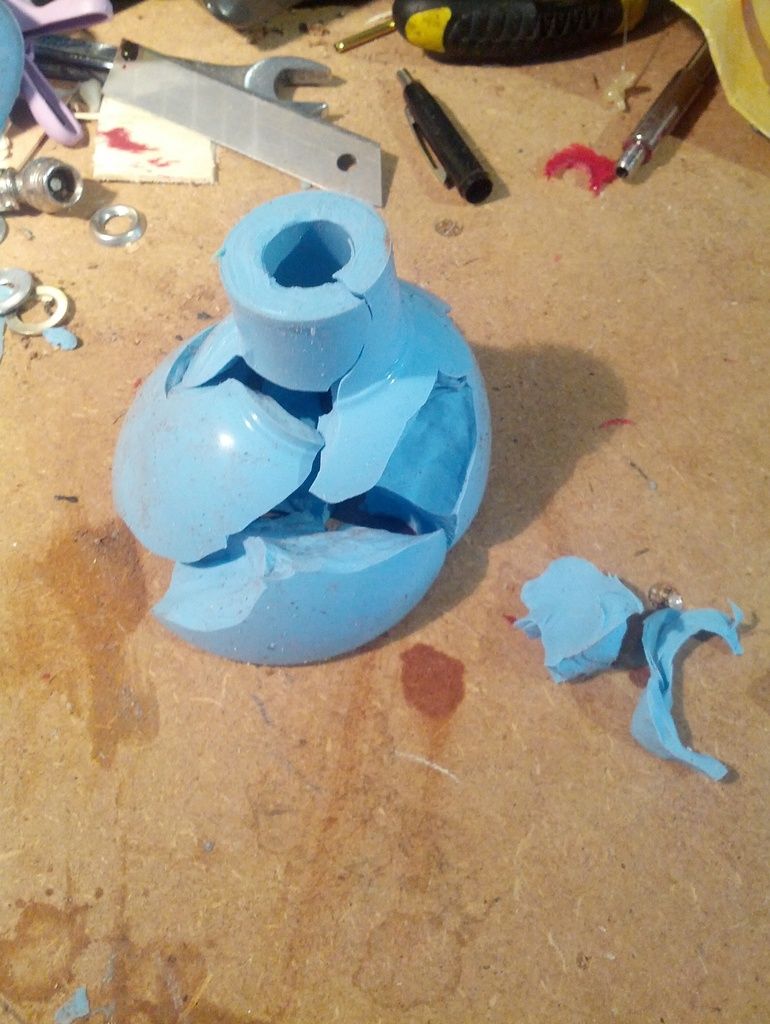
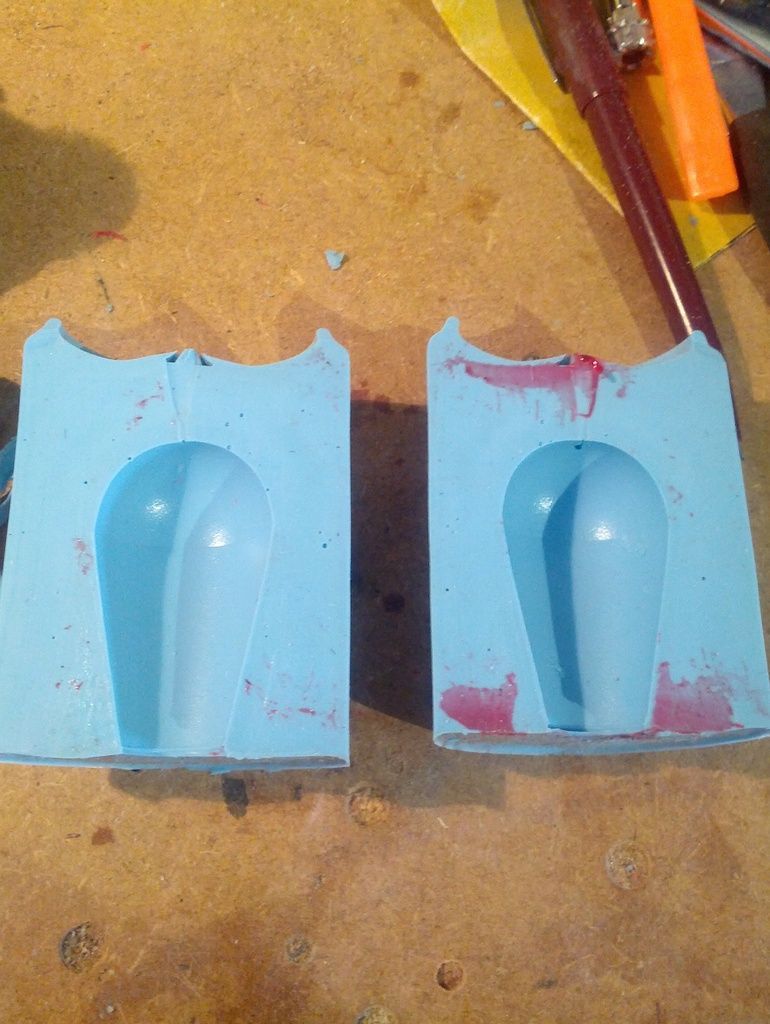
This is a bisected mold I made in a Monster can, it didn't work out (no drillpress at the time), but it is still useful for making a “test example” with any spare material you may have left over.  So I can test the color, stickiness, and whatnot with out harming or prematurely messing with the real one.


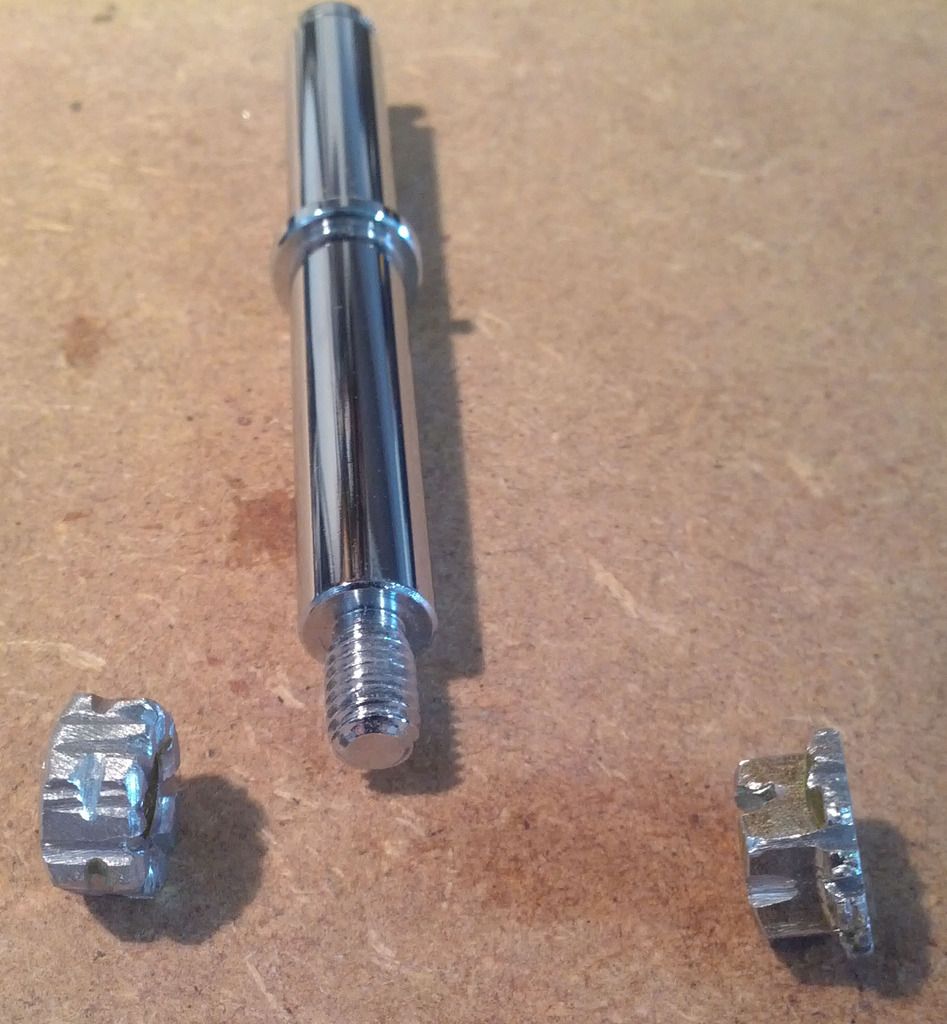
These are the nuts that will be embedded in the new bat-top.


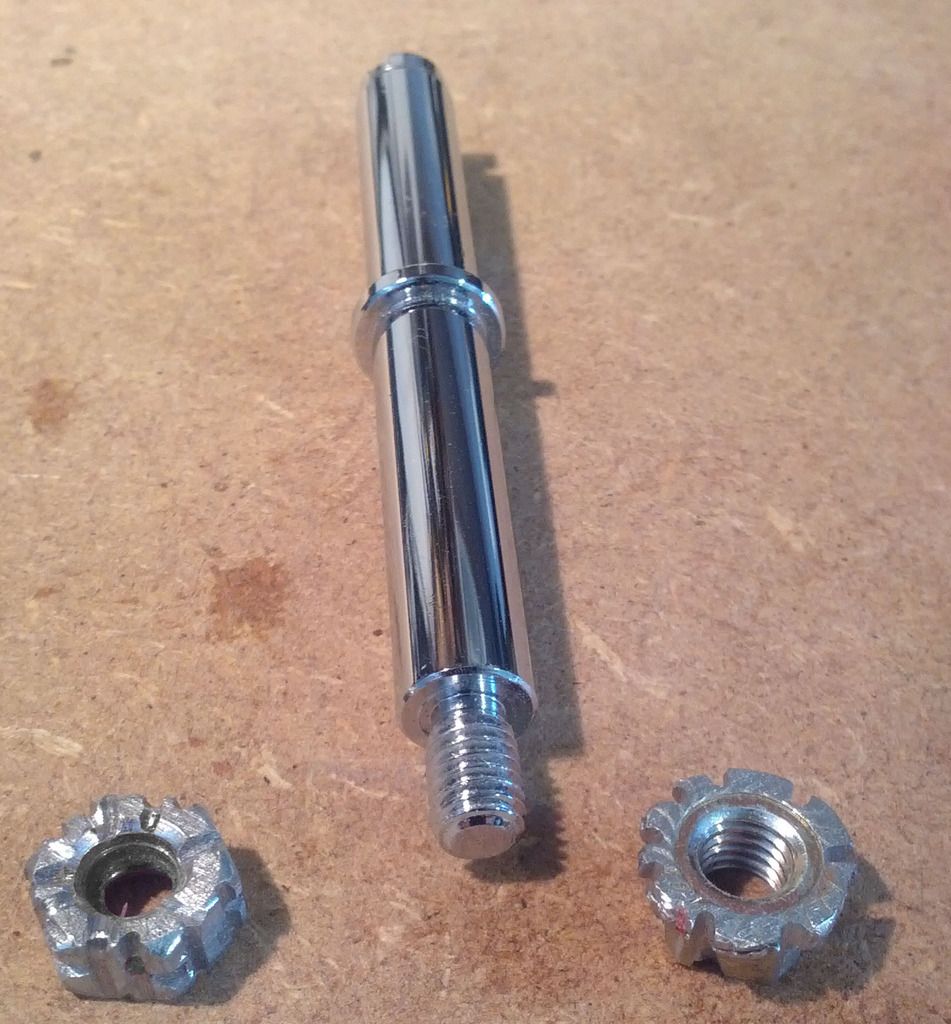
Notice how I have used a Dremel to give them some more biting surfaces.


What the final assembly will look like before embedding.


The final assembly being test fit in the press.


Lowered to check the height.


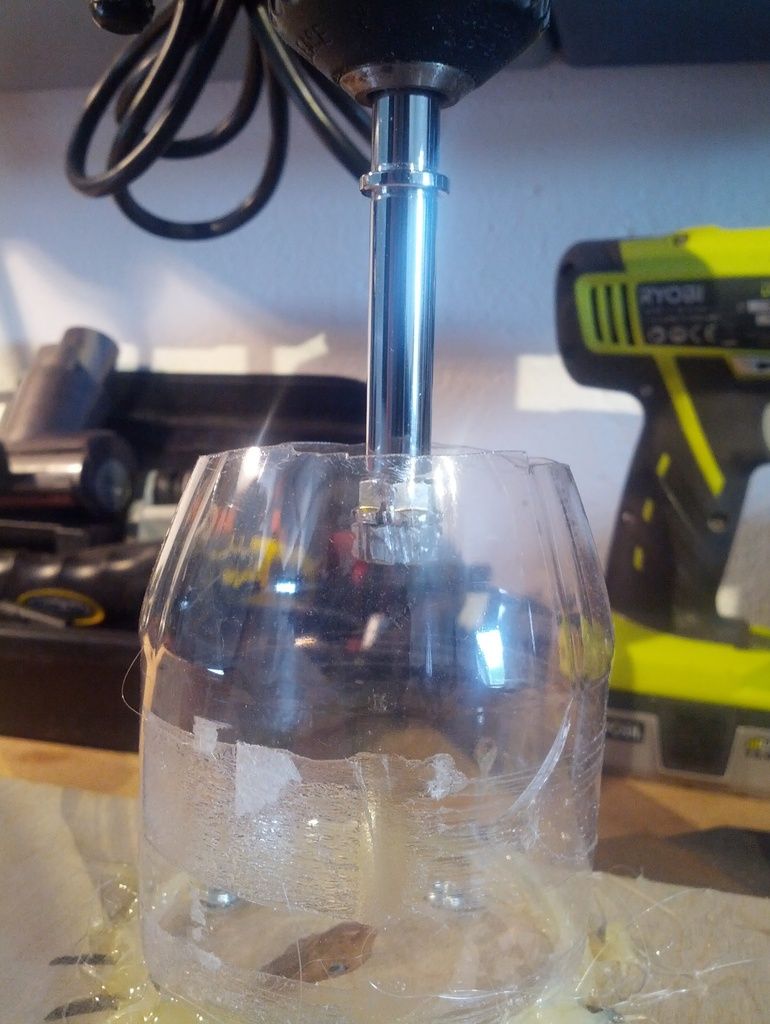
Making sure it's still centered.


If your press isn't mounted down, you should mark its location so that you can recreate the same variables later when it comes time to pour the epoxy (same level for the mold = same level for the cast).


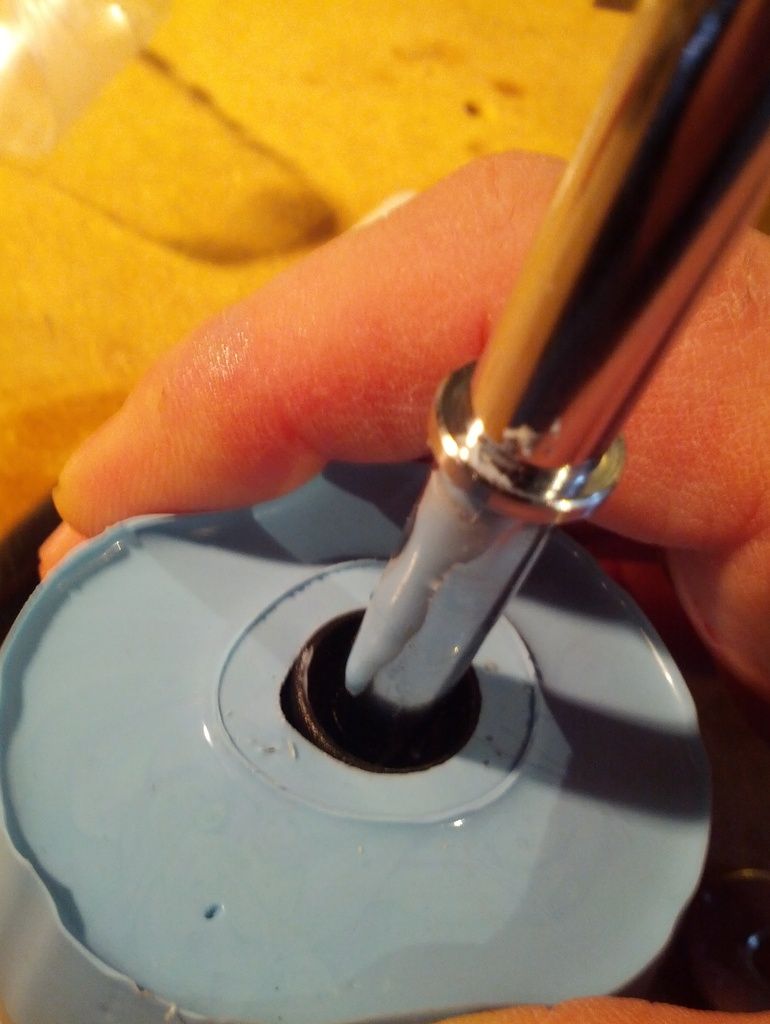
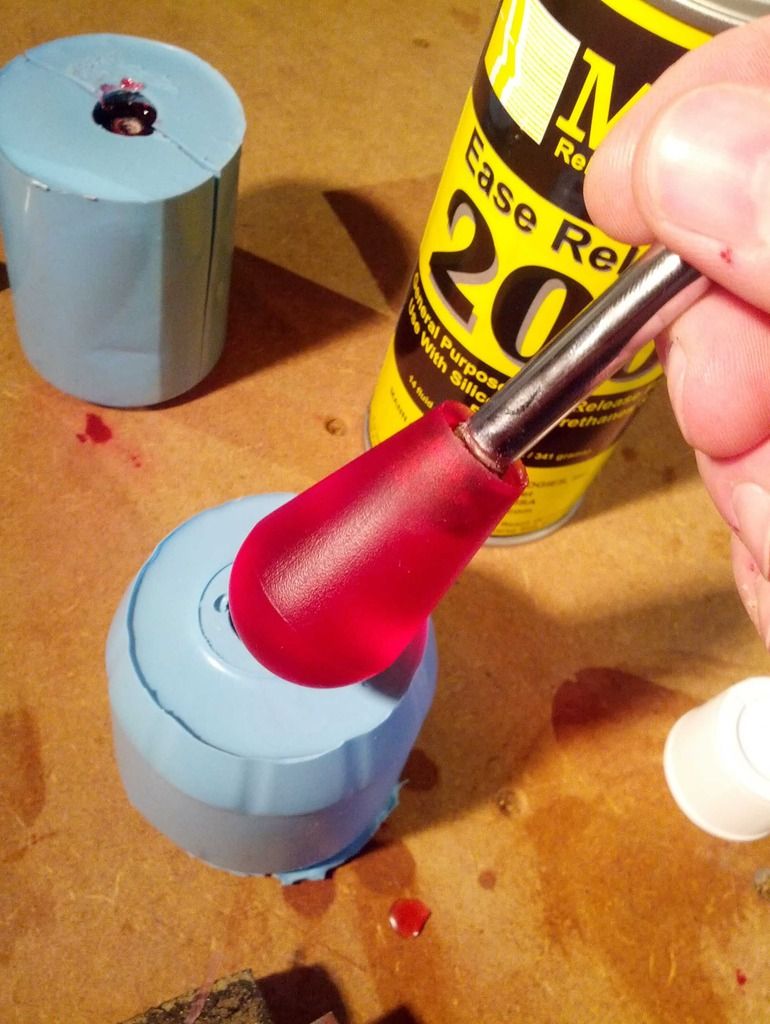
Apply the quick-release to both the coke bottle mold and the bat-top-washer-shaft assembly, and brush it everywhere, then spray it all over them once again (let the pieces sit for at least 5 minutes prior to use)
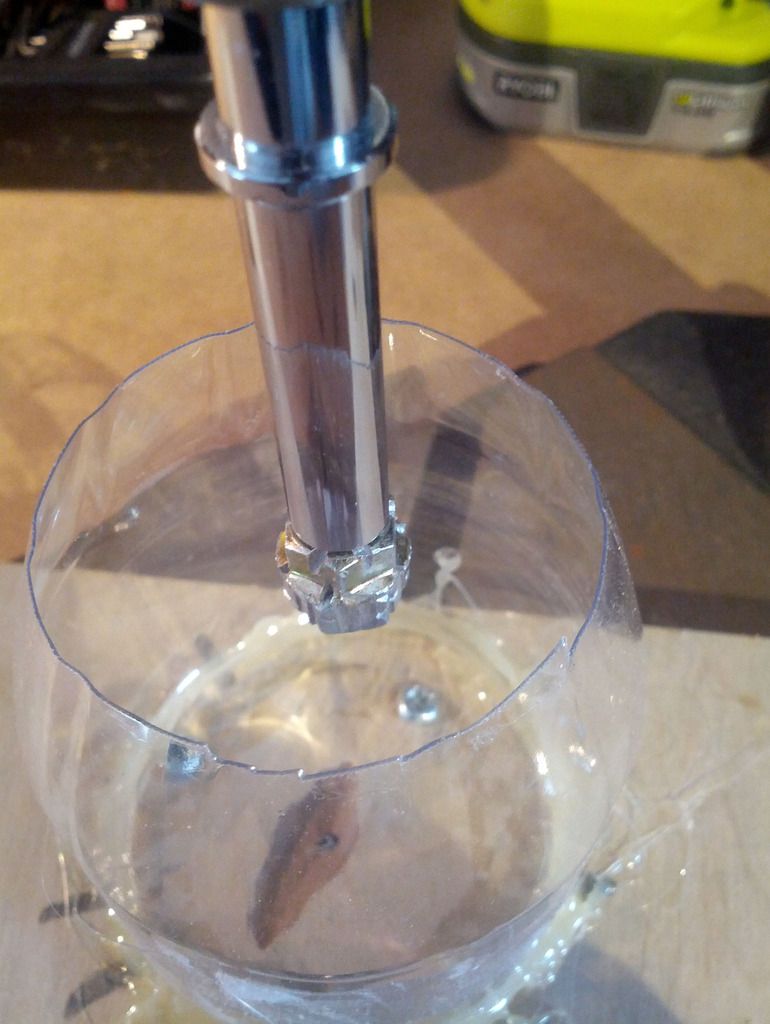
Now reattach the original bat-top-washer-shaft assembly into the chuck and lower it into the empty mold.


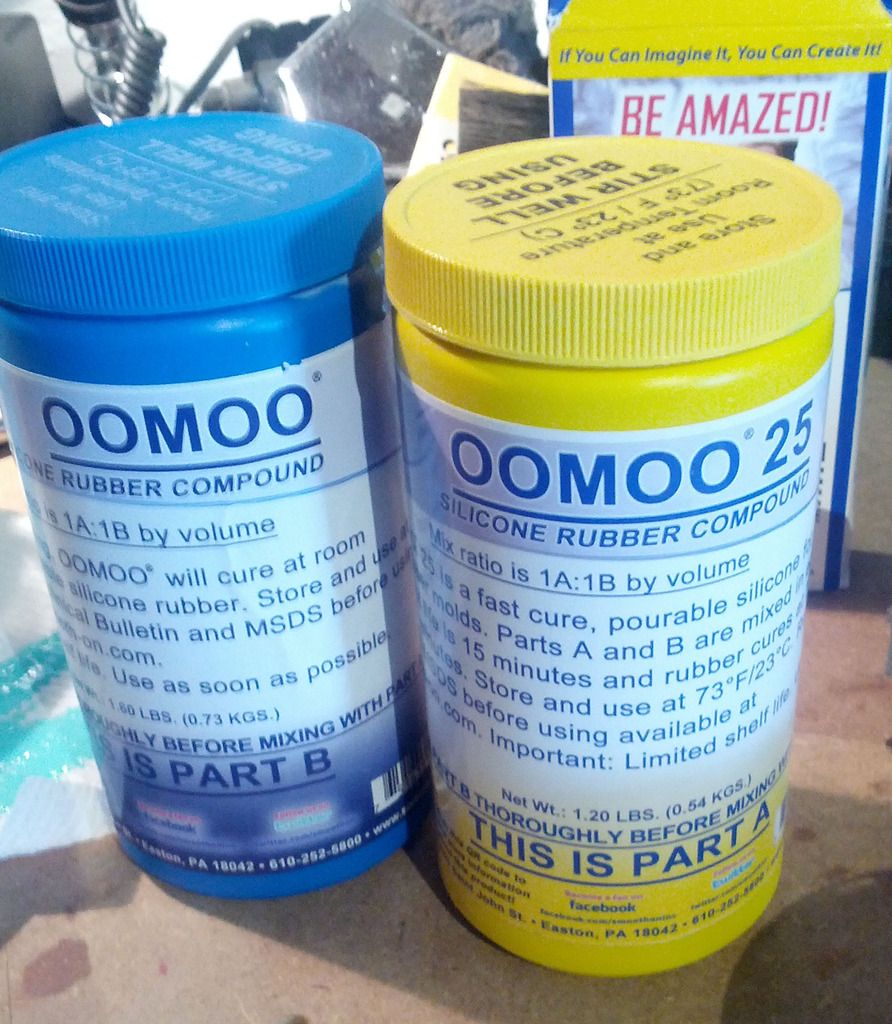
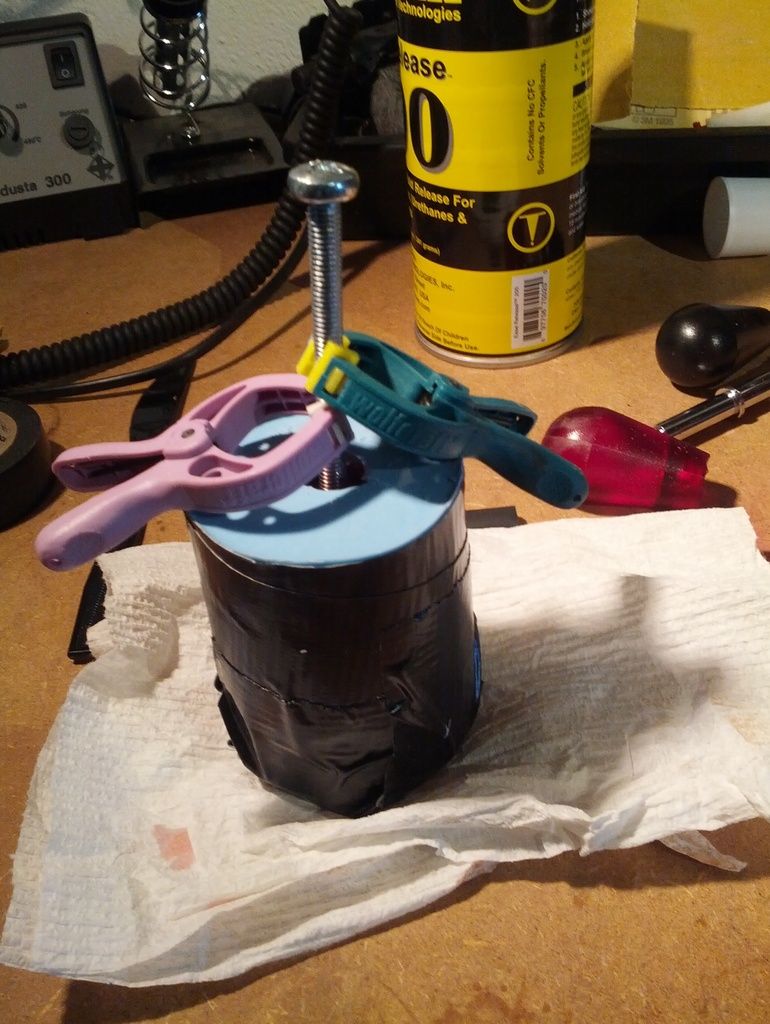
Here is the stuff I used to make the mold, OOMOO 25.  It says it sets up in 75 minutes, but I found that 5 hours is a safer bet.  (remember to keep it inside and warm prior to use)


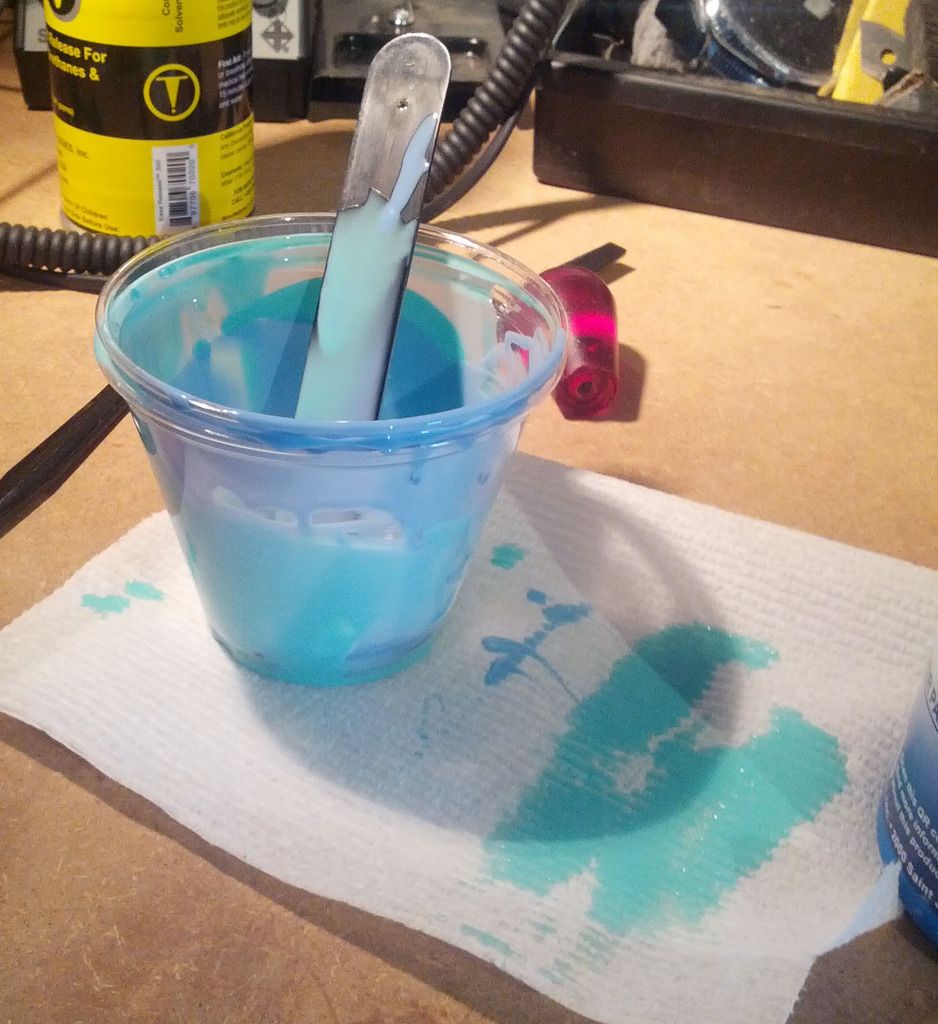
You pour equal amounts into their own cups, and then mix each separately until they are good and mixed (and more viscous), then mix them into a new cup together, then mix that until the color is uniform.

 
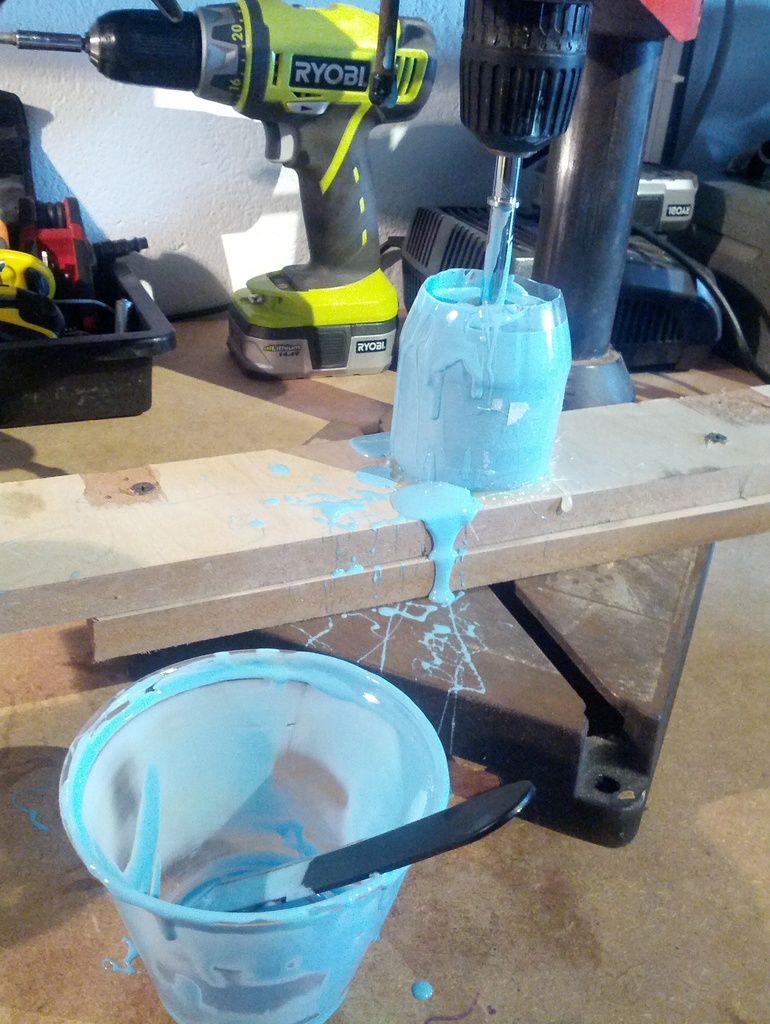
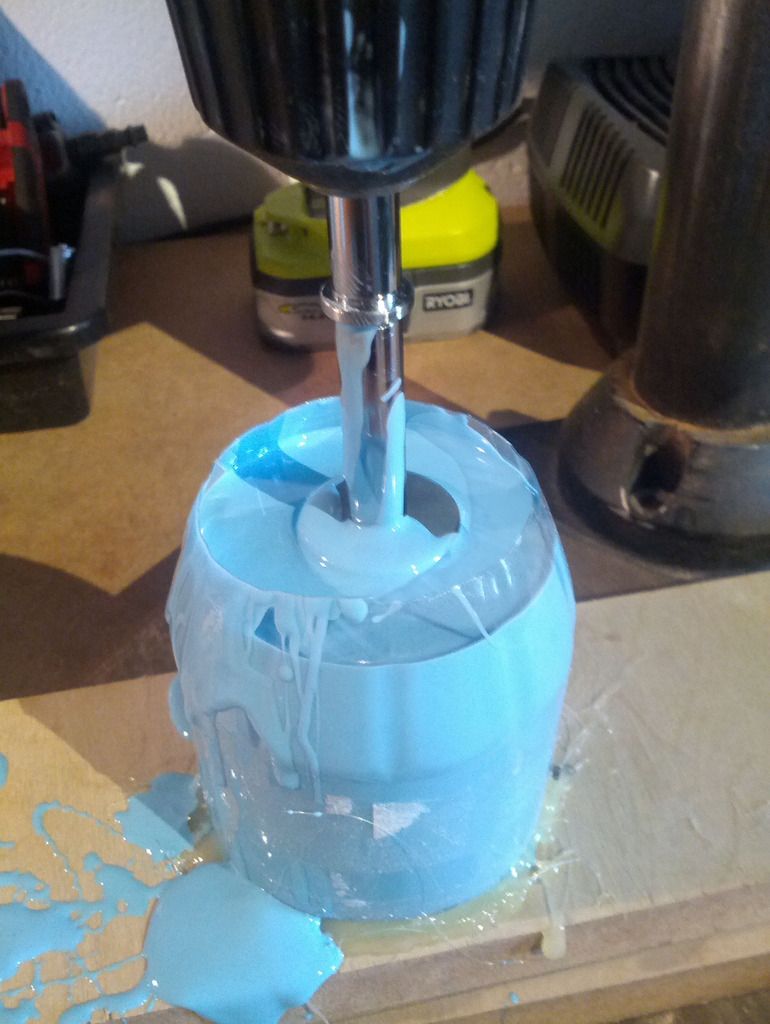
Now pour that mix into your hot-glue mounted, perfectly centered coke bottle half (you should pour it around the already lowered handle, lowering it after might work, but you're on your own) 
Don't worry about a mess, it will just peel off most everything once set if you just leave it alone.


I fill it up to washer.


Now wait 5 hours (or 75 minutes if you're feeling lucky)


After 5 hours loosen the chuck from around the shaft.
Then raise the press up and out of the way (but don't mess with anything else, you need the press to be the EXACT same later when you make the cast.


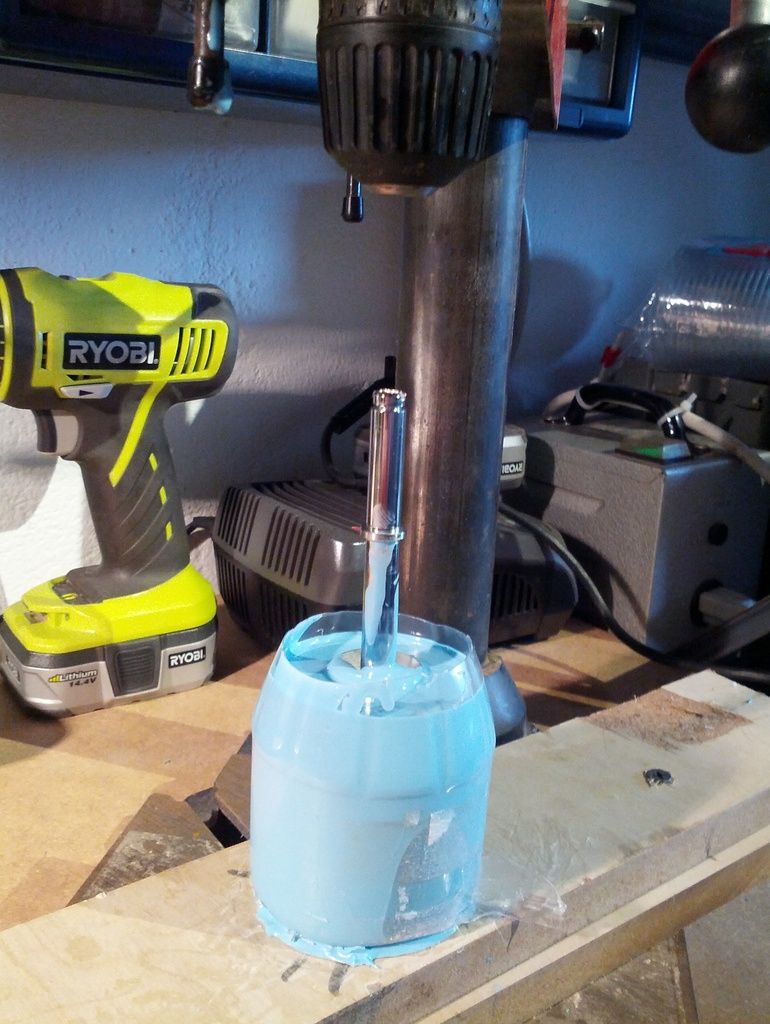
Now remove the mold from the board (this was easier said than done with the hot-glue I used).


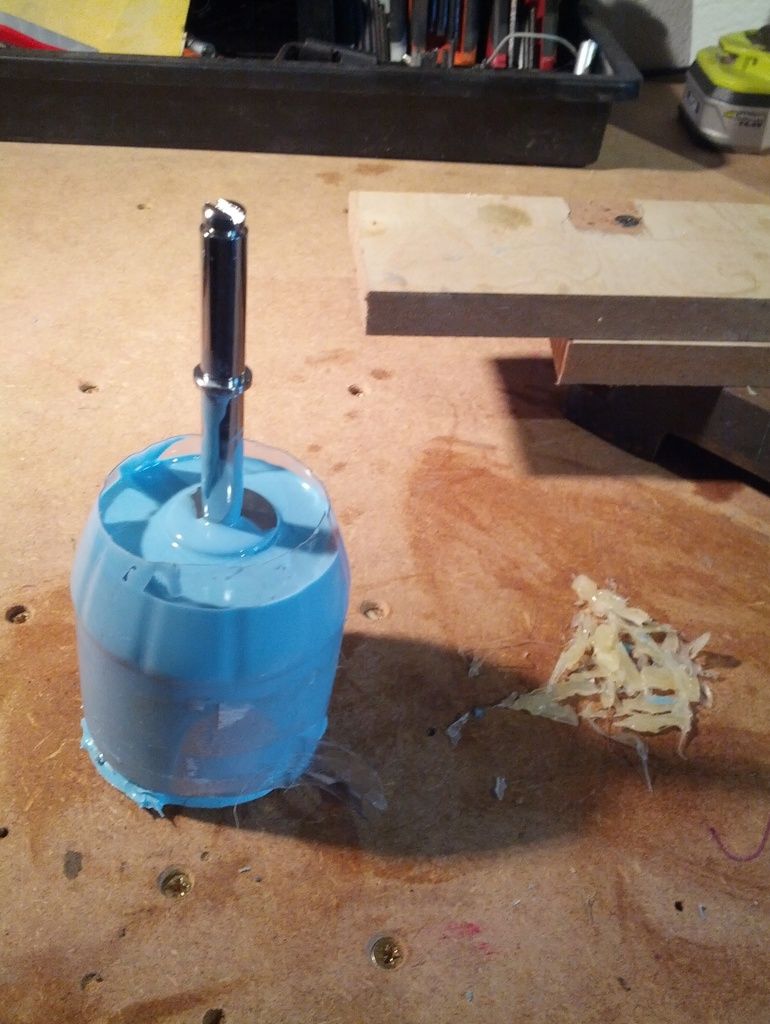
Carefully remove the flimsy coke husk.


Now you can see what the screws were for, they will act as guides to let you position the new mold EXACTLY where it goes back on your board.  I even routed out a dent to give it more absoluteness.
The key thing is that where the mold was when you made it is the same as when you cast the new shaft (or else the shaft will be off-center or at an angle)


Just adding some quick external marks to make finding the screw guides easier later.


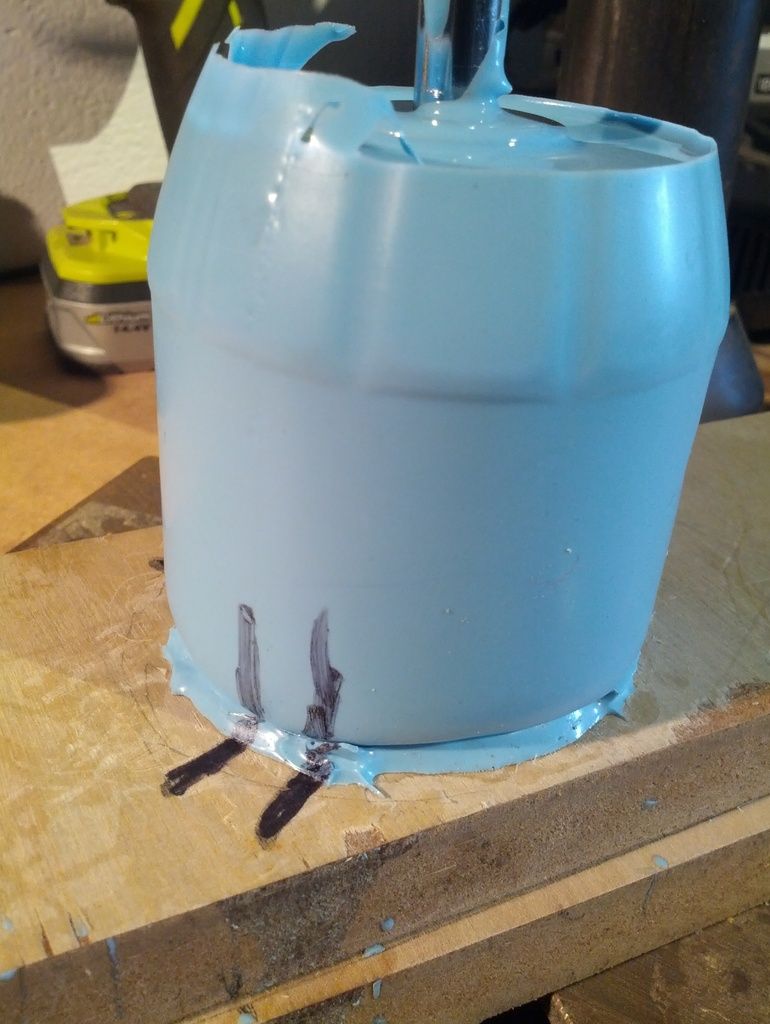
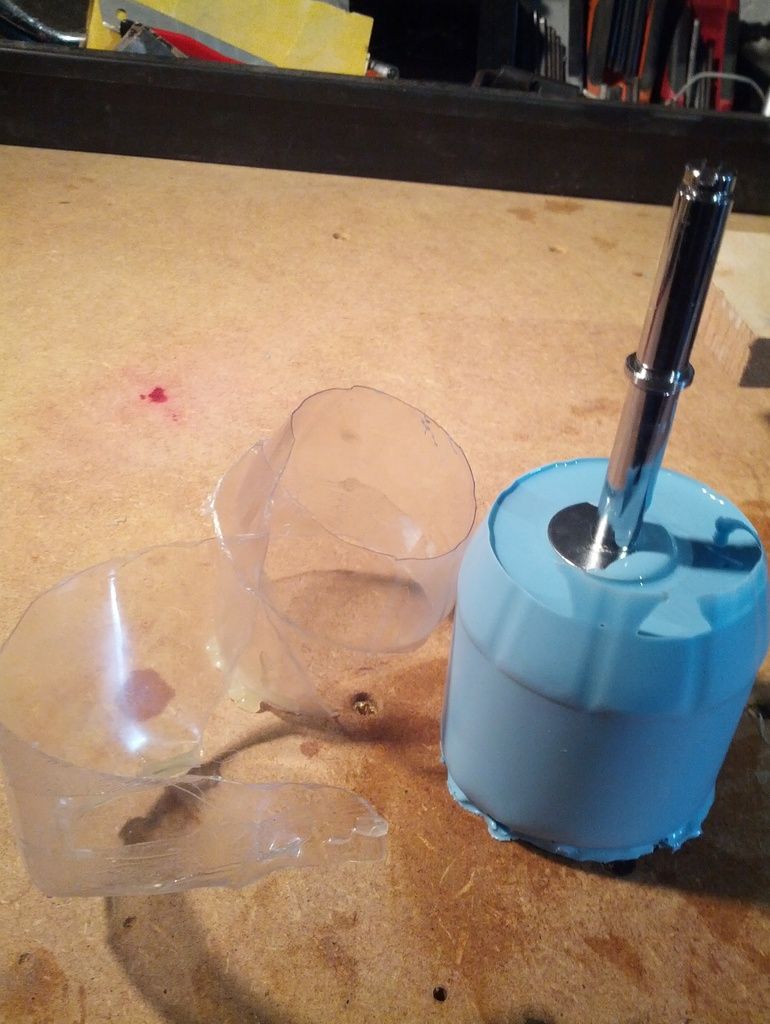
Carefully unscrew the shaft and trim off any excess mold material.


Vola,  all trimmed up.


The entombed original handle.


Reattaching the shaft to make it easier to remove (I also use a bit a water).


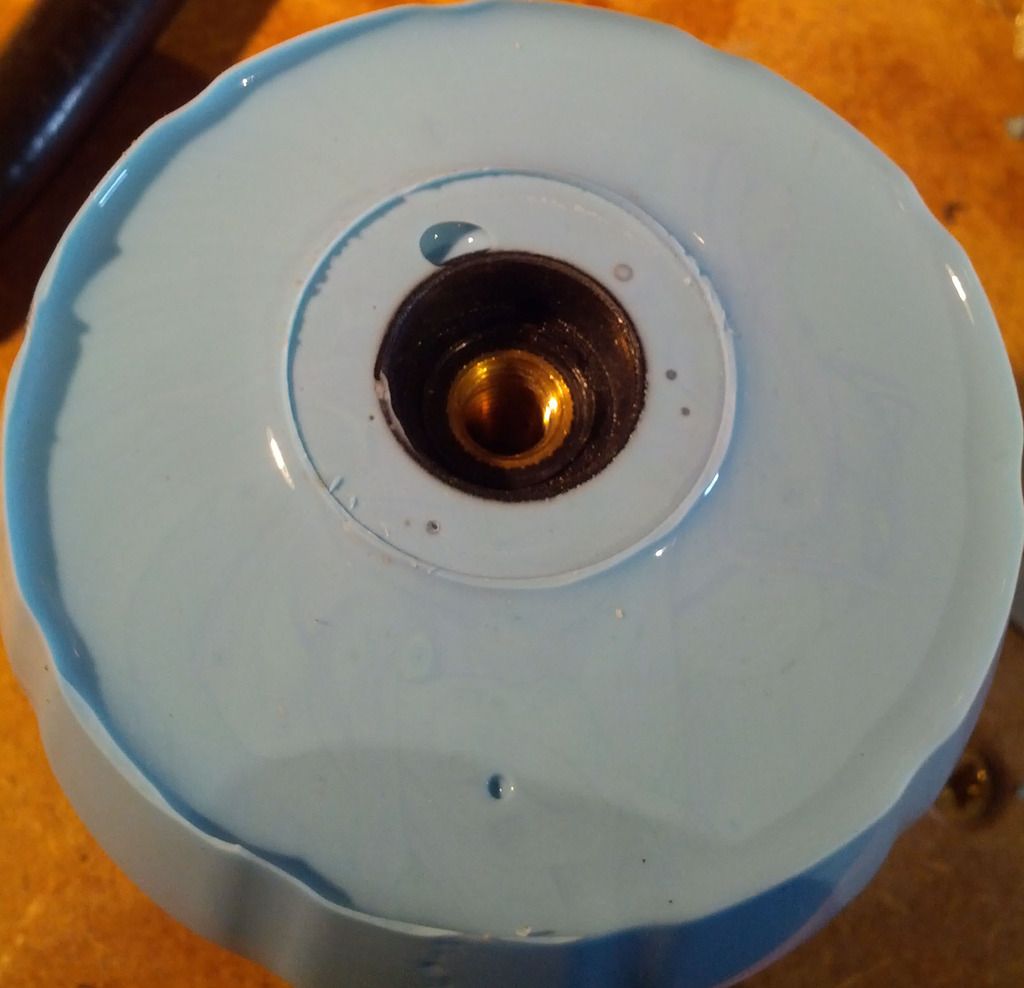
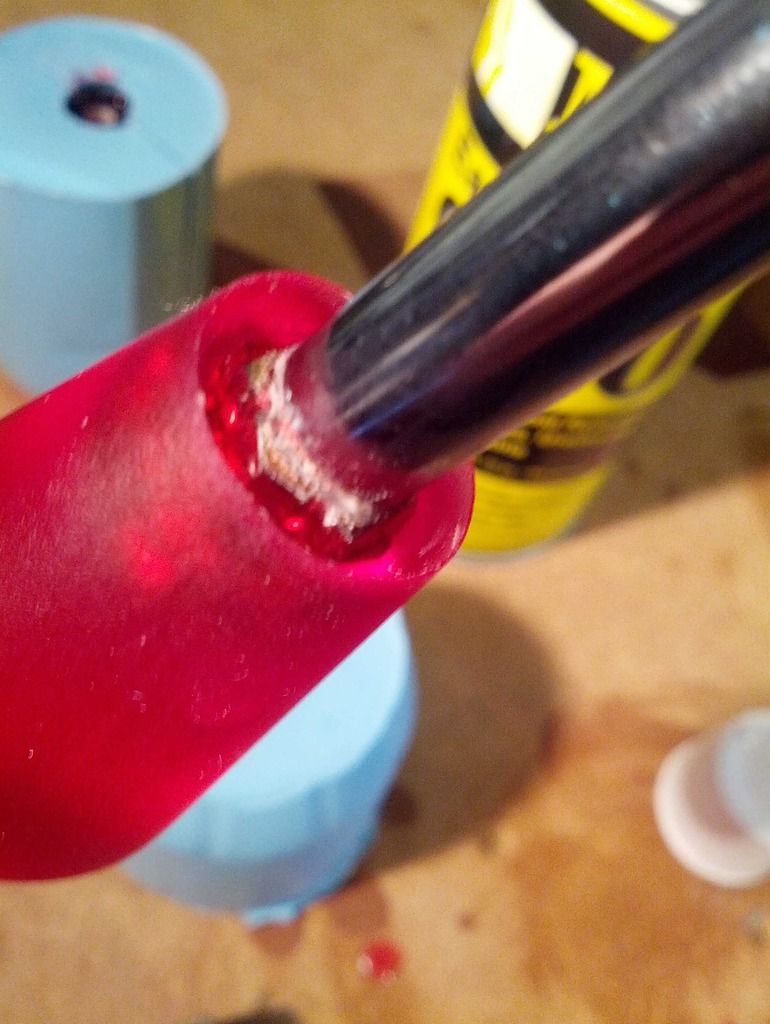
After a bit of fuss it will come out (unless you didn't use enough quick-release).


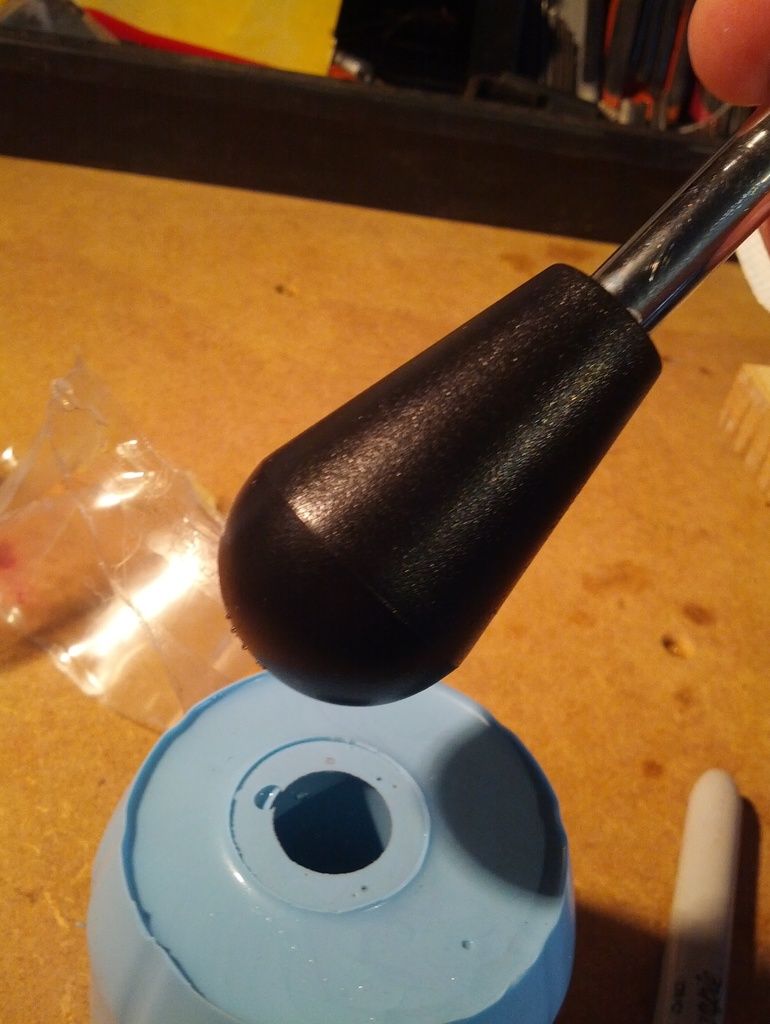
Negative left in the mold.


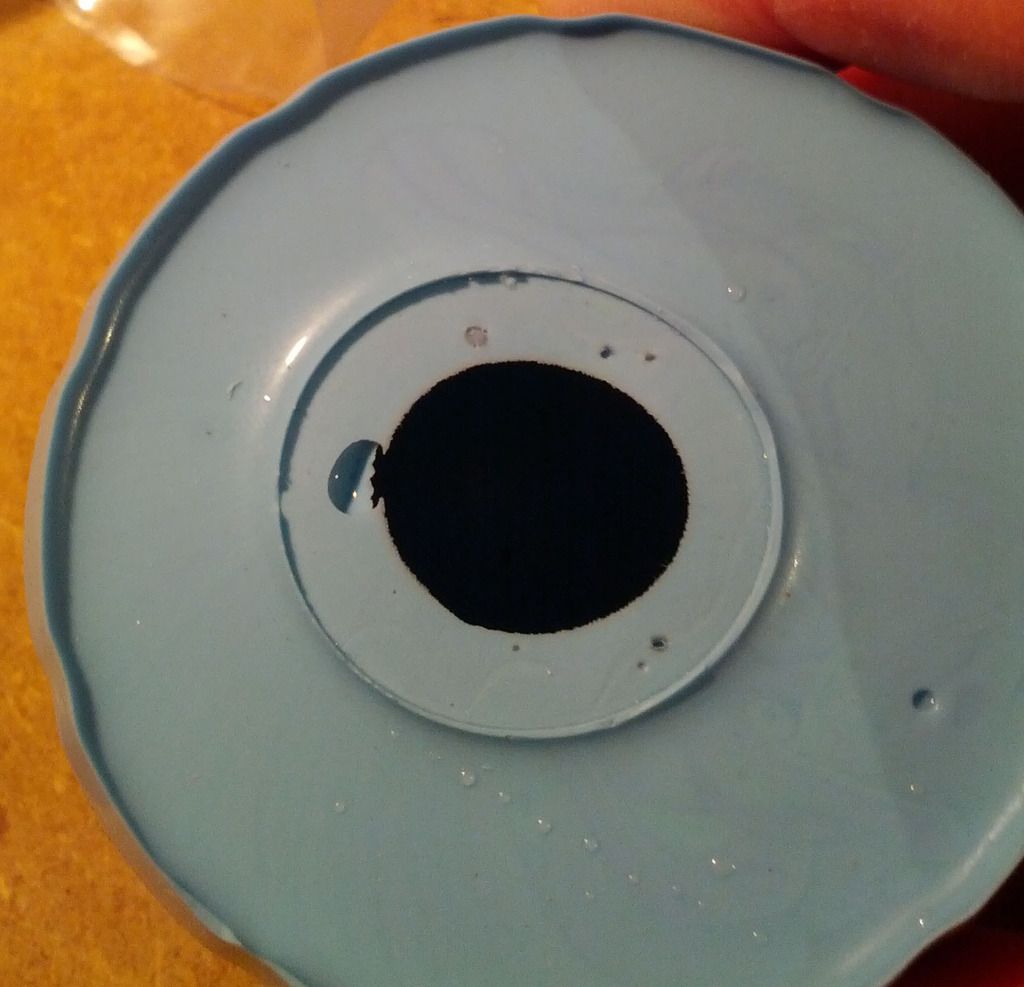
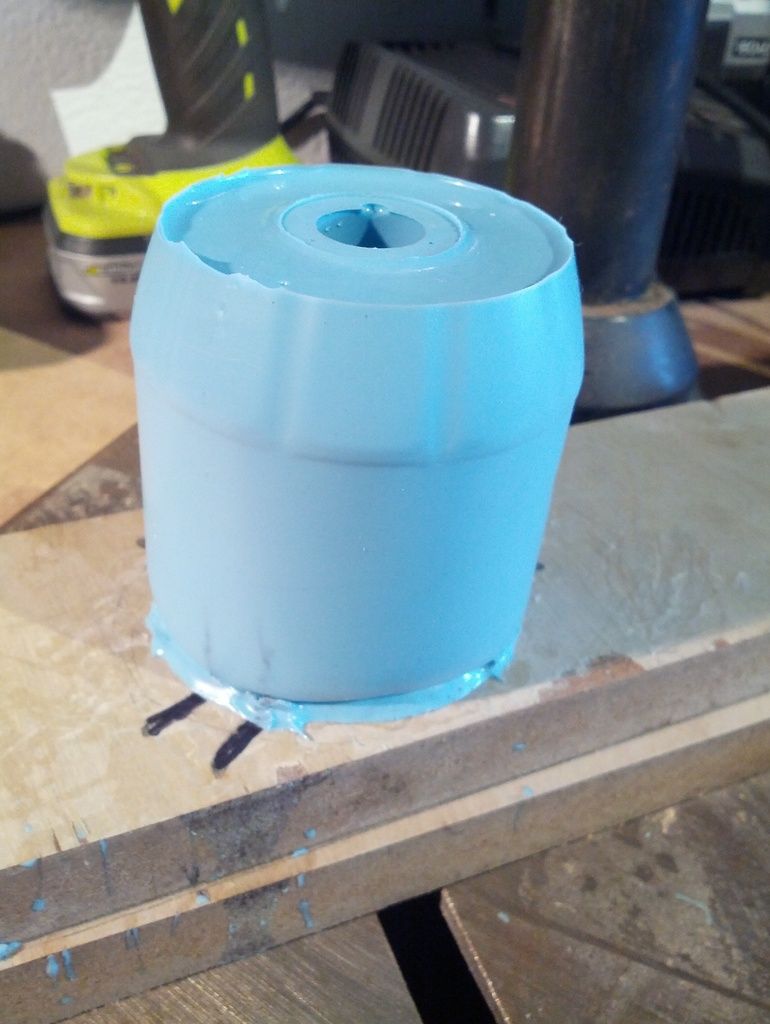
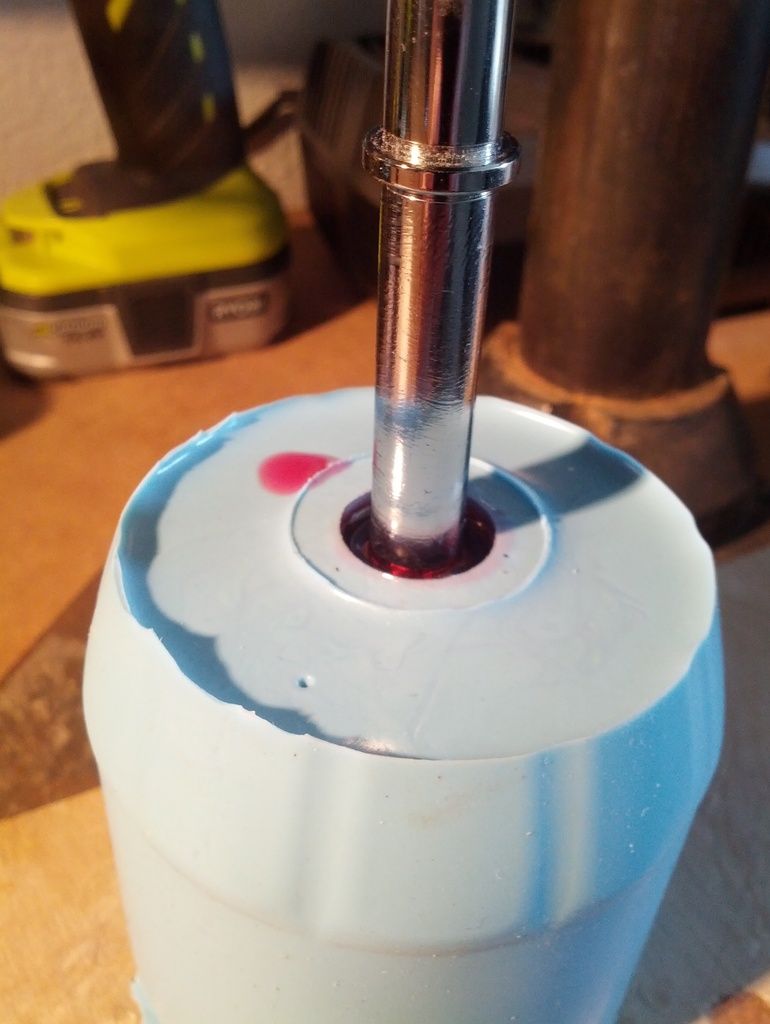
Place the mold back on the board (using the guides).


Remember that shaft we made earlier.  Make sure you generously apply the quick-release to the shaft and threads but NOT on the nuts.  If you get quick release on the nuts they will pull out later.  If you don't get enough release on the shaft and threads, the shaft will be locked into the cast and you will destroy it when trying to remove it.


Mount it in the chuck.


Checking the depth again.


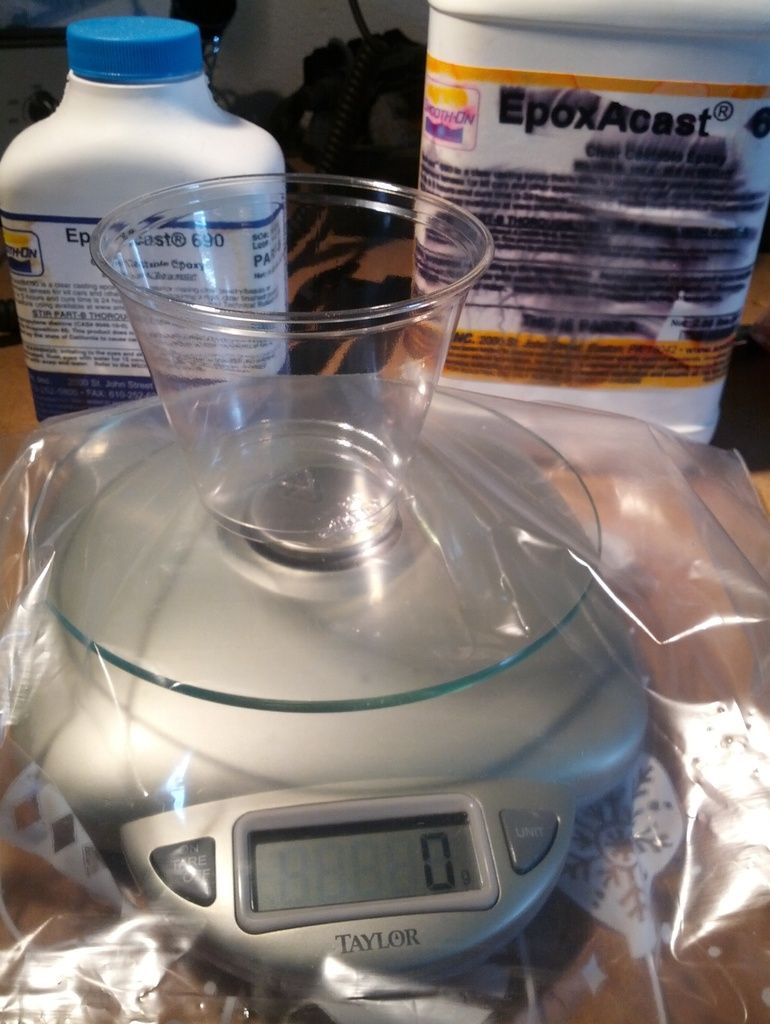
The epoxy is mixed by weight, so you will need a scale.  The stuff I used was 100-30.


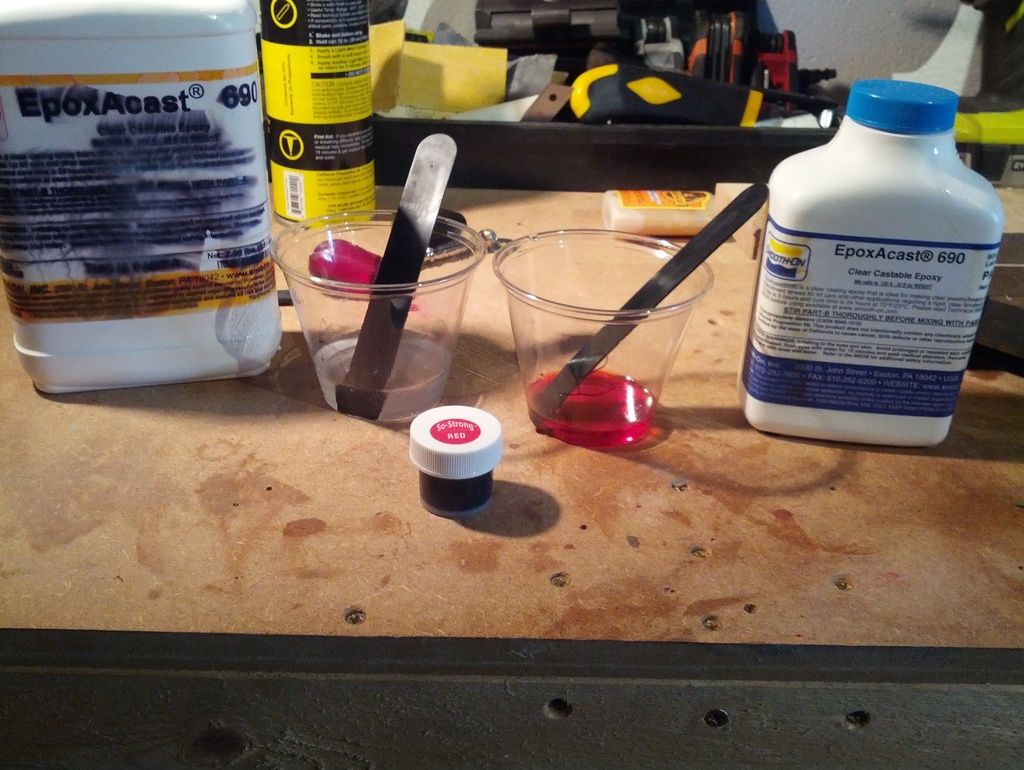
The red dye mixed into part B.


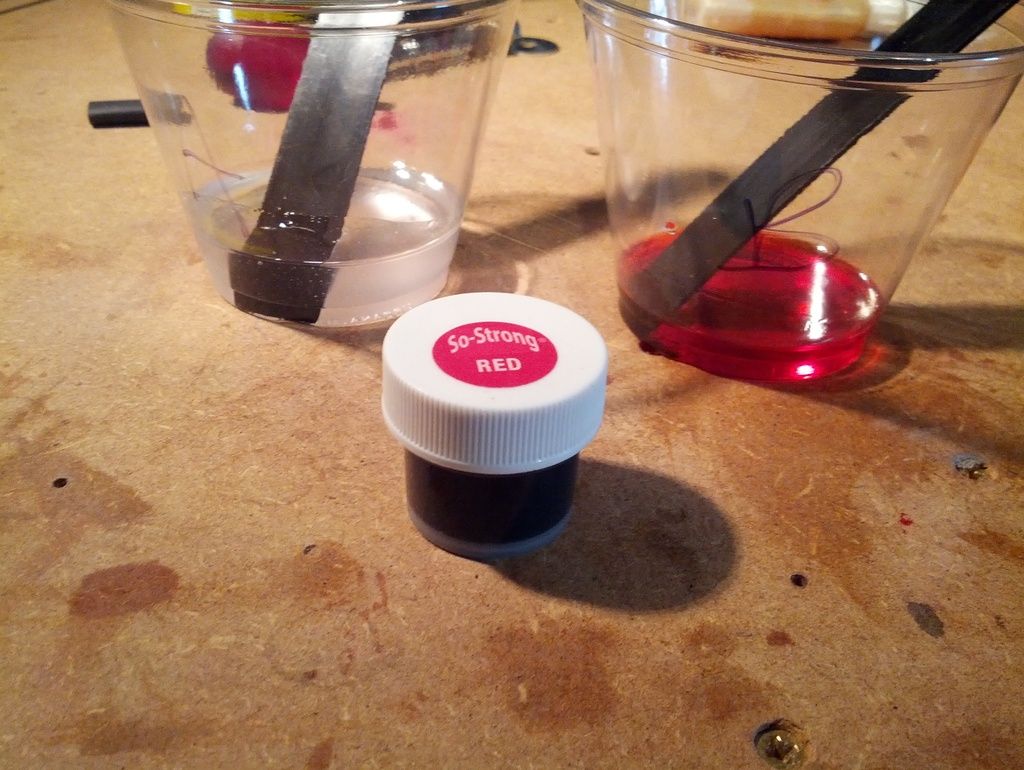
I used 40g of part A and 12g of part B, plus about the amount that fits on a tooth pick worth of dye.  (makes about two bat-tops so maybe cut it in half if making only one)


When you mix them together, it turns cloudy, you will need to mix it until it turns clear again.  Make sure to keep scraping the sides, there can be NO streaks.


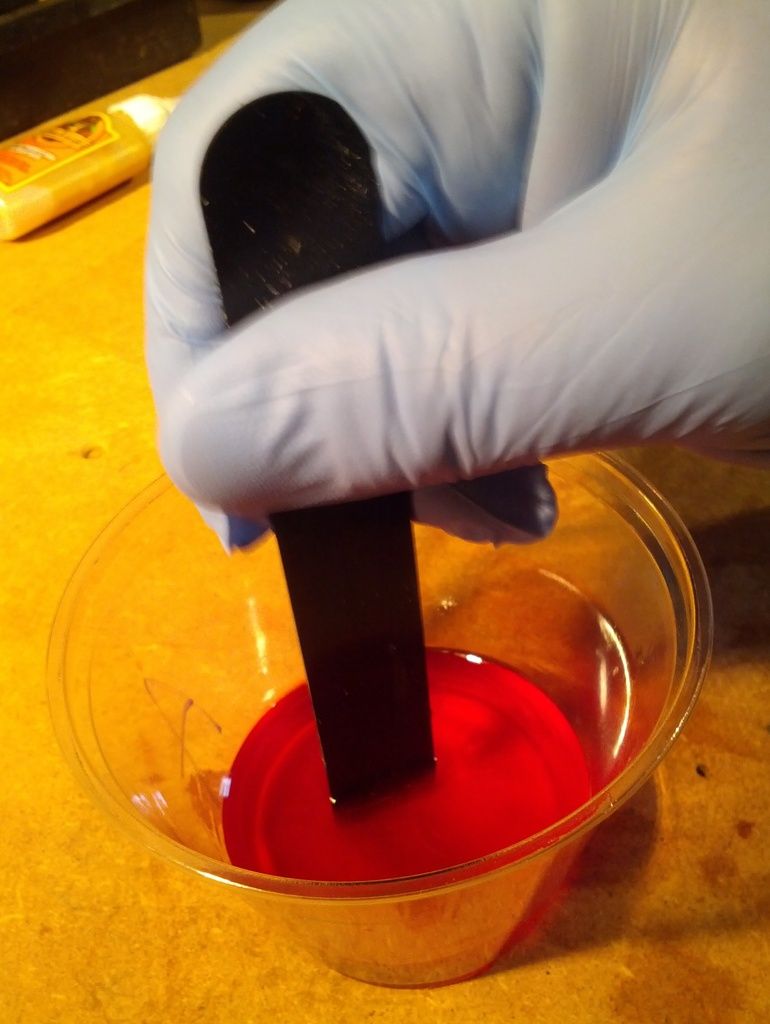
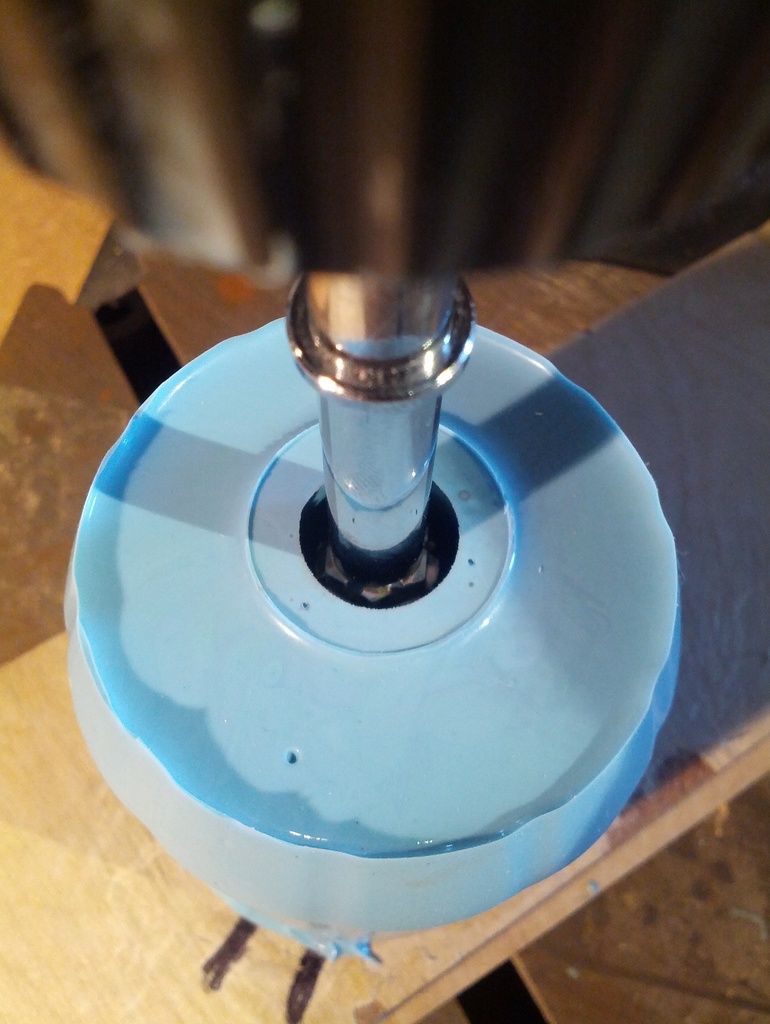
Pour it into the mold, and lower the shaft, and top off as needed.


Better view.


Using the left-overs in an old mold as a test.  (bolt-shaft will definitely be wonky securing it this way)


A day later.


Notice the shrinkage already.  This is caused by trapped air (microscopic tiny bubbles), degassing the casting resin first and then final pour would most likely solve this.  (with a vacuum chamber)


Four days later.  (You can try removing it in 2 days like the package says, but I find that it's still sticky if not a little soft)

You carefully pull your hardened bat-top from the mold.


Notice the shrinkage.  (caused by not degassing)


Test mounted on a spare joystick.


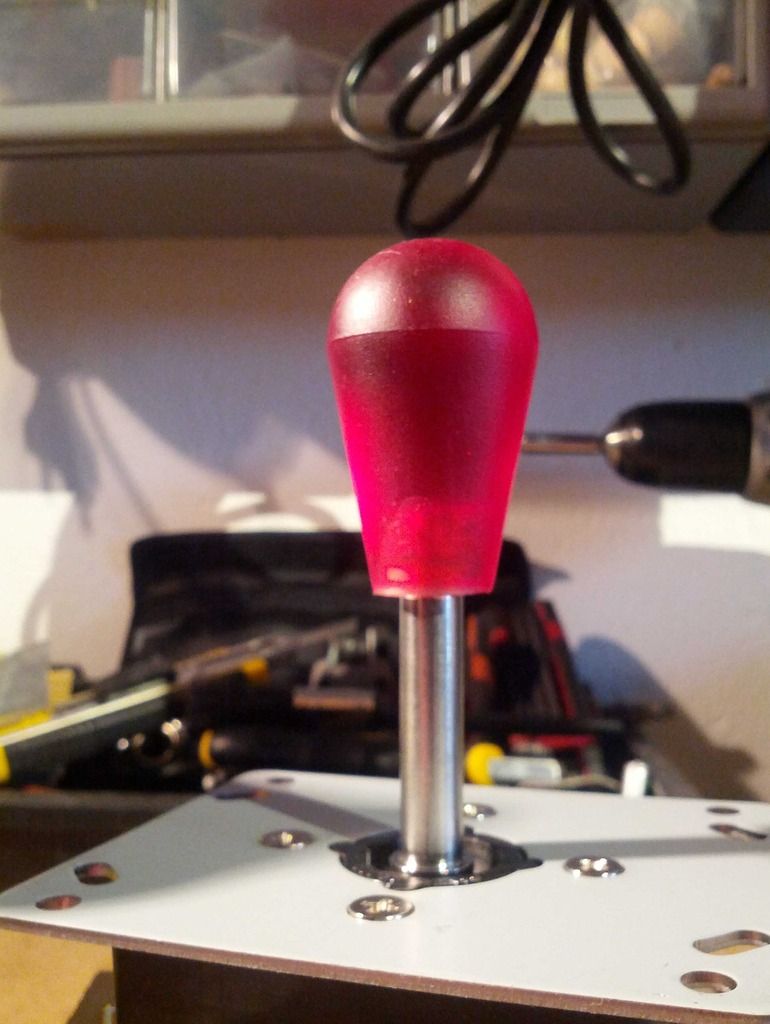
Notice it hasn't been polished yet.  (I'll do that in a day or two when I'm sure it's as hard as it can be)


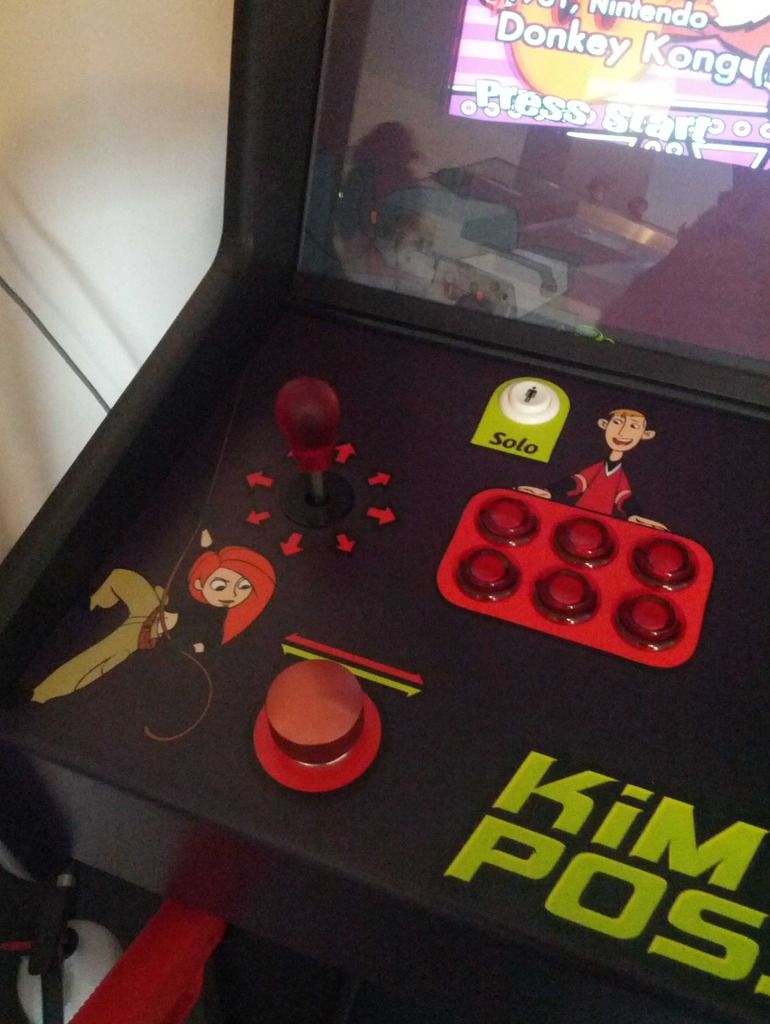
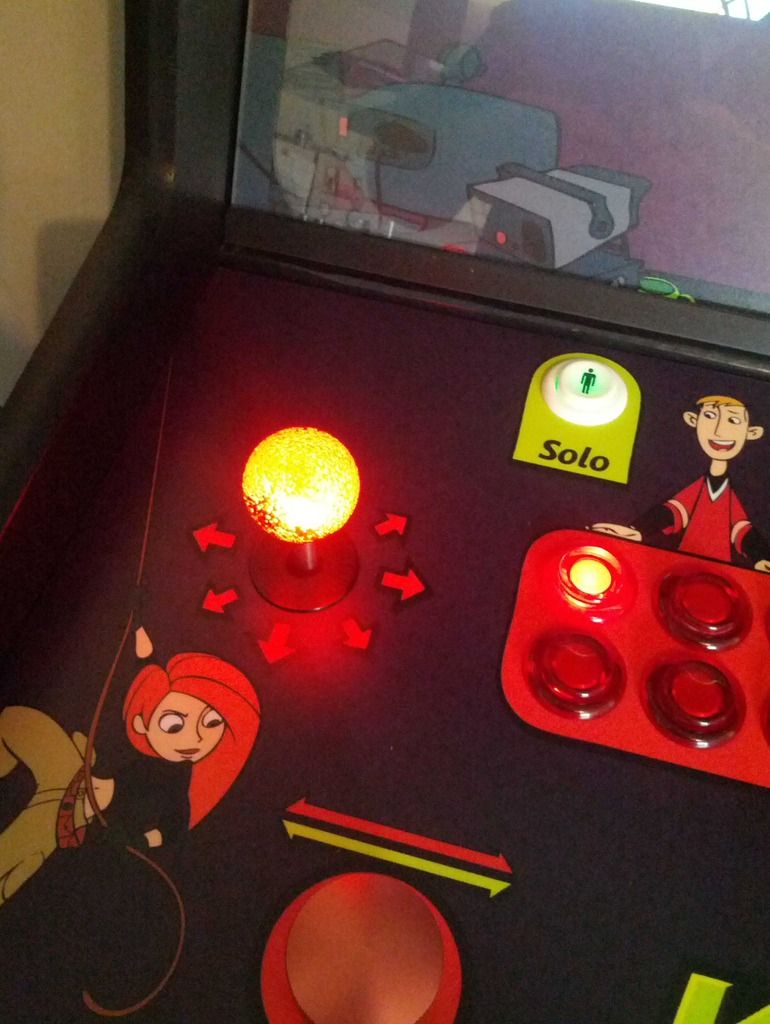
Test mounted on the cabinet.
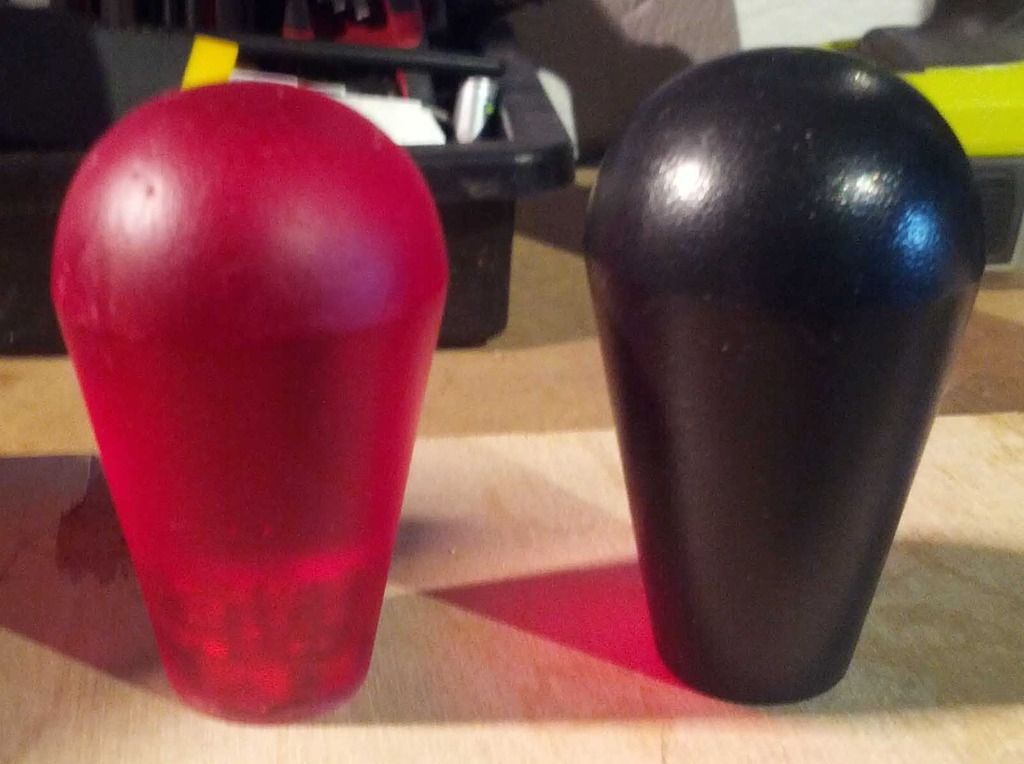
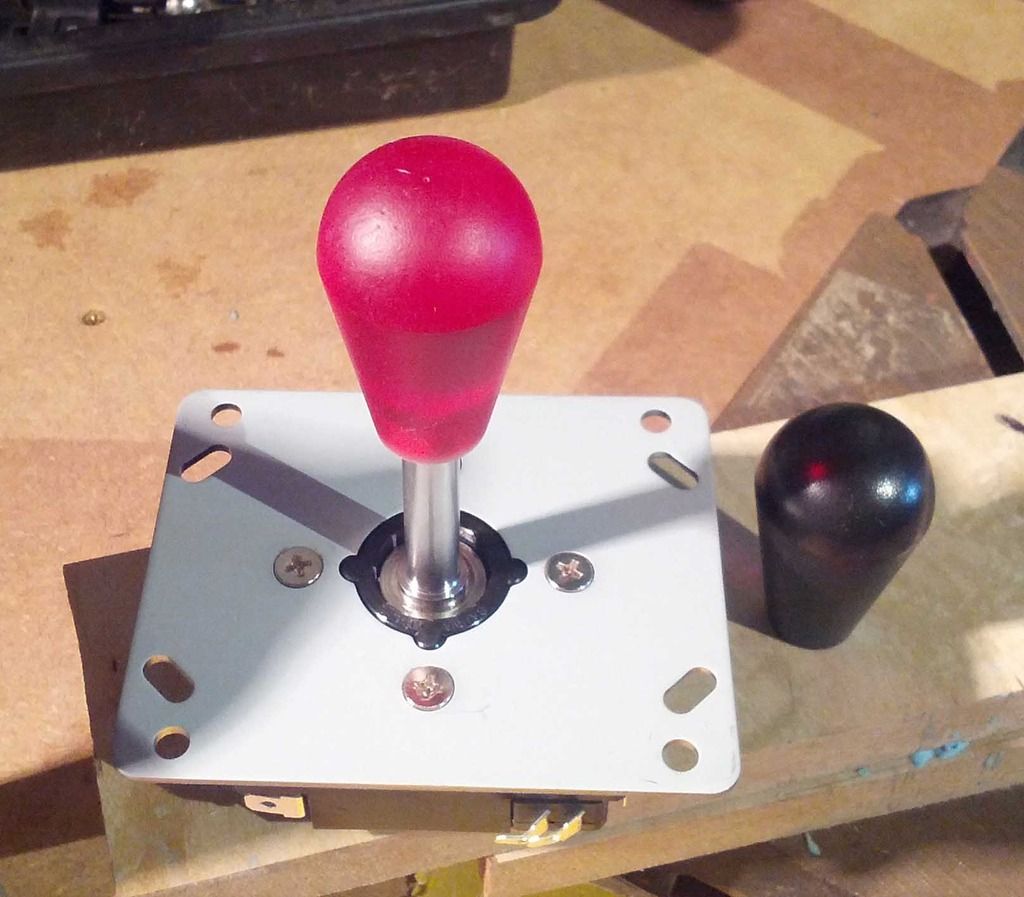

Went from this.


To this.


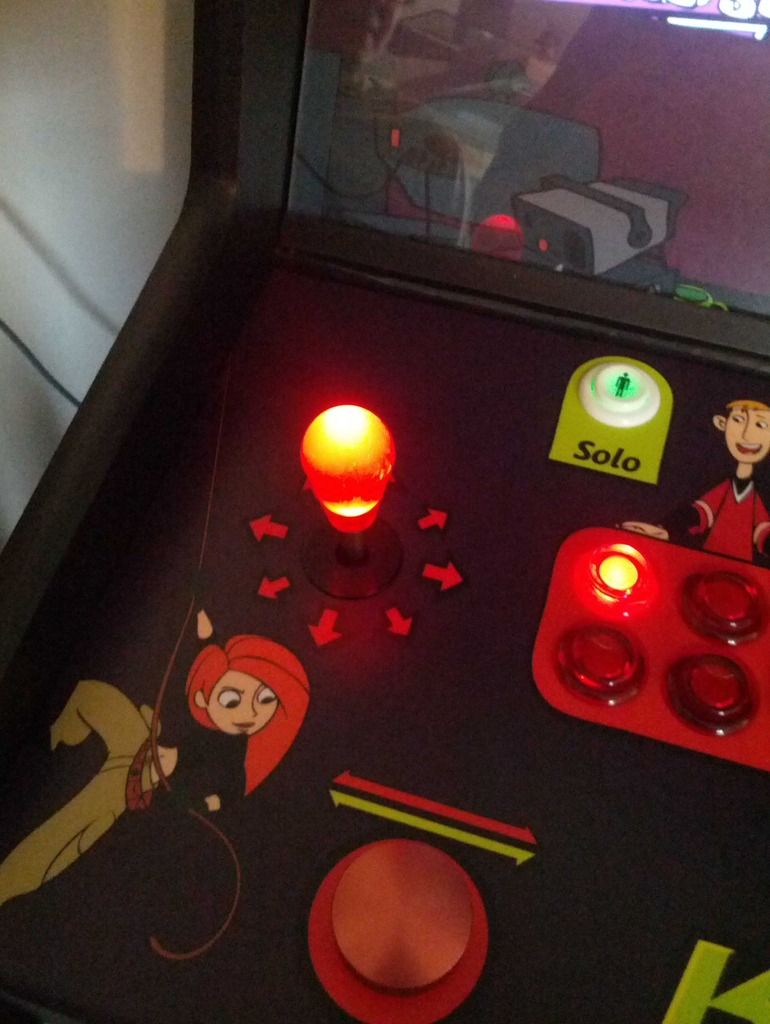
So the final result.


Now onto the blue side.  (This is the current ball top, I'll make the other blue one in a few days)


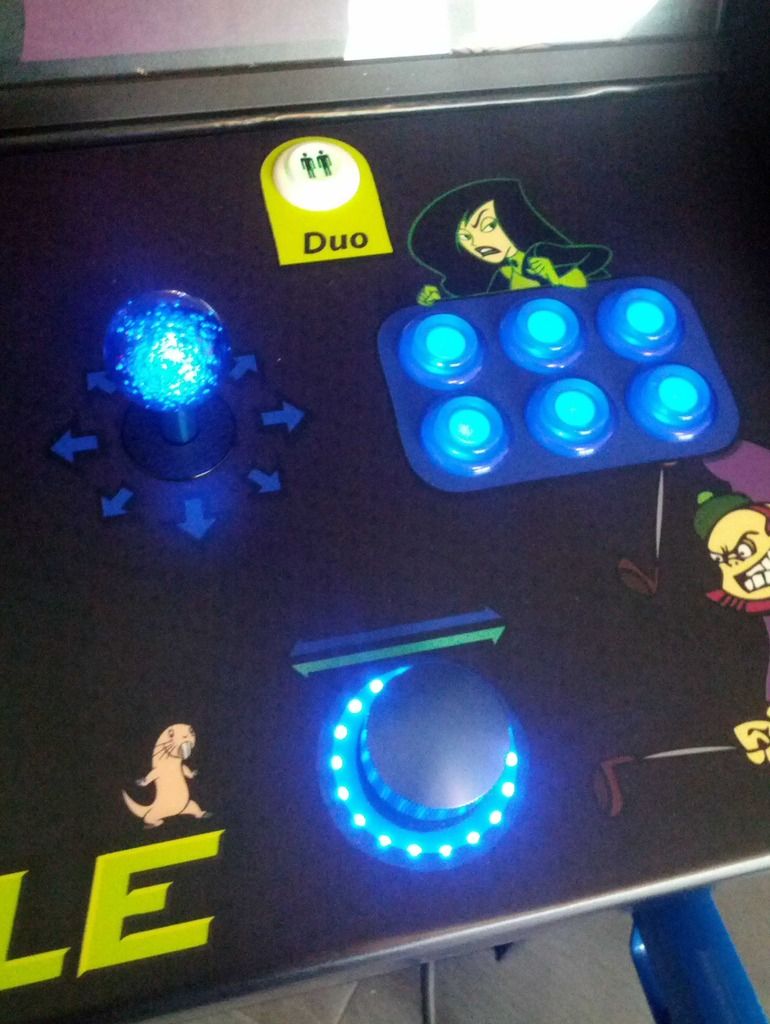
I really do wish I knew how to inject bubbles into my new joysticks, I think they would look a lot better.
But until someone decides to make some real production ones, this is the best I can do.


« Last Edit: August 05, 2015, 03:14:19 pm by MacGyver »

reptileink

  • Trade Count: (0)
  • Full Member
  • ***
  • Offline Offline
  • Posts: 524
  • Last login:July 28, 2023, 11:30:55 am
  • An 8 bit hero
Bubbles would just be air if you ask me. Perhaps about 1/4 of the way into drying, use a syringe and "inject" air into the mold? Of course, it would be really tough to get them uniform I would think  :dunno

~Building Arcade Cabinets are like raising children, you always mess up your first~

yotsuya

  • Trade Count: (+21)
  • Full Member
  • ***
  • Offline Offline
  • Posts: 19960
  • Last login:Yesterday at 10:00:30 pm
  • 2014 UCA Winner, 2014, 2015, 2016 ZapCon Winner
    • forum.arcadecontrols.com/index.php/topic,137636.msg1420628.html
Actually, I think yours look nicer without the bubbles.
« Last Edit: May 13, 2015, 01:18:09 pm by yotsuya »
***Build what you dig, bro. Build what you dig.***

n3wt0n

  • Trade Count: (0)
  • Full Member
  • ***
  • Offline Offline
  • Posts: 540
  • Last login:July 12, 2025, 09:56:52 am
Your cab looks great but the coolest part is the light up bat tops! Nice job on those. I agree. To me, yours look better than the bubbly ones.

MacGyver

  • Trade Count: (0)
  • Full Member
  • ***
  • Offline Offline
  • Posts: 317
  • Last login:December 18, 2023, 12:49:00 am
    • Project Build
Thanks guys.

The blue one is curing as we speak, should be ready Wednesday, I'll post the results.   I also updated the how-to post with links to the other types I found, as well as the original post that made me think I could even do it.
« Last Edit: May 16, 2015, 05:48:12 pm by MacGyver »

millercentral

  • Trade Count: (0)
  • Full Member
  • ***
  • Offline Offline
  • Posts: 99
  • Last login:March 07, 2024, 04:38:47 pm
  • I want to build my own arcade controls!
That is really incredible, thanks for sharing the process you went through -- really interesting! Completely worth the effort, as they look fantastic. Personally, I agree with the others -- I think bubbles would detract a bit from the great effect you created.

wp34

  • Trade Count: (+3)
  • Full Member
  • ***
  • Offline Offline
  • Posts: 4794
  • Last login:April 10, 2022, 09:48:19 pm
That red one really looked cool.  I'm impressed with your patience.  Thanks for taking the time to document the process so thoroughly. 

MacGyver

  • Trade Count: (0)
  • Full Member
  • ***
  • Offline Offline
  • Posts: 317
  • Last login:December 18, 2023, 12:49:00 am
    • Project Build
The shaft prepared for the blue top.


Weighing out part A.


The amount of dye needed to make the blue cup on the left.  Notice the first attempt on the right.


Part B with the dye mixed in.


The first time I used twice as much dye and it turned out near black, so be careful.


Mixing parts A and B together.


Bubbles, the scourge of bat-top making.


Now to wait four days.


So here is the test top I made at the same time (in an old trial mold), I opened it a day early and it seemed mostly fine, so I decided to open the real one a day early too.


Here is a reminder on how much not degassing the epoxy will cause it to shrink.


Here it is still in the chuck.


Released from the chuck and the drill back up.


Out it pops.


Here I am drilling out the inside for some extra room for the LED.


Here is the new blue bat-top in the daylight.


Here they both are in the daylight.


Here they are in the dark.


So in the end they look ok, but they would look a lot better if I had some way to degas both the mold-making latex and the epoxy prior to use.  Degassing the latex would make for a higher resolution mold, and degassing the epoxy would eliminate the shrinkage (and therefore the lighter see-through area near to the bottom because of it).

« Last Edit: August 05, 2015, 03:17:12 pm by MacGyver »

redbeard30

  • Trade Count: (0)
  • Full Member
  • ***
  • Offline Offline
  • Posts: 61
  • Last login:November 23, 2023, 10:32:16 am
Awesome DIY bat tops! A 2 piece mold would've been easier and you could help the air bubble issues by adding another route for air to escape. That way as you pour the resin, the air will be forced out. Only issue is you would have a small piece of resin (sprue) that would need removed and sanded smooth. Plus with two piece molds you can put lock keys in so the mold lines up but this results in a mold line around the cast that needs smoothed. But generally a two piece result s in a better, more detailed castand easier removal. Also no drill press, just need a level surface! Smooth-on makes very good resins and silicon moldaterials that feature virtually no de gassing. Not sure if it s available in your area though. But anyway, awesome job, and I wasn't criticizing, just providing some tips and knowledge that I've learned doing model making for 20 years! Hell,  back when I started, the only resin available had arsenic in it!