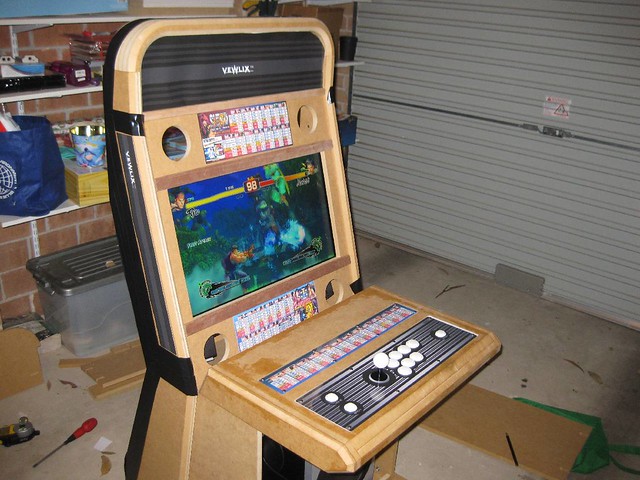
So another day working on the cabinet... I keep procrastinating with the paint prep as I'm actually quite dreading it, so I ended up doing some test prints on some artwork for the cabinet and I'm actually quite happy that I did some test prints as my prints were
EPIC FAIL!! and I'm going to have to do a few more tests to get it 100% (possibly go to different places too)
I'm not sure if it was Officeworks that scaled my CP artwork wrong, or if it was wrong from Photoshop to begin with.
I've been having a lot of problems trying to get a proper 1:1 scale template from the original CAD drawing.
What I thought was proper in photoshop, obviously isn't anywhere near the scale of what it should be.
Back to the drawing boards, however I think I'll try out another print company first, I'm pretty sure my files are to scale, even images that I created turned out "smaller". What a waste of $20!
Also got the AE moves list printed out courtesy of Capcom Japan

I will eventually install a fluro in that section

I'm not really sure if the joystick hole was the only one that "fit" properly, but if I went for that as the only thing that was proper, the button section needs to be moved by about 5-7mm to the right, who knows..
I really wish I knew if it was me or if it was Officeworks that screwed the scaling up

The left section looks like it needs to be pushed to the left by about 3-5mm. This is so frustrating.

Quite evident how off the artwork is here, from this side, it appears the right section is needs to be pushed over to the right by about 5-7mm.

This will pretty much be how the "final" version will be in terms of placement and the amount of blacks.
The only thing I can see changing will be the artwork - so it matches the CP artwork.


Excuse the off-centred logo, but these are just test print artworks

After installing the marquee, I've now come to the conclusion that I will not be sealing the sides, so I can take the top arches off properly for marquee artwork installation.
Had a lot of difficulty wedging the artwork inside the groove for the plexi, so I will have to look at cutting the artwork an extra couple of mm's so I don't wedge the artwork inside the groove.

A front view of the cabinet with a lower profile

A left view of the cabinet with test artwork

That's pretty much it on the artwork side of things, now I just got to fix up the scaling and order a few more things for the "aesthetics" side of of the cabinet (coin slot, speaker grills).
I really need to start prepping for painting, I've just been dreading it so much and I've been "testing" the cabinet too

Till the next update.
PS: Most of the pics of the build have been posted in the thread, however there have been a few pics that I didn't bother posting, if you want to see all the pics, visit the
Flickr Vewlix Build Set


 Home
Home Help
Help Search
 Login
Login Register
 Send this topic
 Print
Print


