Main Restorations Software Audio/Jukebox/MP3 Everything Else Buy/Sell/Trade
Project Announcements Monitor/Video GroovyMAME Merit/JVL Touchscreen Meet Up Retail Vendors
Driving & Racing Woodworking Software Support Forums Consoles Project Arcade Reviews
Automated Projects Artwork Frontend Support Forums Pinball Forum Discussion Old Boards
Raspberry Pi & Dev Board controls.dat Linux Miscellaneous Arcade Wiki Discussion Old Archives
Lightguns Arcade1Up Try the site in https mode Site News

Unread posts | New Replies | Recent posts | Rules | Chatroom | Wiki | File Repository | RSS | Submit news


Author Topic: Visual Pinball Cabinet Build -Lord of the Pins  (Read 19852 times)

0 Members and 1 Guest are viewing this topic.

Sledgehammer

  • Trade Count: (0)
  • Full Member
  • ***
  • Offline Offline
  • Posts: 50
  • Last login:March 30, 2017, 04:48:08 pm
  • "Trust me, I know what I'm doing..."
Visual Pinball Cabinet Build -Lord of the Pins
« on: February 28, 2010, 02:44:57 pm »
Hey guys,

I have been working for the past 3 months on my Visual pinball cab. I decided to wait to start a post because I wasn't sure if I could take this one all the way or not, but I have almost made it so I thought I should start my thread.

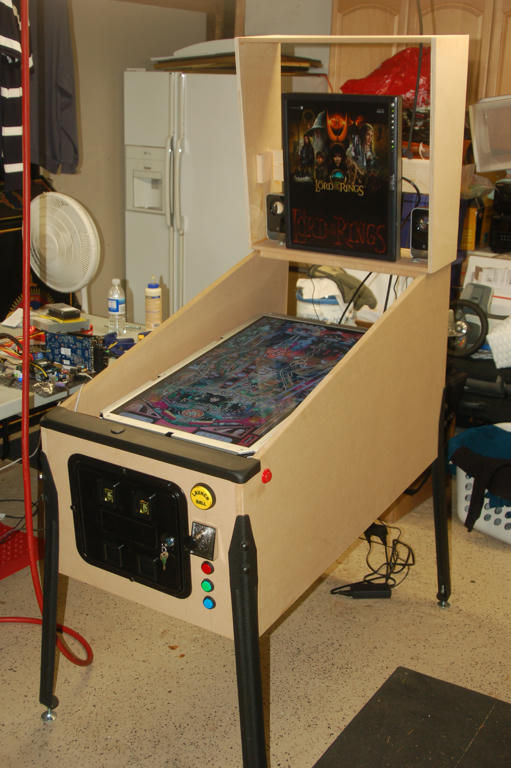
My cab consists of a 32" 1080p playfield, and a Dell 21" LCD monitor for the backbox. I am running an Intel Dual Core CPU, 4GB of memory, and a 9800GT 1GB graphics card. I also just swapped my 200gb PATA hard drive out for a 32gb Sata SSD drive, so no worries about hurting the hard drive if people are bumping the table. I am using an Ipac-2 to control all buttons, and have the plunger fully functional using a leaf switch wired up as normally closed (it works great!).

Initially I had the Nanotech Mot-ion plunger and controller board, but the calibration was complicated and the plunger worked on very few games. I gave up on that and switched to the Ipac for controlling buttons, and two plumb bobs to control nudging. After using the plumb bobs for a few days to nudge the ball (that works really well) I decided I don't want people shaking around my cab with two LCD monitors inside. I decided to switch to two nudge buttons that reside next to my flipper buttons. It works just as well, and I don't have people slamming my cab around.

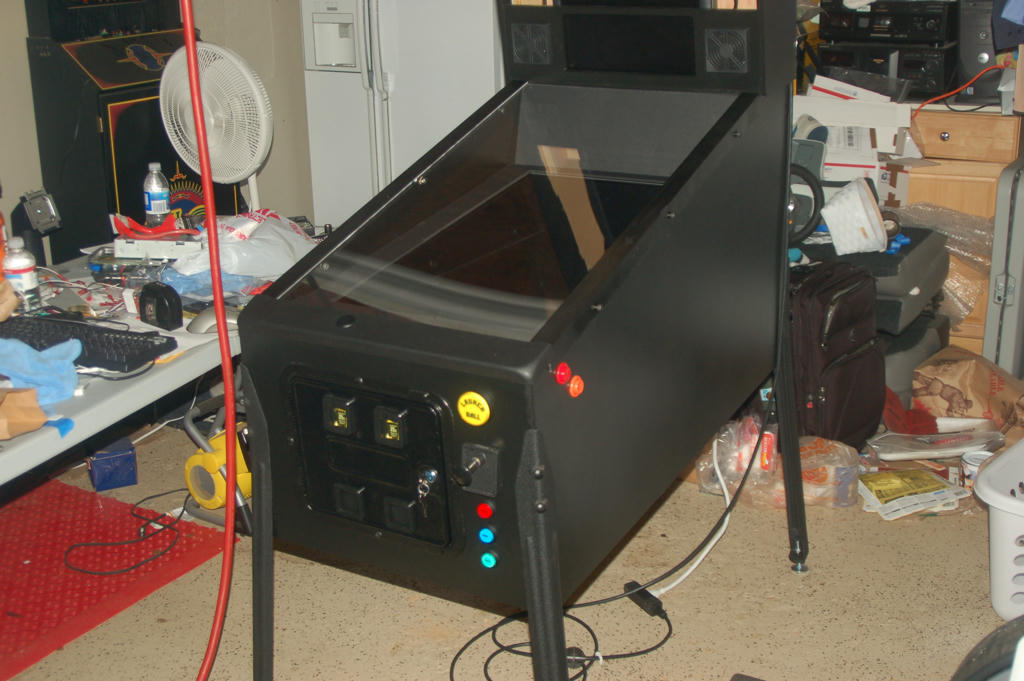
For now the cab is painted black, but I have some ideas for artwork and will be inlisting the help of someone from the Hyperpin forum to design my art for the backglass and the sides of the cab. I love the Lord of the Rings pinball, so my theme will be similar to that cab, however I will call it "Lord of the Pins". I installed two red LED fans inside the cab, and two red cold cathode lights underneath, so it gets a cool red glow under it while it’s on. (you can see it in the youtube vid I linked below).

I am 90 % done with the project, I just need to get a back door fitted to the cabinet, and plexi for the backglass. Then I will order up my artwork and that will be it.

Here is a Youtube video I posted prior to installing the playfield plexi, but it will give you an idea of how the cab looks and functions:


And here are some pics from the build and a few of how it looks right now:
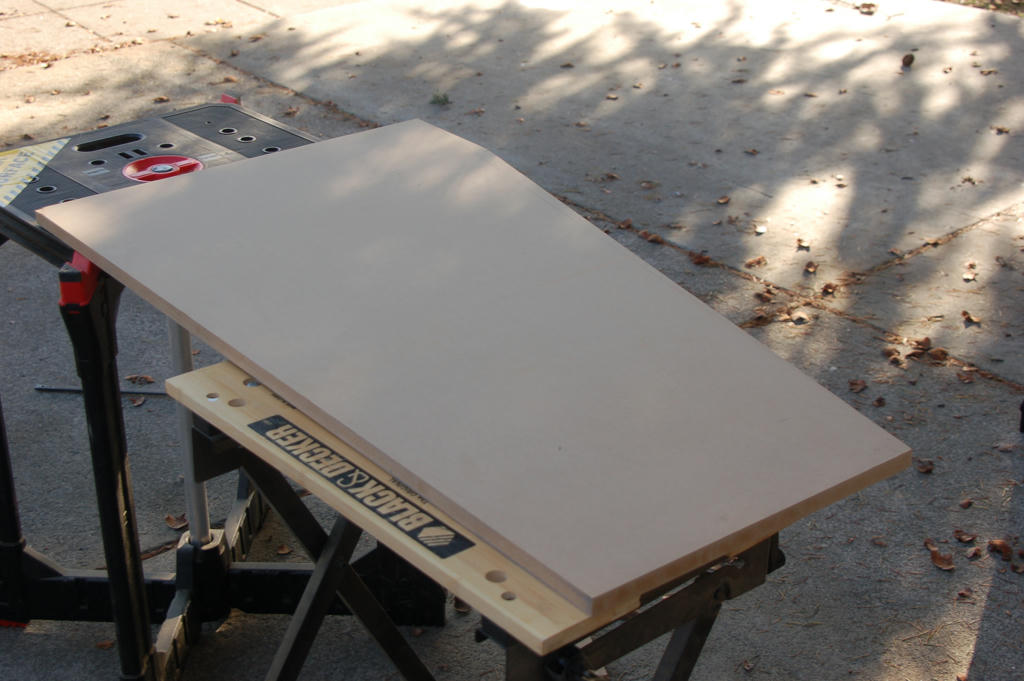
The first cut:

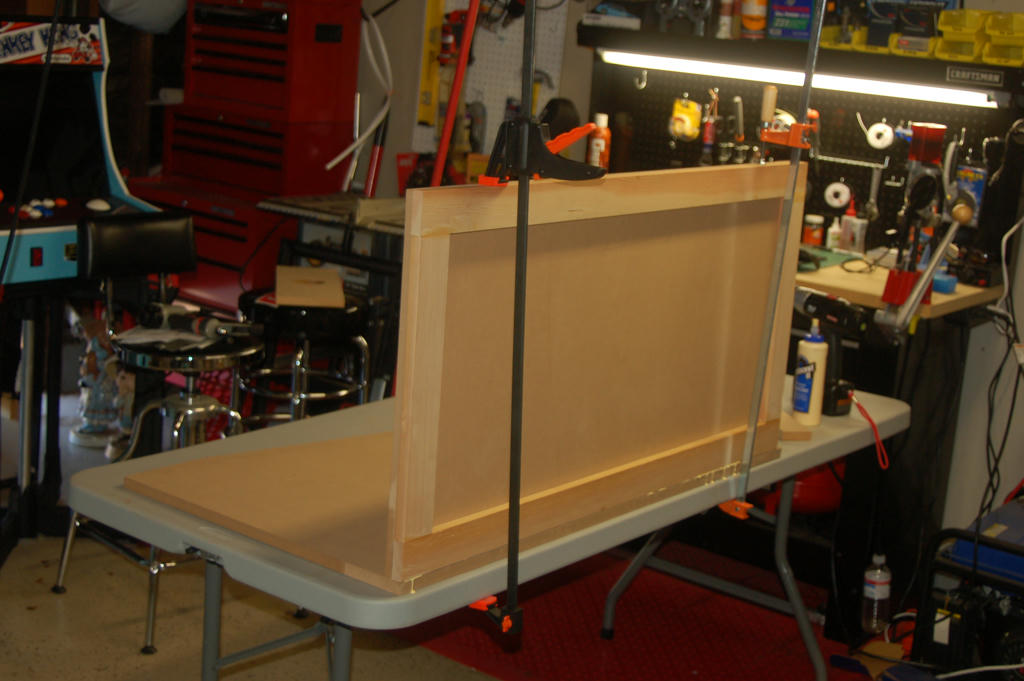
Assembling the bottom and side:


Test fitting the playfield:


Attaching the backbox


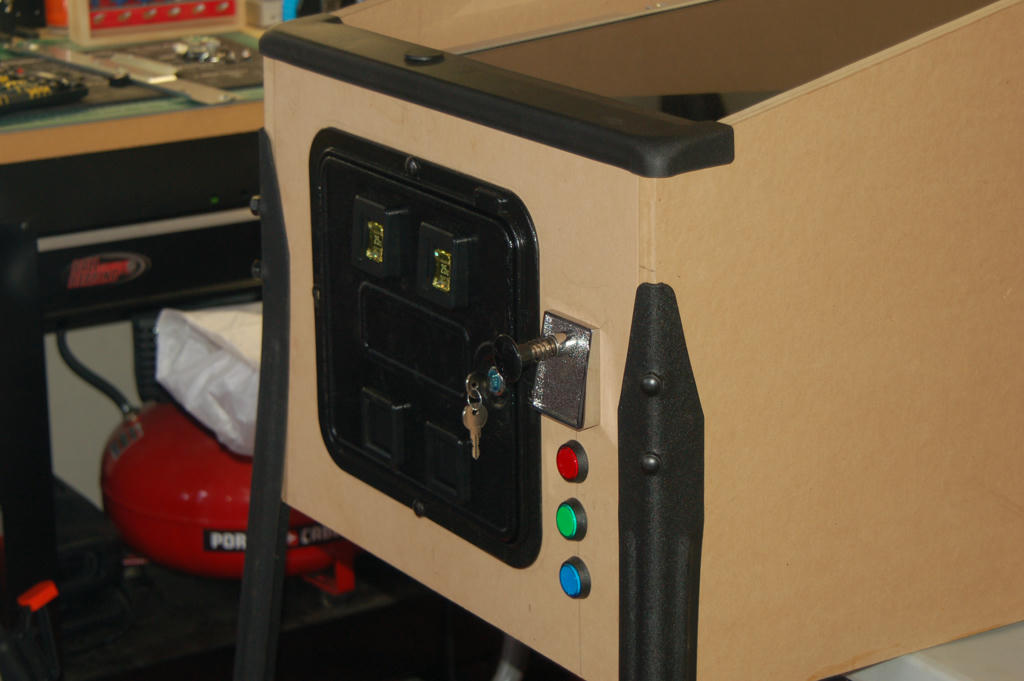
Test fitting the coin door, lockdown bar and buttons


Now is when it gets dangerous…once it’s playable the project comes to a grinding halt!
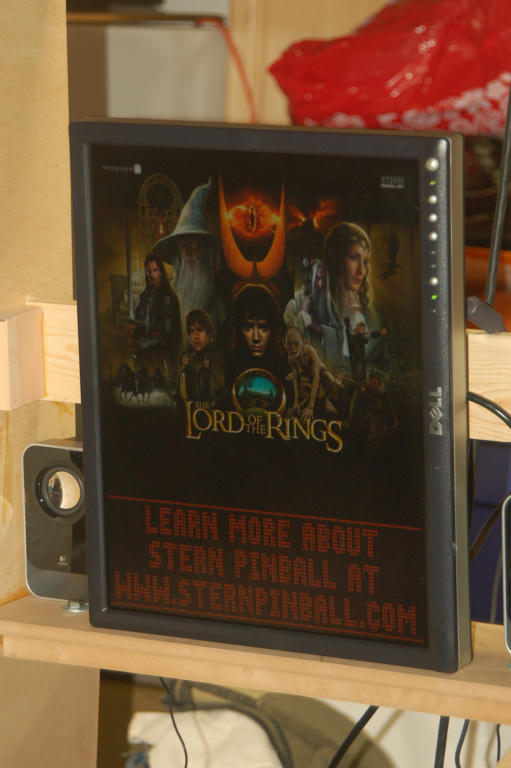
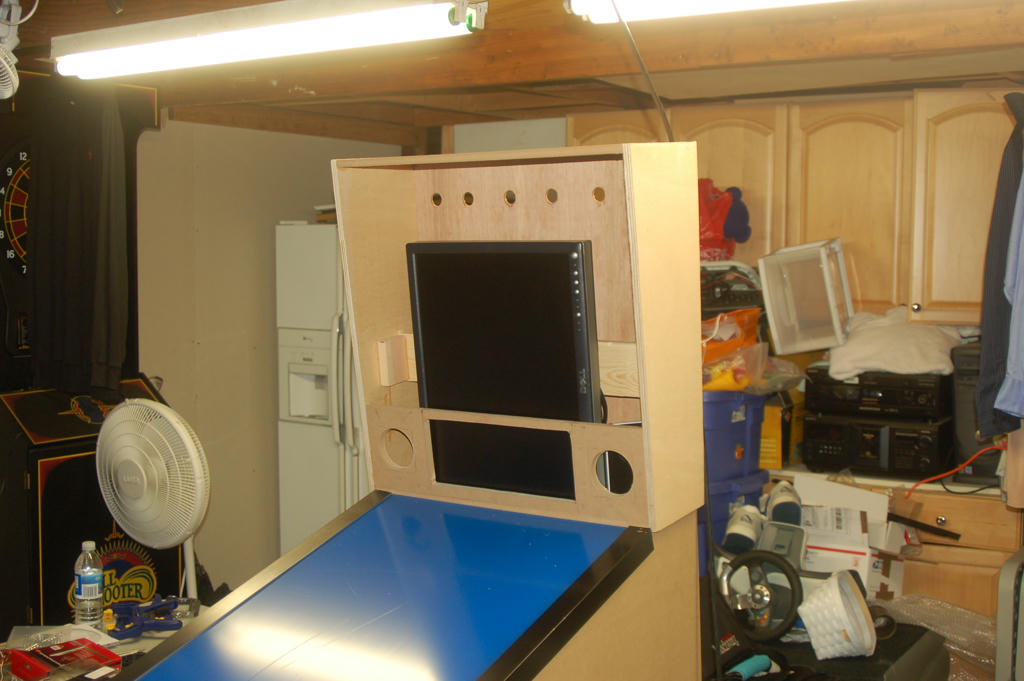

Backbox monitor:


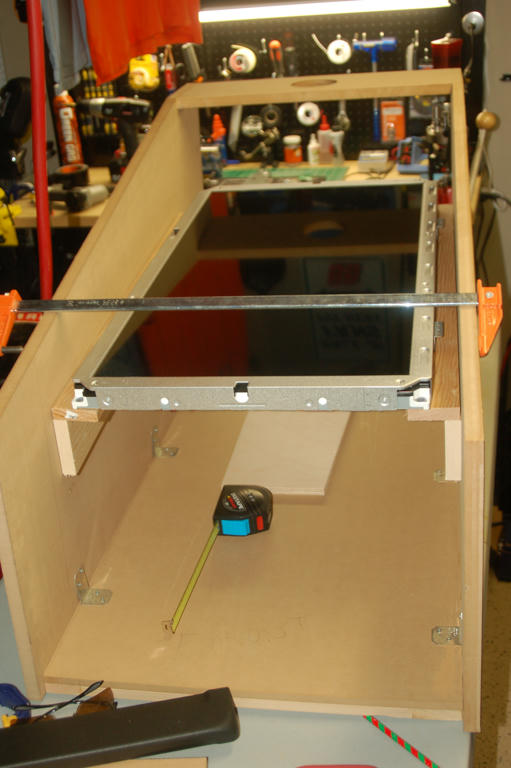
Test fitting the DMD panel


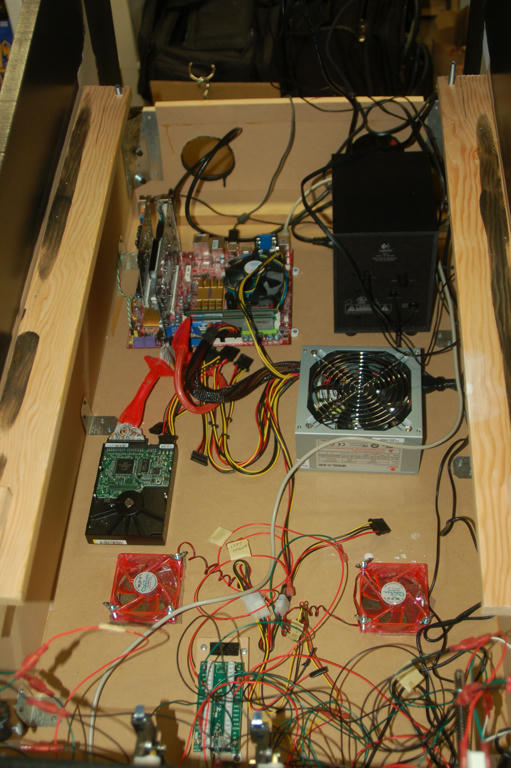
A shot of the inside, before installing the SSD drive:


Changed out the plunger, put some inserts inside the buttons (start, coin and exit) and slapped some semi gloss black paint on


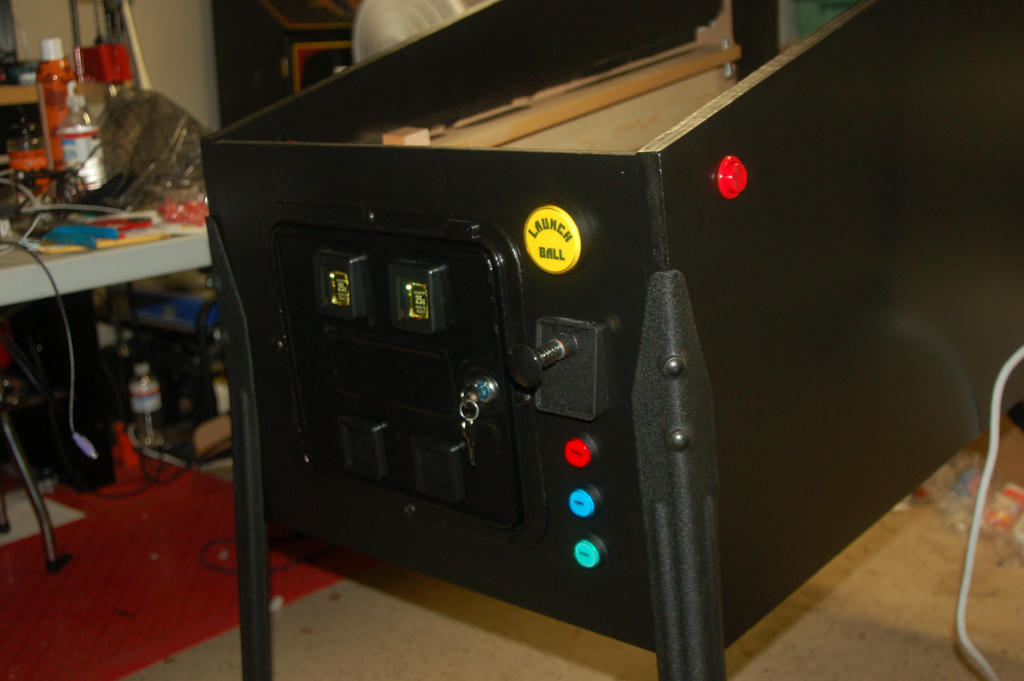
Plexiglass installed over playfield, along with side rails (aluminum angle bar that I painted black) and the lockdown bar


Thanks for checking out my thread. I will post more once I have this thing completed.

Jason


« Last Edit: February 28, 2010, 02:50:15 pm by Sledgehammer »

Dizzle

  • Trade Count: (0)
  • Full Member
  • ***
  • Offline Offline
  • Posts: 355
  • Last login:August 09, 2014, 05:28:04 pm
Re: Visual Pinball Cabinet Build -Lord of the Pins
« Reply #1 on: February 28, 2010, 02:51:45 pm »
Nice!   :applaud:  I just finished a mini-pin but would love to build a full sized version one of these days.

Are you running UVP or Hyperpin?  I've had nothing but problems getting the dual monitor setup to work on VP, so I've been playing Future Pinball exclusively so far.

Love the DK cabs too!!

Sledgehammer

  • Trade Count: (0)
  • Full Member
  • ***
  • Offline Offline
  • Posts: 50
  • Last login:March 30, 2017, 04:48:08 pm
  • "Trust me, I know what I'm doing..."
Re: Visual Pinball Cabinet Build -Lord of the Pins
« Reply #2 on: February 28, 2010, 02:59:18 pm »
Hey, thanks. I am running Hyperpin with both VP and FP.

It took me awhile to get VP running as well in dual screen mode, but it was worth it. It's much more fun playing the VP tables in my opinion.

Main things are:

-Use the FS (full screen) tables released on the Hyperpin and VPforums site

-Use Windows XP. I think some folks have Windows 7 and Vista working, but most people will tell you to go with XP.

-Only use an Nvidia graphics card, and make sure you have the recommended down rev drivers (I think I am on 182.xx). The DMD will not function correctly and other issues arise with the more recent drivers.

-make sure you have the monitors setup correctly so that the playfield is monitor 1 and the backglass is monitor 2, and monitor 1 is on the left of monitor 2 in the Nvidia display settings screen (and also in the Windows display settings)

Good luck with VP, I know how painful it is to get it going. It almost made me stop my project and just give up on the whole darn thing altogether.

Jason

Pinball Wizard

  • Trade Count: (+5)
  • Full Member
  • ***
  • Offline Offline
  • Posts: 482
  • Last login:June 04, 2021, 03:47:13 pm
Re: Visual Pinball Cabinet Build -Lord of the Pins
« Reply #3 on: February 28, 2010, 03:37:26 pm »
If its not too late I'd personally switch the button launch with the plunger. To me a button is a button most anywhere but a plunger is got its place. Otherwise very good looking for everything else.
Where's my gold star :P

spacegoogie

  • Trade Count: (0)
  • Full Member
  • ***
  • Offline Offline
  • Posts: 77
  • Last login:June 30, 2012, 02:53:32 pm
Re: Visual Pinball Cabinet Build -Lord of the Pins
« Reply #4 on: February 28, 2010, 06:10:07 pm »
Nice Jason!!!
I have a Q:
I used a real plunger on my cab, and getting it wired up was a pain. How did you do your plunger.
Thanks!

Jason (spacegoogie)
Perfection is achieved, not when there is nothing more to add, but when there is nothing left to take away.
YouTube Channel: Arcades at home: http://www.youtube.com/spacegoogie

drventure

  • Trade Count: (+2)
  • Full Member
  • ***
  • Offline Offline
  • Posts: 4152
  • Last login:April 23, 2024, 06:53:06 pm
  • Laser Death Ray Bargain Bin! Make me an offer!
Re: Visual Pinball Cabinet Build -Lord of the Pins
« Reply #5 on: February 28, 2010, 06:44:39 pm »
Quote
How did you do your plunger.

I used a standard pinball plunger and mounted a roller switch (exactly like a normal arcade button switch but with a roller on the end, got it at frys), that's pressed when the plunger is at rest. Then I hooked the wires up to the NORMALLY OPEN contacts so that even though the switch is "pressed", the electrical signal is not connected at that state.

When you pull back on the plunger, the switch releases, which "closes" the switch and you have your button press (enter in my case).

Works like a champ.

Sledgehammer

  • Trade Count: (0)
  • Full Member
  • ***
  • Offline Offline
  • Posts: 50
  • Last login:March 30, 2017, 04:48:08 pm
  • "Trust me, I know what I'm doing..."
Re: Visual Pinball Cabinet Build -Lord of the Pins
« Reply #6 on: February 28, 2010, 08:38:23 pm »
My plunger is setup similar to drventure. You can see in the photo below that the plunger presses up against a leaf switch, and I have this switched wired to the Normally Closed contact (my launch ball button is wired to the same spot on my IPAC, but the microswitch on it is on the normally open connection).

When the plunger is pulled back, it releases the pushbutton, which is the equivalent of pushing the enter key on the keyboard. The longer you pull the plunger, the harder the ball is hit, like real life.


spacegoogie

  • Trade Count: (0)
  • Full Member
  • ***
  • Offline Offline
  • Posts: 77
  • Last login:June 30, 2012, 02:53:32 pm
Re: Visual Pinball Cabinet Build -Lord of the Pins
« Reply #7 on: February 28, 2010, 10:58:35 pm »
Lol nice!! I should have done that. I put a two washers on the plunger stem with wires, so when the plunger was pulled back the weirs would touch just like pushing on a button. Thanks for the info!!!
Perfection is achieved, not when there is nothing more to add, but when there is nothing left to take away.
YouTube Channel: Arcades at home: http://www.youtube.com/spacegoogie

Kurt

  • Trade Count: (0)
  • Full Member
  • ***
  • Offline Offline
  • Posts: 104
  • Last login:September 13, 2010, 10:53:22 pm
Re: Visual Pinball Cabinet Build -Lord of the Pins
« Reply #8 on: February 28, 2010, 11:21:48 pm »
Looks awesome how do you find the playfield being that deap?


Sledgehammer

  • Trade Count: (0)
  • Full Member
  • ***
  • Offline Offline
  • Posts: 50
  • Last login:March 30, 2017, 04:48:08 pm
  • "Trust me, I know what I'm doing..."
Re: Visual Pinball Cabinet Build -Lord of the Pins
« Reply #9 on: February 28, 2010, 11:56:09 pm »
Looks awesome how do you find the playfield being that deap?


I don't mind it at all. I have the option to raise it if I want to, I would just need to thread two nuts (right and left) under the holes in the monitor that I currently have bolts running through, and I could raise it up a few inches.

I like it this way though, it gives the illusion of depth kind of like a real cab.

JB

Sledgehammer

  • Trade Count: (0)
  • Full Member
  • ***
  • Offline Offline
  • Posts: 50
  • Last login:March 30, 2017, 04:48:08 pm
  • "Trust me, I know what I'm doing..."
Re: Visual Pinball Cabinet Build -Lord of the Pins
« Reply #10 on: February 28, 2010, 11:58:01 pm »
Lol nice!! I should have done that. I put a two washers on the plunger stem with wires, so when the plunger was pulled back the weirs would touch just like pushing on a button. Thanks for the info!!!

Haha!  I was headed down the same path as you...I cut the wire up and was getting ready to set it all up, then I saw this guys video on youtube and stole his idea!


J

spacegoogie

  • Trade Count: (0)
  • Full Member
  • ***
  • Offline Offline
  • Posts: 77
  • Last login:June 30, 2012, 02:53:32 pm
Re: Visual Pinball Cabinet Build -Lord of the Pins
« Reply #11 on: March 01, 2010, 12:44:01 am »
Bad Ass!!!  :applaud:
So are you going to make anymore?
Thanks for the video!
you can check out my cab stuff here.

www.youtube.com/spacegoogie
Perfection is achieved, not when there is nothing more to add, but when there is nothing left to take away.
YouTube Channel: Arcades at home: http://www.youtube.com/spacegoogie

Dizzle

  • Trade Count: (0)
  • Full Member
  • ***
  • Offline Offline
  • Posts: 355
  • Last login:August 09, 2014, 05:28:04 pm
Re: Visual Pinball Cabinet Build -Lord of the Pins
« Reply #12 on: March 01, 2010, 12:08:58 pm »
Looks awesome how do you find the playfield being that deap?


I don't mind it at all. I have the option to raise it if I want to, I would just need to thread two nuts (right and left) under the holes in the monitor that I currently have bolts running through, and I could raise it up a few inches.

I like it this way though, it gives the illusion of depth kind of like a real cab.

JB

I like the depth it provides too.  You can probably put some kind of artwork on the inside as well.

The depth probably helps with air flow too -- I've heard some people having problems with all of the heat that larger monitors can generate getting trapped beneath the glass.

Sledgehammer

  • Trade Count: (0)
  • Full Member
  • ***
  • Offline Offline
  • Posts: 50
  • Last login:March 30, 2017, 04:48:08 pm
  • "Trust me, I know what I'm doing..."
Re: Visual Pinball Cabinet Build -Lord of the Pins
« Reply #13 on: March 01, 2010, 02:55:52 pm »
I thought about putting some artwork or a logo on that backpanel but once I put the plexiglass on I noticed that when playing the game backglass reflects onto the plexi and it actually looks pretty cool.

I think you're right about the airflow for the LCD as well. I am tempted to not put a back door on the cab and just tape some mesh onto the back to help support overall airflow for the playfield monitor. I have two holes cut out on the back and plan to add two fans blowing air out of the cab (along with the two on the bottom that pull air in) but I am not sure if that will be enough to keep the LCD cool.

Jason

Cozmo

  • Trade Count: (0)
  • Jr. Member
  • **
  • Offline Offline
  • Posts: 5
  • Last login:November 20, 2013, 09:45:28 pm
Re: Visual Pinball Cabinet Build -Lord of the Pins
« Reply #14 on: March 01, 2010, 07:28:25 pm »
can I ask a silly question?

why does everyone build the cabinets with a flat level playfield, but an angled cabinet (higher at the back then front)  why not have the playfield match the angle of the cabinet?

Sledgehammer

  • Trade Count: (0)
  • Full Member
  • ***
  • Offline Offline
  • Posts: 50
  • Last login:March 30, 2017, 04:48:08 pm
  • "Trust me, I know what I'm doing..."
Re: Visual Pinball Cabinet Build -Lord of the Pins
« Reply #15 on: March 01, 2010, 11:41:27 pm »
can I ask a silly question?

why does everyone build the cabinets with a flat level playfield, but an angled cabinet (higher at the back then front)  why not have the playfield match the angle of the cabinet?

My playfield has a slight angle to it. I built the dimensions of the cab (including the leg placement) to the specific specs of a Stern cab with the exception that mine length is a little shorter since the TV is only a 32".

I recall when researching other peoples cabs that they said a real playfield is angled like 6 degrees or something like that, so I went with a very slight angle on the monitor rather than an agressive upward pitch.

I find it very playable and have had no complaints so far.

Have seen other folks cabs where they mounted the LCD at an angle and up against the playfield glass and they got lots of negative feedback from people on it, so I guess you can't win one way or another!  :)

JustMichael

  • Trade Count: (+1)
  • Full Member
  • ***
  • Offline Offline
  • Posts: 1438
  • Last login:September 27, 2015, 01:19:40 am
  • Mmmmm!! Cheesecake!!
Re: Visual Pinball Cabinet Build -Lord of the Pins
« Reply #16 on: March 02, 2010, 01:16:06 am »
Why doesn't someone use a laser mouse to watch the plunger?

ccmathome

  • Trade Count: (0)
  • Full Member
  • ***
  • Offline Offline
  • Posts: 179
  • Last login:February 25, 2021, 12:40:52 am
Re: Visual Pinball Cabinet Build -Lord of the Pins
« Reply #17 on: March 02, 2010, 06:41:10 pm »
How do you like it 22 wide with a I think 17 wide screen? I started one a few months back with the same size play area but am starting over as I was unhappy with the wood I used. Just waiting for the weather to get better