Main Restorations Software Audio/Jukebox/MP3 Everything Else Buy/Sell/Trade
Project Announcements Monitor/Video GroovyMAME Merit/JVL Touchscreen Meet Up Retail Vendors
Driving & Racing Woodworking Software Support Forums Consoles Project Arcade Reviews
Automated Projects Artwork Frontend Support Forums Pinball Forum Discussion Old Boards
Raspberry Pi & Dev Board controls.dat Linux Miscellaneous Arcade Wiki Discussion Old Archives
Lightguns Arcade1Up Try the site in https mode Site News

Unread posts | New Replies | Recent posts | Rules | Chatroom | Wiki | File Repository | RSS | Submit news


Author Topic: The Mame Tapper build - Finished! - 12/1/2010  (Read 18134 times)

0 Members and 1 Guest are viewing this topic.

markronz

  • We traced the call, and it came from....INSIDE YOUR ARCADE MACHINE!
  • Trade Count: (+1)
  • Full Member
  • ***
  • Offline Offline
  • Posts: 821
  • Last login:April 12, 2019, 12:03:08 am
  • Game on!
The Mame Tapper build - Finished! - 12/1/2010
« on: September 21, 2010, 01:42:20 pm »
Hello everyone-
    I've begun work on my second arcade machine.   This one is going to have a Tapper theme to it, except that I wanted to do a black and red color scheme, so I had a friend do a little custom art work for me to modify the original Tapper artwork a bit.   I do have a full blog here, if interested, tracking my overall build, but I figured that most people don't need to see the entire process step by step, so I thought I'd at least post a few pictures on the forum as well.  We all love pics!  :pics

If anyone has any questions about the build or feedback or anything at all just let me know!   Let the pictures begin!


I found a gutted cab in town, fairly cheap.  You can ignore the deer hunter marquee on there, that's not what game it really was. Not sure why I put that on there for the picture, I guess I just thought it looked empty at the time without a marquee.  Anyway, I really liked the faux wood look it had, and I intend to keep it that way.  It was in generally pretty good condition.  There was some damage along the bottoms of the machine, but nothing I couldn't conceal.


The first thing I did was to gut the cabinet even more, sand all the insides down a bit, primed everything to get that clean look and feel back, and then added some wheels to it.


Next I cut a shelf for my control panel box I made to rest on top of.


I repaired the affore mentioned damaged bottoms of the cab.   I used black corner protectors, and some corner guards to clean things up a bit.


This cabinet will have all the buttons and trackball and etc lit up when I am finished with it.   I also got a cold cathode sound sensitive light bar.  The idea is that the lights on the bottom of the arcade machine will flash along with the sound of whatever game you are playing.   If the flashing lights gets annoying or distracting, I can just flip it to just be permanently on instead.  I think it will be a pretty cool little addition.


Here's a bottom up view of where the light bar is installed to give you some idea.


I added some speaker holes, speaker grills, more black corner guards, and the start of the t-molding to the front bottom of the cabinet.


I then began painting everything I needed to, and of course primed everything first.


I installed some exhaust fans and grills onto the cab.  There's one pulling in cold air on the bottom of the cab, and one on the top blowing out hot air.


The fans have red LEDs in them as well.  Here's a picture of them lit up just to give you an idea of what they look like.


I decided to restore the original coin door that came on the machine.   Here is a before and after picture.   I really should have used a spray paint of some sort instead of my normal paint, but it did end up ok anyway.  I'm pretty satisfied with how it turned out.   It was a lot of work stripping off the old paint, so I am not sure I am willing to try it again, but it was ok to do once.  Anyway, you can tell the after look is MUCH improved from where I started.


I painted everything I needed to black, I installed the coin door onto the cab again, and I attached my control panel box to the cabinet.


I decided to make a hidden admin panel to go behind the bottom coin door.  I added a volume knob to this after I took this picture as well.  Also in the picture you can see the DVD drive, a USB drive, and two admin buttons.   The toggle switch is a DPDT switch.   I am using this to hide my mouse buttons on my control panel.  When you flip the switch, P1B5 and P1B6 will turn into left and right mouse click buttons.  When you flip the switch back, they will be the normal buttons.   This was my attempt to keep the control panel a little less cluttered.  My cp will have a few dedicated admin buttons on there, as I enjoy the convenience, but I always felt the mouse buttons were taking up too much space for how often I had to use them.


Here you can see the admin panel installed behind the bottom coin door.


Here is that custom artwork I was referring to.  It's a low res picture, but the real one looks much better, and looks great when printed.   I feel that we kept the overall Tapper feel in tact, but changed the color scheme.


Here is a picture of the current state of the machine, with the marquee installed as well.


And here is another view.


Well thats as many pictures as I have so far.  I will update once I complete some more work.   I am like 75% done with about 5 different things right now, so there's a lot of balls in the air at the moment.   I suspect they will all be finished about the same time, so I will likely have another big update once this happens.

Again, let me know if anyone has any questions, or feedback or anything!  Thanks!
« Last Edit: December 02, 2010, 12:45:00 am by markronz »

borals

  • Trade Count: (0)
  • Full Member
  • ***
  • Offline Offline
  • Posts: 64
  • Last login:March 07, 2020, 05:51:14 am
Re: The Mame Tapper build
« Reply #1 on: September 21, 2010, 08:32:42 pm »
Love the look & feel of this cab, reminds me of the show Cheers hahahaha.


CapriRS302

  • Trade Count: (0)
  • Full Member
  • ***
  • Offline Offline
  • Posts: 89
  • Last login:June 02, 2011, 01:26:47 pm
Re: The Mame Tapper build
« Reply #2 on: September 22, 2010, 09:29:04 am »
Awesome!  Tapper is probably my all time favorite game, after super mario bros.

You should design a beer tap that slides over your joystick so you can be authentic when playing tapper.

Also some of the stuff that reembles a bar from the original machine would be nice, like a footrail and cup holders and such...

markronz

  • We traced the call, and it came from....INSIDE YOUR ARCADE MACHINE!
  • Trade Count: (+1)
  • Full Member
  • ***
  • Offline Offline
  • Posts: 821
  • Last login:April 12, 2019, 12:03:08 am
  • Game on!
Re: The Mame Tapper build
« Reply #3 on: September 22, 2010, 11:37:55 am »
Love the look & feel of this cab, reminds me of the show Cheers hahahaha.

 :)  Thanks.  I liked the show Cheers, and now that you mention it, with the curvy letters, it does look similar.   But I was just copying the original as close as I could:


You should design a beer tap that slides over your joystick so you can be authentic when playing tapper.
Also some of the stuff that reembles a bar from the original machine would be nice, like a footrail and cup holders and such...

That would be awesome if I could get a beer tap.   I'll have to look into that, and see if there's a way that would work.   :)
And yeah, I loved the original Tapper machine.  Some day I'd love to own a real one myself.  But unfortunately I don't have any metal working skills to try to replicate anything like that.  Still should look pretty sweet as it is though.   I got my side art yesterday, and it looks amazing.


JustMichael

  • Trade Count: (+1)
  • Full Member
  • ***
  • Offline Offline
  • Posts: 1438
  • Last login:September 27, 2015, 01:19:40 am
  • Mmmmm!! Cheesecake!!
Re: The Mame Tapper build
« Reply #4 on: September 23, 2010, 01:55:17 am »
I love Tapper.  Simple game play but can be quite frustrating!   :angry:  :banghead:

markronz

  • We traced the call, and it came from....INSIDE YOUR ARCADE MACHINE!
  • Trade Count: (+1)
  • Full Member
  • ***
  • Offline Offline
  • Posts: 821
  • Last login:April 12, 2019, 12:03:08 am
  • Game on!
Re: The Mame Tapper build
« Reply #5 on: October 08, 2010, 02:15:33 pm »
Ok, so I am definitely making some progress on this cab lately.  Pics in the next week or two I am sure.   But I came across a question.   I recently bought a different showcase cabinet as my next project.  The cabinet was once upon a time, re-purposed to be a Tekken 6 game.   It still had the controls in there.   You can see the metal piece below that was simply make shifted to work in the wood cp of the showcase cab.

Now I am considering changing joysticks for the Mame Tapper machine, and I was wondering if there was any way that I could re-use the Tekken 6 joysticks.  The joysticks from the Tekken cab appear to be Sanwa joysticks with a ball top.   I was just going to put some Happ 8 way ultimates into Tapper, but having seen the ball tops now, I really dig the look.

The ball top just looks so much cooler, and I feel like it matches the overall look of the cabinet better.  Don't you agree?

Now I thought it was going to be easy to just remove the joysticks, and use them in the Tapper cab, but I ran into an unexpected problem.   The mounting plate for the Sanwa's appears to be attached to the entire metal panel. See below:


 I don't want to use the entire metal control panel piece, I just wanted the joystick.   So do you think there's any way to re-use them easily?   Or would I just be further ahead buying some new Sanwa's with the ball top?

severdhed

  • Trade Count: (0)
  • Full Member
  • ***
  • Offline Offline
  • Posts: 2971
  • Last login:October 07, 2022, 04:45:32 pm
  • RIP Dinosaur Hippo
Re: The Mame Tapper build
« Reply #6 on: October 08, 2010, 02:29:30 pm »
i don't know too much about sanwa joysticks, but i'm guessing it is a JLF (since it doesnt look like my JLWs)  you can puchase new mouting plates for them from lizardlick.com

http://www.lizardlick.com/Sanwa-JLF-P1-S-quotSquot-Mounting-Plate_p_252.html

they also have flat plates that may or may not be better suited to your situation...

http://www.lizardlick.com/Sanwa-JLF-Parts_c_205.html

i have never used a JLF, but i absolutely love my JLWs, i greatly prefer the feel of them over the happ competition sticks in my friend's cabinet
Current Projects:      Zak-Man | TMNT Pedestal | SNES Pi | N64 Odroid
Former Projects:     4 Player Showcase | Donkey Kong | iCade

markronz

  • We traced the call, and it came from....INSIDE YOUR ARCADE MACHINE!
  • Trade Count: (+1)
  • Full Member
  • ***
  • Offline Offline
  • Posts: 821
  • Last login:April 12, 2019, 12:03:08 am
  • Game on!
Re: The Mame Tapper build
« Reply #7 on: October 08, 2010, 03:32:05 pm »
Thank you.   That is very helpful.   From looking at the parts on Lizard Lick, I would have to agree that it's a JLF.

If I wanted to do that, what type of mounting plate would you guys recommend?   I am doing a wood control panel.  0.75 MDF wood.  It says on the website they are better suited for metal cp's.  I would assume this is still do-able, right?  So If I am using wood, would I just have to route out a square to fit this in?  If so, do you know how deep I should recess the hole?

Also about the restrictor plate.  What would be the advantages of the octagonal plate over the stock 4/8 way plate?  Do they just feel differently?  Do people have any formed opinions of which they liked better?   I plan to play pretty much every type of game.  Old school 4 way games, new-ish fighters, etc.   I plan to leave my joysticks set at 8 way.

And lastly, I took this thing apart now, I hope I am able to put it back together.  But in case I fail, does anyone know of any good places online to look to figure out how to assemble one of these?  And what each wire on the wire harness is for?

JustMichael

  • Trade Count: (+1)
  • Full Member
  • ***
  • Offline Offline
  • Posts: 1438
  • Last login:September 27, 2015, 01:19:40 am
  • Mmmmm!! Cheesecake!!
Re: The Mame Tapper build
« Reply #8 on: October 08, 2010, 04:50:11 pm »
I am curious about one thing.  How do you get your coins back?  On my coin door, there is a black metal box that the coin bucket slides into.  The coins drop through 2 slots in the top of the metal box and into the coin bucket.  I can only access the coins from the lower door.

markronz

  • We traced the call, and it came from....INSIDE YOUR ARCADE MACHINE!
  • Trade Count: (+1)
  • Full Member
  • ***
  • Offline Offline
  • Posts: 821
  • Last login:April 12, 2019, 12:03:08 am
  • Game on!
Re: The Mame Tapper build
« Reply #9 on: October 08, 2010, 04:56:15 pm »
I have no coin mechs in there.  Its for my basement, so I just have a coin button on the control panel.  More accurately one coin for each player.   The coin door is just for looks.

markronz

  • We traced the call, and it came from....INSIDE YOUR ARCADE MACHINE!
  • Trade Count: (+1)
  • Full Member
  • ***
  • Offline Offline
  • Posts: 821
  • Last login:April 12, 2019, 12:03:08 am
  • Game on!
Re: The Mame Tapper build
« Reply #10 on: October 08, 2010, 05:01:35 pm »
Attached is a picture of what the coin buttons look like.  They are illuminated though.  They look awesome, but as is often the case, the pictures don't do them justice.

BadMouth

  • Trade Count: (+6)
  • Full Member
  • ***
  • Offline Offline
  • Posts: 9226
  • Last login:April 22, 2024, 09:54:06 am
  • ...
Re: The Mame Tapper build
« Reply #11 on: October 09, 2010, 08:09:48 am »
Any plans to add a foot rail?

markronz

  • We traced the call, and it came from....INSIDE YOUR ARCADE MACHINE!
  • Trade Count: (+1)
  • Full Member
  • ***
  • Offline Offline
  • Posts: 821
  • Last login:April 12, 2019, 12:03:08 am
  • Game on!
Re: The Mame Tapper build
« Reply #12 on: October 14, 2010, 10:14:55 am »
Any plans to add a foot rail?

Sorry no.  :)  As much as I'd like to, I don't have any real way to reproduce it to be similar to the real arcade cab.   Plus with the way the bottom of the cabinet is designed, because of the overhang, the rail would be in a very awkward position.

markronz

  • We traced the call, and it came from....INSIDE YOUR ARCADE MACHINE!
  • Trade Count: (+1)
  • Full Member
  • ***
  • Offline Offline
  • Posts: 821
  • Last login:April 12, 2019, 12:03:08 am
  • Game on!
Re: The Mame Tapper build
« Reply #13 on: October 14, 2010, 10:29:05 am »
Well, I got a few things done recently.  This cab is really starting to shape up.   Again, to follow the entire build, you can check out my web page here.  But I will post my main progress pictures on here too.

I got my bezel cut and installed, and the glass in front of the monitor finally.  This was really the last big hurdle which kept me busy for a while.   The glass I had cut was a bit too tall, so I had to remove the bottom marquee holder, make a new one, and then reattach it a little higher up.


Ok!  Finally time to attach my side art!   Thanks SO SO MUCH to Rich and This Old Game!   That site is probably the one place in the world that has the original Tapper artwork scanned in and available for print.   I was pretty skeptical that they'd be willing to help me out and modify the side art a bit, but Rich was more than willing to help!   He put my own custom Tapper logo around the top, and put a black oval frame around a good portion of the side art.   I couldn't be more pleased with how it turned out.   In the picture below the protective covering is still on the art, but you will see more pictures of it uncovered in just a bit.


I finally installed my power button on the back on the machine.   I used my skull I drew up for my first cab I built, and use it as the "kill switch" on the back of the machine.  This button will be illuminated when I am done too.


Here's just a wider view of the back/top of the cabinet.   I made a new back door to the cabinet too since the original was warped so bad it barely fit any more.


Then here it is at it's current state!   I'm lovin it!


Another view of the back end:


One more money shot of the cab:


My next big project is, of course, to work on the control panel.   The control panel will be on hinges, so that I can open it up, and it will rest against the monitor glass to hold it in place even more.  Below is control panel wood, and my preliminary plannings for the buttons as such:


Can't wait to get the CP rollin' so this cab will be done!
« Last Edit: October 14, 2010, 10:32:53 am by markronz »

Donkbaca

  • Our reptillian overlords would be pleased
  • Trade Count: (+1)
  • Full Member
  • ***
  • Offline Offline
  • Posts: 2648
  • Last login:May 09, 2012, 06:28:10 pm
    • Slim built MAME/Xbox cab
Re: The Mame Tapper build
« Reply #14 on: October 14, 2010, 12:07:08 pm »
Very well done!  I love the admin panel behind the coin door idea!

BadMouth

  • Trade Count: (+6)
  • Full Member
  • ***
  • Offline Offline
  • Posts: 9226
  • Last login:April 22, 2024, 09:54:06 am
  • ...
Re: The Mame Tapper build
« Reply #15 on: October 14, 2010, 12:29:51 pm »
Looking good.  I'm a bit jealous.
The contrast between the woodgrain and black looks well balanced and really nice.

severdhed

  • Trade Count: (0)
  • Full Member
  • ***
  • Offline Offline
  • Posts: 2971
  • Last login:October 07, 2022, 04:45:32 pm
  • RIP Dinosaur Hippo
Re: The Mame Tapper build
« Reply #16 on: October 14, 2010, 11:45:24 pm »
very cool, i love the woodgrain and black together...very nice
Current Projects:      Zak-Man | TMNT Pedestal | SNES Pi | N64 Odroid
Former Projects:     4 Player Showcase | Donkey Kong | iCade

drventure

  • Trade Count: (+2)
  • Full Member
  • ***
  • Offline Offline
  • Posts: 4152
  • Last login:April 23, 2024, 06:53:06 pm
  • Laser Death Ray Bargain Bin! Make me an offer!
Re: The Mame Tapper build
« Reply #17 on: October 15, 2010, 12:53:50 am »
You SO need to replace the joystick handle with one of these


http://www.kegworks.com/product.php?productid=20145&cat=397&page=1

or something similar

Nice build!

Sidgoop

  • Trade Count: (0)
  • Full Member
  • ***
  • Offline Offline
  • Posts: 46
  • Last login:October 15, 2017, 07:21:51 pm
Re: The Mame Tapper build
« Reply #18 on: October 15, 2010, 09:03:40 am »
Looks great! One question - where did you get your panel mount USB jack?

markronz

  • We traced the call, and it came from....INSIDE YOUR ARCADE MACHINE!
  • Trade Count: (+1)
  • Full Member
  • ***
  • Offline Offline
  • Posts: 821
  • Last login:April 12, 2019, 12:03:08 am
  • Game on!
Re: The Mame Tapper build
« Reply #19 on: October 15, 2010, 09:41:40 am »
Thanks for the compliments guys!  I appreciate it!

DrVenture, I'd love to do something like that for the joystick.  Maybe a future enhancement.  If I only had the skills to retrofit things to my needs as well as you do!  Loved reading through your project by the way!

Looks great! One question - where did you get your panel mount USB jack?

I got my USB port here.  It's kind of a weird picture on that web page though, it's just a back view of the product instead of the front.   There is another model, a silver one, that shows you the front view.   I'm sure other sites have similar products as this, but that's where I got mine!

LeedsFan

  • Trade Count: (0)
  • Full Member
  • ***
  • Offline Offline
  • Posts: 1042
  • Last login:January 17, 2021, 06:14:23 am
Re: The Mame Tapper build
« Reply #20 on: October 16, 2010, 04:21:50 am »
Going back to the joysticks how often will be wanting to switch between 4-way and 8-way? This is something that is a prime consideration for me on projects. For example the Sanwa JLW is just a round plastic plate that swivels round when the four screws are loosened a bit. So it's just a case of lift the lid and turn the plate to switch modes. The JLF though is more intricate and takes a little more effort. And the 4-way doesn't work properly anyway on the JLF. I'm going with Seimitsus on my next project as they have a restrictor plate that just clips to the base in different positions.

markronz

  • We traced the call, and it came from....INSIDE YOUR ARCADE MACHINE!
  • Trade Count: (+1)
  • Full Member
  • ***
  • Offline Offline
  • Posts: 821
  • Last login:April 12, 2019, 12:03:08 am
  • Game on!
Re: The Mame Tapper build
« Reply #21 on: October 16, 2010, 10:39:51 am »
Going back to the joysticks how often will be wanting to switch between 4-way and 8-way? This is something that is a prime consideration for me on projects. For example the Sanwa JLW is just a round plastic plate that swivels round when the four screws are loosened a bit. So it's just a case of lift the lid and turn the plate to switch modes. The JLF though is more intricate and takes a little more effort. And the 4-way doesn't work properly anyway on the JLF. I'm going with Seimitsus on my next project as they have a restrictor plate that just clips to the base in different positions.

Can you explain the switching between 4 way and 8 ways for me again please, and why it's necessary.   I mean I get it.   Like, you switch back to 4 way for older games, Pacman is always a great example, where there is no diagonal directions in the game.  I get that part.  But what I've never got is why you can't just play those games with an 8 way joystick.   Maybe I just have good stick control *snicker snicker* but I've never seemed to have a problem playing those games on 8 ways, and just simply not pressing diagonal directions.  I've built one cabinet before, and I have dedicated 8 ways in that one as well.   On the JLF's I got the octagonal restrictor plates.  So you can clearly feel all 8 directions.  So if I were pressing diagonal, I'd think I would know it.   I guess I should really test it out and see if it's a problem for me.    What do you mean though that the 4 way doesn't work properly on the JLF though?   You mean just with the 4 way restrictor plate, it doesn't work right?  Or what?   

I guess it would seem that it all comes down to personal preference.  Admittedly, I don't play THAT many classic 4 way games, and maybe that's why it's never been that big of an issue for me, but I know that I've played them before and never felt like I had a problem.  Am I the only one like this?  Or is everyone pretty set on having a way to use a real 4 way joystick?   I don't have the money to spend on the U360's, and I don't like having to manually switch the joystick from 4 to 8 way.   I guess of any of the options, I would probably add a third joystick that's dedicated 4 way, but I just don't like the idea of adding another joystick just for that, not to mention screwing up the symmetry of my control panel.  :) 

So I dunno, just let me know what you think about all this.   I appreciate you bringing it up though.   If nothing else, I will definitely hook up the joysticks first, before committing to them in my control panel, and testing them out on 4 way games to see if it's a problem for me first.

severdhed

  • Trade Count: (0)
  • Full Member
  • ***
  • Offline Offline
  • Posts: 2971
  • Last login:October 07, 2022, 04:45:32 pm
  • RIP Dinosaur Hippo
Re: The Mame Tapper build
« Reply #22 on: October 16, 2010, 11:24:08 pm »
i say build it the way you want, chances are you will end up changing it later anyway.  i dont think there are many of us here who built our panel exactly the way we wanted it the first time and just kept it that way.  i've redone my control panels several times.  most of the classic 4 way games used vertical monitors, so build this one the way you are planning, and setup a second one with a vertical monitor and a dedicated 4way stick. that way you get the best of both worlds.
Current Projects:      Zak-Man | TMNT Pedestal | SNES Pi | N64 Odroid
Former Projects:     4 Player Showcase | Donkey Kong | iCade

BadMouth

  • Trade Count: (+6)
  • Full Member
  • ***
  • Offline Offline
  • Posts: 9226
  • Last login:April 22, 2024, 09:54:06 am
  • ...
Re: The Mame Tapper build
« Reply #23 on: October 16, 2010, 11:50:27 pm »
I bought a jlw to use as a dedicated 4-way.  I put it in my test cp and played a bunch of the games that supposedly benefit from a 4-way restrictor.
It didn't do anything for me.  I didn't do any better on the games and they didn't feel any more authentic either. 

I put jlf's with the octagon restrictors in my x-arcade and I really like them for 4-way games.  Like you said, with the octagon, there's no doubt what direction you are pushing.

LeedsFan

  • Trade Count: (0)
  • Full Member
  • ***
  • Offline Offline
  • Posts: 1042
  • Last login:January 17, 2021, 06:14:23 am
Re: The Mame Tapper build
« Reply #24 on: October 17, 2010, 12:45:20 pm »
Well just last night I learned something new regarding Mame. In that it has a software fix for 4-way and 8-way games etc. Not sure which version it was implemented but basically when you select a 4-way game Mame will ignore any diagonal inputs. You have to h+ave it set in the Mame.ini and I'm not sure how good it works.

Basically if you play a 4-way game with an 8-way joystick and you hit a diagonal then sometimes the game does something completely different to what you intended. Pressing up in Pacman (or you think you pressed up) ended up sending up/left diagonal... and off shoots Pac in a different direction! Of course different joysticks will behave better/worse in this situation. And it may not even be an issue now if that Mame fix works well. Perhaps someone can shed light on this?

Even so there are some purists who still want the "feel" of the stick moving diagonally along a 45 degree gate between the 4 directions. Each to their own. Personally I don't mind changing a restrictor or swivelling a gate if it takes only a few seconds.

WhereEaglesDare

  • Trade Count: (+4)
  • Full Member
  • ***
  • Offline Offline
  • Posts: 1536
  • Last login:March 24, 2014, 08:47:08 pm
  • Shut Off All The Compactors on the Detention Level
    • My HomePage
Re: The Mame Tapper build
« Reply #25 on: October 25, 2010, 06:02:26 pm »
See your N64 hanging out there

markronz

  • We traced the call, and it came from....INSIDE YOUR ARCADE MACHINE!
  • Trade Count: (+1)
  • Full Member
  • ***
  • Offline Offline
  • Posts: 821
  • Last login:April 12, 2019, 12:03:08 am
  • Game on!
Re: The Mame Tapper build
« Reply #26 on: October 25, 2010, 06:44:30 pm »
 :) yep.  Sometimes me and the boys still play a little Bond.  Some things never get old.

Donkbaca

  • Our reptillian overlords would be pleased
  • Trade Count: (+1)
  • Full Member
  • ***
  • Offline Offline
  • Posts: 2648
  • Last login:May 09, 2012, 06:28:10 pm
    • Slim built MAME/Xbox cab
Re: The Mame Tapper build
« Reply #27 on: November 01, 2010, 01:35:38 pm »
You should add an actual keg cooler, like these guys do:

www.drinkngame.com

skinz

  • Trade Count: (+1)
  • Full Member
  • ***
  • Offline Offline
  • Posts: 81
  • Last login:February 24, 2013, 10:46:10 am
Re: The Mame Tapper build
« Reply #28 on: November 01, 2010, 07:51:28 pm »
Can't wait to see the control panel.  Looks great so far!!!!

markronz

  • We traced the call, and it came from....INSIDE YOUR ARCADE MACHINE!
  • Trade Count: (+1)
  • Full Member
  • ***
  • Offline Offline
  • Posts: 821
  • Last login:April 12, 2019, 12:03:08 am
  • Game on!
Re: The Mame Tapper build
« Reply #29 on: November 03, 2010, 10:52:20 am »
You should add an actual keg cooler, like these guys do:
www.drinkngame.com

I've seen that before.   Ideal combo, beer and video games.   :cheers:  Sadly this cab will not have a kegerator in it.   I would have had to plan for such a thing from the get go.  :)


Can't wait to see the control panel.  Looks great so far!!!!
Thanks for the interest and compliment!   I just got my CP art in the mail yesterday from Game On Grafix.  Looks amazing!  I had a few items on the art that were specific to the positioning of the controls.  So now that I have the art work, I can finally start to drill some holes so they align correctly with the art.   Updates soon, I hope!
« Last Edit: November 03, 2010, 10:54:19 am by markronz »

markronz

  • We traced the call, and it came from....INSIDE YOUR ARCADE MACHINE!
  • Trade Count: (+1)
  • Full Member
  • ***
  • Offline Offline
  • Posts: 821
  • Last login:April 12, 2019, 12:03:08 am
  • Game on!
Re: The Mame Tapper build
« Reply #30 on: December 02, 2010, 12:44:12 am »
Well it's finally finished!  Hardware wise anyways.  I still have a lot of software work to finish up, but that's the easy part for me.   It's the wood working skills that I'm just now learning.  Again, I won't put all my pictures on here, but if you want to see the full build blog, you can check it out here. Anyway, without further ado, here are some pics!  

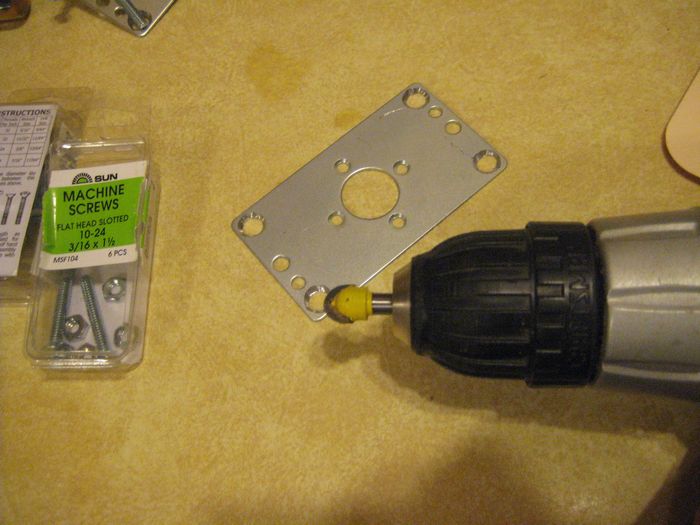
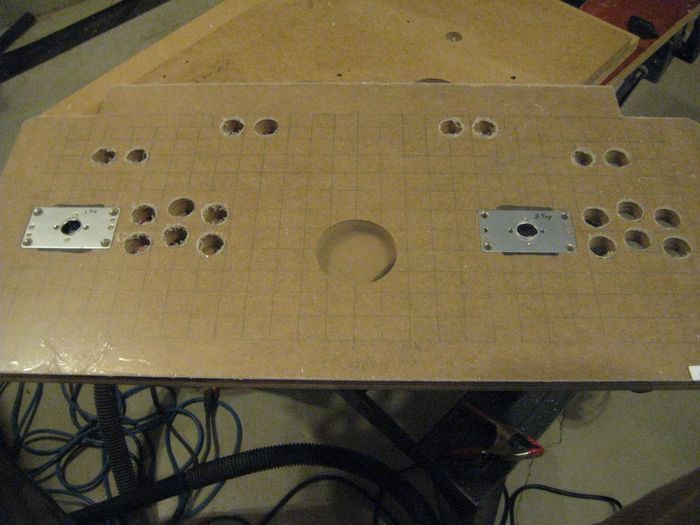
I decided to go with the Sanwa joysticks that I had.  I modified the mounting plate so that the bolts would be flush with the rest of the control panel top:


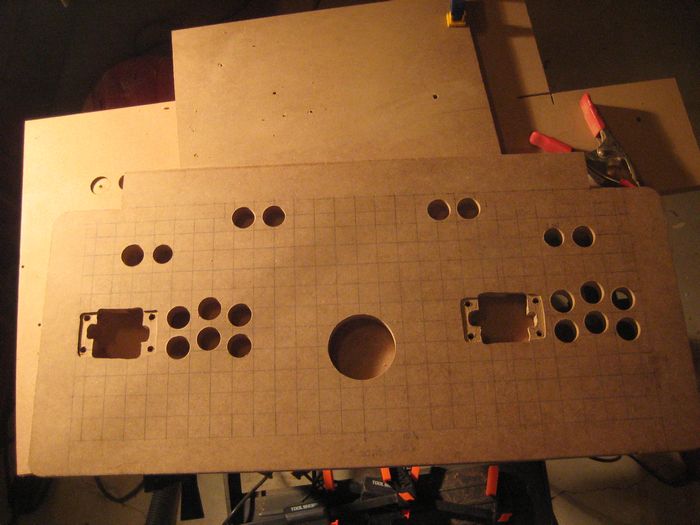
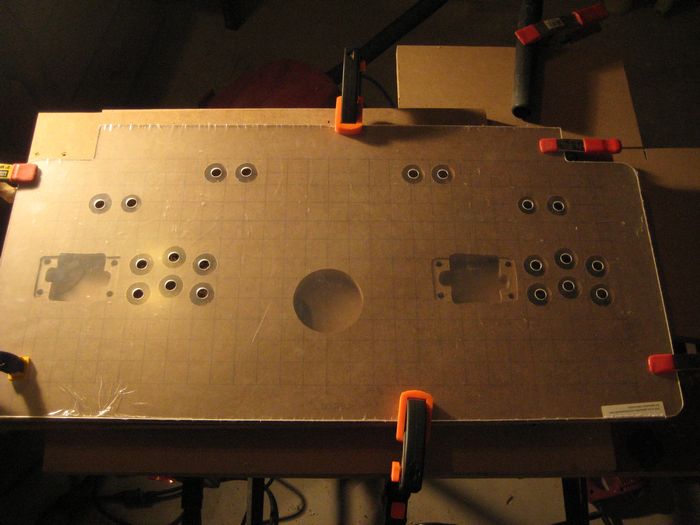
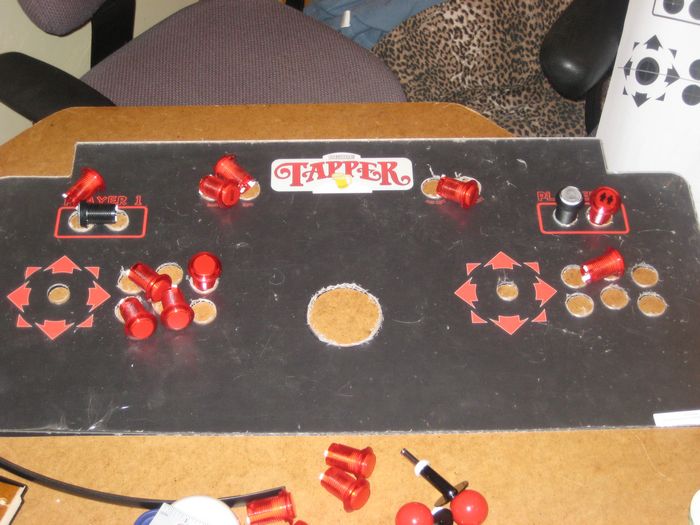
Here's the control panel with all the holes drilled in it:


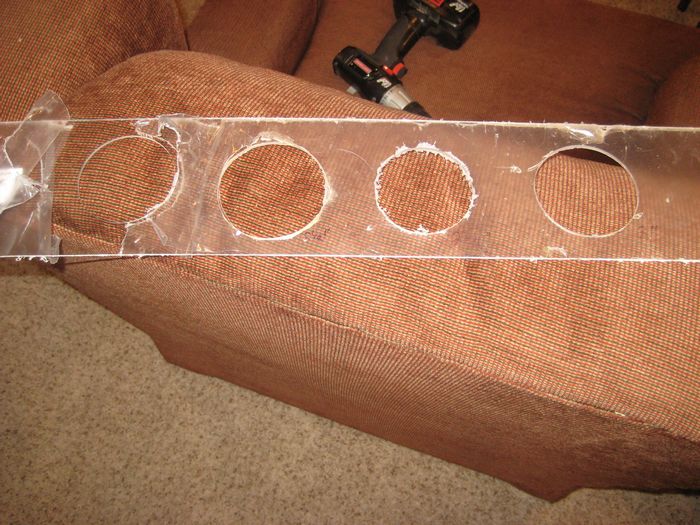
Here's the start of my work with the plexiglass.  I drilled some pilot holes and then used my flush router bit to cut out the holes.   For my first time working with plexiglass, it went fairly well overall.


Here's the end of my work with the plexiglass with everything done except the trackball.


I didn't use the GGG mounting ring for the high trackball kit.  Instead I just cut a hole in the plexiglass that was large enough for the trackball to poke out of it, yet small enough so that the trackball does not fall out.   Turns out that for me, with my thickness of wood, that hole size was 2 7/8"   Not three inches, not 2 3/4", but 2 7/8".   Too bad I had to spend like 50 bucks on the wrong hole saws, but you live and learn I guess.


Through luck or skill, I managed to cut the trackball hole in just the right spot.


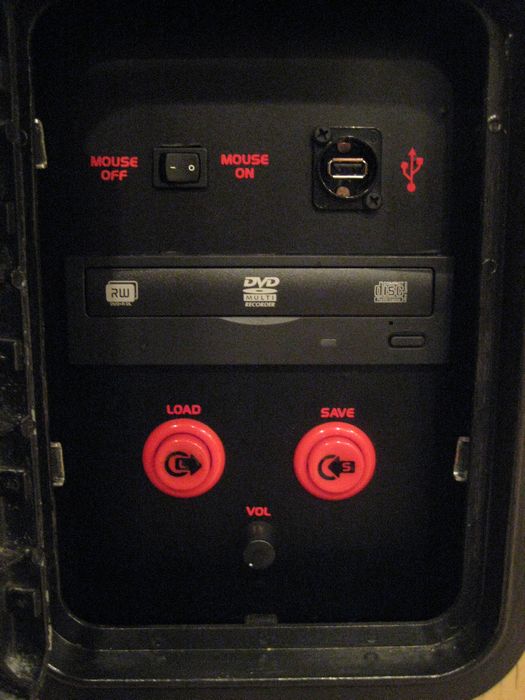
Next you will see that I did a bit of work on my admin panel that's hidden behind the lower coin door.    I covered the wood with a vinyl black cover.  Then I added some decals on there from Pongo here on the forum. Thanks again Pongo!  I think it looks amazing.   I installed a red LED pointing down on the admin panel too, so that it's lit up.


Here's the wiring on the admin panel.


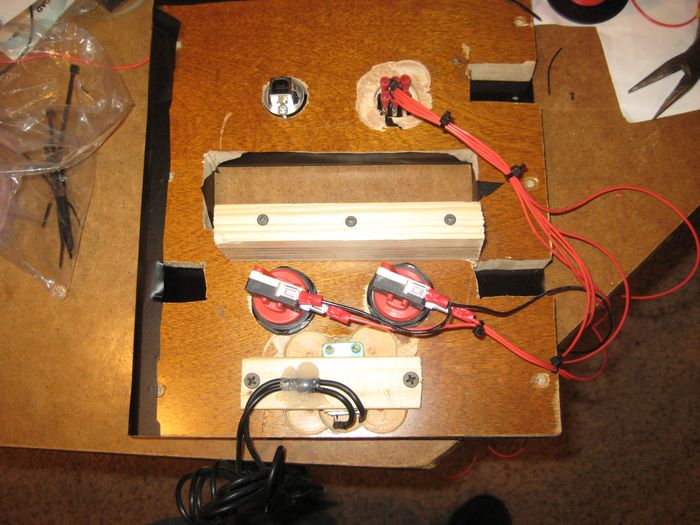
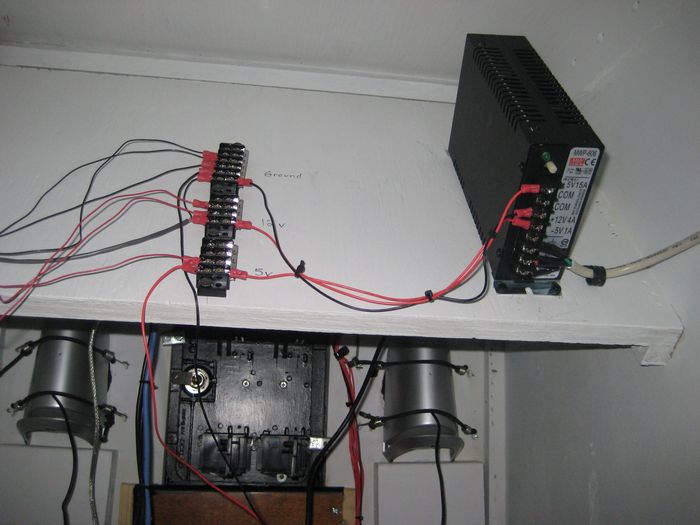
Here's my real arcade power supply that I used, along with the terminal barriers I used to split up the wires to go to all the different fans, and lights and such.


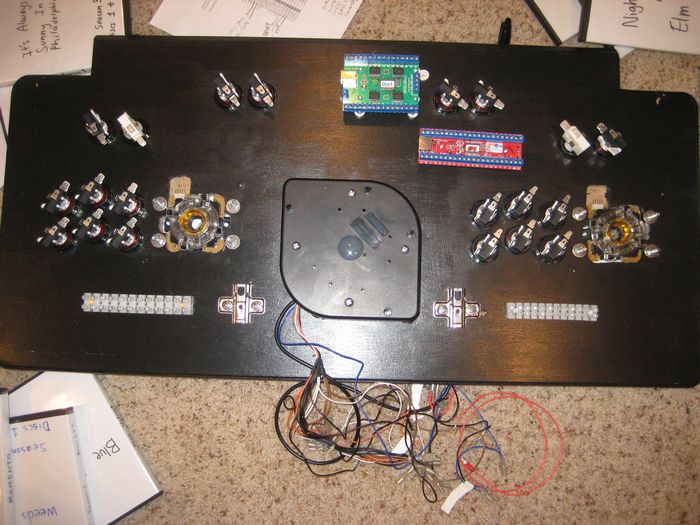
Here's the back of the control panel with all the controls installed but not yet wired.


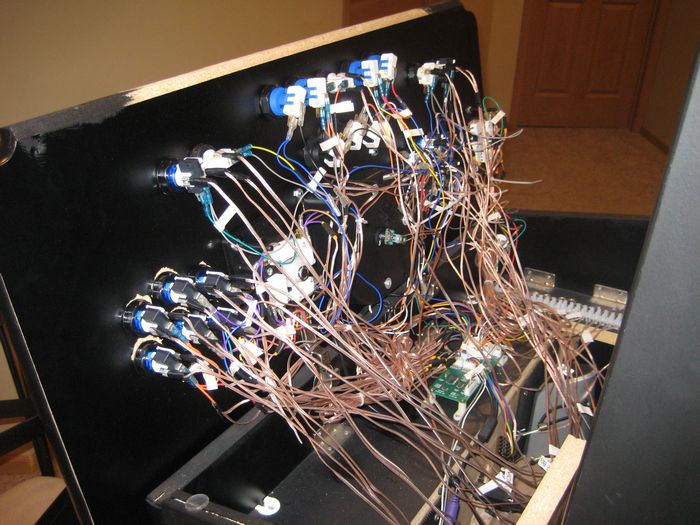
Now, I did post this on the forum on a separate post, but I will put it here too since it's related to this cab.   I'm a little embarrassed of this photo, but this is the wiring from my first arcade I made.  Sloppy as heck, but it worked.   I just wanted to post it here for comparison...


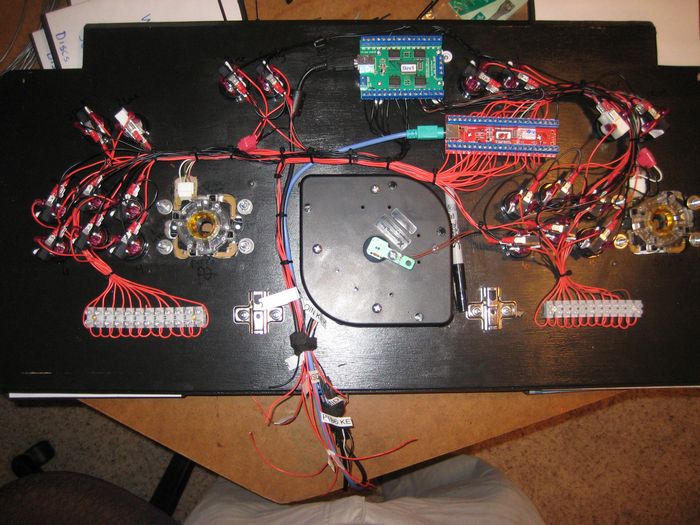
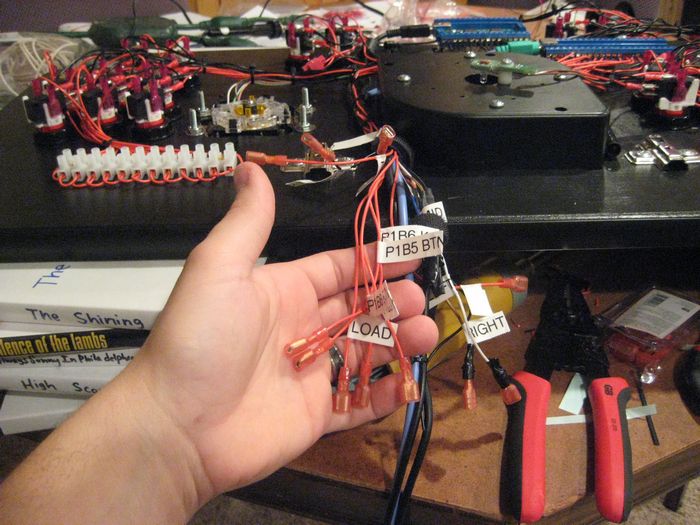
And here's the wiring on the Mame Tapper.   So much better.  Not the best I've seen, because I've seen some amazing things on this forum, but it's very good for me, and I'm proud of it.


I wanted the control panel to be detachable, so I put quick disconnects on the bottom of all the wires that go inside the cabinet.   These go to things like the coin door and the admin panel and such.   So I can still unplug them all if I ever needed to remove the CP.


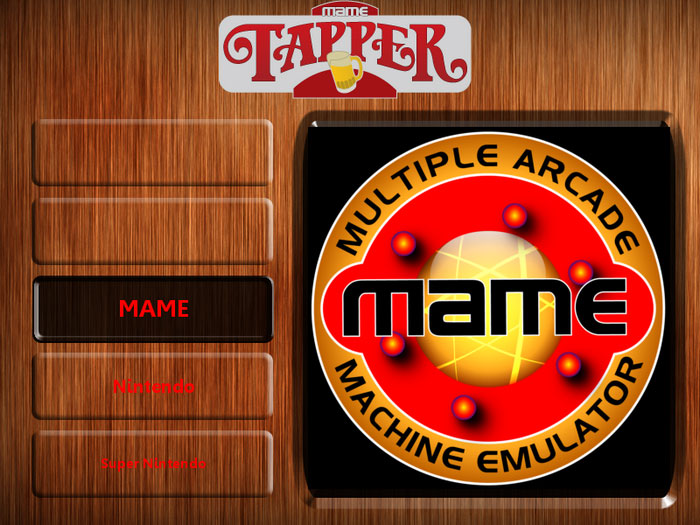
Before I post the final pictures of the cabinet, I thought I'd post a few screenshots of my menus that I am using in Mala.   It took me a while to learn to use photoshop enough to do this, but I'm pleased with how they turned out.   I used a wood background, and it meshes well with the siding of the cabinet.  Also, I used the same background for all the screens, and I think it really ties it all together.    Below is the Main Menu.  


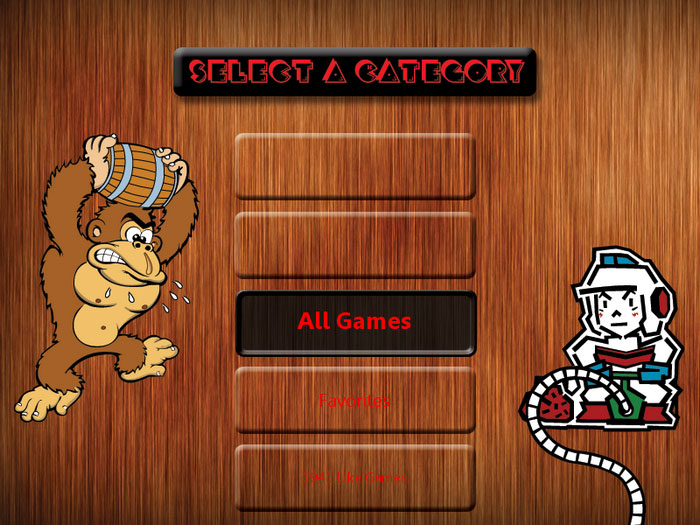
Here's a shot of my category selection screen for MAME.


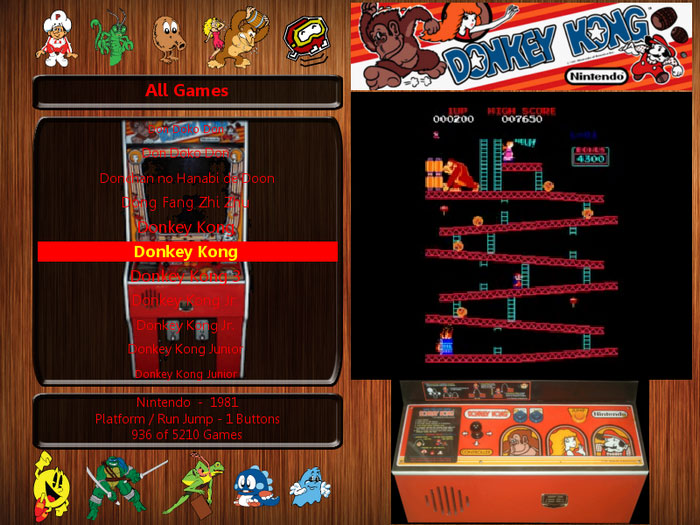
Here's a screenshot of the MAME main screen.


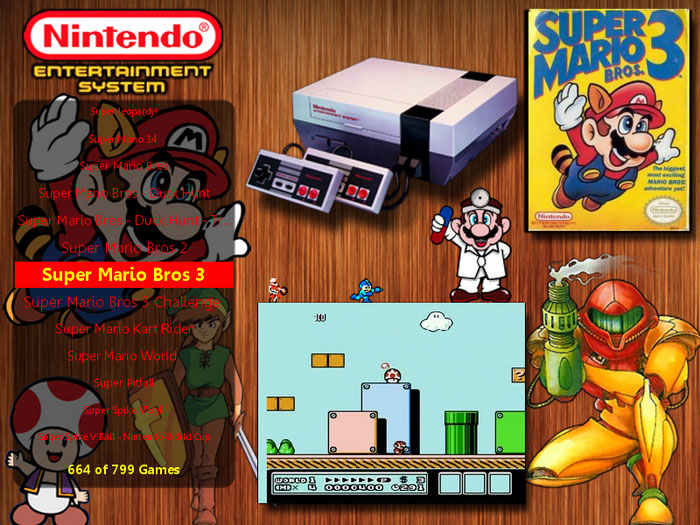
The rest of systems follow the same type of look.  They have screenshots, box pictures, and movies for each game.   I can't remember who I got them from, but I did not create all the layouts for the console systems, I pretty much just changed the background pictures and tweaked them a bit.   I won't post a picture of each console, but here is the Nintendo one anyway.


And here's a picture of the finished control panel:


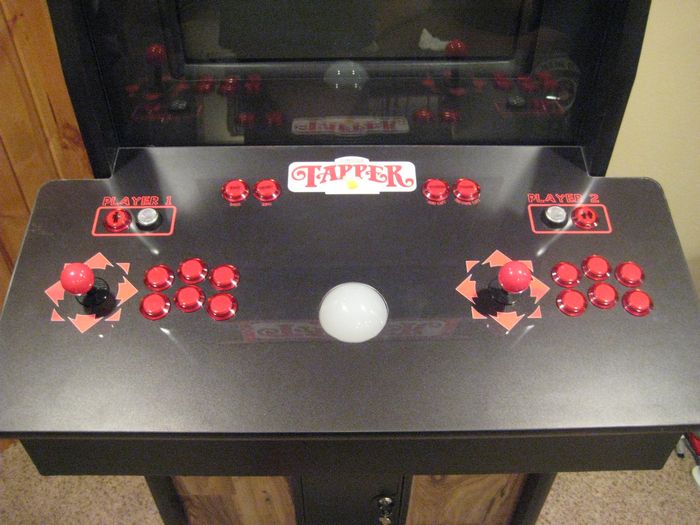
Here are the admin buttons.  You can see that I made my own inserts for the buttons.  They are the Ultralux ones from Ultimarc.


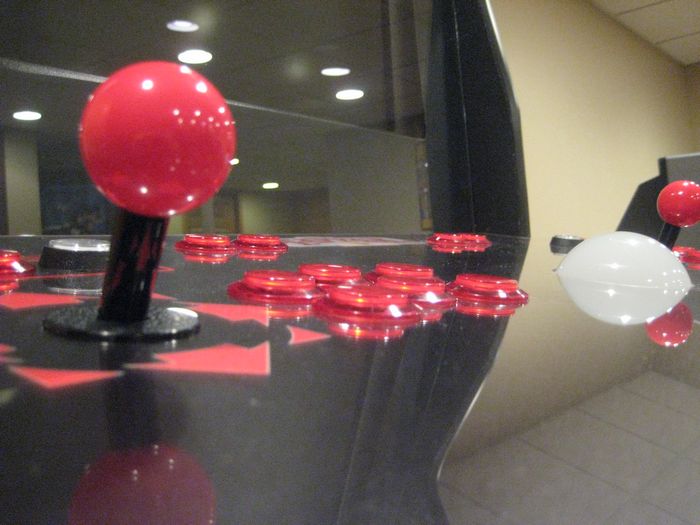
I just thought this was a cool view of the controls...


And here's the money shot of the finished arcade machine!


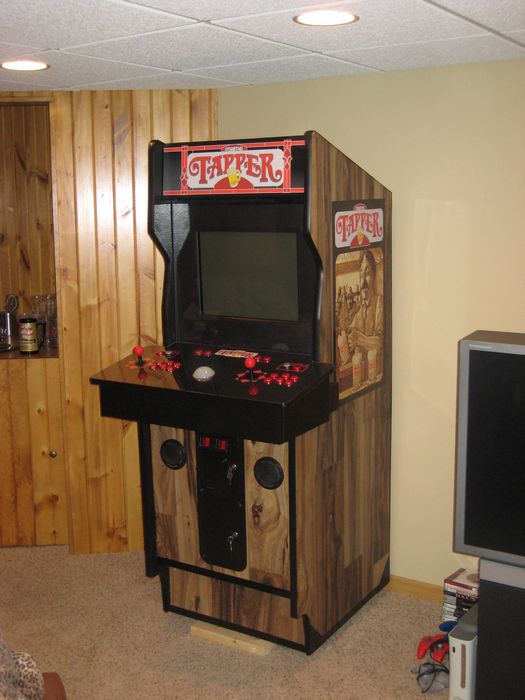
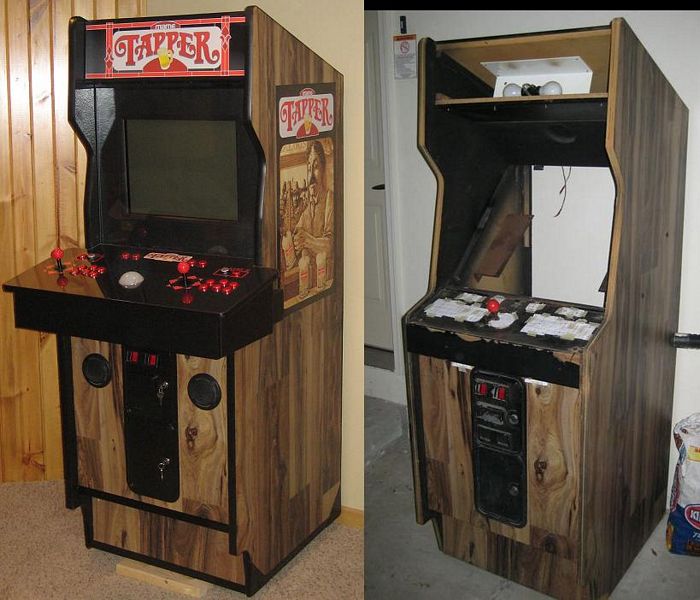
And I figured I was obligated to do at least one before and after picture, so here it is!


And lastly a little video.

It's just got a little video preview you can watch along with a little glimpse of the lighting on my cabinet.

That's it folks!  Thanks for following along!  It was a lot of fun building it and I'm very pleased with how it turned out!   Thanks for all the feedback and compliments everyone!
« Last Edit: December 02, 2010, 12:48:58 am by markronz »

PsychoMikey

  • Trade Count: (0)
  • Full Member
  • ***
  • Offline Offline
  • Posts: 68
  • Last login:January 04, 2014, 04:21:35 am
Re: The Mame Tapper build - Finished! - 12/1/2010
« Reply #31 on: December 02, 2010, 06:51:22 am »
Congrats markronz on this high quality Tapper Cab. Love the quality of finish, video was very cool too!

Good work on the MALA Skin, make's everything come together. Personaly i would remove the cab behind the game list and change the font color in the genre screen to something with more contrast on the wood.

enjoy playing it and start planning your next project!!!  :notworthy:

skinz

  • Trade Count: (+1)
  • Full Member
  • ***
  • Offline Offline
  • Posts: 81
  • Last login:February 24, 2013, 10:46:10 am
Re: The Mame Tapper build - Finished! - 12/1/2010
« Reply #32 on: December 02, 2010, 08:03:14 am »
CP looks amazing as well as the art - Sick job!!!!

vidmouse

  • Trade Count: (0)
  • Full Member
  • ***
  • Offline Offline
  • Posts: 588
  • Last login:November 08, 2021, 10:13:41 am
  • Oop! Ack! Thppphbt!
    • Vidmouse's Arcade
Re: The Mame Tapper build
« Reply #33 on: December 02, 2010, 10:07:09 am »
You SO need to replace the joystick handle with one of these


http://www.kegworks.com/product.php?productid=20145&cat=397&page=1

or something similar

Nice build!

+1 --- a build this good needs to have a real Tapper on it

Mr Wilson

  • Trade Count: (0)
  • Full Member
  • ***
  • Offline Offline
  • Posts: 182
  • Last login:August 14, 2018, 01:24:44 pm
  • it never ends!!!!
Re: The Mame Tapper build - Finished! - 12/1/2010
« Reply #34 on: December 02, 2010, 04:56:35 pm »
 :cheers: :cheers: :cheers: :cheers: :cheers: :cheers: :cheers: :cheers: :cheers: :cheers: :cheers: :cheers: :cheers:

yotsuya

  • Trade Count: (+21)
  • Full Member
  • ***
  • Offline Offline
  • Posts: 19956
  • Last login:Today at 12:09:41 am
  • 2014 UCA Winner, 2014, 2015, 2016 ZapCon Winner
    • forum.arcadecontrols.com/index.php/topic,137636.msg1420628.html
Re: The Mame Tapper build - Finished! - 12/1/2010
« Reply #35 on: December 02, 2010, 05:13:41 pm »
Nice job there!
***Build what you dig, bro. Build what you dig.***

jipp

  • Trade Count: (0)
  • Full Member
  • ***
  • Offline Offline
  • Posts: 282
  • Last login:April 01, 2016, 07:29:49 pm
Re: The Mame Tapper build - Finished! - 12/1/2010
« Reply #36 on: December 02, 2010, 05:19:48 pm »
looks good.  i like the contrast of the wood paneling and black.  if you were to put a tap on the control panel.  id make it so its easy to unscrew in case it gets in the way of game play.

chris.

BobA

  • Trade Count: (+14)
  • Full Member
  • ***
  • Offline Offline
  • Posts: 5943
  • Last login:July 11, 2018, 09:52:14 pm
  • What Me Worry?
Re: The Mame Tapper build - Finished! - 12/1/2010
« Reply #37 on: December 02, 2010, 07:08:03 pm »
Great looking cab.   :applaud: :applaud:

koolmoecraig

  • Trade Count: (+2)
  • Full Member
  • ***
  • Offline Offline
  • Posts: 1433
  • Last login:April 05, 2014, 07:07:20 pm
    • My Intervention
Re: The Mame Tapper build - Finished! - 12/1/2010
« Reply #38 on: December 04, 2010, 05:15:51 pm »
Why did you decide to have the monitor upright as opposed to leaving it inclined?

markronz

  • We traced the call, and it came from....INSIDE YOUR ARCADE MACHINE!
  • Trade Count: (+1)
  • Full Member
  • ***
  • Offline Offline
  • Posts: 821
  • Last login:April 12, 2019, 12:03:08 am
  • Game on!
Re: The Mame Tapper build - Finished! - 12/1/2010
« Reply #39 on: December 04, 2010, 06:01:54 pm »
Good work on the MALA Skin, make's everything come together. Personaly i would remove the cab behind the game list and change the font color in the genre screen to something with more contrast on the wood.

I rather like the cab behind the game list, but I have since tweaked the font color on the genre screen so that it would be move readable, as you were right, it wasn't all that easy to read.   Thanks for the feedback!

looks good.  i like the contrast of the wood paneling and black.  if you were to put a tap on the control panel.  id make it so its easy to unscrew in case it gets in the way of game play.

chris.
I agree with all of you, it would be sweet to have tap controls.   If I end up doing that it might just be a future project.  And Chris, you're right, I think they would have to be screw on ones so maybe i could switch back if they got in the way.

Why did you decide to have the monitor upright as opposed to leaving it inclined?
Well, I guess I didn't post a picture of that on here, but the cabinet was empty when I got it.  There was no arcade monitor at all.   I built a shelf in it and placed a normal computer monitor in it.  So that's the main reason why it's not vertical.  You can see the monitor a little better in this picture.


Anyway, thanks everyone for the nice compliments and feedback!  I appreciate it!!!