Main Restorations Software Audio/Jukebox/MP3 Everything Else Buy/Sell/Trade
Project Announcements Monitor/Video GroovyMAME Merit/JVL Touchscreen Meet Up Retail Vendors
Driving & Racing Woodworking Software Support Forums Consoles Project Arcade Reviews
Automated Projects Artwork Frontend Support Forums Pinball Forum Discussion Old Boards
Raspberry Pi & Dev Board controls.dat Linux Miscellaneous Arcade Wiki Discussion Old Archives
Lightguns Arcade1Up Try the site in https mode Site News

Unread posts | New Replies | Recent posts | Rules | Chatroom | Wiki | File Repository | RSS | Submit news


Author Topic: Mini Galaga project  (Read 25643 times)

0 Members and 1 Guest are viewing this topic.

melon

  • Trade Count: (0)
  • Full Member
  • ***
  • Offline Offline
  • Posts: 33
  • Last login:June 18, 2014, 03:30:26 am
Mini Galaga project
« on: February 24, 2010, 11:31:16 am »
Hey there. It's a long time since I watch these forums, but I didn't write before because my english isn't so good, but I'd like to introduce myself sharing with you some projects I'm working on.
So here I go with my mini Galaga, at the moment it's almost finished (I'm making also a mini pinball cabinet)
Well, the idea is to make a mini replica of a real cabinet. The chosen one is the galaga, I love the game and the cabinet:


I also want it to be playable, so it won't be a exact replica, so I go with sketchup and model something I like:


Its 45cm (17,7") tall and it will have a 8" tft monitor, so you can see what I'm talking about when I say mini. I'll make it with 1cm thick MDF. So let's begin:
I draw the shape:


And now let's cut some wood:


Now let's sand the edges so they look rounded, to imitate some TMolding:


I also cut the coin door. It will be a fake coin door, it has a surprise inside, but I'll show it later...


Now the speakers, it will wave a small PC speakers, but enough for the cab (2,5 Watt):


Dsimounting it and fitting in its place:


A nice cutout for the speakers:


Well, having all the wood ready it's time to glue it together:


You can see in the image the closures to fasten the control panel (we'll see it later) and the backdoor with some holes to make some air flow (it will have two little fans to extract the hot air)
Now it's time to prime it. I'll use a spray, two coats:


And now it's time to paint it. Three coats of a black spray paint:


The backdoor:


Well, and that's all for now. I have to reorganize all my pictures (I have houndreds of them!) and I'll keep posting the progress.
Hope you like it :)

bigpete405

  • Trade Count: (0)
  • Full Member
  • ***
  • Offline Offline
  • Posts: 152
  • Last login:April 30, 2014, 07:48:03 pm
Re: Mini Galaga project
« Reply #1 on: February 24, 2010, 11:37:04 am »
Awesome job. :cheers:

javeryh

  • Trade Count: (+1)
  • Full Member
  • ***
  • Offline Offline
  • Posts: 7901
  • Last login:Yesterday at 05:35:40 pm
Re: Mini Galaga project
« Reply #2 on: February 24, 2010, 12:11:55 pm »
Wow - really nice start!   :cheers:

Ginsu Victim

  • Yeah, owning a MAME cab only leads to owning real ones. MAME just isn't good enough. It's a gateway drug.
  • Trade Count: (+10)
  • Full Member
  • ***
  • Offline Offline
  • Posts: 10093
  • Last login:May 08, 2023, 02:40:58 pm
  • Comanche, OK -- USA
Re: Mini Galaga project
« Reply #3 on: February 24, 2010, 12:38:46 pm »
Looking good! Welcome to the forum!

emphatic

  • Trade Count: (0)
  • Full Member
  • ***
  • Offline Offline
  • Posts: 2008
  • Last login:Today at 03:08:23 pm
  • -"Suck it, Donny!" -"No, YOU suck it.... more".
    • Emphatic's Video Game Collection
Re: Mini Galaga project
« Reply #4 on: February 24, 2010, 12:39:10 pm »
 :applaud: Sexy stuff!

melon

  • Trade Count: (0)
  • Full Member
  • ***
  • Offline Offline
  • Posts: 33
  • Last login:June 18, 2014, 03:30:26 am
Re: Mini Galaga project
« Reply #5 on: February 24, 2010, 01:31:37 pm »
Well, thanks for your comments and for the wellcome :)

The control panel:

First I cut two MDF pieces and glue them together.  Once it's solid i sand the corner so that it gets rounded:


Now the components:


It's a Seimitsu Joystick (I think it's the Joystick Seimitsu LS56 the most compact one I could find) and some Sanwa buttons, with a 24mm diameter, smaller then the 28mm ones (in the image therea are both 24mm and 28mm, just to compare)
The problem is that those buttons are really short. Thy are made to use in metalic control panels, not in wodden ones, so I have to work a little more.
I use this tool to cut some wood:


And now i can screw the pushbuttons:


I also glued another piece of MDF to ensure the union and to hold the closure that will fasten the CPO to the cabinet:


In the image you can see also some plexi bended and some plastic holding the plexi.
The attachment system is so simple, I don't know the name of this closure in english, but it's two parts, one in the control panel and another in the cabinet:


I only have to put the control panel in it's place and fasten it:


Well, I made a first attempt:


I wanted to show it so that you can see the size of the thing, but I discarted it, too big start button.
I think it's better to make the control panel and the bezel in a whole piece, so I bend a piece of plexi and make all the holes:


Now I print some artwork (I had to redraw the bezel... it was so hard to me as I'm not good with photoshop-GIMP):


The bezel will be hold with a plexi sandwich. And putting it all togother, here's the result:


And that's all for now, I'll post more pictures later.
Hope you like it :)

Epyx

  • Trade Count: (+1)
  • Full Member
  • ***
  • Offline Offline
  • Posts: 1961
  • Last login:December 25, 2023, 07:56:36 pm
  • "You're an oddity"
Re: Mini Galaga project
« Reply #6 on: February 24, 2010, 01:36:27 pm »
First of all welcome to the forums!  Second of all...holy crap...awesome mini cab!  I love the work on the CP with the MDF and plexi!  Can't wait to see those final pics!

:applaud:
Last Project


Epyx Tutorials:
Tutorials

javeryh

  • Trade Count: (+1)
  • Full Member
  • ***
  • Offline Offline
  • Posts: 7901
  • Last login:Yesterday at 05:35:40 pm
Re: Mini Galaga project
« Reply #7 on: February 24, 2010, 01:43:42 pm »
Wow! How did you bend the plexi so evenly?  It looks like you might be putting a horizontal monitor in there - if it isn't too late maybe mount it vertically like the original cabinet?  This thing is turning out great!

Bender

  • Trade Count: (+1)
  • Full Member
  • ***
  • Offline Offline
  • Posts: 1919
  • Last login:November 28, 2016, 08:12:21 pm
    • Happ to Tron Conversion tutorial
Re: Mini Galaga project
« Reply #8 on: February 24, 2010, 02:01:45 pm »
Awesome!

Great minds think alike and all....
I was just gonna start a post about mine, I'm making a few of them (although one may be Ms Pacman)
mine is a little smaller but same idea
got one done but it already went out the door without any pics :banghead:
based on a Jakks 12 in one and a portable DVD player (they will end up being less than $100 each)
any it looks pretty much like this


12.5" wide, 18" tall

can't believe you even used the same angle for your sketch up still!
Love the bent plexi and the channel on the bottom to hold it, what is that?


« Last Edit: February 24, 2010, 02:04:26 pm by Bender »

opt2not

  • Trade Count: (+15)
  • Full Member
  • ***
  • Offline Offline
  • Posts: 6173
  • Last login:February 15, 2024, 07:31:21 pm
Re: Mini Galaga project
« Reply #9 on: February 24, 2010, 02:13:36 pm »
This cabinet is pro looking already!  I LOVE the single piece of plexi for the CP and monitor glass!  Looking forward to feasting my eyes on the end result.  :applaud:

Ginsu Victim

  • Yeah, owning a MAME cab only leads to owning real ones. MAME just isn't good enough. It's a gateway drug.
  • Trade Count: (+10)
  • Full Member
  • ***
  • Offline Offline
  • Posts: 10093
  • Last login:May 08, 2023, 02:40:58 pm
  • Comanche, OK -- USA
Re: Mini Galaga project
« Reply #10 on: February 24, 2010, 03:25:22 pm »
Awesome new pics, but really......horizontal? I wasn't expecting that. Is it too late to go vertical?

Blanka

  • Trade Count: (+1)
  • Full Member
  • ***
  • Offline Offline
  • Posts: 2248
  • Last login:January 25, 2018, 03:19:28 pm
Re: Mini Galaga project
« Reply #11 on: February 24, 2010, 03:30:58 pm »
Awesome new pics, but really......horizontal? I wasn't expecting that. Is it too late to go vertical?
The Jakks toy is for horizontal TV's.

melon

  • Trade Count: (0)
  • Full Member
  • ***
  • Offline Offline
  • Posts: 33
  • Last login:June 18, 2014, 03:30:26 am
Re: Mini Galaga project
« Reply #12 on: February 24, 2010, 07:02:10 pm »
Hey, thanks for your comments. I'm glad you like it.
Well, about the monitor going horizontal, I know the original was vertical, but it's just that I play more horizontal games than vertical ones, that's why I decided to go horizontal. And it's very compact, and in the angle the monitor goes, it won't fit if it's vertical, I made the design to a horizontal one.
Bender, your mini looks awesome too, I like it.
At first I was going to put a NOAC (Nes on a chip) I have with 120 games built in it, but I purchased a mini ITX board so that I can play mame and other emulators. It's a challenge to put all the electronics inside, but it's possible!
And the plexi blending, well, you only see the good one  ;D I made almost half a dozen attempts until I got the good one. I used a hot air gun, and much patience...
Well, I have some updates:
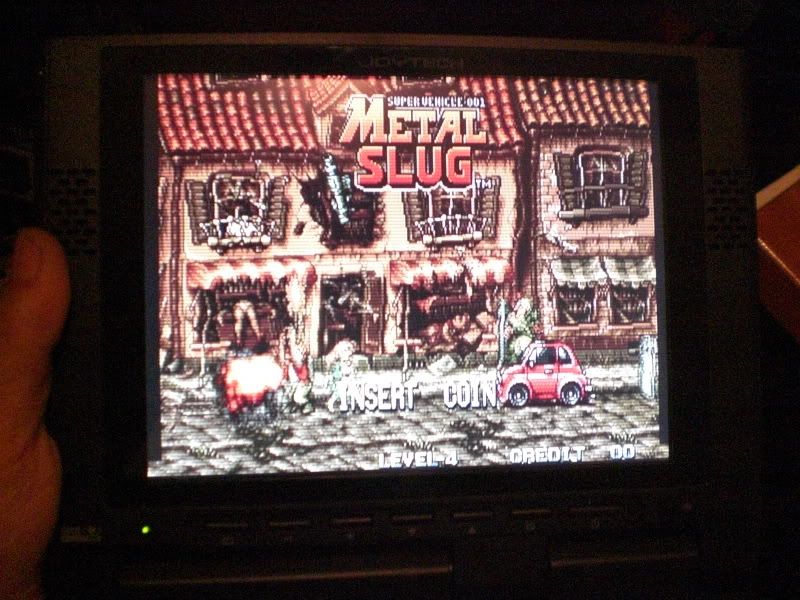
The monitor

I'm using a 8"tft monitor, it's a monitor from joytech for the Play Station 2:
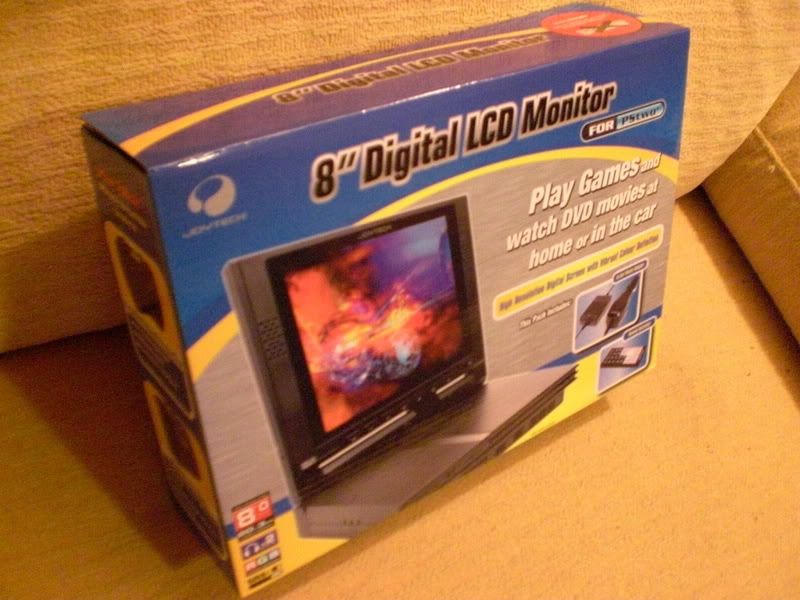


I purchased it on eBay, only 30€... I got it VERY cheap!
Here testing it... the image is great:


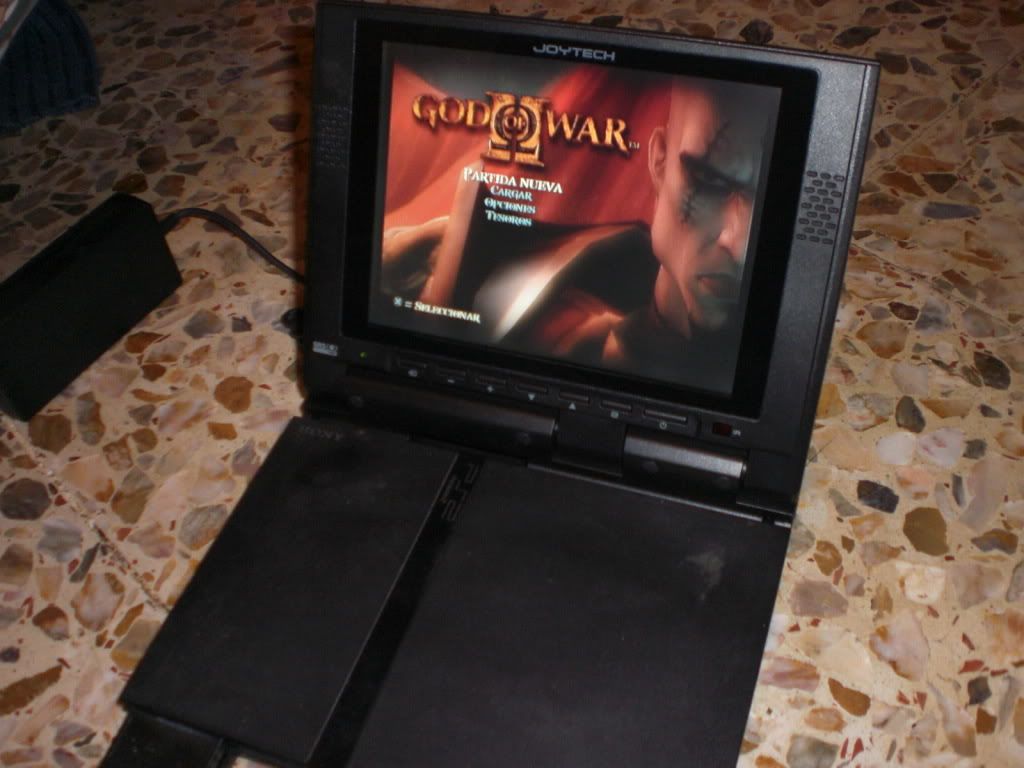
Well, it has an AV port, the one that the PS2 has, so it can get composite, component or RGB signal. As I'm using a mini ITX board at first I could only use the composite signal, because the integrated graphic card that it has doesn't let me change the sync frecuency to 15KHz needed to convert the VGA signal to RGB. But taking a look at it, it has a DB25 port. If I open the case I see that its something like a multi video port, with some signals silkscreened in the board, like VGARED, VGABLUE, etc.


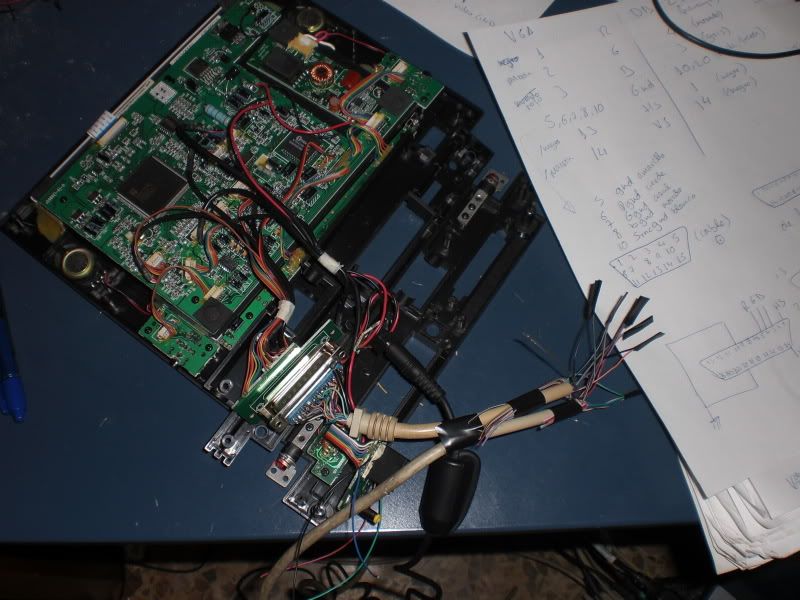
After testing it, and with the help of a friend, using 640x480x60Hz, I got it 8)


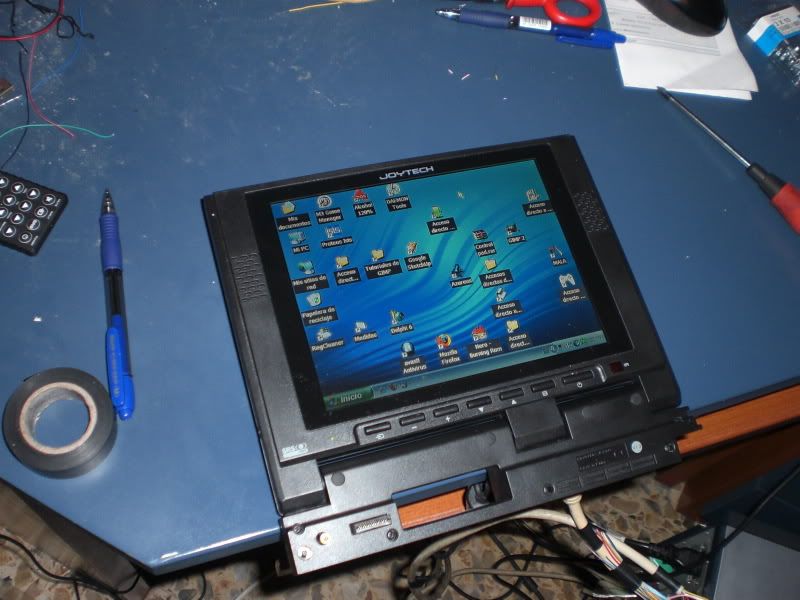
That's still my PC, not the board I'll use. Of course I couldn't resist...


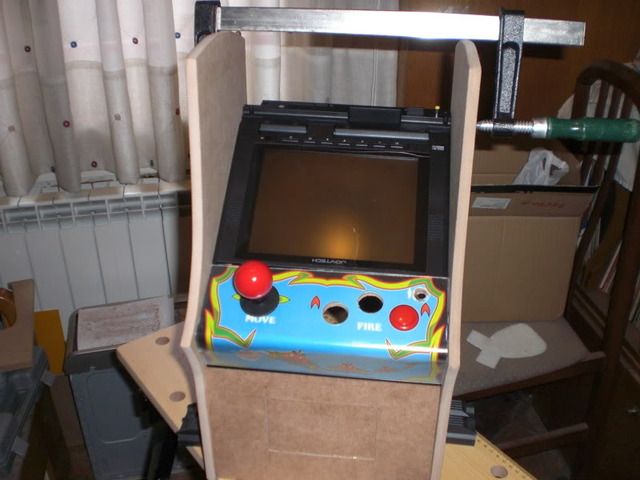
The viewing angle is good only from upside, and this isn't my case, as it will go more horizontal, so I decided to put it upside down, and rotating the image with the video drivers so that I have a good image (here is the cabinet at the beggining, still unpainted and with the first CP I did, but you can see it better):


To fasten it to the cab, I dismounted it and screwed some brackets, so it can be screwed to the laterals of the cabinet:


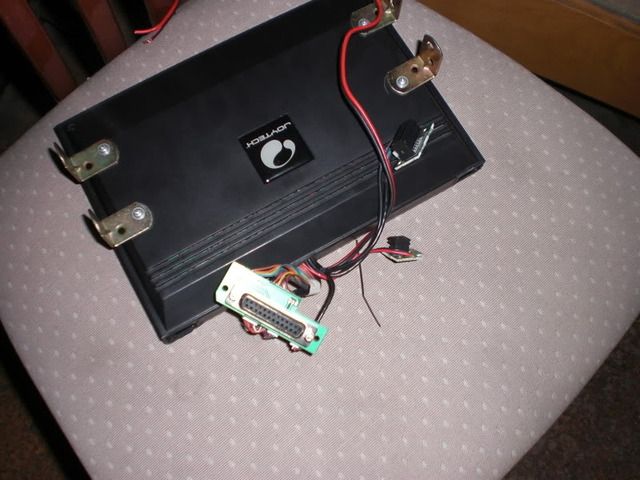
I also had to cut the plastic (it almost doesn't fit into the cab!)
Well, tomorrow more pics, stay tuned.

NIVO

  • Global Moderator
  • Trade Count: (+1)
  • Full Member
  • *****
  • Offline Offline
  • Posts: 1256
  • Last login:August 08, 2022, 12:32:13 pm
  • danny_galaga is my mail man.
    • N.A.M.E. - arcade cabinet project
Re: Mini Galaga project
« Reply #13 on: February 24, 2010, 08:24:53 pm »
outstanding work so far melon  :applaud: This is worthy of anyone owning.

Yvan256

  • Trade Count: (0)
  • Full Member
  • ***
  • Offline Offline
  • Posts: 1039
  • Last login:June 20, 2017, 08:35:41 am
    • Yvan256
Re: Mini Galaga project
« Reply #14 on: February 24, 2010, 09:07:03 pm »
I'm glad to see more and more mini-cab projects! This one is on the right track, too! Amazing work so far!  :cheers:

melon

  • Trade Count: (0)
  • Full Member
  • ***
  • Offline Offline
  • Posts: 33
  • Last login:June 18, 2014, 03:30:26 am
Re: Mini Galaga project
« Reply #15 on: February 25, 2010, 12:52:17 pm »
Well here I go:

The coin door

The idea behind this is to have something like a coin door, but it will have all the auxiliar controls (exit game, pause, volume control, RCA outputs to conect to an external TV...) hidden inside. I only have to push it and it will open, showing those controls, push again and it will close:


I will use two very small hinges and a closure used in some glass doors, you push it until it makes click and it opens, to close you push it again until you hear click and it's closed.


The closure attached:


More shots from inside:


This one from outside, with te coin door open:


I also made a little bezel:


Here in its place, the hinges are hidden:


Well, now after painting I installed a little iluminated button to add credits:


Now lets put the controls in there:


The connections:


You can see the little buttons, the RCAs and the stereo potentiometer, cut directly from the pc amplifier and glued there. All these controls are conected to the rest of electronics with the DB25 conector you can see in the image. Let's say I'm trying to make something like a plug'n play auxiliar control panel.

So, let's see how it all fits (yes, I should clean it  ;D):


Now, if I want to exit the game, go to config, change the volume, or use the AV output, I only have to push it and...


Well, that's the coin door thing, and that's all for now. Hope you like it!

Bender

  • Trade Count: (+1)
  • Full Member
  • ***
  • Offline Offline
  • Posts: 1919
  • Last login:November 28, 2016, 08:12:21 pm
    • Happ to Tron Conversion tutorial
Re: Mini Galaga project
« Reply #16 on: February 25, 2010, 01:01:05 pm »
Love the little coin door!!! :cheers:

shrunkenmaster

  • Trade Count: (0)
  • Full Member
  • ***
  • Offline Offline
  • Posts: 636
  • Last login:July 24, 2022, 10:17:33 am
Re: Mini Galaga project
« Reply #17 on: February 25, 2010, 02:34:15 pm »
What a great little machine this is, so many neat ideas!  :applaud:

emphatic

  • Trade Count: (0)
  • Full Member
  • ***
  • Offline Offline
  • Posts: 2008
  • Last login:Today at 03:08:23 pm
  • -"Suck it, Donny!" -"No, YOU suck it.... more".
    • Emphatic's Video Game Collection
Re: Mini Galaga project
« Reply #18 on: February 25, 2010, 02:35:17 pm »
Very clever stuff. It's all looking super cool btw.  :applaud:

leapinlew

  • Some questionable things going on in this room with cheetos
  • Trade Count: (+4)
  • Full Member
  • ***
  • Offline Offline
  • Posts: 7906
  • Last login:Today at 07:09:32 pm
Re: Mini Galaga project
« Reply #19 on: February 25, 2010, 03:31:26 pm »
Awesome. Looking good.

melarky

  • Trade Count: (0)
  • Full Member
  • ***
  • Offline Offline
  • Posts: 468
  • Last login:July 12, 2020, 12:49:22 pm
  • If I could be any animal, I would be a llama
Re: Mini Galaga project
« Reply #20 on: February 25, 2010, 04:51:26 pm »
That is looking great.  I made a mini Galaga machine a while ago, it was really fun.  Mine had a small game LCD in it with a jakks board.  I actually cut some more of them to sell as kits, they are just sitting in my garage, I never figured out the best way to ship them.  I should probably get on the ball and sell them, I had a ton of people ask me about them.

My post about the one I made is at http://forum.arcadecontrols.com/index.php?topic=68524.0 and I'll attach a pic here of my kid playing the finished one.

Jigenjuke

  • Trade Count: (0)
  • Full Member
  • ***
  • Offline Offline
  • Posts: 482
  • Last login:October 02, 2016, 12:00:50 am
Re: Mini Galaga project
« Reply #21 on: February 25, 2010, 06:46:44 pm »
How did you connect the monitor to the PC?  I would love to hear more about that and see more pics of that process as well.  Great job!!!  Keep up the great worl.

melon

  • Trade Count: (0)
  • Full Member
  • ***
  • Offline Offline
  • Posts: 33
  • Last login:June 18, 2014, 03:30:26 am
Re: Mini Galaga project
« Reply #22 on: February 26, 2010, 07:20:08 am »
That is looking great.  I made a mini Galaga machine a while ago, it was really fun.  Mine had a small game LCD in it with a jakks board.  I actually cut some more of them to sell as kits, they are just sitting in my garage, I never figured out the best way to ship them.  I should probably get on the ball and sell them, I had a ton of people ask me about them.

My post about the one I made is at http://forum.arcadecontrols.com/index.php?topic=68524.0 and I'll attach a pic here of my kid playing the finished one.

Yes, I remember your cabinet. It was one of the things that inspired me to make a mini cabinet. Other things that inspired me were the mini cabinets that a friend of mine makes (sorry, it's in spanish):

http://www.retrovicio.com/foro/showthread.php?t=2788


How did you connect the monitor to the PC?  I would love to hear more about that and see more pics of that process as well.  Great job!!!  Keep up the great worl.

Well, the problem was the pinout of the connector, as there is no documentation, but investigating:


Once the correspondences are found, I only have to get a VGA wire, cut it, and attach a DB25 connector:


I have to get Windows to work in 640x480, 60Hz, the screen doesn't accept another thing. I can't see the POST, but since the Windows boot screen appears I have image.


Ginsu Victim

  • Yeah, owning a MAME cab only leads to owning real ones. MAME just isn't good enough. It's a gateway drug.
  • Trade Count: (+10)
  • Full Member
  • ***
  • Offline Offline
  • Posts: 10093
  • Last login:May 08, 2023, 02:40:58 pm
  • Comanche, OK -- USA
Re: Mini Galaga project
« Reply #23 on: February 26, 2010, 08:24:43 am »
Awesome new pics, but really......horizontal? I wasn't expecting that. Is it too late to go vertical?
The Jakks toy is for horizontal TV's.

Which applies to this project how?

Shortbus

  • Trade Count: (0)
  • Full Member
  • ***
  • Offline Offline
  • Posts: 194
  • Last login:August 26, 2023, 03:20:00 pm
Re: Mini Galaga project
« Reply #24 on: February 26, 2010, 09:58:52 am »
How Frickin cool is that... Welcome!

 :cheers:

Ond

  • Trade Count: (0)
  • Full Member
  • ***
  • Offline Offline
  • Posts: 2265
  • Last login:Today at 09:55:34 am
Re: Mini Galaga project
« Reply #25 on: February 26, 2010, 03:29:32 pm »
I really like this too, mega miniaturised charm factor++  Very inspiring! :lol  I've got spare bits and pieces lying around too, I could make a mini Galaga or, or, a mini....OK, OK, I'll get back and finish off my current project 1st.   :badmood:
« Last Edit: February 26, 2010, 05:25:49 pm by Ond »

SNAAKE

  • Trade Count: (+29)
  • Full Member
  • ***
  • Offline Offline
  • Posts: 3546
  • Last login:January 11, 2024, 12:21:50 pm
  • my joystick is bigger than your joystick !
Re: Mini Galaga project
« Reply #26 on: March 01, 2010, 03:53:34 pm »
what is that control panel clamp thing and where can I buy it online? that looks good for swappable control panel.

saleem

  • Trade Count: (0)
  • Full Member
  • ***
  • Offline Offline
  • Posts: 437
  • Last login:February 07, 2012, 08:03:39 am
Re: Mini Galaga project
« Reply #27 on: March 01, 2010, 05:29:38 pm »
thems toggle catchs/latchs.

just google it.
 :)

melon

  • Trade Count: (0)
  • Full Member
  • ***
  • Offline Offline
  • Posts: 33
  • Last login:June 18, 2014, 03:30:26 am
Re: Mini Galaga project
« Reply #28 on: March 06, 2010, 04:01:38 pm »
Hey, thanks for your comments  ;)
Well, I have more updates:

The electronics

The motherboard

Obviously, as the cabinet is small, I'll have to use a small motherboard. I'm using a mini ITX board, with a dual core Intel Atom, 2GB Memory, a 2.5" 160GB HDD, ahem...


Well, it works, and runs MAME smooth.

For the control panel I'm using one of these:


I dismounted it some time ago, and used the buttons for other projects, so the electronic board is still there:


Those conectors are so bad, better using some good ones:


And from there to the controls.

Now let's try the whole thing:


In that image you can see all the electronics. Many things there, let's explain it:

First, I'll use a mini ITX power source:


It's small, and it's enough for the atom board.
Here the joystick controller board:


For the audio, I'm using the pc speaker's amplifier, but cutting the potentiometer (it's those 6 cables going to the DB25 connector):


I had serious problems with the audio.
The amplifier was made to use his own power suply, a 9V AC voltage (you can see in the board 4 diodes), and I'm using a general 12V input for all the electronics, coming from a switching power supply, wich makes some noise. I replaced the capacitor form the input, using a bigger one. A better coaxial cable and a ferrite attached to it to reduce the noise.

In this image you can see the db25 conector which I'm using to conect the mini coin door (some buttons, from the controller board, the stereo potentiometer, the audio and the composite video output from the motherboard):


You can also see the DC DC adaptor from the 8" LCD (that's the car adaptor dismounted)


There is also a 12V relay. The idea is having a power button in the coin door. That button is directly connected to the motherboard, so when I push the button the motherboard turns on. I get 12V from the PSU to the relay, so whe the motherboard turns on, the PSU outputs 12V, the relay switches and all the electronics have power (audio amplifier, LCD power source)
Well, it's almost finished, stay tuned for more updates.
Hope you like it.

emphatic

  • Trade Count: (0)
  • Full Member
  • ***
  • Offline Offline
  • Posts: 2008
  • Last login:Today at 03:08:23 pm
  • -"Suck it, Donny!" -"No, YOU suck it.... more".
    • Emphatic's Video Game Collection
Re: Mini Galaga project
« Reply #29 on: March 08, 2010, 03:18:15 am »
I like it a lot!  :applaud:

SpaceHedgehog

  • Trade Count: (0)
  • Full Member
  • ***
  • Offline Offline
  • Posts: 937
  • Last login:February 06, 2023, 12:10:24 pm
  • Almost done ...
Re: Mini Galaga project
« Reply #30 on: March 08, 2010, 05:59:03 am »
My wife would go crazy over this .... me too!
Click a pic for a video tour 

patrickl

  • I cannot know for certain which will be tastiest
  • Trade Count: (+2)
  • Full Member
  • ***
  • Offline Offline
  • Posts: 4614
  • Last login:August 27, 2021, 09:25:30 am
  • Yo momma llama
    • PocketGalaga
Re: Mini Galaga project
« Reply #31 on: March 08, 2010, 06:17:04 am »
Wow, nice one, but then I'm biassed since it's my favorite game too, lol.

You should get the BYOAC coins. They have a Galaga ship on it :)

BTW I really hope someone will either remove the incorrect Galaga plans from that site or finally fix them.
This signature is intentionally left blank

severdhed

  • Trade Count: (0)
  • Full Member
  • ***
  • Offline Offline
  • Posts: 2971
  • Last login:October 07, 2022, 04:45:32 pm
  • RIP Dinosaur Hippo
Re: Mini Galaga project
« Reply #32 on: March 08, 2010, 01:01:20 pm »
this is an awesome project.  very innovative.  good job.  i love the way you made the openings for the speakers..did you drill those holes by hand?  that looks awesome
Current Projects:      Zak-Man | TMNT Pedestal | SNES Pi | N64 Odroid
Former Projects:     4 Player Showcase | Donkey Kong | iCade

Trebeck

  • Trade Count: (0)
  • Full Member
  • ***
  • Offline Offline
  • Posts: 418
  • Last login:October 12, 2021, 11:01:21 am
  • "The Arcade" - Build #4
Re: Mini Galaga project
« Reply #33 on: March 10, 2010, 05:40:02 pm »
Very well done indeed!!

 :applaud:

WhereEaglesDare

  • Trade Count: (+4)
  • Full Member
  • ***
  • Offline Offline
  • Posts: 1536
  • Last login:March 24, 2014, 08:47:08 pm
  • Shut Off All The Compactors on the Detention Level
    • My HomePage
Re: Mini Galaga project
« Reply #34 on: March 10, 2010, 05:46:23 pm »


How did you connect the monitor to the PC?  I would love to hear more about that and see more pics of that process as well.  Great job!!!  Keep up the great worl.

Well, the problem was the pinout of the connector, as there is no documentation, but investigating:


Once the correspondences are found, I only have to get a VGA wire, cut it, and attach a DB25 connector:


I have to get Windows to work in 640x480, 60Hz, the screen doesn't accept another thing. I can't see the POST, but since the Windows boot screen appears I have image.


[/quote]

So the DB25 Connector was inside the monitor you bought?

melon

  • Trade Count: (0)
  • Full Member
  • ***
  • Offline Offline
  • Posts: 33
  • Last login:June 18, 2014, 03:30:26 am
Re: Mini Galaga project
« Reply #35 on: March 15, 2010, 02:35:54 pm »
Well, sorry for the delay, been so busy...
this is an awesome project.  very innovative.  good job.  i love the way you made the openings for the speakers..did you drill those holes by hand?  that looks awesome

Yes, I made a template:


And did all the holes by hand with a drill.

So the DB25 Connector was inside the monitor you bought?

Yes the monitor has a DB25 connector. The manufacturer sells an add on (a multi AV thing, with VGA, YPbPr, composite video...) to connect to the screen via the DB25 connetor.

Well, I have some updates.

Having all the electronics ready, it's time to mount it inside the cabinet.
Tha Motherboard will be in the backdoor:


You can also see two little fans to extract the hot air.
Now the rest of electronics at the bottom of the cabinet:


Let's see a shot from behind:


There is the power input jack and an USB port, to add a second player, or to update some things with an external USB drive.

Now the monitor. I had to cut it, it didn't fit inside:


And the monitor screwed to the laterals:


Now let's connect all the things I have at the moment:


Now let's turn it on (cross fingers...)


IT WORKS!!!

Well, I only have to attach the control panel-bezel thing:


I also painted a little piece of plexi that I had lying around:


It's placed between the bezel and the speakers (if I do it with 1cm DM it wouldn't fit, so that you can see there is no much free space there).

Well, it's almost finished (still without the sideart):


Here with his bigger brother:


The frontend (MALA):


More shots:


And here my girlfriend playing some Tetris:


Well, as you can see it's almost finished, I'll post more pics with the machine finished at a classic videogames party last weekend.
Hope you like it.

Encryptor

  • Trade Count: (+34)
  • Full Member
  • ***
  • Offline Offline
  • Posts: 1287
  • Last login:December 21, 2023, 08:01:18 pm
Re: Mini Galaga project
« Reply #36 on: March 15, 2010, 03:50:16 pm »
Very nice! That's a sweet looking little machine you built. Congrats!

Encryptor

Ond

  • Trade Count: (0)
  • Full Member
  • ***
  • Offline Offline
  • Posts: 2265
  • Last login:Today at 09:55:34 am
Re: Mini Galaga project
« Reply #37 on: March 15, 2010, 04:13:54 pm »
Beautiful work! most charming miniature cab I've seen, it must be very pleasing to see it running.

 :cheers:

Ond

melon

  • Trade Count: (0)
  • Full Member
  • ***
  • Offline Offline
  • Posts: 33
  • Last login:June 18, 2014, 03:30:26 am
Re: Mini Galaga project
« Reply #38 on: April 07, 2010, 11:41:54 am »
Hi there.
Sorry for the delay, but now I can say the cabinet is finished!
The following images are from RetroMadrid, a classic videogames party.
Here, near to a vectrex:


Another shot:


And here a friend playing some games:


And that's all, now I'm into another project, here's an advance...


Well, hope you like it  :)

Yvan256

  • Trade Count: (0)
  • Full Member
  • ***
  • Offline Offline
  • Posts: 1039
  • Last login:June 20, 2017, 08:35:41 am
    • Yvan256
Re: Mini Galaga project
« Reply #39 on: April 07, 2010, 11:57:24 am »
Very nice Galaga tabletop, and very interesting micro-pinball project coming along! I'll keep an eye on that new project too!  :cheers: