Main Restorations Software Audio/Jukebox/MP3 Everything Else Buy/Sell/Trade
Project Announcements Monitor/Video GroovyMAME Merit/JVL Touchscreen Meet Up Retail Vendors
Driving & Racing Woodworking Software Support Forums Consoles Project Arcade Reviews
Automated Projects Artwork Frontend Support Forums Pinball Forum Discussion Old Boards
Raspberry Pi & Dev Board controls.dat Linux Miscellaneous Arcade Wiki Discussion Old Archives
Lightguns Arcade1Up Try the site in https mode Site News

Unread posts | New Replies | Recent posts | Rules | Chatroom | Wiki | File Repository | RSS | Submit news


Author Topic: Cocktail Dream (First Build) [Done, basically]  (Read 15655 times)

0 Members and 1 Guest are viewing this topic.

saurian333

  • Trade Count: (+4)
  • Full Member
  • ***
  • Offline Offline
  • Posts: 284
  • Last login:June 10, 2014, 07:58:21 pm
  • "They must've spent tens of dollars on this."
    • My b(uild)log
Cocktail Dream (First Build) [Done, basically]
« on: December 21, 2009, 02:04:39 am »
UPDATE:  Calling it done; see 7/31 posts.

UPDATE:  My cab finally has a name!  (Click the image for info/more)


-------------------------------

So, I discovered this site years ago when I first toyed with the idea of building a cabinet, though I never actually started one.  I've been lurking on and off ever since.  I finally signed up for the forums recently when I decided it was time to build.  There is a wealth of great information here, even if the main site's content is a little outdated.  ;)  I'm very grateful to the site, and as such, it will be the primary outlet for posting my progress!

I recently acquired a bunch of old laptops from my mom's workplace, and to my delight, aside from most having worthless batteries, 4 out of the 5 worked perfectly (actually, the 5th works too, but it's a ThinkPad and has a master password set that can't be cracked).  I decided that one of these would be a great candidate for the cocktail cabinet I've been wanting to build for several years, but never really had the space and a spare PC at the same time.

I have a difficult time doing in-progress pictures for projects like this, but I'm currently at a stopping point, so I thought this would be a good time.  My stopping point is due to the fact that it's f-ing cold in Iowa, and I can't open the basement windows to paint (the furnace is on the fritz at the moment, and I need all the heat I can get).

The cabinet is completely of my own design, with aspects drawn from multiple cabinets I've seen on the net.  This is my first attempt at building a Mame cabinet, as well as at getting a solid Mame configuration running for a particular set of games.  I've been using Mame on and off since about 2000, but never on a dedicated machine.

The most major problem with the software I've run into thus far is that the system I'm installing on is from 2001, and is pretty underpowered.  Since most of the games I want on a cocktail cabinet don't require much, it's quite adequate.  However, I'm using Debian as the OS, and the current build of SDLMame in the repositories is too new to run smoothly on it.  Tried version 119 and still had problems.  Xmame-sdl 106 works much better on it.  The only problem I had with xmame was (I believe) due to the existence of PulseAudio when I first tried it with Ubuntu.  It was causing a serious audio lag even on a Core 2 Duo system.  Now that I'm running a slimmed down Debian Etch with ALSA and no PulseAudio, it's running just fine.

I'll post a list of games later when I've tested them all (just got everything working properly last night)!  I'm starting with a list of games that were included in a 60-in-1 cocktail cabinet I saw posted on Craigslist, and I'm adding a few more that I think are well-suited.

By the way, I made myself a sawboard before starting to build, as described here by DrewKaree.  I used 1/8” hardboard and a 1x4.  It's been INDISPENSABLE.  Thanks for posting that here, Drew!   :cheers:
« Last Edit: July 31, 2010, 11:04:37 pm by saurian333 »

saurian333

  • Trade Count: (+4)
  • Full Member
  • ***
  • Offline Offline
  • Posts: 284
  • Last login:June 10, 2014, 07:58:21 pm
  • "They must've spent tens of dollars on this."
    • My b(uild)log
Re: Untitled cocktail cabinet project
« Reply #1 on: December 21, 2009, 02:13:29 am »
So, without further ado, here are the pics so far!  Sorry some of them are kind of crappy; when I start making real progress, I'll take good ones.


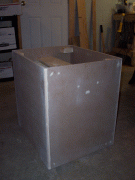
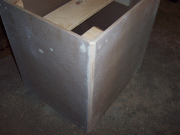
The panels are all 1/2” MDF.  I would have gone 3/4”, but I'm more interested in keeping it easily movable.

Now, the box itself is only about 24” tall.  I realized before even starting that this probably isn't going to be tall enough, but I really wanted the “near-cube” shape, and I can't fit bigger than a 2x4' sheet of MDF in my car!  So my plan there is to add legs/feet of some kind later if necessary.

I'm rather proud of the cab itself.  It's pretty much just a cube, using chunks of 2x4 as braces on the inside, but I'm very satisfied with how the corners turned out.  I used 1/2” 1/4-round base trim and filled the gaps with wood filler.  I also filled all the screw holes and sanded everything smooth as a baby's bottom.  Should look great with paint.
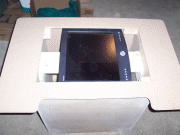


You'll note the top piece has a cut-out for the controls on the long side.  My control box is going to be a 2-player side-by-side; I don't plan on running 2-player alternating games that rely on screen rotation.  Most of the games are vertically oriented, so I'm still trying to decide if I should keep the monitor permanently rotated 90 degrees.  The monitor, by the way, is just an old 17-inch Dell, standard ratio.

Speaking of, note that the monitor cut-out is huge.  That's because I thought I might upgrade the monitor at some point; however, the current monitor rotated 90 degrees will only just fit, so I'm not sure about that anymore.  I don't think I would gain anything for these games with a widescreen monitor.  Since that plan involved using monitor bezels anyway, no harm done.

The top piece will have T-molding around the edge.  No access to a router at the moment, so I'm not in a hurry to get that yet.  Does anyone know of a reliable way to cut the groove without a router, just out of curiosity?


I'm not sure about the control box.  Maybe it should be wider.  Also, anyone have an idea for how I can mount that in a solid but temporary fashion?  I want to be able to remove it fairly easily, for occasional use on another PC.  I don't know about the shape of the CP itself either.  What I've got is probably adequate functionally, but I want to be sure I'll be happy with my CP, which means no compromise on anything but space (it's no good if it won't fit on the cab, after all)!  My CP layout will have 1 stick and 6 (+ start) buttons per player.  I plan to use all Happ controls, including Super 8 joysticks.
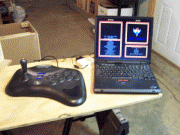


The machine is an IBM ThinkPad T21, with a P3 800MHz and 384MB RAM.  As I mentioned, it's running Debian “Etch.”  I use Fluxbox for my window manager since it's so lightweight.  Mame is implemented using xmame-sdl 106 with the Wahcade frontend.  A great interface, by the way.  There are a few things that I'd have done differently if I'd written my own frontend (which I briefly considered), but I am quite happy with Wahcade overall.  Next to the machine is my Playstation 2 Shadowblade stick connected to a cheap USB adapter.  Temporary stick for “testing” purposes. ;-)  Actually, it's been handy to have a USB stick to help configure the Linux joystick utilities.

On this cab, I think I'm going to go cheap on the coin door/frame and get one just for looks.  If I decide to build an upright one of these days, that one will definitely have a functional coin mech.  Anyway, that will probably go on the right-hand side.  Still contemplating positioning of speaker holes and such.

Please post any comments/ideas/concerns/criticisms/questions you might have!  I'm still very new to this type of project, and I'll take any help offered!  All constructive criticism will be taken seriously!

saurian333

  • Trade Count: (+4)
  • Full Member
  • ***
  • Offline Offline
  • Posts: 284
  • Last login:June 10, 2014, 07:58:21 pm
  • "They must've spent tens of dollars on this."
    • My b(uild)log
Re: Untitled cocktail cabinet project
« Reply #2 on: December 23, 2009, 09:12:15 pm »
Mostly just keeping notes for myself here.  Things to do next:

1) Sort out computer situation.
       The ThinkPad may not be the best solution.  It's working OK for the games I want (mostly older ones...Galaga, Centipede, Pacman, etc.), but I seem to be having a RAM crisis.  I've got all these RAM modules lying around and nearly all of them seem to be bad.  I'm down to 2x128MB in that machine, and one of them does have a bad address, though it doesn't seem to be locking it up anymore.  Thinking I might go with something more powerful anyway to satisfy my craving for some of the newer games (Simpsons and MK mostly) until I can build my upright.  I'd also be able to run the more current SDLMame and other software options.  If I buy a replacement, I have to keep it cheap, so I'm keeping my eyes open for deals.

2) Title/theme.
       I'd like to name the cab, but I don't even know where to begin.  Perhaps I should settle on my color scheme/theme first.  I was originally going to just do basic black, but then thought, "why?"  I'd like to decide on some CP and top artwork, and the rest of the cab will be a solid color to match.

3) Need a router.
       I'm going to have to buy a router fairly soon to cut the groove for the T-molding and the recesses for the joysticks.

4) Controls.
       This is really the next step as far as building.  I need to buy my controls so I can determine whether my layout is going to work and get started on cutting into the CP.  Again, need the router for part of that, but there's no reason I can't start drilling button holes and such.

5) Paint or vinyl?
       Anyone have thoughts on this?  marstc1 used an adhesive vinyl on his SF cab, and I think it looks really good.  That might be the way for me to go since it's much cleaner, easier, and probably nicer-looking than paint.  It does limit my color selection, though, and is more costly.  Can anyone else say this stuff is worth it compared to paint?  Best price I can find on eBay is $18 (shipped) for 10 feet, and that won't be enough for my whole cab.  Two cans of paint is $10 at the most.

I think that's it for now.  Comments?  Anyone?

saurian333

  • Trade Count: (+4)
  • Full Member
  • ***
  • Offline Offline
  • Posts: 284
  • Last login:June 10, 2014, 07:58:21 pm
  • "They must've spent tens of dollars on this."
    • My b(uild)log
Re: Untitled cocktail cabinet project (First Build, finally!)
« Reply #3 on: December 24, 2009, 02:31:49 am »
I think I've decided to paint my cab.  I like the idea of having more freedom with color.  If it doesn't turn out well, I can always sand it smooth and put vinyl over it later.

I'm bored at work, so I tinkered with creating a temporary CP overlay.  I plan to use plexi and keep the overlay fairly easy to change.  I used the Gimp to create this image, following parts of this tutorial as a guide.  I couldn't get the final "glow" effect of the curves to come out quite right, but I like the way it turned out overall.

EDIT:  I intend to use a deep blue or purple on the cab, like the darker part of the CP (just before it fades into black).  Maybe I'll try a gradient on the cab, too, if I feel particularly masochistic at the time.

Here it is, size reduced:
« Last Edit: December 24, 2009, 02:39:46 am by saurian333 »

saurian333

  • Trade Count: (+4)
  • Full Member
  • ***
  • Offline Offline
  • Posts: 284
  • Last login:June 10, 2014, 07:58:21 pm
  • "They must've spent tens of dollars on this."
    • My b(uild)log
Re: Untitled cocktail cabinet project (First Build, please comment!)
« Reply #4 on: December 25, 2009, 04:02:11 am »
Played with CP concept some more and got a mockup done.  I think I'm happy with this layout, at least in theory.  Any suggestions?

Again, the artwork is meant to be replaceable; I like this one for now, though.

saurian333

  • Trade Count: (+4)
  • Full Member
  • ***
  • Offline Offline
  • Posts: 284
  • Last login:June 10, 2014, 07:58:21 pm
  • "They must've spent tens of dollars on this."
    • My b(uild)log
Re: Untitled cocktail cabinet project (First Build, please comment!)
« Reply #5 on: January 01, 2010, 11:23:37 pm »
Rethought my CP layout.  I realized that if I'm going to utilize the extra power of the new MB that will go in the machine for games like MK, I'm going to need more than 4 buttons.  Switched back to my original 6-button layout.  It looks basically the same, except there is an extra pair of black buttons on the right end of the group.  I might move the whole works over a bit so the control groupings are centered, as long as there is still enough space to the left of each joystick for a hand to rest comfortably.

I still haven't ordered controls and stuff.  Buying any more parts or materials is on hold right now until I have more cash; too many other things I need to pay for right now.  Meanwhile, I'm going to finish painting this weekend.  I primed Tuesday and did the first coat of black Wednesday.  It looks like crap, though; the black coat got a bunch of dust (probably sawdust) and other crud stuck in it.  I'll have to sand it down and recoat.  I'm fairly happy with the texture I'm getting from the rollers, so I think one more coat will do the trick if it stays clean.  Main thing I can suggest to a fellow newbie is to make sure your work area is totally clean before you start painting.  I've done a fair bit of painting before, but never had so much dust floating around that I had a problem like this.  I think it has a lot to do with the MDF; cutting that stuff gets pretty nasty.  It isn't as bad as a lot of people here have made it out to be, but it does kick up a lot of dust.  Can't wait to see what a router does to it.

I've also got some carpeting (similar to automotive carpet) that I'm going to line the inside with.  I got very cheap stuff as it was just kind of an afterthought, but I think it will add an interesting element to the cab.  I did finally cut the bottom piece this week and screwed it to the supports inside the box, so I can do the carpet as soon as my paint is dry, hopefully Sunday night.  I also rebuilt my CP box, and I'm much happier with it now.  The side braces are on the outside, the long seam is on the bottom, and I added some curves to the sides.  I was too hasty with the wood putty, so I have a little filling to do before I put the last coat of paint on that piece.  Otherwise, it's looking much better.

Pics will be up sometime this weekend when I get back to working on it.  If anyone's following along, let me know if there's anything in particular you want to see; nothing terribly special going on yet, though.

painterinfo

  • Trade Count: (0)
  • Full Member
  • ***
  • Offline Offline
  • Posts: 117
  • Last login:August 09, 2010, 05:29:27 am
  • Arcade10
Re: Untitled cocktail cabinet project (First Build, please comment!)
« Reply #6 on: January 02, 2010, 12:46:43 am »
Carpet sounds like an interesting idea is it for sound muffling, ie fan noise? Hopefully it won't attract static or dust or make the insides hotter.

Re designing the control panel around the computer, as it is a notebook think of it as a swappable component, couple of years from now you are bound to find a faster replacement computer.

I prefer paint MDF myself (nothing to do with my surname being "Painter") I apply 2 coats of white primer, three coats of colour and then a coat or two of clear. Trick is do thin coats, don't slap it on.

Raw MDF ends I paint first with a coat of 40% White PVC glue mixed with water. After several hours give it a light sanding and then repeat. You can make the surface glass smooth if you want so when you paint it, it is not only tougher you don't get a furry paint finish.
Scripting Wizard

saurian333

  • Trade Count: (+4)
  • Full Member
  • ***
  • Offline Offline
  • Posts: 284
  • Last login:June 10, 2014, 07:58:21 pm
  • "They must've spent tens of dollars on this."
    • My b(uild)log
Re: Untitled cocktail cabinet project (First Build, please comment!)
« Reply #7 on: January 02, 2010, 09:19:33 am »
Hi painterinfo; thanks for your comments!

Carpet sounds like an interesting idea is it for sound muffling, ie fan noise? Hopefully it won't attract static or dust or make the insides hotter.

Mostly just because I thought it would be interesting, but partly for sound dampening.  Hadn't really thought about dust, but with proper ventilation, that shouldn't be a problem anyway.

Re designing the control panel around the computer, as it is a notebook think of it as a swappable component, couple of years from now you are bound to find a faster replacement computer.

Yeah, as I said a couple of posts ago, I'm already looking at using something else.  The 800MHz Pentium just isn't cutting the mustard.  But as far as designing around it, that's not really what I'm doing at all.  The cab is basically just a box with plenty of room for a different computer, sound system, etc.

I prefer paint MDF myself (nothing to do with my surname being "Painter") I apply 2 coats of white primer, three coats of colour and then a coat or two of clear. Trick is do thin coats, don't slap it on.

Raw MDF ends I paint first with a coat of 40% White PVC glue mixed with water. After several hours give it a light sanding and then repeat. You can make the surface glass smooth if you want so when you paint it, it is not only tougher you don't get a furry paint finish.

I used a roll-on latex paint since I'm not equipped for spraying in the basement right now.  I did two coats of grey primer and one black so far.  Hard to do a particularly "thin" coat with this stuff, but I do try not to get sloppy with it.  If I paint my next project, I will probably spray it and attempt to get a nice glossy finish to it.  Interesting note about the glue solution on the raw ends; in this particular case, I don't have any raw edges that won't be covered with T-molding, but I will definitely keep that tip in mind!

Thanks again for the advice!

saurian333

  • Trade Count: (+4)
  • Full Member
  • ***
  • Offline Offline
  • Posts: 284
  • Last login:June 10, 2014, 07:58:21 pm
  • "They must've spent tens of dollars on this."
    • My b(uild)log
Re: Untitled cocktail cabinet project (First Build, please comment!)
« Reply #8 on: January 02, 2010, 09:43:56 am »
Went downstairs for a smoke and decided to test-fit my CP on top of the newly remodeled box...

I should have done that sooner.  Design FAIL.  The curves come down too far, and it leaves a gap.  :banghead:  I'll take pics later to illustrate (I work the night shift, so it's past my bedtime right now).  Man, I'm an idiot sometimes.  Oh well, live and learn, crash and burn, etc.  Since the back piece comes off easily, I think I'll just trim that down an inch or so to reduce the angle (which was honestly a bit too much anyway) enough to at least close the gap.

In the immortal words of Homer Simpson:  "D'OH!!!"

saurian333

  • Trade Count: (+4)
  • Full Member
  • ***
  • Offline Offline
  • Posts: 284
  • Last login:June 10, 2014, 07:58:21 pm
  • "They must've spent tens of dollars on this."
    • My b(uild)log
Re: Untitled cocktail cabinet project (First Build, please comment!)
« Reply #9 on: January 03, 2010, 08:03:10 am »
(Edit)
First off, please excuse the poor quality of some of the pics.  My camera likes to decide at random what should be in focus.  Also seems I had some dust on my lens...ack.

So, here you can see the cab with its first coat of black, with the bad spots sanded down (i.e. pretty much the whole thing) and ready for another coat (tomorrow):


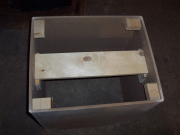
Here's another inside shot, with the bottom in, and another cross-piece that I'll use for a HDD shelf or whatever.  Basically I figured it wouldn't hurt to have in there.


Here's the new CP box, also ready for second coat of paint:


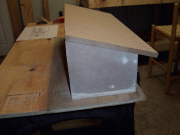
Note here the gap between the CP and the curved side.  I still can't believe I didn't think of this and left 1/2 inch in both the front and back, the exact thickness of the CP.


I figure there are 3 options for dealing with that (other than leaving it alone, since I don't consider that an option).
1 -- Cut about an inch off of the back piece (and the braces you see in back) so that the bottom edge of the CP lines up with the top of the curve.  This would require T-molding all the way around the CP, where I had really only planned to put it in front where it's visible.  That doesn't bother me, though.  I'll be ordering plenty of extra molding when I get that far.  Would look roughly like so (ignore the fact that it sticks out farther in front for the moment):


2 -- Cut more off the back piece so the CP lies flat.  I'm not sure I want it flat, though.


3 -- Cut some off of both the back and front, so that the top of the CP sits at or below the curved edge.  That would probably look best, but I don't think I want the front of the side piece to come up above the CP surface.

I think I like option 2 best, but I'd like to know what others think of how it would look.

Tomorrow will be the day for the second (probably last) coat of paint.  I plan to put it on with a sponge brush; that way it can go on a little thinner and hopefully still not streak, plus I won't get all the crap in it like I did with the roller.  If that doesn't work out, I'll probably just sand again, then break down and spray it in the other part of the basement where I can open the window.  Problem with opening windows right now is that it's about -8 f***ing degrees (Fahrenheit; that's -22C for those across the pond) and windy, and no sign of warming up much for at least a week.  I'll do it if I have to, though; should be able to keep it warm enough in the basement for drying until it's aired out a bit.
« Last Edit: January 03, 2010, 08:05:14 am by saurian333 »

painterinfo

  • Trade Count: (0)
  • Full Member
  • ***
  • Offline Offline
  • Posts: 117
  • Last login:August 09, 2010, 05:29:27 am
  • Arcade10
Re: Untitled cocktail cabinet project (First Build, please comment!)
« Reply #10 on: January 04, 2010, 05:46:22 am »
Shivers that's cold -22. Here it is a balmy 22night 29Day (Celsius) ATM.

My 2 cents re the control panel box, I would lower the front and back, you just have to make sure the controls have enough clearance underneath.

Re the painting, I think you will need several more coats considering you sanded it back to the undercoat in places. When you sand it, use fine grit wet and dry and a sanding block to get the best results. But I guess you can't just pop down to the hardware store when it's 22 below.
Scripting Wizard

saurian333

  • Trade Count: (+4)
  • Full Member
  • ***
  • Offline Offline
  • Posts: 284
  • Last login:June 10, 2014, 07:58:21 pm
  • "They must've spent tens of dollars on this."
    • My b(uild)log
Re: Untitled cocktail cabinet project (First Build, please comment!)
« Reply #11 on: January 04, 2010, 10:12:09 pm »
My 2 cents re the control panel box, I would lower the front and back, you just have to make sure the controls have enough clearance underneath.

Yeah, that's part of the problem: I don't know how much room I have to play with yet.  I plan on using Happ Super 8 sticks...how much room do I need for those?  Just by eyeballing pics, I'm sure my box is tall enough as it is, but I don't know how much lower I can make it.  Also, I really like the sides the way they are, and I'd have to cut/grind the front of those down as well if I don't want the corners sticking up higher than the CP.

Re the painting, I think you will need several more coats considering you sanded it back to the undercoat in places. When you sand it, use fine grit wet and dry and a sanding block to get the best results. But I guess you can't just pop down to the hardware store when it's 22 below.

Well, I put one more coat on last night, thinner than the first but still somewhat thick.  Some spots are indeed a bit light.  I might try touching it up, or just do another coat if I have enough paint left.  Right now it's just about at the "good enough for me" state, but I want it to look better than that.  Re: sanding -- I don't actually want to sand it smooth, because I want the "bumpy" texture.  I already lost a little of that with the last coat.  That's another factor that's telling me, "f*** it, the next cabinet is getting laminate."  But that decision is for much later.

Actually, I can "just pop down to the hardware store" in this weather, having lived in the midwest US my whole life.  You get used to it. ;)  The bigger problem is working the night shift and being on a nocturnal schedule.  The weather is meaningless when the store is closed. :(  If Menards was open 24 hours a day, they'd be the best store ever!

leapinlew

  • Some questionable things going on in this room with cheetos
  • Trade Count: (+4)
  • Full Member
  • ***
  • Offline Offline
  • Posts: 7906
  • Last login:August 19, 2024, 07:21:29 pm
Re: Untitled cocktail cabinet project (First Build, please comment!)
« Reply #12 on: January 06, 2010, 11:49:13 pm »
Looking really good dude.

The painted cab will look good. I've started laminating the cabinets, because it's quick, easy, durable and a great finish. It's definitely pricey.

Keep up the good work.

saurian333

  • Trade Count: (+4)
  • Full Member
  • ***
  • Offline Offline
  • Posts: 284
  • Last login:June 10, 2014, 07:58:21 pm
  • "They must've spent tens of dollars on this."
    • My b(uild)log
Re: Untitled cocktail cabinet project (First Build, please comment!)
« Reply #13 on: January 07, 2010, 04:37:14 am »
Looking really good dude.

The painted cab will look good. I've started laminating the cabinets, because it's quick, easy, durable and a great finish. It's definitely pricey.

Keep up the good work.

Thanks!  I'd really like to laminate, or at least do a much nicer paint job.  But this was never intended to be my first and only, mainly a practice run.  That's not to say I don't care how it looks, though.  Just that I don't mind leaving lots of room for improvement next time around.

On Friday, I'm going to get some hinges, finish up that CP box, and work on the monitor and bezel.  Soon I'll get my controls and new computer, and then the real fun can begin! :D

painterinfo

  • Trade Count: (0)
  • Full Member
  • ***
  • Offline Offline
  • Posts: 117
  • Last login:August 09, 2010, 05:29:27 am
  • Arcade10
Re: Untitled cocktail cabinet project (First Build, please comment!)
« Reply #14 on: January 08, 2010, 04:43:18 am »
Hinges are fun if you get them to swing right. My first set of hinges for my last cab I had to swap them twice to get the right ones.

Working on the control panel would be perfect cold weather type of work I would think. Painting sucks even in the best conditions.

Computer is the only thing I have not put much thought into yet for my cab. I have a couple of old ones lying around and a copy of MAME .036 which works on older machines.

Anyway look forward to your next set of pics.
Scripting Wizard

saurian333

  • Trade Count: (+4)
  • Full Member
  • ***
  • Offline Offline
  • Posts: 284
  • Last login:June 10, 2014, 07:58:21 pm
  • "They must've spent tens of dollars on this."
    • My b(uild)log
Re: Untitled cocktail cabinet project (First Build, please comment!)
« Reply #15 on: January 08, 2010, 05:30:50 am »
Hinges are fun if you get them to swing right. My first set of hinges for my last cab I had to swap them twice to get the right ones.

Working on the control panel would be perfect cold weather type of work I would think. Painting sucks even in the best conditions.

Computer is the only thing I have not put much thought into yet for my cab. I have a couple of old ones lying around and a copy of MAME .036 which works on older machines.

Anyway look forward to your next set of pics.

FYI, if you didn't get it from my previous posts, .108 was working well on the 800MHz machine.  I might still try to salvage that for the cab, at least temporarily, if I can find more working RAM lying around.  (I do have a slightly faster machine with 512MB that works much better, but it's kind of in use in the basement; I might be able to live with swapping those two.)  Deciding on specs is probably the easiest part (at least it was for me, thus far), once you resign yourself to the fact that even the most powerful machine can't emulate ALL of the games!  Don't need to worry about 3D video, most sound boards are adequate, 40GB HDD is enough for the bare minimum (though I wouldn't go less than 160GB), and .5-1GB of RAM seems to be enough for most games.  I haven't tried many newer ones or the ones that seem to be the biggest resource hogs, but I don't plan to run many (if any) of those on this cab.

Yeah, I would like to do the control panel now and wait for at least somewhat warmer weather to finish the painting.  Need the funds, though.  I would hold off on the KeyWiz and get just the controls for now...
...but then I'd have a complete CP that I couldn't do anything with!   :blowup:

Meanwhile, I have tinkered with artwork for the top, having come up with a theme/title finally!  That should be posted today or tomorrow.  I'll want some opinions/suggestions for fine-tuning or additions.
« Last Edit: January 09, 2010, 05:17:02 am by saurian333 »

saurian333

  • Trade Count: (+4)
  • Full Member
  • ***
  • Offline Offline
  • Posts: 284
  • Last login:June 10, 2014, 07:58:21 pm
  • "They must've spent tens of dollars on this."
    • My b(uild)log
Re: Untitled cocktail cabinet project (First Build, please comment!)
« Reply #16 on: January 09, 2010, 05:57:54 am »
OK, no new cab pics just yet; my camera isn't working with my Linux box at the moment.  I'll figure it out later, or do it from my desktop.

Today I've done the last coat of paint (I think it's good now!), cut a monitor bezel out of poster board (turned out wrong, but I might be able to salvage it), cut an overlay for the top from the same poster board, and drilled out the monitor mount.  Next is to fix the angle on that CP, as soon as the paint is dry down there so I don't get dust in it again when I cut.

I did promise pics, and I have handy the artwork I've designed so far.

The story with my chosen theme is that I was trying to think of a retro-styled theme that could have some stupid, catchy, vaguely arcade-related name to go with it.  Coming up with a name for a project in any medium is a curse, and I've spent weeks trying to come up with something.

While trying to think of something that might relate to the fact that I'm building a cocktail cabinet, I eventually thought of the movie "Cocktail."  I suddenly realized it was perfect; the bar's name fit, and neon lights would be a cool, 80s kind of theme.  So, here it finally is!

painterinfo

  • Trade Count: (0)
  • Full Member
  • ***
  • Offline Offline
  • Posts: 117
  • Last login:August 09, 2010, 05:29:27 am
  • Arcade10
Re: Cocktail Dream (previously untitled) (First Build)
« Reply #17 on: January 09, 2010, 06:47:41 am »
Great name for a cocktail machine.

....cut a monitor bezel out of poster board (turned out wrong, but I might be able to salvage it), cut an overlay for the top from the same poster board, and drilled out the monitor mount....

Have you decided on what glass to get and how to clamp it down? I used some aluminium angle strips for mounting the glass on my cocktail machine, but it was not a traditional type build.

Scripting Wizard

saurian333

  • Trade Count: (+4)
  • Full Member
  • ***
  • Offline Offline
  • Posts: 284
  • Last login:June 10, 2014, 07:58:21 pm
  • "They must've spent tens of dollars on this."
    • My b(uild)log
Re: Cocktail Dream (previously untitled) (First Build)
« Reply #18 on: January 09, 2010, 09:23:09 am »
Have you decided on what glass to get and how to clamp it down? I used some aluminium angle strips for mounting the glass on my cocktail machine, but it was not a traditional type build.

That's a nice looking cab. :)

I'm planning to use plexi, and my thought is to just drill/bolt through in the back, since that will be the best way to attach the hinges.  I would use piano hinges through the edge of the board, but my MDF is only half-inch, and I'm afraid it won't hold.

Lexan or glass are just too expensive for my taste, at least for this build.  I'm going fairly cheap all-around on this one, since it's my first, and because my funds are limited.  I'm going to post a cost list when I'm all done, and I'm hoping it won't be too crazy.

wp34

  • Trade Count: (+3)
  • Full Member
  • ***
  • Offline Offline
  • Posts: 4794
  • Last login:April 10, 2022, 09:48:19 pm
Re: Cocktail Dream (previously untitled) (First Build)
« Reply #19 on: January 09, 2010, 02:44:44 pm »
Very nice young Flanagan!   :applaud:

saurian333

  • Trade Count: (+4)
  • Full Member
  • ***
  • Offline Offline
  • Posts: 284
  • Last login:June 10, 2014, 07:58:21 pm
  • "They must've spent tens of dollars on this."
    • My b(uild)log
Re: Cocktail Dream (previously untitled) (First Build)
« Reply #20 on: January 10, 2010, 01:46:08 am »
Thank you. :)

As promised, here (finally) are the pics from yesterday's work (nothing done tonight so far, will probably fix up the CP later).


I should have bought one of these in the first place.  This finally gave me the right amount of control to get a decent coat of paint.  It also got pretty damned close to the texture I was going for.


The monitor mounting board.  I drilled it out with a 3/16, but the 4mm screws I had weren't quite long enough to go through the board.  So I sunk the holes about halfway with a 5/16 forstner bit.


Once I had the monitor mounted and in the cab, I realized it wasn't level (lower on the bottom edge, to fit the stock stand's mounting plate).  Actually, I knew that already, but I realized it was going to be a problem while working on the bezel.  So I put those large-headed screws in just inside the mounting screws on the bottom, and tweaked them until the monitor sat quite level.


Paint mostly dry, looks much better than before.  Once again, please ignore the dust on my camera lens; that only seems to happen when I take pictures of the cab (maybe it's the lighting down there, too).


Poster board overlay for the top.  Eh.  I'm going to do something different when I figure out what to do about the bezel.  I didn't even take one of the bezel, because it looks like ass.  Anyway, the bezel is just stapled to the edge of the monitor opening, so this piece covers that up (and saves me from having to paint it again).  I'll probably end up using cloth or vinyl or something; it will have plexi over the top eventually, anyway.

Notice the seams at top and bottom; I plan to cover those with the artwork.  Yes, there will be lots of overlapping pieces visible on this thing, but all the artwork/overlays are designed to be replaceable, so the actual materials can be temporary.  Anyway, top and bottom center will get the neon MAME logo I posted, and the bottom corners will each have the title logo.


The original bezel pieces.  I put all kinds of time, math, and cutting into these, and they came out totally wrong because I transposed the widths.  :banghead:  The replacements I cut came out wrong, too.  I can't decide if I want to cut completely new ones (PITA) or dress up the existing one.

So that's it, so far.  Tonight I'll be doing a little work, and playing some more games.  I can't wait to get my controls ordered, man; these games are rough with a keyboard, or even a gamepad.

saurian333

  • Trade Count: (+4)
  • Full Member
  • ***
  • Offline Offline
  • Posts: 284
  • Last login:June 10, 2014, 07:58:21 pm
  • "They must've spent tens of dollars on this."
    • My b(uild)log
Re: Cocktail Dream (previously untitled) (First Build)
« Reply #21 on: January 10, 2010, 07:14:55 am »
A few more pics.  Only put in a couple hours tonight.


Fixed the CP box.  I think this is how it will stay.  Opinions?  There will be T-molding around the entire edge now; I trimmed the panel so that it will fit snugly with T-molding on both sides (note the bits of a sample shimming each side).  Look at the rounded corners of my plexi.  Ha...you can barely tell it's there except in the close-up, huh?  ;D  I'm getting better with that stuff.  I really hate plexiglass, but I've discovered that what I was originally taught was basically wrong.  If you're cutting this stuff yourself, make sure you score it like a MF-er, and sandwich it between two boards right at the score line when you snap it off.  You'll get a clean break every time that way.  I did the corners with a Dremel.


Thought I'd show the bezel as long as I'm taking pics.  It looks worse in person.  I just stuck the masking tape on there to hold it in place for now.  Definitely need to do something else; the "black" poster board doesn't match my black paint, or even the black ink of a Sharpie.  Not even close.


More stuff to go in later.  There's the roll of carpet I mentioned; going to line the inside with it.  Those cathodes were actually purchased for my current PC, but they shipped me the wrong color, which I didn't know until I plugged them in.  I didn't want to deal with them after the fiasco I'd already been through; see below.  The fan is pretty standard, as is the grill (will be for the back of the cab).  Their sizes don't actually match, but that's what I had lying around.  I'll either rig something up or buy another grill.  The large brass door hinges will be for the lid, and the smaller ones for the CP.

The fiasco I mentioned:  I recommend against Silicon Valley Compucycle (svc.com).  They have a reasonable stock, and great prices on fans and such, which is what lured me in.  I had ordered 4 fans with green LEDs for my PC case, and they shipped me red.  It took them a pretty long time to respond, at which time they told me the green ones were out of stock and wouldn't be back in (funny they don't take them off the site when that happens).  So I got some better ones as a replacement, after another fairly long wait.  This whole thing set my case project back by about a month, and I was quite upset.  What's worse is one of the replacement fans they sent me was dead.  SilenX fans, normally about $12 a piece (and that's a good price), and one out of four is DOA.  Then I found out the cathode was the wrong f-ing color, too.  I couldn't bring myself to contact them again.

What do you guys think of the cathodes, anyway?  I plan to mount it above the CP; should be just barely out of sight.  I ask because that particular one is red/green/blue (in sections), but I also have a UV one around here somewhere that's not in use anymore.  I don't necessarily plan to have anything UV-reactive on the CP, but it might still look better than the multi-colored thing.

saurian333

  • Trade Count: (+4)
  • Full Member
  • ***
  • Offline Offline
  • Posts: 284
  • Last login:June 10, 2014, 07:58:21 pm
  • "They must've spent tens of dollars on this."
    • My b(uild)log
Re: Cocktail Dream (previously untitled) (First Build)
« Reply #22 on: January 12, 2010, 09:44:15 am »
No pic yet, but I mounted the control box on the cab.  I used machine screws with washers, with the nuts on the CP side.  My plan is to epoxy the screws inside the cab so that the box is relatively easy to remove.  Haven't decided for sure yet, though; I might just build a separate box that I can stick the CP on (if I want to use it on my desktop or whatever).

It was getting so close to looking like an actual cab (rather than just a black box) that I couldn't resist trying it out. :)  Connected it to an external machine, hooked up my Shadowblade stick, and fired up MAME.  I wanted to do this anyway, to see what the overall feel was like, and determine how tall the legs will have to be.  I'm glad I did: it almost made me rethink the entire idea of a cocktail cab!  I can't say I like it much.  The viewing angle is all wrong.  Call me stupid for wanting to build one of these, but I can't recall ever actually playing on a cocktail machine before :( though I have seen them.  That must be part of what intrigued me in the first place.

I do still like the style, though, so what I'm thinking is to re-mount the monitor on a slight incline to get a more comfortable angle.  If I remove those leveling screws I put in, and prop up the whole works until the bezel (the factory one) hits the lid of the cab, that might be just enough.  If not, I'll have to wait until I get a router, and cut an angle into my mounting braces.  In any case, just changing the angle should be enough.  It was playable as it is, but it just felt unnatural.

Incidentally, I determined that the legs will need to lift it up at least 6-8" for the CP to clear my kneecaps.  That alone might help the viewing angle, too.  I'll try boosting the cab up about that much and test again before I go modifying the monitor mount.

saurian333

  • Trade Count: (+4)
  • Full Member
  • ***
  • Offline Offline
  • Posts: 284
  • Last login:June 10, 2014, 07:58:21 pm
  • "They must've spent tens of dollars on this."
    • My b(uild)log
Re: Cocktail Dream (previously untitled) (First Build)
« Reply #23 on: January 17, 2010, 08:12:39 pm »
Just a few pics from last night.  After dinner (breakfast, technically) I'll be back to work, and post more pics later.

First off, I finally bought a router!  Actually, a laminate trimmer, which basically = small router.  It works great, and I wish I'd bought it from the very beginning.  Menards put it on sale for $22; money well-spent.  Also bought a set of bits that day, and a second one tonight, for a total of 18 bits for $20 (god, I love that store).  The router w/ flush-trim bit is my new favorite tool.  Check out how well it works on plexi!  (Note:  it makes a giant mess of plastic shavings, but it's well worth it.)


Here's how I put the hinges on the CP.  I didn't want them showing really, but I couldn't figure another way to have hinges on the inside (piano hinges were a no-go, since I can't screw into the edge of the 1/2" MDF).  Since it's underneath that lip, it shouldn't be too obtrusive anyway.  Sorry for the blurry pic.


I was less worried about the hinges showing on the back, so I was cool with using these cheap satin brass door hinges.  They look fairly nice anyway.  But first, while once again trying to center the top piece over the monitor, I got sick of having to measure every time I put the monitor in.  So, I got it in place one last time, then grabbed a couple of these nylocks that I have a ton of, and screwed them in as stoppers with regular wood screws.  Works very well.


Finally, I brought out the router again and sunk two slots in the back side for the lid side of the hinges to rest in (so that the lid sits flush).  I'll have to shim those to the back of the cab about 1/4" to close the gap; I'm going to try just using some washers.  Note that unfortunately, the barcode sticker on these hinges is on the side that's going to be showing.  :angry:  Tonight, it'll be Goo-Gone to the rescue!


More to come later (early Mon. morning, for those of you on "normal person" time).

painterinfo

  • Trade Count: (0)
  • Full Member
  • ***
  • Offline Offline
  • Posts: 117
  • Last login:August 09, 2010, 05:29:27 am
  • Arcade10
Re: Cocktail Dream (previously untitled) (First Build)
« Reply #24 on: January 17, 2010, 11:15:27 pm »
Quote
I don't necessarily plan to have anything UV-reactive on the CP

What about your hands? Is the UV light strong enough to give you a tan?


Scripting Wizard

saurian333

  • Trade Count: (+4)
  • Full Member
  • ***
  • Offline Offline
  • Posts: 284
  • Last login:June 10, 2014, 07:58:21 pm
  • "They must've spent tens of dollars on this."
    • My b(uild)log
Re: Cocktail Dream (previously untitled) (First Build)
« Reply #25 on: January 18, 2010, 05:33:02 am »
Quote
I don't necessarily plan to have anything UV-reactive on the CP
What about your hands? Is the UV light strong enough to give you a tan?

:lol  Hadn't thought about that; that would be amusing.  Somehow, I doubt it.

saurian333

  • Trade Count: (+4)
  • Full Member
  • ***
  • Offline Offline
  • Posts: 284
  • Last login:June 10, 2014, 07:58:21 pm
  • "They must've spent tens of dollars on this."
    • My b(uild)log
Re: Cocktail Dream (previously untitled) (First Build)
« Reply #26 on: January 19, 2010, 01:37:12 am »
Sorry I'm late. :)

Starting to come together now.  All I need is a slot cutter and a hole saw, and I'll be able to finish the build; then it's computer and controls time.


OK, I was hoping for a reasonable temporary solution for my overlays.  I think I'm just going to call this a "mockup." *cough*

That is black wrapping paper.  Looks OK in the photo, actually (other than the logos, which are laser prints cut and pasted on), but close up, you can see the texture it has.  Unfortunately, the only black wrapping paper I could find was made to be reversible, and it has a silver geometric pattern on the back that sort of gives an embossed look to the black side.  Anyway, this is good enough for me until I can get something printed up professionally.  I don't really want to spend the money on a vinyl print (not on this cab), and a 2x3 paper printout is not worth the $40+ I keep getting quoted.  Anyone have another idea?  I wish I was still in Madison; my school has a sweet color plotter/printer that would do a pretty good (especially for free) job.  On the other hand, I couldn't have built the thing in my apartment. ;)

I will probably just get the CPO done on decent paper; it's only 22x10.5, so that shouldn't be as expensive...right?


The hinges will have to be mounted with bolts.  Yeah, six 3/8" screws might have done it, but I feel more comfortable with something sturdier.  So I picked up some acorn nuts for the top.  If I decide I don't like them later on, I'll get some carriage bolts and paint the heads black.


The hinges in their new homes.  Note the washers used as spacers (I wanted some actual shims, but couldn't find any that would work).  By the way, that left one (top of the picture) was fixed with a little "persuading." ;D


I realized I haven't posted a pic of the whole works since I put the control box on, so here.  I will post pics of the whole thing together when I get the top bolted on (after I cut the slot, which will hopefully be this weekend).

EDIT:  I don't think I have the patience or ambition for such a project, but I keep looking at that top piece and thinking it would be an excellent candidate for the ELWire idea drventure mentioned on his build page the other day.  Could you see those neons actually lighting up?  How sweet would that be?
« Last Edit: January 19, 2010, 01:42:49 am by saurian333 »

saurian333

  • Trade Count: (+4)
  • Full Member
  • ***
  • Offline Offline
  • Posts: 284
  • Last login:June 10, 2014, 07:58:21 pm
  • "They must've spent tens of dollars on this."
    • My b(uild)log
Re: Cocktail Dream (previously untitled) (First Build)
« Reply #27 on: February 14, 2010, 02:21:07 pm »
OK, it's been almost a month, so time for an update.

There will be pics soon.  I finally ordered/received the rest of my controls (previously got a few on a trade; thanks again, HarumaN!) a couple of days ago, so I'll be doing the wiring this week.  I got the T-molding last weekend (came from t-molding.com; great service there, BTW).  Also ordered a MB/CPU (relatively low-end at 2.2GHz, but the price was right), which should be along in a couple of days.

The CP is all drilled out, has the sticks and a couple of the buttons installed.  All of the T-molding (also ordered/received last week) slots are cut.  The CP has got solid black molding and is all done.  Artwork looks cheap and has a little sawdust caught between it and the plexi, but it's going to be replaced eventually, anyway.

The top piece is having its "bezel" painted, so waiting for that to totally dry before putting the plexi back on.  The bezel looks awful.  I made it out of foam core, and it's better than the cardboard, but still crap.  I'm still not sure what to do for a final piece, but I wanted to paint it black so that it looks somewhat like the final product should.  Still haven't gotten that artwork printed either, so that's going to be sub-par for a while, too.

Cutting the slots was a ---smurfette---.  A 1/16" cutter makes too wide of a groove for the smaller (apparently standard) size T-molding.  :banghead:  Who knew there was that much difference in using the recommended 3/64"?  Anyway, I don't have a 3/64", so I ended up running a strip of duct tape over the groove before tapping the molding in.  Works perfectly.

The sides of the CP box were a different story.  On the first cut I tried to make, the damned router slipped and took a big chunk out of the side.  :angry:  So I spent a good portion of time cutting a new piece.  I don't have any of the latex paint left that I used on the rest of the cab, so I used the "matching" spray paint I bought for the bezel.  It's probably not ever going to actually match.  Grr.  Also, at the very top where I have a curve right before the edge?  That was a bad idea.  Ended up using a framing nail to get the end of the molding to stay in.  Yesterday was just not my day.  :badmood:

On the plus side of things, I finally bought myself a new TV on Friday.  I knew I'd bought the right one when we were just barely able to fit it in the back seat of my car!  Turns out that 42" is plenty big enough for the distance we're sitting from it, too.  So this week, I'll be doing my wiring on the couch while watching my Blu-rays as God intended them to be watched.  :applaud:

saurian333

  • Trade Count: (+4)
  • Full Member
  • ***
  • Offline Offline
  • Posts: 284
  • Last login:June 10, 2014, 07:58:21 pm
  • "They must've spent tens of dollars on this."
    • My b(uild)log
Re: Cocktail Dream (First Build) [Done, basically]
« Reply #28 on: July 31, 2010, 08:50:09 pm »
Wow, it's been a long time since I updated this thing.  I actually "finished" the cab a long time ago.  I kind of lost ambition to put final touches on it when...well...

I decided I don't really like the cocktail configuration after all. :(

Here are some pics that I took, for the sake of posterity.


The first one shows my power button on the back right of the unit (pretty proud of that; it's wired inline with the existing power switch, completely non-destructive), and also gives an idea of the paint texture.  Roughly what I was going for, but not quite there.  Also shows some scratches (from cutting with a razorblade; that was dumb), but they're on the underside, so I wasn't too concerned.

The last one shows the Wahcade (for Linux) frontend, which I'm quite pleased with.  The only thing that bugs me is that when I test-drove this thing on that old laptop (also running Ubuntu), I had everything working perfectly.  All the key mappings worked, everything loaded at boot, 100% cool.  Now that I have a dedicated machine in place, I can't get the button mappings to load automatically, the Wahcade shortcuts aren't working, and I can't properly exit a game (it starts right back up for some reason, like there's a button held down somewhere).  I haven't had the ambition to figure out all the details.

I'm relatively happy with the way the build turned out, especially for what was really kind of a dry run that involved very little planning ahead (apart from overall measurements).  I really could/should have done better on the paint job, but it looks all right for the most part.  If I kept it, I'd definitely do something about the bezel, and probably paint the legs black (I bought some prefab, screw-on ones at the hardware store).  But honestly, I either did something very wrong, or I remembered playing a cocktail cab wrong.  I know I only played a PacMan cocktail once in my life, but I don't remember it feeling so unnatural.  Maybe the distance from the monitor to the glass shouldn't be so much?  Maybe my design is all wrong?  Not sure, but I decided for certain yesterday (when I had to start seeing the chiropractor again, due to my job in front of a computer all day) that my neck couldn't handle playing a cocktail even if I wanted to fix it up right.

So I'm going to disassemble and completely rework the thing at some point.  I think much of the material can be re-used in my next build attempt, so that's what's going to happen.  I figure if I want a sit-down cab, the candy-cab/Vewlix style is more up my alley.  I have a few ideas for a Vewlix-like design.  One of them is sketched out on graph paper.  I'm going to force myself to get better with Sketchup (or similar) and plan it out right this time.  Still cooking up themes, and trying to go for a unique design.  People here like Ond, DrVenture, and many others have inspired me to really do my own thing and go nuts, and that's exactly my plan.

In any case, that build will probably start in a month or so, before it gets too cold to cut/sand MDF outside.  I don't mind doing some of it inside, but I made a big mess last year, and I hope to avoid that this time.  My hope is to be ready to paint it by next spring, assuming I don't go with laminate this time around.  Currently, I'm beginning work on a PC case modeled after the shuttle-style ones (just ordered a board/cpu and such today).  I'll be posting updates to that on a blog outside here (I'll add a link to my sig when I get it started), since it doesn't particularly relate to arcade machines.  It's going to be primarily a media server / renderer / secondary gaming machine.

It was fun to build, and I'll be just a little sad to take it apart.  But, there's just no room in my life (or house) for a cabinet that I won't play.  So, back to the drawing board!

jimmy2x2x

  • Trade Count: (+1)
  • Full Member
  • ***
  • Offline Offline
  • Posts: 1215
  • Last login:December 19, 2018, 01:29:48 am
Re: Cocktail Dream (First Build) [Wiring...Cab almost done!]
« Reply #29 on: July 31, 2010, 08:57:13 pm »
Really sorry to hear that, it looks like a nice tidy build - couldn't you iron out the software issues and sell it on, rather than break it up for parts?

Seems such a shame to kill it!


saurian333

  • Trade Count: (+4)
  • Full Member
  • ***
  • Offline Offline
  • Posts: 284
  • Last login:June 10, 2014, 07:58:21 pm
  • "They must've spent tens of dollars on this."
    • My b(uild)log
Re: Cocktail Dream (First Build) [Wiring...Cab almost done!]
« Reply #30 on: July 31, 2010, 09:32:19 pm »
Thanks for the kind words. :)  I appreciate that.

That thought had occurred to me.  Honestly, I'm having trouble convincing myself that it turned out well enough to sell as a finished piece of work.  You can't tell from the pics, but the artwork isn't all that hot; just laser prints and backing paper.  I couldn't bring myself to spend $60-80 for cheap paper printouts, and I definitely wasn't willing to put out for vinyl on my first build.  Also, that bezel really does look pretty bad, and I haven't yet worked out a way to do it better.

If someone showed a real interest in buying it, then sure, I'd be happy to put a few more touches on it and sell it.  As for the software, I'd probably throw Windows on it and go with a more common/supported frontend.  Linux is too much for the average user to troubleshoot, especially when it comes to anything gaming-related.  If I had the free time, I'd love to sit and tweak the code and customize the distribution, but I really don't.

Or, I would take just take out the PC/monitor and sell it for a little more than cost of materials, if someone wanted a cheap DIY cab.  Anyone want to drive to Dubuque, IA to pick up an empty, halfway-decent cab?  I can't afford to take a loss on the parts, so be prepared to pay for them. ;)

But really, I will end up modifying what's already done more than completely trashing it.  The CP will most likely remain intact and go into a new box.  The sides of the main box would get slimmed down, and have a door put in.  The front of the base would probably get replaced (or covered with a new piece) if I follow my current favorite idea.  The only thing that would really get "scrapped" is the top (saving the plexi, of course).  We'll see...I might do a whole new CP for the next one (with some Sanwa stuff I traded for on these forums); then I'd be more willing to sell the existing one.

saurian333

  • Trade Count: (+4)
  • Full Member
  • ***
  • Offline Offline
  • Posts: 284
  • Last login:June 10, 2014, 07:58:21 pm
  • "They must've spent tens of dollars on this."
    • My b(uild)log
Re: Cocktail Dream (First Build) [Wiring...Cab almost done!]
« Reply #31 on: July 31, 2010, 10:07:54 pm »
Got that blog started.  Be gentle; there's not much there yet! :)

http://saurian333.blogspot.com/
(same link added to sig)

drventure

  • Trade Count: (+2)
  • Full Member
  • ***
  • Offline Offline
  • Posts: 4152
  • Last login:April 23, 2024, 06:53:06 pm
  • Laser Death Ray Bargain Bin! Make me an offer!
Re: Cocktail Dream (First Build) [Wiring...Cab almost done!]
« Reply #32 on: July 31, 2010, 10:27:24 pm »
Yeah, it'd be tough to sell it, but it'd be tough to rip it up for parts.

I like that little biostar rig you mentioned. I've kind of been thinking about building up a Media center pc for a while now.

After my recent run in with lightning and building up a SAN raid to replace the little 500gb Iomega SAN drive I was using, I'm a little more convinced that I can still be a prebuilt rig in capability and money spent.

Anyway, I liked the Cocktail build but I can totally understand being dissatisfied with a first build. Here's to the next one!  :cheers:

saurian333

  • Trade Count: (+4)
  • Full Member
  • ***
  • Offline Offline
  • Posts: 284
  • Last login:June 10, 2014, 07:58:21 pm
  • "They must've spent tens of dollars on this."
    • My b(uild)log
Re: Cocktail Dream (First Build) [Wiring...Cab almost done!]
« Reply #33 on: July 31, 2010, 10:52:27 pm »
You're right, it will be tough either way.  I really do like the cabinet, but it's just taking up space right now, really. 

Kind of like my old Grand Am; I liked that car, but with a worn-out tranny, major brake leak, bad tire seal, and electrical problem, it was just sitting there undriven, and had to go.

Although, the cab actually works...so I guess it's not really like that at all.  Nevermind.

I've seen much cooler shuttle cases, but the Biostar is by far the coolest I've seen for $50 including motherboard.  Problem is, it only has a 915 chipset, which means no dual-core; also only supports DDR, whereas DDR2 is both faster and usually cheaper.  So, it was either that with about a 3.4GHz chip, or a $32 board with a 2x3GHz.  And I saved on RAM, because I have an extra GB of DDR2 already. :)

Quote
Anyway, I liked the Cocktail build [...] Here's to the next one!  :cheers:

Thanks for saying so; it means a lot to me.  And I'll definitely drink to that! :cheers:

painterinfo

  • Trade Count: (0)
  • Full Member
  • ***
  • Offline Offline
  • Posts: 117
  • Last login:August 09, 2010, 05:29:27 am
  • Arcade10
Re: Cocktail Dream (First Build) [Done, basically]
« Reply #34 on: August 02, 2010, 01:54:15 am »
Hi Dude,

I would try and fix the electrical problem and see if you can sell it for enough to cover the cost for the same parts you are going to rip out, at least the fault will be easier to troubleshoot while they are installed.

Otherwise you start your next build with second hand parts and one that might be faulty?


Scripting Wizard

saurian333

  • Trade Count: (+4)
  • Full Member
  • ***
  • Offline Offline
  • Posts: 284
  • Last login:June 10, 2014, 07:58:21 pm
  • "They must've spent tens of dollars on this."
    • My b(uild)log
Re: Cocktail Dream (First Build) [Done, basically]
« Reply #35 on: August 02, 2010, 03:04:38 pm »
Hi Painter; that's a great point.  I hadn't actually thought about there being a connection problem or a faulty switch somewhere.  I was pretty convinced it was a software issue, since it was working perfectly on a different machine.

Some of the parts were secondhand to begin with.  Most of them I bought new, and I wouldn't consider them "used" at this point, since I have barely played 2 hours total on the thing.  I just couldn't get comfortable enough in front of it.

I'll fire it up sometime this week to try working out the kinks, and test out the panel on a separate machine while I'm at it.  The reason I would want to gut it is to reuse my CP and PC anyway, so I need to get it working one way or the other.  The 1/2" MDF might not be worth saving (if I do another scratch build for the next one, I'm going with 3/4"; that 1/2" is too hard to work with in some applications).

painterinfo

  • Trade Count: (0)
  • Full Member
  • ***
  • Offline Offline
  • Posts: 117
  • Last login:August 09, 2010, 05:29:27 am
  • Arcade10
Re: Cocktail Dream (First Build) [Done, basically]
« Reply #36 on: August 03, 2010, 05:38:25 am »
Good luck, it would be really great to see you finish on a high, I remember reading about the harsh temperatures that you had to work under, new tools etc, thanks for sharing the story.

 
Scripting Wizard

saurian333

  • Trade Count: (+4)
  • Full Member
  • ***
  • Offline Offline
  • Posts: 284
  • Last login:June 10, 2014, 07:58:21 pm
  • "They must've spent tens of dollars on this."
    • My b(uild)log
Re: Cocktail Dream (First Build) [Done, basically]
« Reply #37 on: August 09, 2010, 03:19:07 am »
Just taking advantage of my existing thread here.  ;D  I haven't actually made any progress with the cocktail, but I've been working a lot on my upcoming PC build.  Got all the components assembled and tested, and came up with a 3D model of the case.  Please check out my blog if you're interested; I'd love to hear any suggestions from folks here.