Okay, I've gotten everything set up. I'm using 2 OEM Atari volcano buttons with LED's in conjuction with a mini-pac. I also have the Ultimarc wiring harness for the mini-pac, which made things a bit easier for this project.
My button assemblies look almost exactly the same as the one shown on the wiki:

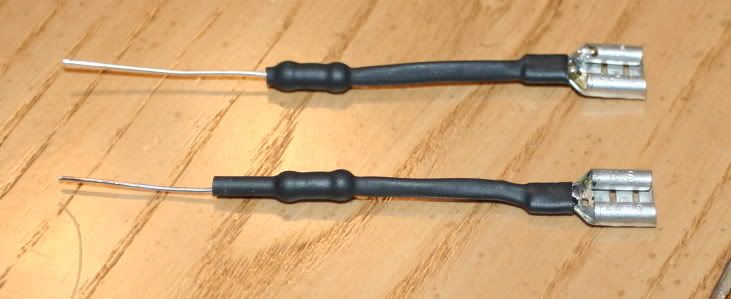
My LED's are marked 2.1, so I took the advice of some others and used 220ohm resistors (1/2 watt). I attached the resistors to quick connects using solder and shrink tubing:
Each of these were connected to 5v coming from the header on the minipac. I got my power from pin 7 (see later pic for diagram). I split the power line into 2 lines, and then connected each of my 'resistor assemblies' to the line.
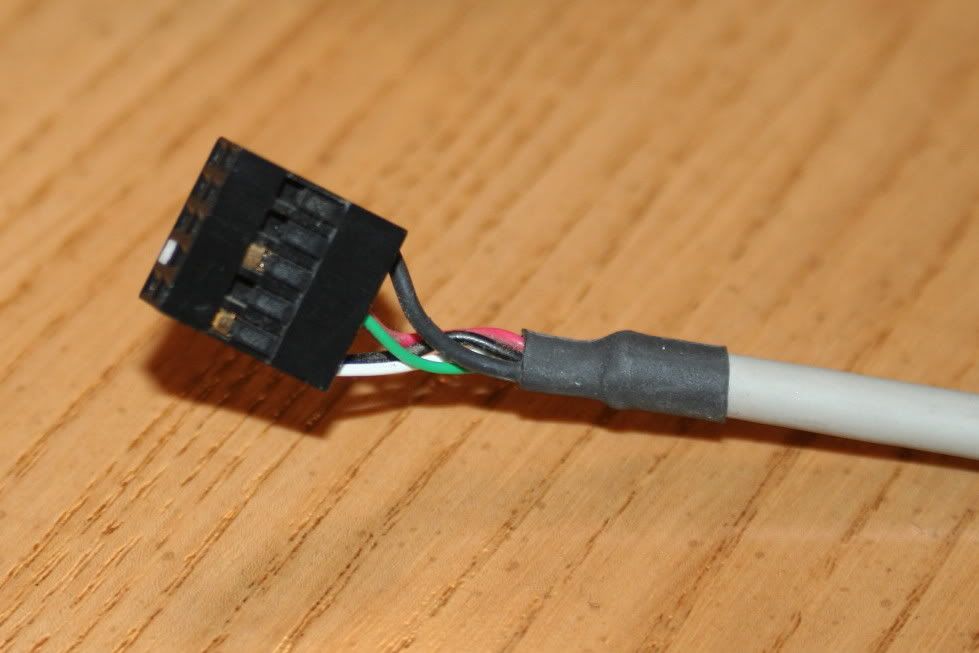
Now that each LED had power going to it, I needed to ground them. This is where I got stuck for a looooong time. After doing lots of reading and asking a few key questions, I finally got the info I needed: pins 4, 9, and 10 act as the grounds you need for your LED's. The mini-pac (or IPAC) 'flashes' those grounds when it captures LED actions from ledutil.exe, a partner program for mame. Now that I finally figured out which pins created the proper ground contacts for which LED, I set to getting a cable to bring my numlock and capslock grounds to my 2 LEDs. Since I was already using the wiring harness on my mini-pac, I decided to cannibalize a USB cable from my boneyard:
This internal USB cable uses the same pin connector as the mini-pac. I'm going to pull 2 wires out of the connector with my trusty safety pin:
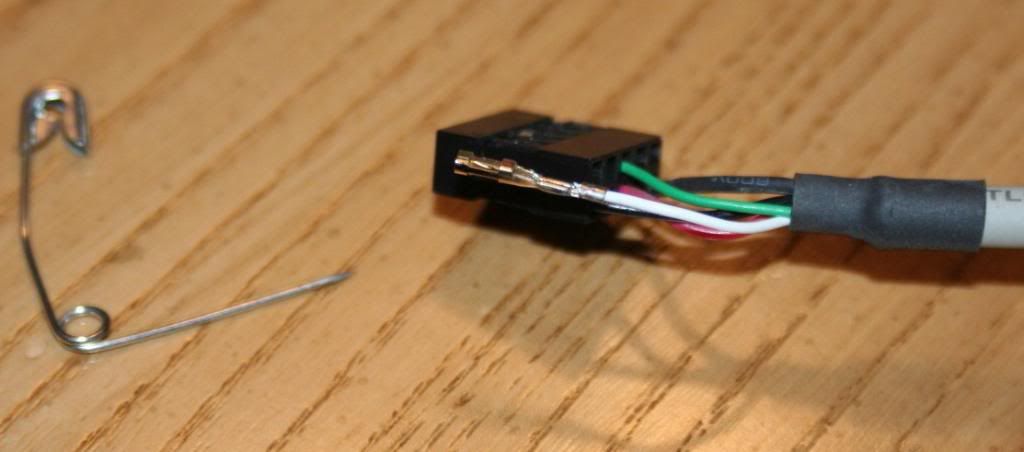
Showing one of the pins removed...
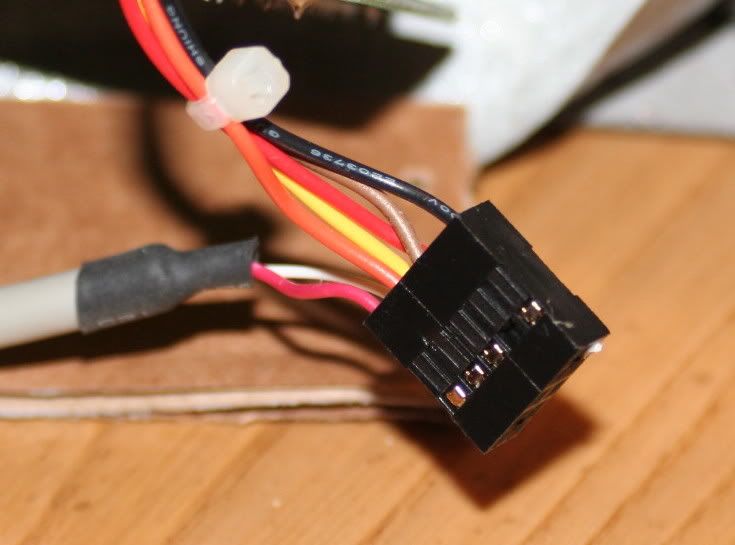
And here's the final result: the Ultimarc mini-pac wiring harness header, with 2 additional wires plugged in. The bottom 2 wires, red & white, are the ones I added to the header block. The wiring harness only makes use of about 4 of the 9 available holes in the block, so adding additional wires to this block would be very easy with more old USB cables lying around, which I have tons of.
Andy's website (
www.ultimarc.com) does a good job explaining the wiring setup for LED's, but his wiring diagram for the minipac left me very confused. I've added a few more words and explanations to help aid in understanding which pins do what on the header:
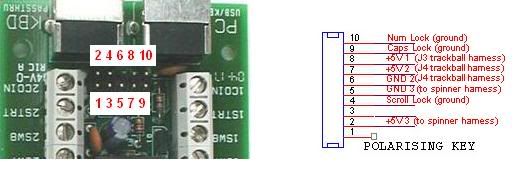
I used pin 8 as the power line for my trackball. Pin 7 was the line I used to power my LED's. Pin 2 carries the other 5v line, and I left that one alone, because it went to the spinner connector. That way if I ever want to install a spinner, I can use the connector.
One of the first things I noticed after lighting these LED's was that depending on whether or not the caps lock or num lock was on or off, they would sometimes get 'out of sync.' When starting an Atari game, player one (num lock) would flash opposite player 2 (caps lock) b/c one was on, and the other was off when the game launched. To fix this, I used a simple dos program to force both the caps lock and num lock to the 'on' state when my front end launches. Voila, lighted, flashing LED's!
Hopefully this info helps others who are trying to figure out how to wire the Atari volcano buttons to work with the IPAC/mini-pac.
If anyone is interested in the little utility programs I used to force numlock and capslock on/off on boot, PM me and I'll send them to you.


 Home
Home Help
Help Search
 Login
Login Register

 Send this topic
 Print
Print Topic: Atari Volcano buttons revisited (wiring & use) (Read 15290 times)


