O.K., here is my first attempt at a scratch built project. My goals were as follows:
1. Very simple design since I lack tools, woodworking experience, money, and space!
2. It needed to be relatively small because I really dont have the space.
3. Whenever possible, I needed to use stuff that I already had to save money, and to get the stuff out of storage.
4. I wanted to do something a little bit different and not necessarily traditional since I have many limitations.
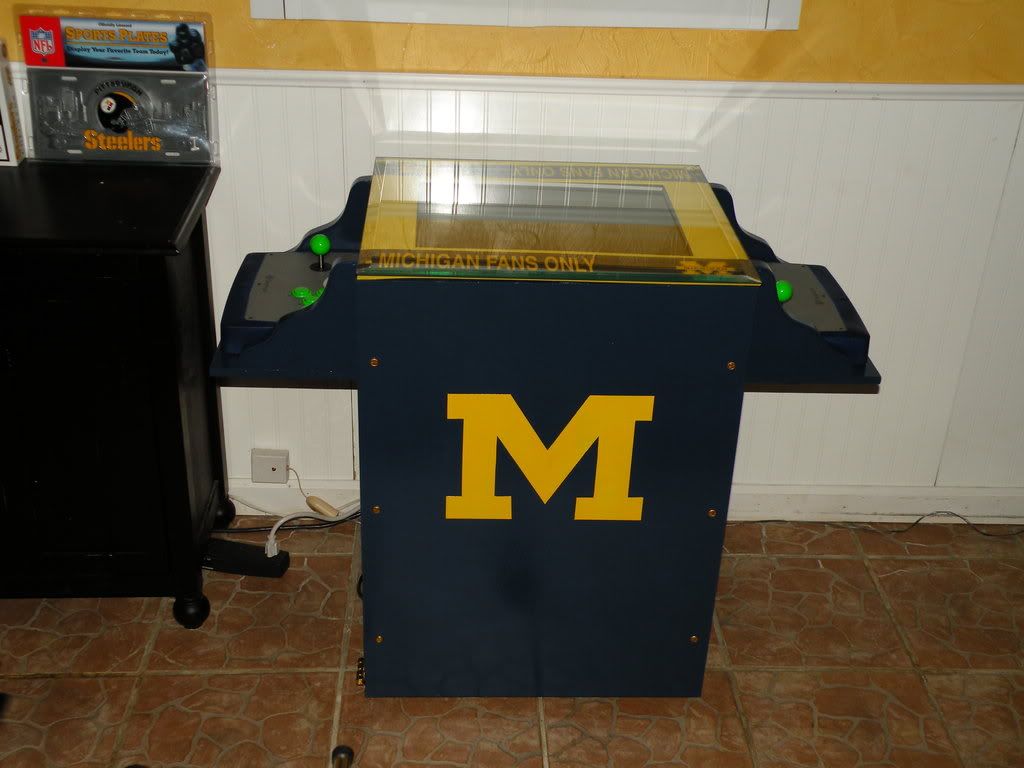
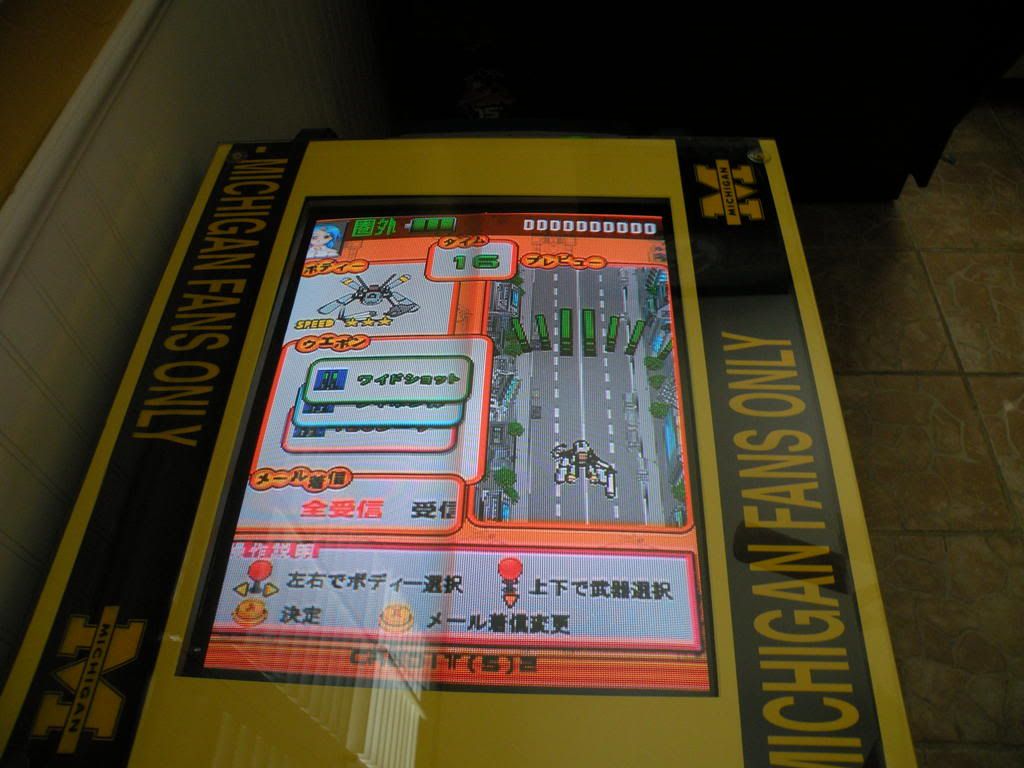
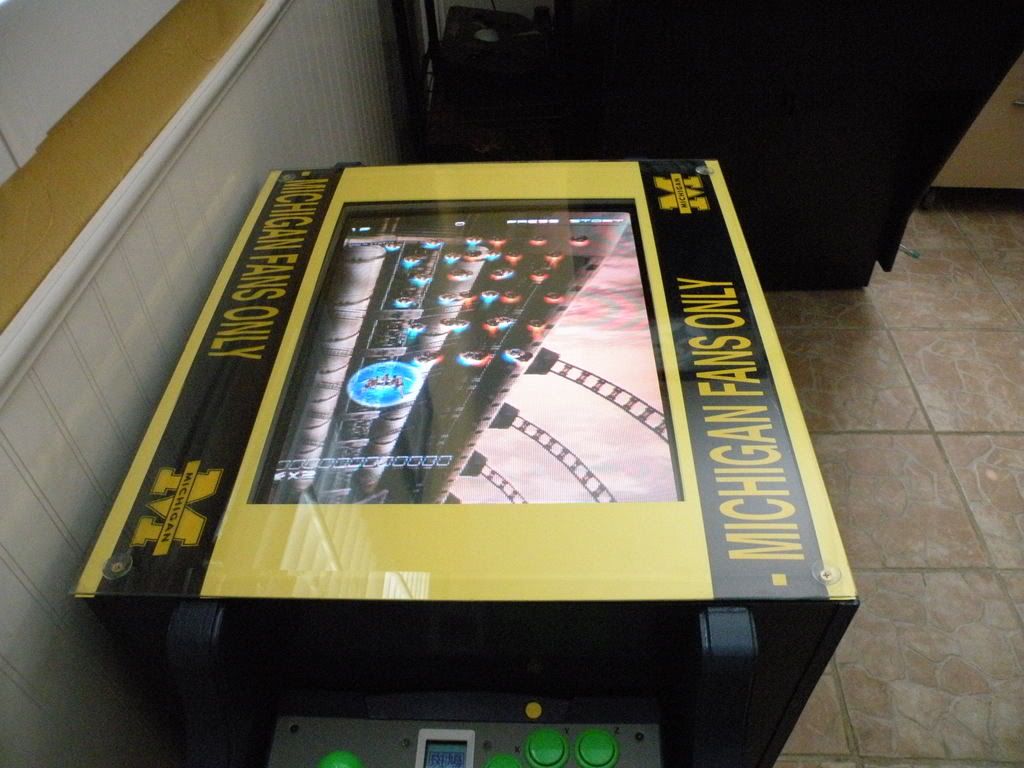
5. The design had to fit in with my sports theme. I have a small space off of my dining room with a Pittsburgh Steelers / Michigan Wolverines theme.
6. I already have an upright machine (old Quasicade Pro) for Mame and various consoles, so I thought a sports table would be cool.
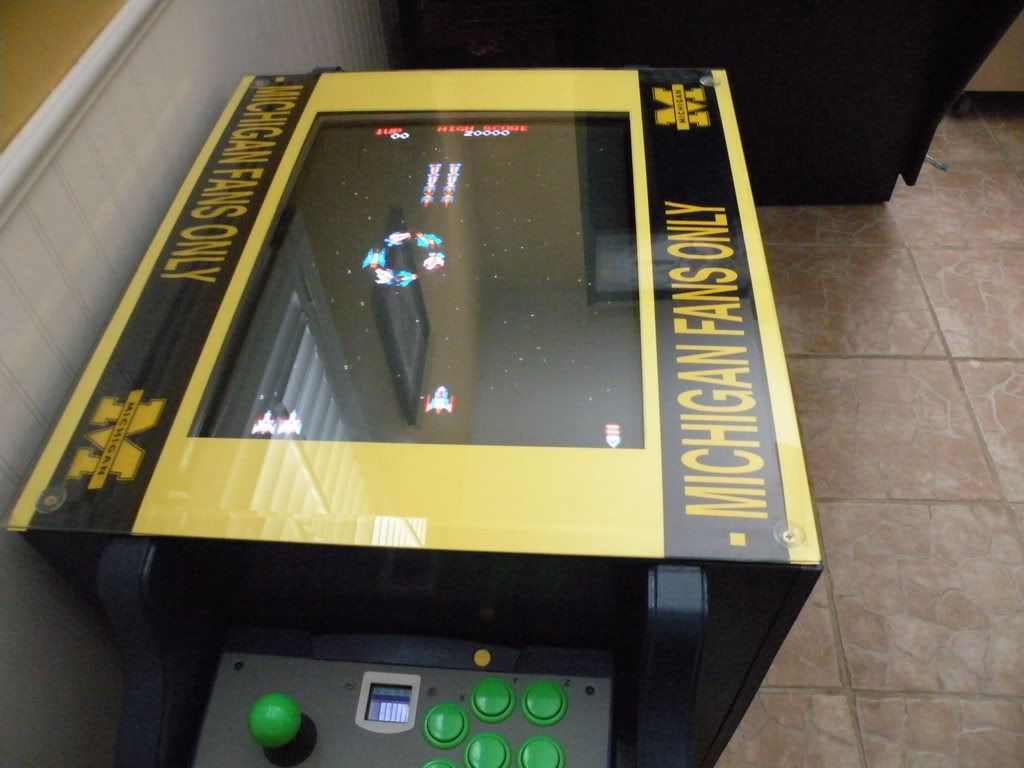
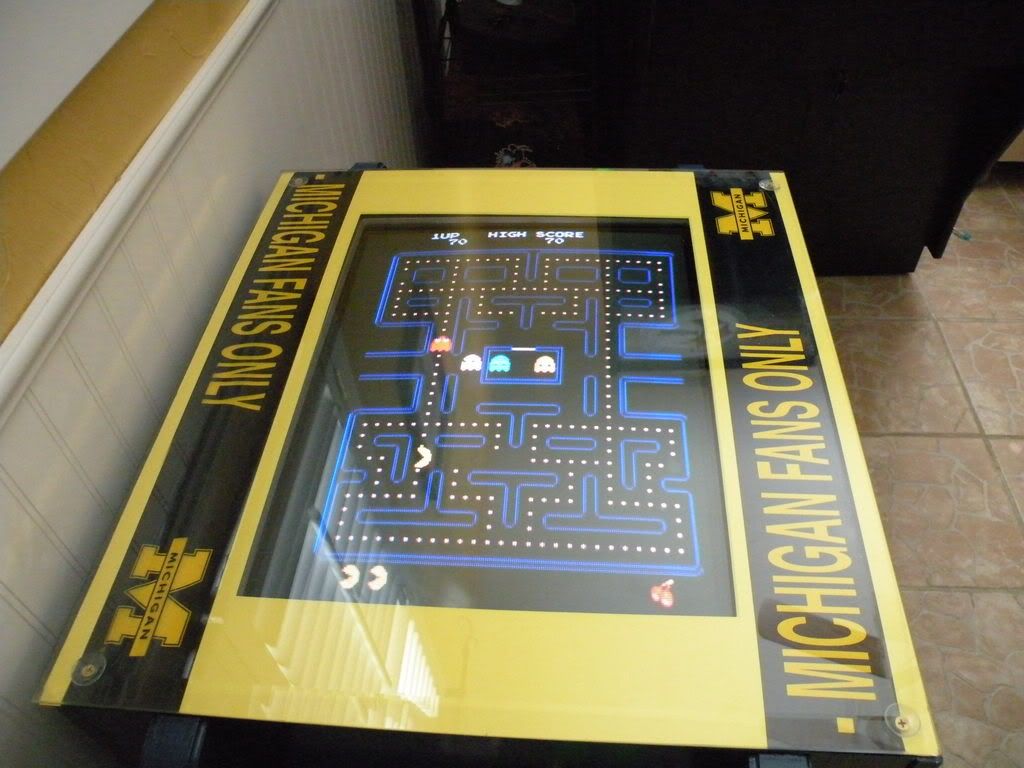
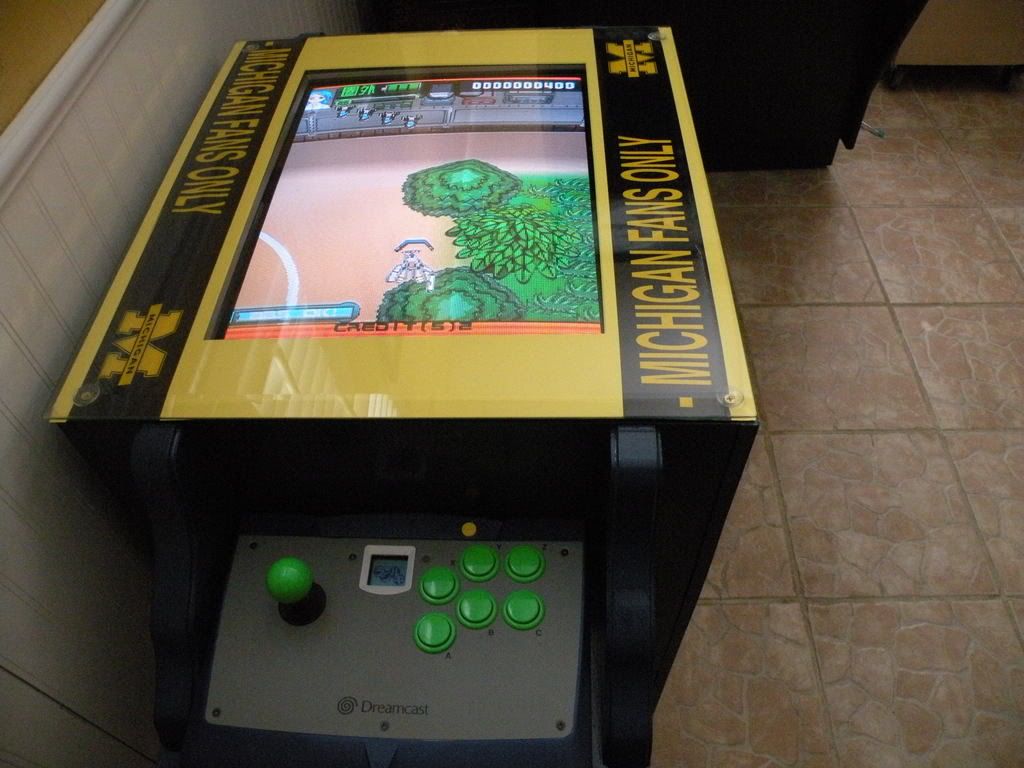
7. I wanted to use a Sega Dreamcast to play the following shooters in tate mode: Ikaruga, Gunbird 2, Radiligy, Karous, Psyvariar 2, Shikagami No Shiro 2, Trizeal, Under Defeat, and Trigger Heart Exelica.
8. For fun, Mamed! DC with some older vertical games.
9. Not be referred to as Hellcade or Crap Mame! (*be nice everyone, its my first try!)

So, I gathered up my backup Dreamcast, my two Agetec Arcade Sticks, a Dreamcast keyboard (for Mamed!), My old S-Video 20 Television, a set of mini Yamaha speakers and subwoofer from an old computer, a piece of beveled glass from an old end table that we planned on replacing, Michigan tailgating tape, and a powerstrip.
I bought the following: A couple sheets of MDF, some wood to add stability to the frame inside, some sandpaper, a thick maize framing mat board, various screws and washers, 4 lockable castors, 4 suction cups, a hinge, eyebolt, and handle (for the access door), a drill bit, L Brackets, 4 wooden shelf brackets, Plastic Spraypaint, 1 quart of varnish, 1 quart of Michigan Yellow Team Choice paint, and 1 gallon of of Michigan Blue Team Choice paint.
Overall, really low cost other than the gallon of Michigan Blue paint (Home Depot, Team Choice Glidden $24)
Basically, my wife, who is awesome with woodworking (no pun intended), designed the table on illustrator and drew up the plans. We went to my Dads house and used his tablesaw to cut the wood. We also borrowed his miter saw to cut the extra wood used for support inside. We assembled the box, built a TV shelf inside with brackets, drilled access holes and ventilation holes, attached the door hardware, attached the joystick shelves with the bookshelf brackets, painted, taped off the M logo and painted again, attached the castors, attached the speakers, varnished, and wired everything up and dropped in the TV. I taped off and spray painted the tops and sides of the Agetec sticks. My wife then cut the opening out of the mat board using a mat cutter and attached the tailgating tape. We screwed the mat board down on the top through the 4 suction cups. We then attached the glass and we were done!
Overall it turned out better than we thought! I didnt take pictures during the construction because I wasnt really confident that we could pull it off well enough to post. We actually built it mostly inside the house since we dont have a garage! Considering my goals, I think it worked out well. Its really fun to play the vertical shooters on this thing!
Things to do still:
1) Buy a degaussing wand (ordered one from Uxcell)
2) Buy a service remote to adjust for overscan (this TV has bad overscan and wont enter service mode without a special remote)

3) Possibly replace the buttons with higher quality ones. (does anyone know of a brand of buttons that would fit in this stick without modifying the holes?)
4) If possible, switch out the joysticks with magstick pluses.
(does anyone know if these would even fit?)
***I used the Agetec sticks instead of building dedicated control boxes because I wanted to have the VMUs show, and I wasnt confident about my ability to hack controllers. Overall they work fine, although I know they are not the ideal choice. I know many people have replaced the components in these before with real Sanwa parts, so I was hoping that someone could recommend some easy upgrades. I dont want to alter the button holes or anything crazy like that.
So, thats it! I know its nothing fancy like the rest of the projects here, but maybe my next one will be more complex. Here are some pictures with Ikaruga, Radiligy, Pac Man and Galaga running.
Note: I used Mamed! instead of Mame4all because Mamed! allows screen rotation and also allows you to set the games for cocktail mode. Overall, both emulators are severely limited, and I wouldnt build a cabinet around them. Neither one allows you to save your options (you have to configure each time, thus the inclusion of the keyboard), and the resolution options are limited. They also dont support the arcade sticks too well, although you can get around it in Mamed! by setting things up with the keyboard before playing. Also, Mame4all doesnt support samples yet! I wish someone would update either one of these!


 Home
Home Help
Help Search
 Login
Login Register

 Send this topic
 Print
Print Topic: My Sega Dreamcast Cocktail table (Michigan theme) (Read 17761 times)


