This is my first project. It's not fancy, and it doesn't have a name.
I caught the arcade cabinet bug, joined the forums, and started reading all the cool designs that have been posted here. It's good to have big dreams, but I figured I should start small and learn the basics before I embark on a major investment.
So, I started with a Vigolix. I wanted a vertical for the classic arcade games and shooters, so I customized the design a touch. Thought I might document the adventure here to encourage other newbies like myself. I started with minimal woodworking experience, and learned a lot along the way.
The basic Vigolix structure went together just as planned, cut it out with a jigsaw. The design is what, 12 years old now? I wonder how many people start with this easy and inexpensive design?
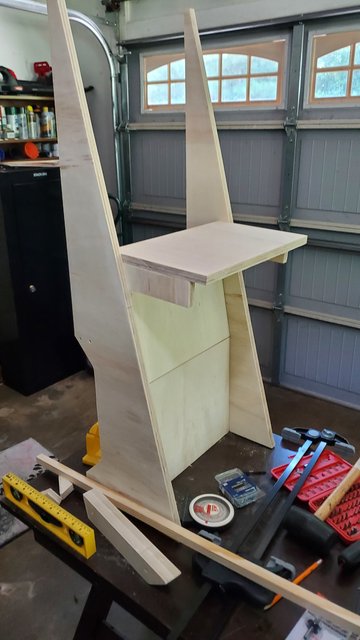

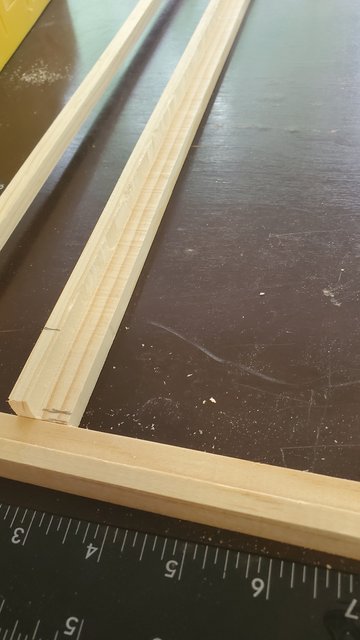
My plan was to forego a marquee and instead use a large vertical monitor and have the marquee be software-based, changing per game. I had a 22" LCD TV in the garage for this purpose. It wouldn't fit unless it was de-cased, so I came up with a plan to make it work. De-casing meant giving up the VESA mounts, so I needed to design a frame to hold the panel. I ended up using 3/4" furring strips and routing a setback into the inner edge for the panel to be held in. Had to learn how to use a router for this.

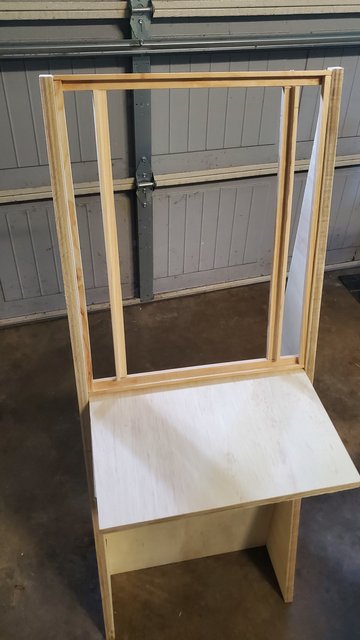
The design worked pretty well, here is what it looked like during a test fitting.

The TV I used had speakers already, with audio over HDMI. Figured I could eliminate an audio amp and extra wiring if I could re-use them so I did. They had a weird way of mounting to the frame, so I just cut out the TV frame sections that included these speaker mounts and drilled new holes in the mounts so I could re-use them.

Did a little priming and painting (spray paint) with sanding between coats. I was disappointed that I still had some raised grain from this and determined I would use laminate when I started my next project.


A test fit of the electronics was next. I'm using a Pi 3B and a GRS LED Single Player Arcade DIY Kit. This kit came with a joystick, encoder and 8 buttons, and was simple for a new user to understand. It went together well.

The last step was t-molding. Here is where I recognized a huge error. I misunderstood the specs and had routed slots way too big. Couldn't use the t-molding when it arrived in the mail and didn't know what to do. A search of the forum showed me that some people use a different product called edge banding, so I went and bought some. Watched a few videos and got out my trusty iron and hot-melted the edging in place. Unfortunately the store didn't have the special trimmer tool, so I had to freehand the trimming using a scalpel blade. It's not perfect..

That done, it was time to fire it up.
It's not perfect, but it gave me a chance to put all the things I read about here into practice and figure out maybe what to do (or not do) next time. Total cost was under $110 (I already had the Pi and the TV) and several weekends of work in a hot garage.
I am very pleased with how it all turned out


Just wanted to say I appreciate everyone who has posted their designs and tips here in the forums. Reading all these projects gave me the head start and encouragement I needed to DIY this myself. And thanks to Vigo for a cool design!


 Home
Home Help
Help Search
 Login
Login Register

 Send this topic
 Print
Print Topic: vertical vigolix (Read 5614 times)


