It's been a while since I've made anything, so now that I'm living in a new city and got all my tools nicely organized... I figured it's about time to do something new.
I am not a big fan of the 1up Arcade cabinets, for many reasons I'm sure that many of you are not. The components are cheap, the build is cheap, they all look the same with different stickers slapped on them, no light behind the marquee, etc... But! When the Mortal Kombat cabinet came out and I got to play it, I was really wanting to buy one. That is when reality slapped me in the face and said, it's still a 1up cab. So, what I decided to do a couple of weeks ago is beginning to design a cabinet in the size of the 1up cabs, but make it with the correct styling of the actual arcade cab that I'm trying to simulate.
My last cab I was going to make a 2nd "drop-in" control pane with Mortal Kombat control scheme, but I never got around to doing it. So I'm just going to build another cab. Right now, I'm waiting on the controls to all come in, along with a few other parts like the monitor and speakers. I figured I'd start sharing a little of what I'm doing with you all. I have lots of progress photos, but I'm going to hold off on posting those until closer to the end. For now, here is my 3D mockup. (I'm still working on the artwork, and I'm not sure if I will just go with the MK2 art, or something custom.
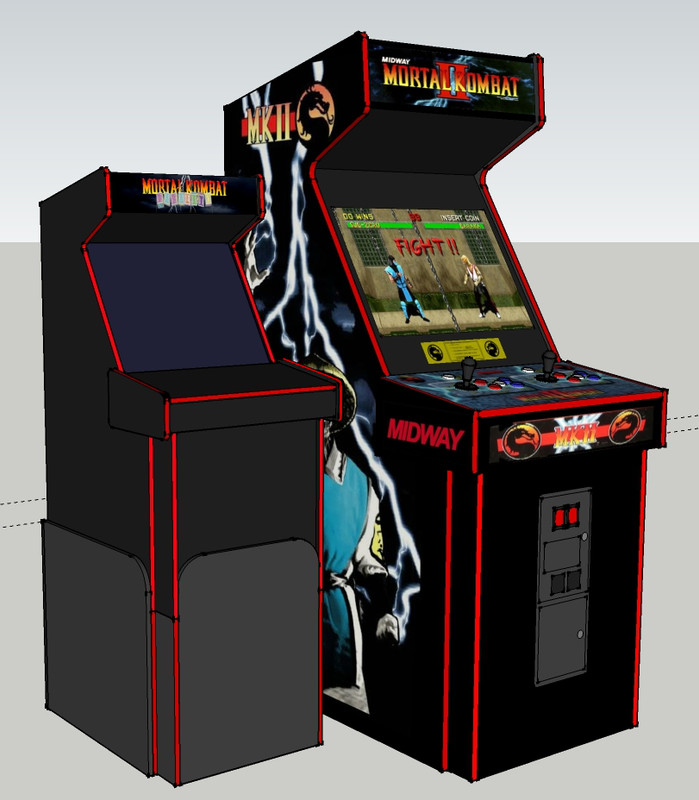
As you can see I also plan on making a custom riser for the cabinet. The difference in this build is that I'm going to be widening the control panel, ever so slightly, to accommodate easier access for two players. Also I will be running the emulation via RPi. I will end up putting a bunch of MK games on this thing.
List of Games:
Arcade - MK, MKII, MK3, UMK3, MK4 (if it can run on Pi)
SNES - MK, MKII, MK3, UMK3, (MK1 Blood Hack)
Genesis - MK, MKII, MK3, UMK3
32X - MKII
Sega CD - MK
Gameboy - MK, MKII (because why not)
Game Gear - MK, MKII (because why not)
PSX - MKT, MK4, Sub-Zero Mythologies
Additional Arcade games: Time Killers and Blood Storm
Cost of build (rounded to the nearest half dollar:$98 - Wood
$40 - Wood for Riser
$10 - Paint
$0 - Tools, hardware, wires (already owned)
$44 - Joysticks, Buttons, wireharnass, USB encoder
$0 - Speaker Amp (already had laying around, I think it was $10 originally)
$16 - Speakers (not counting the $10 speakers that I threw away)
$0 - Monitor (found someone giving away old monitors on Facebook for free)
$0 - LED Strips for the marquee (I got them a couple of years ago for a different project, I can't recall the cost).
$27 - Bezel Glass - I went with a smoky-colored Acrylic. Tried it on my DT cab and loved it
$169 - All artwork - obviously the highest cost part for the whole thing.
$24 - T-Molding
----------------------
$428 Total
Optional costs:
$50 coin slot
[CLICK IMAGES TO ENLARGE THEM]
[Update]Well, I've been waiting for more of my parts to come in and ran into an issue. Bought some speakers on eBay and found out they were just grills, despite the auction saying that it comes with speakers. Anyway, I thought I'd post a few pictures while I continue to wait for my speakers to come in as the next thing I have to do involves installing the speakers. Since this thing is so small I have no choice but to wait. So anyway here is a bit of progress...
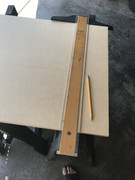
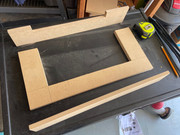
Wood waiting to be cut

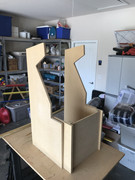
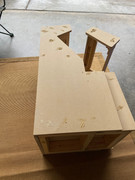
Building the base


Measuring out the side and getting ready to cut.


Starting assembly.

 [Update 2]
Got my speakers in the mail today WOOOO! I soldered some speaker wire onto those 3" bad boys and hook them up to my amplifier and BOOM! At max volume, they are ultra-quiet, even though they were advertised as LOUD. Needless to say, I don't have much of an update. I've added some additional photos above that I took from before I ordered my speakers. Today I've ordered some new speakers and hope they don't take as long to get here and hope that they are much better. The reviews said they were "great" we shall see.

More to come later.
[Update 3 - 11-1-19]I had a beautiful warm day today, so I took advantage and pulled my tools outside so I could get some more work done. Most of the big stuff is out of the way now. And as that speaker issue is now out of the way, I was able to get more work on the cab done. I've cut the speaker holes in the speaker panel and added the top and back of the cab. I have also added the back housing for my LED lights for my marquee.

[Speaker panel and top of the cab in place]

[cab back in place]
My next part to tackle will be the lock for the back of the cabinet as well as putting airflow out the back of the cab. Then on to the control panel, and then on to the monitor mount.
[Update 4 - 11-2-19]
Doing a test on the button spacing before sending my graphics to the printer. The joystick was just a rough cut, I plan on making a jig when I have the real thing cut.
[Update 5 - 11-3-19]
This is my first time using LED strips for lighting a marquee... I think I may have overdone it a bit. I'll have to go in and remove a couple of strips as it's very bright. Either that or I will have to defuse the light a bit.
[Update 6 - 8-7-2021]I can't believe it's been nearing two years since my last update! After the weather got too cold for me to work on the project COVID hit... and you'd think that would have given me plenty of time to work on the cab, but no. I actually got quite a bit busier during these past two years. So, I finally pulled the cab out of its little corner and started working on it yet again. It took me a while to get reacclimated with the design, especially with the control panel. I have actually cut a new piece of wood for the control panel because of a slight adjustment that I've decided to do. But the CP is now assembled. I was planning on mounting the monitor today, but I've just gotten too hot outside that I decided to call it quits for today.
Made some modifications to my control panel before assembly.

Well, it's starting to come together.
[Update 7 - 8-9-2021]Got home after work and after buying the screws I needed to mount my monitor... turns out I bought the wrong length screws. So, I'll have to return to the hardware store to buy the proper length. The question is, do I want to go back today? I guess it depends on if there is anything I want to do now that I'm off work besides working on the tiny cab. I do need to pick up some wood for my marquee restrainer... so I guess it might not be a bad idea to go get it today.

 [Update 8 - 8-14-2021]
I purchased my plexiglass for the bezel and the artwork for the cab, so while I'm waiting on those to arrive, I decided to fix the sides of the control panel and cut the notches for the top of the control panel. Take a look at the size comparison to the original cut... it was really messed up.

 [Update 9 - 8-19-2021]
Today was productive, I was able to get my bezel retainer and monitor all mounted.

I also got all of my artwork in the mail, so I was able to put together my marquee (no picture yet), as well as get my control panel ready to start doing some good game testing. I still need to pick up the plexiglass for the CP, so I can't go any further until I have that in hand. But along with that.


I was able to get my tinted plexiglass and bezel installed, as well as getting my control panel cut so that it will keep the plexiglass in place and to keep from tokens falling where they do not belong.
 [Update 10 - 8-22-2021]
Over the past couple days I've been working on several things, I now have the control panel ready and have tested it, it works great and looks good.

I've sanded the exterior and now in this photo worked on plugging the holes and then more sanding.
And finally from today, starting to paint the cabinet and will have to do a bunch of wet sanding and a few more coats of paint. Not sure how long this process will be as I've never done this on such a large project before. I've done it on my smaller projects and even that took quite a bit of time. So... this may be an all week thing when I've got free time.
 [Update 11 - 8-29-2021]
Over the past week I have been working at painting and sanding, painting and sanding, painting and... you get the point.
The riser was started (it's even further along now, but I'm needing to still do the filling and painting before I post any more of that)

I pulled out my decals and decided to put those on. Also, because of the last-minute change that I made on the side of the control panel, the decals were too small for it. So I'll have to order new decals to fix that problem.


I spent all day Saturday working on the programming of the Pi. Most of my difficulties were in figuring out how to configure the inputs for all the different emulators. That is all worked out now and I've put quite a bit of time into my theme.
[Update 12 - 9-15-2021]I have been down in Louisiana for the past two weeks, so needless to say, I've not been able to work on the cab. After getting back I started back up again and I have the riser mostly finished. Now that I have the exact dimensions (as I made changes to the riser as I got further along in the build). I will have to make and order my graphics for the riser. I was thinking of putting 3 different MK logos, one on each side and one on the front. But, I am rethinking that as I'd rather have an all-black front to the cab. So, I'm not quite sure what I'm going to do as of yet. But, I certainly want something for the lower part of the cab.
I ordered my T-Molding yesterday and can't wait to get that put on the cab as that is basically the last thing I need to do on the outside. I still have cable management to deal with and wire connectors for my hidden buttons so I can do a quick disconnect when I disassemble the cab (for when I have to move it).
 [Update 13 - 9-20-2021]
It seems there was a hiccup on getting the rest of my decals, so for now I did what I could with the t-molding. Still waiting on my miles connectors and I have to take a trip to the local hardware store to pick up a couple more items (small details) to finish this thing off. Programming has been done (for the most part). There are a few more things that I would like to do with the OS, but they may or may not happen.

[Update 14 - 10-01-2021]
For the most part I am finished. I have a few minor things to do, the major one of the issues is to add a volume control outside of the cabinet and it will be done. I am quite happy with the final results, I may make a couple corrections on some things, but my guess is that it wont matter. Way way here are the final shots.
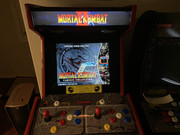


If there was anything I could change, I probably would have made this as one unit, rather than building a riser. That riser was a pain in the butt.


 Home
Home Help
Help Search
 Login
Login Register

 Send this topic
 Print
Print Topic: [Finished] Mortal Kombat - 1up the 1up (Read 23805 times)


