Main Restorations Software Audio/Jukebox/MP3 Everything Else Buy/Sell/Trade
Project Announcements Monitor/Video GroovyMAME Merit/JVL Touchscreen Meet Up Retail Vendors
Driving & Racing Woodworking Software Support Forums Consoles Project Arcade Reviews
Automated Projects Artwork Frontend Support Forums Pinball Forum Discussion Old Boards
Raspberry Pi & Dev Board controls.dat Linux Miscellaneous Arcade Wiki Discussion Old Archives
Lightguns Arcade1Up Try the site in https mode Site News

Unread posts | New Replies | Recent posts | Rules | Chatroom | Wiki | File Repository | RSS | Submit news


Author Topic: CP-1 Command Pod: The VR Space exploration project  (Read 54012 times)

0 Members and 1 Guest are viewing this topic.

johnrt

  • Guest
  • Trade Count: (0)
Re: CP-1 Command Pod: The VR Space exploration project
« Reply #240 on: February 25, 2015, 04:21:17 pm »
So what's up? I hope you're still finishing this project. Looks amazing!  :lol

fallacy

  • Trade Count: (0)
  • Full Member
  • ***
  • Offline Offline
  • Posts: 966
  • Last login:March 23, 2024, 12:27:45 am
Re: CP-1 Command Pod: The VR Space exploration project
« Reply #241 on: February 28, 2015, 02:24:16 pm »

Holly ---steaming pile of meadow muffin--- this is the first project I have seen on this form that I actually want. How much do you want for it? lol.

ChanceKJ

  • Trade Count: (0)
  • Full Member
  • ***
  • Offline Offline
  • Posts: 3229
  • Last login:August 07, 2021, 02:52:06 pm
Re: CP-1 Command Pod: The VR Space exploration project
« Reply #242 on: February 28, 2015, 02:27:35 pm »
 :laugh: I've got a feeling he won't be selling it.

SpaceHedgehog

  • Trade Count: (0)
  • Full Member
  • ***
  • Offline Offline
  • Posts: 937
  • Last login:February 06, 2023, 12:10:24 pm
  • Almost done ...
Re: CP-1 Command Pod: The VR Space exploration project
« Reply #243 on: March 01, 2015, 04:28:26 am »
Thanks for the on-going interest  :cheers: Still waiting for improved weather before getting back on this so hopefully very soon ... also diverted a little with the R-Pod MKII at the moment as well ;)
Click a pic for a video tour 

SpaceHedgehog

  • Trade Count: (0)
  • Full Member
  • ***
  • Offline Offline
  • Posts: 937
  • Last login:February 06, 2023, 12:10:24 pm
  • Almost done ...
Re: CP-1 Command Pod: The VR Space exploration project
« Reply #244 on: May 28, 2015, 04:52:39 pm »
Weather has definitely improved, the Arcade Cabinet complete, the R-Pod had various tweaks made to it so I guess it's time to get back on this project.
Click a pic for a video tour 

Slippyblade

  • Trade Count: (+2)
  • Full Member
  • ***
  • Offline Offline
  • Posts: 3167
  • Last login:November 16, 2023, 11:39:51 am
  • And to the death god we say, "Not today!"
Re: CP-1 Command Pod: The VR Space exploration project
« Reply #245 on: May 28, 2015, 05:15:24 pm »
Woohoo!  An update!

SpaceHedgehog

  • Trade Count: (0)
  • Full Member
  • ***
  • Offline Offline
  • Posts: 937
  • Last login:February 06, 2023, 12:10:24 pm
  • Almost done ...
Re: CP-1 Command Pod: The VR Space exploration project
« Reply #246 on: July 03, 2015, 02:47:33 pm »
Well, the seat got a mention in the E: D newsletter so I'm feeling almost shamed into picking this up again this weekend. Not that I mind, anything to give me a push to get this progressing again ...
Click a pic for a video tour 

SpaceHedgehog

  • Trade Count: (0)
  • Full Member
  • ***
  • Offline Offline
  • Posts: 937
  • Last login:February 06, 2023, 12:10:24 pm
  • Almost done ...
Re: CP-1 Command Pod: The VR Space exploration project
« Reply #247 on: July 04, 2015, 06:12:11 am »
I cut the main box sections for the headrest pillar. This will attach to the back of the upper seat panel and the main, padded headrest section will attach to this.

Pieces:


Loose assembled:


Click a pic for a video tour 

SpaceHedgehog

  • Trade Count: (0)
  • Full Member
  • ***
  • Offline Offline
  • Posts: 937
  • Last login:February 06, 2023, 12:10:24 pm
  • Almost done ...
Re: CP-1 Command Pod: The VR Space exploration project
« Reply #248 on: July 04, 2015, 07:18:48 am »
I've assembled the pillar and attached it to the back of the seat:

Click a pic for a video tour 

SpaceHedgehog

  • Trade Count: (0)
  • Full Member
  • ***
  • Offline Offline
  • Posts: 937
  • Last login:February 06, 2023, 12:10:24 pm
  • Almost done ...
Re: CP-1 Command Pod: The VR Space exploration project
« Reply #249 on: July 04, 2015, 10:09:52 am »
I've made the main padded section for the headrest:


The padded section will be angled forwards a little.
Click a pic for a video tour 

SpaceHedgehog

  • Trade Count: (0)
  • Full Member
  • ***
  • Offline Offline
  • Posts: 937
  • Last login:February 06, 2023, 12:10:24 pm
  • Almost done ...
Re: CP-1 Command Pod: The VR Space exploration project
« Reply #250 on: July 04, 2015, 12:10:08 pm »
Cut the first side piece for the headrest. This will be cloned 3 times to allow for double thickness sides and have a ribbed rubber inlay:


Click a pic for a video tour 

GSXRMovistar

  • Trade Count: (0)
  • Full Member
  • ***
  • Offline Offline
  • Posts: 436
  • Last login:November 02, 2023, 07:10:28 pm
  • Gez, this is gonna be expensive!
    • forum.arcadecontrols.com/index.php/topic,148135.0.html
    • CoffeeCade
Re: CP-1 Command Pod: The VR Space exploration project
« Reply #251 on: July 04, 2015, 01:10:32 pm »
Fantastic work, out of interest what tools do you use? Your cuts always look very precise and clean, and you seem to get new pieces out in no time.

SpaceHedgehog

  • Trade Count: (0)
  • Full Member
  • ***
  • Offline Offline
  • Posts: 937
  • Last login:February 06, 2023, 12:10:24 pm
  • Almost done ...
Re: CP-1 Command Pod: The VR Space exploration project
« Reply #252 on: July 04, 2015, 02:01:17 pm »
Fantastic work, out of interest what tools do you use? Your cuts always look very precise and clean, and you seem to get new pieces out in no time.

Thanks! I posted this a couple of pages back but these are the tools I use:


Circular saw used very occasionally:


Old Black and Decker drill - does the job:


Small workbench:


A couple of G-Clamps:


That's it really.

« Last Edit: July 04, 2015, 02:04:35 pm by SpaceHedgehog »
Click a pic for a video tour 

SpaceHedgehog

  • Trade Count: (0)
  • Full Member
  • ***
  • Offline Offline
  • Posts: 937
  • Last login:February 06, 2023, 12:10:24 pm
  • Almost done ...
Re: CP-1 Command Pod: The VR Space exploration project
« Reply #253 on: July 05, 2015, 07:24:53 am »
Anyone who's followed any of my projects knows the drill with these steps.

Cloned the side pieces (2x12mm and 2x18mm MDF):


Cutouts for the outermost pieces:


Click a pic for a video tour 

SpaceHedgehog

  • Trade Count: (0)
  • Full Member
  • ***
  • Offline Offline
  • Posts: 937
  • Last login:February 06, 2023, 12:10:24 pm
  • Almost done ...
Re: CP-1 Command Pod: The VR Space exploration project
« Reply #254 on: July 05, 2015, 09:22:36 am »
I've completed the main outer MDF panel sections  for the headrest.

Inlay area:


Light bevel for the inner piece:


Inner and outer panels together:


Close up:


Click a pic for a video tour 

SpaceHedgehog

  • Trade Count: (0)
  • Full Member
  • ***
  • Offline Offline
  • Posts: 937
  • Last login:February 06, 2023, 12:10:24 pm
  • Almost done ...
Re: CP-1 Command Pod: The VR Space exploration project
« Reply #255 on: July 05, 2015, 10:25:34 am »
It's good to mess about with shapes sometimes. I was originally going to go with this orientation:


Now I think that this looks better:

Click a pic for a video tour 

SpaceHedgehog

  • Trade Count: (0)
  • Full Member
  • ***
  • Offline Offline
  • Posts: 937
  • Last login:February 06, 2023, 12:10:24 pm
  • Almost done ...
Re: CP-1 Command Pod: The VR Space exploration project
« Reply #256 on: July 05, 2015, 11:30:38 am »
I've made the rubber inlays for these panels:

Backing board:


Ribded rubber sheet cut to size and stuck to the backing board:


Inserted into the panel:


Close up:


I still have to cut the window into the inside 12mm panel.

Edit: Done for the day. I have a mostly free day tomorrow so I'll be able to make some more progress then.
« Last Edit: July 05, 2015, 11:48:31 am by SpaceHedgehog »
Click a pic for a video tour 

Vidiot

  • Trade Count: (0)
  • Full Member
  • ***
  • Offline Offline
  • Posts: 303
  • Last login:February 15, 2024, 10:00:17 am
  • John 3:16
Re: CP-1 Command Pod: The VR Space exploration project
« Reply #257 on: July 05, 2015, 01:16:07 pm »
The details and craftsmanship in your projects astound me. :dizzy: Incredible stuff.  :notworthy: :applaud:


dkersten

  • Trade Count: (0)
  • Full Member
  • ***
  • Offline Offline
  • Posts: 1472
  • Last login:March 12, 2024, 11:47:30 am
  • If you are gonna do it, do it right..
Re: CP-1 Command Pod: The VR Space exploration project
« Reply #258 on: July 05, 2015, 03:43:25 pm »
The details and craftsmanship in your projects astound me. :dizzy: Incredible stuff.  :notworthy: :applaud:
I have to agree, but I will add that the level of patience and discipline is what astounds me.  I have a very good understanding of what kind of time it takes to do projects like this and not start skimping on the quality to get to the finish line.  And this is coming from someone who spent 1200 hours over 6 years writing a book and has built dozens of pieces of furniture.  I don't think I could make it halfway through his projects before starting to rush things just to get the thing done and start using it.  My hat's off to you SpaceHedgehog. 

SpaceHedgehog

  • Trade Count: (0)
  • Full Member
  • ***
  • Offline Offline
  • Posts: 937
  • Last login:February 06, 2023, 12:10:24 pm
  • Almost done ...
Re: CP-1 Command Pod: The VR Space exploration project
« Reply #259 on: July 06, 2015, 03:40:24 am »
The details and craftsmanship in your projects astound me. :dizzy: Incredible stuff.  :notworthy: :applaud:

Thanks very much Vidiot. I don't believe anything undertaken here is beyond anyone who's reasonably competent with woodworking. You're a prolific builder with obvious skill and it would surprise me if you couldn't do something like this relatively easily. In the grand scheme of things, I have relatively little experience with woodworking with just these project builds behind me.

I have to agree, but I will add that the level of patience and discipline is what astounds me.  I have a very good understanding of what kind of time it takes to do projects like this and not start skimping on the quality to get to the finish line.  And this is coming from someone who spent 1200 hours over 6 years writing a book and has built dozens of pieces of furniture.  I don't think I could make it halfway through his projects before starting to rush things just to get the thing done and start using it.  My hat's off to you SpaceHedgehog. 

Thanks for that dkersten, your words are very kind. I do acknowledge that I have a lot of patience that is for sure and it probably stems from hours and hours spent painting figures when I was younger! In fact, this prompted me to find a box with some of them stored in. These are more recent ones but each took probably somewhere between 3 to 20 hours, possibly more. Indulge me if you will:


Some of these are tiny:


I'm a firm believer in doing things that you find interesting / enjoyable / important to the best of your ability. The sense of reward and achievement is the overriding factor as you will know first hand from your endeavors. My only advice, for what it's worth, is to put something down and walk away when you're struggling with motivation and come back to it later - you no doubt know that already  ;)

I checked out your book btw - I'll be picking a copy of that up  :cheers:
« Last Edit: July 06, 2015, 03:42:20 am by SpaceHedgehog »
Click a pic for a video tour 

SpaceHedgehog

  • Trade Count: (0)
  • Full Member
  • ***
  • Offline Offline
  • Posts: 937
  • Last login:February 06, 2023, 12:10:24 pm
  • Almost done ...
Re: CP-1 Command Pod: The VR Space exploration project
« Reply #260 on: July 06, 2015, 08:38:01 am »
I cut the fiddly bits to complete the basic heeadrest shell. I will still need to make some internal bracing sections for these to help keep the shape together.

Flat sections:


In position:


Side on:


I will probably get this headrest part of the build completely finished before starting anything else.
Click a pic for a video tour 

dkersten

  • Trade Count: (0)
  • Full Member
  • ***
  • Offline Offline
  • Posts: 1472
  • Last login:March 12, 2024, 11:47:30 am
  • If you are gonna do it, do it right..
Re: CP-1 Command Pod: The VR Space exploration project
« Reply #261 on: July 06, 2015, 11:01:41 am »
Thanks for that dkersten, your words are very kind. I do acknowledge that I have a lot of patience that is for sure and it probably stems from hours and hours spent painting figures when I was younger! In fact, this prompted me to find a box with some of them stored in. These are more recent ones but each took probably somewhere between 3 to 20 hours, possibly more. Indulge me if you will:
Wow, I am impressed.  As with your other projects, I have a lot of respect for the level of detail and know what it takes to achieve it. 
Quote
I'm a firm believer in doing things that you find interesting / enjoyable / important to the best of your ability. The sense of reward and achievement is the overriding factor as you will know first hand from your endeavors. My only advice, for what it's worth, is to put something down and walk away when you're struggling with motivation and come back to it later - you no doubt know that already  ;)

I checked out your book btw - I'll be picking a copy of that up  :cheers:
I can't agree more that motivation is EVERYTHING, and plays a key role in the patience aspect.  The hardest part about creating something like what you do is being able to stop when things don't go the way you want and go back and redo them the right way.  If you lack the motivation to have it done with all the detail and intricacy I see in your projects, you will end up cutting corners or just dropping the project altogether. 

Thanks on the book, I appreciate it!  I hope you enjoy it!

SpaceHedgehog

  • Trade Count: (0)
  • Full Member
  • ***
  • Offline Offline
  • Posts: 937
  • Last login:February 06, 2023, 12:10:24 pm
  • Almost done ...
Re: CP-1 Command Pod: The VR Space exploration project
« Reply #262 on: July 06, 2015, 12:41:50 pm »
I'm sure I will enjoy the book dkersten, it sounds like just my kind of thing  :cheers:

I've cut the inlay access panels:


I am currently gluing the sections I cut earlier (epoxy will also be used once this is dry and additional braces added):


« Last Edit: July 06, 2015, 12:58:14 pm by SpaceHedgehog »
Click a pic for a video tour 

Slippyblade

  • Trade Count: (+2)
  • Full Member
  • ***
  • Offline Offline
  • Posts: 3167
  • Last login:November 16, 2023, 11:39:51 am
  • And to the death god we say, "Not today!"
Re: CP-1 Command Pod: The VR Space exploration project
« Reply #263 on: July 06, 2015, 05:20:59 pm »
I love painting minis.  The wife and I were into Warhammer Fantasy for a long time and have a couple hundred figs between the two of us.  I fully understand about the time investment - I've got a little over 20ish hours invested in my general figure. His magic glaive was the first time I ever got a color fade to flow correctly!

Fursphere

  • Trade Count: (0)
  • Full Member
  • ***
  • Offline Offline
  • Posts: 1210
  • Last login:Today at 10:13:19 pm
Re: CP-1 Command Pod: The VR Space exploration project
« Reply #264 on: July 06, 2015, 06:36:33 pm »
I love painting minis.  The wife and I were into Warhammer Fantasy for a long time and have a couple hundred figs between the two of us.  I fully understand about the time investment - I've got a little over 20ish hours invested in my general figure. His magic glaive was the first time I ever got a color fade to flow correctly!

I gave up on trying to paint fades with brushes and got a semi-cheap airbrush to paint 40k minis.  best.purchase.ever for that hobby.  :) 

/end thread derail   :P

SpaceHedgehog

  • Trade Count: (0)
  • Full Member
  • ***
  • Offline Offline
  • Posts: 937
  • Last login:February 06, 2023, 12:10:24 pm
  • Almost done ...
Re: CP-1 Command Pod: The VR Space exploration project
« Reply #265 on: July 07, 2015, 06:41:49 am »
Good to know other people on here are into figure painting too. Never had a go with an airbrush; something I've always had an eye on but never got around to it for some reason.
Click a pic for a video tour 

ChanceKJ

  • Trade Count: (0)
  • Full Member
  • ***
  • Offline Offline
  • Posts: 3229
  • Last login:August 07, 2021, 02:52:06 pm
Re: CP-1 Command Pod: The VR Space exploration project
« Reply #266 on: July 07, 2015, 02:10:05 pm »
I love painting 40K. I used to teach a painting class in a local hobby shop when I was 16. We were actually just talking about GamesWorkshop models in another thread.  :D

Superfrog

  • Trade Count: (0)
  • Full Member
  • ***
  • Offline Offline
  • Posts: 393
  • Last login:June 28, 2022, 10:39:08 am
    • My YouTube Channel
Re: CP-1 Command Pod: The VR Space exploration project
« Reply #267 on: July 07, 2015, 02:34:34 pm »
Back in the day I did some orks and rats and it was fun to do, how small they where and relaxing to paint with ONE hair brush  ;D
But I never play the board games with it.
My brother had A LOT of pieces and played long battles with friends, very nice and fun to watch.

Also fun to watch is the continue of a new masterpiece  :cheers:

I'm planning for a racing rig when I have a new home, so I lurk a lot on the net and your pod is a very good point to start at.
Thinking of 1 big projector and a rig instead of 3 monitor setup.

But it can allllll be something else  :banghead:

SpaceHedgehog

  • Trade Count: (0)
  • Full Member
  • ***
  • Offline Offline
  • Posts: 937
  • Last login:February 06, 2023, 12:10:24 pm
  • Almost done ...
Re: CP-1 Command Pod: The VR Space exploration project
« Reply #268 on: July 08, 2015, 06:55:22 am »
Seems like a lot of us have been into figure painting - that's probably why we spend so much time getting so picky over the tiny details :)

A couple more badges arrived in the post. I'll embed one of these in the top of the headrest. Haven't decided which one or what to do with the other one yet ...


Good luck with your racing sim build Superfrog!
Click a pic for a video tour 

Superfrog

  • Trade Count: (0)
  • Full Member
  • ***
  • Offline Offline
  • Posts: 393
  • Last login:June 28, 2022, 10:39:08 am
    • My YouTube Channel
Re: CP-1 Command Pod: The VR Space exploration project
« Reply #269 on: July 08, 2015, 03:22:23 pm »
Thanks SpaceHedgehog  :cheers:

Your right about the picky thing.
I have that with almost everything I do, sometimes it's  :banghead: :banghead: :banghead: :dizzy:
But very satisfied when all things coming together at the end.

That's all the fun for me.

And watching at fine detailed builds  :cheers:

Greetings

SpaceHedgehog

  • Trade Count: (0)
  • Full Member
  • ***
  • Offline Offline
  • Posts: 937
  • Last login:February 06, 2023, 12:10:24 pm
  • Almost done ...
Re: CP-1 Command Pod: The VR Space exploration project
« Reply #270 on: July 09, 2015, 02:32:40 pm »
Slap the body filler on and sand back to seal the MDF edges:


It'll still require more filling after I find the defects after applying the primer.
Click a pic for a video tour 

BGoulette

  • Trade Count: (0)
  • Full Member
  • ***
  • Offline Offline
  • Posts: 192
  • Last login:April 23, 2024, 09:41:55 am
    • lazerjoose.com
Re: CP-1 Command Pod: The VR Space exploration project
« Reply #271 on: July 09, 2015, 02:56:59 pm »
This -- and your r-pod -- is amazing! Have you ever used a product like Zinsser Ready Patch in place of body filler? I've used both (for non arcade projects, regrettably) and wondered if you had a preference, assuming you've tried both. I love reading through your posts in this thread -- some great work, for sure!

SpaceHedgehog

  • Trade Count: (0)
  • Full Member
  • ***
  • Offline Offline
  • Posts: 937
  • Last login:February 06, 2023, 12:10:24 pm
  • Almost done ...
Re: CP-1 Command Pod: The VR Space exploration project
« Reply #272 on: July 09, 2015, 03:31:35 pm »
Cheers for that BGoulette  :cheers: I've tried a number of methods to get a good finish including various fillers. One thing I can be sure of with the body filler is that I will get consistent finish so it's something I've grown to trust and accept it'll take some time. Having said that, I'm always game for trying different products so will keep an eye out for that one.

Glad you enjoy reading the posts; feedback like that makes me glad I make the effort!
Click a pic for a video tour 

SpaceHedgehog

  • Trade Count: (0)
  • Full Member
  • ***
  • Offline Offline
  • Posts: 937
  • Last login:February 06, 2023, 12:10:24 pm
  • Almost done ...
Re: CP-1 Command Pod: The VR Space exploration project
« Reply #273 on: July 11, 2015, 06:55:35 am »
The headrest side panels have been prepared:


First undercoat applied:


Bracing has been made for the central shell panels:


Holes drilled to fit the badge :


Click a pic for a video tour 

SpaceHedgehog

  • Trade Count: (0)
  • Full Member
  • ***
  • Offline Offline
  • Posts: 937
  • Last login:February 06, 2023, 12:10:24 pm
  • Almost done ...
Re: CP-1 Command Pod: The VR Space exploration project
« Reply #274 on: July 11, 2015, 08:54:48 am »
A few meters of vinyl. I love this stuff:


Covered part of the shell with vinyl:


Badge close up:


Click a pic for a video tour 

SpaceHedgehog

  • Trade Count: (0)
  • Full Member
  • ***
  • Offline Offline
  • Posts: 937
  • Last login:February 06, 2023, 12:10:24 pm
  • Almost done ...
Re: CP-1 Command Pod: The VR Space exploration project
« Reply #275 on: July 11, 2015, 11:43:20 am »
I've covered the headrest pillar and back plate with vinyl:


Approximately 75% of this won't be visible when fitted ...
Click a pic for a video tour 

SpaceHedgehog

  • Trade Count: (0)
  • Full Member
  • ***
  • Offline Offline
  • Posts: 937
  • Last login:February 06, 2023, 12:10:24 pm
  • Almost done ...
Re: CP-1 Command Pod: The VR Space exploration project
« Reply #276 on: July 11, 2015, 12:49:28 pm »
Sanded, marked, filled and sanded again:


I will start painting these black tomorrow. There's almost certainly a little more filling to do as well.
Click a pic for a video tour 

SpaceHedgehog

  • Trade Count: (0)
  • Full Member
  • ***
  • Offline Offline
  • Posts: 937
  • Last login:February 06, 2023, 12:10:24 pm
  • Almost done ...
Re: CP-1 Command Pod: The VR Space exploration project
« Reply #277 on: July 12, 2015, 10:40:56 am »
Applied the first coat of flat black. I'll need to inspect for flaws once dry and fill / sand again:

Click a pic for a video tour 

vwalbridge

  • Trade Count: (0)
  • Full Member
  • ***
  • Offline Offline
  • Posts: 2082
  • Last login:July 31, 2021, 12:21:09 pm
  • Don't half-ass two things, whole-ass one thing.
Re: CP-1 Command Pod: The VR Space exploration project
« Reply #278 on: July 12, 2015, 04:49:53 pm »
That vinyl looks really great.

I must have used some crummy vinyl but I could never seem to get it to adhere whatsoever to MDF. Do you have a trick or special vinyl that will adhere properly to bare MDF?
If you can read this, it means Photobucket's money grab ruined my signature photos.

SpaceHedgehog

  • Trade Count: (0)
  • Full Member
  • ***
  • Offline Offline
  • Posts: 937
  • Last login:February 06, 2023, 12:10:24 pm
  • Almost done ...
Re: CP-1 Command Pod: The VR Space exploration project
« Reply #279 on: July 18, 2015, 01:24:42 pm »
This project will be dedicated to my mother, Wendie, who sadly passed away yesterday.

@vwalbridge, I use blackboard vinyl. It's thicker than regular self adhesive vinyl, is more durable (it's designed to be abused a bit), more forgiving when applying and has a great texture to it. It comes in approx 1m widths. I purchase it from here:

http://www.mdpsupplies.co.uk/blackboard.asp

For simple flat surfaces, it's self explanatory. Preparation of the surface is key - it must me flat and smooth. I will typically use a Swiffer cloth to remove any dust and then pass my hands over the surface a few times. It may sound obvious but it's best to work on an elevated surface if possible to avoid any debris being picked up from the floor.

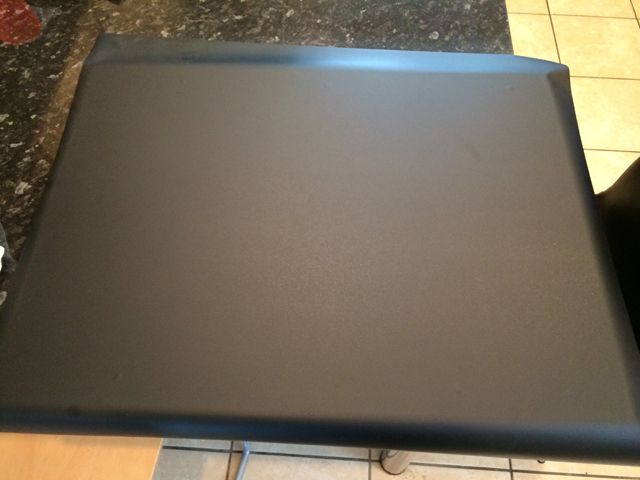
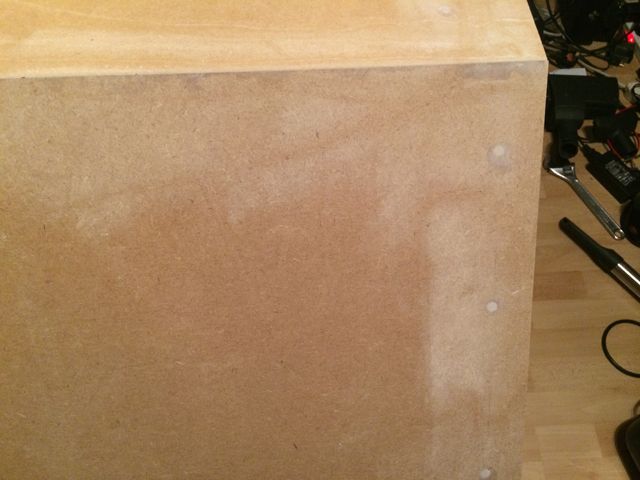
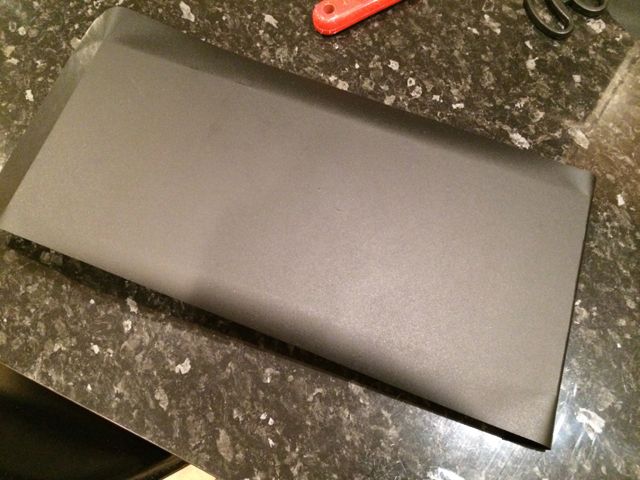
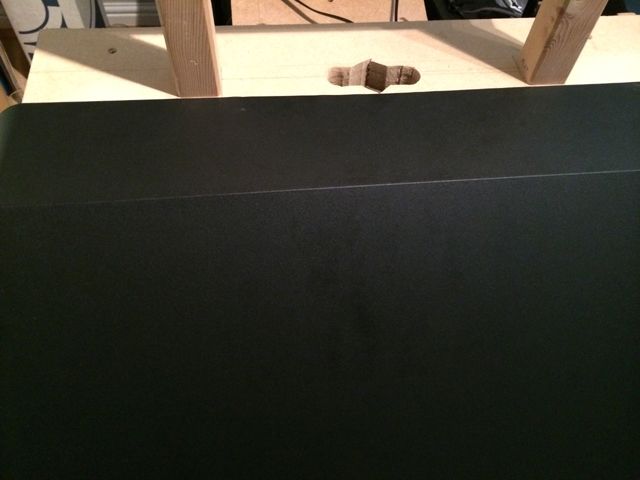
Take your single piece of wood, cut the vinyl to size and apply. Over cut the vinyl by a sensible amount, to ensure that the whole piece is covered, draw back the backing paper by a few inches and start working from one end. Use your hand to start smoothing from the middle of the piece initially and then smooth towards the edges. Continue to draw back the vinyl a few inches at a time and repeat the process until covered (the 2 bumps at the top of this picture are due to holes drilled in the panel):


Once covered, flip the piece over, Place on a large piece of scrap wood and trim the excess the a sharp knife - a blade which extends beyond the thickness of the panel should be used:


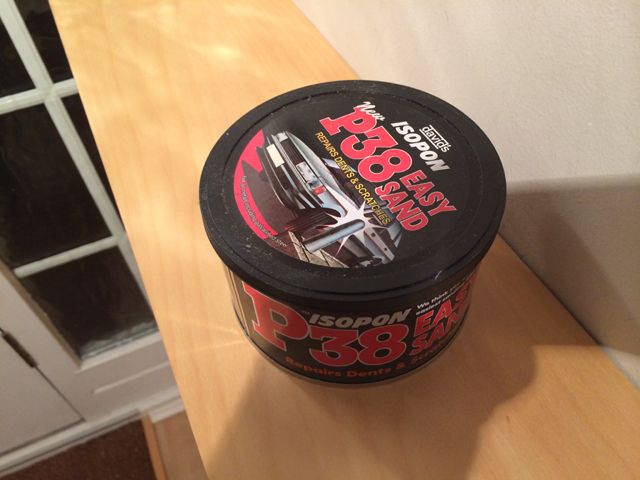
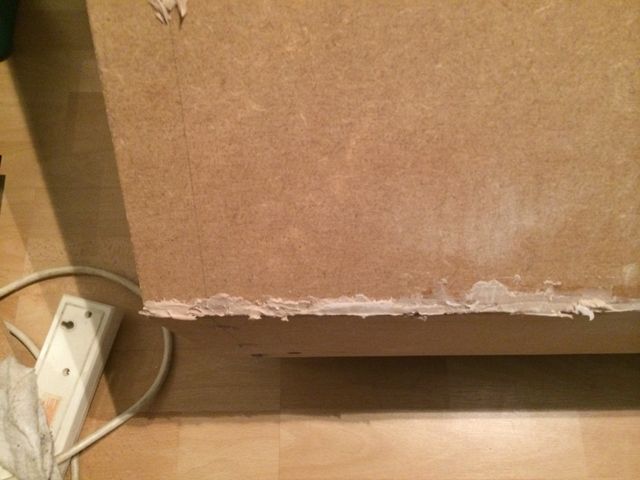
For panels which have screws embedded or are uneven, make sure these are filled and sanded. Avoid regular filled as this tends to crack and shrink. I use car body filler (p38):


Apply liberally to fill the holes:


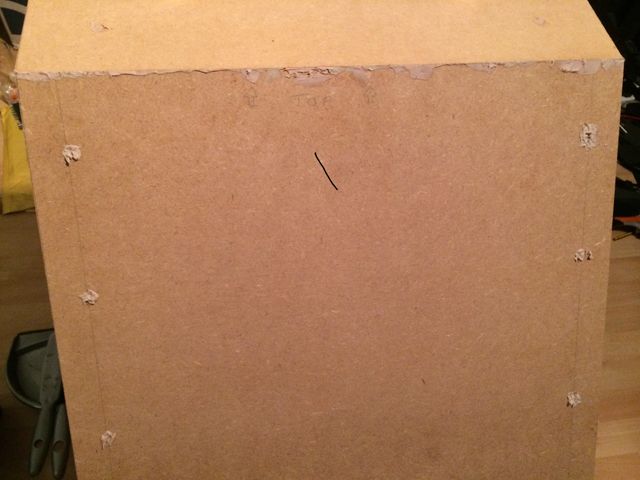
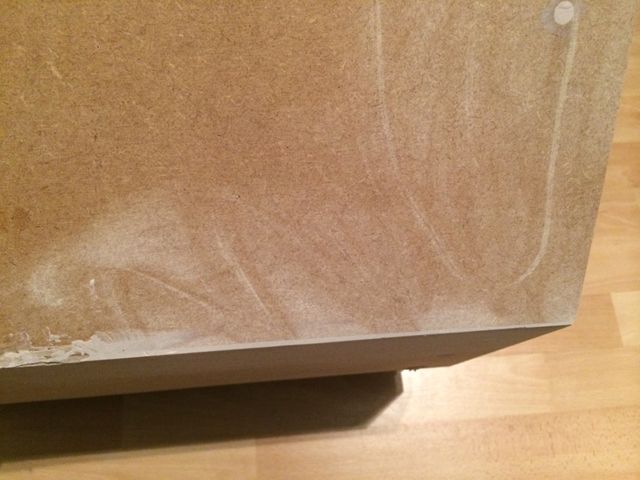
Sand with a 180 grit sandpaper until smooth:


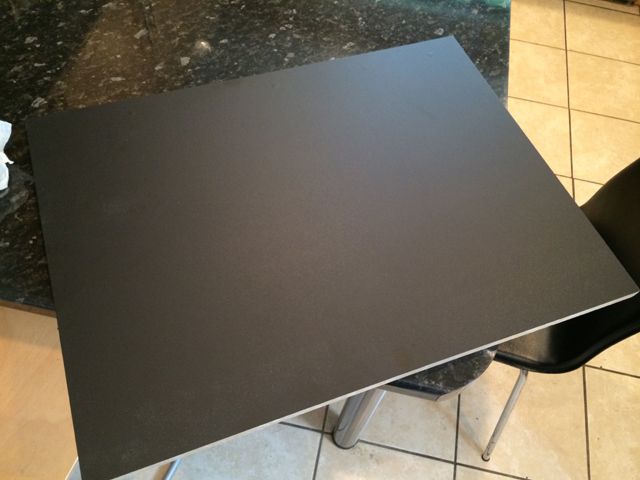
You can now dust and apply the vinyl.

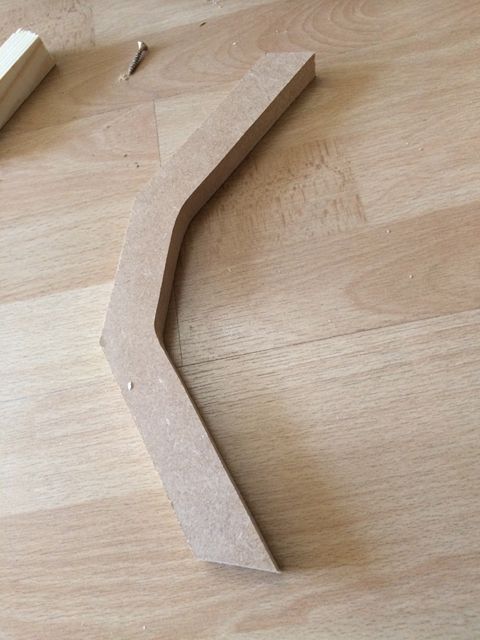
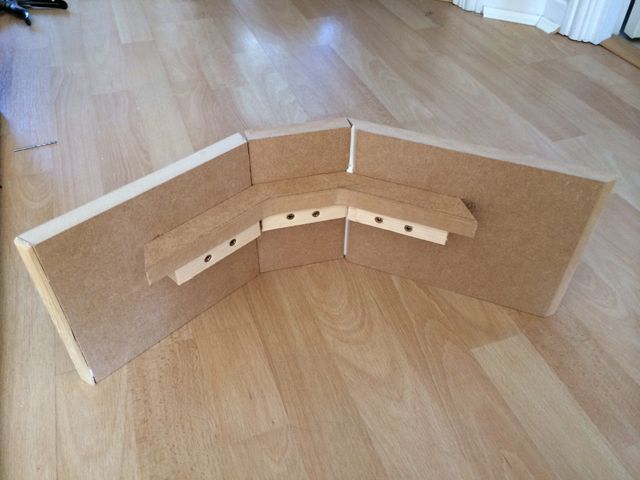
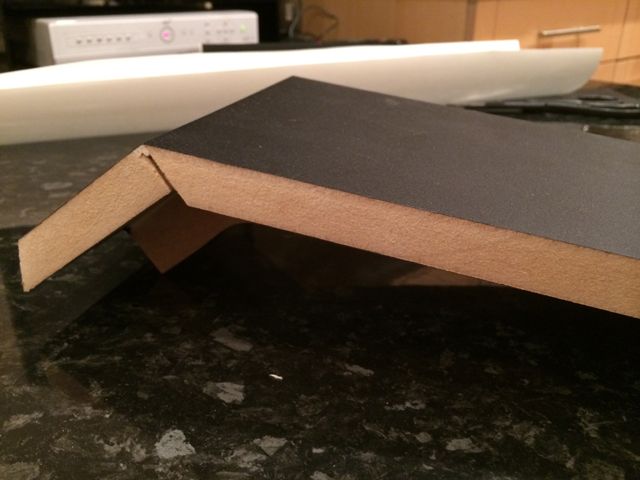
For more complex pieces across multiple planes where a single seamless stretch of vinyl is to be applied, I usually create some bracing to give the piece rigidity. Taking the front of the shifter pod as an example


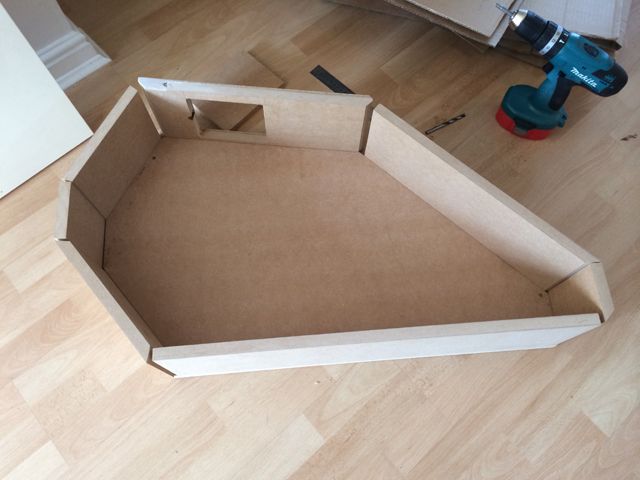
Create some internal bracing to ensure the whole piece is well supported:


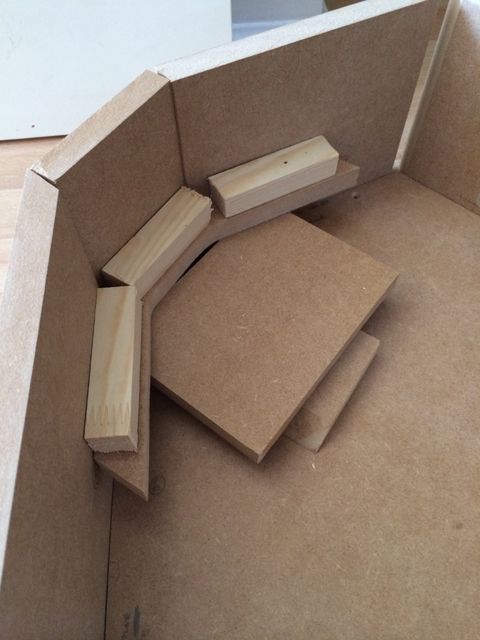
The panels can then be glued together along with the bracing. Wood strips are added so the bracing can be screwed to the outer panel:


Once you have your piece prepared, use filler and sand down:


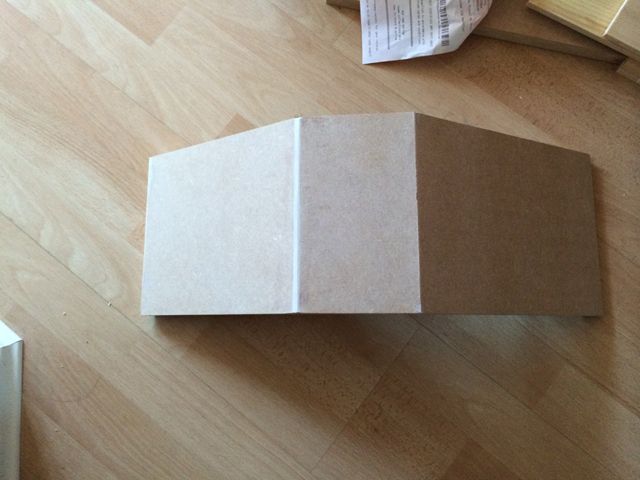
For vinyl covering of a piece like this, it may be sensible to start in the middle rather than one end. Here, I have drawn back the backing paper and applied it to one of the middle angled sections. Be sure not to let the vinyl pick up any debris and reattach some of the backing paper if necessary. Apply the vinyl close to one of the edges and attache to the first surface. Work the vinyl around the edges pressing really firmly with your thumbs as you do so. This may well start to hurt after a while!


Continue to cover the piece by drawing back the backing paper:


Important note
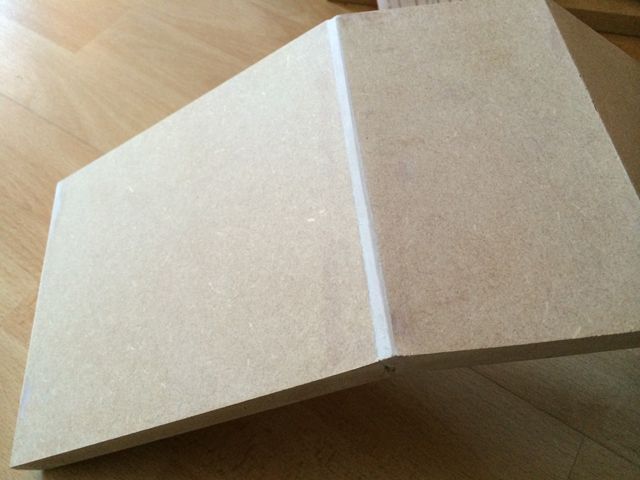
: If wrapping around angles greater than about 70 degrees, round off the edges by sanding very lightly. This will ensure that the vinyl doesn't bubble at the edges.

Once you reach the underside of the piece, starting in the middle, pull the vinyl firmly (it will stretch very slightly) and stick into place. Then do the same in sections working towards the outsides. Again. this avoids any unsightly bubbling.

You can then trim the vinyl. Work in sections if necessary if it's being wrapped around the ends of the panels:


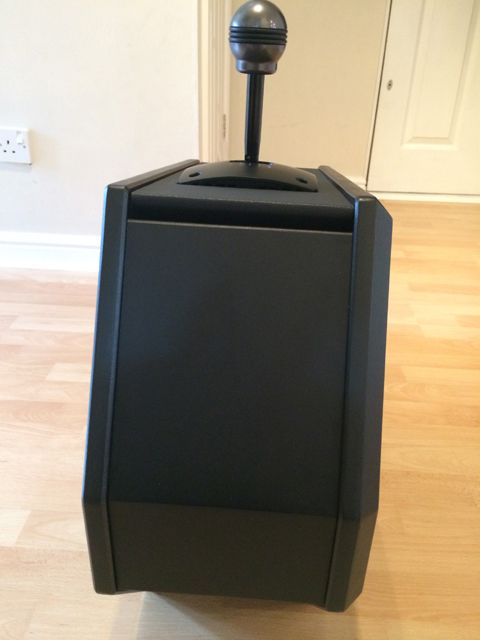
You should end up with a nicely covered piece:


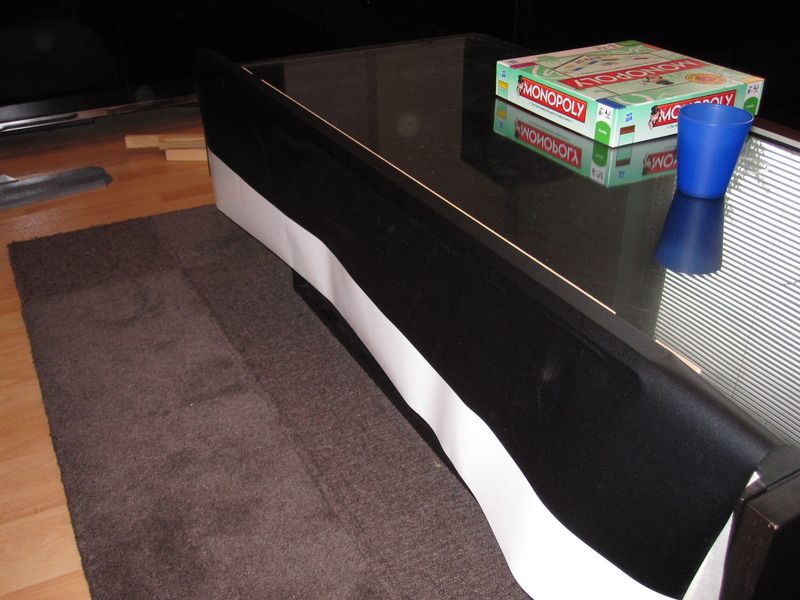
For larger sections, it's best to enlist the help of another pair of hands. Preparation is key so use filler as required and sand to a nice sharp angle:


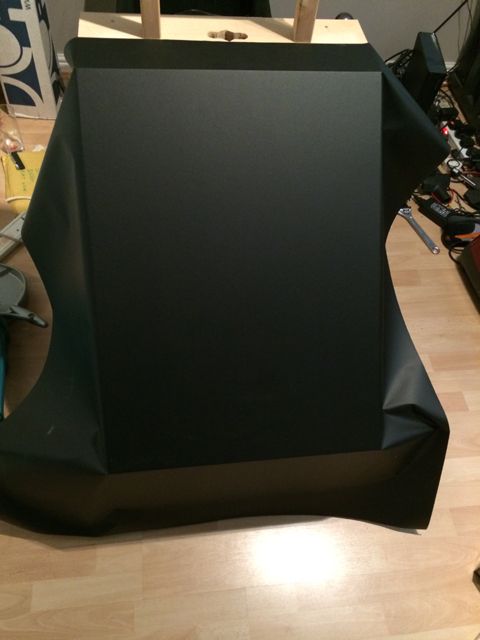
Dust off and start to apply the vinyl. I go overboard with excess on larger complex surfaces. It's best to waste more vinyl here than ruin the piece and have to cut another large section and throw the original away. Here I started applying the vinyl at the top. Line the vinyl up, attach to the first surface and press very firmly with your thumbs - I cannot stress enough the need to be very aggressive with this.


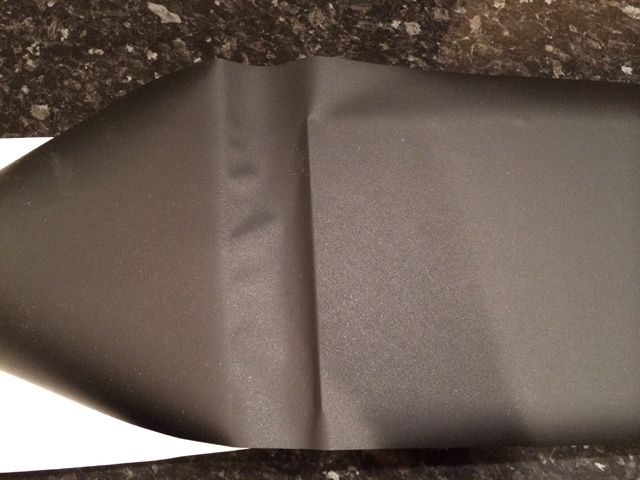
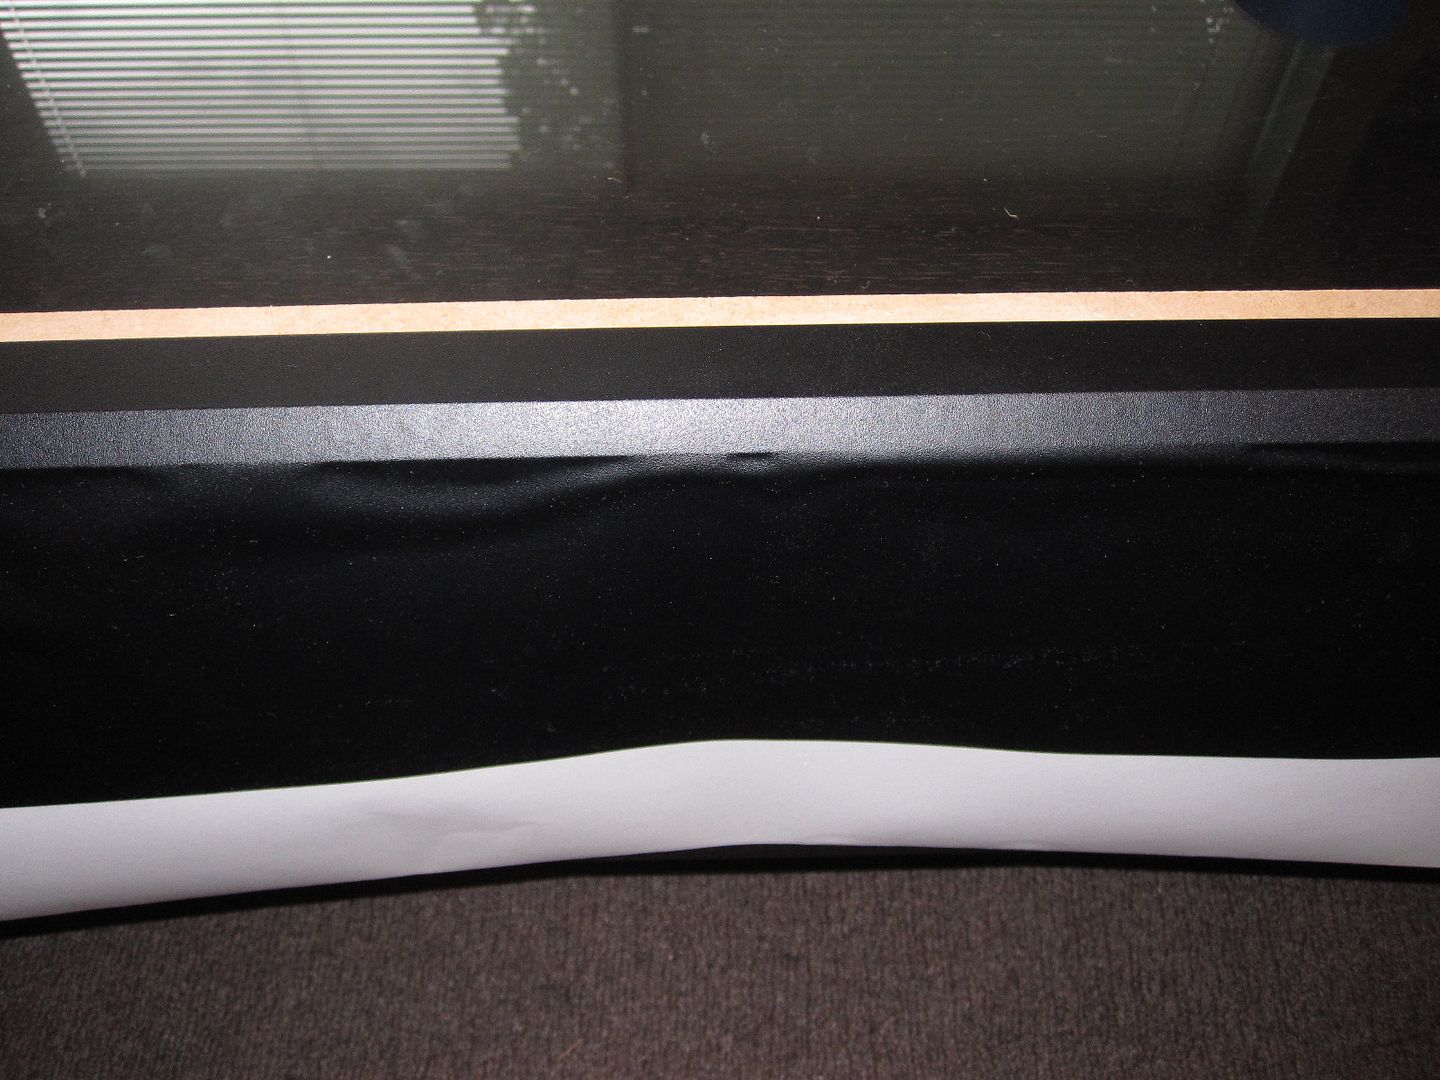
Again, working slowly and drawing the vinyl backing paper a few inches at a time, apply the vinyl:


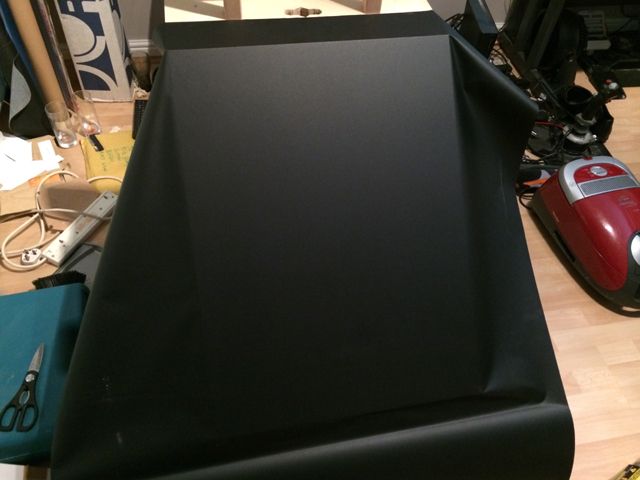
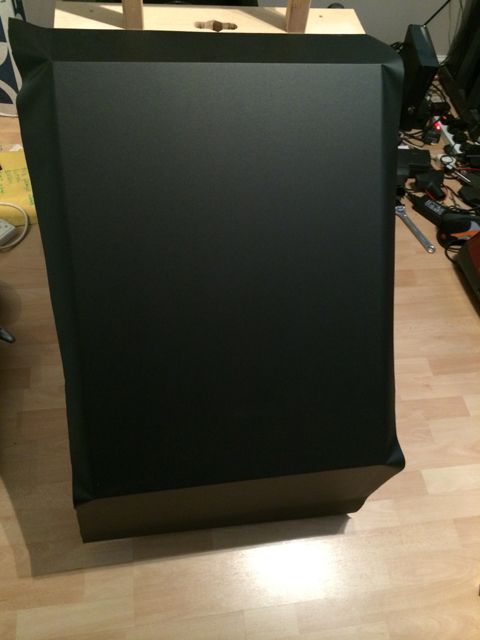
It will end up looking something like this:


If there's a lot of excess, rough cut some of it away with a blade, keeping a reasonable distance from the edges:


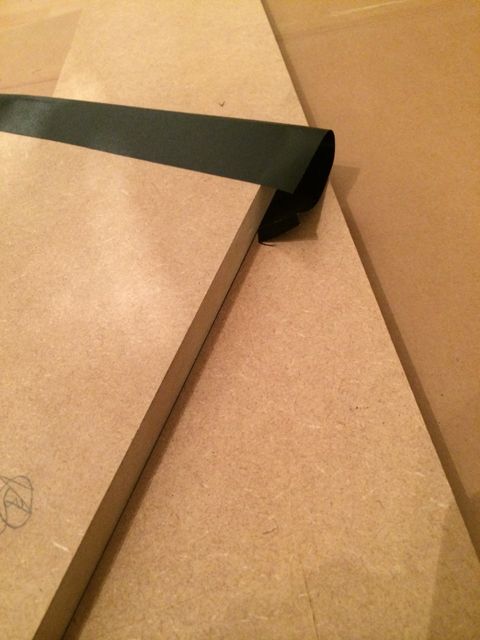
For a large immovable shape like this, a sharp blade and a length of wood can be used:


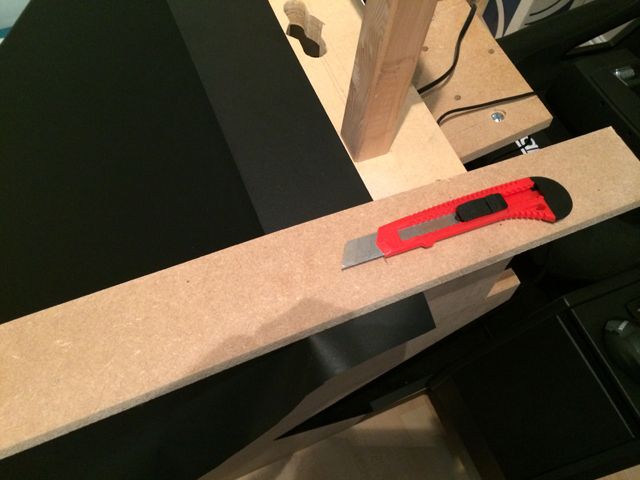
Place the wood on the top of the vinyl and cut from the underside, working in sections:


Continue around the edge until complete:


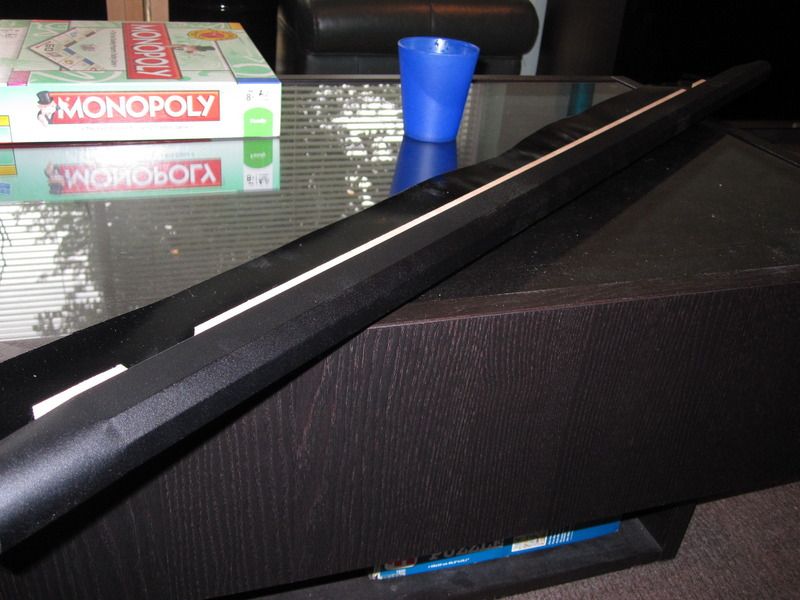
I will then usually paint the edges of the MDF black (water based blackboard paint) to ensure that no wood is visible once any side pieces are attached. As the side is painted, a piece of kitchen towel can be used to ensure any paint making its way onto the vinyl surface can be wiped away.

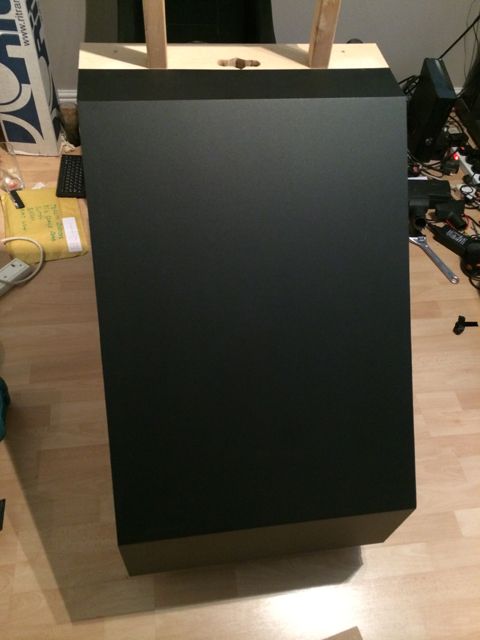
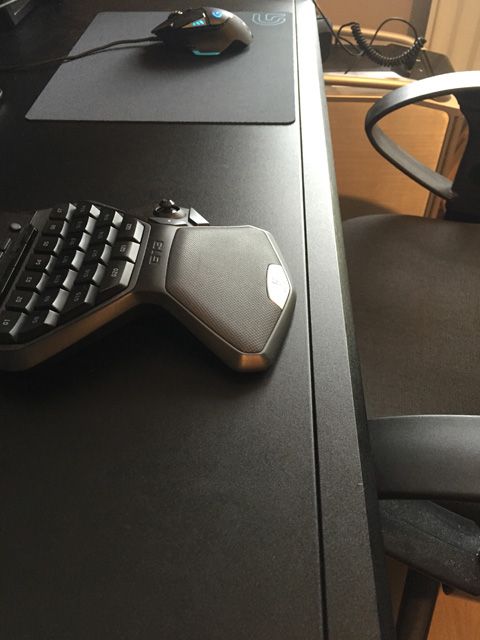
A few more pictures of the wrapping process for a more difficult piece - the front section of my desk. This really hurt my thumbs!


The finished piece:


Hope this was useful.
« Last Edit: July 18, 2015, 01:26:44 pm by SpaceHedgehog »
Click a pic for a video tour