Main Restorations Software Audio/Jukebox/MP3 Everything Else Buy/Sell/Trade
Project Announcements Monitor/Video GroovyMAME Merit/JVL Touchscreen Meet Up Retail Vendors
Driving & Racing Woodworking Software Support Forums Consoles Project Arcade Reviews
Automated Projects Artwork Frontend Support Forums Pinball Forum Discussion Old Boards
Raspberry Pi & Dev Board controls.dat Linux Miscellaneous Arcade Wiki Discussion Old Archives
Lightguns Arcade1Up Try the site in https mode Site News

Unread posts | New Replies | Recent posts | Rules | Chatroom | Wiki | File Repository | RSS | Submit news


Author Topic: First cab coming along  (Read 10070 times)

0 Members and 1 Guest are viewing this topic.

Zeenon

  • Trade Count: (0)
  • Full Member
  • ***
  • Offline Offline
  • Posts: 41
  • Last login:January 26, 2018, 08:51:10 pm
  • New Jersey - The Greatest Country in the World
First cab coming along
« on: March 14, 2013, 11:09:02 am »
So a friend and I set off to build a cab a few months back and I thought I'd post some pics.


Your basic plywood, laminate, and t-molding model. We basically took the design aspects from arcadecab.com and a few members here (boothammer, Project X Arcade), and this is what we came up with. I didn't want a deep cab so it is narrower then your usual setup. Note the slot about a foot behind the marquee area.....this was made to slide a 27" x 23" piece of glass in from the top. 


Couple fans to keep the inside cool. Added a push button to the top right for PC on/off. I split (Y) this outside the case so you can still use the normal power button on the PC.


Mini coin door


I know a drawer on a cab is not popular, but I needed some storage for the light guns, manuals, and occasional keyboard/mouse.


backside. I used the threaded inserts on panels I thought I may need access too in the future. I split top/bottom panels figuring I would most likely be working on the PC more then anything, and glued a piece of T-molding to hide the seem.


Modded PC power supply which will power a PACLED64, the two fans, and lights on the coin door.

Far from finished but I just thought I'd check in.

Z
« Last Edit: March 14, 2013, 11:17:58 am by Zeenon »

Mental

  • Trade Count: (0)
  • Full Member
  • ***
  • Offline Offline
  • Posts: 93
  • Last login:May 18, 2013, 09:46:08 am
    • Complete cocktail arcade system
Re: First cab coming along
« Reply #1 on: March 14, 2013, 02:30:59 pm »
Looks like you know what you're doing!
Complete cocktail arcade system: arcadecabinets.ca

Zeenon

  • Trade Count: (0)
  • Full Member
  • ***
  • Offline Offline
  • Posts: 41
  • Last login:January 26, 2018, 08:51:10 pm
  • New Jersey - The Greatest Country in the World
Re: First cab coming along
« Reply #2 on: March 15, 2013, 10:48:20 am »
I owe it all to the pictures and write-ups of the people on this forum. Before I started I had zero woodworking knowledge but a ton of computer/electrical know how.

Thanks to PL1 and Badmouth for answering all of the dumb questions I threw their way.

Z


Zeenon

  • Trade Count: (0)
  • Full Member
  • ***
  • Offline Offline
  • Posts: 41
  • Last login:January 26, 2018, 08:51:10 pm
  • New Jersey - The Greatest Country in the World
Re: First cab coming along
« Reply #3 on: March 15, 2013, 11:03:51 am »
I finally figured out the aimtrak lightgun setup issue. I could get one game working, then when I went to the next I'd have to fiddle around with the button assignments in the amitrak utility. I could never see the side buttons inside MAME unless I unchecked Offscreen shots reload. So I got Area 51 working, then Carnevil, then I get to Terminator 2 and I can't uncheck Offscreen shots reload....GREAT :(

So I think I solved it, if you are going to use GP Buttons you MUST enable the joystick input also or MAME will not see those L/R buttons. So far out of the 7 light gun games I tested all work.


Z

Zeenon

  • Trade Count: (0)
  • Full Member
  • ***
  • Offline Offline
  • Posts: 41
  • Last login:January 26, 2018, 08:51:10 pm
  • New Jersey - The Greatest Country in the World
Re: First cab coming along
« Reply #4 on: March 22, 2013, 02:57:32 pm »


Mock up of control panel sides.  (No these are not the colors, I just grabbed some spare buttons to test)


Like everyone else says the pictures do not do it justice, but the blue buttons are banging!!!

Z

Zeenon

  • Trade Count: (0)
  • Full Member
  • ***
  • Offline Offline
  • Posts: 41
  • Last login:January 26, 2018, 08:51:10 pm
  • New Jersey - The Greatest Country in the World
Re: First cab coming along
« Reply #5 on: April 25, 2013, 08:48:19 pm »
Finally had a chance to finish up the CP base. Yes it is laminated....never again. Joined the baseboard and sides with biscuits and wood glue.

The buttons on the left and right are for pinball tables with the plunger in the front.


Have to finish up the holes for the joystick and route the trackball....


Finished up the marquee...


DHTech

  • Trade Count: (0)
  • Full Member
  • ***
  • Offline Offline
  • Posts: 127
  • Last login:November 29, 2014, 03:48:36 pm
  • Arcade Flashback
    • Arcade Flashback - Hand Made Custom Arcade Machines UK
Re: First cab coming along
« Reply #6 on: April 26, 2013, 02:19:22 am »
Good job sir  :)

BillinIndiana

  • Trade Count: (0)
  • Full Member
  • ***
  • Offline Offline
  • Posts: 38
  • Last login:June 19, 2013, 12:18:53 pm
  • I want to build my own arcade controls!
Re: First cab coming along
« Reply #7 on: April 26, 2013, 03:02:15 pm »
I like this one a lot.. Nice job. What size/model #  is the monitor ?

Gray_Area

  • -Banned-
  • Trade Count: (+1)
  • Full Member
  • ***
  • Offline Offline
  • Posts: 3363
  • Last login:June 23, 2013, 06:52:30 pm
  • -Banned-
Re: First cab coming along
« Reply #8 on: April 26, 2013, 07:19:39 pm »
What?....you laminated the cab, but the cp dodged ya?

Looks fab, dude. I might touch up the front edge of the cp, as it looks a little hand-done.
-Banned-

Jeromebechaz

  • Trade Count: (0)
  • Full Member
  • ***
  • Offline Offline
  • Posts: 77
  • Last login:April 05, 2017, 06:16:20 am
  • I want to build my own arcade controls!
First cab coming along
« Reply #9 on: April 26, 2013, 07:56:42 pm »
Can you teach me why you have 3 pinball buttons? I'm thinking about putting 2 on each side but what is recommended?

Brian74

  • Trade Count: (0)
  • Full Member
  • ***
  • Offline Offline
  • Posts: 1089
  • Last login:April 21, 2025, 11:11:53 am
  • Yep... I built that!!
Re: First cab coming along
« Reply #10 on: April 26, 2013, 08:43:14 pm »
Can you teach me why you have 3 pinball buttons? I'm thinking about putting 2 on each side but what is recommended?

My guess, two for flippers one for nudge.
         

Jeromebechaz

  • Trade Count: (0)
  • Full Member
  • ***
  • Offline Offline
  • Posts: 77
  • Last login:April 05, 2017, 06:16:20 am
  • I want to build my own arcade controls!
First cab coming along
« Reply #11 on: April 26, 2013, 09:27:31 pm »
Can you teach me why you have 3 pinball buttons? I'm thinking about putting 2 on each side but what is recommended?

My guess, two for flippers one for nudge.
do you think it is necessary  for 3? even 2? On one side that is

Drnick

  • Trade Count: (+2)
  • Full Member
  • ***
  • Offline Offline
  • Posts: 1642
  • Last login:June 21, 2024, 03:32:31 pm
  • Plodding Through Life
Re: First cab coming along
« Reply #12 on: April 27, 2013, 10:27:38 am »
You want 2 on each side if you play tables that use upper flippers or magnasave.  3rd button is optional, depends on if you want nudge buttons or go the Motion Detection method.

Jeromebechaz

  • Trade Count: (0)
  • Full Member
  • ***
  • Offline Offline
  • Posts: 77
  • Last login:April 05, 2017, 06:16:20 am
  • I want to build my own arcade controls!
First cab coming along
« Reply #13 on: April 27, 2013, 06:44:21 pm »
Yeah I think I'll just go with 2

Zeenon

  • Trade Count: (0)
  • Full Member
  • ***
  • Offline Offline
  • Posts: 41
  • Last login:January 26, 2018, 08:51:10 pm
  • New Jersey - The Greatest Country in the World
Re: First cab coming along
« Reply #14 on: April 27, 2013, 10:52:56 pm »
BillinIndiana,

ViewSonic 27" VA2703 http://www.amazon.com/Viewsonics-VA2703-27-Inch-Widescreen-Monitor/dp/B005ZT5C2M/ref=sr_1_2?ie=UTF8&qid=1367117801&sr=8-2&keywords=VA2703

Gray_Area,

Laminating the sides was not fun :angry:. I still have to sand down the outer edges of the CP top, laminate it, and add the t-modeling.

Jeromebechaz,

Everyone is correct, the buttons are L/R Flipper. L/R Nudge, and L/R Magnasave or L/R Upper Flipper. http://forum.arcadecontrols.com/index.php/topic,130438.msg1334965.html#msg1334965

Z
« Last Edit: April 27, 2013, 11:04:05 pm by Zeenon »

Zeenon

  • Trade Count: (0)
  • Full Member
  • ***
  • Offline Offline
  • Posts: 41
  • Last login:January 26, 2018, 08:51:10 pm
  • New Jersey - The Greatest Country in the World
Game Central Station
« Reply #15 on: September 25, 2013, 01:20:11 pm »
Final pics. Finished my MAME cab and pinball machine at the same time. Added my pinball highlights to this thread, but if you want the original click
 http://www.hyperspin-fe.com/forum/showthread.php?24865-Tiki-Gods-Pinball-46-quot-32-quot-DMD-Widebody-Build


Z

« Last Edit: September 25, 2013, 01:37:53 pm by Zeenon »

Zeenon

  • Trade Count: (0)
  • Full Member
  • ***
  • Offline Offline
  • Posts: 41
  • Last login:January 26, 2018, 08:51:10 pm
  • New Jersey - The Greatest Country in the World
Re: First cab coming along
« Reply #16 on: September 25, 2013, 01:30:36 pm »
PINBALL CABINET

- Cabinet

    Widebody based on the popular Williams plans by Mameman.
    Ultimate Cab-Builder's Kit (Widebody) ($400) LINK
    -----Optional Parts: (although these are not needed the header makes for a quick disconnect if needed, and the coin mech adds another touch of realism)
    -----13 Pin header for coin door ($1) LINK
    -----Happ coin door mechs ($20 total) eBay but here is a LINK
    Virtuapin Digital Plunger Kit ($140) LINK

    Paradise Arcade Clear IL Translucent button with Rollie Leaf switches for flippers ($5 ea)
    IL-lumination RGB LEDs for buttons ($2.75 ea)
    Bally Launch Ball button -Yellow ($10)
    Illuminated Reduced Footprint Pushbutton w/ Soft-touch switch (red,green,blue) ($2.25ea)
    LED-Wiz™ 32-port USB Lighting and Output Controller ($45)

    18 gauge wire (red, green, blue, black)

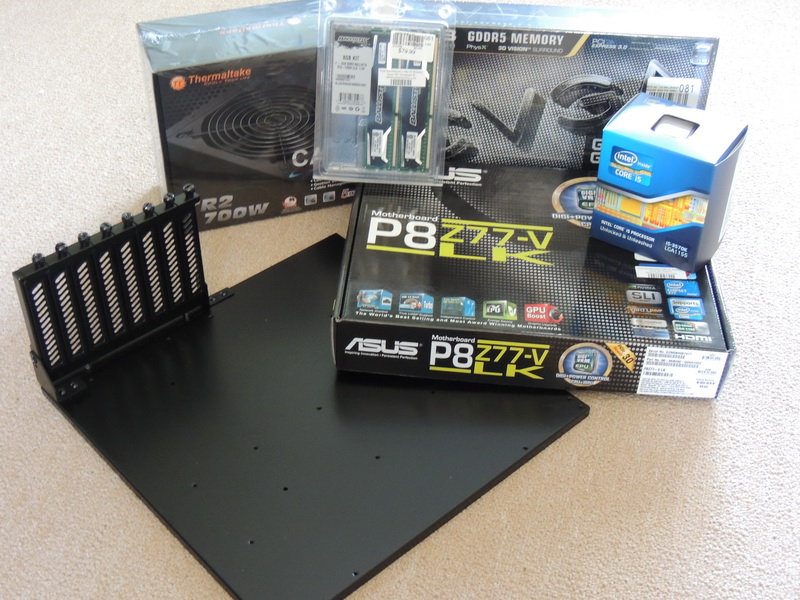
- PC Setup

    Windows 7 64-Bit
    Intel Core I5-3570K
    ASUS P8Z77-VLK ATX Motherboard
    Crucial 8GB 1600 RAM (2x 4GB sicks)
    EVGA GTX660SC 2GB PCIE Video Card
    Thermaltake TR2 700W ATX Power Supply
    Medialink Wireless Adapter ($20)

- Screens

    46" Playfield: Samsung UN46ES6003 Super Thin LED LCD 1080P ($640) Amazon Warehouse deals
    Decasing  here
    32" Backfield: Samsung UN32EH5000 1080p 60Hz LED HDTV ($280) Amazon Warehouse deals
    Vishay LEE-128G032B Orange LED DMD w/ PinDMD2 ($355)
    KK-156 (76650-0096) Molex connector for DMD ($3)
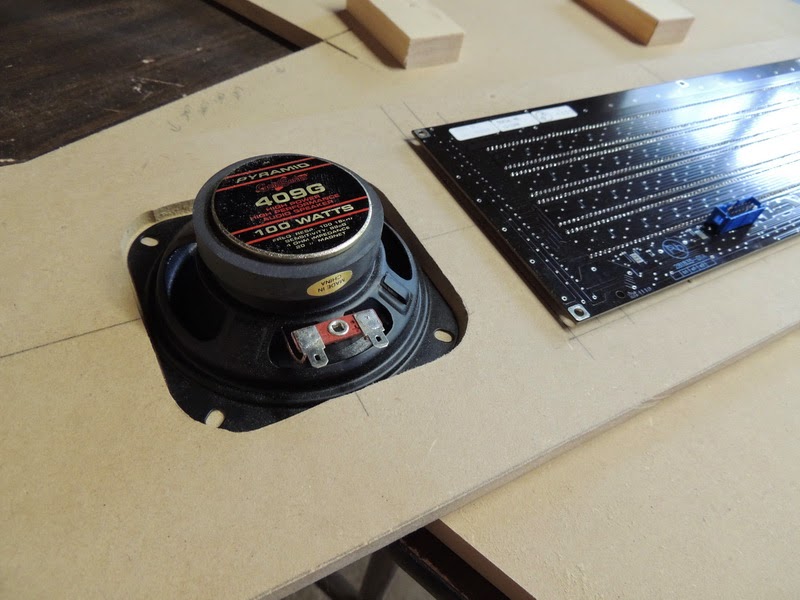
 LINK

- Sound

2 - Pyramid 4" dual cone 100W speakers #409G
Infinity 10" Subwoofer ($50)
Lepai LP-168HA 2.1 2x40W amplifier
Boss 400W 4 Channel Amp #CE404

- Lighting
- 5x Cree LED MCPCB STAR 3LED RD/GN/BLU ($12 ea) LINK
- 5x STARBOARD HEATSINK 2.88C/W 1" ($3 ea)LINK
- 2 x 22 LED white car Flash Strobe Emergency Light 12V ($14) LINK
- Arctic Silver Alumina AATA-5G Thermal Adhesive (for LED heatsinks) LINK


- Cooling

    5x Cooler Master 120mm R4 Computer Case Fan (R4-C2R-20AC-GP) $7.50ea Amazon
    5x 120mm chrome fan grills $3ea Amazon

- Misc Toys
   
    Zeb's Virtual Output Kit ($300) LINK
    Zeb's Shaker/Gear Motor Combo ($135) LINK
   Thermaltake TR-700 700W power supply for VOP ($)

    ATX Motherboard Tray - Black $32 Performance PCs
   Smart Strip LCG3 ($30)

Starting to get all the parts in:


Vishay and PinDMD2:


Custom made brackets made of angled aluminum to hold HD's. I may switch to SSD drive in the future.


46" Samsung playfield.
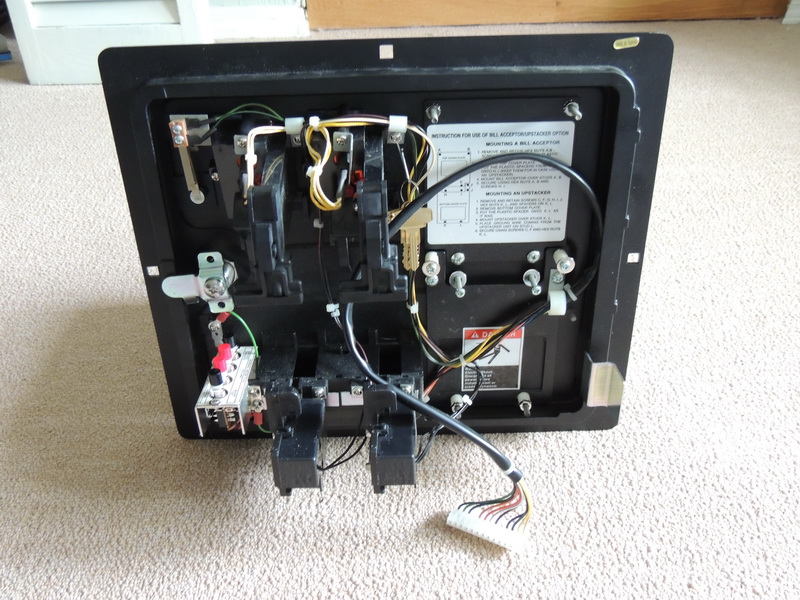

Coin door


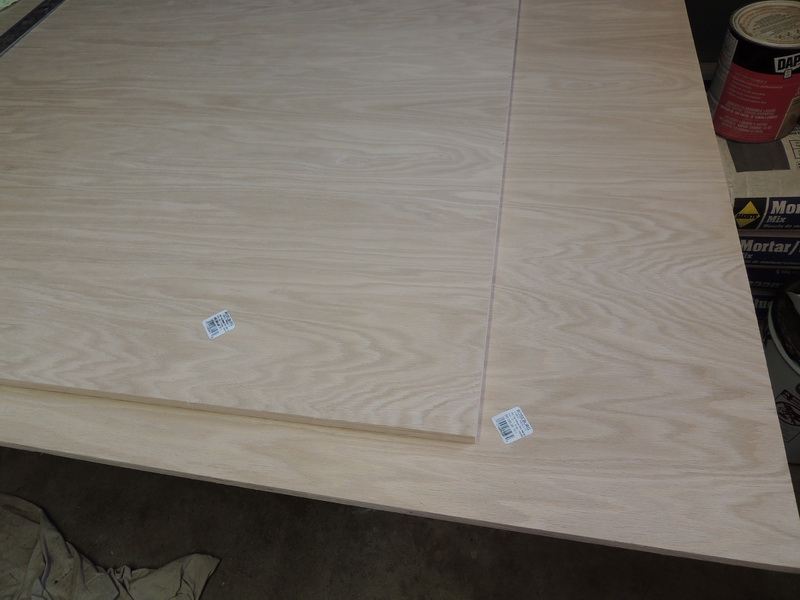
2 - sheets of 4x8 oak to start with:


As seen on other posts I bought a set of metal guides since I was using a circular saw for 98% of the cuts:
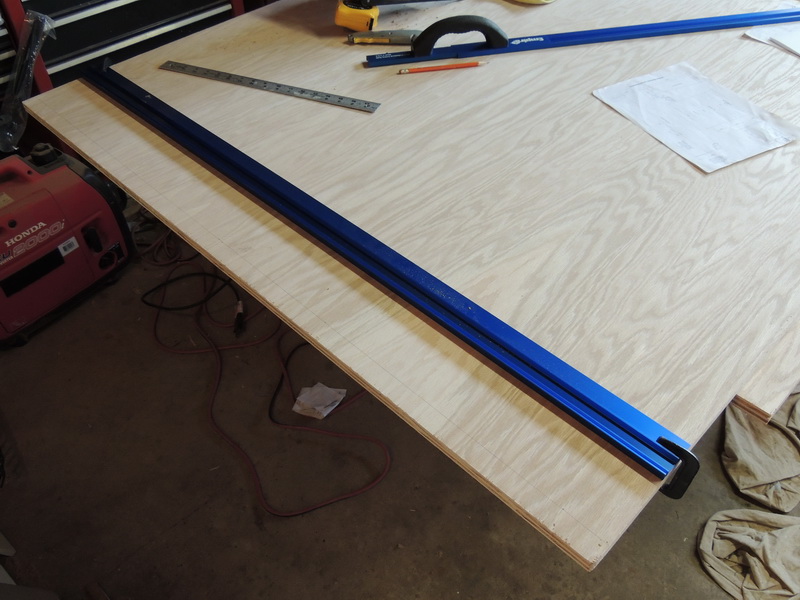

First side cut:


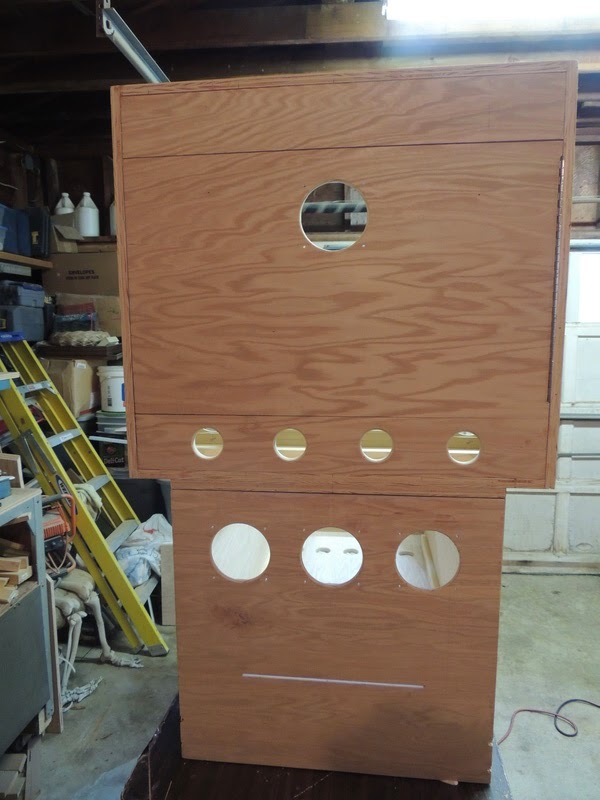
Ahhh the finished product. I just wanted to see what I was dealing with so I dry fit all the pieces.


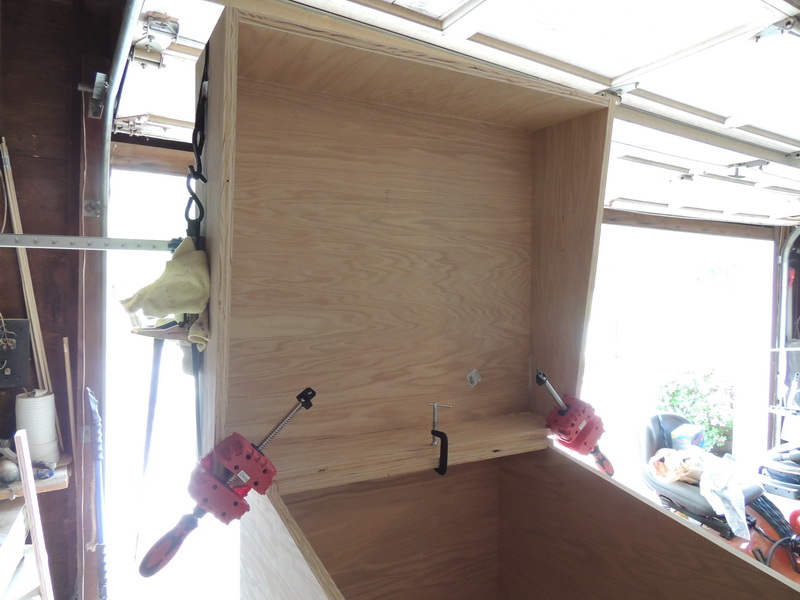
Cutting the holes in this cab was a breeze with scottpe advice on the circle jig (see scottpe Star Wars build). Never owned one before but it was invaluable.


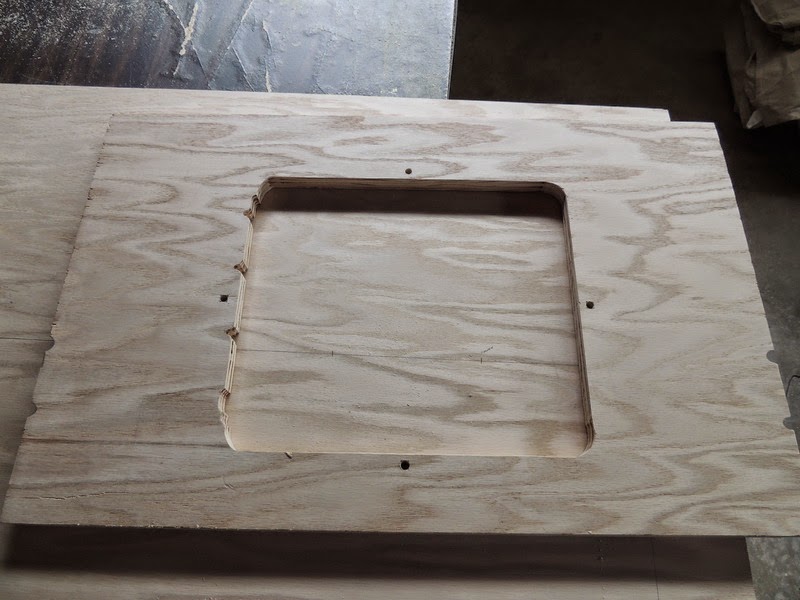
Coin door. What a PITA, why are there notches on the left side....anyway.....used a jigsaw to rough cut then routed around for a clean line.


I used this router bit to make the holes for the leg bolts after hearing the pains everyone was experiencing (before gluing the cab together):
 

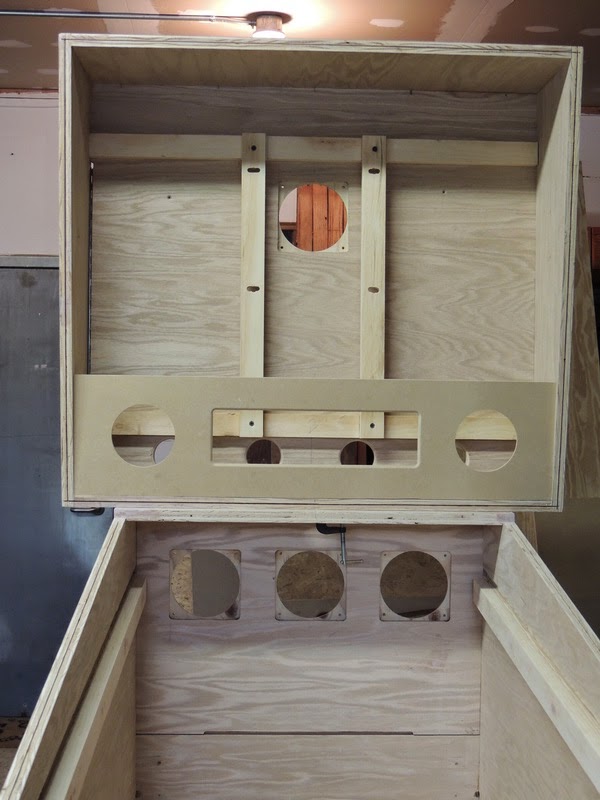
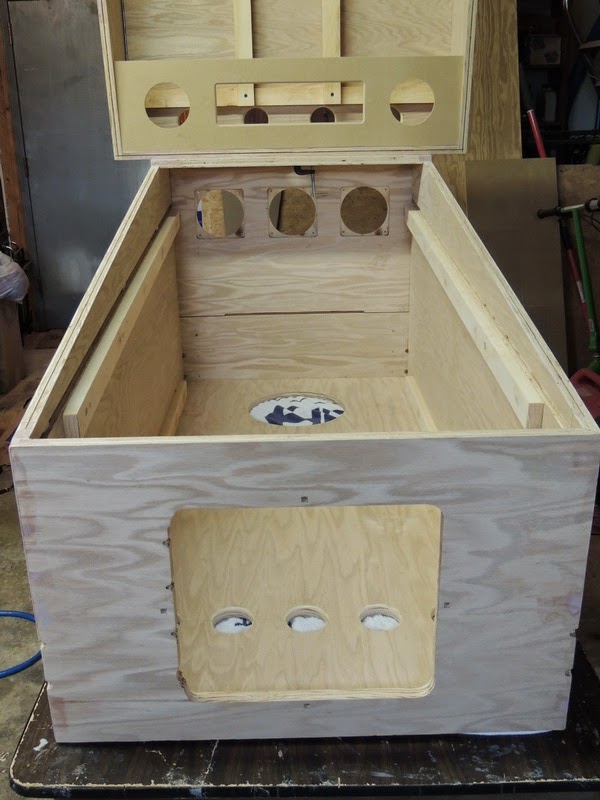
I bought a biscuit joiner during my MAME project so I figured I would bypass most of the screws and use biscuits and gorilla glue:
 

For added strength (although the biscuits and glue were solid) I tacked down some 1" x 2" with screws on the bottom left/right:
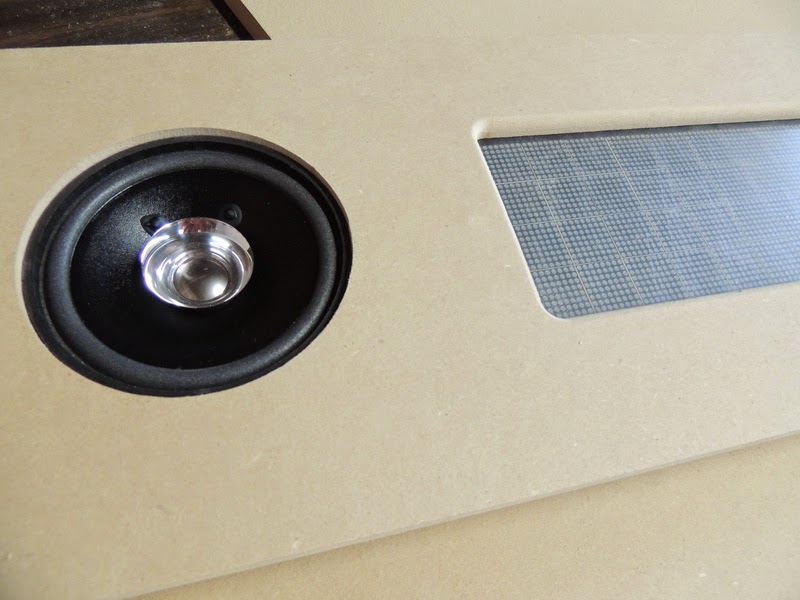
 

DMD panel


The speaker looks like it's not centered in this pic, but it is. The film is also still on the plexi.


I have to say, scottpe's build is a great tutorial for those wanted to build a cab. (notice any similarities?) Between scott's and bill55 builds you have a ton of build pics. (BTW Scott we need more pics, I'm almost finished with the first chapter :) )


Couple spots here and there I touched up with Bondo.
« Last Edit: September 25, 2013, 01:38:42 pm by Zeenon »

Zeenon

  • Trade Count: (0)
  • Full Member
  • ***
  • Offline Offline
  • Posts: 41
  • Last login:January 26, 2018, 08:51:10 pm
  • New Jersey - The Greatest Country in the World
Re: First cab coming along
« Reply #17 on: September 25, 2013, 01:33:57 pm »
Flipper placement: 3 1/8" from front edge, 2 5/16" down, 1 3/4" center to center.


This is MY take on the two types of contactors I used.

Siemens 3RT1016-1BB41

- Perfect size even though there is plenty of room in a WB cab.

- 24V

- Used for flipper feedback in my cab

- Could be a little louder, but I like the fact they are quieter than the AB's below.

- Fast!!

Note: Some of the contactors on ebay come with an aux connector and diode piggy backed on the contactor as shown below. 1)You don't need the aux connector. It disconnects from the contactor by pushing a tab on the side. 2) If you are using Zebs VOB you don't need the diode either, since it is built on the VOB.


Allen Bradley Contactor 100-A09NZ*3

- These are much longer then the Siemens contactors

- 24V

- Used for sling shot (x2) and bumpers (x4)

- Loud but I like the fact they sound different then the Siemens

- I do think they are much slower then the Siemens


6 contactors shown in pic. #7 is behind the sub woofer and #8 is up behind the LED bar.


Z

Rick

  • Trade Count: (+1)
  • Full Member
  • ***
  • Offline Offline
  • Posts: 2787
  • Last login:May 19, 2025, 11:21:11 am
  • Bartop, Cocktail and Pinball Arcade Cabinets
    • Gameroom Designs Canada
Re: First cab coming along
« Reply #18 on: September 25, 2013, 02:04:45 pm »
Please allow me to drool all over my keyboard. That is a beautiful build, sir!