Previously on Mission Control....
After comparing the thin plastic Happ bezel to the super thick solid wood of the sides I decided to make a custom bezel for the cab that would feel more substantial and... errr.... custom.
Here is the Photoshop concept mockup.

I was going to hit up a very generous BYOACer for some CNC work to make the bezel, but I couldn't get the blue panels in anything under 4x8' without shipping them across the country and back. So I decided to save the CNC for something else and went at it on my own. I wanted the entire thing to feel polished and machined regardless of the fact I was doing it with hand held power tools. The biggest problem I faced creating a curved surface to accurately sit flush against the *very* curved monitor surface.
First step was to print out the design I had laid out in Illustrator. Each panel of the bezel got its own template starting with one properly sized for the monitor glass with each addition panel about 3/4" bigger than the one beneath. Each panel opening is angled (wider at the top, narrower at the bottom) to match the toenailing angle of the cabinet sides.

Next I cut the templates out of MDF using guides I screwed on. I cut the curved sections with a jigsaw.

I was really concerned that the little fluctuations in the lines from my hand held cuts would be obvious when transferred to the plastic. So I set each finished template on a sheet of paper and traced it. That let me see where any wobbles needed to be sanded out. Especially where the straight router cuts met the "freehanded" jigsaw curves.

To help the plastic routing go smoothly I rough cut the plastic to within a half inch or less of the template with a jigsaw.
Then I routed the plastic against the templates.

While it isn't *quite* as messy as routing MDF, I get the sense I'm poisoning myself even faster with the vapors the acrylic gives off.
Next, I flipped it over to round the edges using the MDF as a guide for the bearing... The roundover bit was large enough to completely round the edge.

I guess this is the point at which I should have flame polished since there were no scratches on the face. Like an idiot I took sand paper to the edge, with each pass extending further and finally overlapping the face in certain sections.
Finally I polished them back to glassy goodness which took many hours....days actually....and 9 grits of super fine special order magic sandpaper.
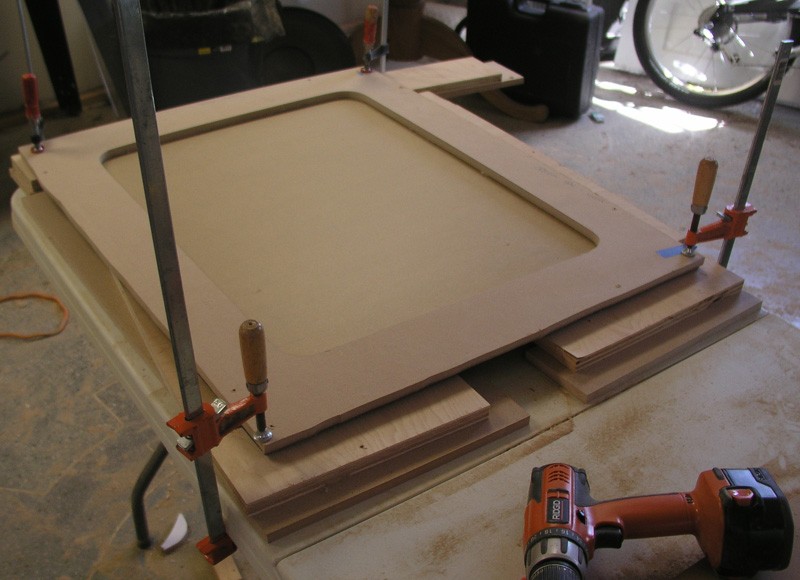
The most intimidating part of the bezel design was to shape it to follow the convex curves of the arcade monitor. To do this, I traced the horizontal and vertical curves from a Happ 27" bezel to a couple of narrow boards.

Then I cut the profile into them, sanded out imperfections and used a flush trim bit to create a copy of each. I use these to force the lowest face of the bezel into a convex shape that matches the monitor glass.
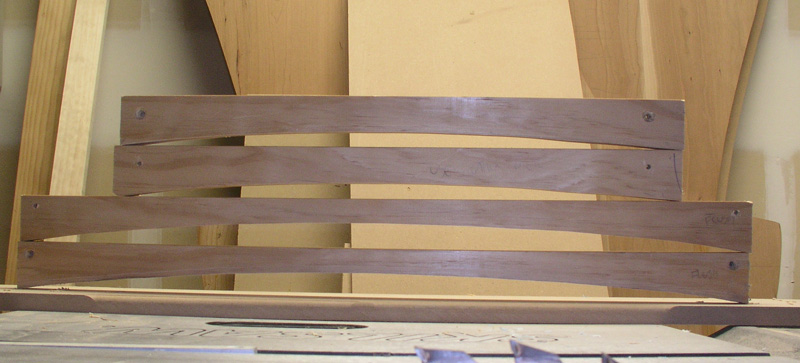
I painted them black in case they would be seen and attached acrylic strips to the top to allow for easy cementing to the bezel.... not realizing at the time they wouldn't be flush with the bezel to allow for cementing once the plastic was bent beneath them. So I had to shim them by measuring how far the bent plastic forced them away from the panel they would be attached to, then cutting a thing piece of wood to match.


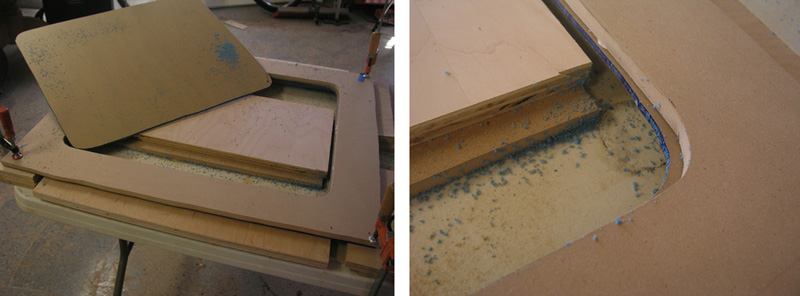
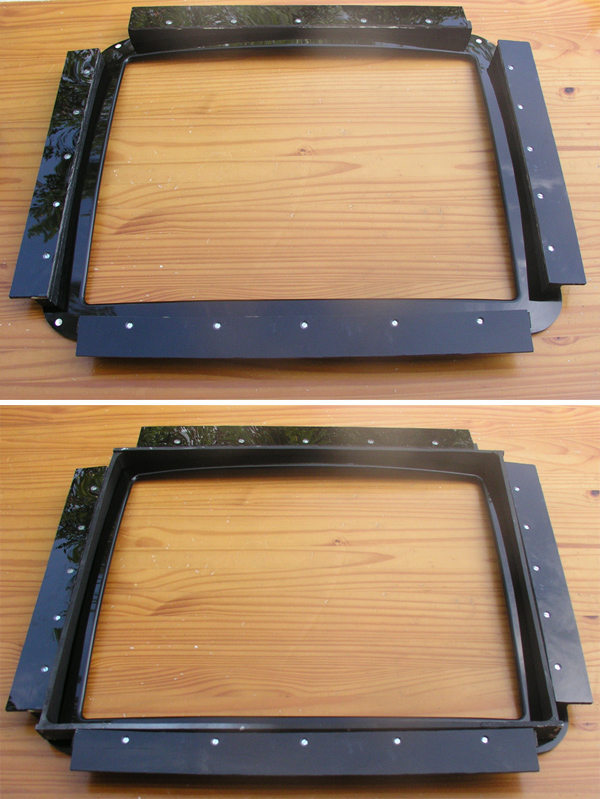
You can see how these arches pull the plastic into shape below.
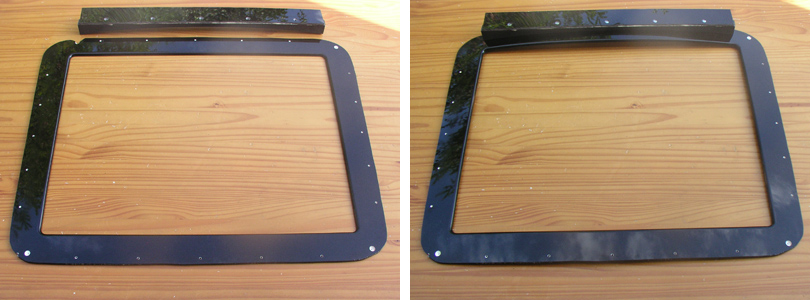
[imghttp://forum.arcadecontrols.com/index.php?action=dlattach;topic=51525.0;attach=83122;image[/img]http://I thought these arches would sit back far enough from the opening in the bezel to be pretty much unseen. In fact they sit so close, and push the innermost bezel so far down you can see it all very clearly. The following pic shows the problem. In its final form there are three larger panels that sit on top of this one, but regardless all these structures and the corner edge of the inner bezel were in plain view.

Soooo... back to the drawing board to make an "inner trim frame" to hide it all.. This inner frame had to have the same curvature, so I copied the curves from the arches into MDF, extended them to run the full length of the inner panel and cut thing 1/4" strips of poplar to match.


I glued them together into a frame and added tiny woodscrews to stabilize the joints.
Since this inner frame would be very visible, I didn't want it to detract from the machined look of the plexi. I escpecially didn't want it to look homemade or wooden. I wanted to avoid the look of the simple butt joint the frame had.

So I cut the edges off a long piece of cove molding from Home Depot leaving only the curved center portion behind... and thankfully my fingers as well, since this was a kind of dicey cut on my tablesaw, Mr. Crappy. I sacrificed the family coloring time markers for the greater good to clamp and glue the curves into place, then I used Dap Plastic Wood to smooth the transition and sanded the bejeesus out of it.

As mentioned early in the thread, the painting too forever. At first I was set on using gloss paint to best match the plexi. Since I just couldn't perfect it I retreated to a textured paint, and I think the result is actually far better than the gloss would have been anyway. It really looks like power coated metal.
Here is the painted frame in place hiding the corners of the inner panel and the faces of the rough looking arches.

[
Next I glued the inner panel assembly (with the arches attached) and the inner trim frame resting on top to the back of the next larger panel. As I mentioned I had to shim them to be flush with the flat panel it was getting glued to.


Here you can see the edge of the inner trim frame hiding the arch ugliness in all its powder coated like glory.

You can also see the thin panels of 1/8" acrylic I had cemented to the face of the blue panel. This allows the panel above it to be cemented to it, but float offset above.
Next I cemented the dark blue panel on top of the light blue panel also with 1/8" strips on top. Finally I cemented the top most black panel to the dark blue panel. I used a slow setting viscous plastic cement to allow me to reposition and fudge the panels around into alignment. That stuff stunk so bad I had both garage doors open, the side door open and a filter cartridge respirator on... and still got a headache. Didn't feel right the rest of the night. But hey.... Bezel done!
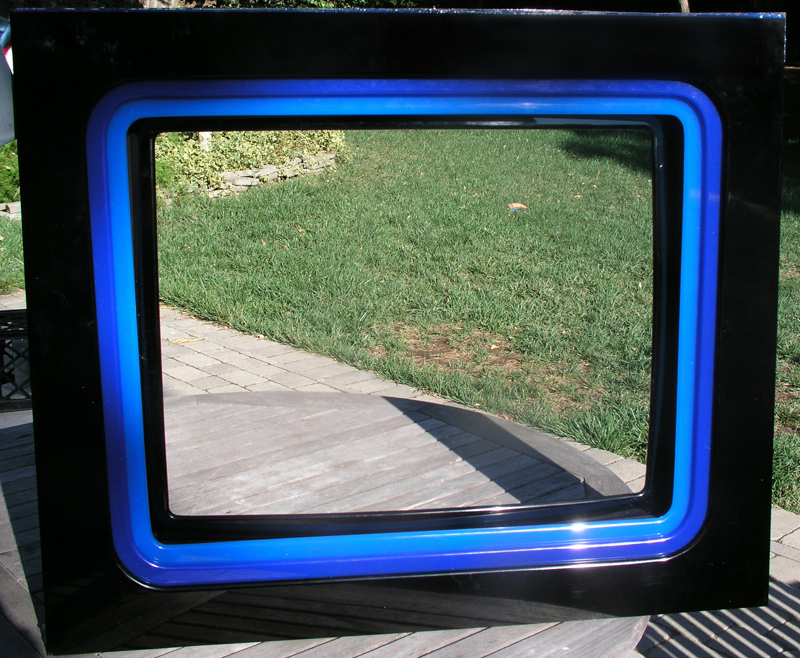
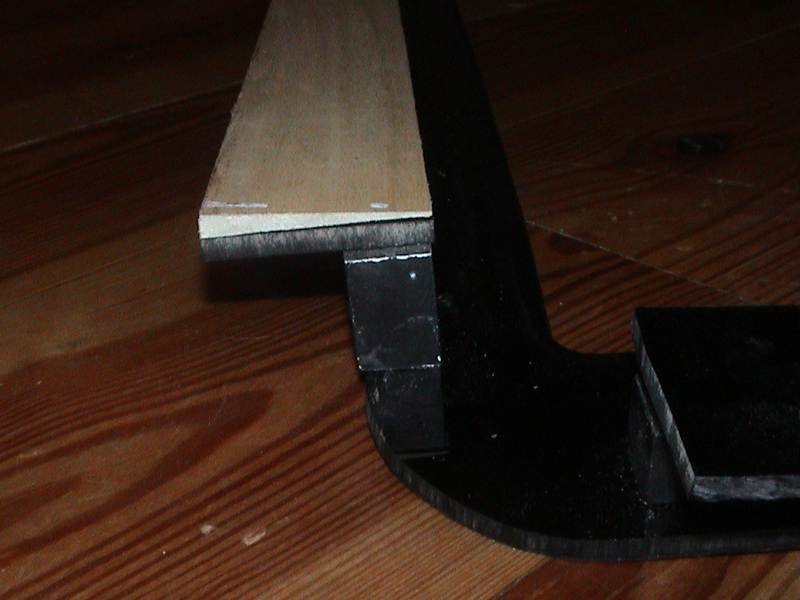
This is the lower edge of the bezel. Super tasty.

And the lower right corner. Also much tasty. You can see how much that vexxing inner trim piece add to the look.

Concept to completion.

I still need to clean all the fingerprints and smudges off. The sunlight really highlights those as does seeing this next the the Photoshop mockup.
I test fit the bezel against the actual monitor to spectacular flushness. I'll post a pic of that when I can get it in good light. Thing. Of. Beauty.


 Home
Home Help
Help Search
 Login
Login Register

 Poll
Poll
 Send this topic
 Print
Print Topic: Mission Control Project: 5 years on, what to do with the leftovers? (Read 553701 times)


