Main Restorations Software Audio/Jukebox/MP3 Everything Else Buy/Sell/Trade
Project Announcements Monitor/Video GroovyMAME Merit/JVL Touchscreen Meet Up Retail Vendors
Driving & Racing Woodworking Software Support Forums Consoles Project Arcade Reviews
Automated Projects Artwork Frontend Support Forums Pinball Forum Discussion Old Boards
Raspberry Pi & Dev Board controls.dat Linux Miscellaneous Arcade Wiki Discussion Old Archives
Lightguns Arcade1Up Try the site in https mode Site News

Unread posts | New Replies | Recent posts | Rules | Chatroom | Wiki | File Repository | RSS | Submit news


Author Topic: Been A Year! Back at It and Almost Done!  (Read 3551 times)

0 Members and 1 Guest are viewing this topic.

draculawithglasses

  • Trade Count: (0)
  • Full Member
  • ***
  • Offline Offline
  • Posts: 20
  • Last login:April 13, 2010, 11:57:06 am
Been A Year! Back at It and Almost Done!
« on: February 01, 2009, 01:30:26 am »
Man, its been a rough year... I've only had time and money to tinker with my cab for the last year, but I am back at it and determined to finish up within the next month (Thanks to Uncle Sam being ever so generous this season!). I actually took a semester off school and scheduled a vacation from work mid February to finish this thing up (As a C.S. major I am really going to enjoy playing with software that isn't business related... I really need the break!). Although I don't post a lot, I've checked these forums almost everyday, (kinda like checking WOOT! everyday) especially the project announcements, and I must say  that I have learned a ton and also a lot of you have rolled out some amazing cabs this year!

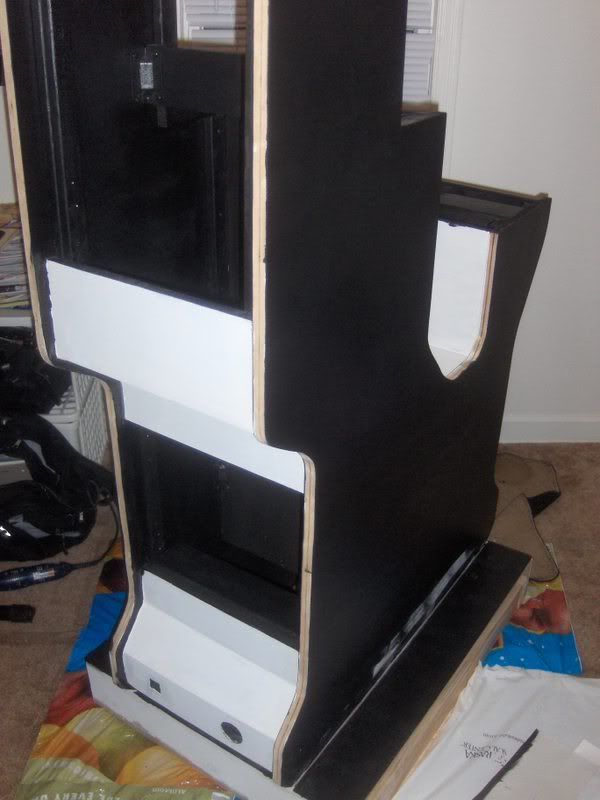
This is my first cab. I originally designed it taking inspiration from Taz's Mame Marvel cab. His slim cab design is genius. I really didn't have a choice as far as the cab width...the only room in my house that has room for a cab has a brutally small doorway and weird hallway angles before you even hit the door. I wanted something that would easily come apart in three or more pieces so I could easily move it. I designed it so I can easily remove the control panel and TV box, which accomplishes this quite well.

Well, I think last year I stopped about here...


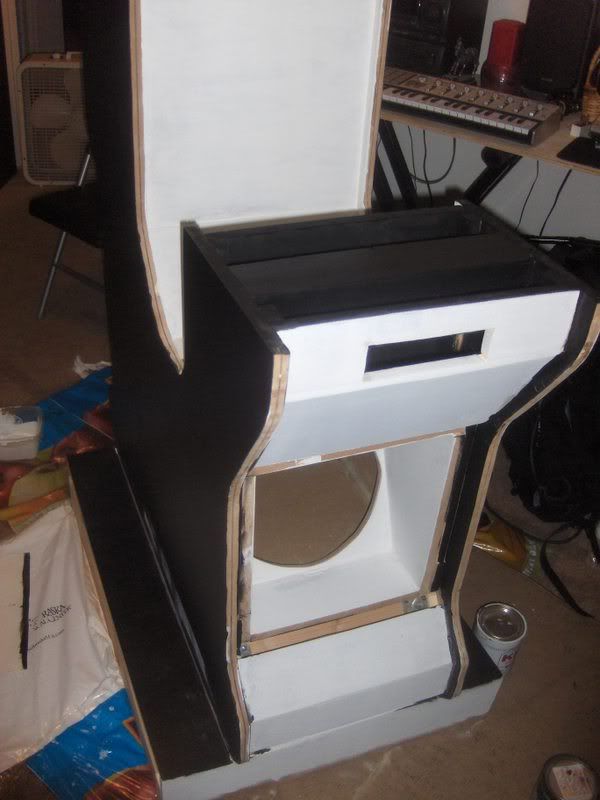
And a few months later I was about here...


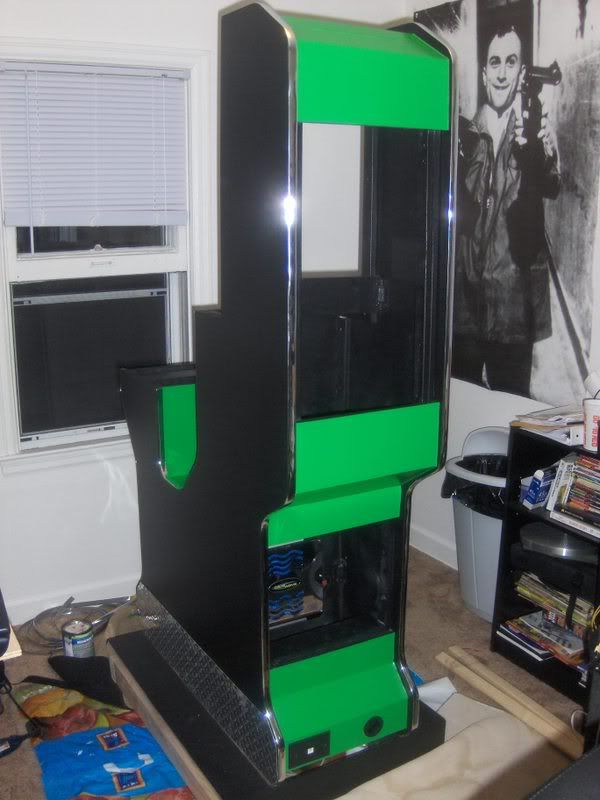
As you can see, I decided to go Green and I also grinded out some diamond plate to glue on the sides. I was thinking Vegas when I ordered the chrome t-molding. I am very happy with the way it came out! Like a fish, I like shiny things.

In case you are wondering why I have a giant circular hole in the front of the cab, I am going to put a 10' subwoofer in there. I am a music junkie, so I had to throw in some good tunage for when I'm woopin my friends in Killer Instinct. I built a full box for the subwoofer as you can see here...


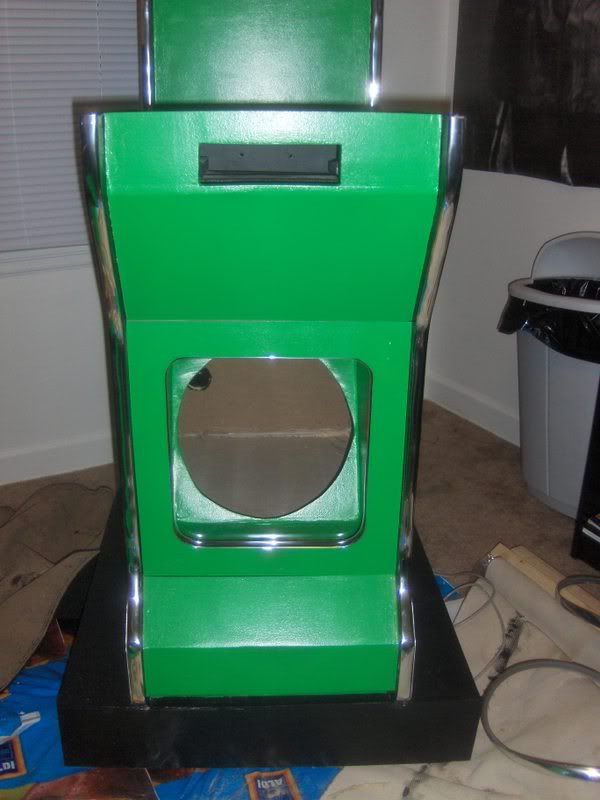
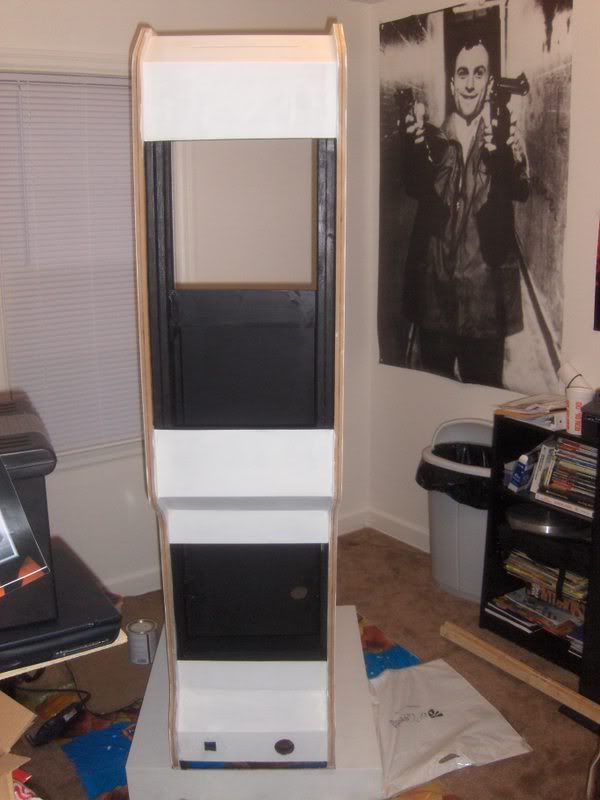
What else??? I added a RJ-45 module so I can just plug directly into my router and do maintenance through remote desktop. Easier than opening up the control panel and pulling out a keyboard in my opinion...

The other hole in the front is for a Wii. This was something I agreed to do for my girlfriend to make up for all the sawing (in the house during winter haha).

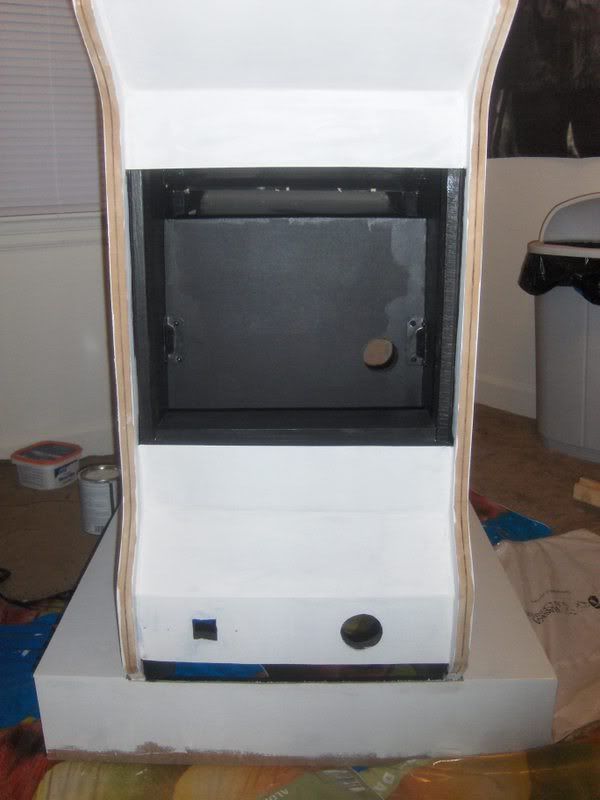
The last few weeks I have been working a lot on the control panel and also boxing in the 32" LCD I bought for this cab. Here's where I am currently at....


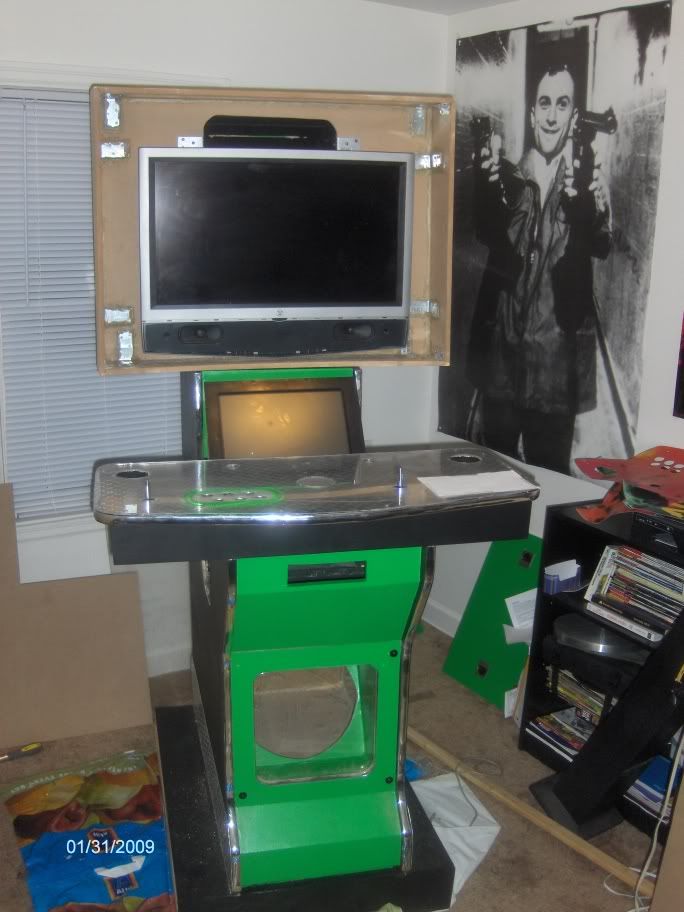
Awhile back during the cheap Ebay ELO touchscreen craze I picked one up as well. I wanted a dedicated monitor to run a jukebox. I mounted it at angle below the monitor box and it couldn't have fit better. I am going to case it in with plexi at some point.

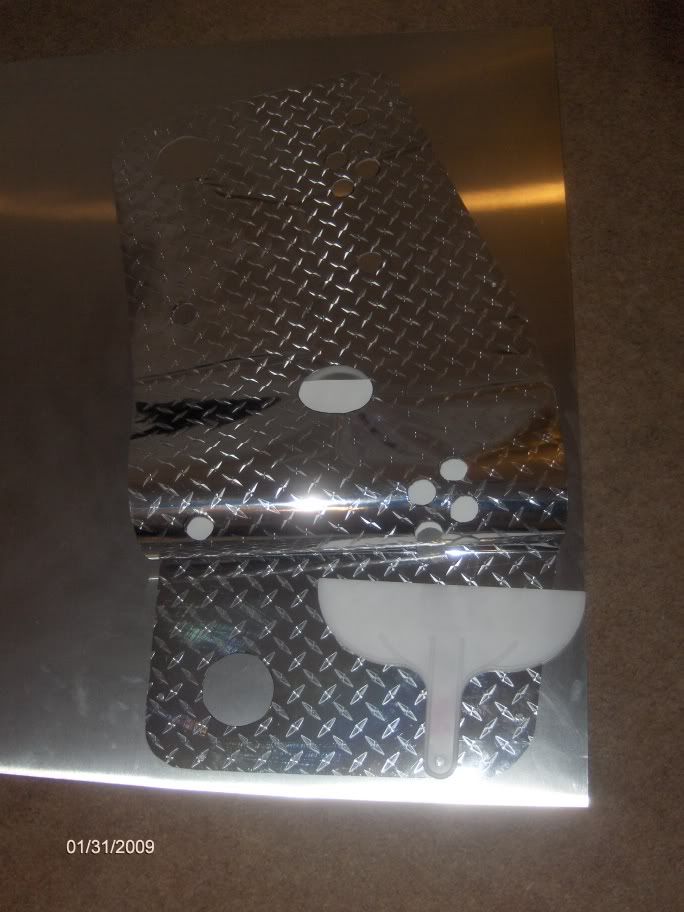
I thought a ton over the last year about what I wanted to do with the artwork on the control panel. I actually bought area 51 artwork from MameMarquees.com (As you can see in the background) but decided It wasn't right for this cab. I will use that on a full sized cab when I get a bigger house! The quality of the vinyl from MameMaquees is perfect those guys really do some amazing work. I plan to have them do the artwork surrounding the monitor once I get to it. So, I decided to keep it flashy. I wanted plexi to cover the top of the control panel but I also wanted diamond plate underneath. Trying to fabricate diamond plate for this would have been a nightmare and also it wouldn't look right under the plexi, but I found a way to satisfy my wishes. I found a guy on Ebay that makes diamond plate decals that are actually made out of paper thin aluminum and look exactly like real diamond plate...I was amazed when I got it. Being paper thin though it was wavy under the plexi and that is a no go. What I decided to do was to get a thin mill aluminum sheet and just adhere the decal to it, then just cut the aluminum. It turned out perfect and looks like real diamond plate. Here's a couple pics...
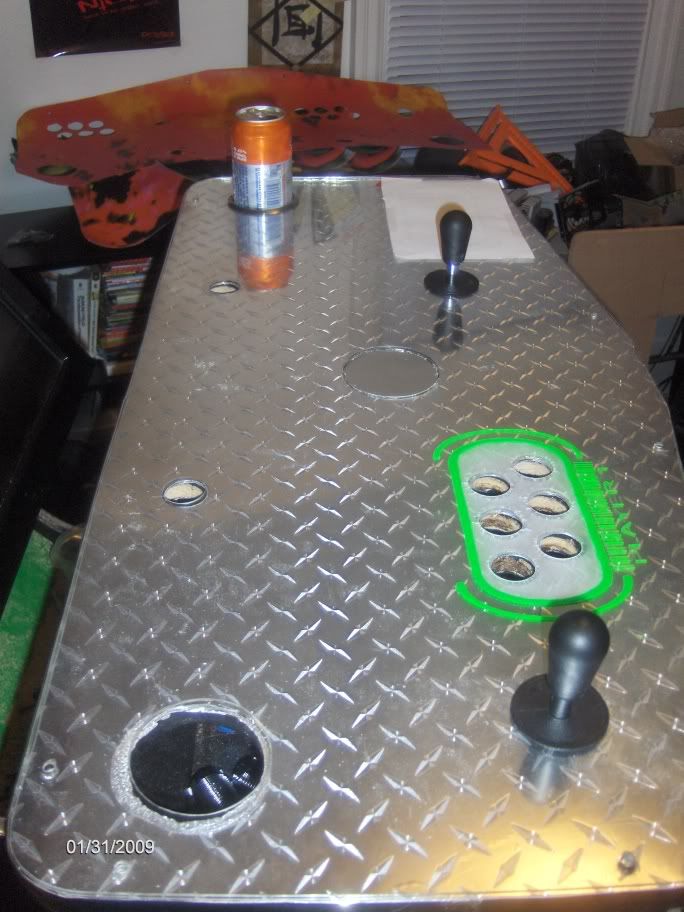


f

As you can see in the pic above my hole saw went crazy on the decal on the cup holder hole nearest the bottom. No big deal though because I plan to etch around the cup holder anyway. I have a blog out their somewhere on the internet that I started last year, once I find it and my project is done I will go into details and give my 2 cents on cab fabrication do's and dont's!

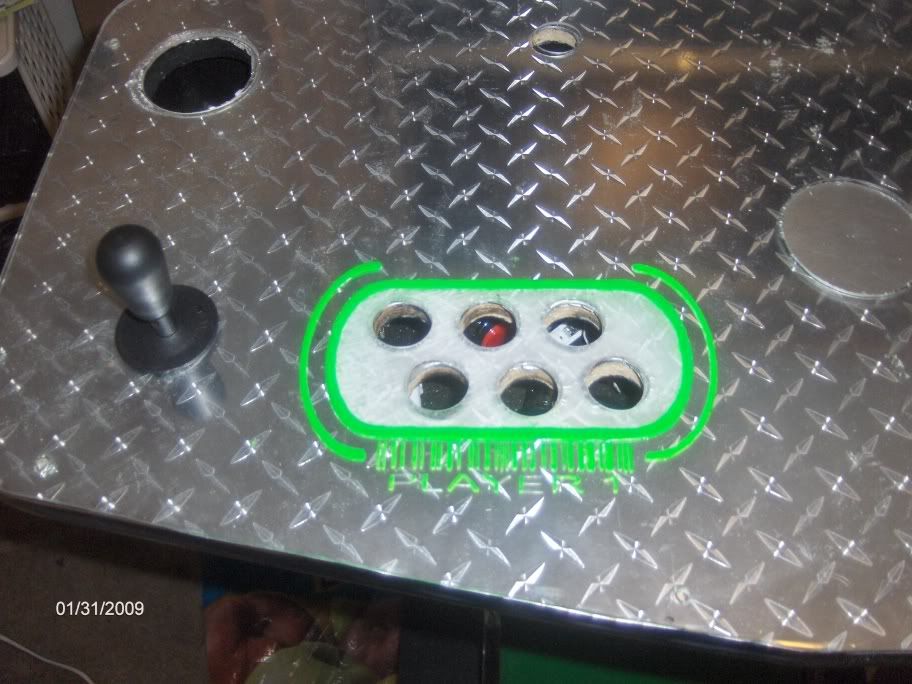
To dress it up a bit more, I decided to go with etching the plexi. I did this with a Dremel and hours of time staring straight down and then hours more painting and I am only 25% complete. I used a florescent green airbrush paint from Dick Blick because it has the perfect consistency and it is also real florescent paint. The reason I chose to go florescent is because I ordered some UV LED's to light this baby up! Here's a closer pic...


Well that's about it for now... Again, I plan to go crazy on this cab within the next month and hopefully finish her up. I wanted to wait to post until I was done but truth be told I am too damn excited!

Real quick here's a rundown of the hardware features of my cab:

- 32" Westinghouse 1080p LCD
- 15" ELO touchscreen for Jukebox software
- 10" Eclipse sub woofer
- 6x9" Eclipse car speakers
- Pyle 1400 Watt amplifier
- ASUS P5K PRO Motherboard
- RAM?? Haven't bought yet
- Graphics??? Haven't bought yet
- Intel Wolfdale E8400
- 2 Ultrastick 360's
- Ultimarc Ultralux LED Chrome push buttons
- HAPP backlit 3" USB Trackball
- 2 LCD TopGun Light guns
- Nintendo Wii

Hope you enjoy my project, I appreciate any comments or criticism that anyone has! Still am trying to decide on a name...any suggestions? (It's almost like naming your baby!) I will try to keep updating over the next month with progress. :burgerking:

draculawithglasses

  • Trade Count: (0)
  • Full Member
  • ***
  • Offline Offline
  • Posts: 20
  • Last login:April 13, 2010, 11:57:06 am
Re: Been A Year! Back at It and Almost Done!
« Reply #1 on: February 01, 2009, 02:01:24 am »
Woops...Edit, it's a 27" LCD not a 32". That's a different TV I have in the house. Didn't think much as I wrote that. Sorry.

beastathon

  • Trade Count: (0)
  • Full Member
  • ***
  • Offline Offline
  • Posts: 48
  • Last login:October 22, 2019, 02:55:53 pm
Re: Been A Year! Back at It and Almost Done!
« Reply #2 on: February 01, 2009, 06:06:59 pm »
Very cool and unique cab. I don't normally like any skinny cabs, but this one actually appeals to me. Good work, and keep us posted.

bgspot

  • Trade Count: (+1)
  • Full Member
  • ***
  • Offline Offline
  • Posts: 63
  • Last login:January 10, 2020, 12:37:52 pm
Re: Been A Year! Back at It and Almost Done!
« Reply #3 on: February 02, 2009, 12:32:17 am »
Thats a very interesting design. I like seeing cabs that break away from traditional design. Can't wait to see it in its completed form

draculawithglasses

  • Trade Count: (0)
  • Full Member
  • ***
  • Offline Offline
  • Posts: 20
  • Last login:April 13, 2010, 11:57:06 am
Re: Been A Year! Back at It and Almost Done!
« Reply #4 on: February 02, 2009, 12:15:13 pm »
Hey thanks for the comments on my design guys!

Once again I must give props to Taz's awesome skinny Mame Marvel cab, once I saw his cab the ideas just started flowing for me. I was shooting for a big showcase 'feel' but at the same time keep it semi easily portable and in proportion to the skinny body. I added some odd angles to give it kind of rugged look. You don't even want to know what I was thinking originally when I designed this haha - Ok, I'll let the cat out of the bag for just for fun... Originally I wanted to add tank treads over the two sides on the base. However I couldn't locate anything the correct size that would actually work and skinny wheels to go with them. Those things are friggin' expensive too!

I also knew I wanted to add a car sub woofer to this thing. So I designed the base to where I was able to build a full 10" subwoofer box for my Eclipse sub and mount an amp on the back. This helped me stretch the control panel out to achieve the showcase style. Then I just kind of balanced weight distribution and style for the rest.

I am still  planning and designing the monitor box face and the marquee...I have been tossing around a few ideas. I think I am going try and do something original on these.

I will post more pictures with my progress soon. Thanks again for your interest.  :burgerking:

draculawithglasses

  • Trade Count: (0)
  • Full Member
  • ***
  • Offline Offline
  • Posts: 20
  • Last login:April 13, 2010, 11:57:06 am
Re: Been A Year! Back at It and Almost Done!
« Reply #5 on: February 09, 2009, 02:46:08 pm »
This past week I've just been etching like crazy and buying stuff. Still waiting on my LCD TopGuns from play-asia.com. Hoping to get those this week, can't wait to try them out for myself. Anyone else ordered them from play-asia? Just wondering what an ETA might be to the states. In no way am I complaining... just excited for these...

Hoping to finish up etching and painting the control panel plexi this week. I'll post some pics when I'm done.

Ohh, I received some UV LED's in the mail today. I am working on figuring out where to mount them for the best lighting. Originally I planned to side light the plexi but after playing around it actually lights up a lot better from the top down. I'm thinking about mounting them just above the touchscreen to the T.V. box... Not quite sure yet... Ideally I would like to incorporate a photoresistor on this circuit to detect dark/light but I may just go with a switch. I'll have to look into how complicated this would be to do, I'm an amateur of the circuitry. Any tips would be greatly appreciated! I'm thinking 6 of these guys should do the trick. They are 3mm 3.4~3.8V 20mA LED's that came with 12V resistors. I'd like to just pull the power off of the PC power supply if possible.


Hunk_4TH

  • Trade Count: (+5)
  • Full Member
  • ***
  • Offline Offline
  • Posts: 311
  • Last login:May 21, 2025, 04:44:07 pm
  • I DON'T ALLOW VANDALISM IN MY STOOOOOOOOOOORE!
Re: Been A Year! Back at It and Almost Done!
« Reply #6 on: February 09, 2009, 03:10:34 pm »
This past week I've just been etching like crazy and buying stuff. Still waiting on my LCD TopGuns from play-asia.com. Hoping to get those this week, can't wait to try them out for myself. Anyone else ordered them from play-asia? Just wondering what an ETA might be to the states. In no way am I complaining... just excited for these...

Hoping to finish up etching and painting the control panel plexi this week. I'll post some pics when I'm done.

Ohh, I received some UV LED's in the mail today. I am working on figuring out where to mount them for the best lighting. Originally I planned to side light the plexi but after playing around it actually lights up a lot better from the top down. I'm thinking about mounting them just above the touchscreen to the T.V. box... Not quite sure yet... Ideally I would like to incorporate a photoresistor on this circuit to detect dark/light but I may just go with a switch. I'll have to look into how complicated this would be to do, I'm an amateur of the circuitry. Any tips would be greatly appreciated! I'm thinking 6 of these guys should do the trick. They are 3mm 3.4~3.8V 20mA LED's that came with 12V resistors. I'd like to just pull the power off of the PC power supply if possible.


Hello there! Just answering your question regarding Play-Asia's ETA. I've ordered a few things from them in the past and I must say that their ETA is very good and quick! IMO :)

drventure

  • Trade Count: (+2)
  • Full Member
  • ***
  • Offline Offline
  • Posts: 4152
  • Last login:April 23, 2024, 06:53:06 pm
  • Laser Death Ray Bargain Bin! Make me an offer!
Re: Been A Year! Back at It and Almost Done!
« Reply #7 on: February 09, 2009, 04:17:25 pm »
I like it. The diamond plate isn't really my style, (I'm more of a copper/brass/steampunk kinda guy) but it sure looks nice on that cab!

Good to know such stuff exists out there, I might be able to use some eventually.

DaOld Man

  • Trade Count: (+4)
  • Full Member
  • ***
  • Offline Offline
  • Posts: 5158
  • Last login:May 24, 2025, 09:57:44 pm
  • Wheres my coffee?
    • Skenny's Outpost
Re: Been A Year! Back at It and Almost Done!
« Reply #8 on: February 09, 2009, 06:01:22 pm »
I like this cab.
Good to see some cup holder ideas..

draculawithglasses

  • Trade Count: (0)
  • Full Member
  • ***
  • Offline Offline
  • Posts: 20
  • Last login:April 13, 2010, 11:57:06 am
Re: Been A Year! Back at It and Almost Done!
« Reply #9 on: February 09, 2009, 06:10:01 pm »
Thanks the comments and reply's guys :cheers:

It's been a long time since I ordered the diamond plate decal but it looks like he's still selling the stuff, here's a link for anyone interested:

http://cgi.ebay.com/ebaymotors/4x12-Diamond-Plate-Plastic-Sticker-Decal-sheet-50-OFF_W0QQcmdZViewItemQQ_trkparmsZ72Q3a1205Q7c66Q3a2Q7c65Q3a12Q7c39Q3a1Q7c240Q3a1318QQ_trksidZp3911Q2ec0Q2em14QQhashZitem150322157013QQitemZ150322157013QQptZMotorsQ5fCarQ5fTruckQ5fPartsQ5fAccessories

It looks like he has some thicker stuff available on request now as well. Who knows, he might be able to do copper, etc as well? Not sure how this stuff is made. Might be worth checking into to safe some cash?!?! Originally I had requested black diamond plate and he said he could do that, so apparently he's the one (or has close contact to the person)  who's manufacturing this stuff.

draculawithglasses

  • Trade Count: (0)
  • Full Member
  • ***
  • Offline Offline
  • Posts: 20
  • Last login:April 13, 2010, 11:57:06 am
Re: Been A Year! Back at It and Almost Done!
« Reply #10 on: February 09, 2009, 06:11:46 pm »
Jesus that was a giant link! Sorry about that. Screwed up my browser frame. :dunno

draculawithglasses

  • Trade Count: (0)
  • Full Member
  • ***
  • Offline Offline
  • Posts: 20
  • Last login:April 13, 2010, 11:57:06 am
Re: Been A Year! Back at It and Almost Done!
« Reply #11 on: February 09, 2009, 09:09:57 pm »
I like this cab.
Good to see some cup holder ideas..

Cup holders are a must have IMO. I was trying to figure out what the heck to use that wouldn't look cheesy and then it hit me... Why not use some casino cup holders to go with the flashy Vegas-like trim?

I just got them from an online poker supply site. I think they were around $5 bucks a piece.

geocab

  • Trade Count: (0)
  • Full Member
  • ***
  • Offline Offline
  • Posts: 82
  • Last login:July 07, 2012, 01:32:05 pm
Re: Been A Year! Back at It and Almost Done!
« Reply #12 on: February 13, 2009, 12:17:56 am »
Great work so far.  I'm interested to see how the UV LEDs turn out with the flourescent paint.


draculawithglasses

  • Trade Count: (0)
  • Full Member
  • ***
  • Offline Offline
  • Posts: 20
  • Last login:April 13, 2010, 11:57:06 am
Re: Been A Year! Back at It and Almost Done!
« Reply #13 on: February 14, 2009, 08:20:21 pm »
Got my TopGun II's today. Once they shipped it only took 2 days via FedEX to the states, i'm impressed! Had a snowstorm though and there was no residential delivery for two days and then I missed the fedex guy yesterday (Required a signature) so I finally ended up picking just them up.

I'm trying to do a test drive on my big screen (47" LCD) but i'm having some issues calibrating them. I have the Infrared sensors on the top and bottom of my TV (As recommended by the manual) and I installed the EMS driver (Later tried Smogs driver) but after calibrating according to the manual it seems to be way off. The windows mouse cursor does not follow the laser dot and kind of jumps from top to bottom and in random locations. I tried the Smog driver and in the configuration window no devices show up in the list, I checked device manager in windows and it is using the correct driver. Anyone have any suggestions or have a related experience?

-Im using XP Pro SP3
- Using 2 TopGun II's
- One set of infared sensors, one on top one on bottom of screen
- I unplugged my wireless mouse and keyboard (Only interference I can think of)
- I stand roughly 6 feet from screen and sensors during calibration

I've only been playing around for about 45 minutes, I I figure something out I'll post the solution.

Thanks

draculawithglasses

  • Trade Count: (0)
  • Full Member
  • ***
  • Offline Offline
  • Posts: 20
  • Last login:April 13, 2010, 11:57:06 am
Re: Been A Year! Back at It and Almost Done!
« Reply #14 on: February 14, 2009, 09:21:32 pm »
Well I figured out the Smog driver issue. Although I was pointing windows towards the Smog driver it was still installing the EMS driver. I have now correctly installed the Smog driver but after calibration it still moves the cursor frantically and it seems that the x y axis are reversed. I will try a different calibration order and continue thinking of what may be causing interference.

Ohh, I also tried the TopGun II debug LCDimage tool but when I try to install the driver it says that it is not compatible for this device (???). It was under the TopGun II downloads and not the TopGun downloads so I would imagine this is the correct driver?? :banghead: