I'll repeat a bit of my last post to pack more relevant info into this one.
LEDs are 850nm 3w with built a in 140 degree lens. When they are powered, there is a bit of red visible to the naked eye. It is subtle and not distracting, but 940nm ones would probably work just as well and have no visible light. I like that I can see that they are on.
These are the ones I used:
https://smile.amazon.com/dp/B08XQDLS8L?ref=ppx_yo2ov_dt_b_product_details&th=1 I am not saying they are the best for the job. I primarily bought them because I could get them quickly.
They were ran in series 6.5 volts and 300mA. This is less than half of the rated current, but it keeps them cool enough to not use heatsinks.
This is the buck converter/current limiter I am using:
https://smile.amazon.com/dp/B07G446KHJ?psc=1&ref=ppx_yo2ov_dt_b_product_details(Not sure if it is a good one or not. It took a while to get the voltage adjustment working.)
For the sake of completeness, I am using an Asus USBBT500 bluetooth dongle. I am sure there are cheaper ones that will work.
This video was helpful in my understanding of how to set the LEDs up:
I just wired them in series in a loop (+ in then - to +, - to +, etc ). (That is a thermocouple taped to the first one to measure temps)

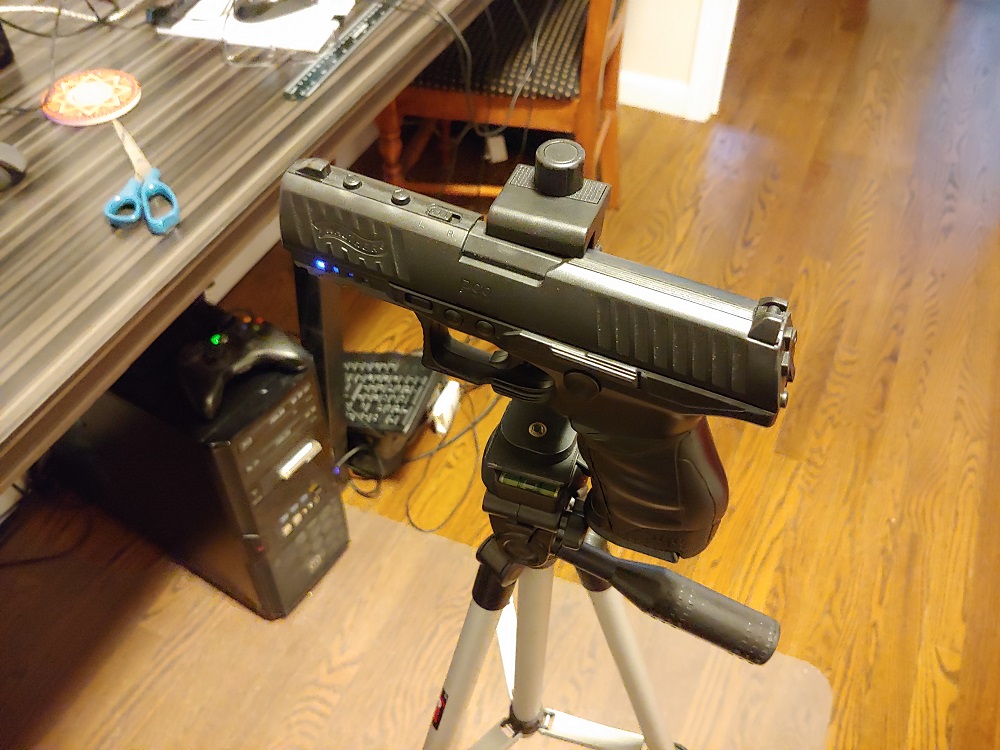
It could just be that I'm inexperienced with it, but I found the calibration screen difficult to do holding the gun by hand so I ended up holding it with a phone mount on a tripod.
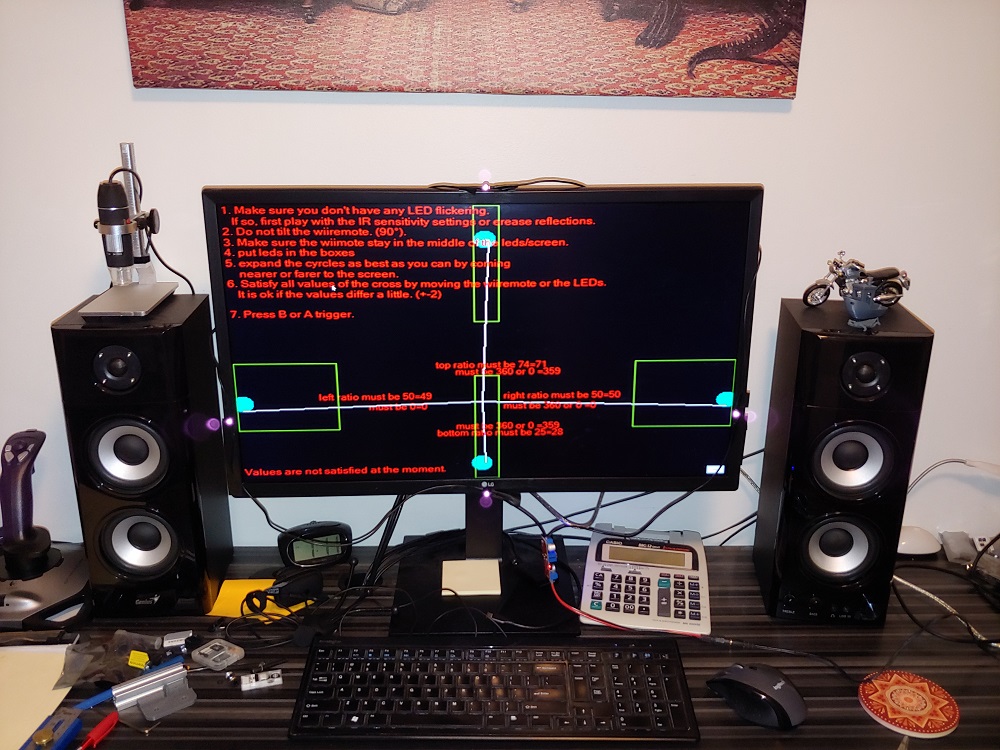
With the gun stationary, I could move the LEDs to get the correct numbers on the screen. The side ones ended up needing to be moved inward closer to the edge of the screen while the top one needed moved off the top of the monitor. I am sure this will be easier once I wrap my mind around everything, but it felt a bit overhelming trying to get it right at first. I am sure I will be able to explain it better after doing it again on my cab.


Once the LED locations were calibrated I tested the gun as a mouse. It was drifting a bit toward the edges. I played around with the offset calibration to correct this.
I thought the offset calibration wizard was going to be helpful as it has you get close enough to only see two LEDs, but in the end I didn't find it useful and preferred to play around entering my own numbers. Basically playing the high low game until I found the value where the mouse pointer was dead on with the gun sights near the edges of the screen.
So gun calibrated I launch MAME and learned how much I've forgotten. No fake mouse input in MAME. So I switch to the vjoy plugin and it doesn't work because I don't have vjoy installed on this PC. So after getting vjoy and MAME square away, the first thing I notice is that the on-screen crosshairs in MAME trail pretty bad. It doesn't cost me to miss any shots, but not ideal I guess. Luckily there is a setting for this in Lichtknarre. Under "More Settings" next to each player is a "Step" setting. I double it and the trailing is pretty much gone. Not sure at what expense, but the games were perfectly playable without crosshairs at the stock setting.
In mame with vjoy, the offset near the edges still seemed a bit off. I am pretty sure it could be adjusted or corrected in the games original service menu, but I didn't want to get into that yet. Using the sights on the gun, the shots were close enough to count as a hit in all the games I tried, but it still felt like it could use some tuning.
I guess I should be more positive here: Yes, it works well enough that you can use the gun sights and turn off the on-screen crosshairs..and from a distance I would expect to play light gun games at. The gun was around 40" from a 27" monitor. At least that is my experience with these Walther replica Wii guns.

Vjoy is an extra layer that affects the testing, so I moved on to Demul where I could just use it as a mouse.
I started off with House of the Dead 2's service menu. After playing some HOTD2 and Maze of Kings, I moved on to Sport Shooting USA.
This is the game to test guns on! I took my time to dial in the calibration in the game's original service menu.
How well do they work? Watch the video below. I am aiming using only the gun's sights from 40 inches away. You can see that the shot doesn't always correspond to the mouse pointer. That is the game's original arcade calibration at work. For the second round of shooting, I managed to get some decent footage from behind the gun. The next to the last shot misses and you can see that I had the gun turned. When I straighten it, the shot lands. EDIT: I also want to mention that the camera on my phone messed with the wii camera despite having the light disabled. It would make the crosshairs jump to random places. I put tape over the LED on the phone and the crosshairs became stable.
EDIT: THE LAG SEEN IN THE BEGINNING IS BECAUSE THE SENSITIVITY SETTING IN MAME IS TOO LOW. On analog input games, reduce the deadzone to zero or near zero, increase the saturation to 1, and increase the sensitivity until the sights do not lag.
So in summary:
It meets my standards for accuracy and distance from the cabinet.
I will be installing this on my cab.
I will have some tuning to do to use the vjoy plugin.
Setup and calibration feels a bit klunky and stressful, but I am sure we can improve it once we understand it better.
Front-end integration is probably not going to happen, but I wouldn't rule it out completely.
It took a while to get both guns connected, but when I relaunched the program and pressed the sync button on them, they both immediately paired.
On these guns, it seems that I only have to press the sync button, not hold it down. I think holding it down before was actually preventing them from pairing.
If you have wii guns, it is definitely worth it.
EDIT: Randy, please add the author's github to the first post:
https://github.com/Geekonarium/LichtknarrePlugin Maybe one of the talented people at BYOAC will take an interest in helping develop it.


 Home
Home Help
Help Search
 Login
Login Register
 Send this topic
 Print
Print


