Main Restorations Software Audio/Jukebox/MP3 Everything Else Buy/Sell/Trade
Project Announcements Monitor/Video GroovyMAME Merit/JVL Touchscreen Meet Up Retail Vendors
Driving & Racing Woodworking Software Support Forums Consoles Project Arcade Reviews
Automated Projects Artwork Frontend Support Forums Pinball Forum Discussion Old Boards
Raspberry Pi & Dev Board controls.dat Linux Miscellaneous Arcade Wiki Discussion Old Archives
Lightguns Arcade1Up Try the site in https mode Site News

Unread posts | New Replies | Recent posts | Rules | Chatroom | Wiki | File Repository | RSS | Submit news


Author Topic: Cocktail Overhaul  (Read 3126 times)

0 Members and 1 Guest are viewing this topic.

DillonFoulds

  • Trade Count: (0)
  • Full Member
  • ***
  • Offline Offline
  • Posts: 605
  • Last login:August 27, 2019, 05:04:44 am
Cocktail Overhaul
« on: August 30, 2012, 12:32:53 am »
So... back in January of 2010 I stumbled on this cocktail machine on Kijiji (Canada's Craig's list), for a price I couldn't pass up.
In the time since then, I haven't had a suitable place to work on it, not to mention a marriage, honey moon, and birth of my son... life sure manages to get in the way of hobbies, but it's all worth it. Over this time I managed to save up enough to pick up a few power tools, and also stock pile some other building goodies. Totem has a 2$ off-cut bin full of 2'x4' sheets of various boards that I pick over from time to time to build up my stash on the cheap.I've got some primer and paints from various other projects. This summer I booked some vacation time. The wife is at work this week, and my son (now 14 months old) is spending the days with grandparents. I finally have some "me time". This is my first major undertaking on a project of this magnitude. I have absolutely no real prior woodwork experience. This project will be the first time I've ever really put power tools to wood on my own. Please be gentle!

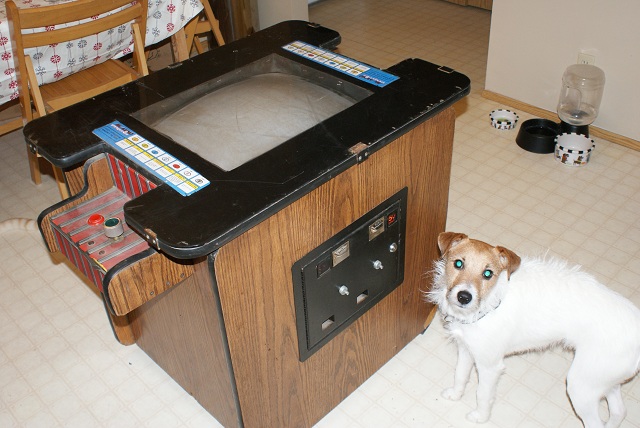
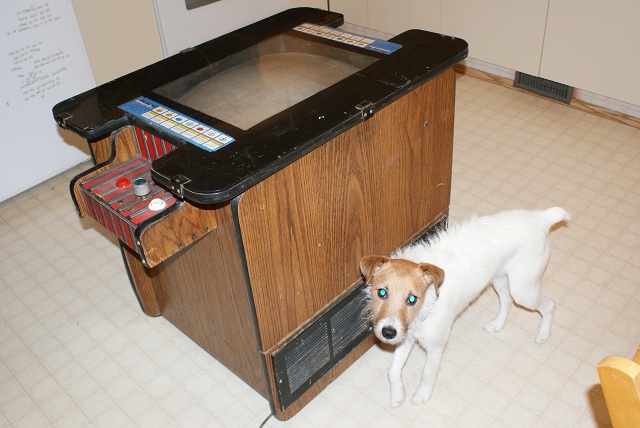
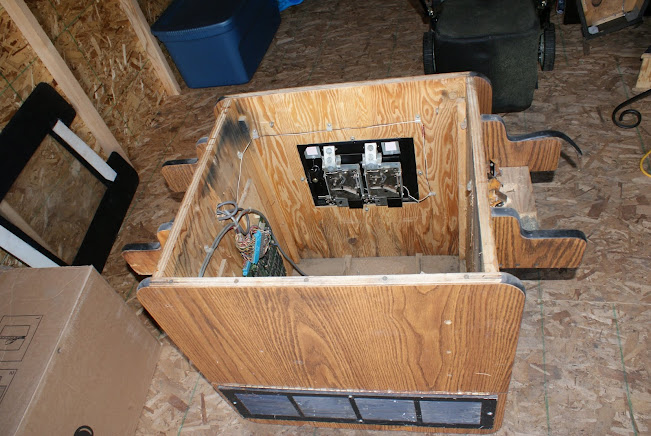
Without further ado, here's the cocktail as I picked it up over two and a half years ago:


Now then, let's get started...
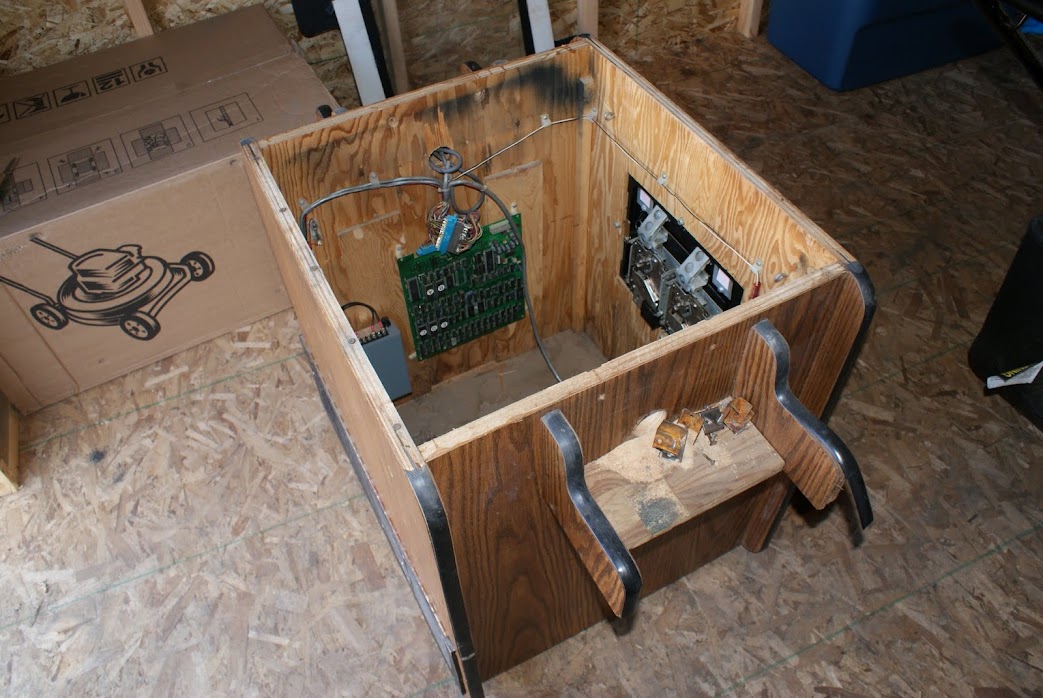
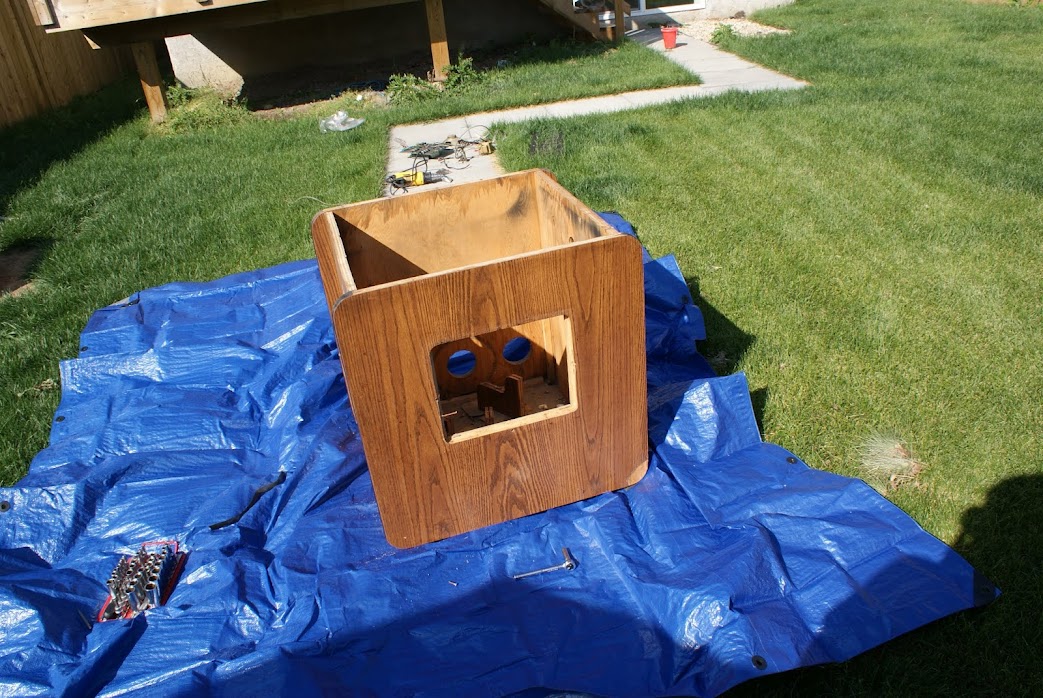
DAY 1! August 28, 2012

Step 1: Strip out EVERYTHING!

Remove the top panel...


Won't be needing this for what I have in mind...


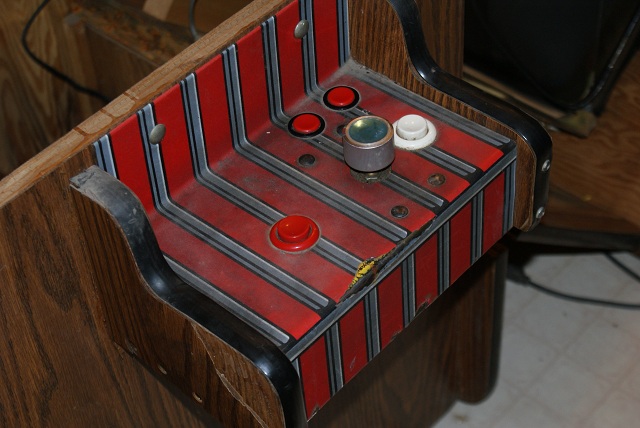
Looks like the monitor is heavily burnt in, possibly from a couple games... who cares?


Let's strip all the hardware out of this cabinet now...


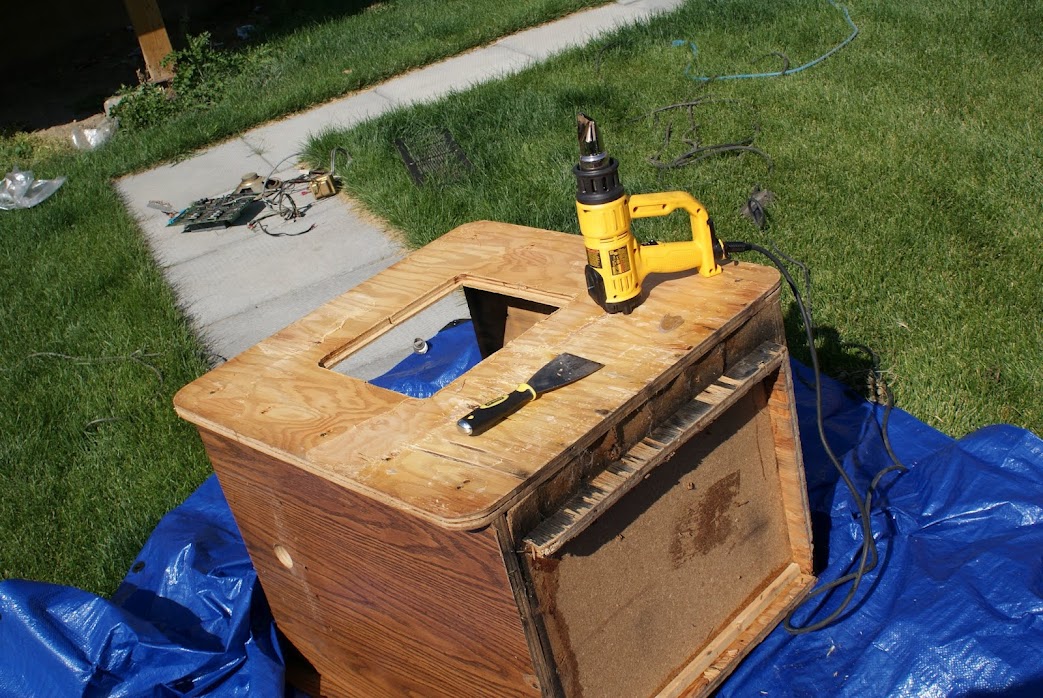
Step 2: Strip the laminate

Putty knife and a heat gun, set to 1100f... this makes real short work of the process!


Step 3: First Sand + Early Bondo

Hit it rough with 80 grit, and tried my first attempt at Bondo'ing...


...and failed horribly. First few batches I mixed up all hardened in about 2 minutes. Must be too much hardener. Cut it back to about half as much hardener. I gave up for the day at this point.

DAY 2! August 29, 2012

Rainy morning, only going to have a couple hours of work time once the yard has dried up enough. The grass is still soaked, but at least I've got my tarp down. It's useful two-fold. Helps me from getting wood and screws everywhere, and keeps the moisture down as well! Also, still no go with the bondo. Since I cut back on the hardener, it's STILL SOFT today!

Speaking of moisture, I noticed something yesterday...


This bottom has GOT to go!


A couple hard whacks with a hammer absolutely disintegrated the bottom panel. See all the particle board laying around?


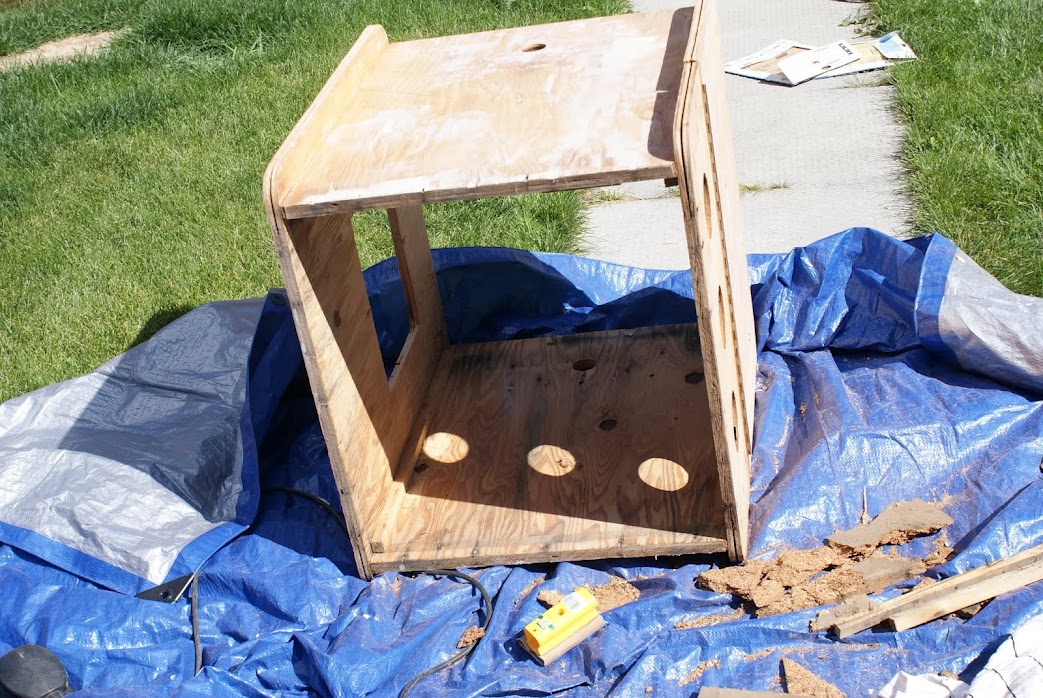
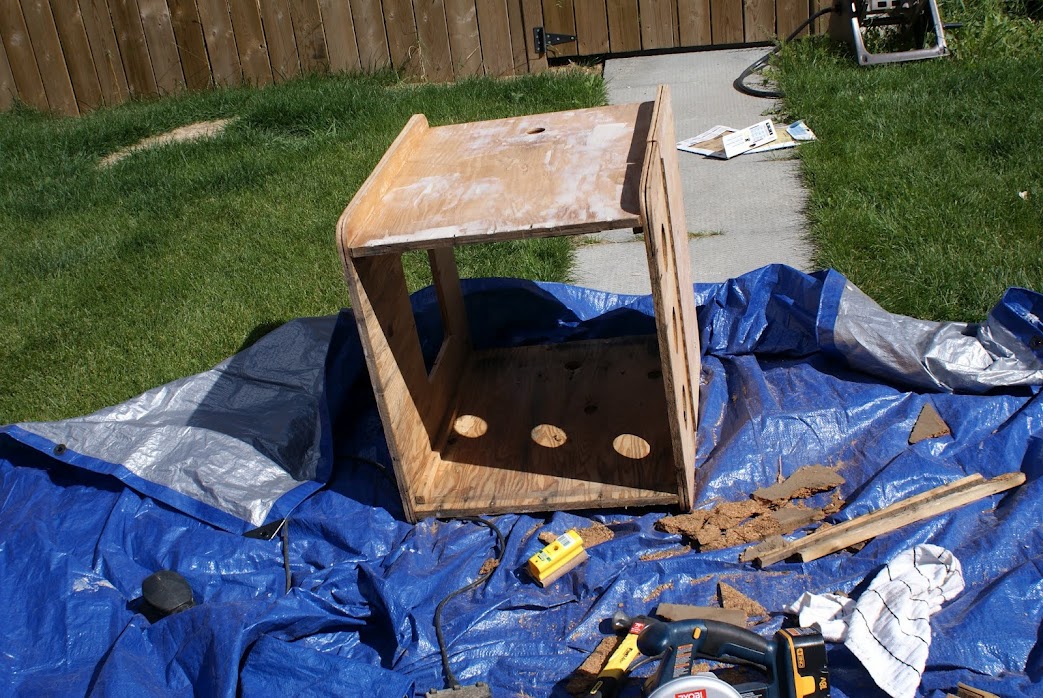
No worries, just means I get to put my virgin saw to some 3/4" MDF!

Measured out the hole for the bottom panel, chopped up a board, and here goes nothing...


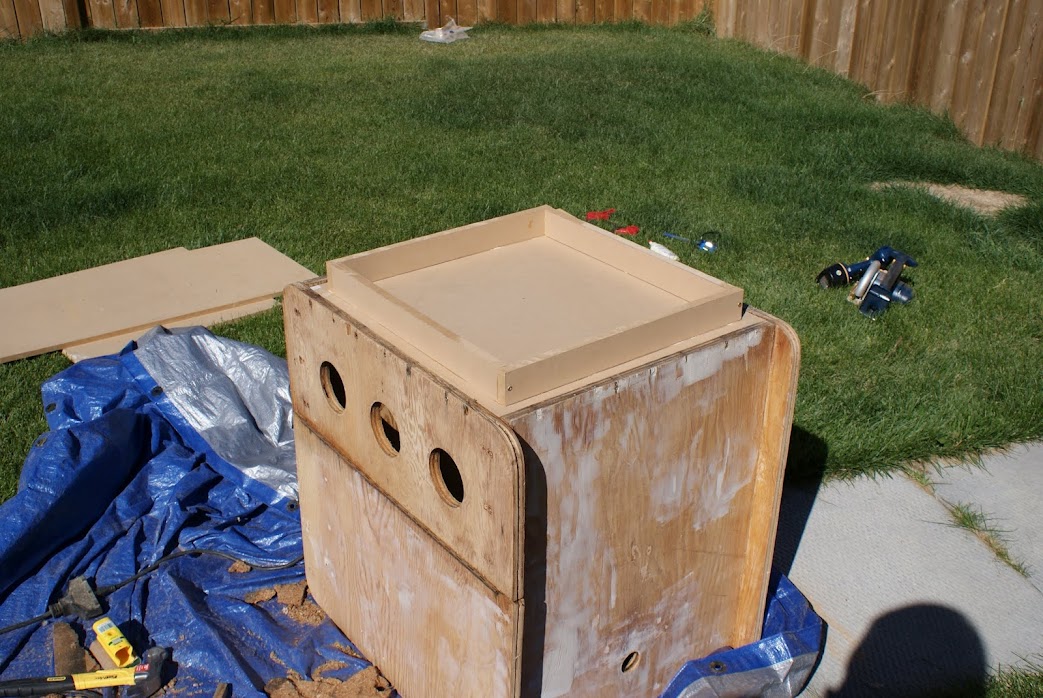
Well! Looks like it fits! I must have been fluking out pretty good! The glue says clamp and let set for 25 minutes, but I don't have clamps that would fit this. While I let the glue set, I stacked on a couple sheets of my 2'x4' 3/4" MDF, and just to be sure, I set my 19" CRT on top of it all. I still have enough time to run to the hardware store to pick up some wood filler, and a couple new putty knives.
« Last Edit: August 30, 2012, 10:18:41 am by DillonFoulds »

Unstupid

  • Trade Count: (+2)
  • Full Member
  • ***
  • Offline Offline
  • Posts: 997
  • Last login:September 08, 2021, 08:46:34 am
Re: Cocktail Overhaul
« Reply #1 on: August 30, 2012, 02:36:10 am »
That's a nice looking coin door... You can get the 25 cents plastic inserts on eBay for a couple bucks.

tokyorock

  • Trade Count: (0)
  • Full Member
  • ***
  • Offline Offline
  • Posts: 13
  • Last login:June 07, 2013, 11:00:17 am
Re: Cocktail Overhaul
« Reply #2 on: August 31, 2012, 11:19:00 am »
The push buttons on the control could use some replacing, but make sure to keep the spinners if they're functional. Those things are expensive.

Can't wait to see the final product. Have you decided on a theme for the machine?

DillonFoulds

  • Trade Count: (0)
  • Full Member
  • ***
  • Offline Offline
  • Posts: 605
  • Last login:August 27, 2019, 05:04:44 am
Re: Cocktail Overhaul
« Reply #3 on: August 31, 2012, 07:58:14 pm »
All the controls will get replaced. I'm gonna put in some sanwas, with square gates, and try for a 4 button setup. The spinners, I might see about going Turbo Twists. To do this, I'm debating stretching the panel by about 3 more inches, just for a bit of lee-way, I'm basing this on what happened with the Canucks cocktail.

For a theme, I'm planning on going all black paint, Chrome T-molding, Grey tinted glass (got a quote locally for about 85cad plus tax), not sure if I'll do the coin door black, or just possibly a strip and clearcoat, or what... Lastly, I'm going to pick up some checker-plating and do 1 foot kick plates on either player side...

Chrome T-Molding - Anyone know a better supply for this? I've only got a 1/16" slotcutter bit, unfortunately :(


Checkerplate I have in mind:

laminarflow

  • Trade Count: (0)
  • Full Member
  • ***
  • Offline Offline
  • Posts: 10
  • Last login:April 04, 2015, 03:25:03 pm
    • My Music site
Re: Cocktail Overhaul
« Reply #4 on: August 31, 2012, 10:51:11 pm »
Where do you plan to get the Check plate from...im thinking of the same for the bottom of my cabinet Restoration.

DillonFoulds

  • Trade Count: (0)
  • Full Member
  • ***
  • Offline Offline
  • Posts: 605
  • Last login:August 27, 2019, 05:04:44 am
Re: Cocktail Overhaul
« Reply #5 on: September 01, 2012, 12:35:10 am »
The company I work for has connections with a few local metal shops. I'll have to buy it raw, and have the in-house welders cut and break it for me.

As for the spinners, PBJ, I'll get back to you on that, but I'll put your name on them. Spinner shots. According to CanadaPost, shipping will only be about 15-20$.
« Last Edit: September 01, 2012, 12:41:48 am by DillonFoulds »

DillonFoulds

  • Trade Count: (0)
  • Full Member
  • ***
  • Offline Offline
  • Posts: 605
  • Last login:August 27, 2019, 05:04:44 am
Re: Cocktail Overhaul
« Reply #6 on: September 24, 2012, 04:31:08 pm »
Quick note, I've got the first coat of primer down, I'll sand it and add another coat next.

I've got a quick question if anyone knows much about glass. Locally I found a glass shop that I can order glass and pick it up the next day. That's great and all, but I have two questions with regards to the glass. Basically, I'm stuck with two options, a 3mm sheet of glass with a 30%vlt tint, or a 5-6mm, but it only comes in about 60%vlt.

If I go with the 3mm, I could probably wrap 3/4" t-molding around the top, and use a 5/8" sheet of MDF for a top. The t-molding then should cover both the wood and the glass, albeit the whole top might look a bit thin.

If I go with the 6mm, I'll use a 3/4" sheet of MDF, and wrap it in the t-molding, and have the glass sit on top, but all the glass clips I'm seeing are all for 1 1/4" thick tops, and mine would be about a C-hair thinner than an inch, so the clips might not fit.

The price of both sheets is going to sit pretty much 75$ + tax, which I'm fine with.

At this point, I'm leaning towards the darker tinted, but thinner glass, and wrap the whole thing in 3/4" T-Molding and call it a day.

cmoses

  • Trade Count: (0)
  • Full Member
  • ***
  • Offline Offline
  • Posts: 718
  • Last login:July 27, 2023, 05:19:00 pm
Re: Cocktail Overhaul
« Reply #7 on: September 24, 2012, 11:19:26 pm »
Looking good.  I will be watching this thread closely.  I just picked up a cocktail cabinet over the weekend.  It is my new project.  The cab needs some serios TLC and there are some monitor issues, burn in, vertical collapse.  Trying to figure out exactly what I want to do, repair it, replace it, go computer CRT, go LCD.  I am pretty sure it was originally a Pacman, but it now has a Galaxian board in it and does not have any artwork or anything so I think I will be MAMEing it.  The wood laminate is in mostly good shape, there is a chunk missing out of the side of one of the control panels.  I have thought about stripping it all off and going with new laminate.  I will be paying attention to your project.  It looks like your off to a good start.

Good luck
Clayton

Seith

  • Trade Count: (0)
  • Full Member
  • ***
  • Offline Offline
  • Posts: 402
  • Last login:September 08, 2018, 10:50:41 am
Re: Cocktail Overhaul
« Reply #8 on: September 25, 2012, 12:06:13 am »
Darker tint always looks better!  Although you aren't putting a CRT in here... I can only assume you are replacing it with an LCD?  What's the viewing angle on the LED you are using?