After years of thinking about it and months and months of research and planning I have finally started to actually make it.
Originally I had designed my own cabinet based on ARTIFACT's Game Museum (
http://forum.arcadecontrols.com/index.php?topic=68794.0;all) and Markc74's Terminus (
http://forum.arcadecontrols.com/index.php?topic=92156.0), and as I was working away from home for a couple of months I was able to spend days trolling the web and reading virtually every topic on this website.
After watching Systms youtube videos one thing dawned on me. How would I get it though doorways in to the living room once constructed? After pondering different solutions I decided to choose the more challenging route of using fixtures and fitting used in flatpack furniture. At least if I move house I can take it with easily.
As I've worked for IKEA for 17 years I have a large knowledge on how flatpack furniture fits together. Whatever people say about building IKEA furniture I've never had a problem, just follow the instructions.
After a few months of not touching the project I decided I didn't like the design I started again. After looking at original Arcade cabinets, Q*bert's cabinet shape stood out, that's what I want!
I soon found a plan of the cabinet and started drawing it in Illustrator making a couple of alterations. I have made it taller and thinner (depth) and rotated the screen upright like most arcade cabinets. I originally I purchased a 21" monitor to give it that retro picture quality but I found it was too deep and too heavy for my liking so I bought a 24" Led monitor.
I've been slowly purchasing mdf, buttons etc. Time so start making it.
Over the Easter weekend I got off my arse and started drawing out the cabinet sides.
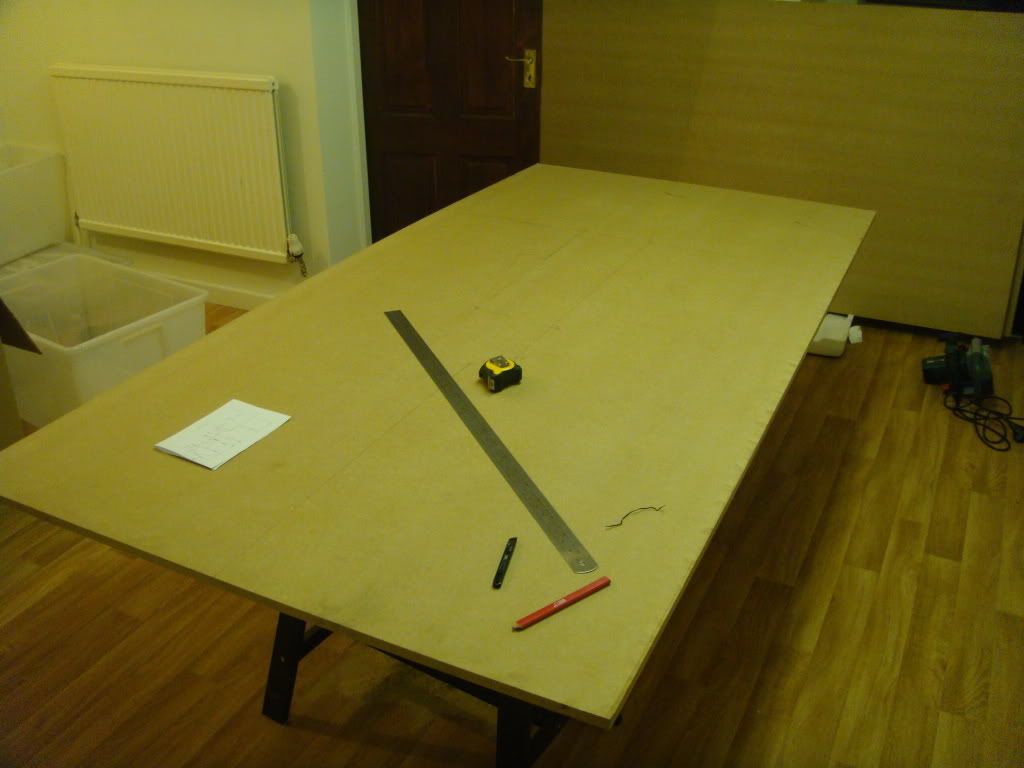
Cut out the shape.

(I didn't use a hacksaw as shown in the photo)
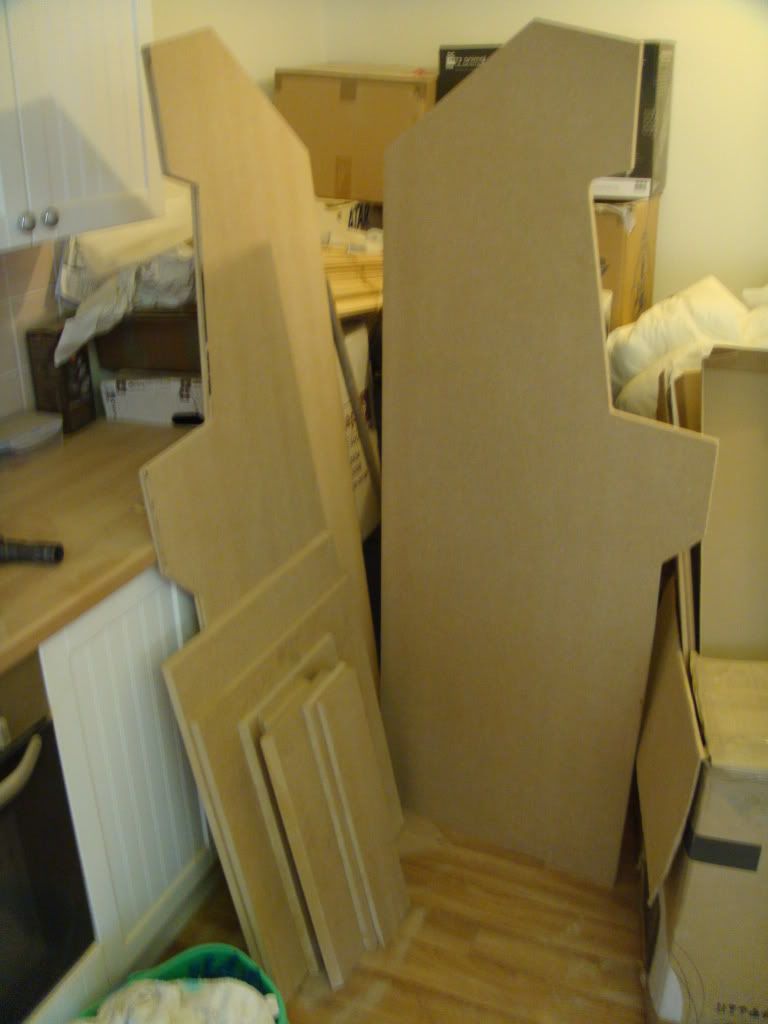
Time to make a copy.


It took me a while to find the correct sized slot router bit. Not bad for the first time.

Time to start cutting the the other panels.

All panels cut, l thats what I thought until I realised I havent cut the bottom. Doh!

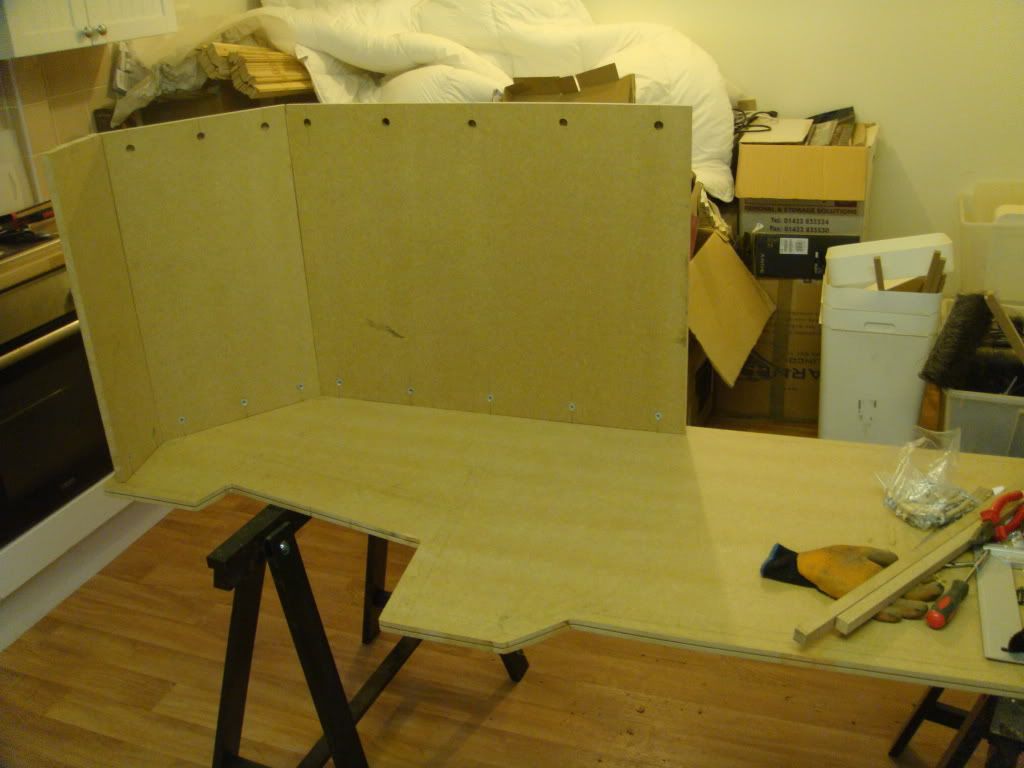
Just needed to check the panels fit together. Not 100% perfect but as I'm using a hand circular saw its a good first attempt.

A view from the back.

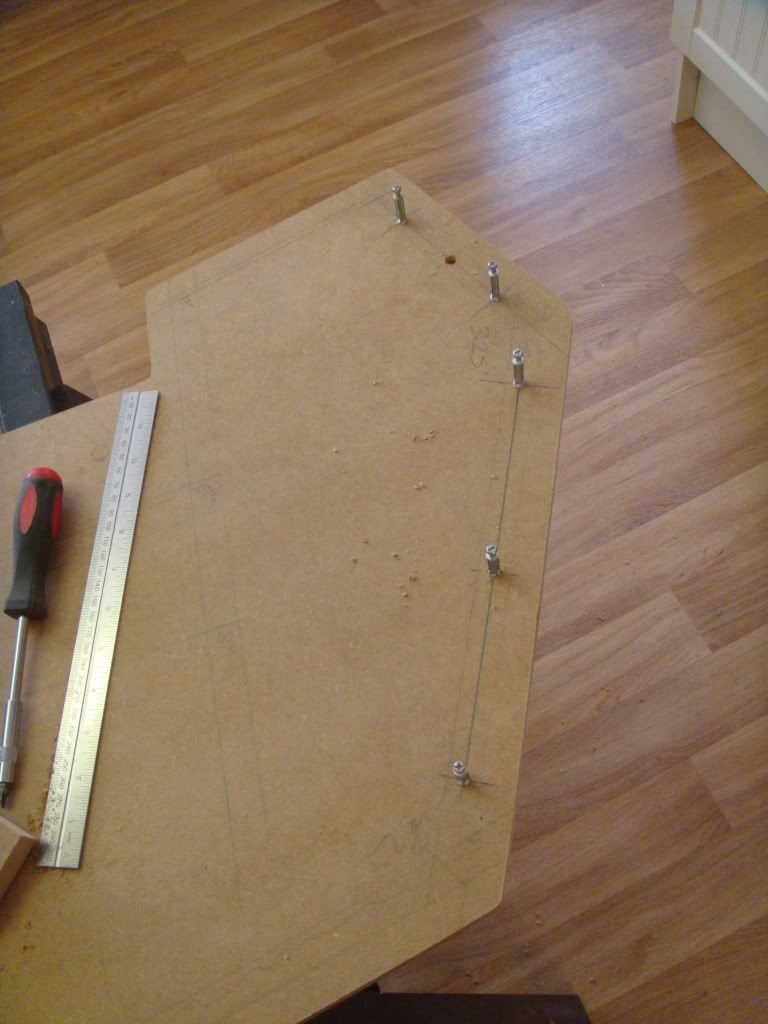
After a few measurements and drilling the first panel is in place.

Since the first panel was a success I drilled the second panel.

Posts in place for the second panel.
Third panel in place. Everything going well.


 Home
Home Help
Help Search
 Login
Login Register

 Send this topic
 Print
Print Topic: Q*bert inspired cabinet. 1st ever project attempt. (Read 7015 times)


