Main Restorations Software Audio/Jukebox/MP3 Everything Else Buy/Sell/Trade
Project Announcements Monitor/Video GroovyMAME Merit/JVL Touchscreen Meet Up Retail Vendors
Driving & Racing Woodworking Software Support Forums Consoles Project Arcade Reviews
Automated Projects Artwork Frontend Support Forums Pinball Forum Discussion Old Boards
Raspberry Pi & Dev Board controls.dat Linux Miscellaneous Arcade Wiki Discussion Old Archives
Lightguns Arcade1Up Try the site in https mode Site News

Unread posts | New Replies | Recent posts | Rules | Chatroom | Wiki | File Repository | RSS | Submit news


Author Topic: First Arcade Project - Desktop Controls  (Read 2989 times)

0 Members and 1 Guest are viewing this topic.

Wolfman5750

  • Trade Count: (0)
  • Full Member
  • ***
  • Offline Offline
  • Posts: 25
  • Last login:November 08, 2012, 09:27:20 am
First Arcade Project - Desktop Controls
« on: March 31, 2010, 08:02:36 pm »
Well I've finally started on my arcade project.  I've been wanting to build a full size machine for a few years now, (even bought Saint's book).  Things just never quite worked out.  Well, I got a job where I move around a lot, so it's still not convenient, but I decided to compromise and build a set of desktop arcade controls that could one day be attached to a full size upright cab.

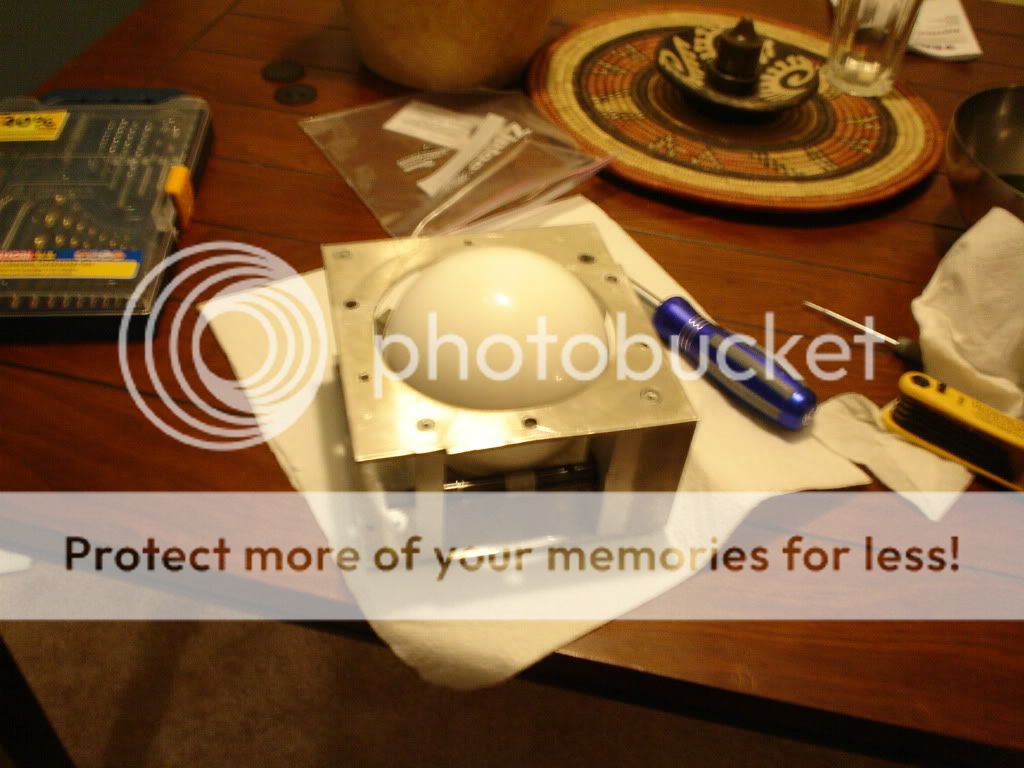
So it all started with this trackball I got off of EBAY.  I bought it for 5 bucks and thought (at the time) that it was any awesome deal.

It was a little dirty, so I cleaned it up, and other than the rollers. everything looked great.
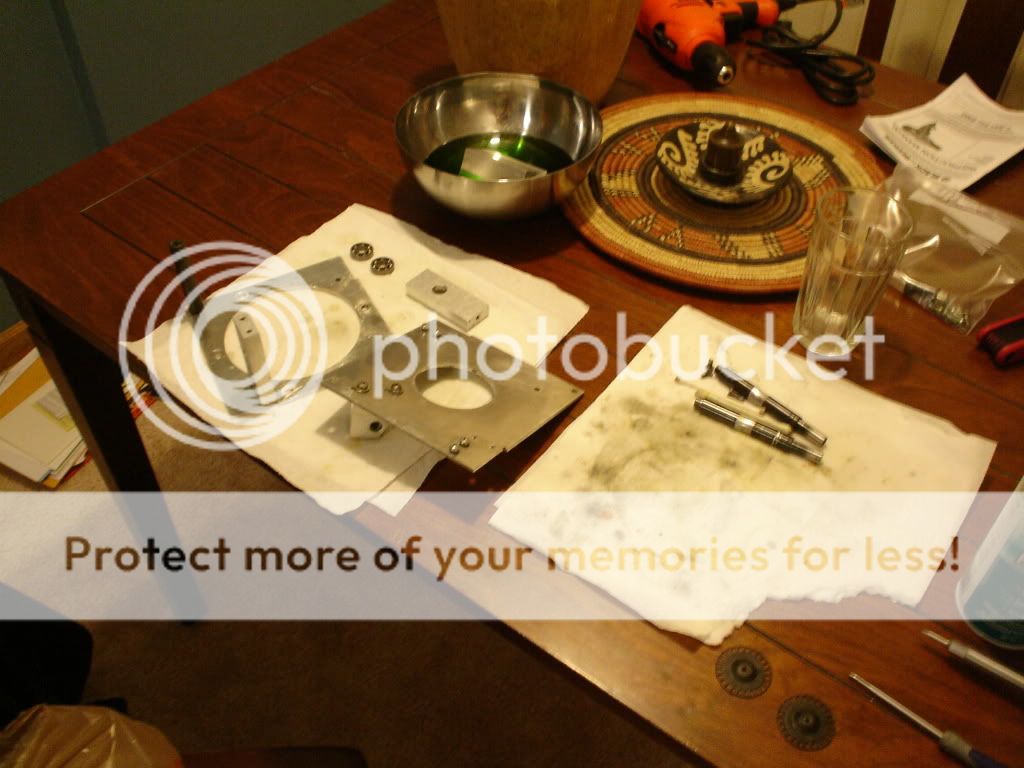


The bearings cleaned up nicely in some simple green and I used some sewing machine oil to lube them back up.

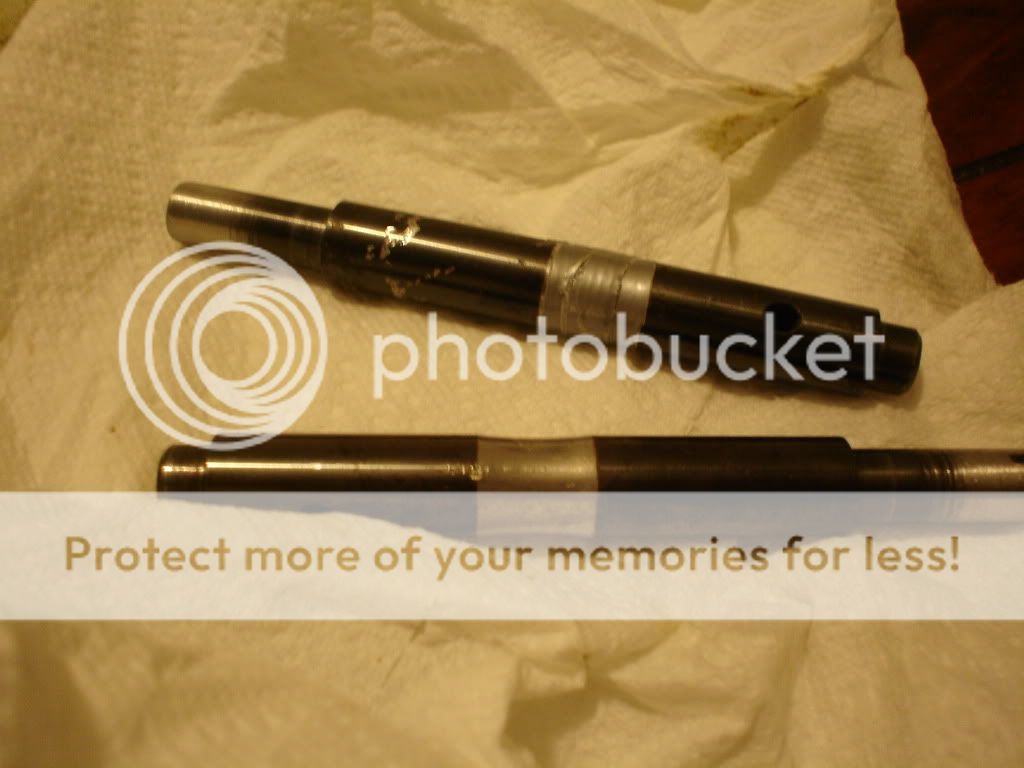
For testing purposes I put some duct tape around the worn spots on the rollers.


And Here's the finished product
EDIT: sorry, same picture twice
« Last Edit: April 01, 2010, 10:08:49 pm by Wolfman5750 »

Wolfman5750

  • Trade Count: (0)
  • Full Member
  • ***
  • Offline Offline
  • Posts: 25
  • Last login:November 08, 2012, 09:27:20 am
Re: First Arcade Project - Desktop Controls
« Reply #1 on: March 31, 2010, 08:14:18 pm »
Then I started on the base. I really liked the look of the CP's on Mountain's Mame and the Neon Mame, but I didn't think I could copy the curve, so my original design was more trapezoidal.  After I got all the parts, I decided to go with the curved front anyway.

I was all ready to work outside. The weather out here in Chicago was nice all week, and then it snowed on the weekend.  I was determined to work on this project, so I got some painters plastic and made my dining room into a wood working bubble.


Also in the picture is how I built my giant router compass.  I cut a hole in a strip of 1/4 inch mdf with my dremel tool.  I screwed that end to the bottom of my router.  On my work table I drilled another hole so that the whole assembly could rotate. This gave me a circle with a 45 inch radius

Here is a pic of the router mounted to the giant compass (and my girlfriend helping me take measurements  :))


I rough cut it with my dremel tool and then made a couple of passes with the router.  Afterwards the only thing I could think was "hmmm... didn't know I could do that..."


And another

Wolfman5750

  • Trade Count: (0)
  • Full Member
  • ***
  • Offline Offline
  • Posts: 25
  • Last login:November 08, 2012, 09:27:20 am
Re: First Arcade Project - Desktop Controls
« Reply #2 on: March 31, 2010, 08:30:19 pm »
Then my girlfriend and I took some 1 inch PVC piping I had laying around and traced it on the corners.  I rough cut them with my dremel and then sanded them.


The CP (before the curve) was 14" x 28".  I wanted the base to be inset slightly, so I made it 1" smaller all the way around.

I put it in my circle cutting jig and cut the same curve into it.


I was on a roll with the next part, so I forgot to take pictures.  I have some on my phone that I can put up if people are interested.

My goal was to make the whole thing as thin as I could, so I made the height of the box short enough to route out the bottom of the CP and mount the 4.5" trackball directly to the bottom of the box. Basically the whole thing is going to be sandwiched together. I cut another curved piece of MDF and screwed that onto the front of the box.  Then I bent a piece of 1/4" mdf accross the two curves and screwed it down


Here's the finished box


And here'sthe box and the Layout that my girlfriend applied to the top of the CP.


smalltownguy

  • Trade Count: (+1)
  • Full Member
  • ***
  • Offline Offline
  • Posts: 924
  • Last login:February 13, 2023, 10:48:26 am
Re: First Arcade Project - Desktop Controls
« Reply #3 on: March 31, 2010, 08:59:30 pm »
**he got his GIRLFRIEND to help with his arcade exploits**


MARRY HER

 :-*
Man, will my cab EVER be finished?

jmike

  • Trade Count: (+10)
  • Full Member
  • ***
  • Offline Offline
  • Posts: 1018
  • Last login:June 24, 2025, 04:54:36 pm
Re: First Arcade Project - Desktop Controls
« Reply #4 on: April 01, 2010, 06:41:23 am »
**he got his GIRLFRIEND to help with his arcade exploits**


MARRY HER

 :-*

+1  :notworthy:

If that's not wifey material, I don't know what is

zipseattle

  • Trade Count: (0)
  • Jr. Member
  • **
  • Offline Offline
  • Posts: 3
  • Last login:August 16, 2019, 01:15:16 am
Re: First Arcade Project - Desktop Controls
« Reply #5 on: April 01, 2010, 10:47:06 am »
If that's not wifey material, I don't know what is

 :applaud:

Note that she let him use the router in the living room...

Wolfman5750

  • Trade Count: (0)
  • Full Member
  • ***
  • Offline Offline
  • Posts: 25
  • Last login:November 08, 2012, 09:27:20 am
Re: First Arcade Project - Desktop Controls
« Reply #6 on: April 01, 2010, 12:40:31 pm »
I've got a pool table in my living room too  ;D

Yeah, she's just as into this project as I am. It's awesome!
« Last Edit: April 01, 2010, 01:01:50 pm by Wolfman5750 »

Wolfman5750

  • Trade Count: (0)
  • Full Member
  • ***
  • Offline Offline
  • Posts: 25
  • Last login:November 08, 2012, 09:27:20 am
Re: First Arcade Project - Desktop Controls
« Reply #7 on: April 01, 2010, 10:47:04 pm »
Alright, so the next thing I did was I cut button holes in my CP using a hole saw and I rough cut the trackball hole


Then I attached a template that I had made using my dremel circle cutter to my cp with double sided tape.


Next I routed out the hole with my template bit and ended up with an (almost) perfectly round trackball hole. When I made my template, I used the measurement from Daviea in a previous post of a hole with a diameter of 3.95 inches.  The template was just barely too big, so after I cut the hole into my cp, I flipped it over and routed along the edge with a round over bit.


Finally I routed out a 6" x 6" x 0.5" square in the underside of my cp for the trackball to sit in.

And here's how it sits.


The roundover on the bottom of the circle is just enough to let the trackball roll.

I'm really beginning to love this router.  I hadn't used one before this.
« Last Edit: April 02, 2010, 06:06:09 pm by Wolfman5750 »

jmike

  • Trade Count: (+10)
  • Full Member
  • ***
  • Offline Offline
  • Posts: 1018
  • Last login:June 24, 2025, 04:54:36 pm
Re: First Arcade Project - Desktop Controls
« Reply #8 on: April 02, 2010, 06:51:48 am »
I've got a pool table in my living room too  ;D

Yeah, she's just as into this project as I am. It's awesome!

 ;) She got a sister?

Seriously, this is looking really sharp. Keep up the good work and remember take plenty of pics.

 :cheers:

RobbyMac

  • Trade Count: (0)
  • Full Member
  • ***
  • Offline Offline
  • Posts: 228
  • Last login:January 05, 2019, 06:48:50 pm
  • My New years Resolution is 1400 x 900.
    • My cabinet build
Re: First Arcade Project - Desktop Controls
« Reply #9 on: April 02, 2010, 07:02:10 am »
Yeah yeah... When you see one control panel you'v seen them all...
I want to hear more about this 'wife that's into arcades and pool tables'
:D :D :D

Just kidding. Lookin good so far... You precut alot of that with a dremmel?

Wolfman5750

  • Trade Count: (0)
  • Full Member
  • ***
  • Offline Offline
  • Posts: 25
  • Last login:November 08, 2012, 09:27:20 am
Re: First Arcade Project - Desktop Controls
« Reply #10 on: April 02, 2010, 09:32:23 am »
Ha Ha thanks... Sorry, No sister  :dunno

But yeah I actually precut everything with a dremel tool and then finished it off either by hand sanding or the router.  My extensive power tool collection consists of a dremel tool, router (20 bucks on craigslist), and a power drill (30 bucks from Wal Mart). 

I've actually burned through two general purpose dremel bits

Mr.Ian

  • Trade Count: (0)
  • Full Member
  • ***
  • Offline Offline
  • Posts: 54
  • Last login:August 21, 2013, 09:28:37 pm
Re: First Arcade Project - Desktop Controls
« Reply #11 on: April 03, 2010, 05:54:10 am »
Invest in a cheap Jigsaw, it will save you in the long run, with paying for Dremel bits

Nice work by the way.


I love my router too !!!! They Rock

Wolfman5750

  • Trade Count: (0)
  • Full Member
  • ***
  • Offline Offline
  • Posts: 25
  • Last login:November 08, 2012, 09:27:20 am
Re: First Arcade Project - Desktop Controls
« Reply #12 on: April 04, 2010, 01:41:28 pm »
So I have a question for you guys.  My original plan was to have a square box on the bottom of the CP and then put the GGG coin buttons on the front.  Do you think I should still put those on the front, or should I find someplace else to put them? If not, would there be any problem with using the mouse buttons to double as coin buttons?

Thanks

smalltownguy

  • Trade Count: (+1)
  • Full Member
  • ***
  • Offline Offline
  • Posts: 924
  • Last login:February 13, 2023, 10:48:26 am
Re: First Arcade Project - Desktop Controls
« Reply #13 on: April 04, 2010, 01:57:19 pm »
So I have a question for you guys.  My original plan was to have a square box on the bottom of the CP and then put the GGG coin buttons on the front.  Do you think I should still put those on the front, or should I find someplace else to put them? If not, would there be any problem with using the mouse buttons to double as coin buttons?

Thanks

Will you have functional coin mechs on the machine? If so, I'd wire the coin inputs to your reject plunger. It's simple to do, and very effective. It also somewhat conceals your credit access.
Man, will my cab EVER be finished?

Wolfman5750

  • Trade Count: (0)
  • Full Member
  • ***
  • Offline Offline
  • Posts: 25
  • Last login:November 08, 2012, 09:27:20 am
Re: First Arcade Project - Desktop Controls
« Reply #14 on: April 04, 2010, 03:46:35 pm »
Right now I'm just making desktop arcade controls.  Because I move a lot, I can't really make a full size arcade machine. What I have are these:

http://groovygamegear.com/webstore/index.php?main_page=product_info&cPath=73&products_id=295

Before I decided to make the front of the control panel curved, I was originally going to just add them to the front face of the cp box

Wolfman5750

  • Trade Count: (0)
  • Full Member
  • ***
  • Offline Offline
  • Posts: 25
  • Last login:November 08, 2012, 09:27:20 am
Re: First Arcade Project - Desktop Controls
« Reply #15 on: April 06, 2010, 12:32:28 am »
Alright, here's a small update.  I've actually got some major progress that I will update tomorrow.

But for now here's the top of the CP with the cut plexiglass.


I cut the plexi in the rough shape of the cp with a plastic scoring knife.  I used double sided tape around all the edges of the cp and around every button hole.  I was really nervous about cracking the plexi, so I wanted it as firmly attached as possible. I went around the outside edge with the router, which was amazingly easy and smooth.  The same goes for the trackball hole.  used the hole saw in reverse with gentle pressure to cut the button and joystick holes. Also no problem there.  Way easier than I thought it would be.  ;D

Wolfman5750

  • Trade Count: (0)
  • Full Member
  • ***
  • Offline Offline
  • Posts: 25
  • Last login:November 08, 2012, 09:27:20 am
Re: First Arcade Project - Desktop Controls
« Reply #16 on: April 06, 2010, 12:38:26 am »
And here's a picture of the trackball and encoder wheel.


I bought happ replacement rollers for this because the boards on it were happs...

Well those didn't fit. Turns out that this is a modified Atari trackball. The rollers have been cut short and then drilled and tapped to match the happ boards.  Too late to get another trackball, I've already cut everything to match this one.  :dunno