Build Your Own Arcade Controls Forum
September 02, 2010, 11:11:51 AM *
Welcome, Guest. Please login or register.

Login with username, password and session length
News:
X-Arcade Joystick: Relive Arcade Classics
 
   Home   Help Arcade Search Login Register  

 
Main Woodworking Reviews Software Monitor/Video
Audio/Jukebox/MP3 Project Announcements Artwork Consoles Buy/Sell/Trade
Arcade Miscellaneous Everything Else Politics n Religion Forum Discussion Wiki Discussion
DOS/WinCab PowerMAME SK Jukebox UncleTs Jukebox Project Arcade
Linux Restorations Pinball MaLa Frontend controls.dat
Maximus Arcade Old Boards Old Archives    
 
Unread posts | New Replies | Recent posts | Arcade | Rules | Chatroom | Wiki | File Repository | RSS


Pages: [1]   Go Down
  Send this topic  |  Print  
Author Topic: DOA 4 Hori Stick Mod  (Read 4435 times)
0 Members and 1 Guest are viewing this topic.
adonis_minus_20
Trade Count: (0)
Full Member
***
Offline Offline

Posts: 94


View Profile
« on: January 13, 2006, 10:19:49 AM »

I just finished modding the joystick replacing it with a Sanwa JLF-TP-8Y, I don't have my buttons yet (I'm also going to replace the stock buttons with Sanwa 30 mm screw-in buttons - white).
Logged
Franco
Guest
Trade Count: (0)
« Reply #1 on: January 13, 2006, 03:02:14 PM »

Nice tutorial. Im sure it will come in handy/inspire some people. Im gonna do a DCinnaNES tutorial when I get round to it, Ive got all the parts, I just need to crack on with it!
Logged
MarkMan
Trade Count: (0)
Full Member
***
Offline Offline

Posts: 13


View Profile
« Reply #2 on: January 19, 2006, 06:30:15 AM »

Looks really good, make sure you post more info on replacing the buttons!  They look like a hassle to do Sad !

Good work!
Logged
MameMaster!
Trade Count: (+9)
Full Member
***
Offline Offline

Posts: 1859


Engage number one!


View Profile WWW
« Reply #3 on: January 19, 2006, 12:09:57 PM »

you're on a roll with console stick mods!...nice job.  Grin
Logged

adonis_minus_20
Trade Count: (0)
Full Member
***
Offline Offline

Posts: 94


View Profile
« Reply #4 on: January 19, 2006, 12:50:34 PM »

Looks really good, make sure you post more info on replacing the buttons!  They look like a hassle to do Sad !

Good work!

Thank you!  I'm still waiting on my buttons, as soon as they come in, and I finish the mod, I'll post steps and pics.  If you're the same MarkMan, I posted this on doacentral.com and shoryuken.com too.  Yeah, I'm expecting doing the buttons to suck  Sad

you're on a roll with console stick mods!...nice job.  Grin

Thanks!  I wish I knew how to build cases though, since I don't, I'll just stick with modding using the premade joysticks.

Jim
 
Logged
versapak
Somewhere between a block of wood and a monkey
Trade Count: (+1)
Full Member
***
Offline Offline

Posts: 1529


I am t3h GAY!!!


View Profile
« Reply #5 on: January 19, 2006, 06:44:07 PM »

Are the buttons analog?


The DOA games on Xbox were some of the very few that actually used analog buttons, so it wouldn't surprise me to see analog buttons on a DOA 4 controller.


« Last Edit: January 29, 2006, 09:51:59 PM by versapak » Logged

adonis_minus_20
Trade Count: (0)
Full Member
***
Offline Offline

Posts: 94


View Profile
« Reply #6 on: January 19, 2006, 08:25:22 PM »

Are the buttons analog?

No, MS ditched the analog buttons on the 360 controller.  The only thing that is analog for the buttons are the left and right triggers, X,Y,A,B,LB, and RB are all digital.

I think this is dumb, but for whatever reason, that's what they decided to do.

Jim
Logged
versapak
Somewhere between a block of wood and a monkey
Trade Count: (+1)
Full Member
***
Offline Offline

Posts: 1529


I am t3h GAY!!!


View Profile
« Reply #7 on: January 29, 2006, 10:09:19 PM »

Well, I bought the stick.

I didn't replace anything yet, but I did relocate the buttons. The layout on that thing is just plain asstacular.

I relocated em to fit the more standard layout of:

X-Y-L
A-B-R


I dunno what Team Ninja and the guys at Hori were thinking, but man that thing was bad. It probably wouldn't have irked me so much, if the controls were fully programmable in DOA 4, but noooooooooo...

Take a look at the picture of the controller up there.

Notice how it is laid out. Notice that the LB and RB buttons are up top with the Start, Back, and 360 Guide buttons.

Notice where the L & R buttons are, next to the A button.

Well...

DOA 4 does NOT allow you to assign kick or punch to the L & R buttons. Seriously... WTF?

To make matters worse though... It DOES allow you to map kick and punch to the LB & RB buttons. LOL

Now REALLY... W - T - F!?!


Oh well. Fortunately this community has greatly improved my control tinkering skills, and relocating those buttons was a piece of cake.

The switches are actually soldered into the PCB, so you do need to de-solder them, which was painless enough with a de-soldering bulb. After that, rewiring was elementary stuff.

I'd post pictures, but really there isn't all that much to show. Just look at the pictures already here, and just picture the PCB's no longer attached to the buttons directly, but wired to them, and picture the buttons relocated to the fore mentioned layout of :

X-Y-L
A-B-R


Smiley


« Last Edit: January 29, 2006, 10:13:45 PM by versapak » Logged

adonis_minus_20
Trade Count: (0)
Full Member
***
Offline Offline

Posts: 94


View Profile
« Reply #8 on: February 13, 2006, 12:48:07 AM »

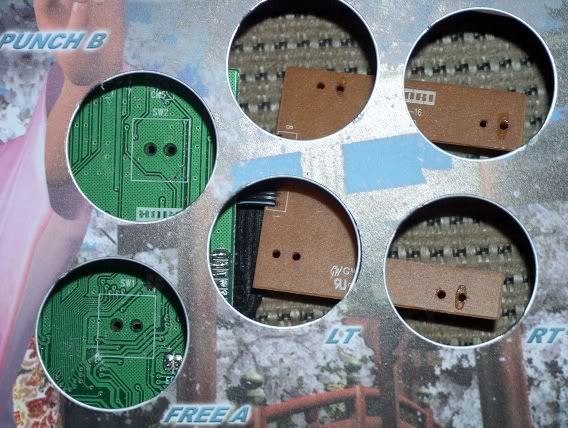
So I got my buttons, and I was working on this thing last night, and everything was going OK.  I got the first four buttons desoldered just fine:


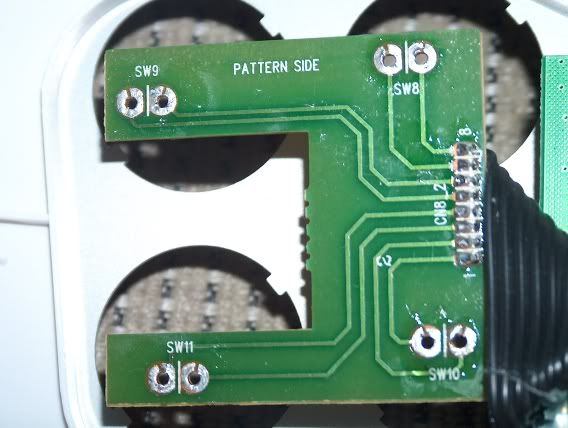
I was thinking this isn't so bad (I suck at soldering).  I got to the last two buttons that are on the main part of the PCB:


And they just wouldn't come out.  I thought they were completely desoldered, but they were stuck.  I stupidly proceeded to continue applying the soldering iron to the PCB, and proceeded to fry it (no pic sorry).

I am so upset.  I spent a good deal of time on this just to eff it up.  I suck at soldering and should stay away from soldering irons.

Here's some observations from what I did with this thing:

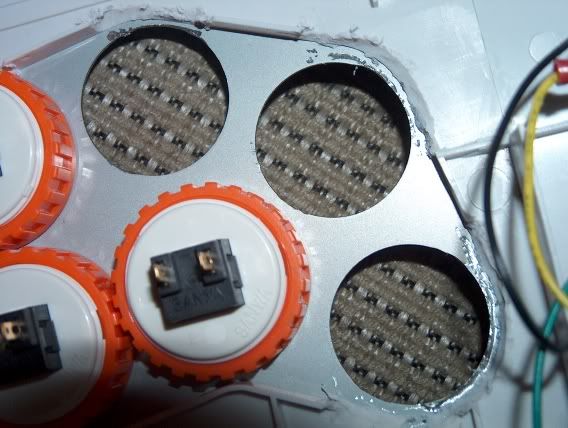
Don't use screw-in Sanwa buttons, as they will not fit without using a dremel tool to grind down some of the plastic on the inside of the base - use snap-ins instead.  Here's pics of plastic that I had to grind away to make my screw-in buttons fit:


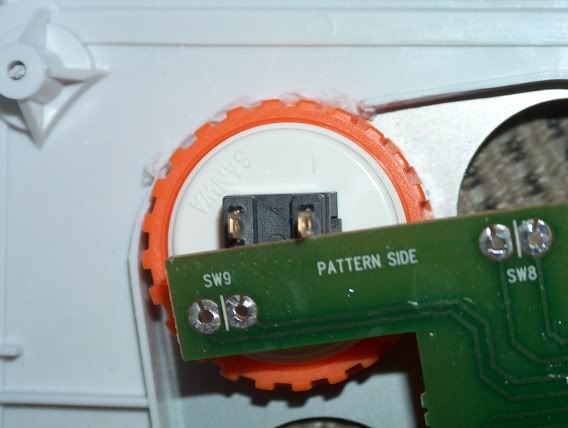
Either way there are two little metal tabs on each button hole that need to be ground down with a dremel tool in order to get either type of Sanwa button to fit (diameter of button hole).  I actually did all of the prep work for this, grinding down the metal tabs, and grinding down the plastic in the base to get my screw-in buttons to fit.
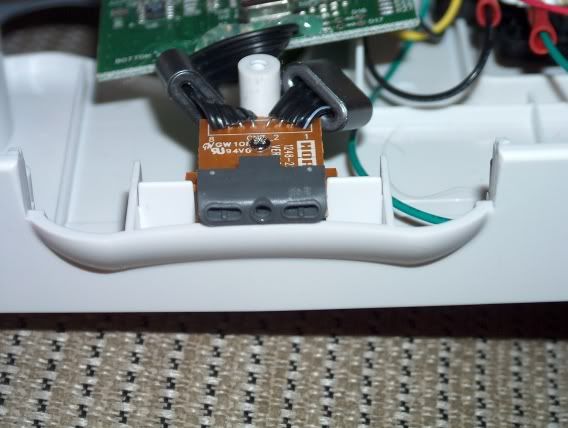
Metal Tabs Suck:


Metal Tabs Removed:


Don't try to use quick disconnects for the buttons, there isn't enough room in the case.  This thing is so shallow that the PCB won't fit in the case if you do.  It probably would be tight even without disconnects, as the Sanwa buttons require more depth than the Hori buttons originally in the stick.  You might be able to just solder wires directly to the Sanwa buttons from the PCB, and make it fit.  Maybe  shortening the prongs on the bottom of the Sanwa buttons to save some space would help.

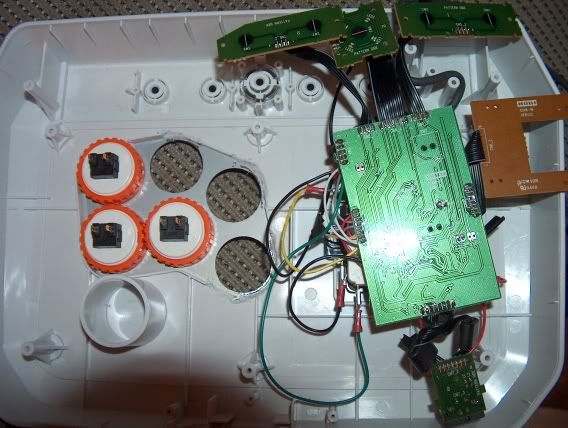
Here's some other pics.  I ended up having to remove all of the screws for the PCBs and the XBOX Live plastic cover piece, in order to have room to be able to do the prep work.

XBOX Live Plastic Cover Piece:


XBOX Live Connector Without Cover Piece:


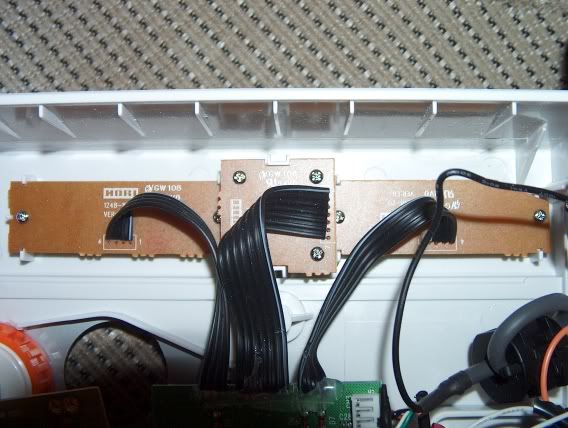
Top Little PCBs for LB/RB/START/BACK:


Whole PCB Free And Pushed Off To The Side:


I am disappointed that I screwed this up, but it was still fun to work on.  I hope that my posts regarding this stick were helpful.  The stick isn't bad, but it is really a pain in the ass to mod.  If you can build a custom case, and hack a hand controller, you'd probably be better off.  I would say if you have decent soldering skills, you'll have no problem with doing this, so I don't want to scare anyone away.  I knew I was shakey regarding this, so I'm not really surprised that I pooched the poodle.

Jim
Logged
Zapatistab
Trade Count: (0)
Full Member
***
Offline Offline

Posts: 109


View Profile
« Reply #9 on: February 17, 2006, 11:57:22 AM »

I did the same mod, and yes the buttons were a pain. I shaved the buttons contacts down, and I don't recommend doing it. I would suck it up and keep the stock buttons. You can always swap the microswitches, and use the buttons as strickly cosmetic. Also you can fit the entire Sanwa joystick inside the DOA case, if you do some case modding. You need to shave away some plastic inside. And  you will  need to swap the joystick shaft, because the Sanwa shaft is too small.
Logged
Pages: [1]   Go Up
  Send this topic  |  Print  
 
Jump to:  

Powered by MySQL Powered by PHP Powered by SMF 1.1.11 | SMF © 2006-2009, Simple Machines LLC | Sitemap Valid XHTML 1.0! Valid CSS!
Page created in 0.253 seconds with 23 queries.