USE AT YOUR OWN RISKI am in no way responsible for any harm you may do to your PC by following these steps. Please have knowledge of restoring, backing up, troubleshooting WIN 7. The tutorial is for moderate/advanced PC users only, if you do not have this knowledge stop here and go no further.
–YOU HAVE BEEN WARNED- HIDING WINDOWS 7OverviewThis tutorial will show you how to hide and or remove any visual representation that you are using Windows7 as an OS for your arcade machine. We will be using instantsheller which will do most of the work, coupled with a few additional tweaks to the OS to make boot-up visibly pleasing to yourself or whomever your trying to impress.
I understand that some these steps may overlap what instantsheller may already do, but they will catch any process instantsheller fails to execute to ensure your presentation is clean.
To save you some time, I have provided a Dropbox link which will have all of the basic tools/files to follow the tutorial.
Tutorial Tools <----- Files Here
Let's get started.....
 Windows PreparationBackup your PC
First and foremost backup your system prior to making any of these changes, as any of these steps done incorrectly could prevent your windows from loading properly.
Enable GODMODE- Create a folder on your desktop
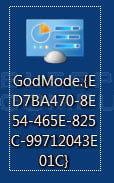
- Name the folder GodMode.{ED7BA470-8E54-465E-825C-99712043E01C}
This will create an icon that looks like this:

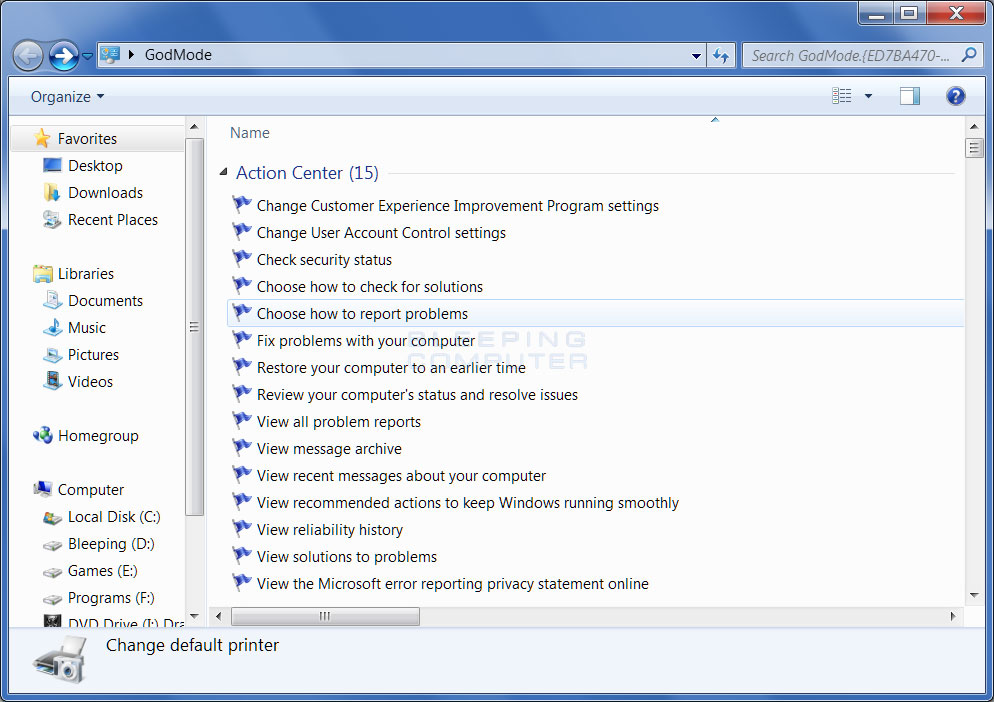
And will give you access to all configurable screens in Win 7.

While in GODMODE follow these steps (we are gonna go down the list in order, use the search function in the top right hand corner if needed).
1. Change User Account Control Settings
Set to "Never Notify" and reboot. Since we will be making a lot of changes to the PC, this will remove that annoying pop-up asking if you want a program to make changes to your PC.

2. Choose How to Check For Solutions
Set to "Never", this will keep the windows solutions and problems pop-up from displaying.

3. Change When Computer Sleeps
Set
Turn off Display and
Put Computer to Sleep to "Never", this keeps PC from hibernating (Note: this may look different PC, this is the screen for a laptop.)

4. Require a Password When the Computer Wakes
If you decide to keep a password on your PC, tick
"Don't require a Password" and save changes. This keeps the lock screen from showing up should your PC go into hibernation or sleep mode.

5. Turn Windows Features On or Off
This is optional, if there are any features that you will never use on the cab, then turn them off. This is a similar to what NLITE does for stripped down XP installs.
This is what my setup looked like, but yours may differ based on your selections. Reboot if you make any changes.

6. Adjust Appearance and Performance of Windows
Set to
"Adjust for Performance", this will free up resources and speedup your PC.

7. Create or Remove Your Account Password
You will need to do this if you want to have a static image show up after your custom boot animation. The alternative is to use the auto-login feature in instantsheller if you absolutely want a PW on your rig, however, you will lose the additional boot-up image as instantsheller will hide it. Ensure that the highlighted verbiage is visible to confirm that you have removed your password.

8. Turn Automatic Updating on or Off
It is recommended that you update your windows to current and then turn off windows update prior to making any of these changes. Any updates made after the changes could modify the hacked files and cause your system to fail at boot or worse a BSOD. I experienced this while testing and rolled the system back prior to the updates with a system restore to correct the problem.

You can now shut down GodMode, erase it or keep it on your desktop
Turn off update alerts for 3rd party any installed programsThis is optional, but this step keeps installed programs from alerting you that an update is available and ready to be installed. These annoying reminders take focus from your front end.
Remove Taskbar Balloon Pop-upsPlace the "Disable_Notifications.reg" file and place on your desktop and execute.
This will suppress any notifications at the bottom right of your task-bar.
Disable Sticky KeysTip Provided by :
burn_654http://www.techrepublic.com/blog/windows-and-office/quick-tip-disable-the-sticky-and-filter-keys-in-windows/Disable Windows Startup RepairTip Provided by
abispac1. Open CMD Prompt
2. Run these 2 commands
bcdedit /set {default} recoveryenabled No
bcdedit /set {default} bootstatuspolicy ignoreallfailures
Take Ownership of FilesPlace the "Add_Take_Ownership_to_context.reg" file and place on your desktop and execute.
When you right click on the OS files we are going to modify and click "Take Ownership", this will give you the permissions needed move and modify.
 Pause and take a break, clear your brain, this is where you can really screw things up.
We are now going to modify the OS system files, pay attention to detail or you will be starting over with a new install of Windows.
1. Extract the Elevated_Command_Prompt.zip and place the command prompt short cut on your desktop.

2. Install ResourceHacker (reshacker_setup.exe)
3. Create a folder on your desktop and call it "File Backups".
Removing the Windows Branding1. Navigate to C:\Windows\Branding\Basebrd
2. Right click on the basebrd.dll file

3. Click "Take ownership"
4. Drag file to your desktop
5. Click on it, and associate the file type to Resource Hacker. (This keeps you from having to open resource hacker up separately for the rest of the files)
6. Right Click on each highlighted resource and hit "Delete Resource"

7. Save the file and resourcehacker will create a backup file basebrd_original.dll, place that file into your backup folder.
8. Drag the modified file back into C:\Windows\Branding\Basebrd
9. Click on the 'Elevated Command Prompt' shortcut
10. Change directory to C:\Windows\Branding\Basebrd
11. Type mcbuilder and hit enter

12. Wait for the command prompt and then close it out.
Removing the Toilet Bowl of Death1. Navigate to C:\Windows\System32\
2. Right click on the imageres.dll file

3. Click "Take Ownership"
4. Drag file to your desktop
Tip provided by
Romshark : Should you have a problem moving or modifying the file in the system32 folder and your running a 64-bit OS. Edit the "imageres.dll" file in the SysWOW64 directory instead.
5. Click on it
6. Right Click on each highlighted resource and hit "Delete Resource"

7. Save the file and resource hacker will create a backup file imageres_original.dll, place that file into your backup folder.
8. Drag the modified file back into C:\Windows\System32\
9. Click on the 'Elevated Command Prompt' shortcut
10. Type mcbuilder and hit enter

11. Wait for the command prompt and then close it out.
Removing the Boot Screen and Shut Down Verbiage1. Navigate to C:\Windows\System32\en-US
2. Take ownership and drag these three files to desktop

3. Click on the authui.dll file
4. Remove the 'Please Wait' from the quotes, leave the quotes (Do not use delete resource)

5. A green arrow will now be available, click it to compile.

6. Save the file and resource hacker will create a backup file authui_original.dll, place that file into your backup folder.
7. Drag the modified file back into C:\Windows\System32\en-US
8. Click on the wininit.exe file
9. Remove the highlighted text from the quotes, leave the quotes (Do not use delete resource).

10. A green arrow will now be available, click it to compile

11. Save the file and resource hacker will create a backup file wininit_original.exe, place that file into your backup folder.
12. Drag the modified file back into C:\Windows\System32\en-US
13. Click on the winlogon.exe file
14. Remove the highlighted text from the quotes, leave the quotes (Do not use delete resource).


15. A green arrow will now be available, click it to compile.

16. Save the file and resource hacker will create a backup file winlogon_original.exe, place that file into your backup folder.
17. Drag the modified file back into C:\Windows\System32\en-US
18. Click on the 'Elevated Command Prompt' shortcut
19. Change directory to C:\Windows\Branding\en-US
20. Type mcbuilder and hit enter

21. Wait for the command prompt and then close it out.
Reboot and make sure all of the changes were made, if you did it correctly you should boot back into the desktop.
Reboot again, and look for any branding or verbiage that we removed above, if it is still there, repeat the steps for that object only.
Now its time to add the bling to Windows
(Note: The next 2 steps are not worth bothering with if you have an SSD Drive or a quick bootup motherboard. The boot-up is so fast that the animation doesnt have time to finish and the logon screen just flashes.)Change boot animationClick
HERE to get more info on how to create your custom animation.
1. Open 'Windows 7 Boot Updater'
2. Change the settings to match below, the animation will vary based on what you want to show.
Default - Microsoft animation
Static Image - you own custom static image will show at boot
Animation - your own custom animation

3. If you chose animation, hit play to make sure your animation works.
4. Hit Apply
5. Reboot
6. If you want to reverse the changes, re-open the boot updater, click options, and then restore back-ups
 Troubleshooting Bootupdater
This is one of the steps that can send mess up your PC, the steps below will help you to recover your PC.
 Change Logon Boot and Shutdown Images
1. Extract and install 'Windows 7 Logon Background changer'
2. Open 'Windows 7 Logon Background changer'

3. Select your background
4. Change the text to be 'no shadow' in the settings.

5. Hit Apply
4. Reboot and make sure the changes have been applied
Suppress Taskbar(Note: I tried this program on 2 PC's same OS, one worked and the other I could not get the setting GUI to show up and could not figure out why). If this happens, then just autohide the taskbar, once you shell your front end, it may hide the taskbar well enough for your application.)1. Install and open "Shybar"
2. Enable auto-hide taskbar (you have to enable auto-hide to enable shybar), now set shybar shown below.

3. Click Hide
The toolbar will disappear, to make it reappear for use go to bottom of the screen, you will notice now it takes 2 secs before it appears. You can adjust Shybar to your own personal preferences.
Configure Instantsheller1. Extract and open "instantsheller"

- Application to Shell - Select the front end that you want to shell to , ie. Hyperspin, Mala, GameEX.
- Hide Startup, Login, Shutdown Screens, and Set Auto Login - If you created a custom animation and logon background, uncheck this selection otherwise they will be hidden.
- Change Shell Application - If you want to shell back to the desktop uncheck this option. Good for testing.
- If this login requires password - If you kept your password, click the Auto-Login button to set your credentials.
2. Optional: This is a secondary safeguard for making the windows boot-up animations disappear. This is only if you did not create a custom boot animation.
No GUI Boot- Type "msconfig" in your windows "search programs and files"
- Click the "Boot' tab
- Check "No GUI Boot"
3. Click 'I'm ready to do it.'
4. Reboot
To undo instantsheller requires a good eye, as the cursor will now be a small black dot.
If you need to reverse instant sheller to get back to normal windows functions, hit Ctrl-Alt-Del in your front end or desktop and choose 'New Task'. Then type 'explorer' into the box and hit enter. Navigate back to instantsheller and execute and hit undo. Reboot PC
Enjoy and good luck


 Home
Home Help
Help Search
 Login
Login Register
 Send this topic
 Print
Print


