I started work on my Xbox 360 arcade sticks last night and I thought I would do a top mount guide for anyone wanting to top mount there joysticks.
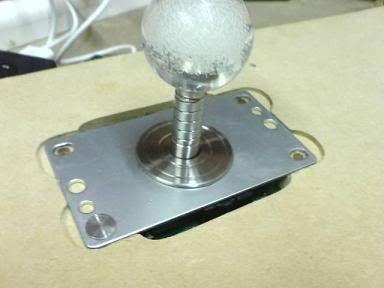
Japanese joysticks such as the JLF and JLW amongst others are traditionally mounted to a thin metal CP. If you bottom mount them you reduce the shaft length between the CP and ball top and you end up with a stick height that is unsuitable. This guide will show you how to top mount them so that you retain the full shaft length. The U360 is a modified Sanwa JLW so this guide will also work for that.
I'm not saying this is the best way to top mount sticks but its what works for me.
I'm top mounting a Sanwa JLF in this guide but you can apply the techniques to other sticks.
The tools I used were:
Drill (hand or bench/pillar)
Jigsaw
Router
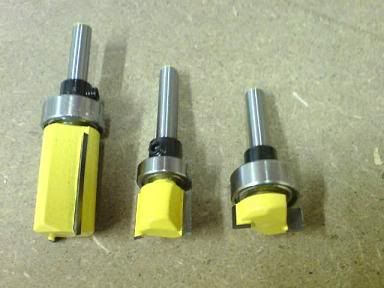
Router bits - 1/2" flush trim, 3/4" pattern bit
Router table (not necessary but it does make things easier IMO)
Pencil for marking out
Scrap pieces of MDF for making templates.
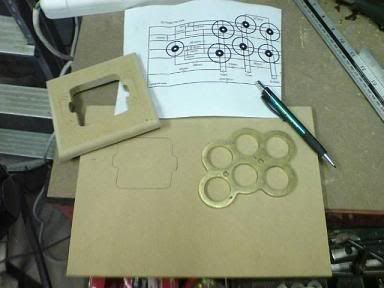
I'm making some templates in this guide to keep everything nice and neat. Making templates is also handy as once you have them made you can quickly churn out multiple CPs. You don't have to make the templates but I think its much easier in the long run.
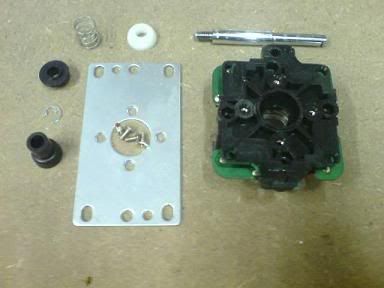
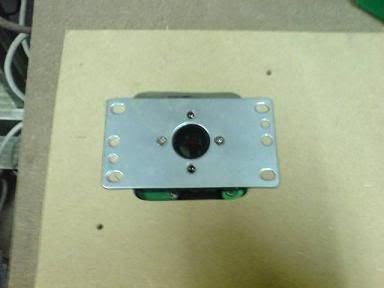
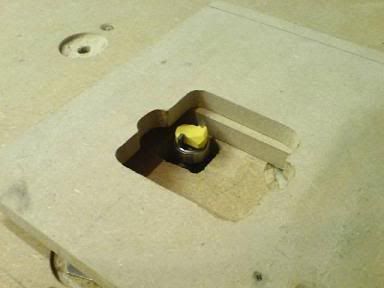
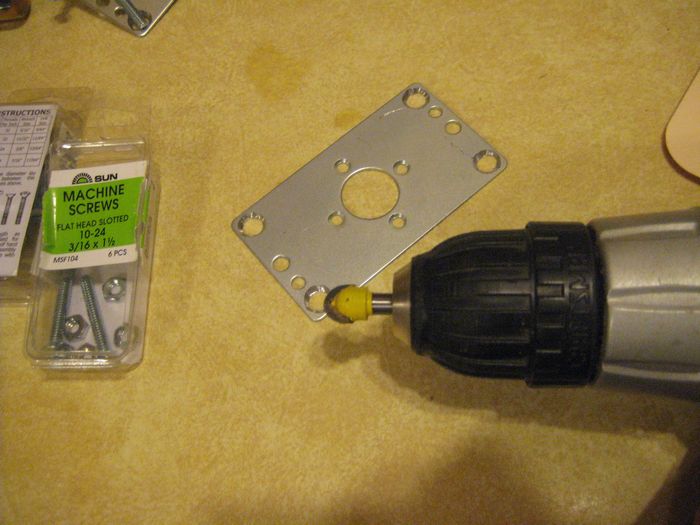
1) Disassemble the shaft from the joystick by removing the e-clip. Remove the other components from the assembly and put them to one side. Remove the four screws that hold the mounting plate to the joystick base and remove the mounting plate.
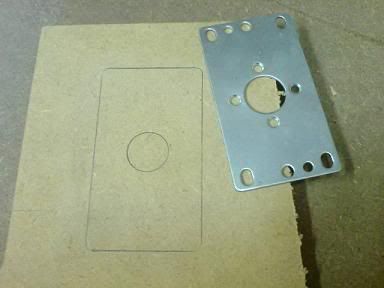
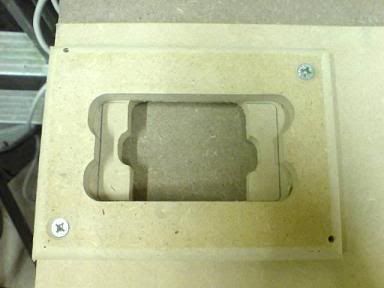
2) You need to make a though hole in the CP for the base to fit through. This is where I made the first template. Trace round the joystick base on a scrap piece of MDF.
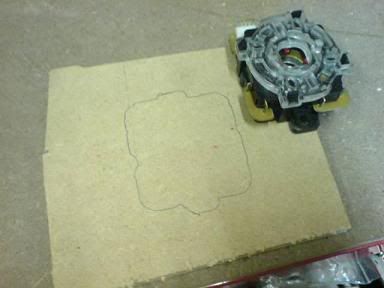
3) Remove the bulk of the material from the inside of your traced line. I drilled four 10mm holes close to the corners and then used a jigsaw to remove the center section. You then need to remove enough material so that the joystick base slides through the hole. You can use any method to remove the excess but I free hand routed mine using a 1/4" bit on my router table. You could jigsaw, scroll saw, file etc - whatever works for you.
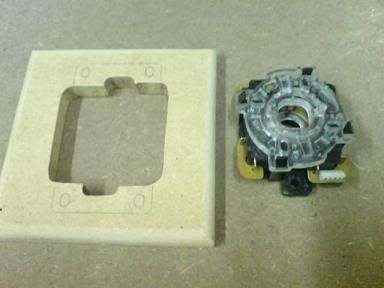
The joystick base should fit nicely through the hole. I left about 1-2mm for clearance but it doesn't really matter as long as it fits in. You don't want to remove too much material though as you will be reducing the amount of material that the mounting plate will eventually sit on.
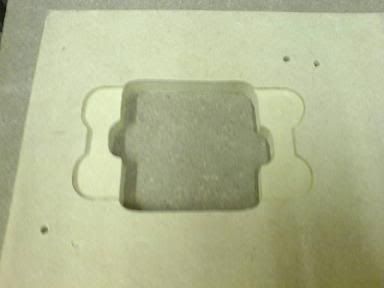
4) That's the first template complete. I then made a second to use to counterbore the recess for the mounting plate to sit in. Trace round the mounting plate on another piece of scrap MDF.
5) Cut out the excess again and remove the last of the material leaving a mm or two for clearance.
You can see I extended the corners slightly. This is because the pattern bit I am using has a much larger diameter (3/4"-19mm) than the radius on the corners of the mounting plate (~5mm). The extended corners will allow the mounting plate corners to fit inside the profile.
6) That's the templates complete. You can now use them to template route your CP. Mark out your joystick position on your CP.
7) Fix your 1st template to the CP and use a flush trim bit to template route the profile after removing the excess. I used my DIY router table but you could do the same using a router normally.
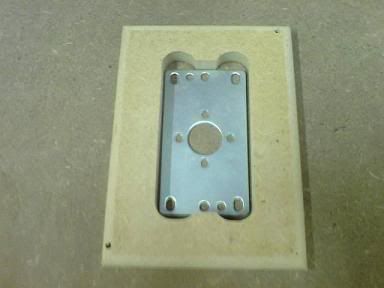
8.) Attach the mounting plate to the joystick base and slide the base through the hole you just routed. You can then trace round the mounting plate to find the recess position.
9) Put your second template over the marked out position and fix it to the CP.
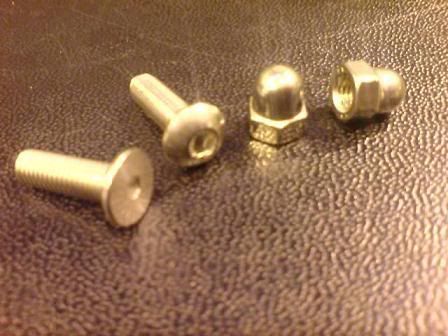
10) You can then use a pattern bit with your router to route out the recess. You need to remove the height of the mounting plate plus the height of the mounting plate you are using. I'm using some M5 machine screws that I faced off to leave a 1mm thick head so my recess depth was ~3mm
These are the pattern bits I have. I used the shorter 3/4" bit so that the bearing runs along the templates profile.
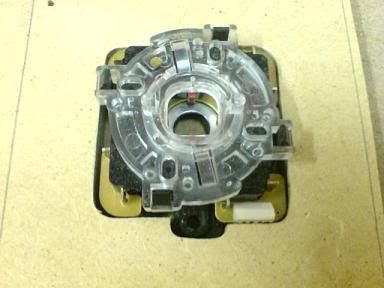
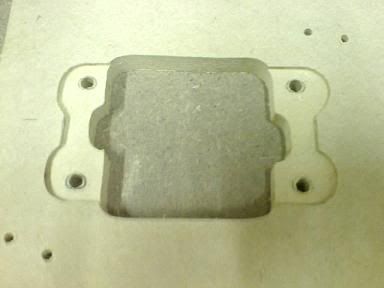
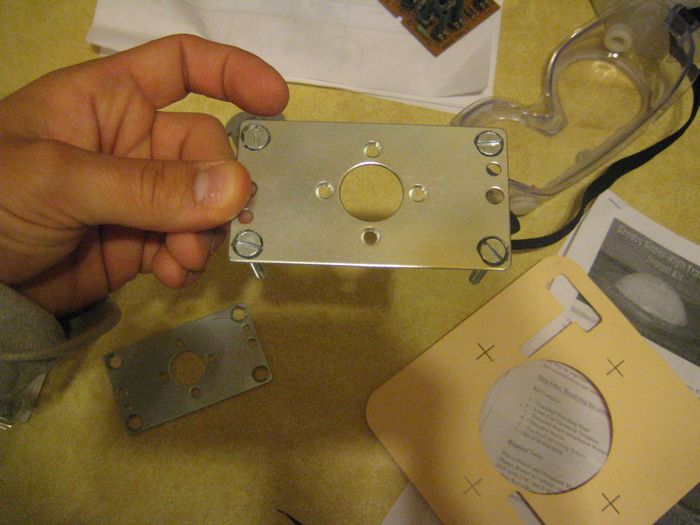
11) Unscrew the template from your CP and you should be left with something like this:
12) Insert your mounting plate and joystick base into the hole and recess. Check that the recess is deep enough. If its not the adjust the router height and go round the profile again. Once you are happy with the depth you can trace the mounting hole positions.
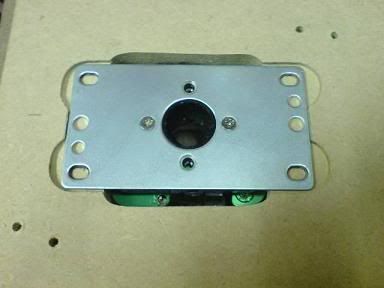

13) I'm using M5 machine screws and bolting the mounting plate to the CP with some M5 dome nuts so I drilled 5.5mm holes.
14) Finally reassemble everything. Job done

Keep the templates as they will come in handy if you need to mount any more joysticks.
Hope this helps

markronz's recommended mounting plate modification:
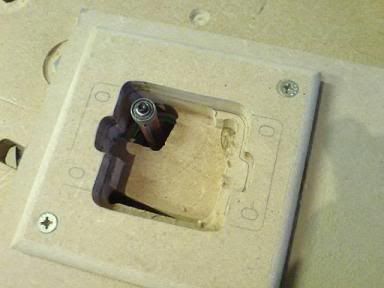
I can explain to you what I ended up doing with mine. I used a bit to customize the mounting plate a bit. I basically made the mounting holes recessed so that the screws would sit level with the rest of the mounting plate. See below:
Here is a picture with the screws in place. As you can see, the whole top of the mounting plate is now level.
When recessing the mounting holes, you just have to make sure to use a V shaped tool to recess the holes. Then of course don't go too far. The screws still need to catch the metal, but yet need to sit even with the top of it. If you route in too deep, the screws would just fall through the holes. So that was the only touchy part for me.
And yes, my dust washer is on top of the artwork. For me, that's how I'd prefer it anyway.


 Home
Home Help
Help Search
 Login
Login Register

 Send this topic
 Print
Print Topic: Sanwa JLF/JLW/Ultimarc U360 top mounting guide (Read 54951 times)


