Main Restorations Software Audio/Jukebox/MP3 Everything Else Buy/Sell/Trade
Project Announcements Monitor/Video GroovyMAME Merit/JVL Touchscreen Meet Up Retail Vendors
Driving & Racing Woodworking Software Support Forums Consoles Project Arcade Reviews
Automated Projects Artwork Frontend Support Forums Pinball Forum Discussion Old Boards
Raspberry Pi & Dev Board controls.dat Linux Miscellaneous Arcade Wiki Discussion Old Archives
Lightguns Arcade1Up Try the site in https mode Site News

Unread posts | New Replies | Recent posts | Rules | Chatroom | Wiki | File Repository | RSS | Submit news


Author Topic: Project Too Big and Spinny  (Read 8317 times)

0 Members and 1 Guest are viewing this topic.

TheRetroCarrot

  • Trade Count: (0)
  • Full Member
  • ***
  • Offline Offline
  • Posts: 42
  • Last login:July 26, 2024, 10:32:36 am
  • I want to build my own arcade controls!
Project Too Big and Spinny
« on: March 28, 2024, 08:28:53 pm »
Starting this thread to document my journey into my 3rd cabinet build. The last 2 being LCD bartops, this is a bit more in depth. Current plans, 32" RGB converted Sony Trinitron for the monitor. 9700k, 32gbs ram, 280x PC for crt-emudriver. Hopefully running launchbox frontend with retroarch as I have a lot of experience with them and find them easy to work with, though I'm a little worried about how 240p and 480i will work with them. 2 4" speakers under the marquee box, subwoofer. 2 player control panel, hidden USB ports to connect additional arcade pads. Probably going to use an LED pixelcade panel for the marquee as I've always thought they looked cool. I considered LCD but unfortunately I can't find anyone that makes an LCD panel larger than 28", which is much too small for this build.

The most fun part to me, the monitor will rotate on a 40" lazy susan bearing. I only plan on manual rotation not motorized. I'll cut a small 3/4" slot into the marquee box and the control panel so the entire screen bezel can rotate with it. This avoids having an ugly cutout around the screen to accommodate both orientations. Bezel will be outset from the side panels and edge routed to slope down into where the edge molding meets. It's designed as seated cab, same control height as a candy cab. Though I'm considering insetting the entire cab into a riser with a joke to raise and lower it to standing height.

90% of parts are on order, once those arrive this will probably be a very fast project with a lot of updates. Once I get going I don't sleep until a project is done (unfortunately).

Behold:


Did a quick design in fusion to make sure all my dimensions work. Seems good, the slewing bearing should fit perfect and rotating doesn't get in the way of the screen inset luckily. It appears this thing is going to be absolutely massive to accommodate the 32" display, 44" wide and 46" depth. Going to take a lot of space in the house...

« Last Edit: March 29, 2024, 11:25:42 pm by TheRetroCarrot »

TheRetroCarrot

  • Trade Count: (0)
  • Full Member
  • ***
  • Offline Offline
  • Posts: 42
  • Last login:July 26, 2024, 10:32:36 am
  • I want to build my own arcade controls!
Re: Project Too Big and Spinny
« Reply #1 on: April 02, 2024, 08:29:29 pm »
Basically the final design finished and ready to cut. Just waiting on materials. 40" rotating bearing assembly, 2 5" shielded mids and tweaters, 2 6" woofers in a ported box will go below. Coin operated. Pixelcade marquee on order. Trying crown 202 switches this time since they have nice colors.


Daniel B.

  • Trade Count: (+2)
  • Full Member
  • ***
  • Offline Offline
  • Posts: 251
  • Last login:May 10, 2024, 05:08:12 pm
  • Lightgun and Point Blank enthusiast
Re: Project Too Big and Spinny
« Reply #2 on: April 05, 2024, 11:09:18 pm »
be aware that many tvs are quick to be magnetized upon rotation if on. sometimes more than the degaussing coil can correct. happened on my trinitron and wega terribly.
Namco Exceleena II (red) | Sega Astro City (needs ms9 monitor work)

TheRetroCarrot

  • Trade Count: (0)
  • Full Member
  • ***
  • Offline Offline
  • Posts: 42
  • Last login:July 26, 2024, 10:32:36 am
  • I want to build my own arcade controls!
Re: Project Too Big and Spinny
« Reply #3 on: April 06, 2024, 03:44:15 am »
That's not something I considered, I'll have to test this particular set. Hopefully it's fine as all parts are on order at this point.

Edit: A quick test shows a bit of discoloration in one corner. The tv actually has some purity issues in the top left when horizontal, this moves to the top right (previously bottom right) when vertical. I was going to have to apply a magnet to correct purity horizontally, I may have to do something funny to improve it in both positions.

Purity issues in either location go away when the tv faces south, unfortunately that isn't the direction the cabinet will end up in.
« Last Edit: April 06, 2024, 03:52:23 am by TheRetroCarrot »

Daniel B.

  • Trade Count: (+2)
  • Full Member
  • ***
  • Offline Offline
  • Posts: 251
  • Last login:May 10, 2024, 05:08:12 pm
  • Lightgun and Point Blank enthusiast
Re: Project Too Big and Spinny
« Reply #4 on: April 06, 2024, 06:56:52 am »
Yeah so just power her on, I would suggest might as well test your PC connection or whatever this bad boy is going to run, and then rotate the monitor on it's side - Look for discoloration. Try both directions because sometimes, depending on the set and where we are located on the globe, only one direction will be a problem.

You can solve by either making a degaussing coil or buying one of those green wands from amazon or ali-express, but they are not very strong.

The situation here is that it may come back while rotated no matter what you do - I've been experiencing this with one of my sony sets and it seems like the mask is just magnetized anytime the set is on while in vertical mode. I first wondered if one of the color drive chips were bad, and what I ended up doing in my troubleshooting was trying to ACTIVELY COOL the chassis board with a fan in my candy cab. I don't think the temperature was the problem, but one side effect i noticed is that as long as there is a fan (AC powered, desk fan, clip fan, etc) in the cabinet, I believe the rotor of the fan is acting like an electro magnet and it keeps my screen completely clear!

Like I said, I had 2 sony sets, higher end consumer, not pvm/bvm and they both seemed to experience this. The trinitron, no matter what I do will always discolor when rotated, the wega seemed to do it only when power was on to the monitor.

so what I'm trying to say is - test it out, with the set on/off and maybe everything will be fine and no issue. If there is an issue, you can try to solve the issue with magnets, coils, wands IF AND ONLY IF the degaussing circuit doesn't solve it. If for some reason these sets are similar, you can try to put a fan near the set and see if it prevents the issue. Freaking voodoo man, I swear.

If it does discolor when you rotate, turn it off and back on to trigger the coil on the monitor and see if that solves the problem first, which it probably will.


Sorry to ramble so much about this issue but I wanted to offer some additional detail and hopefully save you a headache. I hope it works just fine, or worse case you turn the tv off when you rotate. Crossing my fingers for you.

Also, I think this build looks super over the top and BADASS and I can't wait to see some more progress. This is freaking cool!

Daniel
Namco Exceleena II (red) | Sega Astro City (needs ms9 monitor work)

TheRetroCarrot

  • Trade Count: (0)
  • Full Member
  • ***
  • Offline Offline
  • Posts: 42
  • Last login:July 26, 2024, 10:32:36 am
  • I want to build my own arcade controls!
Re: Project Too Big and Spinny
« Reply #5 on: April 06, 2024, 01:57:01 pm »
Disaster struck. Went to put the back panel on and didn't notice s-video port was misaligned by about a mm, tiniest bit of pressure snapped the PCB. Now no video input and severe purity issues on the OSD. Not sure if it's repairable at this point.... 32" CRTs are incredibly difficult to find where I live and all the parts are on order and designed around the size of this display. I'm pretty distraught right now...

TheRetroCarrot

  • Trade Count: (0)
  • Full Member
  • ***
  • Offline Offline
  • Posts: 42
  • Last login:July 26, 2024, 10:32:36 am
  • I want to build my own arcade controls!
Re: Project Too Big and Spinny
« Reply #6 on: April 06, 2024, 05:13:00 pm »
Well that was incredibly stressful:


These traces are very small, originally I thought the crack might be mild enough I could just scrape back a mm and solder direct, but that was very unreliable. So I bypassed the worst of it with jumper wires. Some of the lower breaks I had no problem bridging. I'm still missing some as s-video and likely my scart input isn't working yet, but my color is normal again and composite video is back...


The purity issue I'll get back to, it's interesting the purity rings seem to do absolutely nothing on this set. It's very sensitive to direction, I get 1 corner discolored if I face it North, but not South. It absolutely does need to degauss on rotation, not a big deal though, it has a very strong degauss coil in this set actually. I also have a manual coil. Magnets correct purity, the issue is as soon as the set degausses it undoes the improvement from magnet placement. The fan thing is very interesting, how close were you putting it? I mean a degaussing tool is basically just a bunch of wire wrapped in a circle from what I understand.

emphatic

  • Trade Count: (0)
  • Full Member
  • ***
  • Offline Offline
  • Posts: 2015
  • Last login:Today at 03:25:23 pm
  • -"Suck it, Donny!" -"No, YOU suck it.... more".
    • Emphatic's Video Game Collection
Re: Project Too Big and Spinny
« Reply #7 on: April 06, 2024, 06:58:43 pm »
Way to go saving that TV.  :cheers:

Daniel B.

  • Trade Count: (+2)
  • Full Member
  • ***
  • Offline Offline
  • Posts: 251
  • Last login:May 10, 2024, 05:08:12 pm
  • Lightgun and Point Blank enthusiast
Re: Project Too Big and Spinny
« Reply #8 on: April 06, 2024, 09:13:52 pm »
1st - good job fixing that pcb. I snapped a neck board in half and had no luck and ended up tossing a nice 27" sony about a year ago.

I know it's crazy but it's like the fan motor is acting like a constant degauss which is what is required on one of my sets. Somehow, facing either east or north I cannot get the shadow mask demagnetized even with a powerful coil, or magnets on the metal ring around the tube like I've done in the past. Its a sega astro city cabinet, and I place the fan on the inside of the coin box so honestly the fan is within 12"-20" from the top of the tube, basically next to the chassis board because I at first thought it was overheating because It would get more and more screwy the longer it was on, so I thought an IC was overheating. I'm not super smart with electronics but I understand enough to be dangerous.

You could likely fit a box fan or any fan really either behind the tube or in the base of the cabinet - for example I've also sat the fan on top of my computer tower in the base and that is close enough - I've tried different types of fans, like squirrel cage blowers and regular fans and to be honest the cheapest ones I found at goodwill seemed to be the most reliable. 

Anyways - hope this helps and PM me if you need anymore information. Can't wait to see how you progress on this project!
Namco Exceleena II (red) | Sega Astro City (needs ms9 monitor work)

TheRetroCarrot

  • Trade Count: (0)
  • Full Member
  • ***
  • Offline Offline
  • Posts: 42
  • Last login:July 26, 2024, 10:32:36 am
  • I want to build my own arcade controls!
Re: Project Too Big and Spinny
« Reply #9 on: April 06, 2024, 11:06:22 pm »
Thanks all :), I'll definitely experiment with a fan, it'd cool the PC as well haha.

The TV isn't quite saved yet, something is still missing on the s-video side. I have an image, but black and white only. I can trace continuity all the way through from the chroma pin so I'm not sure what's going on there. I have beautiful color through RGB now, but I can't get it to sync whatsoever. Currently testing with a SNES Jr and N64 since both are RGB modded, I've tried connecting csync to the svideo luma pin, composite, and main-y on the PCB, none seem to make a difference. I'm not particularly knowledgeable when it comes to electronics, so if anyone is an expert on sync at all help would be appreciated! I've never had to worry about it since I run component for every system I own. The TV Is an AA-2D chassis so plenty of documented mods that all obtain sync from similar locations.

I'd really like to get s-video fully functioning to ensure nothing there is messing with my sync, otherwise I couldn't really care less about it.

EDIT: GOOD NEWSSSSSS. Found another trace and fixed my chroma issues, had a pad I fixed spliced to the wrong side of a resistor. S video fully functional and more importantly RGB is working great and looks absolutely incredible. Back to finalizing my design plans so the woodworking is as easy as scribe and cut... And finish my coin slides and sensor circuitry. It was a sad 15 hour day of no food or breaks, but what a relief to have it working.

« Last Edit: April 07, 2024, 01:18:03 pm by TheRetroCarrot »

javeryh

  • Trade Count: (+1)
  • Full Member
  • ***
  • Offline Offline
  • Posts: 7936
  • Last login:Today at 06:11:56 pm
Re: Project Too Big and Spinny
« Reply #10 on: April 07, 2024, 05:18:17 pm »
Looking good. Love the CRT - nothing beats it!

TheRetroCarrot

  • Trade Count: (0)
  • Full Member
  • ***
  • Offline Offline
  • Posts: 42
  • Last login:July 26, 2024, 10:32:36 am
  • I want to build my own arcade controls!
Re: Project Too Big and Spinny
« Reply #11 on: April 07, 2024, 06:41:50 pm »
Attached the design plans if anyone wants to see them for whatever reason. Basically ready for cutting now, other than the screen assembly will need to wait on the bearing arrival.

mourix

  • Trade Count: (0)
  • Full Member
  • ***
  • Offline Offline
  • Posts: 309
  • Last login:October 10, 2024, 06:11:22 pm
Re: Project Too Big and Spinny
« Reply #12 on: April 08, 2024, 12:59:08 pm »
Attached the design plans if anyone wants to see them for whatever reason. Basically ready for cutting now, other than the screen assembly will need to wait on the bearing arrival.

Before reading the dimensions I was confused at the low control panel. What a colossus, love it!

With this level of overkill you might as well add a trackball btw.

TheRetroCarrot

  • Trade Count: (0)
  • Full Member
  • ***
  • Offline Offline
  • Posts: 42
  • Last login:July 26, 2024, 10:32:36 am
  • I want to build my own arcade controls!
Re: Project Too Big and Spinny
« Reply #13 on: April 08, 2024, 06:48:35 pm »
Haha ya it's candy cab seated height. I have 2 official Taito stools on the way.

I'd love a trackball however the only game I'd use it for is marble madness, so I'd want 2. I'm having a difficult time finding a good layout that gives enough distance for the players, the original was 14.75"ish. The control panel acrylic is already cut and I don't want to move the existing controls at all. Hrm...

TheRetroCarrot

  • Trade Count: (0)
  • Full Member
  • ***
  • Offline Offline
  • Posts: 42
  • Last login:July 26, 2024, 10:32:36 am
  • I want to build my own arcade controls!
Re: Project Too Big and Spinny
« Reply #14 on: April 09, 2024, 11:27:50 pm »


So I made them fit.... Thanks for spending my money.... About 1mm clearance under the panel for all this haha. It'll work though, they're a little closer together than ideal, but not enough to make it unfun. I could've moved them further into the control panel, but since it's a seated cab that would make it quite uncomfortable. I also changed the control under panel angle, as I realized while working with the trackballs it would've hit your knees...

TheRetroCarrot

  • Trade Count: (0)
  • Full Member
  • ***
  • Offline Offline
  • Posts: 42
  • Last login:July 26, 2024, 10:32:36 am
  • I want to build my own arcade controls!
Re: Project Too Big and Spinny
« Reply #15 on: April 10, 2024, 10:59:39 pm »
Made some simple coin sliders with photointerrupters for input.


javeryh

  • Trade Count: (+1)
  • Full Member
  • ***
  • Offline Offline
  • Posts: 7936
  • Last login:Today at 06:11:56 pm
Re: Project Too Big and Spinny
« Reply #16 on: April 19, 2024, 12:44:00 pm »
"simple" haha

Are you sure about that encoder?

TheRetroCarrot

  • Trade Count: (0)
  • Full Member
  • ***
  • Offline Offline
  • Posts: 42
  • Last login:July 26, 2024, 10:32:36 am
  • I want to build my own arcade controls!
Re: Project Too Big and Spinny
« Reply #17 on: April 19, 2024, 05:59:48 pm »
I've used it in my last 2 builds and it never gives me any issues. I'm not doing RGB or anything fancy so I just need reliable inputs.

TheRetroCarrot

  • Trade Count: (0)
  • Full Member
  • ***
  • Offline Offline
  • Posts: 42
  • Last login:July 26, 2024, 10:32:36 am
  • I want to build my own arcade controls!
Re: Project Too Big and Spinny
« Reply #18 on: April 19, 2024, 06:13:47 pm »
The panels are pretty far along, and my bearing for the screen arrived and seems great. I would've liked to document a bit more but it's just such a pain in the ass taking photos, video, living, with all the MDF dust even outside. This is my first time working with MDF, I sure like how it's flat and has nice factory edges though.

Got the kick panel done:


Control panel bottom:


Computer is built:


Worked on the side panels, had an unfortunate mishap ruining my first panel. I've now learned the painters tape CA glue+activator template trick for routing:


Side panels mostly done:


My work area is a mess:


Control panel acrylic came, pixelcade folks laser cut a couple for me with my marquee which is awesome!:


Got the computer outputting RGB to the TV and groovymame setup. Launchbox big box looks surprisingly good even with the stock theme, though I intend to find one more like hyperspin:


Got the sub made up. Realized my blades aren't going to cut it for cutting panels cleanly. I did this first and am now routing every edge after rough cutting. It'll be painted though and I filled it all smooth:


Got my panels routed for t-molding today. I also did a little dado cut in the side panels so that the marquee can just slide in prior to the top panel being installed, then the t-molding will hide that.


Did some test fitment for the mid-speakers being flush mounted.

TheRetroCarrot

  • Trade Count: (0)
  • Full Member
  • ***
  • Offline Offline
  • Posts: 42
  • Last login:July 26, 2024, 10:32:36 am
  • I want to build my own arcade controls!
Re: Project Too Big and Spinny
« Reply #19 on: April 21, 2024, 10:52:33 pm »
Had a bit of a disaster. Left the house for a morning and got a bit of sun in my work area.... Didn't take much to turn all my panels into pretzels, had no idea MDF warped this easily. Panic assembled everything I could to add support and pull it back square. Luckily it worked well and everything fit great.

All that's left of the woodworking is the coin box shelf, the screen surround, cleaning up a router slip on the control panel, and venting the back panel. Not really sure what I'm going to do for the back panel venting yet.


TheRetroCarrot

  • Trade Count: (0)
  • Full Member
  • ***
  • Offline Offline
  • Posts: 42
  • Last login:July 26, 2024, 10:32:36 am
  • I want to build my own arcade controls!
Re: Project Too Big and Spinny
« Reply #20 on: April 26, 2024, 11:47:28 pm »
Today was a monumental day, screen was mounted and spins better than I could've imagined, only takes a finger. Only thing left of the initial build is the screen bezel, and installing hinges for the back door. Should be ready for disassembly and then paint by Sunday. Project should be complete within two weeks. I'm amazed how little I've had to deviate from my designs, a couple tiny little adjustments here and there but altogether everything worked out.


emphatic

  • Trade Count: (0)
  • Full Member
  • ***
  • Offline Offline
  • Posts: 2015
  • Last login:Today at 03:25:23 pm
  • -"Suck it, Donny!" -"No, YOU suck it.... more".
    • Emphatic's Video Game Collection
Re: Project Too Big and Spinny
« Reply #21 on: April 27, 2024, 08:08:02 am »
Groovy.  :cheers:

Ond

  • Trade Count: (0)
  • Full Member
  • ***
  • Offline Offline
  • Posts: 2326
  • Last login:October 02, 2024, 07:40:12 am
Re: Project Too Big and Spinny
« Reply #22 on: April 27, 2024, 06:53:17 pm »
I'm so happy to see other builders here building big and ambitious projects. For me, this the heart of BYOAC. In times past 'experts' would have weighed in and maybe told you rotating a CRT is too tricky/don't bother/ blah blah blah.  Your ring bearing solution is really good! All that weight nicely supported and balanced allowing for quality rotation control.  The main issue with lovely old CRTs other than weight, is image issues being affected by tube orientation changes. If you can solve magnetic coloration issues this will be epic indeed! When building your own arcade cabinet CRTs are still king for the real arcade experience.

I've been working with MDF for a long time. I love it for cabinet building but it has its own best practice rules. Grain free, shapes well, great for gluing panels and takes surface finishes (the right ones) like a dream.  It also has terrible dust issues, is heavy, splits when nailed or screwed in the wrong way, dulls tool blades, absorbs moisture and yes, bends in the sun  ;D.  I often combine it with Marine Ply to solve some of those problems.

Watching your progress  :cheers:

TheRetroCarrot

  • Trade Count: (0)
  • Full Member
  • ***
  • Offline Offline
  • Posts: 42
  • Last login:July 26, 2024, 10:32:36 am
  • I want to build my own arcade controls!
Re: Project Too Big and Spinny
« Reply #23 on: April 29, 2024, 11:05:38 am »
Thanks for the kind words. The CRT is the heart of this project, I just don't find myself playing my LCD cabinets ever, and a big reason is because of the LCD.

I'm happy to say the initial build is 99% complete at this point, the only thing left is to mount the back service door, hinges are already installed just need to clip on and adjust. Wood filler and sand the front bezel so it looks like one piece, and change up my marquee mounting as I wasn't happy with how aluminum angle looked, I'm going to inset the diffuser and just use t-molding. I'll take some photos once I get to that as I need to disassemble quite a bit before I can work on it.

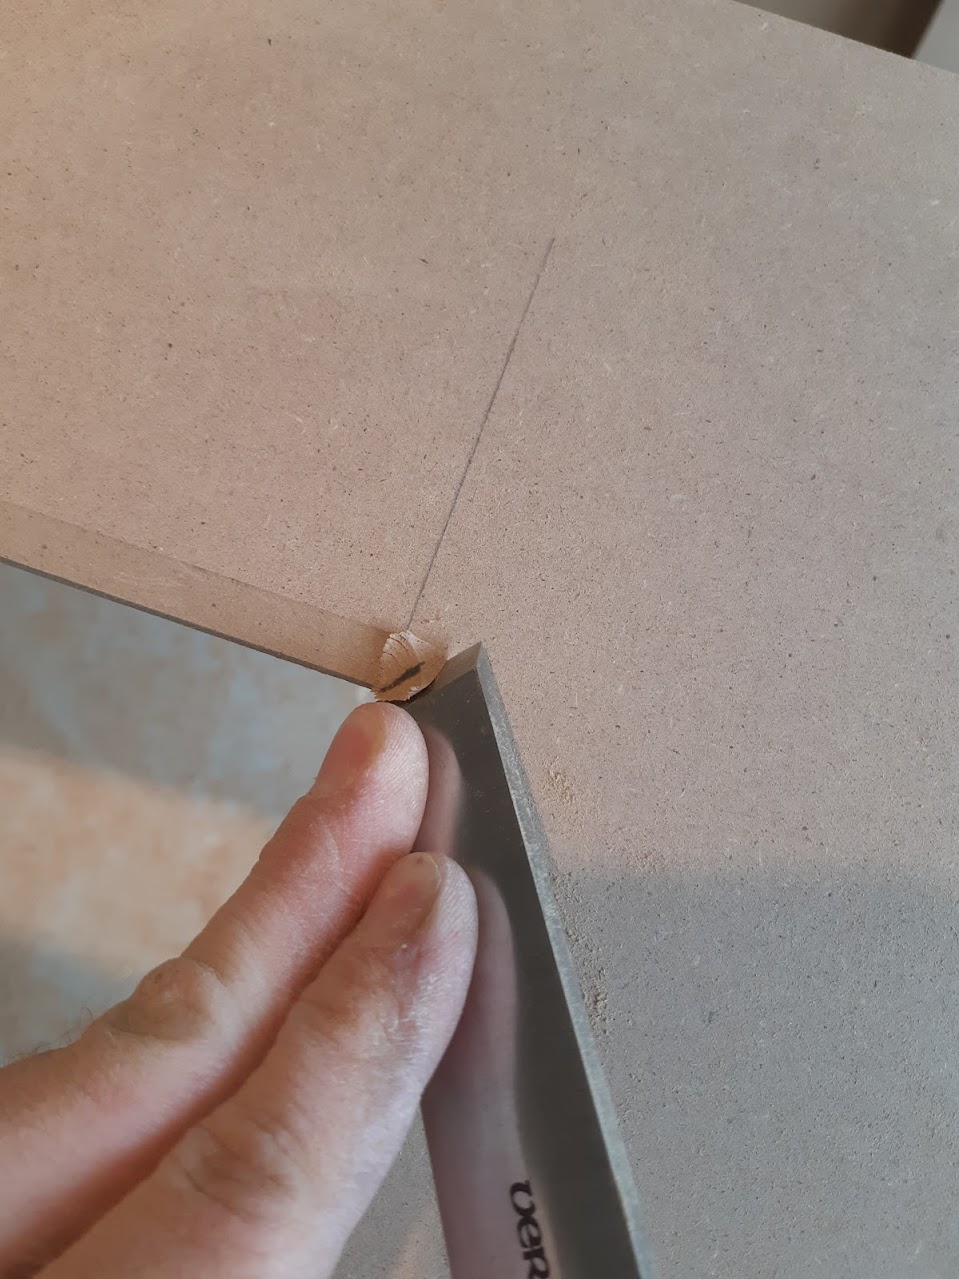
Put my stupidly expensive flushing chisel to use... Glad I spent the money for all the inside corners on this thing, probably the most expensive tool I bought that I didn't already own.


The bezel turned out decent, it's not perfect by any means, getting the radius for the screen was incredibly difficult, and took an entire day just for those 4 pieces. I ended up murdering the original TV shell which made me a bit sad, and used it to draw out the radius, then used a jigsaw and sanded. In hindsight I'd probably have attempted a 3d scan and made a router template, but I have doubts about the accuracy of that without proper scanning equipment.
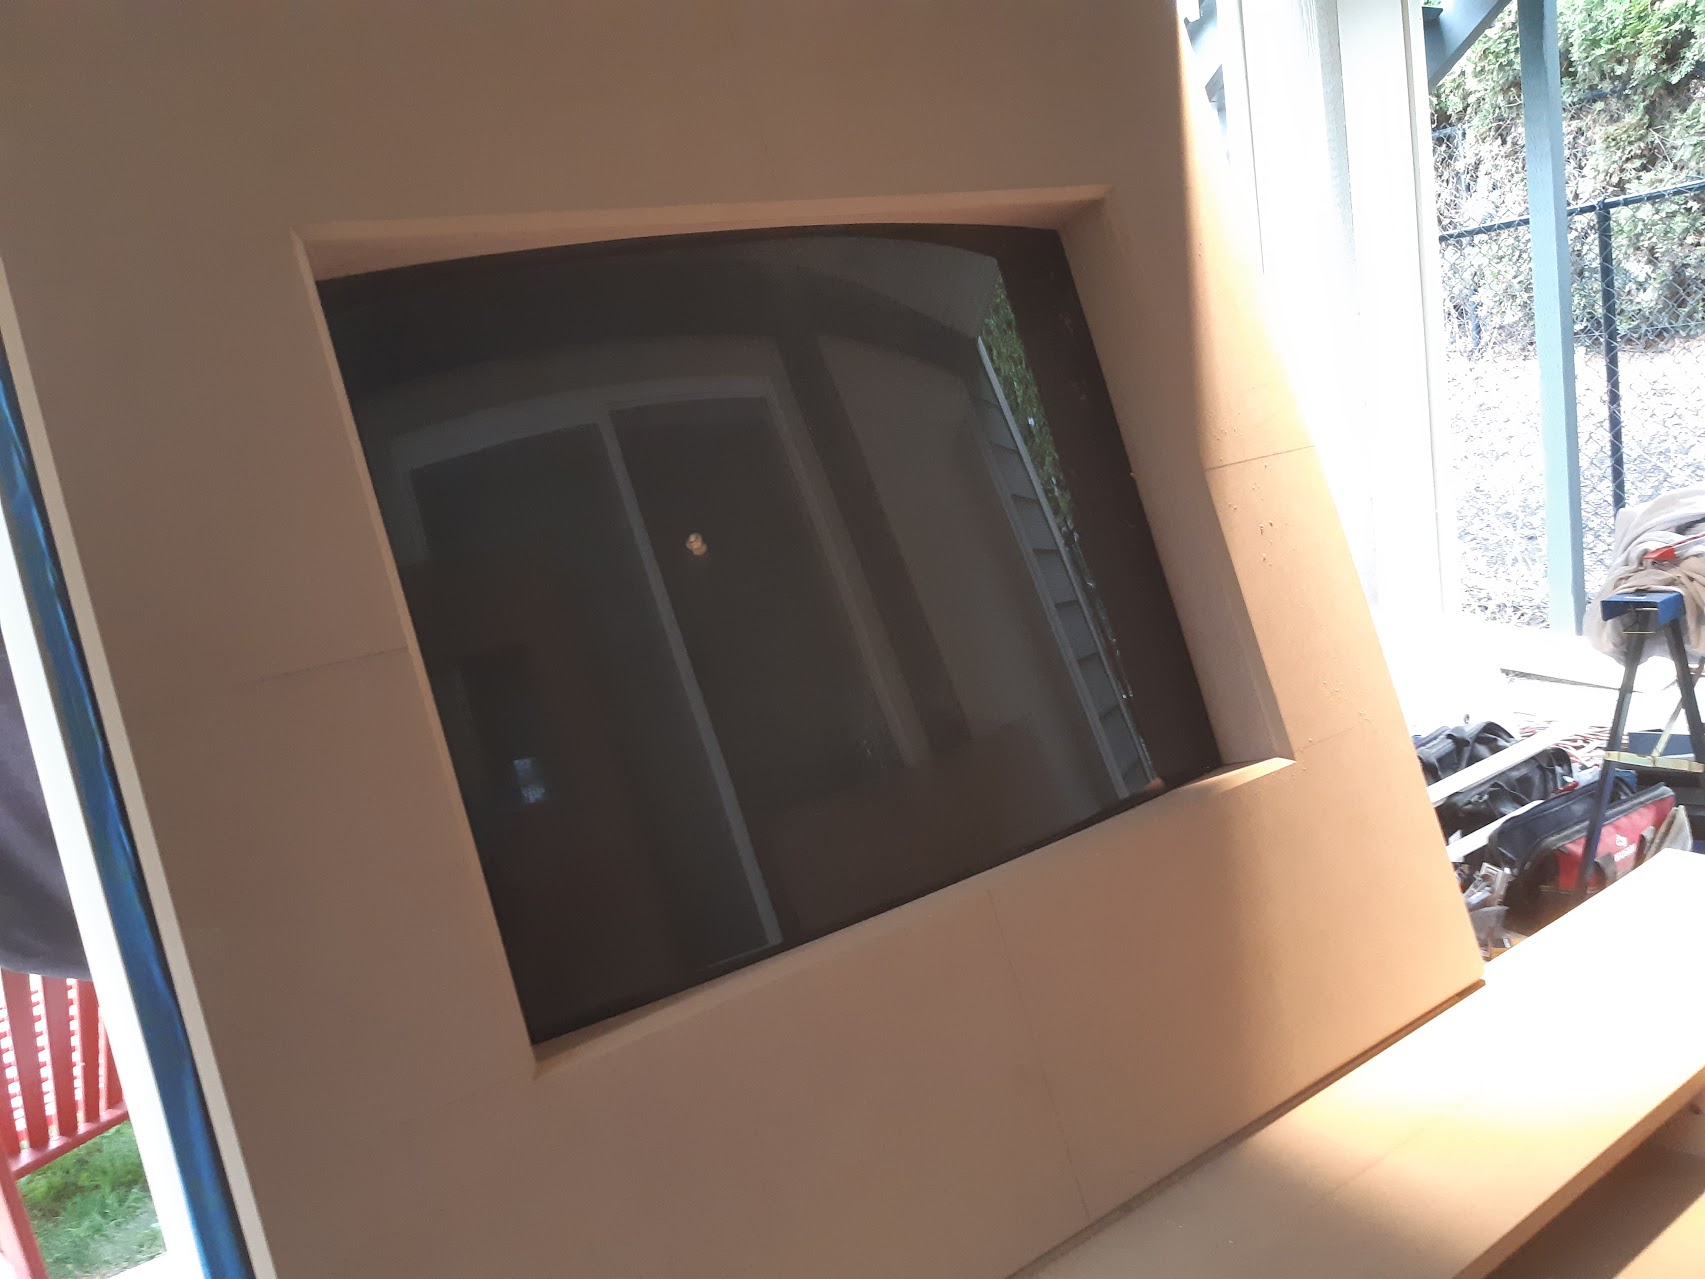

Spins perfect with 1 finger. Mounted the control panel with dowels so it can easily be removed. Amazingly I managed to get the screen and bezel within 1mm of center, which was the part I was most worried about with this project. I did add too much gap at the back of the control panel, I only ended up needing about 1cm for clearance and did around an inch. I might put weather stripping brushes to fill that hole, or just leave it. If anyone has any other ideas I'd appreciate them, the screen spins into that gap but only a very small amount, so whatever I filled with would have to be flexible, non abrasive, and return to position.


Since I already cut up the original shell I figure I might as well use the original PCB mounts. Makes it easily serviceable and clean. Just enough space for it to spin in any direction. I'll want to block the direction at some point to avoid people spinning and getting the cables tangled and destroying things, but I'll do that after I'm happy with the display calibration. It seems to like spinning left more than right for purity, but this will be much easier to test now than it was just flipping the tube over by hand.
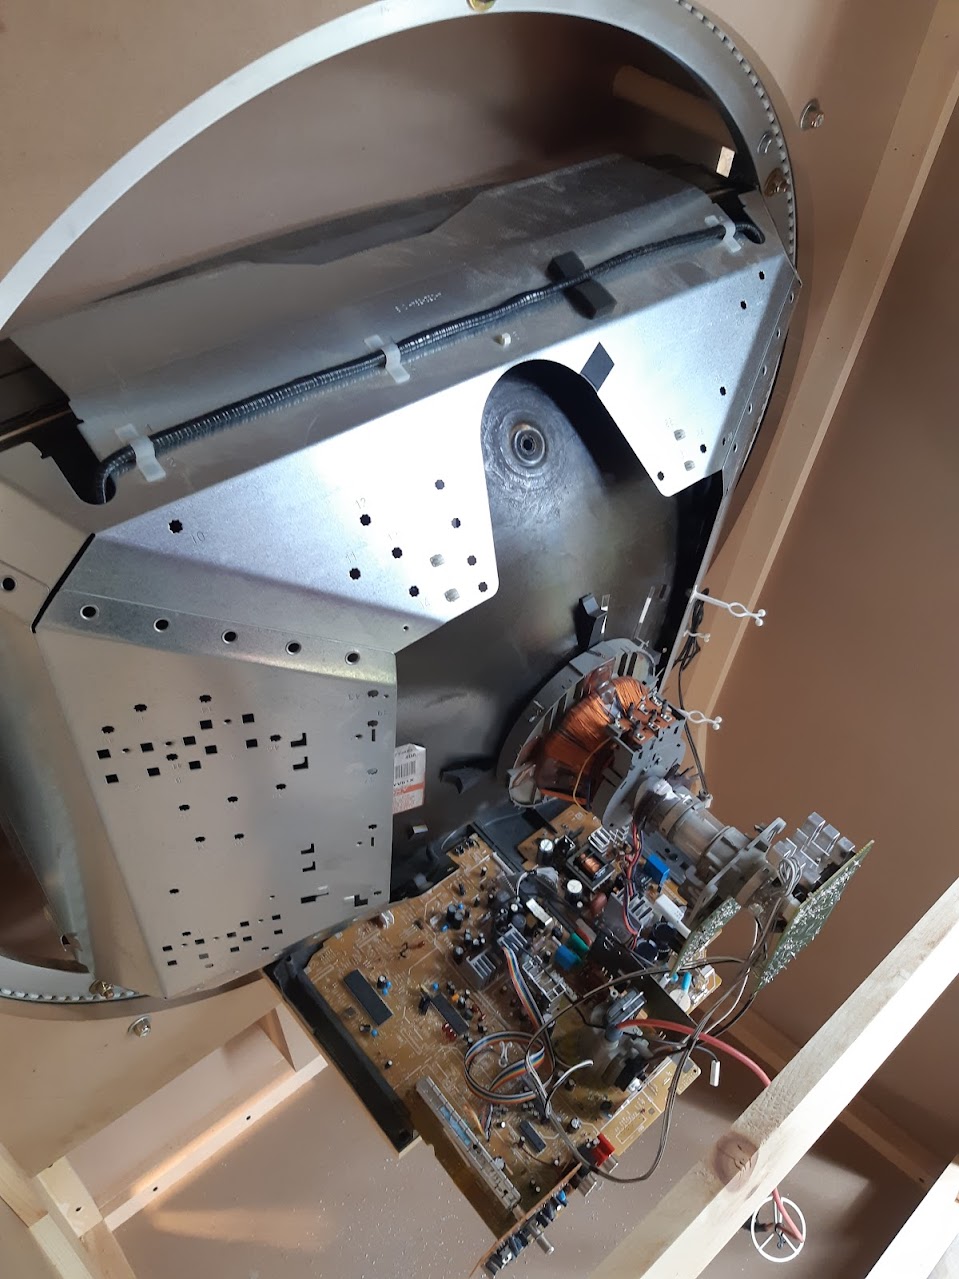

Something I found interesting is that the exact location where I have purity struggles, is where it looks like they tack welded a plate over a seam in the original tube frame at the factory. I'm not sure if this is normal, or why this would have been done over just welding the frame itself. I'm almost thinking this might have been a hacky repair down in the factory for some reason, though it might just be standard. Can't say I've ever noticed on another tube before, and the location made me wonder. Either way I managed to get the purity to an acceptable barely perceptible issue before, I know I'll be able to get it good with enough playing around with magnets. I also ran my degaussing coil over the metal shield while I had it apart, as I suspect it might have gotten magnetized.

emphatic

  • Trade Count: (0)
  • Full Member
  • ***
  • Offline Offline
  • Posts: 2015
  • Last login:Today at 03:25:23 pm
  • -"Suck it, Donny!" -"No, YOU suck it.... more".
    • Emphatic's Video Game Collection
Re: Project Too Big and Spinny
« Reply #24 on: April 30, 2024, 12:12:50 am »
So, the bezel spins along with the tube? In my candy cabs (EGRET II), I have to remove the bezel before rotating the screen, then put it back in the upright or horizontal way depending on the orientation of the tube.

TheRetroCarrot

  • Trade Count: (0)
  • Full Member
  • ***
  • Offline Offline
  • Posts: 42
  • Last login:July 26, 2024, 10:32:36 am
  • I want to build my own arcade controls!
Re: Project Too Big and Spinny
« Reply #25 on: April 30, 2024, 12:19:03 am »
Correct, it's not as aesthetically pleasing this way as the bezel has to sit out a tiny amount, but I wanted it to be as simple as grab the bezel and turn it so that I'm motivated to do it.

firedance

  • Trade Count: (0)
  • Full Member
  • ***
  • Offline Offline
  • Posts: 329
  • Last login:Today at 04:22:14 am
Re: Project Too Big and Spinny
« Reply #26 on: May 01, 2024, 12:46:08 pm »
May seem to a silly question, have you measured the doorways to make sure it actually gets through them when it's fully built  :angel:

TheRetroCarrot

  • Trade Count: (0)
  • Full Member
  • ***
  • Offline Offline
  • Posts: 42
  • Last login:July 26, 2024, 10:32:36 am
  • I want to build my own arcade controls!
Re: Project Too Big and Spinny
« Reply #27 on: May 01, 2024, 01:53:01 pm »
It's getting built in the room. Everything was designed to be disassembled. The panels are all sitting in it's final resting place right now, just setting up a paint booth outside and they'll be sprayed and moved back in before assembly. It'll be setup right next to my DrumMania setup I built last year :)

TheRetroCarrot

  • Trade Count: (0)
  • Full Member
  • ***
  • Offline Offline
  • Posts: 42
  • Last login:July 26, 2024, 10:32:36 am
  • I want to build my own arcade controls!
Re: Project Too Big and Spinny
« Reply #28 on: May 02, 2024, 12:15:56 am »
Started spraying today. The cheapo HVLP seems pretty decent, but doesn't do the greatest job with the BIN primer I'm using. More overspray than I'd like. Not really a big deal since the stuff sands ridiculously well. The paint itself will be much less frustrating. Needing ammonia to clean the gun so often is extremely wasteful and time consuming, whereas the actual spraying takes no time at all. This will likely take quite some time as I don't have anywhere nice to let panels dry other than my makeshift booth, and I can't do many at once due to the overspray. Got 2 panels primed after work today, starting with all the low importance items that won't be visible.


firedance

  • Trade Count: (0)
  • Full Member
  • ***
  • Offline Offline
  • Posts: 329
  • Last login:Today at 04:22:14 am
Re: Project Too Big and Spinny
« Reply #29 on: May 02, 2024, 11:34:05 am »
It's getting built in the room. Everything was designed to be disassembled. The panels are all sitting in it's final resting place right now, just setting up a paint booth outside and they'll be sprayed and moved back in before assembly. It'll be setup right next to my DrumMania setup I built last year :)

Nice  ;D

TheRetroCarrot

  • Trade Count: (0)
  • Full Member
  • ***
  • Offline Offline
  • Posts: 42
  • Last login:July 26, 2024, 10:32:36 am
  • I want to build my own arcade controls!
Re: Project Too Big and Spinny
« Reply #30 on: May 03, 2024, 10:24:04 pm »
Should be ready to paint tomorrow! Final sanding and hopefully I have enough primer on the MDF edges to not soak up paint and make a mess...


javeryh

  • Trade Count: (+1)
  • Full Member
  • ***
  • Offline Offline
  • Posts: 7936
  • Last login:Today at 06:11:56 pm
Re: Project Too Big and Spinny
« Reply #31 on: May 06, 2024, 04:32:06 pm »
Looks good so far!

Zebidee

  • Trade Count: (+9)
  • Full Member
  • ***
  • Offline Offline
  • Posts: 3322
  • Last login:Today at 07:23:10 am
Re: Project Too Big and Spinny
« Reply #32 on: May 06, 2024, 05:54:34 pm »
I've only just looked in at this project, which I regret, as it is ambitious and innovative. Nice work so far!


Something I found interesting is that the exact location where I have purity struggles, is where it looks like they tack welded a plate over a seam in the original tube frame at the factory. I'm not sure if this is normal, or why this would have been done over just welding the frame itself. I'm almost thinking this might have been a hacky repair down in the factory for some reason, though it might just be standard. Can't say I've ever noticed on another tube before, and the location made me wonder. Either way I managed to get the purity to an acceptable barely perceptible issue before, I know I'll be able to get it good with enough playing around with magnets. I also ran my degaussing coil over the metal shield while I had it apart, as I suspect it might have gotten magnetized.


A thought has occurred to me that perhaps your "purity" issue relates to the horizontal stabilizing wire(s) present in all Sony Trinitron CRTs? They prevent the aperture grill wires from vibrating, but are often faintly visible if you look hard enough.

This is an extreme close-up:

https://en.wikipedia.org/wiki/Aperture_grille#/media/File:CRT_Phosphors.jpg
https://en.wikipedia.org/wiki/Aperture_grille
« Last Edit: May 06, 2024, 06:01:48 pm by Zebidee »
Check out my completed projects!


Zeosstud

  • Trade Count: (0)
  • Full Member
  • ***
  • Offline Offline
  • Posts: 574
  • Last login:October 12, 2024, 11:41:48 am
  • I want to build my own arcade controls!
Re: Project Too Big and Spinny
« Reply #33 on: May 09, 2024, 09:58:09 am »
What a fantastic project.. I hope you enjoy this for years to come.

Zeosstud

TheRetroCarrot

  • Trade Count: (0)
  • Full Member
  • ***
  • Offline Offline
  • Posts: 42
  • Last login:July 26, 2024, 10:32:36 am
  • I want to build my own arcade controls!
Re: Project Too Big and Spinny
« Reply #34 on: May 14, 2024, 06:56:29 pm »
Big update day. As the project is now finished outside of adding games and 1 3.5mm-RCA cable that is too short to be cable managed.

Monitor is mounted and cables routed successfully. Used the original PCB mount on some 2x1s and then a 5lb york iron plate to counterbalance so it wouldn't spin on it's own.


Pixelcade marquee and speakers installed, busted off a tab from one of the tweeters but managed to rip out the driver and resolder it without damaging the visible portion of the speaker:


Some simple stoppers at each end of the rotation


As cable managed as I care to do, everything is routed out of the way other than the 1 cable mentioned prior. Once I have that I'll tie everything up a bit better:


Made a 3d printed mount for the amp. Extended the volume pot so I can mount it on the back panel once that goes on:


The screen ended up working out excellent. The mistake with trying to correct purity using magnets was actually putting them on the back of the shield. This worked while running, however as soon as you restarted the TV it would undo your work for some reason. Flipping the magnets to the other side of the shield worked perfect. It now has very good purity on both horizontal and vertical positions. The screen also does not need to be turned off for the degauss circuity to recharge, so long as it's been running for 5ish minutes you can simple turn it off, grab the bezel and spin the whole screen, and turn it back on.

For a front end I'm using big box and just designed a "Confirm Orientation" screen with some graphics which is actually platform selection. I have games separated into vertical and horizontal games in their respective platform. I've then made a fake vertical theme to go along with a modified version of (I forget the name of the theme I modified...................). I ended up doing the vertical theme a bit different since theme videos are always horizontal and I didn't want to remake them for each game.

Lots of adding games to do, and marquee banners to make now. Configuration is very easy now that I have a couple games setup, I can mostly copy configs via RDP and then just tweak screen position and controls on a per game basis from the arcade when I add them.

Overall everything worked out better than I could've hoped. Things I would change would be less gap behind the control panel for the screen to spin, the top only has about .25mm clearance, the bottom has way too much. I would remove all hard edges from the side panels, it turned out okay but the t-molding would definitely sit better with some slight curve to the top edges. Not something anyone would ever notice though.

Also I ordered 43cm Taito official stools since my control panel height is the same as a candy cab. This might have turned out to be a mistake... The screen is simple so massive that at 43cm eye height is a little low in vertical orientation. I'll probably just make some risers with cup holders/wallet basket/ token holders to put under the stools. Or resell them as much as that pains me. It'll be a couple months still until they arrive.

emphatic

  • Trade Count: (0)
  • Full Member
  • ***
  • Offline Offline
  • Posts: 2015
  • Last login:Today at 03:25:23 pm
  • -"Suck it, Donny!" -"No, YOU suck it.... more".
    • Emphatic's Video Game Collection
Re: Project Too Big and Spinny
« Reply #35 on: May 15, 2024, 10:44:58 am »
Nice work. Does the bezel sit flush in horizontal mode? Or is that gap as seen in the last picture (Dodonpachi) by design?

TheRetroCarrot

  • Trade Count: (0)
  • Full Member
  • ***
  • Offline Offline
  • Posts: 42
  • Last login:July 26, 2024, 10:32:36 am
  • I want to build my own arcade controls!
Re: Project Too Big and Spinny
« Reply #36 on: May 15, 2024, 10:55:45 am »
The gap is always there to allow the bezel to rotate entirely, I might put some weather stripping brushes/sweeps in the gap, but I'm not really bothered by it. It's more visible in the photos because the back panel is off and I have a light shining back there, with the back panel on it's all black. The bottom gap is larger than it needs to be, that ended up being a design error. I had to have the acrylic for the control panel laser cutting outsourced so I decided to live with it. Typical Canadian markup of 2000% wanted 200 bucks for a tiny sheet of acrylic and nobody locally would cut it... Meanwhile Al from Pixelcade cut me one for $20 and threw it in with my marquee order.   

If anybody has an idea for a material to fill the gap I'd love to hear it. The weather stripping sweeps tend to be a lot stiffer than I'd want, I need something very soft and flexible enough to allow the screen to rotate in and out without being scratched.
« Last Edit: May 15, 2024, 11:04:06 am by TheRetroCarrot »

TheRetroCarrot

  • Trade Count: (0)
  • Full Member
  • ***
  • Offline Offline
  • Posts: 42
  • Last login:July 26, 2024, 10:32:36 am
  • I want to build my own arcade controls!
Re: Project Too Big and Spinny
« Reply #37 on: May 15, 2024, 11:19:01 am »
Here's a visual for brainstorming. I'm sure there is a perfect material for this I'm not thinking of. Just needs to be flexible, snap back, and most importantly not scratch the finish on the bezel.


yamatetsu

  • Trade Count: (0)
  • Full Member
  • ***
  • Offline Offline
  • Posts: 2717
  • Last login:Today at 02:17:54 pm
  • Just because.
Re: Project Too Big and Spinny
« Reply #38 on: May 15, 2024, 02:09:04 pm »
Velcro tape (the soft part, not the one with the hooks)?
                  

emphatic

  • Trade Count: (0)
  • Full Member
  • ***
  • Offline Offline
  • Posts: 2015
  • Last login:Today at 03:25:23 pm
  • -"Suck it, Donny!" -"No, YOU suck it.... more".
    • Emphatic's Video Game Collection
Re: Project Too Big and Spinny
« Reply #39 on: May 15, 2024, 03:28:12 pm »
Aha, I didn't think the bezel was supposed to be fitted when you rotate the screen. I figured you would just rest it on the screen area and gravity would hold it in place after a rotation of the screen. If you remove it between rotations it should be less complicated to fill the gaps, right?