Main Restorations Software Audio/Jukebox/MP3 Everything Else Buy/Sell/Trade
Project Announcements Monitor/Video GroovyMAME Merit/JVL Touchscreen Meet Up Retail Vendors
Driving & Racing Woodworking Software Support Forums Consoles Project Arcade Reviews
Automated Projects Artwork Frontend Support Forums Pinball Forum Discussion Old Boards
Raspberry Pi & Dev Board controls.dat Linux Miscellaneous Arcade Wiki Discussion Old Archives
Lightguns Arcade1Up Try the site in https mode Site News

Unread posts | New Replies | Recent posts | Rules | Chatroom | Wiki | File Repository | RSS | Submit news


Author Topic: BulletReign: Vertical Jamma Switching SHMUP cab (Progress Report Jan '16)  (Read 33836 times)

0 Members and 1 Guest are viewing this topic.

harveybirdman

  • Trade Count: (0)
  • Full Member
  • ***
  • Offline Offline
  • Posts: 2538
  • Last login:February 19, 2024, 12:40:25 pm
  • SHMUP'EM
Re: BulletReign: Vertical Jamma Switching SHMUP cab (some lite CP work)
« Reply #40 on: January 10, 2015, 03:55:05 pm »
Raiden II,  Final Star Force, and Brave Blade are all but confirmed... still not sure about the others.

The drop to the first level hole is a bit drastic, but that definitely deserves some consideration.

Nephasth

  • Guest
  • Trade Count: (0)
Re: BulletReign: Vertical Jamma Switching SHMUP cab (some lite CP work)
« Reply #41 on: January 10, 2015, 07:22:39 pm »
I just snagged this from Twisted Quarter. Since the CP slides out with the board attached, it makes for fast swaps.

harveybirdman

  • Trade Count: (0)
  • Full Member
  • ***
  • Offline Offline
  • Posts: 2538
  • Last login:February 19, 2024, 12:40:25 pm
  • SHMUP'EM
Re: BulletReign: Vertical Jamma Switching SHMUP cab (some lite CP work)
« Reply #42 on: January 10, 2015, 09:04:06 pm »
Thats sweet dude, making me rethink the switching piece of this project...

But there's plenty of time to think it through, gotta save money for boards first!

Nephasth

  • Guest
  • Trade Count: (0)
Re: BulletReign: Vertical Jamma Switching SHMUP cab (some lite CP work)
« Reply #43 on: January 11, 2015, 09:10:57 am »
For a project I'm working on that will use a 6in1 switcher, I wanted to get one of these, but I can't find a source state side. So I'll probably end up making something similar out of MDF.


emphatic

  • Trade Count: (0)
  • Full Member
  • ***
  • Offline Offline
  • Posts: 2010
  • Last login:Today at 08:07:08 am
  • -"Suck it, Donny!" -"No, YOU suck it.... more".
    • Emphatic's Video Game Collection
Re: BulletReign: Vertical Jamma Switching SHMUP cab (some lite CP work)
« Reply #44 on: January 11, 2015, 09:23:12 am »
I just snagged this from Twisted Quarter. Since the CP slides out with the board attached, it makes for fast swaps.

I've got one of those in one of my cabinets.


Had to saw off the top though, or it wouldn't fit in the metal slot for the wooden board.

harveybirdman

  • Trade Count: (0)
  • Full Member
  • ***
  • Offline Offline
  • Posts: 2538
  • Last login:February 19, 2024, 12:40:25 pm
  • SHMUP'EM
Re: BulletReign: Vertical Jamma Switching SHMUP cab (some lite CP work)
« Reply #45 on: January 16, 2015, 11:24:31 pm »
Small Update

I currently have three projects in some stage of planning/execution.  Figured I'd let you in on a couple

Task 1 Refinish the Cab

I've begun to strip the vinyl from the cabinet.  I was unable to deduce a ninja way of doing it, therefore I committed to brute force, determination, and a paint scrapper.  When I got tired of pulling off tiny strips at a time I broke out the heat gun.  I wouldn't say it was faster, but it made things a bit easier.  It also had an unfortunate side effect, leaving adhesive/vinyl remnants but I figured ---fudgesicle--- it, I'll sand that ---steaming pile of meadow muffin--- off later....

Here are some pics of the ol' girl naked...


I haven't bought the laminate yet for her new clothes, because I figure I'll need to refinish it in the shop and you're supposed to do it when the temperature is greater than 70 degrees. 

I'm a little nervous about chipping the stuff though, I am pretty sure we have a laminate flush trim bit somewhere in the shop and the youtube videos I've watched make it look pretty simple but the stuff is spendy, and if I screw the pooch that's $ 40 down the drain.  Oh well that's a Spring problem...


Task 2

Fix that jumpy monitor picture....

I ordered a cap kit from Syracuse semiconductors on Ebay, I still am nervous as a long tailed cat in a room full of rocking chairs about tackling this but I'll be damned if I'm going to let my fear of failure prevent me from learning arcade Kung Fu.  What's the worse that could happen?  If I mess up the board I can replace it for 100ish bucks....  May the force be with me...

I made myself this...


and it's off to the races....  The discharge was pretty uneventful, before I could brace for a pop the anode cap popped off almost as soon as I put the screwdriver beneath it.  Went ahead and touched the discharge tool to the tube hole just to make sure but the since it's been off for weeks, there wasn't much if any fanfare.

So a few screws removed and I pulled the monitor as you can see here


Now for a closer look under the hood


Looks like we have a few suspicious caps...


Neck board doesn't look too bad but the cardboard backing seems to be separated, perhaps from humidity.


Next step is to get the board separated form the monitor and ask the monitor forum for a crash course...  Do any of you see anything else glaringly wrong?  How do I know if fly-back transformer is good?  Any other tips?


The third task is finishing the coin door but that's still under development.... I am expecting some new coin rejects in the mail soon though.


« Last Edit: January 16, 2015, 11:26:09 pm by harveybirdman »

harveybirdman

  • Trade Count: (0)
  • Full Member
  • ***
  • Offline Offline
  • Posts: 2538
  • Last login:February 19, 2024, 12:40:25 pm
  • SHMUP'EM
Re: BulletReign: Vertical Jamma Switching SHMUP cab (Monitor Update)
« Reply #46 on: January 27, 2015, 07:42:23 pm »
---fudgesicle--- YEAH!!! DEEZ nuts you WG K7193  :angry:

Turns out it helps if your sync is hooked up to -H instead of +H..... Lesson learned and excuse to buy a molex connector, crimper, and pins, going to need them when I wire up the CP anyway  :cheers: :cheers: :cheers:


harveybirdman

  • Trade Count: (0)
  • Full Member
  • ***
  • Offline Offline
  • Posts: 2538
  • Last login:February 19, 2024, 12:40:25 pm
  • SHMUP'EM
Re: BulletReign: Vertical Jamma Switching SHMUP cab (Laminate Application)
« Reply #47 on: February 09, 2015, 01:07:48 am »
We've had a streak of unseasonably warm days here in the 918, so I started with the laminate facelift.

After reviewing this thread in the Woodworking forum: http://forum.arcadecontrols.com/index.php/topic,49927.0.html , and seeking the advice of the forum here: http://forum.arcadecontrols.com/index.php/topic,143704.0.html , I embarked on repairing the water damage on one side panel and the huge chuck from a corner on the other.

I was looking for a smaller 3/4 sheet of plywood but lately a lot of the plywood available (especially in smaller project sizes) seems to be 1/16 or so thinner and obviously that wouldn't match up to the existing structure.  I could have bought a sheet of Birch veneered ply, but even a small sheet of that mess is $25 so since there was no more that 3 or 4 inches of issues on each side of the cab I opted to just get a couple of 1x6's (one for the repair and one for the butt joint)

I don't know if anyone is reading my ramblings, so I'll just get right to the pictures....

The first step was to cut out the damage, to keep it simple I just cut out 5 1/12 inches which is the width of my replacement board.


Testing for fit


Oh but those sharp corners....  No worries I used this method to mark em...


Then I used THIS bad boy to make quick work of them (everyone needs a table sander)


When I was planning this project one of the things I was scared of the most was slot cutting the new work, I've read so many horror stories and seen pictures of blown out work.  But luckily for me my piece was small and was super easy cause I could do it on the router table.  The hardest part of this job was getting the bit at the right level (made several test cuts on scrap wood)


When It came time to actually attach the repair I had grand designs of gluing and doweling it it to place, I even bought a kit that comes with little pokers to help you align the pieces.


Ultimately though (probably because I couldn't get the holes on the existing panel straight because of the bottom getting in the way, the fit just wasn't right with the dowels and I said many cuss words.


So I just butt jointed it to hell, glued and screwed another 1x6 on the inside.


Some shots of the finished repairs


« Last Edit: February 09, 2015, 01:11:52 am by harveybirdman »

harveybirdman

  • Trade Count: (0)
  • Full Member
  • ***
  • Offline Offline
  • Posts: 2538
  • Last login:February 19, 2024, 12:40:25 pm
  • SHMUP'EM
Re: BulletReign: Vertical Jamma Switching SHMUP cab (Laminate Application)
« Reply #48 on: February 09, 2015, 01:19:25 am »
Then it was time to Laminate son!

I did a little surface preparation (I got a bit greedy with the saw on this side)


I used the manufacturers instructions, watched a Lowe's video, and this method worked well


One side down


Laminating the speaker Panel


As I applied the laminate I thought, how in the hell am I going to cut out those slits for the speakers...  My flush trim bit was to large to fit in the holes...  TO LOWES BATMAN!  I bought this guy and it did STELLAR work!


And here are some shots of both cab sides laminated...


Sadly I broke the ---steaming pile of meadow muffin--- out of my kickplate removing it (they REALLY didn't want the local juvenile delinquents to get into these things, they glued and stapled the ---steaming pile of meadow muffin--- out of it.  Next time I will be cutting a new kickplate and adding a coin door opening. 

Thanks for following!  :cheers:

BorgDog

  • Trade Count: (0)
  • Full Member
  • ***
  • Offline Offline
  • Posts: 436
  • Last login:August 22, 2021, 02:22:52 pm
  • Not a hipster for over 50 years!
Re: BulletReign: Vertical Jamma Switching SHMUP cab (Laminate Application)
« Reply #49 on: February 09, 2015, 09:01:19 am »
Nice work, and yes I do need the disc sander.  Where did you get your's?
My Projects:
MisSpent Youth a Vigolix bartop,  Little Bastard a rotating tablet/display bartop,
Pin-Dog a mini pin-cab on vpforums.org  Star Wars a wedgehead pincab on vpinball.com

Louis Tully

  • Trade Count: (+5)
  • Full Member
  • ***
  • Offline Offline
  • Posts: 1800
  • Last login:February 13, 2015, 09:41:03 pm
Re: BulletReign: Vertical Jamma Switching SHMUP cab (Laminate Application)
« Reply #50 on: February 09, 2015, 09:21:13 am »
.
« Last Edit: February 12, 2015, 07:33:30 pm by Louis Tully »

harveybirdman

  • Trade Count: (0)
  • Full Member
  • ***
  • Offline Offline
  • Posts: 2538
  • Last login:February 19, 2024, 12:40:25 pm
  • SHMUP'EM
Re: BulletReign: Vertical Jamma Switching SHMUP cab (Laminate Application)
« Reply #51 on: February 09, 2015, 09:47:33 am »
Thanks Louis!    :cheers:

Borg: So I'm pretty spoiled, my father spent a lifetime amassing tools and I am lucky as the benefactor.  He actually got the sander,  router table, and many other tools in the shop as part of the purchase of their farm. The former owner taught woodshop at the local school,   pretty sure this may have come out of the classroom.

Here's a modern equivalent for $111 bucks.

https://www.google.com/shopping/product/4690366249741903410?q=table+sander&espv=2&biw=1201&bih=836&bav=on.2,or.r_qf.&bvm=bv.85464276,d.eXY&ion=1&tch=1&ech=1&psi=zcnYVMi8GoebNpOlhIgP.1423493576836.5&ei=18nYVIP_GoKUNpbTg5AP&ved=0CLgBEKYrMAI
« Last Edit: February 09, 2015, 09:57:34 am by harveybirdman »

wp34

  • Trade Count: (+3)
  • Full Member
  • ***
  • Offline Offline
  • Posts: 4794
  • Last login:April 10, 2022, 09:48:19 pm
Re: BulletReign: Vertical Jamma Switching SHMUP cab (Laminate Application)
« Reply #52 on: February 11, 2015, 05:48:57 pm »
Those white sides look bangin!   :applaud:

harveybirdman

  • Trade Count: (0)
  • Full Member
  • ***
  • Offline Offline
  • Posts: 2538
  • Last login:February 19, 2024, 12:40:25 pm
  • SHMUP'EM
Re: BulletReign: Vertical Jamma Switching SHMUP cab (Laminate Application)
« Reply #53 on: February 11, 2015, 06:32:25 pm »
Thanks!  :cheers:

I've always loved the look of the white sides, Liberator, Missile Command, quantum, Xevious....

since at the end of the day this is ultimately just a glorified art piece I know I want something that in that vein.

zackt69

  • Trade Count: (0)
  • Full Member
  • ***
  • Offline Offline
  • Posts: 26
  • Last login:August 07, 2015, 04:12:34 pm
  • I want to build my own arcade controls!
Re: BulletReign: Vertical Jamma Switching SHMUP cab (Laminate Application)
« Reply #54 on: February 12, 2015, 01:04:03 pm »
Those white sides look bangin!   :applaud:

Agreed, that white laminate looks excellent! Everything is coming along great man, nice work.

opt2not

  • Trade Count: (+15)
  • Full Member
  • ***
  • Offline Offline
  • Posts: 6173
  • Last login:April 02, 2024, 07:42:30 pm
Re: BulletReign: Vertical Jamma Switching SHMUP cab (Laminate Application)
« Reply #55 on: February 12, 2015, 01:30:05 pm »
So clean!  Love the white laminate.   :applaud:

harveybirdman

  • Trade Count: (0)
  • Full Member
  • ***
  • Offline Offline
  • Posts: 2538
  • Last login:February 19, 2024, 12:40:25 pm
  • SHMUP'EM
Re: BulletReign: Vertical Jamma Switching SHMUP cab (Laminate Application)
« Reply #56 on: February 12, 2015, 02:22:23 pm »
So clean!  Love the white laminate.   :applaud:

Those white sides look bangin!   :applaud:

Agreed, that white laminate looks excellent! Everything is coming along great man, nice work.

Thanks guys it means a lot!  Wish I had more to show, hopefully the wife will let me get away with working on it some more over the long weekend. 

I have some cool ideas for the board access panel it will open like the second door she opens in this video:

http://www.thehardwarehut.com/product-video.php?p_ref=194246

and it's going to have graphics on the inside that pay homage to a certain "aircraft carrier"  something like this


Basically if it turns out right when its open you might half way expect planes to launch out of it  ;D

Plus I have to endeavor to convince Yots that doing something besides an all black coin door with turn out epic, don't really want to let the cat out of the bag on that one yet though, but I hope it turns out as awesome as it looks in my head.  Definitely more to come!  Thanks again for all the encouragement!

RetroGreg

  • Trade Count: (0)
  • Full Member
  • ***
  • Offline Offline
  • Posts: 329
  • Last login:March 19, 2022, 06:56:33 pm
Re: BulletReign: Vertical Jamma Switching SHMUP cab (Laminate Application)
« Reply #57 on: February 12, 2015, 10:30:22 pm »
I really like the look of the z backs. Looks great so far and I can't wait to see more!

Locke141

  • Trade Count: (0)
  • Full Member
  • ***
  • Offline Offline
  • Posts: 1690
  • Last login:April 20, 2024, 04:36:20 pm
  • Never grow up.
Re: BulletReign: Vertical Jamma Switching SHMUP cab (Laminate Application)
« Reply #58 on: February 13, 2015, 12:35:04 am »
I really like the look of the z backs. Looks great so far and I can't wait to see more!

+1

This is looking very nicely.
« Last Edit: February 13, 2015, 12:48:56 am by Locke141 »

yotsuya

  • Trade Count: (+21)
  • Full Member
  • ***
  • Offline Offline
  • Posts: 19956
  • Last login:Today at 12:09:56 am
  • 2014 UCA Winner, 2014, 2015, 2016 ZapCon Winner
    • forum.arcadecontrols.com/index.php/topic,137636.msg1420628.html
Re: BulletReign: Vertical Jamma Switching SHMUP cab (Laminate Application)
« Reply #59 on: February 13, 2015, 12:50:03 am »
Plus I have to endeavor to convince Yots that doing something besides an all black coin door with turn out epic, don't really want to let the cat out of the bag on that one yet though, but I hope it turns out as awesome as it looks in my head.  Definitely more to come!  Thanks again for all the encouragement!

I have yet to see one that doesn't look janky, but good luck, bro. I think the problem might be in the paint/finish that has been used in the past. Almost all of them look like a spray painted afterthought. Maybe you'll be a trailblazer.  :cheers:
***Build what you dig, bro. Build what you dig.***

harveybirdman

  • Trade Count: (0)
  • Full Member
  • ***
  • Offline Offline
  • Posts: 2538
  • Last login:February 19, 2024, 12:40:25 pm
  • SHMUP'EM
Re: BulletReign: Vertical Jamma Switching SHMUP cab (Laminate Application)
« Reply #60 on: February 16, 2015, 10:22:17 am »
I don't know about trailblazer, I'm hoping I just don't screw it up.....


Well slowly but surely I'm putting things back together...

I apologize for the lack of documented picks, but I did measure and cut a new kickplate.  When it came time to cut the coin door I measured the remains of the old kickplate for the dimensions.  I watched several videos on cutting the sink hole out of counter tops, as I figured cutting my coin door out would be a similar task.  I don't have a jigsaw, so I went another route....

First the stupid curves.  I got all the way out to the shop with my 2 1/8 hole saw and I left the stupid bit that it fits on at home.... I'm sure dad has some but I couldn't find them so I used a forstner bit and a five minute job turned into a fifty minute job.  I had to stop often to cool off the bit.  Here's a pic of me using the wrong tools for this job....


For the straight cuts I used a speed square and some scrap wood to make a straight edge/fence for my router and it worked very well.

Somehow I didn't get a few holes line up right but the coin door seems to cover up all the sins

Here's the kickplate after some laminate application.


Sorry a few of the pics are blurry, I had a smudge on my lens.

Next up I primed and painted the back panels... Screw painting I'm super glad I went with the laminate on the important sides.  And I have plenty left over for the board access panel which I still have on the to do list.

Primer Coat


Finish Coat


harveybirdman

  • Trade Count: (0)
  • Full Member
  • ***
  • Offline Offline
  • Posts: 2538
  • Last login:February 19, 2024, 12:40:25 pm
  • SHMUP'EM
Re: BulletReign: Vertical Jamma Switching SHMUP cab (Laminate Application)
« Reply #61 on: February 16, 2015, 10:30:53 am »
Here's a shot with the speaker panel and kickplate installed


Now that I had things painted it was time to install the T-Molding....  Man am I SUPER stoked with this Cool Blue T Molding from GroovyGameGear it REALLY set things off!


As you may recall if you were following my monitor issue thread, at some point the sync was incorrectly hooked up to this monitor.  I went ahead and set off for my molex crimper and molex connectors and I immediately put them to use.

Before the repair


And after


With any luck I'll have everything back in the cabinet by the weekend....

Next Steps

Board Storage Solution
Board Access Panel


Further down the road:
CP prep and finish
CP wire up
Coin Door prep and finish
JAMMA 6 in 1 Mod to physical 6 way switch.
Artwork

Thanks for following! :cheers:
« Last Edit: February 16, 2015, 10:35:28 am by harveybirdman »

wp34

  • Trade Count: (+3)
  • Full Member
  • ***
  • Offline Offline
  • Posts: 4794
  • Last login:April 10, 2022, 09:48:19 pm
Re: BulletReign: Vertical Jamma Switching SHMUP cab (Laminate Application)
« Reply #62 on: February 16, 2015, 10:35:42 am »

Now that I had things painted it was time to install the T-Molding....  Man am I SUPER stocked with this Cool Blue T Molding from GroovyGameGear it REALLY set things off!


That blue really does look great with the white.   :cheers:

harveybirdman

  • Trade Count: (0)
  • Full Member
  • ***
  • Offline Offline
  • Posts: 2538
  • Last login:February 19, 2024, 12:40:25 pm
  • SHMUP'EM
Re: BulletReign: Vertical Jamma Switching SHMUP cab (Laminate Application)
« Reply #63 on: February 16, 2015, 10:41:21 am »

Now that I had things painted it was time to install the T-Molding....  Man am I SUPER stocked with this Cool Blue T Molding from GroovyGameGear it REALLY set things off!


That blue really does look great with the white.   :cheers:

Thanks, I'm going to start saving now for artwork worthy of this finish... Maybe I can bring opt2not out of retirement...

harveybirdman

  • Trade Count: (0)
  • Full Member
  • ***
  • Offline Offline
  • Posts: 2538
  • Last login:February 19, 2024, 12:40:25 pm
  • SHMUP'EM
Re: BulletReign: Vertical Jamma Switching SHMUP cab (kickplate, paint, t mold)
« Reply #64 on: February 27, 2015, 12:17:25 pm »
This isn't really much of an update, but I need to dish out some props and take the opportunity for some feedback given I may have a few issues to work through soon.

So for board storage (I'm not completely sold that this is the way I'm going) I decided to build my way through the design process.

I'm toying with a sliding panel approach.  Fundamentally I know if I do this, I need to have all my grooves on the supports line up perfectly.  So I decided to cut them all out of the same 1x12 and then rip it down into supports.

The switch on my table saw went out midway through the project so I had to use something else, it took me a while to gauge the depth and spacing for my cuts as you can see here.


Once I had all the grooves cut on the actual project piece I bypassed the table saw switch and ripped the 1x12 (stupid dangerous, need to get a new switch before I continue using the table saw)  Here are the results.


Ripped down the tempered hardboard to 11 inch high panels.  This is really on the small end and could be the reason I go a different direction.  The board access panel is only a 12 inch opening so if any of my JAMMA boards won't fit on these panels I may have to consider a horizontal mounting option instead.  I'm interested to know opinions on this approach.  What is the widest JAMMA board you have? Do you have many wider than 11 inches?


I also did a few house cleaning things, I moved the "add credit" button to the top of the cabinet (ignore the sawdust)


It was ice cold in my garage and I had been storing my monitor out there temporarily while I worked on the Cab.  Once I got the laminate applied I was in a hurry to button things back up and get the components out of the garage and I got in a hurry.

When putting back in the bezel glass I didn't have it set properly, and that coupled with the CP being slightly bent caused an eruption of broken glass.  Thankfully noting was damaged outside of the glass.  I didn't take a picture but it was UGLY and I said many swears.

Thankfully Nep has this same cabinet, and was ever so kind to provide the dimensions of my now devastated bezel glass.  I owe you a beer bro if you're watching.  :cheers:

I was able to source some replacement glass locally for about 27 bucks.


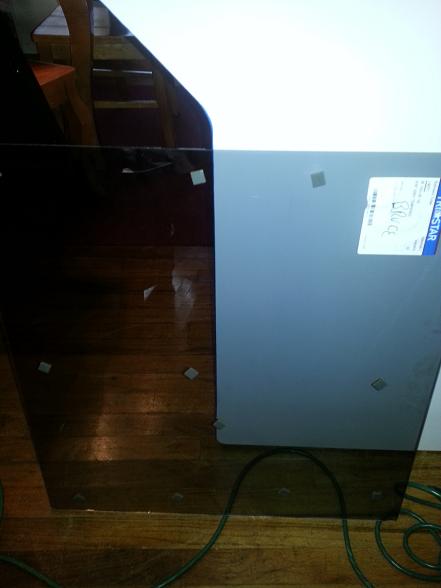
Mounted in the cabinet:


I debated on weather or not to show this, because I still have a lot of work to do, but I did want to give a little mock up to see what things will look like, and I of course have been wanting to play through Raiden II so here's the current mock up.

The button location will change, and the Strikers Marquee is obviously a place holder.  I'm trying to finalize my marquee art so I can order one of those translites that stpcore is offering but I've decided to redo the space portion and lose the Macross jet.  After setting Macross Plus to easy mode, and playing through it in MAME I've decided it's a quarter muncher and so ridiculously hard it's barely fun.  I really want the art to have nods to specific games but not have the plane pictured be easily identifiable as "this" ship from "that" game.  Enough talk here's what she looks like.


opt2not

  • Trade Count: (+15)
  • Full Member
  • ***
  • Offline Offline
  • Posts: 6173
  • Last login:April 02, 2024, 07:42:30 pm
Re: BulletReign: Vertical Jamma Switching SHMUP cab (Board Stoarge? Mockup)
« Reply #65 on: February 27, 2015, 01:53:38 pm »
Nice rack. :lol

The widest board I've owned has got to be a Midnight Resistance. I remember it was almost a square, > 11 inches.  It was a pain to find a box to fit it in for shipping when I sold it.

As for the credit button, I'm not sure I would have put it up there, especially using a Volcano button for it!  Atari Volcanos are meant to be seen, man!

Thanks, I'm going to start saving now for artwork worthy of this finish... Maybe I can bring opt2not out of retirement...
Maybe... ;)

harveybirdman

  • Trade Count: (0)
  • Full Member
  • ***
  • Offline Offline
  • Posts: 2538
  • Last login:February 19, 2024, 12:40:25 pm
  • SHMUP'EM
Re: BulletReign: Vertical Jamma Switching SHMUP cab (Board Stoarge? Mockup)
« Reply #66 on: February 27, 2015, 02:36:00 pm »
I see the point about the button, I just knew I didn't want it on my panel.  If I change my mind holes can be filled (that's what she said)

I like the LS-60's but I wish the spring was stiffer.... Do the LS-56 or 58  have any more resistance?

opt2not

  • Trade Count: (+15)
  • Full Member
  • ***
  • Offline Offline
  • Posts: 6173
  • Last login:April 02, 2024, 07:42:30 pm
Re: BulletReign: Vertical Jamma Switching SHMUP cab (Board Stoarge? Mockup)
« Reply #67 on: February 27, 2015, 02:46:41 pm »
The LS-56/58's spring is apparently a bit stiffer.  I believe the 60's were meant to be similar in feel to the Sanwa JLF's but with a much shorter throw. But I haven't tried the LS-60's yet to compare, this is just what I've been reading from the reviews.

But the LS-56/58's are my shmup sticks of choice! 


Locke141

  • Trade Count: (0)
  • Full Member
  • ***
  • Offline Offline
  • Posts: 1690
  • Last login:April 20, 2024, 04:36:20 pm
  • Never grow up.
Re: BulletReign: Vertical Jamma Switching SHMUP cab (Board Stoarge? Mockup)
« Reply #68 on: March 09, 2015, 01:49:59 pm »
This is really coming along well. I noticed you have some games you would like to add on that list in your signature that are out of your price range. Have you considered using one of your JAMMA slots with a J-PAC and running Mame for just the games that are just two expensive? Either way this is a very cool build.

harveybirdman

  • Trade Count: (0)
  • Full Member
  • ***
  • Offline Offline
  • Posts: 2538
  • Last login:February 19, 2024, 12:40:25 pm
  • SHMUP'EM
Re: BulletReign: Vertical Jamma Switching SHMUP cab (Board Stoarge? Mockup)
« Reply #69 on: March 09, 2015, 02:29:41 pm »
This is really coming along well. I noticed you have some games you would like to add on that list in your signature that are out of your price range. Have you considered using one of your JAMMA slots with a J-PAC and running Mame for just the games that are just two expensive? Either way this is a very cool build.

Yes I've thought about it, I mean who wouldn't want to play Batsugun, Battle Bakraid, Cyvern, Mushihimesama Futari and Donpahchi on a dedicated SHMUP cab after all....  And let's face it, I could by a used Honda for what all of those boards cost!

Still I'd have to source a PC to do this (not only is my current Mame PC pulling double duty it has no PCI E slots), plus a Jpac, and either a transcoder or an arcade VGA, I could definitely get a Rayforce or an ESP RA. DE. for what that would cost.  I do have quite a bit of savings but I have other expenses with this build (Switcher plus mods, hinges, reasonably price Jamma boards, Artwork, and lots of spray paint  >:D)  Also I'm concerned about the 5 Volt  if I run both boards and a J-Pac when the J Pac is active in the switcher.  Anyone have any experience with this?  I notice Andy's page seems to advise against a power supply.

Then again I still love the idea of original hardware as much as possible, and coinopexpress does have a bunch of the boards I want.  Still I don't love the idea of paying an extra 5% for paypal and I've heard the shipping is a doozie.

We shall see, thanks for following man!

Locke141

  • Trade Count: (0)
  • Full Member
  • ***
  • Offline Offline
  • Posts: 1690
  • Last login:April 20, 2024, 04:36:20 pm
  • Never grow up.
Re: BulletReign: Vertical Jamma Switching SHMUP cab (Board Stoarge? Mockup)
« Reply #70 on: March 10, 2015, 04:43:20 am »
I don't recall where but I think I read that GroovyMAME has a way to force many older cheep ATI cards to out put to 15HRZ it may be a cheeper options the ARCADE VGA. With a real arcade monitor it not like you need to use any filters.

Over on Arrow direct you can get a plenty fast HP COMPAQ ELITE 8100 3.2GHZ CORE I5 for $194 before discounts, if the winter20 code is still working that's about $160. If you do go with the ARCADE VGA ($89.00), and the J-pac $59.00. Thats $308 before shipping, not cheep but not super expensive, and you could add all the console SHMUP.

Either way, I'm loving this project. These builds that focus in on one type of game.

By the way, do you follow Oklahoma State wrestling program? I got to meat John Smith a few time at some wrestling fundraiser in NYC. 
« Last Edit: March 10, 2015, 06:11:11 am by Locke141 »

RetroGreg

  • Trade Count: (0)
  • Full Member
  • ***
  • Offline Offline
  • Posts: 329
  • Last login:March 19, 2022, 06:56:33 pm
Re: BulletReign: Vertical Jamma Switching SHMUP cab (Board Stoarge? Mockup)
« Reply #71 on: April 21, 2015, 11:46:44 pm »
Paging Mr. Birdman....... any updates? Sorry - I'm eagerly anticipating this one  :cheers:

harveybirdman

  • Trade Count: (0)
  • Full Member
  • ***
  • Offline Offline
  • Posts: 2538
  • Last login:February 19, 2024, 12:40:25 pm
  • SHMUP'EM
Re: BulletReign: Vertical Jamma Switching SHMUP cab (Board Stoarge? Mockup)
« Reply #72 on: April 22, 2015, 05:19:25 pm »
Metal chilling like the lost boys during the daytime

harveybirdman

  • Trade Count: (0)
  • Full Member
  • ***
  • Offline Offline
  • Posts: 2538
  • Last login:February 19, 2024, 12:40:25 pm
  • SHMUP'EM
Re: BulletReign: Vertical Jamma Switching SHMUP cab (Board Stoarge? Mockup)
« Reply #73 on: April 22, 2015, 05:31:21 pm »
Oh and I bought a rubber sanding block and I've been watching OND videos.  :cheers:

RetroGreg

  • Trade Count: (0)
  • Full Member
  • ***
  • Offline Offline
  • Posts: 329
  • Last login:March 19, 2022, 06:56:33 pm
Re: BulletReign: Vertical Jamma Switching SHMUP cab (Board Stoarge? Mockup)
« Reply #74 on: April 24, 2015, 12:00:47 am »
Thanks for humoring me. Great work so far.

harveybirdman

  • Trade Count: (0)
  • Full Member
  • ***
  • Offline Offline
  • Posts: 2538
  • Last login:February 19, 2024, 12:40:25 pm
  • SHMUP'EM
Re: BulletReign: Vertical Jamma Switching SHMUP cab (Board Stoarge? Mockup)
« Reply #75 on: April 24, 2015, 09:34:16 am »
Thanks, I hope to get some paint down this weekend, but the weather hasn't been cooperating.

Plus I just cut a stupidly large (for me) check to the State of Oklahoma..... Oh well, such is life.

Thanks for following, the next update will be a jaw dropper....  ;)

not worth an update but here are some pics of some painting and wet sanding in process, these are after the second coat preceded by a 1500 wet sand


« Last Edit: May 04, 2015, 01:20:22 pm by harveybirdman »

harveybirdman

  • Trade Count: (0)
  • Full Member
  • ***
  • Offline Offline
  • Posts: 2538
  • Last login:February 19, 2024, 12:40:25 pm
  • SHMUP'EM
Well folks, it's been nearly three months, here's what ol harv has been up to.


We went from this: 


to THIS:


More to come on the how and the frustrations during this section of the project that are STILL palpable!

 :cheers:

wp34

  • Trade Count: (+3)
  • Full Member
  • ***
  • Offline Offline
  • Posts: 4794
  • Last login:April 10, 2022, 09:48:19 pm
That turned out great.  I really like the stripes.  Are you going to extend them past the coin door?

harveybirdman

  • Trade Count: (0)
  • Full Member
  • ***
  • Offline Offline
  • Posts: 2538
  • Last login:February 19, 2024, 12:40:25 pm
  • SHMUP'EM
That thought had crossed my mind yes, but it depends on what I end up doing with the artwork on the kick plate.

harveybirdman

  • Trade Count: (0)
  • Full Member
  • ***
  • Offline Offline
  • Posts: 2538
  • Last login:February 19, 2024, 12:40:25 pm
  • SHMUP'EM
So here are some of the materials I used for painting.  If I had it to do all over again I would probably use a self etching primer, perhaps some of the issues I had with peeling paint may have been due to the primer.  Most of the problems however were due to coats being applied above the recommended humidity level.  Pro tip:  If you want to paint something and it’s raining outside, don’t do it!  The stripes I first laid out (pictured below) had to be completely sanded off and redone because they didn’t adhere properly. 

When I had to tape over them the tape peeled sections right off!  By the time I finally laid down the final stripes and covered with the Shimmer Effect (to match the other metallic paints I was using) I didn’t take any chances with the masking, and covered most of the striped area with Aluminum foil (this worked VERY well).  I used various tapes, Frog tape, regular and delicate, Tamiya Tape, and what I found worked the best at preventing over-spray was the plain ol narrow blue painters tape.  It also helped to use small pieces to cover each raised portion of the door rather than one unbroken piece


Also if you haven’t watched Ond’s series on getting a mirror finish paint job it’s definitely worth a look, I wet sanded in stages like he suggests and polished with rubbing and polishing compounds.  I just broke down and bought a 20 orbital polisher from Wal-Mart to achieve these results.


Also as you no doubt noticed from the pictures, I altered the button layout to Sega Astro City Player 2 on both players’ buttons.  I used the print outs from slag coin and marked button one’s placement as it related to the existing holes for button’s two and three.  I drilled a pilot hole and then used a hole saw to widen the hole to spec.  I don’t know if this was the best way (broke several teeth on my hole saw doing this) but the thing said it was good for metal and I made it work.


If you missed my posts in the main forum, I replaced the incandescent bulbs with LED wedge bulbs that are much brighter.  I still don’t get exactly what I want from this and may look at other options to enhance the lighting.  Basically the issue is with the bulb placement.  Basically in keeping the functionality of the coin rejects it is difficult to avoid shadows being cast.  For now though things look good enough but in the future I may run another line from the power supply to some LED strips, we’ll see.


Oh yeah and I got this in the mail last week!


I am going to roll my own rotary switch control to replace the remote control.  This is pretty well documented at KLOV and on several YouTube videos.  Basically the way I envision it working is diagrammed below, do any of you electrical engineer types see any problem with running the five volt to the ground on this rotary switch and using the switch to direct it to the appropriate contact on the board?  I bought 100k ohm resistors to use per the videos I’ve watched to prevent voltage to multiple boards at once.