Twice now I have used this process to achieve a flawless install of the Ultimarc U-Trak flush mount track ball. I figured this time I would take a few pics and share it here.
Here I the scoop: First, if you are not familiar, this is a trackball that is designed to be 100% undermount and not require any kind of hardware from up above. Thing is, just drilling a hole with a hole saw will not get you good results. The hole is about 80mm across and not only will a hole saw make a fairly rough cut, finding an 80mm hole saw is pretty much impossible. The trackball comes with a trim ring to cover up the messy hole, but if your control panel is 3/4" wood you would have to recess the trackball to get the lip to come up enough to use the trim ring. Plus what is the point in having a full undermount trackball if you are just going to put a trim ring on top and not have it truly flush?
(you can find pics of the trackball on Ultimarc's website)
So here is a good way to cut a perfect 80mm hole using the trim ring as a router guide. The trim ring itself is not very heavy duty, and there isn't a way to clamp it to the control panel surface anyway. So we will cut a scrap piece to mount the trim ring in, then use it to sandwich the trim ring between the scrap and the control panel, and then use a router to make the hole the exact size of the top of the trackball.
First, get your hole marked out on the control panel. You can use the trim ring that comes on the u-trak for this, but make sure you have your clearance on the backside, the unit is pretty big.
Now, take a 3.5" hole saw and a scrap of MDF or particle board and cut a hole roughly in the center of it. If you don't have a 3.5" hole saw, draw a 3.5" hole with a compass and use a jigsaw to cut it as close as you can. It doesn't have to be perfect, but the closer you get to being round, the better your results will be in the end.
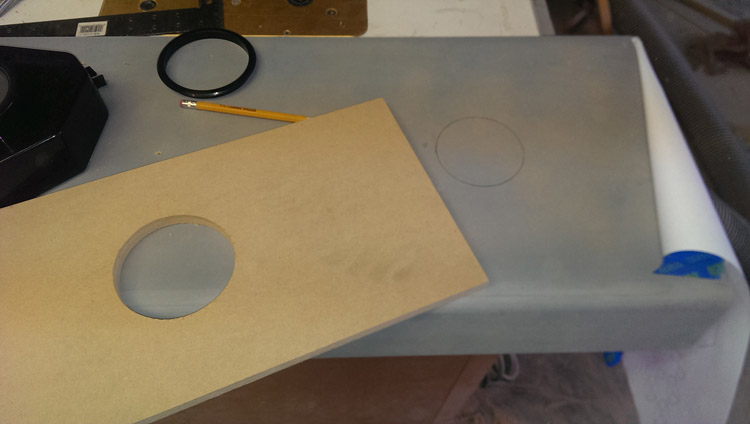
ok, now take your trim ring and place it in the hole. It will be loose, nearly 1/8th inch all the way around.
(view from the other side of the hole with ring inserted on the other side)
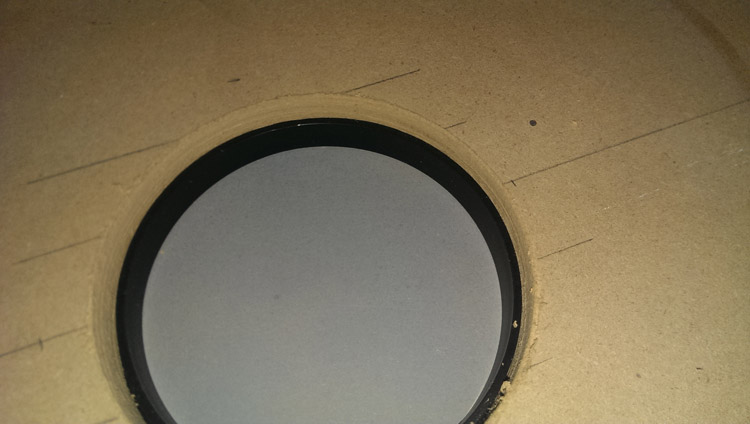
I use paper folded up and then tucked in all the way around to shim it and snug it up. It doesn't have to be super tight in there, just enough so that you can't shift it around easily. Once the ring is sitting in the hole with enough shims to hold it in place, you are ready to go to the next step.
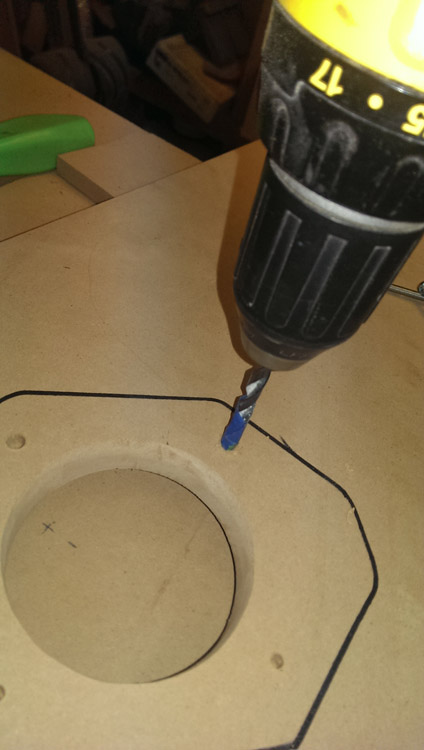
Cut the control panel hole with a jig saw or 3" hole saw so that you are INSIDE the circle you drew. It is critical that you make your hole smaller than the final hole.
Now take your scrap piece with the trim ring set in it and clamp it to your control panel, centering the trim ring on your circle (trim ring side sandwiched between the scrap and the control panel).
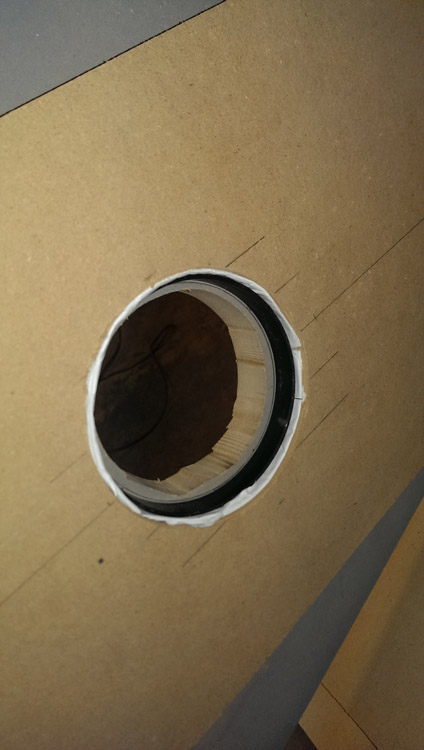
You can see in the image the paper shims I used to keep the ring centered in the scrap piece, and through the hole you can see the control panel surface with the hole cut smaller than the circle drawn on it, and you can see that the hole is centered properly.
Now flip the whole thing over (use a corner of a workbench so your clamps don't interfere) and if necessary, clamp the whole works to your work surface. Your next step is to use the router on it, so you don't want it tipping over on you or sitting at an awkward angle.
Use a flush trim bit with the bearing on the end of the bit to trim out the excess with your router and get your finished hole. Set the bearing as close to the top of the trim ring that is sandwiched in between the two pieces of wood. The trim ring is angled out a little, so the closer to the top of it you are, the smaller your hole will be and the closer it will fit your flush mount trackball.
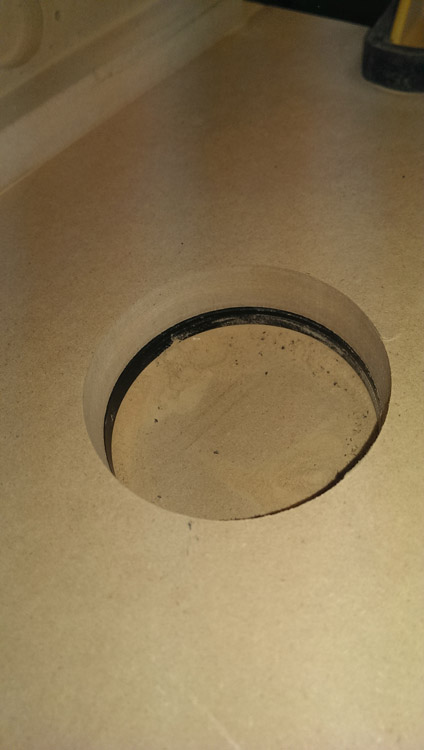
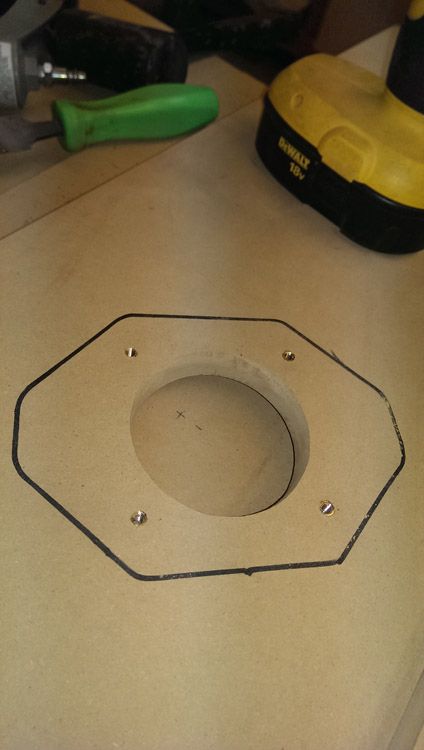
Here is a view after trimming it out. You can see the control panel is now perfectly flush with the trim ring. The shims and then being sandwiched between the two pieces of wood kept the trim ring's shape so your hole comes out perfect.
Now use a file or some sandpaper to flare the hole out toward the underside of the control panel. You have to flare it out just over a millimeter to get the trackball to slide all the way into the hole from behind. Be careful not to sand or file the outside of the hole (the side on the top of your CP) as this is the final hole that will be visible. Once you have flared the hole out enough, the track ball will sit flush and from the top it will look like this:
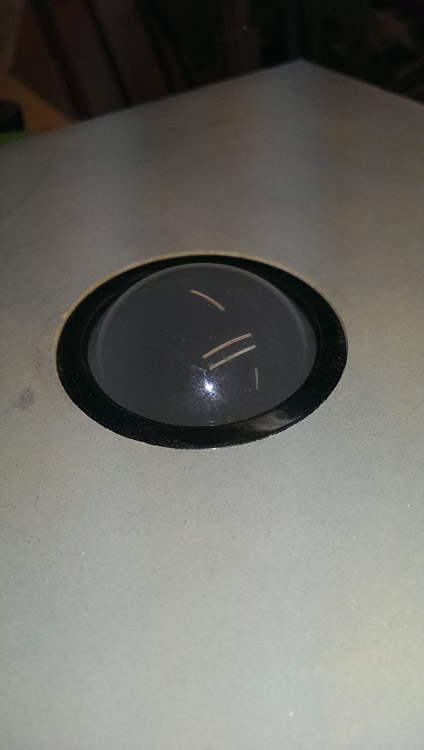
Now, the top of the lip around the ball is rounded over just a little, so you will have about a millimeter of exposed wood in there. If you want it to look better, route out a slight recess on the backside to get it to sit just a little higher. Only go about a millimeter as any further will mean you will have to sand or file your hole out even further, and it will be very difficult to make it perfectly round.
Mounting:
Now that you have the hole how you want it, note the arrow on the top side of the trackball housing and point it toward the top of your CP. I use a speed square to make sure it is perfectly square to the CP before marking and drilling.
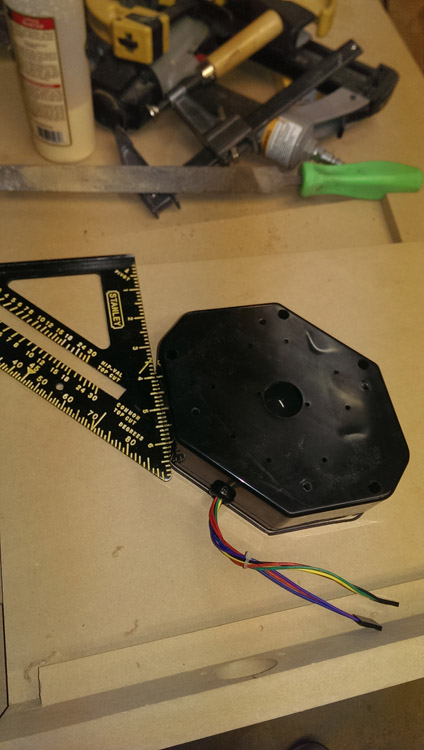
It is a good idea to trace out the housing onto your wood now, just for reference so you don't end up using that space when drilling other holes or assembling things later.
With the housing in place and squared up, use a 3/16" drill bit (or close to that size) to drill the pilot holes. Be sure to set your bit as deep as the housing plus about 1/2" (mark it with tape if you have to, although a "jobber" length drill bit will be just long enough). Drill out the 4 holes (again, be sure you are only going 1/2" into the wood, about 3/8" if you routed out a 1mm recess to raise the ball a little, you don't want to drill through your cp to the surface)
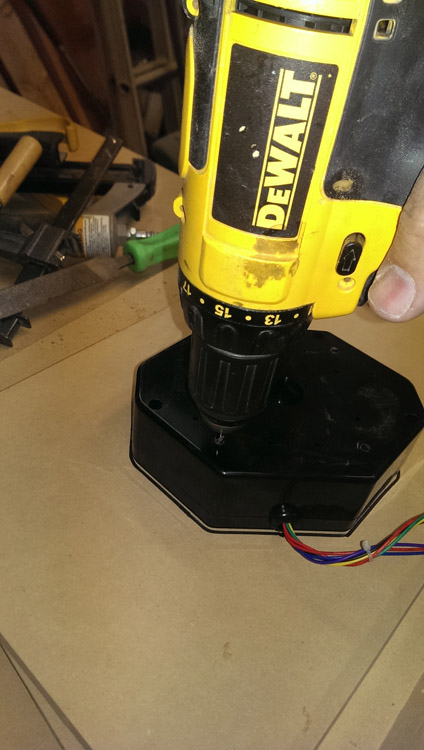
Now move the trackball housing out of the way and use a 1/4" bit with tape marking 1/2" deep to drill out the 4 holes.
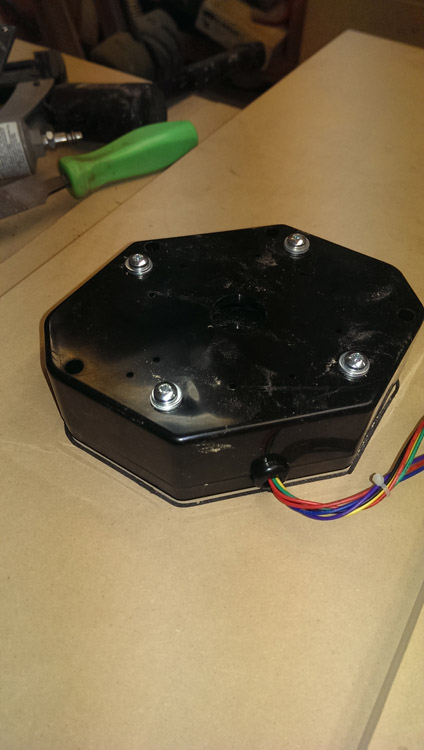
Now use a mallet or hammer to knock the brass inserts that came with the trackball into place. Flush them to the wood.
Finally, I recommend using a washer or 2 on the screws as they are almost exactly 1/2" longer than the housing is deep, and any pulp or sawdust in the bottom of the holes will cause the insert to start to pull out (or worse, to blow through the other side if you recessed the trackball at all).
Finally, remove the trackball once you have made sure it fits and flip the CP over. If you don't have a finished surface yet, use some flat black paint to paint the inside of the hole since about a mm will be visible. You can also use a sharpie to black it out, but paint works well if you don't have to worry about getting it all over.
When you apply your art, use a sharp razor blade to trim around the hole, keeping the blade as close to perpendicular to the surface of the CP as you can, and be careful to cut the vinyl and not the wood. You should be able to use the wood as a guide and get a perfect cut.
And there you go, a nicely flush mounted trackball with no hardware showing on top, no trim ring necessary, and no special recessing necessary.
(this pic is from my first control panel)


 Home
Home Help
Help Search
 Login
Login Register

 Send this topic
 Print
Print Topic: Guide to mounting Ultimarc U-Trak (Read 14438 times)


