Main Restorations Software Audio/Jukebox/MP3 Everything Else Buy/Sell/Trade
Project Announcements Monitor/Video GroovyMAME Merit/JVL Touchscreen Meet Up Retail Vendors
Driving & Racing Woodworking Software Support Forums Consoles Project Arcade Reviews
Automated Projects Artwork Frontend Support Forums Pinball Forum Discussion Old Boards
Raspberry Pi & Dev Board controls.dat Linux Miscellaneous Arcade Wiki Discussion Old Archives
Lightguns Arcade1Up Try the site in https mode Site News

Unread posts | New Replies | Recent posts | Rules | Chatroom | Wiki | File Repository | RSS | Submit news


Author Topic: UltraStik 360 + RGB LED + Topfire + Rotary Mod  (Read 21475 times)

0 Members and 1 Guest are viewing this topic.

heatseeker86

  • Trade Count: (0)
  • Jr. Member
  • **
  • Offline Offline
  • Posts: 5
  • Last login:January 13, 2019, 03:47:51 am
UltraStik 360 + RGB LED + Topfire + Rotary Mod
« on: May 15, 2013, 05:40:19 pm »
:eBay: , <click> :BuyItNow:

*sigh*

So while Im waiting for some parts from Hong Kong, I wont further delay this. I wanted to thoroughly document the reconstruction of my player 2 stick but for now I do have some pics that should get the point across.

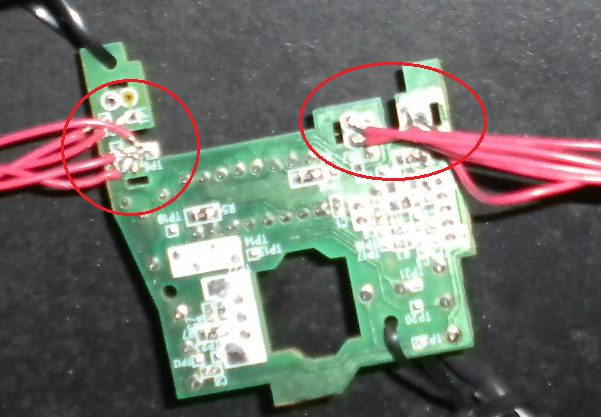
This mod creates a fully free rotating rotary joystick out of the ever-so-awesome UltraStik 360s that I bought earlier this year. It also incorporates a 6 wire SlipRing useful for the LED/topfire mod created by Bender found here.

And sorry!, some of the pictures do not depict exactly what the actual parts look like.


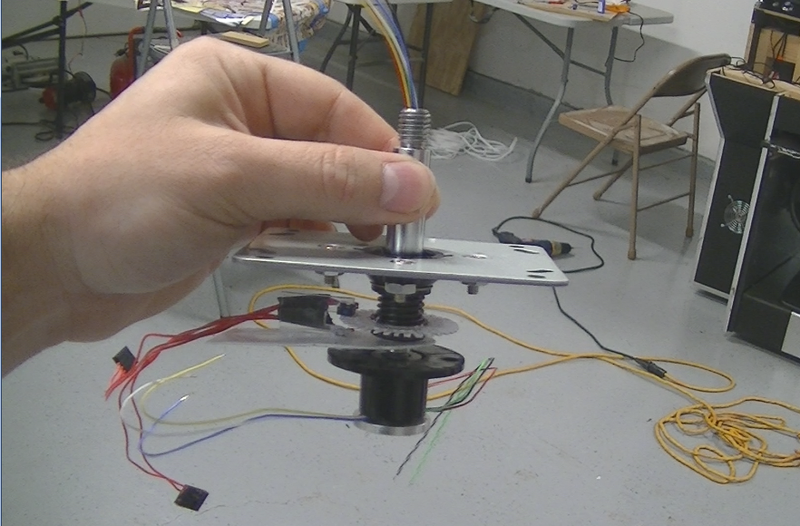
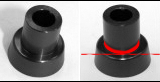
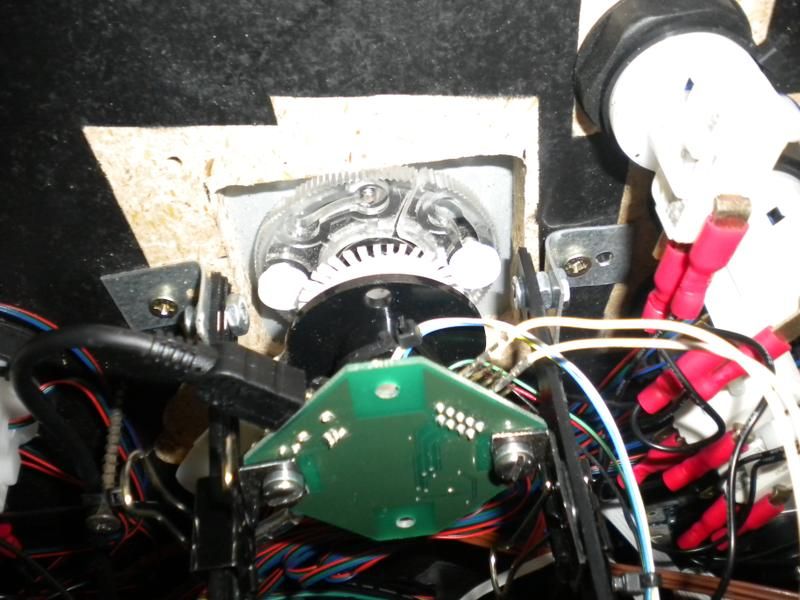
I managed to take this pic of the nearly completed shaft portion before locking it down.

So heres whats going on:


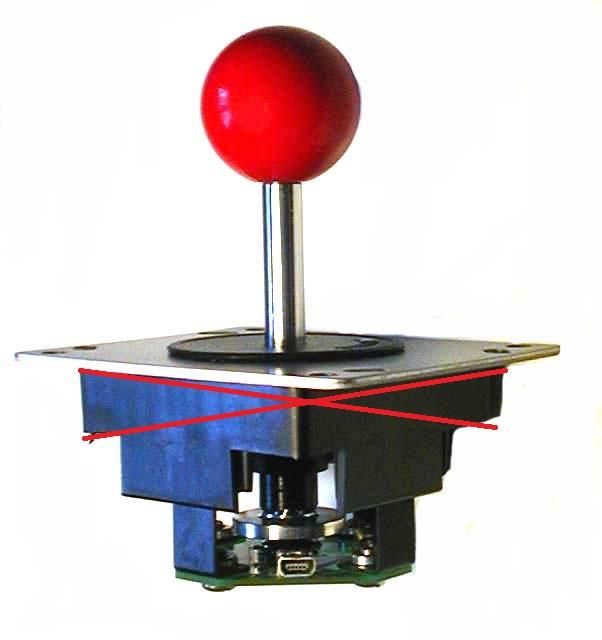
First of all, I had to remove the plastic housing from the base of the joystick as it takes up entirely too much room. Within the housing, however, there is a cross shaped plastic support piece which is what we'll be using to keep the joystick secured to the plate.


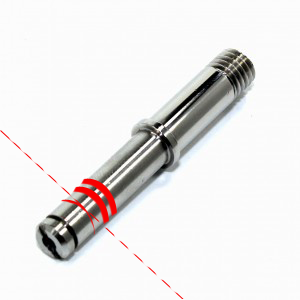
For the shaft (Bat top/Oval), I cut about a half inch from the bottom and cut 2 addition 1mm grooves 1-2 mm from the very end and 1mm apart. Hollowed out with a 1/8in drill bit throughout the whole shaft, and then an additional 3/8's deep on BOTH ends of the shaft with a 1/4in drill bit (as I needed room to tuck in some excess wire at the top and to fit the rotor end of the slipwire unit at the bottom)


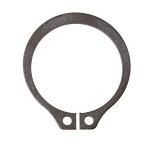
Instead of using the E-rings that come with the sticks, I got a pair of these 1/4 inch retaining rings from home depot. They work nicely.


The actuator was also cut down to the base where the spring (hard spring) makes contact with the actuator and once it was secured by the retaining ring, I used a small amount of Loctite superglue to keep it rotating with the shaft.

The point of all this is to get the lower part of the assembled shaft as SHORT as possible to reduce the area of movement of the magnet.


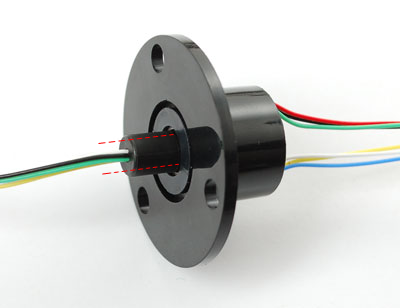
This is the Slip Ring I used (SRC022A-6 available at Adafruit but I also found some on ebay as well). I had to file down the sides of the rotor side of the slip ring in order to fit it into the 1/4in hole on the lower end of the shaft and then adding another small amount of Loctite glue once inserted.


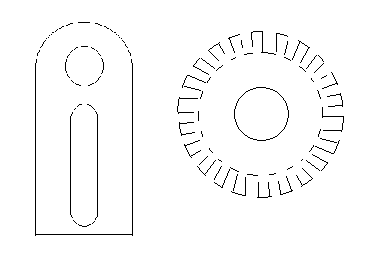
For the encoder wheel and slider piece (sorry for the ridiculous illustration), they are just plastic cut with a utility knife. By the way, the more teeth you have on the wheel the better resolution you will get out of the encoder. Glue the wheel around the actuator and secure the slider in place with the other retaining ring.

Which brings us to cannibalizing this poor defenseless but otherwise useless ball mouse for its encoders.


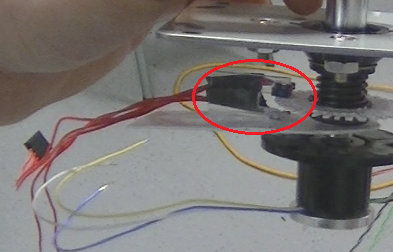
So I extracted the mouse PCB, desoldered the detectors and emitters, attached them the best I could to yet another mere piece of plastic, mounted them to the slider, and wired them back to the PCB.

And since we have 2 axises on a mouse, we can give one axis to each of the 2 joysticks. Sweet deal. Besides, I discovered that one axis will not work without the other... lol.. So even if youre using just one, the other must be connected and functional as well.


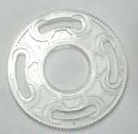
And lastly, the restrictor plate. When I first got the U360's, I didnt think I would need the plates but I ordered them anyway just in case. Good thing I did because it solved a very annoying problem.

Even though I got the shaft assembly as short as possible, there was still a sliiiiight over throw at the magnet and PCB and it was enough that if you moved the stick to any extreme direction, the player would feel it. Applying the restrictor plate fixed this but not where you would think.


By placing it at the top, of all places, it restricts the stick beautifully preventing the magnet going anywhere out of range. I did have to file down the UPPER EDGE of the INNER CIRCLE on the plate to get it to fit flush and I cut it in half to get it in there obviously since this was an afterthought. And using longer screws at the top would be a great idea as you can see they are quite short here.

And of course, I had the U360 PCB secured any way I could. Using these clamps here seem keep it in place while making it adjustable as well. Superglue the magnet to the SlipRing and DONE.


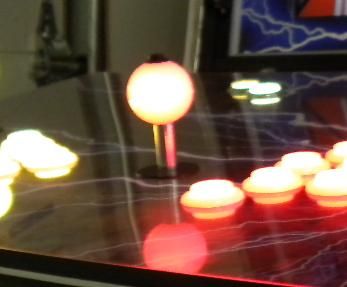
In addition to all this, I am using these Hoku 38mm ball tops (from Paradise Arcade). They are slightly larger than the rest and have just enough room to fit the LED and SPST button shown below. (I had to cut the contacts shorter on these)


Combine that with Benders topfire/LED mod and THERE YOU HAVE IT... U360+LED+Topfire+Rotary


Anyways, Im sure I may not have been thorough enough on some things so if you need me to elaborate on anything, ask away.. And any suggestions for improvement are welcome. Enjoy.

 :cheers:

« Last Edit: May 16, 2013, 09:26:00 pm by heatseeker86 »

Profusion Retrocade

heatseeker86

  • Trade Count: (0)
  • Jr. Member
  • **
  • Offline Offline
  • Posts: 5
  • Last login:January 13, 2019, 03:47:51 am
Re: UltraStik 360 + RGB LED + Topfire + Rotary Mod
« Reply #1 on: May 15, 2013, 08:30:10 pm »
Sorry about the disappearing pictures everyone. JustCloud is seriously jerkin me around right now. Ill fix this.

Profusion Retrocade

lcmgadgets

  • Trade Count: (0)
  • Full Member
  • ***
  • Offline Offline
  • Posts: 471
  • Last login:July 31, 2023, 01:46:12 pm
  • Can u guess what game this image is from?
Re: UltraStik 360 + RGB LED + Topfire + Rotary Mod
« Reply #2 on: May 16, 2013, 10:41:28 am »
Sweet!
"Godzilla is a warning. A warning to each and every one of us. When mankind falls into conflict with nature, monsters are born."
Professor Hayashida

AGarv

  • Trade Count: (0)
  • Full Member
  • ***
  • Offline Offline
  • Posts: 225
  • Last login:March 22, 2016, 07:29:18 pm
Re: UltraStik 360 + RGB LED + Topfire + Rotary Mod
« Reply #3 on: May 16, 2013, 10:07:47 pm »
Alright, now THAT is cool.  The only think missing is physical 4-way restriction for Assault! :)

monkey puzzle

  • Trade Count: (0)
  • Full Member
  • ***
  • Offline Offline
  • Posts: 193
  • Last login:March 23, 2024, 02:11:59 pm
Re: UltraStik 360 + RGB LED + Topfire + Rotary Mod
« Reply #4 on: June 12, 2013, 05:49:31 pm »
Very nice mod. Cleverly thought out. Does anybody know if the rotary mod would be possible on any other type of joystick? Such as the J-Stik for example?

marioxb

  • Trade Count: (0)
  • Full Member
  • ***
  • Offline Offline
  • Posts: 235
  • Last login:March 08, 2024, 01:54:31 pm
  • I want to build my own arcade controls!
Re: UltraStik 360 + RGB LED + Topfire + Rotary Mod
« Reply #5 on: August 29, 2013, 09:38:55 am »
So... How much would you charge to modify two of these for me? With or without the top fire, not sure if I want that yet or not. I sort of want the joystick to look like a regular joystick. How hard is it to play Ikari Warriors with a button, like it was Contra or something? That's how the NES version worked anyway...

Scorpie

  • Trade Count: (0)
  • Full Member
  • ***
  • Offline Offline
  • Posts: 36
  • Last login:December 12, 2022, 04:28:58 am
  • I want to build my own arcade controls!
Re: UltraStik 360 + RGB LED + Topfire + Rotary Mod
« Reply #6 on: July 07, 2014, 07:07:51 am »
So... How much would you charge to modify two of these for me? With or without the top fire, not sure if I want that yet or not. I sort of want the joystick to look like a regular joystick. How hard is it to play Ikari Warriors with a button, like it was Contra or something? That's how the NES version worked anyway...

Was thinking the same thing. I lack the knowledge and tools for doing this myself...

Nocturnaloner

  • Trade Count: (0)
  • Full Member
  • ***
  • Offline Offline
  • Posts: 212
  • Last login:May 05, 2016, 12:39:53 pm
  • AARRRRcade!
Re: UltraStik 360 + RGB LED + Topfire + Rotary Mod
« Reply #7 on: February 12, 2016, 08:58:25 am »
Since it looks like heatseeker86 is out of the scene, can anyone tell me from the photos, exactly where his trigger wires are coming out of the joystick shaft at the bottom?  The magnet is glued to the bottom of the slip ring, but how are the wires coming out above the magnet?

dropper

  • Trade Count: (0)
  • Jr. Member
  • **
  • Offline Offline
  • Posts: 5
  • Last login:April 20, 2017, 09:22:07 pm
  • I want to build my own arcade controls!
Re: UltraStik 360 + RGB LED + Topfire + Rotary Mod
« Reply #8 on: February 12, 2016, 10:02:47 am »
In the picture for the  "Which brings us to cannibalizing this poor defenseless but otherwise useless ball mouse for its encoders.", he has a view of the magnet attached to the slip ring.  It appears that he cut a notch and perhaps a channel and fed the wires out of one side.  (Just looked through and you can see it in the first picture, as well.

Keith

Nocturnaloner

  • Trade Count: (0)
  • Full Member
  • ***
  • Offline Offline
  • Posts: 212
  • Last login:May 05, 2016, 12:39:53 pm
  • AARRRRcade!
Re: UltraStik 360 + RGB LED + Topfire + Rotary Mod
« Reply #9 on: February 12, 2016, 10:39:59 am »
In the picture for the  "Which brings us to cannibalizing this poor defenseless but otherwise useless ball mouse for its encoders.", he has a view of the magnet attached to the slip ring.  It appears that he cut a notch and perhaps a channel and fed the wires out of one side.  (Just looked through and you can see it in the first picture, as well.

Keith

Ok, I get it now, thanks.  The wires clear the metal shaft because they pass through the slip ring, which is inserted into the shaft.  The notch in the slip ring allows the wires to come out over the magnet.


haynor666

  • Trade Count: (0)
  • Full Member
  • ***
  • Offline Offline
  • Posts: 1471
  • Last login:April 22, 2024, 03:17:30 am
  • retro maniac
Re: UltraStik 360 + RGB LED + Topfire + Rotary Mod
« Reply #10 on: March 08, 2017, 04:39:37 pm »
Great project :)