Main Restorations Software Audio/Jukebox/MP3 Everything Else Buy/Sell/Trade
Project Announcements Monitor/Video GroovyMAME Merit/JVL Touchscreen Meet Up Retail Vendors
Driving & Racing Woodworking Software Support Forums Consoles Project Arcade Reviews
Automated Projects Artwork Frontend Support Forums Pinball Forum Discussion Old Boards
Raspberry Pi & Dev Board controls.dat Linux Miscellaneous Arcade Wiki Discussion Old Archives
Lightguns Arcade1Up Try the site in https mode Site News

Unread posts | New Replies | Recent posts | Rules | Chatroom | Wiki | File Repository | RSS | Submit news


Author Topic: Supergun-style / MAME cab hybrid *FINISHED*  (Read 7755 times)

0 Members and 1 Guest are viewing this topic.

i64X

  • Trade Count: (0)
  • Full Member
  • ***
  • Offline Offline
  • Posts: 39
  • Last login:April 04, 2022, 09:14:58 am
  • newb
    • i64X.com
Supergun-style / MAME cab hybrid *FINISHED*
« on: April 25, 2013, 10:50:16 am »
So I decided to start a new project. Some of you may remember the previous bartop I did here:

http://forum.arcadecontrols.com/index.php/topic,128852.msg1316776.html#msg1316776

With this new one I wanted to follow this criteria: a.) looks nicer if it is to be displayed and b.) can be put away if need be, but c.) is still easy to quickly hook up and play.

All of those things rolled together made me think of doing a "supergun" style controller, but shoving a small MAME PC inside it. The top control panel will have 2 players worth of controls with a 6 button layout, P1/P2 start buttons, and power/insert coin/exit buttons.

Guts inside will essentially just be the PC and an iPac. Motherboard supports audio and video out via HDMI, so the only external ports will be a PC-cord style power plug which will take any standard PC cord, and a female HDMI port that will take any HDMI cable. I bought these items from PartsExpress to accomplish that goal:

http://www.parts-express.com/pe/showdetl.cfm?partnumber=093-118

http://www.parts-express.com/pe/showdetl.cfm?partnumber=181-784 - To connect the PC to the HDMI jack

http://www.parts-express.com/pe/showdetl.cfm?partnumber=090-442

All of that should make the outside of the cab look fairly finished. The board I got generates hardly any heat at all, so I'm not sure if I'm going to need an exhaust fan yet or not.

I want this one to be really nice. No MDF and black paint like the bartop arcade game. I've got ideas for some little details along the way that I think will accomplish that. :) The first of which - it's going to be made out of solid red oak. Red oak is kinda expensive, but it's worth it IMO, and looks gorgeous.

Enough explanation - on to what's done so far on the build:

Some measuring and pre-planning. We were going to 45 the edges to give them a more finished look, but I like the look of a stained edge of a piece of wood. The front and back panels will be flat, and the sides will have edges visible.


Test fitting overlap of the top. This was actually reduced slightly since I screwed up a couple things on this top and decided to start over with a new top, which is slightly smaller.


This is the base all put together. Notice everything isn't 100% perfect (look at the joints). This will be taken care of with hours of sanding. :)


This is the piece after a lot of sanding. One side was chopped down slightly and drilled for the piano hinge. The reduction in height will make the top sit flush on top of the box.


I re-created this SFA3 art in Illustrator and took it to a place and had it printed on adhesive 3M vinyl. I cut the characters out with a razor blade by hand and they'll be going on top of the control panel (obviously under plexi). I didn't want a solid CP top because I wanted the wood to be visible. Oak is pretty. No need to cover it all up. :)

On the final CP, Ryu will be on the P1 side and Ken will be on the P2 side. I cut the buttons in such a way that they won't have any holes in their faces. :) I'm really hoping this will look great.


We sandwiched the characters between two pieces of plexi and put some heavy stuff on them to flatten them out. Couple days while we're staining and clear coating should do the trick.

On to the creation of the CP. I rounded the corners and slot-cut this piece. Notice the slot cut is not in the middle. After slot cutting the piece we ran it through a planer and took off about 1/16th of an inch from the top of the piece. This is so the clear acrylic, once placed on top, will sit perfectly flush with the top of the T-moulding. Details details. :)


You can see here the button layout I'm going with. Traditional Japanese style, but with only 6 buttons. I'm not using the right-most two buttons from the pic. I really like this joystick spacing and wish I would have used it on my bartop. I might re-do the CP on the bartop with this layout.

After drilling all those holes, I clamped my acrylic on top and got to work with a router and a flush trim bit.


The result is a perfect fit all the way around. Note the jaggies on the acrylic - that's the protective plastic that they put on the top and bottom so it doesn't get scratched - it's not rough. The actual cut is like factory. I love that flush trim bit!


Next I got to work with the Dremel drilling out all of the button holes. This takes a while, but using a standard drill bit in a Dremel tool really works well here. The holes end up perfect.


Many holes. :)


Button test fit. Poyfict.


Now it's time to fit the joysticks. I like to recess these - not a lot, but just enough to add stability. I went about 1/8" deep here. Could have gone deeper, but I wanted to keep as much real board there as possible just in case fighting game combat gets vigorous. :)


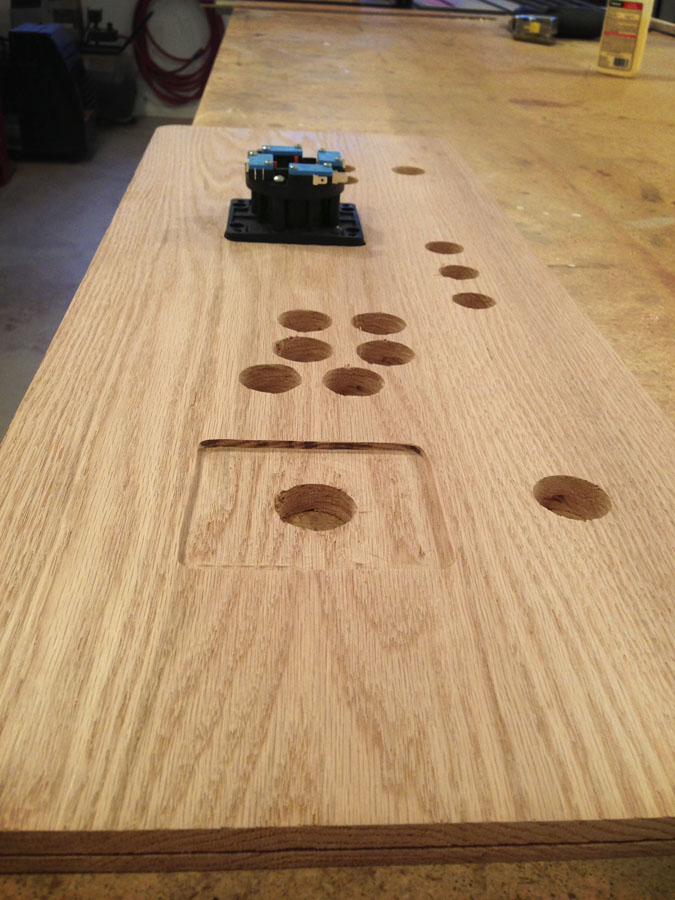
Notice there that the top 3 buttons holes are smaller than the rest (11/16" vs 1 1/8"). Those 3 buttons are going to be Ultralux lit buttons. I have a red one, green one, and yellow one for "Exit," insert coin, and power respectively. I made custom labels and put them inside the buttons. I'll get pics of those later. I was going to use lit buttons for the whole CP, but they're a bit stiff and I really like the feel of standard buttons. I read about the spring removal trick after the fact, so I might play around with the buttons and see if I can make them feel more like the Happ buttons and might toy with the idea of replacing them.

Now, time to stain. I used a pretty light colored stain that really brings out the grain of the wood. Pictures don't do this justice at all, and the lack of lighting doesn't really help either. The pieces came out really nice.


That's how I left it. Stain had to dry overnight. Tonight I can go back and put on the varnish, which will take a while to dry as well. After that's done the only thing I'll be waiting on are my electronics from Parts Express. I'll be leery drilling holes in this for those pieces after the stain and varnish are already on, but I wanted to get that part done ASAP because I hate waiting for dry time.

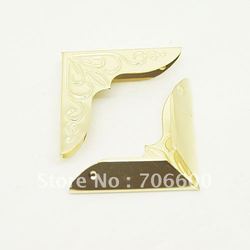
I picked up some nice, big screw-on plastic/felt feet for the bottom so it can be placed on a hardwood floor or coffee table and won't damage the surface. I also picked up some gold hardware like corner finishers similar to this for the bottom 4 corners:


The piano hinge is also gold, and I picked up a couple gold clasps to keep the lid closed (though I don't know if I'm going to use them or not - I need to see what they'll look like) as well as some decorative gold handles for the sides so the unit can be carried easily by 1 person without picking it up by the top, which might be bad. :)

I've never seen one of these done before, although I wouldn't be at all surprised if someone's already done it. If anyone has links to any projects that others have done that are similar I'd like to see them if you can provide links.

I'll keep updates coming as I get more done. Let me know if you guys have any ideas.

I hope picture quality is acceptable - I took them with my phone.
« Last Edit: April 30, 2013, 09:35:39 am by i64X »

sabreerbasAlpha

  • Trade Count: (0)
  • Full Member
  • ***
  • Offline Offline
  • Posts: 253
  • Last login:February 13, 2017, 07:28:29 pm
  • Remember those big 10ps?
Re: Supergun-style / MAME cab hybrid *PICS*
« Reply #1 on: April 25, 2013, 11:05:49 am »
some nice work there mate. What wood is that?..

i64X

  • Trade Count: (0)
  • Full Member
  • ***
  • Offline Offline
  • Posts: 39
  • Last login:April 04, 2022, 09:14:58 am
  • newb
    • i64X.com
Re: Supergun-style / MAME cab hybrid *PICS*
« Reply #2 on: April 25, 2013, 11:08:50 am »
some nice work there mate. What wood is that?..

Solid red oak. Top is 2.5' long 1x12, bottom is 1x10, and sides are either 1x8 or 1x6 (don't remember).

sabreerbasAlpha

  • Trade Count: (0)
  • Full Member
  • ***
  • Offline Offline
  • Posts: 253
  • Last login:February 13, 2017, 07:28:29 pm
  • Remember those big 10ps?
Re: Supergun-style / MAME cab hybrid *PICS*
« Reply #3 on: April 25, 2013, 11:13:48 am »
some nice work there mate. What wood is that?..

Solid red oak. Top is 2.5' long 1x12, bottom is 1x10, and sides are either 1x8 or 1x6 (don't remember).

Nice. looking good so far..

retrostark

  • Trade Count: (0)
  • Full Member
  • ***
  • Offline Offline
  • Posts: 98
  • Last login:February 06, 2017, 03:48:51 pm
  • Indie Dev/Custom Arcade Cabinet Hobbyist
    • RetroStarkCustomCabs.com
Re: Supergun-style / MAME cab hybrid *PICS*
« Reply #4 on: April 25, 2013, 12:43:09 pm »
can't wait to see what you are planning. great work. looks sleek!
Indie Dev/Custom Arcade Cabinet Hobbyist

i64X

  • Trade Count: (0)
  • Full Member
  • ***
  • Offline Offline
  • Posts: 39
  • Last login:April 04, 2022, 09:14:58 am
  • newb
    • i64X.com
Re: Supergun-style / MAME cab hybrid *PICS*
« Reply #5 on: April 25, 2013, 12:52:37 pm »
Thanks dudes.  :cheers:

i64X

  • Trade Count: (0)
  • Full Member
  • ***
  • Offline Offline
  • Posts: 39
  • Last login:April 04, 2022, 09:14:58 am
  • newb
    • i64X.com
Re: Supergun-style / MAME cab hybrid *PICS*
« Reply #6 on: April 26, 2013, 10:11:29 am »
Got the varnish on last night. It should be dry by the end of the day today so I can mate the bottom and the CP and start putting buttons and stuff in. :)


Mr Wilson

  • Trade Count: (0)
  • Full Member
  • ***
  • Offline Offline
  • Posts: 182
  • Last login:August 14, 2018, 01:24:44 pm
  • it never ends!!!!
Re: Supergun-style / MAME cab hybrid *PICS*
« Reply #7 on: April 26, 2013, 02:45:59 pm »
nice work  :applaud:

sabreerbasAlpha

  • Trade Count: (0)
  • Full Member
  • ***
  • Offline Offline
  • Posts: 253
  • Last login:February 13, 2017, 07:28:29 pm
  • Remember those big 10ps?
Re: Supergun-style / MAME cab hybrid *PICS*
« Reply #8 on: April 26, 2013, 06:44:08 pm »
That's going to look so sexy when you rip off that protective cover on that Plexi. It will look sweet against that Oak. Very nice mate..

Work faster and finish it.. :applaud:

i64X

  • Trade Count: (0)
  • Full Member
  • ***
  • Offline Offline
  • Posts: 39
  • Last login:April 04, 2022, 09:14:58 am
  • newb
    • i64X.com
Re: Supergun-style / MAME cab hybrid *PICS*
« Reply #9 on: April 27, 2013, 09:45:19 am »
Finished the outside. Some of the internals are coming this week. I was hoping to have it done and working this weekend, but no such luck.

Anyway, on to the rest of the build.

I added some felt feet so as not to scratch any surface this might be placed on. Also added little decorative corners to finish off the bottom of the cab.


Light-up LED buttons on the top for "Insert Coin," "Power" and "Exit."


All the buttons are in, t-molding not on yet.


Quick shot of the bottom of the CP. I've got one bolt that's 1/2" longer than the rest that I need to cut down. The store didn't have enough chrome topped carriage bolts in 1.5", so I had to get a 2" for one. Gah.


Added handles so the unit can be easily carried without picking it up from the top. T-molding is also now on. Sits flush with the plexi on top. Looks SO pro. :-D


Clasps on the front help keep it closed.


The finished unit. Lookin SO good. :)


emphatic

  • Trade Count: (0)
  • Full Member
  • ***
  • Offline Offline
  • Posts: 2017
  • Last login:Today at 10:21:02 am
  • -"Suck it, Donny!" -"No, YOU suck it.... more".
    • Emphatic's Video Game Collection
Re: Supergun-style / MAME cab hybrid *PICS*
« Reply #10 on: April 27, 2013, 11:08:00 am »
The artwork implementation is so good. :cheers: Your skill is great!  :blah:

i64X

  • Trade Count: (0)
  • Full Member
  • ***
  • Offline Offline
  • Posts: 39
  • Last login:April 04, 2022, 09:14:58 am
  • newb
    • i64X.com
Re: Supergun-style / MAME cab hybrid *PICS*
« Reply #11 on: April 28, 2013, 09:58:06 pm »
The artwork implementation is so good. :cheers: Your skill is great!  :blah:

Thanks man. Here's some more...

Some stuff from Parts Express came this weekend. I'm still waiting on the spade connectors from Amazon to finish wiring up the control panel to the IPAC2, but the HDMI and power stuff came in, so here that is...


Trebeck

  • Trade Count: (0)
  • Full Member
  • ***
  • Offline Offline
  • Posts: 418
  • Last login:April 19, 2025, 01:05:29 pm
  • "The Arcade" - Build #4
Re: Supergun-style / MAME cab hybrid *PICS*
« Reply #12 on: April 29, 2013, 12:11:04 am »
Great details, great work.  Well done!


i64X

  • Trade Count: (0)
  • Full Member
  • ***
  • Offline Offline
  • Posts: 39
  • Last login:April 04, 2022, 09:14:58 am
  • newb
    • i64X.com
Re: Supergun-style / MAME cab hybrid *PICS*
« Reply #13 on: April 30, 2013, 09:36:02 am »
Great details, great work.  Well done!

Thanks!  :cheers:

kahlid74

  • Trade Count: (+1)
  • Full Member
  • ***
  • Offline Offline
  • Posts: 1366
  • Last login:January 01, 2021, 12:42:56 pm
  • Gaming for a better future!
    • GamersAnon
Re: Supergun-style / MAME cab hybrid *FINISHED*
« Reply #14 on: April 30, 2013, 11:50:17 am »
Mmmmm love me some hardwood.  Nice craftsmanship and great execution however you've got a considerable issue I think needs addressing, air flow.  You've got electrical components generating heat inside that cavity with no way of escaping.  It's going to get dangerously hot in there.  Consider adding some fan vents/fans to get the air out/into the enclosure.

i64X

  • Trade Count: (0)
  • Full Member
  • ***
  • Offline Offline
  • Posts: 39
  • Last login:April 04, 2022, 09:14:58 am
  • newb
    • i64X.com
Re: Supergun-style / MAME cab hybrid *FINISHED*
« Reply #15 on: April 30, 2013, 01:15:22 pm »
Mmmmm love me some hardwood.  Nice craftsmanship and great execution however you've got a considerable issue I think needs addressing, air flow.  You've got electrical components generating heat inside that cavity with no way of escaping.  It's going to get dangerously hot in there.  Consider adding some fan vents/fans to get the air out/into the enclosure.

I thought about this. There's a 1/16th" gap all around the top of the unit. The power supply has a small fan in it, and the CPU has a low RPM fan on it (it's an AMD chip that is a lower power chip). I've seen some boards with the same AMD chip with no fan. I was hoping that the 1/16th" gap would be enough to let hot air escape via some sort of thermodynamics voodoo magic. I tested it out last night and was surprised - but after a couple hours of gaming in MAME popped the top and checked the temp inside the case and it wasn't at all bad.

I figured if worse came to worst, I would put a 40mm fan dead center in the back of the case with a gold grill on the outside of the case to keep it decorative. Luckily, at least with how my test went last night, I shouldn't need it. I'm giving this to my buddy in a couple weeks, so I'm going to test it until then to make sure that everything stays cool enough for it not to be an issue. We'll see.

The testing will be hard I can assure you... nothing as bad as "having" to test something like this for nights on end.  ;)