Next Up -
Tools:I actually cheated on this build. I have a lot of the cuts done already. But I can now post with the benefit of hindsight in some cases.
For my first build in 2003 I bought a cheap router (Mastercraft plunge router), a jigsaw, and a Ryobi table saw. The table saw was ridiculously difficult to muscle around entire sheets of MDF by myself while getting an even cut and not killing myself. I would recommend not doing it that way.
I also tried getting the cuts done at the place I bought the lumber from. That was also a hassle as the guy doing the cutting treated it like he was doing you a favour and they only claimed that they would be accurate to 1/8". Scratch that.
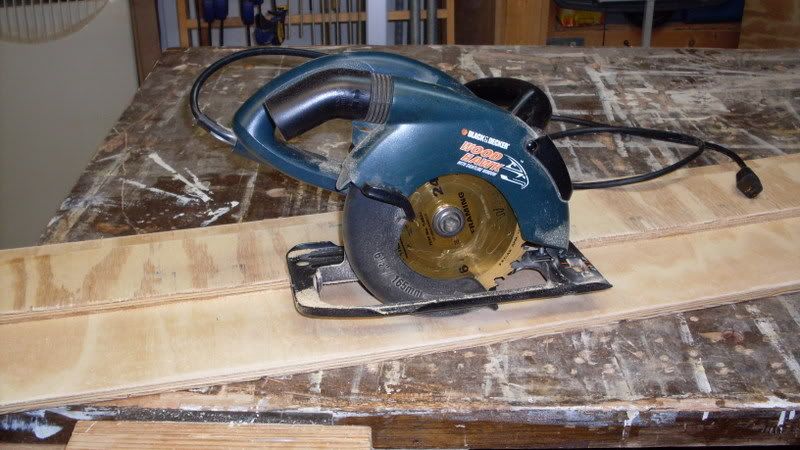
So for this build, I thought I would use my circular saw with a straight edge to cut one side of the cabinet and then use a pattern trace bit in my router to do the second side. The rest of the cuts are just squares and rectangles and are easier to do.
I found the straight edge with with the circular saw works well enough, but there's a lot of time spending on measuring. You have to measure the line you want to cut and then add on the dimension of the fence/table/guard/whatever it's called on the circular saw. i don't do this for a living and a lot of mistakes were made simply due to math and the addition of fractions.
To help me with that, I bought a drywall t square which has become one of my most used measuring tools.

I measure the line that I want to cut and then use the T square to make the line all the way across the MDF sheet. Then I place the circular saw blade exactly on the mark I just made. With the saw in place, I slide the T square right against he saw and clamp it down. It's instantly square, the saw is in the correct location, and I have a guiding pencil line to double check my line as I make the cut. Using the T square as a fence, I ran the saw down the MDF and got a pretty reasonable cut.
With that combo, the cuts are a lot less stressful and I started knocking out some pretty accurate stuff. Accurate for me that is. A lot of the cuts are still between 1/16th and 1/8th out. for some cuts, that's a big deal. Specifically the ones that need to square up with another edge. For others like the panel sides, it doesn't matter in the least as we're just going to trace it using the router. The router doesn't care if things are out of square, it just transfers the pattern to the other side. If the side you're tracing looks good, the second side will look good. But garbage in, garbage out so take your time and get the first one right.
Part way through the build, my router blew apart. I did some reading to try to figure out what a good replacement would be and found out how dangerous these things are when not used correctly. And I was certainly not using it correctly. Check out this thread as a cautionary tale. The dude cut his finger off with a router in a split second. That's bonkers.
http://forum.arcadecontrols.com/index.php/topic,52708.0.htmlI ended up getting desperate and buying a Black and Decker router. Had it lose power and stutter its way along the boards. Not good. I can fix it with sanding , but still not ideal.
Returned it and got a Ridgid. Waaaaay better. More power and smoother cuts. But then I had a moment of weakness and bought a Dewalt router...because...it...fit...with...the ...Dewalt track saw that I also bought. Keep in mind that this was when I was pretty much done all of my cuts, so buying thousands of dollars of tools is certainly not required for your build. In fact, the only reason I mention it is for my next point about an awesome alternative to heading down that path.
Using a tracksaw was a dream. Even though I had finished most of my cuts, I used it on a few and there was so little measuring with such an EASY high quality result, that I immediately started daydreaming about my next cabinet. It requires no measuring, just lay the edge on your pencil line and cut. Easy. But that got me thinking that I could build a guide for my Circular saw to do almost the same thing. Or at least to keep the basic idea of "clamp it where you want to cut" which I found to be the biggest benefit.
Sure enough, lots of people have already figured this out and they call it a
sawboard. There's even a super convoluted, 27,00 post sticky about it in the woodworking section of this forum. For simplicity sake, I'll save you 90 minutes of reading and scratching your head and point you to this:
http://www.popularmechanics.com/home/tools/reviews/a3602/4283497/Picture of a sawboard is here (not mine):
For newbies like me, I absolutely positively 100% recommend you build one of these. It makes everything so simple and takes about 20 minutes to put together. If you are one of the guys in the circular saw only club, and are reading this saying "That doesn't seem like it would help" , stop and look at it some more. You are missing something. It's awesome and it will make your circular saw cutting better and faster. No, it's not the wooden equivalent of an aluminum straight edge like you are thinking. It's the home made equivalent of a $650 track saw.
Also, if something about it doesn't make sense, just take a stab at building a half assed one. In 20 minutes, it will make sense and then you'll be able to build a proper one based on the lengths that you need, your clamp sizes, and circular saw. All that you've lost is a little bit of time and some scrap lumber before getting something awesome that will help you every step of the way.
To paraphrase my version of the instructions:
1) Cut a long 3/4" MDF base 4 or 5 inches wider than the base of your circular saw - The length of this board will be the maximum length that you can cut in one pass, so 8' wouldn't be out of line.
2) Cut another long piece of MDF the same length as the base but it only needs to be 2 or 3 inches wide. The only thing to note here is to make sure there is one long edge that has never been cut before. As in, it's the same as when you brought it home from the store. That's because this will be your straight edge that you will run your saw against, so one edge needs to be as straight as possible. The other edge...we do not care how straight it is in the slightest.
3) Screw/glue the guide piece into the base piece with the worst edge of your guide lined up with one of the edges of your base.
4) Put your circular saw against the wood fence (on the nice straight edge I mentioned above) and run a cut all the way down. This cuts the base to the exact dimension of your saw and blade. Zero clearance.
5) Ignore any instructions or videos that have you stressing about measuring the perfect dimension and squareness of the base and fence. Your first cut takes care of all of that and makes the base square to the fence. It's easy. I promise.
There are lots of enhancements or modifications that others will suggest (and some really good ideas in there) but for the purpose of this post, you have what you need, From this point on, all you have to do when you want to make a cut is to draw your line and then lay the edge of the sawboard on that line and cut away. You know exactly where the saw blade will be without any additional measuring or math.
You can easily get away with building your cabinet with a sawboard, circular saw, a router, and some clamps. Throw in a T square and a tape measure, and I think you've got what you need.
If you have any inside corners you need rounded, you might need a jigsaw, but I barely used mine - Just one inside corner on the panel sides. If you want to get really luxurious, a palm sander makes smoothing things out quick and easy, but you can do the same thing with sanding blocks and time.
So there we go. My complete A-Z of the tools I used and an explanation of the tools I think you need.


 Home
Home Help
Help Search
 Login
Login Register

 Send this topic
 Print
Print Topic: Cabinet Build for the Non-Cabinet Builder (Read 12215 times)


