Main Restorations Software Audio/Jukebox/MP3 Everything Else Buy/Sell/Trade
Project Announcements Monitor/Video GroovyMAME Merit/JVL Touchscreen Meet Up Retail Vendors
Driving & Racing Woodworking Software Support Forums Consoles Project Arcade Reviews
Automated Projects Artwork Frontend Support Forums Pinball Forum Discussion Old Boards
Raspberry Pi & Dev Board controls.dat Linux Miscellaneous Arcade Wiki Discussion Old Archives
Lightguns Arcade1Up Try the site in https mode Site News

Unread posts | New Replies | Recent posts | Rules | Chatroom | Wiki | File Repository | RSS | Submit news


Author Topic: Stargate Mini project  (Read 10415 times)

0 Members and 1 Guest are viewing this topic.

taylormadelv

  • Trade Count: (+1)
  • Full Member
  • ***
  • Offline Offline
  • Posts: 377
  • Last login:February 18, 2019, 05:46:59 pm
Stargate Mini project
« on: September 03, 2011, 01:51:12 pm »
This is borderline a "restoration" and a "project". I bought a Williams mini cabinet about a month or so ago. It is a Bubbles mini but it was missing the control panel and a panel under the marquee. Some nice wood damage along the bottom and sides and of course, no original boards.
So this is my chance to build a Stargate mini!!!!
I will post more photos but THIS is what I have started with:
I have gotten help from Mlenardon from coinopspace and klov with artwork. He is the reason I am posting this, as he asked me to post progress, I will. He sent me a CPO scan, a marquee scan and a bezel scan. I actually found an NOS Stargate Mini marquee and bought it. Now I have to work on a custom bezel.
I am having custom wood cut for this. One panel for the CP, with a mortise cut for a Nintendo 2 way joystick (you can't find the original Stargate mini joystick) and the under marquee panel with a Nintendo style speaker grille routered out. Much, much more to come...

taylormadelv

  • Trade Count: (+1)
  • Full Member
  • ***
  • Offline Offline
  • Posts: 377
  • Last login:February 18, 2019, 05:46:59 pm
Re: Stargate Mini project
« Reply #1 on: September 04, 2011, 10:30:28 am »


So this is what I started with. No control panel, no marquee and the panel under the marquee with the Nintendo style speaker grille cutout removed.
There was some wood flaking at the bottom, as the leg levelers had been removed and the cabinet was being slid around directly on the wood, which is always bad. I put on 2" casters to raise her off the floor and make her easy to move around.
I love Emlers Wood Filler, not toxic, easy to use, cleans up with water. I breathe enough toxic stuff from the paint!
Here she is in the cue for bondo work in my overcrowded garage! The Nintendo & Midway cabinets are conversions I am working on for a client, they are not mine.


taylormadelv

  • Trade Count: (+1)
  • Full Member
  • ***
  • Offline Offline
  • Posts: 377
  • Last login:February 18, 2019, 05:46:59 pm
Re: Stargate Mini project
« Reply #2 on: September 04, 2011, 10:43:50 am »
And look what I found! An NOS Stargate Mini marquee!!! Still has the proctective layer of paper on the back!


Here's a preview of the under marquee panel that Jeff412 over at klov is cuttong for me:

Here's a few shots of savit4l8r's Stargate mini and the only photo of a Bubbles mini I have ever found:

And a recent screen pic of my Stargate High score I just got on thursday:


The greatest game ever created IMO: look at this beautiful, grainy shot of a real G07 monitor working perfectly with Stagate!

Rick

  • Trade Count: (+1)
  • Full Member
  • ***
  • Offline Offline
  • Posts: 2787
  • Last login:May 19, 2025, 11:21:11 am
  • Bartop, Cocktail and Pinball Arcade Cabinets
    • Gameroom Designs Canada
Re: Stargate Mini project
« Reply #3 on: September 04, 2011, 09:47:54 pm »

Nice.  Somebody else around here owns a Carvewright.  LOVE my machine!  (Hope he's not charging you too much!)

taylormadelv

  • Trade Count: (+1)
  • Full Member
  • ***
  • Offline Offline
  • Posts: 377
  • Last login:February 18, 2019, 05:46:59 pm
Re: Stargate Mini project
« Reply #4 on: September 24, 2011, 12:52:34 pm »

The under marquee panel cut by Jeff412 over at KLOV. Nice work and it shipped perfecly!


The control panel cut by Jeff and the buttons holes drilled by yours truley.

Control panel primed with Bullseye 321, this is awesome stuff!

Bubbles start buttons bondo, first round of bondo.

Start priming the sides and some of the front. The bottom two carriage bolts on the Williams mini are inaccesable without taking wood apart. So instead of tearing up wood or cutting the bolts off, I decided to leave the bottom coin door on the cabinet. I never do things this way, as you can see that the top coin door has been renoved and has been refinished to be installed much later on.

taylormadelv

  • Trade Count: (+1)
  • Full Member
  • ***
  • Offline Offline
  • Posts: 377
  • Last login:February 18, 2019, 05:46:59 pm
Re: Stargate Mini project
« Reply #5 on: September 24, 2011, 01:05:04 pm »


Here's the under marquee panel with an original 6" Williams speaker from a Duramold and the real marquee light strip from the Bubbles, so even though the wood is new, the working parts are real, original Williams parts!

The panel primed and painted with Rustoleum high gloss black professional. I will tell you that the "professional" versions of Rustoleum spray far superior to the "regular" cans. The pro versions do not drip, spray in any direction and go on super duper smooth. I can't find a Hammertone black in the professional cans yet though.
I actually tried good ole trusty "Satin Black" and I did not like the finish, Stargate cabinets have a nice sheen to them, kinda a semi high gloss. When I work on basket case Williams cabs, I always reach for satin black but this was a special case and I was able to get the cabinet really smooth and take my time. The high gloss is a bit "glossier" than original but I like the finish and I am going glossy on this.


taylormadelv

  • Trade Count: (+1)
  • Full Member
  • ***
  • Offline Offline
  • Posts: 377
  • Last login:February 18, 2019, 05:46:59 pm
Re: Stargate Mini project
« Reply #6 on: September 24, 2011, 01:17:01 pm »
I went maybe 4 passes of primer/bondo(woodfiller)/sand before I got the front acceptable, it will never be perfect, especially with high gloss black paint but it will work.
Then it was time to start painting the red base on the sides. The only color code I could find was "Ralph Lauren Duke Red" from Home Depot. They do not carry this brand anymore but they can go into their computer and match almost any brand of paint, so I had them mix a batch of semi gloss, which you see here. I actually want this glossier and I will be buying another can of this but in high gloss.


CPO from arcadeoverlays. I am very happy with this CPO material, the best non-NOS CPO I have ever used. Really close to the old school polycabonate. A few hours later and we have 8 button holes and the 2 way joystick opening cut out!

I have no ability to cut button holes like in an original Williams cabinet but I am very particular about using real, leaf switch buttons. Stargate should never be played with micoswitch buttons, it just never feels right. I love translucent leafs and I have used some old leaf switch holders made for plywood. The buttons cannot be held in with pal nuts anymore but since this will be in my home and not a real arcade, I'm not worried about the buttons going missing or falling out.Stay tuned!!!!


Yvan256

  • Trade Count: (0)
  • Full Member
  • ***
  • Offline Offline
  • Posts: 1039
  • Last login:June 20, 2017, 08:35:41 am
    • Yvan256
Re: Stargate Mini project
« Reply #7 on: September 24, 2011, 06:39:31 pm »
Very nice work so far. I've never seen a Stargate mini in person. What are the dimensions?

taylormadelv

  • Trade Count: (+1)
  • Full Member
  • ***
  • Offline Offline
  • Posts: 377
  • Last login:February 18, 2019, 05:46:59 pm
Re: Stargate Mini project
« Reply #8 on: October 15, 2011, 12:28:19 pm »
Williams mini cabinets are the thinnest I have ever worked on. The cab is only 18.5" wide, not certain about height and depth but you can see she's pretty small.
Finally cleared the garage and have more room and time to work on the Stargate. This project will be a bit different than many here for a few reasons. I do not have the talents and abilities of some here with working with raw wood, I prefer to work on old cabinets and cut as little wood as is neccessary.
Another thing that will make this project a bit different than many here is that this will not be emulation. I was not certain how I was going to fire Stargate up, I was planning on mame but I made a few deals in the last few weeks for some critical Startgate parts...


I just could not believe this when I saw it in a sales post on klov. So I spent $40 on having a new, fresh control panel cut and another $35 on a new CPO that I will not need....

taylormadelv

  • Trade Count: (+1)
  • Full Member
  • ***
  • Offline Offline
  • Posts: 377
  • Last login:February 18, 2019, 05:46:59 pm
Re: Stargate Mini project
« Reply #9 on: October 15, 2011, 12:40:32 pm »


This is one of the only legal aftermarket versions of Defender/Defender II(Stargate) I have ever seen. This is a completely legitimate and legal version of these Williams games on a tiny Jamma board. The only 2 games on this board are Defender/Defender II but it has the capacity to load Joust and Robotron for another game that Team Play made in the early 2000's. The cabinet this came from is a full sized 25" monitor that will become my trackball mame in the near future. The company "Team Play" made a few retro-arcade games a few years ago, Defender/Defender II was one of the 3 or 4 they made and sold. I have configured the board to load into Defender II directly, so I do not have to use the "select game" button, I just don't care about Defender. A neat feature of this board is that the games have a true free play mode, press player 1 start and I go into a 1 credit/3 ship game of Stargate! No coins, no need to open the coin door!


taylormadelv

  • Trade Count: (+1)
  • Full Member
  • ***
  • Offline Offline
  • Posts: 377
  • Last login:February 18, 2019, 05:46:59 pm
Re: Stargate Mini project
« Reply #10 on: October 15, 2011, 12:55:23 pm »
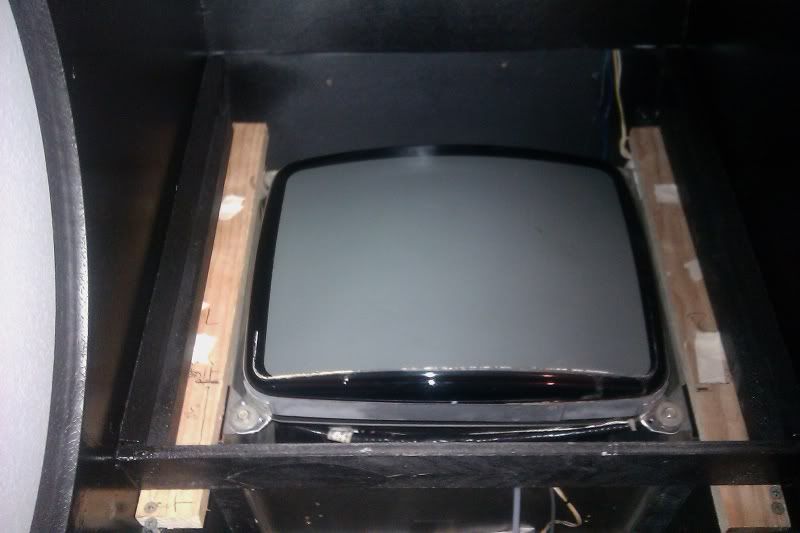
So the 15" CGA monitor I will be using is from this Taito "Gameroom Classics" Bartop cabinet, sans PCB, of course. This monitor is basically brand new and displayed Stargate perfectly. Since it was crammed in that tiny bartop, the monitor has no frame and was extremely difficult to pry out of that tiny cabinet. I did not want to disconnect some of the tiny, tiny wires that connect the jamma harness and the monitor, so I decided to work around the harness that came in the bartop. A bit messy and not the "correct" way of doing things but this will get the job done. I used a monitor frame from a G07-FB0 that I broke the yoke on and it fits perfectly! Then I had to figure out a way to mount the monitor in the cabinet and I really do not want to cut a big piece of plywood and cut a hole, so I took a shortcut. I carefully measured the slots on the inside of the cabinet where the wood is suppposed to slide in, cut my wood and mounted it to the monitor frame. As you can see, the harness is still there!
The contrast ratio of a real, CGA arcade monitor is much higher than VGA CRT's I have encountered. Stargate has some really cool strobing effects in the attract mode, mame plays Stargate perfectly but does not DISPLAY prefectly...years of experinece on this one...


taylormadelv

  • Trade Count: (+1)
  • Full Member
  • ***
  • Offline Offline
  • Posts: 377
  • Last login:February 18, 2019, 05:46:59 pm
Re: Stargate Mini project
« Reply #11 on: October 15, 2011, 01:06:54 pm »
I take my time with bondo/paint, as you can see. It's worth going slow, just pays off in the end. The above pics attempt to show how glossy and shiny I got the cab to be just before I stencil it. I did at least 4 passes of bondo(woodfiller)/primer/paint on the front. Then I used semi gloss red and did not like the finish. So I bought a can of high gloss "Duke Red" and I really like the finish. I use foam rollers for a smoooooth finish. I let this latex paint dry for a few days to harden up before I use my stencils...


I have not taken pics yet but I wil be using translucent leaf switch buttons and I have ordered all my led's from www.nicemite.com. A very clever solution for lighting leaf switch buttons, which is extremely difficult. Since I am dealing with a tiny control panel, I really need these....
Stay tuned!

Yvan256

  • Trade Count: (0)
  • Full Member
  • ***
  • Offline Offline
  • Posts: 1039
  • Last login:June 20, 2017, 08:35:41 am
    • Yvan256
Re: Stargate Mini project
« Reply #12 on: October 15, 2011, 06:03:54 pm »
Williams mini cabinets are the thinnest I have ever worked on. The cab is only 18.5" wide, not certain about height and depth but you can see she's pretty small.

Would it be possible to get the other dimensions? If it's only 18.5" wide I'm wondering about height and depth!  :dizzy:

taylormadelv

  • Trade Count: (+1)
  • Full Member
  • ***
  • Offline Offline
  • Posts: 377
  • Last login:February 18, 2019, 05:46:59 pm
Re: Stargate Mini project
« Reply #13 on: October 15, 2011, 06:30:51 pm »
Would it be possible to get the other dimensions? If it's only 18.5" wide I'm wondering about height and depth!  :dizzy:

Just for you buddy! She's 61" tall from bottom to top of marquee. 56" from bottom to top of back of cabinet and 24" deep from control panel to back door.

taylormadelv

  • Trade Count: (+1)
  • Full Member
  • ***
  • Offline Offline
  • Posts: 377
  • Last login:February 18, 2019, 05:46:59 pm
Re: Stargate Mini project
« Reply #14 on: October 29, 2011, 09:37:28 am »
I must say that this particular little cabinet has been more work than any other cabinet I have ever worked on! Every little detail is always more work than expected on this one.
For instance, the T-Moulding on the Williams mini is very detailed and has curves in almost every spot in the the length of the t-moulding, making this a very detailed job. A full sized cab usually takes me about an hour, this took me 2 hours!
I am posting a few shots of the stencils as they went on. Again, very advanced stuff here. This was my first stencil job and I am glad I have done lots of side art installations before I tried this. Doing stencils is almost like doing painting/side art TIMES 4! !) Paint and sand 2) apply stencil(s) 3) paint stencil(s) 4) Remove stencil 5) repeat as neccessary! YIKES this is very, very detailed work. Do not be in any hurry when you attempt to do this. My results were not perfect and I learned a few things along the way but I like the way it came out.


taylormadelv

  • Trade Count: (+1)
  • Full Member
  • ***
  • Offline Offline
  • Posts: 377
  • Last login:February 18, 2019, 05:46:59 pm
Re: Stargate Mini project
« Reply #15 on: October 29, 2011, 09:44:53 am »


taylormadelv

  • Trade Count: (+1)
  • Full Member
  • ***
  • Offline Offline
  • Posts: 377
  • Last login:February 18, 2019, 05:46:59 pm
Re: Stargate Mini project
« Reply #16 on: October 29, 2011, 09:57:56 am »
This little project turned into more hours of wiring a cabinet and control panel than I have ever done before. This is almost embarrasing but when I add up all the time involved with just this tiny control panel, it comes out to about 10 hours of wiring altogether and I DO know how to wire a control panel but this one was just soooo much detailed work in a tiny, tiny area!
The nicemite led's worked perfect! They were crucial in getting all those led's into basically no area to install them. The Stargate mini control panel I bought had the artwork reverse printed onto plexi and this made the cp just a tiny bit thicker than normal. So the pal nuts just had no meat to grab onto the leaf switch buttons, so I was forced to tape the nicemites down and the pushbuttons themselves are held with friction, as they are super duper tight in the plexi. In fact, there is joint compound in the holes from where someone glued in the original buttons. This is about as much wiring I could get into one tiny area!


You can see how I mounted the PCB towards the front of the cabinet, works nicely, as the volume pot control is directly on the PCB itself.


The special two way joystick needed to be rebuilt, as it was very sloppy moving up. I salvaged a Midway joystick for leaf switch parts and rebuilt this bad boy. No sloppiness! I has to use two screws instead of bolts to hold the leafs, so I screwed into a piece of scrap wood to hold everything together.

taylormadelv

  • Trade Count: (+1)
  • Full Member
  • ***
  • Offline Offline
  • Posts: 377
  • Last login:February 18, 2019, 05:46:59 pm
Re: Stargate Mini project
« Reply #17 on: October 29, 2011, 10:12:09 am »
Here's how I mounted the monitor. A real, 13" CGA monitor, no VGA here!
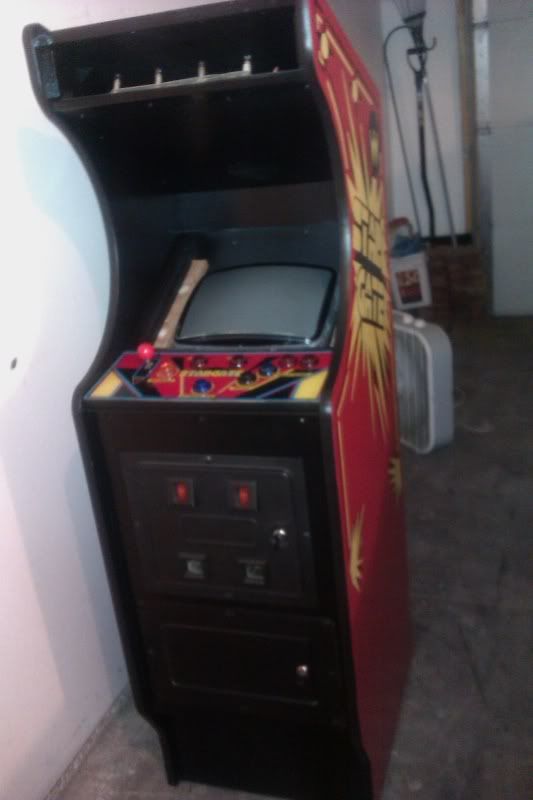
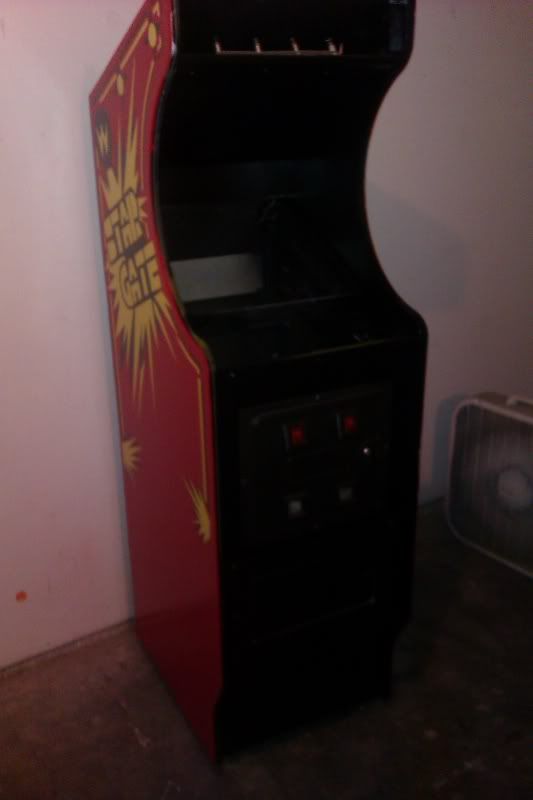
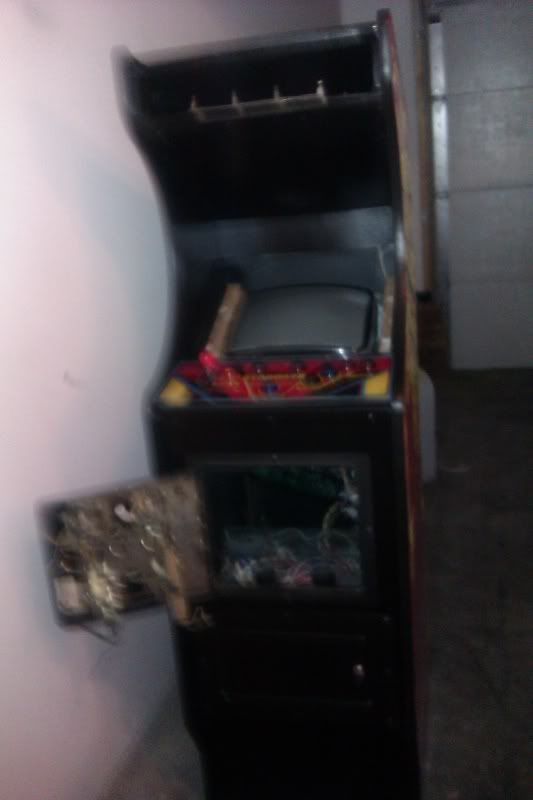
The coin door is missing the coin return flaps, that can be taken care of later (Lizardlick has these)
Again, I ran into way more work than I ever imagined with the marquee. I thought this part would be easy but since the marquee is an actual 28+ year old NOS marquee, it still had the protective backing paper on it. I soaked this for hours in soapy water but it took at least 45 minutes of very, very carefully scraping off the paper, piece by piece by hand, ACK!
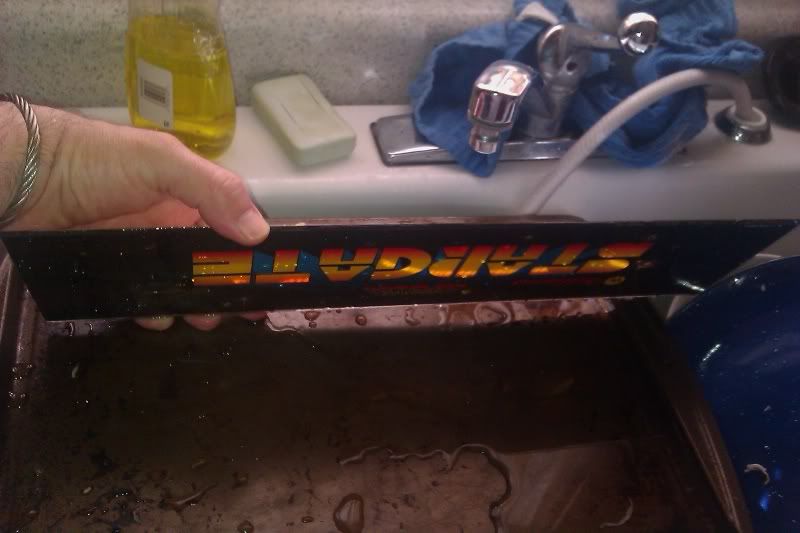
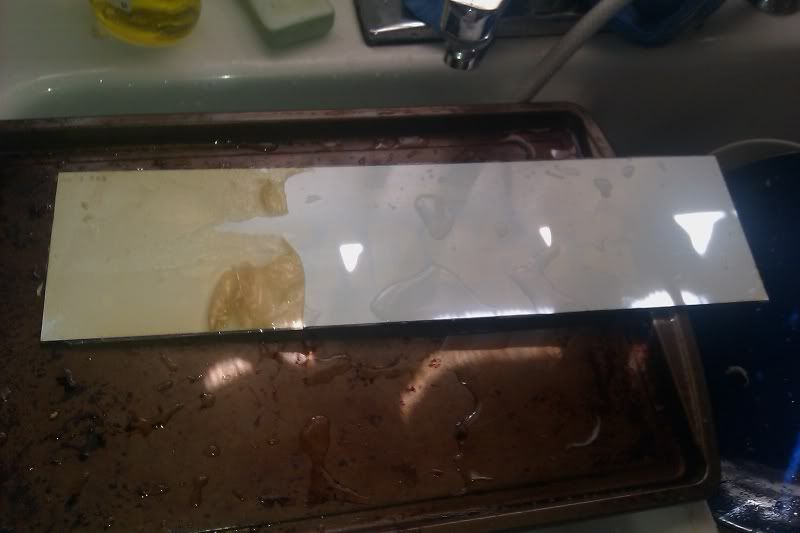
So after hours and hours of wiring and connecting and all the other stuff, I reach that critical moment where I hope everything is connected properly and won't blow up when I actually plug the game in for the first time. Posting progress here, just makes this even more of a highwire act, as if I fail, I fail in front of all the peeps reading this thread. I double, triple, checked, said a prayer, plugged her in and......
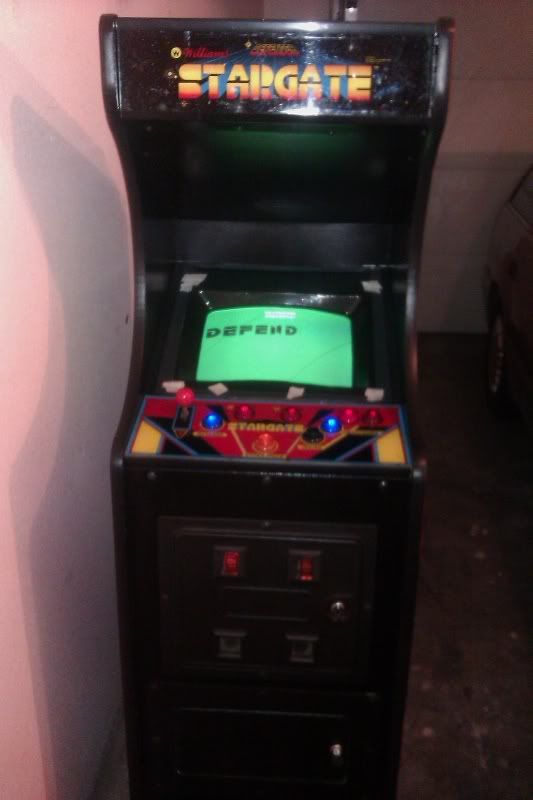
SHE WORKS!
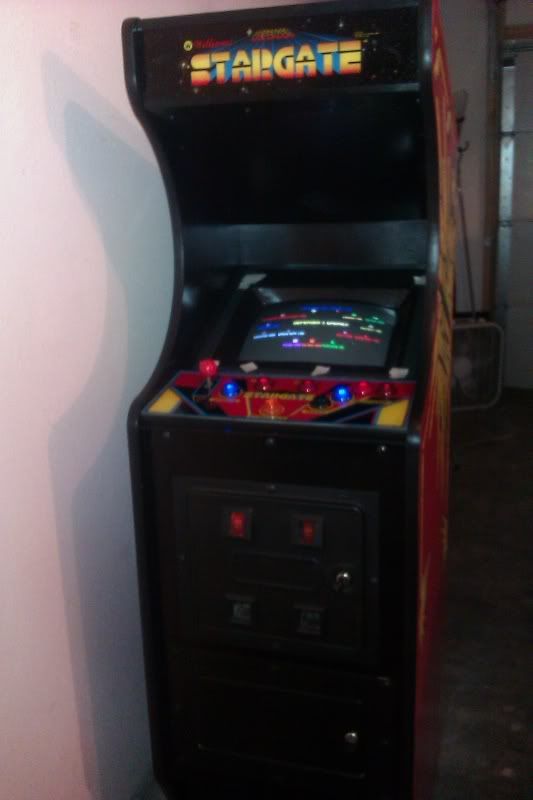

Nephasth

  • Guest
  • Trade Count: (0)
Re: Stargate Mini project
« Reply #18 on: October 29, 2011, 10:19:15 am »
Very nice! :applaud:

Is tape your final solution for your LEDs? I know the last thing you want to do is more work to your CP, but this seems like a good solution to your pal nut problem:


Recessing holes for your pal nuts would be ideal, but if you don't want to recess holes for the pal nuts, the screws seem like a more reliable mounting method for the LEDs than tape.

taylormadelv

  • Trade Count: (+1)
  • Full Member
  • ***
  • Offline Offline
  • Posts: 377
  • Last login:February 18, 2019, 05:46:59 pm
Re: Stargate Mini project
« Reply #19 on: October 29, 2011, 10:22:53 am »
She's not completely done but I get to post some very satisfying photos of her working here; I normally like my marquees off but the fact that the 6.3V bulbs are real dim in the marquee fits me perfectly, very happy with how the marquee is dim and doesn't light up the room it is in.


You can see the plastic bezel that I am using. It had a smooth, plastic finish, which I did not like and did not match the Williams bezel, so I painted it with Rustoleum Hammertone black and got a finish that is close to an original Williams bezel. I have used masking tape to secure the bezel until I cut a new piece of posterboard for the plastic bezel.
Also, as you can see, the Green translucent button is so dark that the led barely shines through it. Nicemite did not offer a dark green option, I really needed it...
The glass bezel and the bezel artwork will be last....Thanks for looking!
« Last Edit: October 29, 2011, 10:32:01 am by taylormadelv »

taylormadelv

  • Trade Count: (+1)
  • Full Member
  • ***
  • Offline Offline
  • Posts: 377
  • Last login:February 18, 2019, 05:46:59 pm
Re: Stargate Mini project
« Reply #20 on: October 29, 2011, 10:27:13 am »
Very nice! :applaud:

Is tape your final solution for your LEDs? I know the last thing you want to do is more work to your CP, but this seems like a good solution to your pal nut problem:


Recessing holes for your pal nuts would be ideal, but if you don't want to recess holes for the pal nuts, the screws seem like a more reliable mounting method for the LEDs than tape.

I will be looking into a solution like this. Remember that the CP is 28 year old, crumbly particle board and will fall apart instantly with any resitance. So drilling is out. I do not like using masking tape as a permanent solution. I like the screws solution, I will probably try this....
« Last Edit: October 29, 2011, 10:29:06 am by taylormadelv »

Yvan256

  • Trade Count: (0)
  • Full Member
  • ***
  • Offline Offline
  • Posts: 1039
  • Last login:June 20, 2017, 08:35:41 am
    • Yvan256
Re: Stargate Mini project
« Reply #21 on: October 29, 2011, 11:25:36 am »
Would it be possible to get the other dimensions? If it's only 18.5" wide I'm wondering about height and depth!  :dizzy:

Just for you buddy! She's 61" tall from bottom to top of marquee. 56" from bottom to top of back of cabinet and 24" deep from control panel to back door.

Thank you! I have a weird project where I'm limited in size and I'd like it to be at least as big as a mini stand-up.