Hi all,
Well, to make a long story short, I "re-acquired" my Total Carnage/Smash TV 2-in-1 machine. It was in decent shape, but the monitor was removed and I needed to re-do the control panel, so that the sticks are lined up properly. In the long run, I plan to make it a 3-in-1 with either Robotron (I need to purchase the PCB and modify harnesses obviously) or maybe a 4-in-1 with Karate champ (I already have the PCB for this one and again I will need to modify the harness to make it JAMMA).
For reference here's my old video of the arcade game in action with the 2-in-1 JAMMA switcher installed:
Here's a pic of the machine in it's previous state:

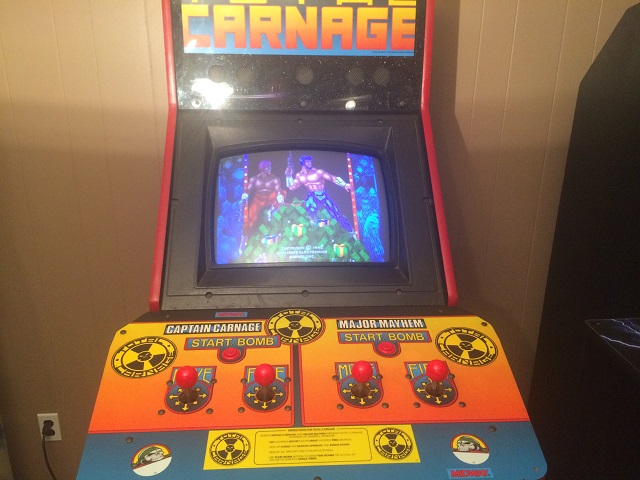
Update: Here's the completed pic with the new CP installed:
Now that I have the machine back, the CP was my main focus. I found a guy on the Mid Atlantic Pinball Arcade group who (by sheer luck) had grabbed a converted Total Carnage cab that was also a previous Gauntlet conversion like mine. The CP fit was an exact match. So naturally I expressed interest. We ended up working out a deal and he mailed the CP to me.

It was in rough shape to say the least: (before)

But with Magic Eraser it cleaned up fairly well: (after)

On the replacement CP, I noticed that the artwork was getting chewed up by the rotation of the player one firing joystick. Looking on the back of it, I discovered why: The hole that was being used was the "bigger" hole from the original joystick. Because of this, I decide to not use the plywood from the replacement CP. I used 3/4" MDF which should solve the problem once I cut the proper hole size.

Using the original CP's wood as a guide, I traced and roughly cut the MDF to size:


Then I flipped it over, clamped it down and went to town with a flush bit on my router:
(by the way, I found out the hard way that the bearing on the flush bit should be on the tip of the bit, not on the inside. I tried a bit with the bearing on the inside and the bearing keep "riding up" the bit and falling inside the t-molding groove. The 2nd bit with the bearing on the tip worked perfectly: lesson learned).

Just to give you an idea of how chewed up the t-molding groove was on the original panel:

Here it is after routing it. I did a test fit and the metal CP on top lines up great. Now I needed to route the edges for the t-molding:


Success!


Now time for the holes. I don't have many pics of the process, but I basically used a forstner 1-1/4" bit, lined it up with the hole on the CP and gave it a tap to mark where to drill on all of the holes. I then removed the metal CP and drilled away.

Here I'm lining up the hardware trying to match where they go based on the CP. The small pieces of wood are free Home Depot paint stirrers cut to size! They go along the inside of the cabinet when the CP rests on top to give it a snug fit. I'm gluing them in place and will finish up later once they dry.

More to come later!
Oh, and did I mention that I will probably be using Dominux 8-way joys in this update? I ordered blue ball tops with the intention to use it in another project but I will order red ball top replacements for this project.


DeLuSioNaL29


 Home
Home Help
Help Search
 Login
Login Register

 Send this topic
 Print
Print Topic: Total Carnage/Smash TV CP Makeover - COMPLETED (Read 12867 times)


