The idea of building a JukeBox came about from building my MAME cab - moving into my new house with no money to buy a pooltable to take up the space in the games room + too many spare computers laying about. So with plenty of free parts, a few months to spare (before the move) and wayyyyy too much over-confidence (ie "surely couldn't be that hard?") I set to work on building my nameless jukebox.
I was going to post the project as it progressed, however the only planning was the initial frame and, then with panic setting in on realizing I was running out of time, everything else was on the fly - which I learnt was where many of the
mistakes characteristics came into effect. I was planning to jam all the gear into an existing 1950's radiogram, but it wouldn't fit so i created my own. It started out as a wurlitzer but turned into an old stereogram look-a-like.
Its really a side job, nothing of the caliber of members of this forumn - but hey it's something you can all compare too and go "thats something I probably want to avoid"

Now keep in mind that the idea was not to build something amazing (as I am lacking both creative and woodworking skills) but build something with minimum $$$ in the minimum amount of time (had to be finished before the move) to my ability (really just get some hands on with power tools

). It would also give me some practice in preparation to build my MAME cab.
So a quick run down on the gear:
1. Screen - free from a friend of a friend who mentioned he could get me a supermarket touch screen ( I gave him an Atari 2600 for his troubles)
2. Amplifier + Subwoofer - Free from my parents who upgraded. (has remote too, comes in handy)
3. Speakers - Free from my G/F (however *apparently* this gives her 50% rights over it use, sneaky very sneaky)
4. Record Player - Free from an old 50's radiogram (I sooo wish i could of used the whole unit)
5. PC - Dual 1GHz 1GB server, cost me $5 from work.
6. Software - WinXP + AlbumPlayer (trial atm)
7. Wood - Frame was Pine from Bunnings ($2 per length) and the front and back are old left over Jarrah Floorboards.
8. Tools - Inherited every power tool (soldering iron, 3 x sanders, battery drill, grinder, electric drill etc etc) under the sun thanks to my G/F's parents
Ok some photos:
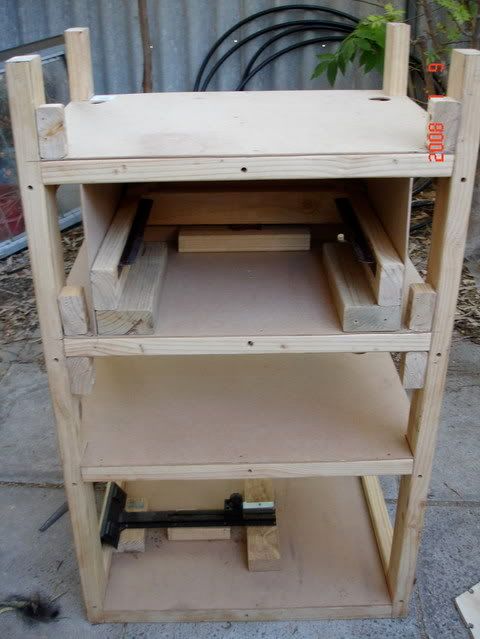
The basic frame with the PCB holder + the alcove + sliding mount for the record player.
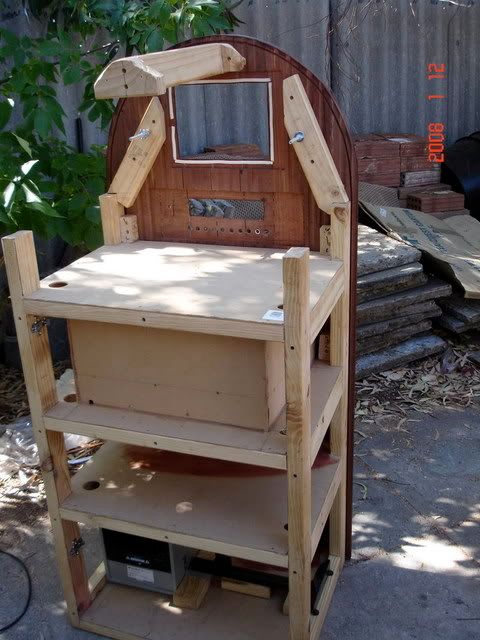
Front face fitted (shot taken from behind)

Front face again from the front.
JB up on a set of work-horses to fit out the PC board, subwoofer and wiring (touchscreen mounted)
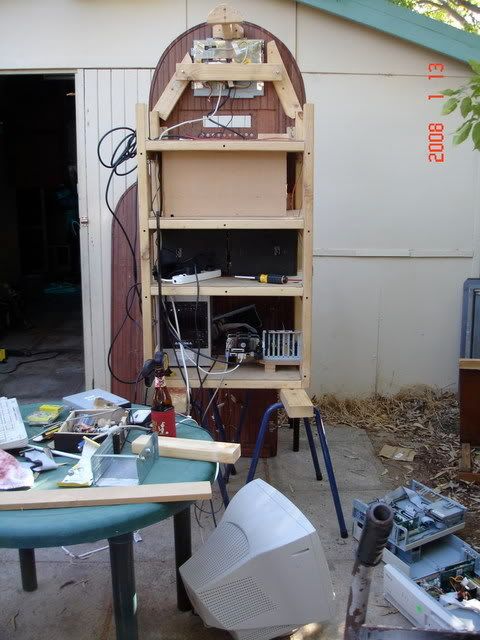
In the new house next to the *still-to-be-completed* arcade machine. The JB is working, but not completed.
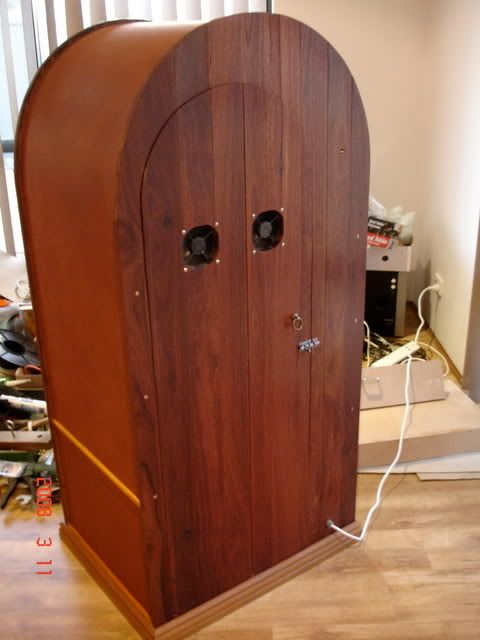
View from behind with the JB comlpeted. Two fans from the old server fitted to the door, latch and deadbolt as well. Also a recessed switch to turn everything on in the top RH corner (yet to have button cover fitted).
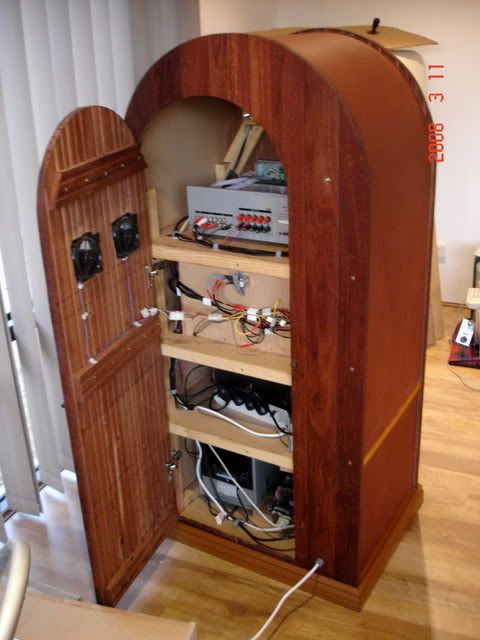
Back door open.
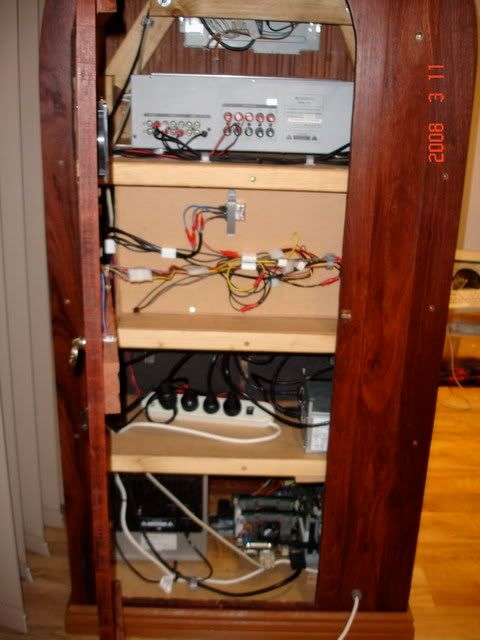
Close up of the guts of it.
- Lower shelf = subwoofer to the left with PC board on the right.
- next shelf up = Speaker boxes with power board
- next shelf up = record player alcove + relay to turn on everything.
- top shelf = amplifier + touchscreen.
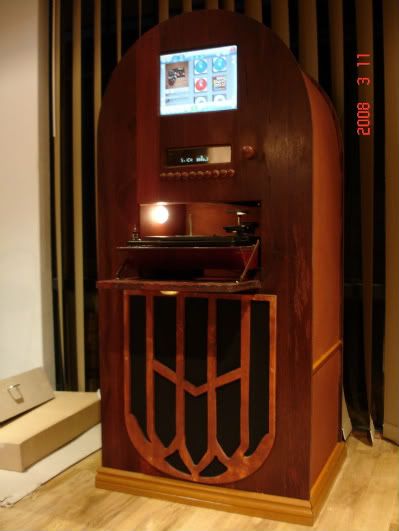
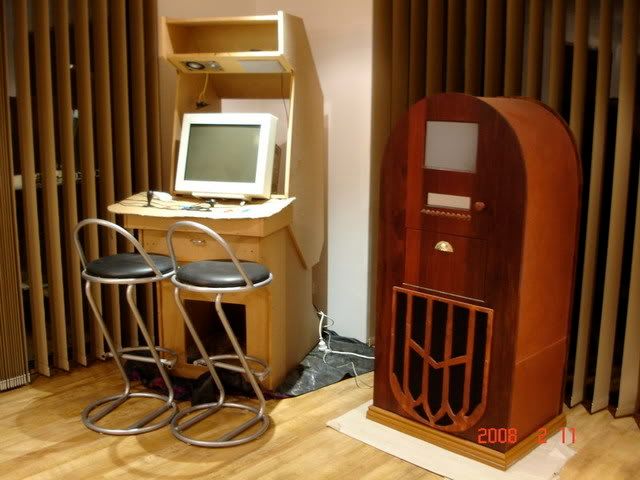
Final product showing record player door open (with light actuated by server 'case open' microswitch)
Most costly part = router bit for cutting trench $26 (for the sidebaord).
Hardest part= designing push button actuator action for the amplifier buttons (fire + grinder + glue + plastic cut outs + piping-in-piping + grease = success)
Most fun = First time using a router and circular saw (as the images will prove the not-so-straight cuts)
I learnt a lot and hopefully gained some skills to help me with the building of my cab.
Still left to do is to add something to the top as it seems missing *bulky*, possibly add picture frames around the amp and touchscreen window to make the edges *even*, and adjust the speaker grill I made/cut/hacked (its a bit twisted off RH down).
Oh, and thanks to Welshmark as his idea kicked started mine
http://forum.arcadecontrols.com/index.php?topic=67867.0.


 Home
Home Help
Help Search
 Login
Login Register

 Send this topic
 Print
Print Topic: Something Different (Newbie JukeBox) (Read 7925 times)


