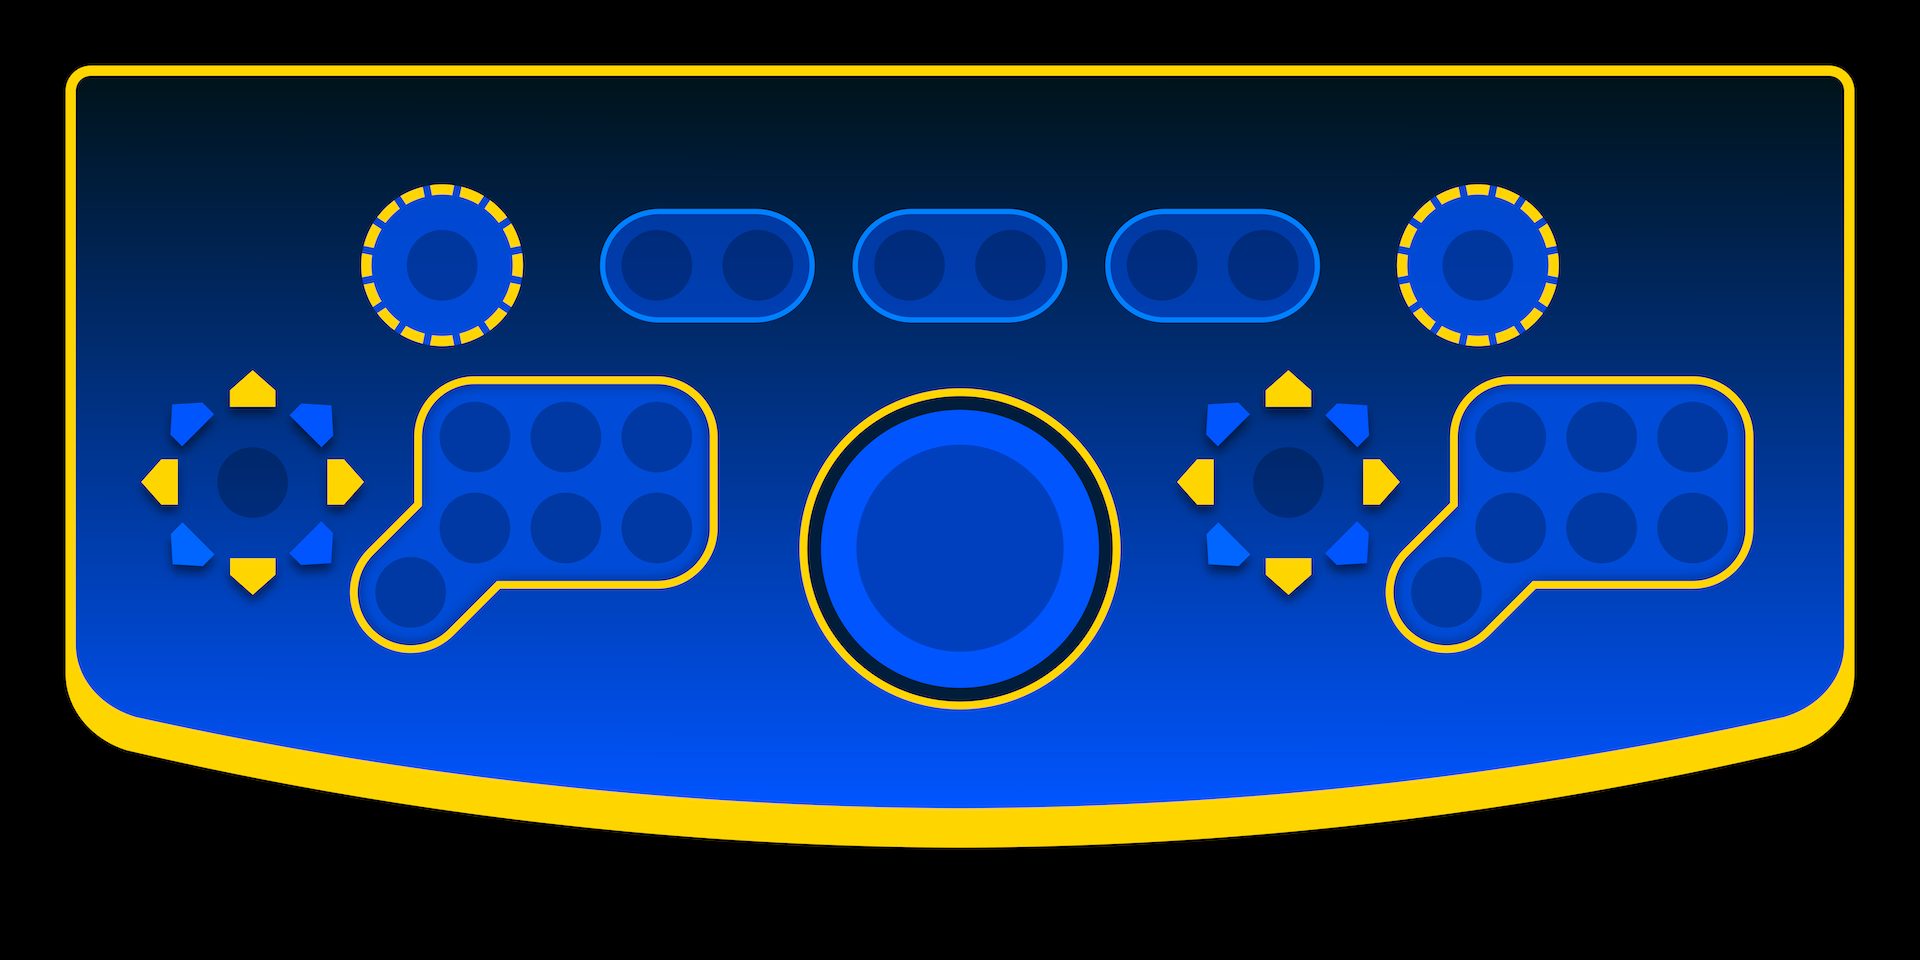
Control Panel GraphicsFor this style of control panel, the graphics are sandwiched between the panel surface and a sheet of clear acrylic. Everything is held in place by the controls and the T-molding so no additional fasteners are required.
Continuing with the blue / yellow / black theme, I used
Inkscape to create a fairly simple, high contrast design that highlights each control, as well as the grouping of controls for player 1 and 2. Inkscape also has tools for measuring the size and distance between shapes, making it easy to work to a 1:1 scale. I started this process earlier in the build and went through several iterations before settling on a final design.
Another consideration is choosing specific colours. Colours won't print exactly as they appear on a monitor, so it can be a good idea to do test prints with a few different variations to find which works best. Graphics software may also allow you to choose print-safe colours.
 Material and Printing
When creating the graphics, all the elements are vector based layers, which means they can be resized and rearranged without losing detail. For printing, everything needs to converted to a high resolution bitmap image of at least 300dpi. I used 600dpi for better resolution - you can go higher, but there are diminishing returns. The image should be supplied to the printer in an uncompressed, or lossless format such as PNG.
I originally though it might be possible to print the graphics on poster paper and rely on the acrylic to keep it flat, but it's not very durable, and is difficult to align without adhesive backing. Vinyl seems to be the best option. I chose to use a temporary adhesive, rather than permanent as it allows for mistakes to be corrected, and for the graphics to be more easily swapped out in the future.
Another thing to consider is gloss vs matte finish. Gloss finish results in more vibrant colours, and this is what I originally chose, but I found that when the acrylic is pressed tightly against the gloss surface, the thin-film interference patterns become very noticeable, especially when illuminated. I thought about trying to separate the surfaces using thin shims around the buttons, but eventually decided it was easier to sacrifice a bit of contrast and use a matte finish instead.
Vinyl is used everywhere for signage, so most print shops will be able to do this type of job.
Applying the VinylThe first step is to align the graphics with the holes in the control panel. On my printed graphics, I included circles for where the holes will need to be cut, so I started by cutting 4 of these - two on each side, and aligning these holes with the matching holes in the panel. Before removing any adhesive backing, I clamped one end of the vinyl to the panel using a left over piece of clear acrylic. This ensures the vinyl stays aligned, while keeping the holes visible.
With the vinyl secured, I then removed the adhesive from the unclamped end, up until about one third of the width. Then, with a little tension to keep the vinyl flat, applied it to the surface of the panel, working from the inside out to keep it smooth and remove air bubbles. The temporary adhesive makes this simpler as it's relatively easy to peel of the vinyl and redo a section if it's not quite right.
Now that one end is attached to the panel with adhesive, the other end can be unclamped and the rest of the backing can be removed. For this stage, it's a good idea to remove a small amount of backing and apply the vinyl a section at a time.
Once the vinyl has been applied, it can be trimmed to size with a craft knife or other similarly sharp blade. It's important to ensure that the is no overlap around the edge as this will cause the vinyl to kink when the T-molding is applied. The rest of the holes can now be cut the same way, running the blade around the inside of the holes.


 Acrylic, T-molding and Controls
The acrylic can now be placed over the vinyl and a few buttons installed to keep it in place while the T-molding is applied. As with the screen glass, one of the most challenging aspects of assembling the control panel is ensuring there is no dust or debris between the vinyl and the acrylic. Outside of a NASA clean room, there is really no good solution for this, but I did eventually end up with a result I was happy with.
The process of applying the T-molding is described in an earlier post - if everything was measured correctly, the top of the T-molding should be perfectly flush with the surface of the acrylic. With the acrylic and T-molding in place, the controls can now be installed, ready for wiring.


 Home
Home Help
Help Search
 Login
Login Register

 Recent Posts


