Main Restorations Software Audio/Jukebox/MP3 Everything Else Buy/Sell/Trade
Project Announcements Monitor/Video GroovyMAME Merit/JVL Touchscreen Meet Up Retail Vendors
Driving & Racing Woodworking Software Support Forums Consoles Project Arcade Reviews
Automated Projects Artwork Frontend Support Forums Pinball Forum Discussion Old Boards
Raspberry Pi & Dev Board controls.dat Linux Miscellaneous Arcade Wiki Discussion Old Archives
Lightguns Arcade1Up Try the site in https mode Site News

Unread posts | New Replies | Recent posts | Rules | Chatroom | Wiki | File Repository | RSS | Submit news


Author Topic: (update 6-20) SFII cab done  (Read 7493 times)

0 Members and 1 Guest are viewing this topic.

BurgerKingDiamond

  • Trade Count: (+4)
  • Full Member
  • ***
  • Offline Offline
  • Posts: 690
  • Last login:July 01, 2021, 11:12:14 am
(update 6-20) SFII cab done
« on: April 10, 2012, 10:24:18 am »
I'm getting a new cab!! It's a Blast City.

Like this in case you're not familar


I don't know the exact condition, so it may need some refurbishing. This project stems from the need to make some room for it. Here's current setup


The candy will stay, and I'll keep it and the Blast City tated. I'm going to use the wood from the Raiden (MAME) cab on the left to build a 4 slot NEO GEO cab which I'm going to try and make as similar to this as possible.


I'm going to convert the Raiden II cab into a Street Fighter II cab for a friend.  First I'll convert the Raiden II cab so I can get it out of my place and get some room. It's going to get a repro bezel, sideart, control panel and marquee all from Gameongrafx, and I'll use all the buttons and computer from the MAME cab.

The NEO GEO cab will use the 27" Multi-sync Wells Gardner monitor pulled from the Raiden II cab, as well as the JAMMA harness, psu etc.. I just won a 4 slot NEO GEO mobo on ebay for a good price, but the audio is busted so that will require some troubleshooting.

I'll have some spare parts that I'll be trying to get rid of which I'll make a seperate thread for. This will include a 27" Sony Trinitron CRT with s-video (great for a MAME cab), blue t-molding (I don't know how well used t-molding works but I'll let somebody have it for free if they want it), a coin door w/mechs and LEDs, an ATX psu and maybe more.

Stay tuned.
« Last Edit: June 21, 2012, 02:08:57 pm by BurgerKingDiamond »
-Welcome to the Fantasy Zone.

HaRuMaN

  • Supreme Solder King
  • Global Moderator
  • Trade Count: (+45)
  • Full Member
  • *****
  • Offline Offline
  • Posts: 10324
  • Last login:Yesterday at 03:35:02 pm
  • boom
    • Arcade Madness
Re: 2x cab conversion project to begin soon
« Reply #1 on: April 10, 2012, 10:45:35 am »
 :badmood:

BurgerKingDiamond

  • Trade Count: (+4)
  • Full Member
  • ***
  • Offline Offline
  • Posts: 690
  • Last login:July 01, 2021, 11:12:14 am
Re: 2x cab conversion project to begin soon
« Reply #2 on: April 10, 2012, 11:17:12 am »
 :burgerking:
-Welcome to the Fantasy Zone.

HaRuMaN

  • Supreme Solder King
  • Global Moderator
  • Trade Count: (+45)
  • Full Member
  • *****
  • Offline Offline
  • Posts: 10324
  • Last login:Yesterday at 03:35:02 pm
  • boom
    • Arcade Madness
Re: 2x cab conversion project to begin soon
« Reply #3 on: April 10, 2012, 11:18:13 am »
I need more candy... specifically another Capcom Impress so I can have one horiz and one vert...

emphatic

  • Trade Count: (0)
  • Full Member
  • ***
  • Offline Offline
  • Posts: 2010
  • Last login:Today at 08:07:08 am
  • -"Suck it, Donny!" -"No, YOU suck it.... more".
    • Emphatic's Video Game Collection
Re: 2x cab conversion project to begin soon
« Reply #4 on: April 10, 2012, 12:44:41 pm »
Looking forward to seeing this!  :cheers:

BurgerKingDiamond

  • Trade Count: (+4)
  • Full Member
  • ***
  • Offline Offline
  • Posts: 690
  • Last login:July 01, 2021, 11:12:14 am
Re: 2x cab conversion project to begin soon
« Reply #5 on: April 10, 2012, 12:55:05 pm »
Quote
Haruman
mmm candy

Quote
emphatic
I'm looking forward to getting started hopefully this weekend.
-Welcome to the Fantasy Zone.

opt2not

  • Trade Count: (+15)
  • Full Member
  • ***
  • Offline Offline
  • Posts: 6173
  • Last login:April 02, 2024, 07:42:30 pm
Re: 2x cab conversion project to begin soon
« Reply #6 on: April 10, 2012, 01:30:22 pm »
 :applaud:

<3 Blast City

BurgerKingDiamond

  • Trade Count: (+4)
  • Full Member
  • ***
  • Offline Offline
  • Posts: 690
  • Last login:July 01, 2021, 11:12:14 am
Re: 2x cab conversion project to begin soon
« Reply #7 on: April 15, 2012, 11:34:46 pm »
small update..

I didn't get as much done this weekend as I hoped. I put some wheels on the soon to be Street Fighter cab though, which while unimpressive was vitally important. That thing weighs a TON.

(new drill pictured too)


Installing the wheels was easy. I used lag screws that were as close to the thickness of wood as I could find. Then I drilled pilot holes slightly smaller than the lag screw diameter to keep enough wood for the threads to bite into. Then just tighten them up with a ratchet.


swivels in the front and straights in the back. It's amazing how easy this thing is to move around now, even on carpet. The wheels are spaced closer inside (the back ones especially) because there are some old leg leveler inserts in the way. It's still very stable though.


I also managed to decase and test the computer monitor that will replace the current arcade monitor. Man it hurts me inside to give away this monitor. It's really a thing of beauty.


The next thing to do is get a piece of sheet metal cut for the control panel. I'm hoping to stop by the local machine shop someday after work this week and put in that order.

I also need to find somebody who can help me extract this obscenely heavy 29" arcade monitor from this cab. Once I manage that I can get the computer monitor mounted.
« Last Edit: April 16, 2012, 08:21:04 am by BurgerKingDiamond »
-Welcome to the Fantasy Zone.

HaRuMaN

  • Supreme Solder King
  • Global Moderator
  • Trade Count: (+45)
  • Full Member
  • *****
  • Offline Offline
  • Posts: 10324
  • Last login:Yesterday at 03:35:02 pm
  • boom
    • Arcade Madness
Re: 2x cab conversion project to begin soon
« Reply #8 on: April 16, 2012, 09:57:26 am »
I also need to find somebody who can help me extract this obscenely heavy 29" arcade monitor from this cab.

Sir Isaac Newton?

BurgerKingDiamond

  • Trade Count: (+4)
  • Full Member
  • ***
  • Offline Offline
  • Posts: 690
  • Last login:July 01, 2021, 11:12:14 am
Re: 2x cab conversion (minor update 4-15)
« Reply #9 on: April 16, 2012, 11:18:39 am »
Sir Fig Newton.
-Welcome to the Fantasy Zone.

BurgerKingDiamond

  • Trade Count: (+4)
  • Full Member
  • ***
  • Offline Offline
  • Posts: 690
  • Last login:July 01, 2021, 11:12:14 am
Re: 2x cab conversion (minor update 4-15)
« Reply #10 on: April 17, 2012, 09:17:20 pm »
my NEO GEO 4-slot came in the mail today.


I already know the sound doesn't work, but right now I can't test it all because I have no games, and no Jamma adapter. I have Metal Slug 2, Samurai Showdown III, IV and Kabuki Klash coming in the mail. I still need to get that Jamma adapter ordered though..

A friend came over and we took out the arcade monitor.
I don't think I mentioned it but I got this Raiden II cab on Craigslist about a year ago for an amazing deal. The guy had a storage unit full of cabs only 5 minutes from my house. I got it for $250 and it had a Raiden II pcb and this brand new Wells Gardner D9200 monitor. Plus, I already had a Raiden II pcb, so I sold the one that came with the cab for $150.


I made a new control panel from a piece of sheet metal today. It will go over the existing cp. Then I can drill all the appropriate button holes. This is way easier then getting a whole new cp fabricated, plus I don't have the tools to do it. And it's better then Bondo-ing over the old holes.

I placed the old cp over the sheet metal and traced it out with a Sharpie. Then used an angle grinder to cut it out, using the material I bought for my monitor brackets as a straight edge. It came out perfect on the first attempt (usually not the case). It only took about 15 minutes.


-Welcome to the Fantasy Zone.

emphatic

  • Trade Count: (0)
  • Full Member
  • ***
  • Offline Offline
  • Posts: 2010
  • Last login:Today at 08:07:08 am
  • -"Suck it, Donny!" -"No, YOU suck it.... more".
    • Emphatic's Video Game Collection
Re: 2x cab conversion (minor update 4-15)
« Reply #11 on: April 18, 2012, 04:13:29 am »
Cool!

yotsuya

  • Trade Count: (+21)
  • Full Member
  • ***
  • Offline Offline
  • Posts: 19956
  • Last login:Today at 12:09:56 am
  • 2014 UCA Winner, 2014, 2015, 2016 ZapCon Winner
    • forum.arcadecontrols.com/index.php/topic,137636.msg1420628.html
Re: 2x cab conversion (minor update 4-15)
« Reply #12 on: April 18, 2012, 01:30:46 pm »
BKD-

I love that idea of the new panel going over the old one. How are you going to attach them, and what are you going to to about the front, where there would be a lip/edge with one on top of the other? Are you going Bondo and sand those edges together?
***Build what you dig, bro. Build what you dig.***

BurgerKingDiamond

  • Trade Count: (+4)
  • Full Member
  • ***
  • Offline Offline
  • Posts: 690
  • Last login:July 01, 2021, 11:12:14 am
Re: 2x cab conversion (minor update 4-15)
« Reply #13 on: April 18, 2012, 02:44:06 pm »
Hey. I don't anticipate there being a probem with a lip because the cut turned out so well. It's pretty much perfectly flush. Even though the buttons and sticks would be enough to hold them together well I plan on using some sort of adhesive between the two layers. There will be a cp overlay that will also wrap around the the entire panel which should cover it up nicely.

However, if for some reason it doesn't end up as nice and flush as I want, Bondo would probably be my next step.
-Welcome to the Fantasy Zone.

opt2not

  • Trade Count: (+15)
  • Full Member
  • ***
  • Offline Offline
  • Posts: 6173
  • Last login:April 02, 2024, 07:42:30 pm
Re: 2x cab conversion (minor update 4-15)
« Reply #14 on: April 18, 2012, 02:54:28 pm »
Oh man, I just now noticed the Raiden II panel in your cabinets pictures...the control placements look wack! So glad to see you're fixing that, 'cause that looked like it was a pain to play on. There's no way you could make a street fighter config work as is.

Are you going to put plexi on top of your metal cut-out? Those dynamos usually had plexi overtop from what I remembered.

Looking forward to seeing how this conversion turns out! (hopefully you can get it done soon so you can start on the other projects!)


yotsuya

  • Trade Count: (+21)
  • Full Member
  • ***
  • Offline Offline
  • Posts: 19956
  • Last login:Today at 12:09:56 am
  • 2014 UCA Winner, 2014, 2015, 2016 ZapCon Winner
    • forum.arcadecontrols.com/index.php/topic,137636.msg1420628.html
Re: 2x cab conversion (minor update 4-15)
« Reply #15 on: April 18, 2012, 03:04:34 pm »
Hey. I don't anticipate there being a probem with a lip because the cut turned out so well. It's pretty much perfectly flush. Even though the buttons and sticks would be enough to hold them together well I plan on using some sort of adhesive between the two layers. There will be a cp overlay that will also wrap around the the entire panel which should cover it up nicely.

However, if for some reason it doesn't end up as nice and flush as I want, Bondo would probably be my next step.

Thanks for the idea. I've been toying with something similar. I have an old metal CP and wanted to make a new one, but the curves I would need would just be impossible to probably replicate. I can make one like you did and put it on the original one, but there is enough of a curve on the front of the original that I would need to make sure that if it weren't flush, there would be something to fill in the gap between panels. Bondo and sanding would probably do it, then I could apply the overlay.
***Build what you dig, bro. Build what you dig.***

BurgerKingDiamond

  • Trade Count: (+4)
  • Full Member
  • ***
  • Offline Offline
  • Posts: 690
  • Last login:July 01, 2021, 11:12:14 am
Re: 2x cab conversion (minor update 4-15)
« Reply #16 on: April 18, 2012, 03:38:42 pm »
Oh man, I just now noticed the Raiden II panel in your cabinets pictures...the control placements look wack! So glad to see you're fixing that, 'cause that looked like it was a pain to play on. There's no way you could make a street fighter config work as is.

Are you going to put plexi on top of your metal cut-out? Those dynamos usually had plexi overtop from what I remembered.

Looking forward to seeing how this conversion turns out! (hopefully you can get it done soon so you can start on the other projects!)


Yeah man, the set-up was definitely wack. The second player button placement was more comfortable, but I didn't really like standing on that side. It felt weird.

I never played the damn thing anyway because the sticks didn't register diagonals well. I was too lazy to fix them. I really just got the cab for the monitor and PCB. It's taken a year to get around to actually doing anything with them.

It did have plexi, but I'm not sure if I'll put one back. The overlay I'm getting is supposedly durable enough to not need one. Plus I'm already over my estimated budget and my friend is looking for something bare bones (his wife already nixed the side-art).

Quote
yotsuya

I'm sure that Bondo would do the trick. I forget the thickness of the sheet metal I bought, it's thick enough to have some structure to it, but I was able to bend it without very much effort using my knee. It just needs to be rigid enough to support the buttons, the main cp will provide the main structure. Since it was pretty slim I was able to cut through it like butter (with a new metal cutting wheel on a 4-1/2" angle grinder). Get a nice long piece of metal (like an angle iron without the angle), preferably a little thicker than the cp so it has a nice lip for the grinding wheel to ride against. Either use clamps to hold it in place, or do what I did and get a friend to stand on the ends.
« Last Edit: April 18, 2012, 03:40:49 pm by BurgerKingDiamond »
-Welcome to the Fantasy Zone.

BurgerKingDiamond

  • Trade Count: (+4)
  • Full Member
  • ***
  • Offline Offline
  • Posts: 690
  • Last login:July 01, 2021, 11:12:14 am
Re: 2x cab conversion (minor update 4-15)
« Reply #17 on: May 29, 2012, 10:20:02 pm »
It's been awhile since I update, but I have been slowly chipping away at this baby. I really need to get it done because I'll be picking up my Blast City in about 2 weeks and have no space..

The monitor was installed without too much trouble. All it took was to cut out the frame from a piece of plywood. Then set the tube face down on the surface and trace out the perimeter with a sharpie and cut it out with a jigsaw.


The control panel button holes were cutout with my new drill (7 amp baby!) and a 1-1/8" hole saw. I used a template from slagcoin. Some clamps held the new sheet metal to the existing panel. The trick was to use a hose to directed at the hole as I drilled to keep the blade cool and lubricated. I ruined one blade by forcing it too fast. I took my time with the second blade and it went much better. It didn't even brake any teeth off.


here's the panel drying in the sun prior to a little Bondo application to clean up some rough edges.


This panel was not originally designed for a two player 6 button configuration and you can see that it's a little cramped. But it is playable and more comfortable than the pictures make it look. You'll note that the 1st player stick only has 3 bolts. The angle of the panel didn't allow for the corner of the stick mounting plate. So I had to cut it off with the Dremel. Whatever. It's not going anywhere.


I also installed the LED marquee light. Next to do is install the speakers and order the artwork.
« Last Edit: May 29, 2012, 10:25:14 pm by BurgerKingDiamond »
-Welcome to the Fantasy Zone.

emphatic

  • Trade Count: (0)
  • Full Member
  • ***
  • Offline Offline
  • Posts: 2010
  • Last login:Today at 08:07:08 am
  • -"Suck it, Donny!" -"No, YOU suck it.... more".
    • Emphatic's Video Game Collection
Re: 2x cab conversion (update 5-29)
« Reply #18 on: May 30, 2012, 12:03:52 pm »
 :applaud: Great panel-puzzle skills you've got, man!

BurgerKingDiamond

  • Trade Count: (+4)
  • Full Member
  • ***
  • Offline Offline
  • Posts: 690
  • Last login:July 01, 2021, 11:12:14 am
Re: 2x cab conversion (update 5-29)
« Reply #19 on: May 30, 2012, 12:36:51 pm »
Thanks! It really turned out well.
-Welcome to the Fantasy Zone.

opt2not

  • Trade Count: (+15)
  • Full Member
  • ***
  • Offline Offline
  • Posts: 6173
  • Last login:April 02, 2024, 07:42:30 pm
Re: 2x cab conversion (update 5-29)
« Reply #20 on: May 30, 2012, 02:19:33 pm »
Dude, good work figuring out that CP. The spacing looks pretty good for 2 players.
You planning on putting art and plexi over it?

I'm jealous you're getting a Blast! I'm talking to Sparky over at shmups, about his Pony Mark III, I've been wanting one for a while. It's good for the lack of space I have, plus it would make a perfect shmups cab. He lives near my in-laws place in Southern Cali, and I'm going down there next week. I might pick it up off him. Trouble will be figuring out how to bring it back up here.
 :dunno

BurgerKingDiamond

  • Trade Count: (+4)
  • Full Member
  • ***
  • Offline Offline
  • Posts: 690
  • Last login:July 01, 2021, 11:12:14 am
Re: 2x cab conversion (update 5-29)
« Reply #21 on: May 30, 2012, 02:50:24 pm »
You have to figure something out!

I saw that thread. If I didn't live on the East Coast I would seriously consider driving to pick it up. Fot $160 bucks I'd snap up that empty cab and throw my spare monitor in.

I'm getting a SFII polycarbonite overlay. It's supposed to be durable enough without plexi. I'll wait to see whether I'll go without.
-Welcome to the Fantasy Zone.

BurgerKingDiamond

  • Trade Count: (+4)
  • Full Member
  • ***
  • Offline Offline
  • Posts: 690
  • Last login:July 01, 2021, 11:12:14 am
Re: 2x cab conversion (update 6-20) SFII cab done
« Reply #22 on: June 20, 2012, 06:33:20 pm »
The Street Fighter II cab is done and at it's new home and I'm picking up the Blast City on Friday.

Here's the final work on the SFII..

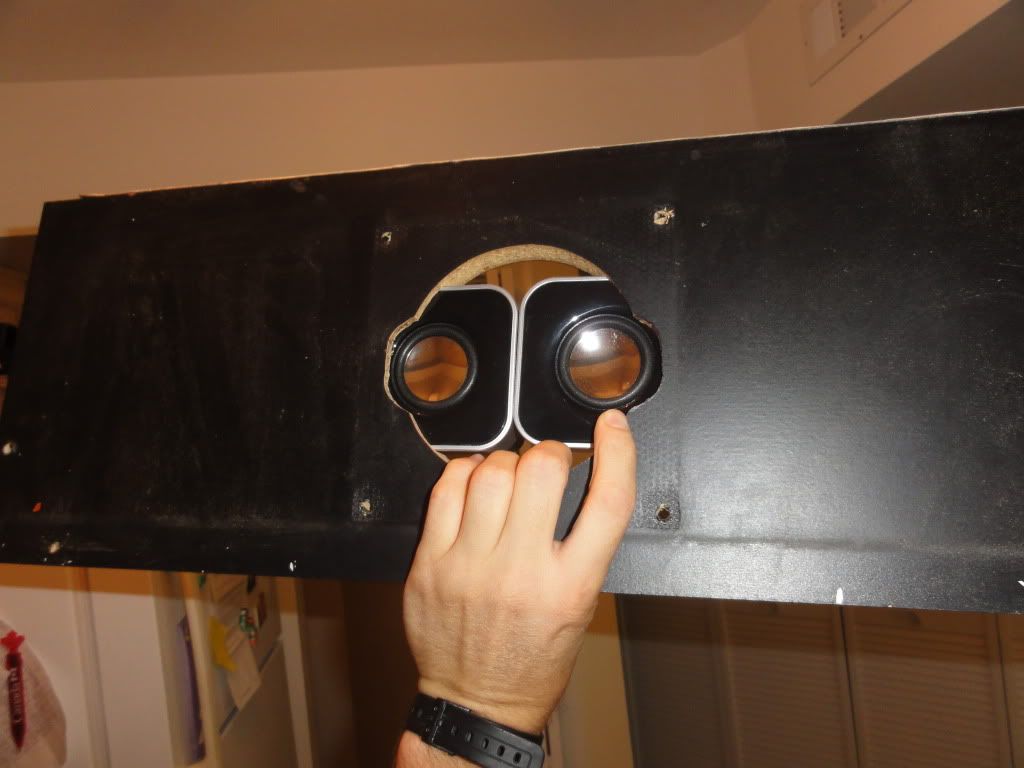
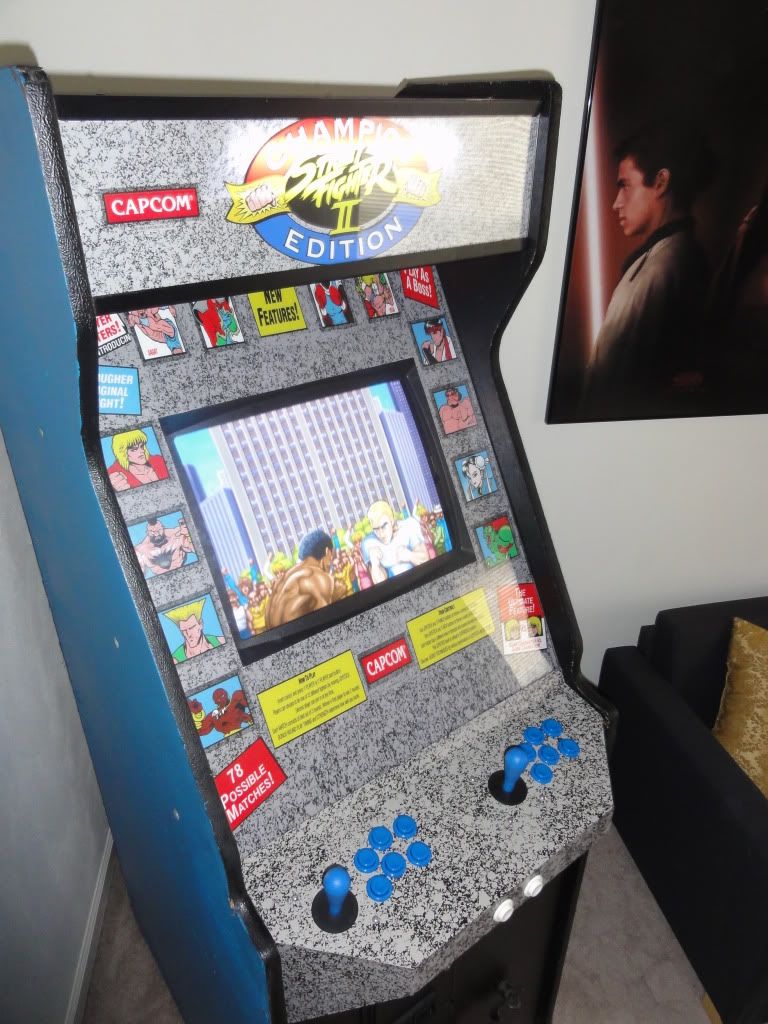
I routed out some spots for the speakers:


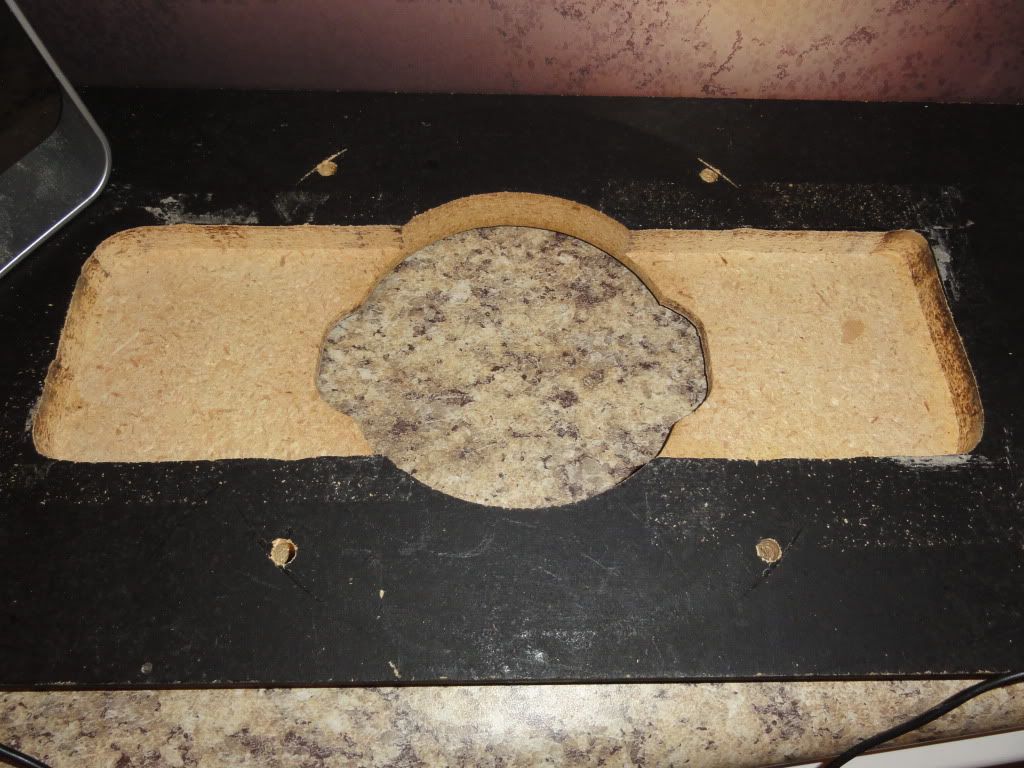
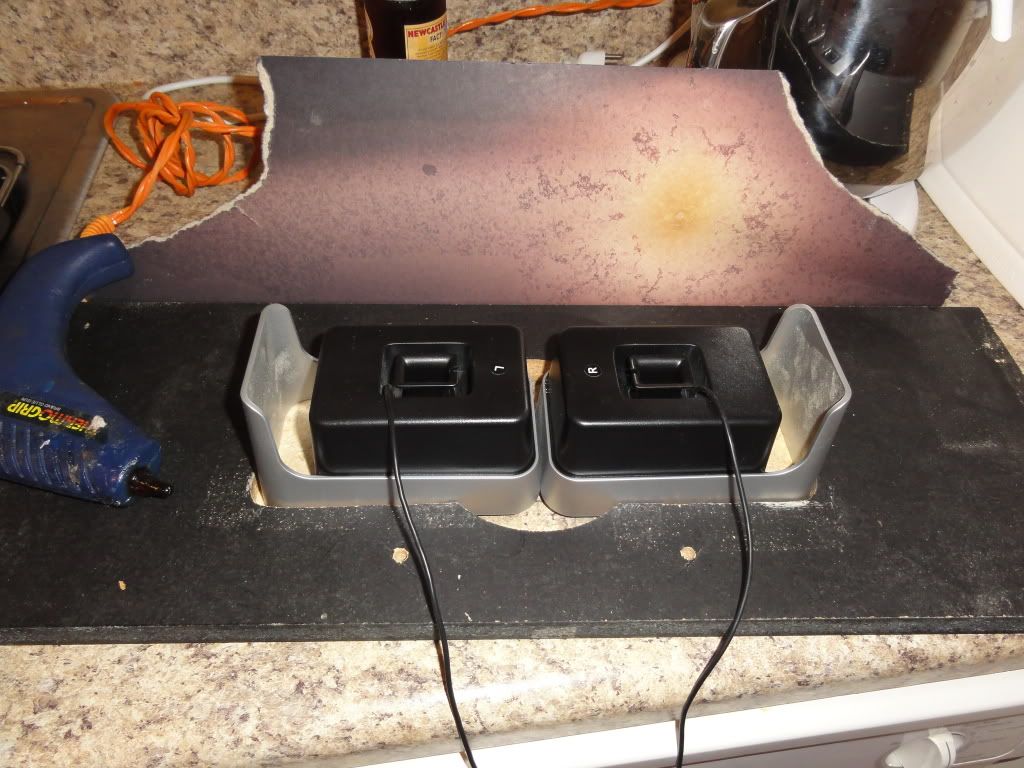
The speakers come with a sub that is just sitting in the bottom of the cab next to the PC. The volume/power unit is just sitting inside the coin door on top of the coin box.

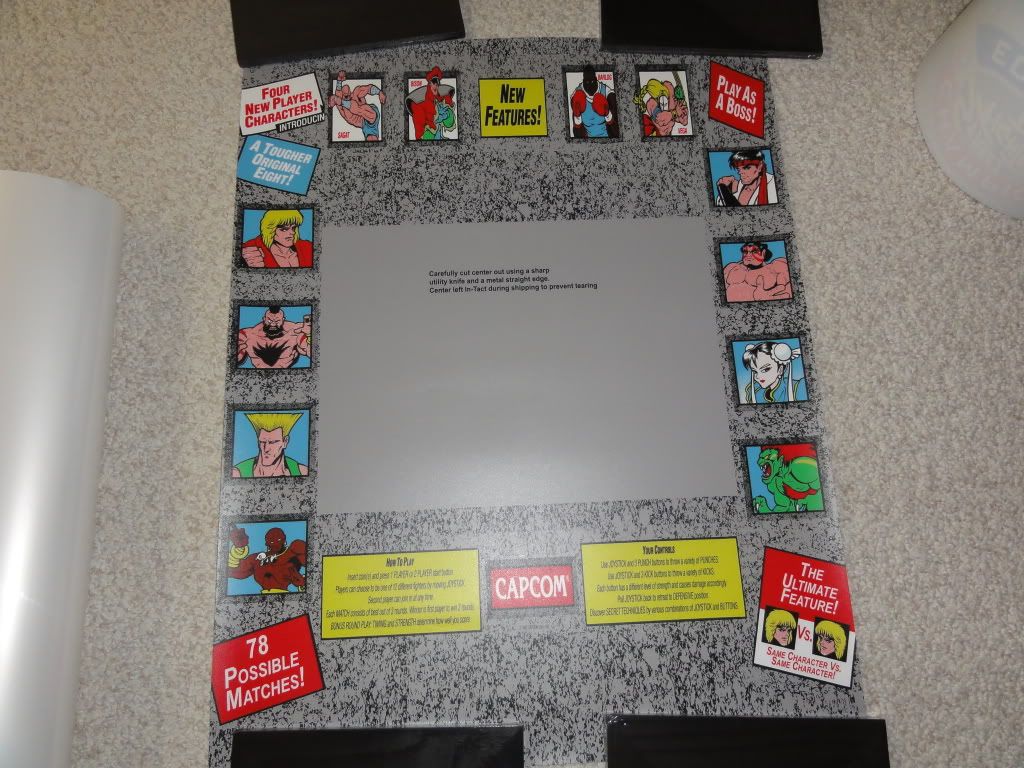
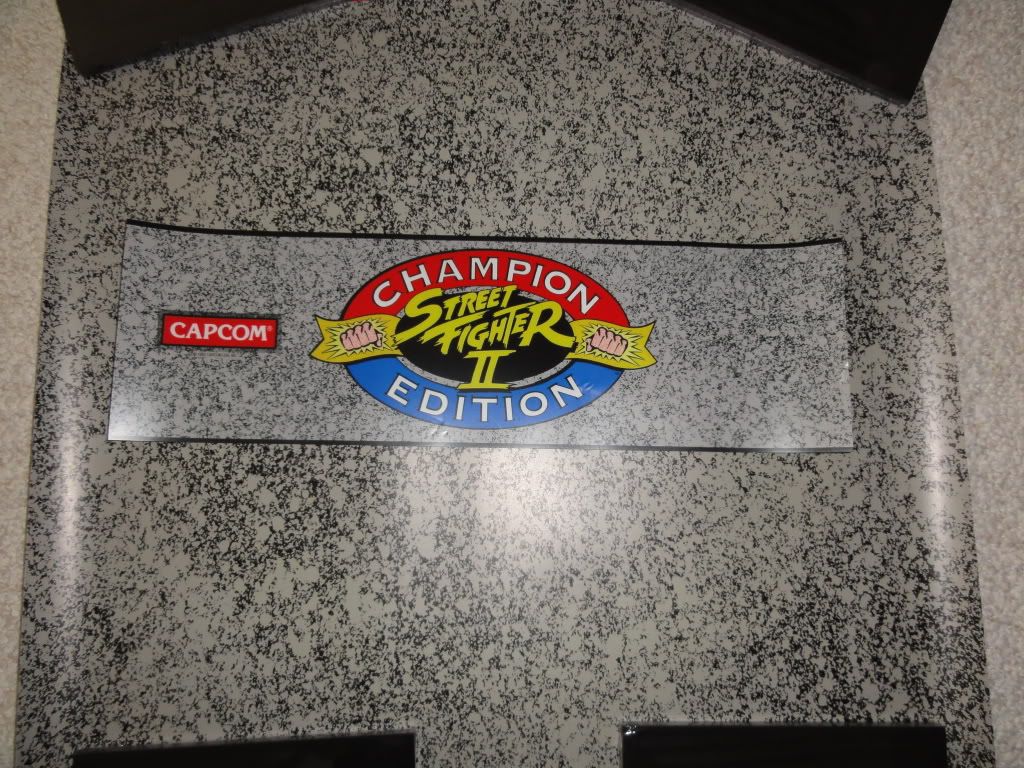
Here's some before shots of the art from Gameongrafix


and some final shots. I don't have any pictures of the wiring, but I used the encoders that Vigo sells. They work great and are so easy. All wires come pre-crimped with quick connects and the connections at the encoder PCB are molex. Wiring a panel has never been so easy!


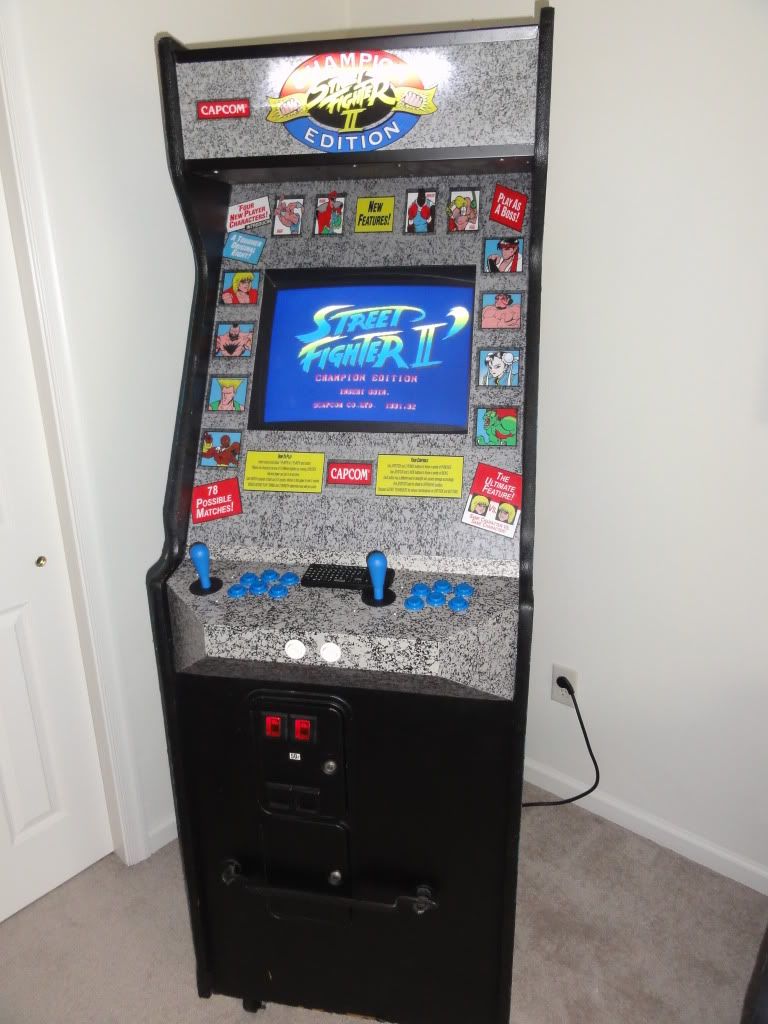
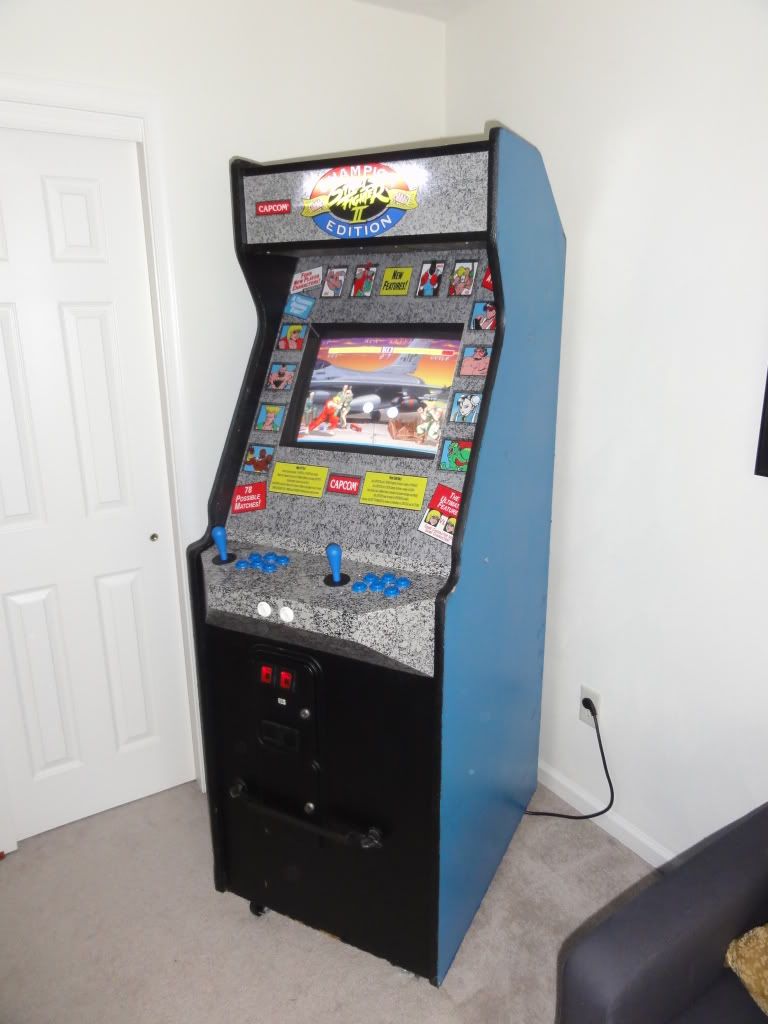
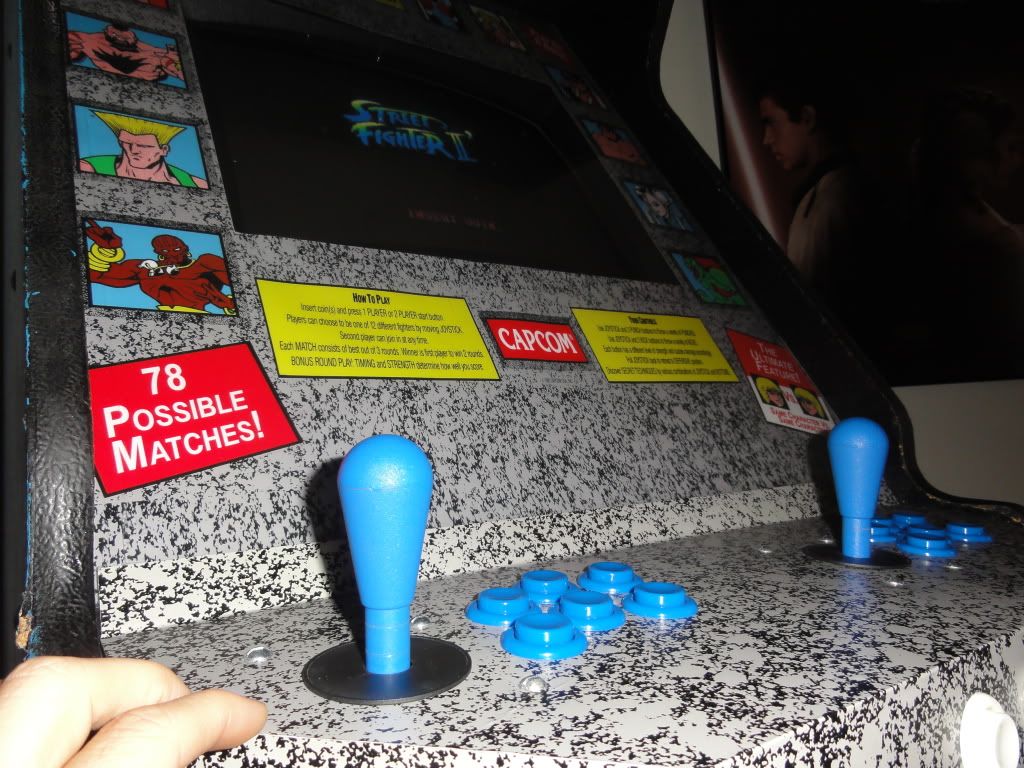
I wanted to really keep it looking authentic as possible so I didn't add any extra buttons (budget considerations nixed the sideart for now at least though). Just 6 buttons per player and 1 start per player. The only way to put in a credit is to drop in a coin or open the door and flip the microswitches themselves.

I extended the PC power button to the inside of the coin door and the coin lights and marquee light both come off the PSU. The power buttons is set to put the computer to sleep and it wakes up straight into Hyperspin in less then 10 seconds. I need to remount the LED marquee strip because the lighting is super uneven. That's my only major complaint with the build, but my friend doesn't care at all so I don't know if I'll ever do anything about it.

Other nitpicks would be the T-molding, paint and plexi. The molding isn't bad but is a little rough in places, and the same goes for the paint, and the plexi is just a little dull. If the cab was gonna stay here I would get around to fixing all that. I started to run over budget though so those final aesthetic touches were cut. It's kinda too bad though because otherwise this thing would look mint.

« Last Edit: June 20, 2012, 06:44:26 pm by BurgerKingDiamond »
-Welcome to the Fantasy Zone.

emphatic

  • Trade Count: (0)
  • Full Member
  • ***
  • Offline Offline
  • Posts: 2010
  • Last login:Today at 08:07:08 am
  • -"Suck it, Donny!" -"No, YOU suck it.... more".
    • Emphatic's Video Game Collection
Re: 2x cab conversion (update 6-20) SFII cab done
« Reply #23 on: June 21, 2012, 12:44:22 am »
That came out great!  :cheers:

DCsegaDH

  • Trade Count: (0)
  • Full Member
  • ***
  • Offline Offline
  • Posts: 298
  • Last login:September 18, 2013, 04:14:10 pm
Re: (update 6-20) SFII cab done
« Reply #24 on: June 22, 2012, 04:05:23 am »
Great job, its simple and clean!

BurgerKingDiamond

  • Trade Count: (+4)
  • Full Member
  • ***
  • Offline Offline
  • Posts: 690
  • Last login:July 01, 2021, 11:12:14 am
Re: (update 6-20) SFII cab done
« Reply #25 on: June 24, 2012, 07:11:46 pm »
thanks guys. I was supposed to pick up the Blast City this weekend, but the shipping company is screwing around so hopefully next weekend.

My motorcycle has been keeping my busy in the meantime. I'm not cut out to be a mechanic  :angry: :angry: :angry:
-Welcome to the Fantasy Zone.

yotsuya

  • Trade Count: (+21)
  • Full Member
  • ***
  • Offline Offline
  • Posts: 19956
  • Last login:Today at 12:09:56 am
  • 2014 UCA Winner, 2014, 2015, 2016 ZapCon Winner
    • forum.arcadecontrols.com/index.php/topic,137636.msg1420628.html
Re: (update 6-20) SFII cab done
« Reply #26 on: June 24, 2012, 07:17:32 pm »
Looks great! I'm curious why you went with the same color for both players. I thought the original was red/blue?
***Build what you dig, bro. Build what you dig.***

DaOld Man

  • Trade Count: (+4)
  • Full Member
  • ***
  • Offline Offline
  • Posts: 5139
  • Last login:December 13, 2023, 12:03:14 am
  • Wheres my coffee?
    • Skenny's Outpost
Re: (update 6-20) SFII cab done
« Reply #27 on: June 24, 2012, 07:42:44 pm »
Turned out good!
 :applaud: :applaud: :applaud:

BurgerKingDiamond

  • Trade Count: (+4)
  • Full Member
  • ***
  • Offline Offline
  • Posts: 690
  • Last login:July 01, 2021, 11:12:14 am
Re: (update 6-20) SFII cab done
« Reply #28 on: June 24, 2012, 07:56:49 pm »
Looks great! I'm curious why you went with the same color for both players. I thought the original was red/blue?

I had a bunch of old parts I was getting rid of. So I struck a compromise between using all of those up and trying to keep it pretty true to form.
-Welcome to the Fantasy Zone.