Main Restorations Software Audio/Jukebox/MP3 Everything Else Buy/Sell/Trade
Project Announcements Monitor/Video GroovyMAME Merit/JVL Touchscreen Meet Up Retail Vendors
Driving & Racing Woodworking Software Support Forums Consoles Project Arcade Reviews
Automated Projects Artwork Frontend Support Forums Pinball Forum Discussion Old Boards
Raspberry Pi & Dev Board controls.dat Linux Miscellaneous Arcade Wiki Discussion Old Archives
Lightguns Arcade1Up Try the site in https mode Site News

Unread posts | New Replies | Recent posts | Rules | Chatroom | Wiki | File Repository | RSS | Submit news


Author Topic: The Smash Pad - kittens and cleaning and stools - oh my!  (Read 52368 times)

0 Members and 1 Guest are viewing this topic.

Seith

  • Trade Count: (0)
  • Full Member
  • ***
  • Offline Offline
  • Posts: 402
  • Last login:September 08, 2018, 10:50:41 am
Re: The Smash Pad - The CRT comes out of it's shell
« Reply #40 on: May 06, 2012, 01:20:51 pm »
Some pics of the television I will be using before it gets decased.
« Last Edit: May 06, 2012, 01:42:25 pm by Seith »

Seith

  • Trade Count: (0)
  • Full Member
  • ***
  • Offline Offline
  • Posts: 402
  • Last login:September 08, 2018, 10:50:41 am
Re: The Smash Pad - The CRT comes out of it's shell
« Reply #41 on: May 06, 2012, 01:46:37 pm »
Process pics of the TV getting decased.  I should note that we did not have to discharge the television to do this, simply just took the casing off so that we could measure the internal tube width.  Kept the control buttons, got rid of the speakers.  Two happy bonuses with this TV:  I can unplug it and leave it unplugged for a while and when I come back and plug it back in, it remembers the channel it was on when it was unplugged.  Also, I can navigate to the s-video input using the control buttons on the TV, no need for a remote.  As you can see it's pretty dirty inside the TV lol, par for the course for CRTs nowadays I suppose.

Seith

  • Trade Count: (0)
  • Full Member
  • ***
  • Offline Offline
  • Posts: 402
  • Last login:September 08, 2018, 10:50:41 am
Re: The Smash Pad - The CRT comes out of it's shell
« Reply #42 on: May 07, 2012, 10:08:52 pm »


Also got the cuts done this past Saturday with my dad.


My dad measuring the guide for the skill saw.


A nice cut, everytime.  What a pro.


I learn best by studying others.  His hand is steady as ever with that jigsaw, what can I say.

DaOld Man

  • Trade Count: (+4)
  • Full Member
  • ***
  • Offline Offline
  • Posts: 5139
  • Last login:December 13, 2023, 12:03:14 am
  • Wheres my coffee?
    • Skenny's Outpost
Re: The Smash Pad - The MDF dust must flow
« Reply #43 on: May 07, 2012, 10:36:33 pm »
Looking good! The times and the projects you share with your dad will be cherished by you for a long time. Listen to what he says, because some day you will be on the teaching side, and you will be passing it on to yours.
(Sorry DaOld Man is in dad mode right now.)  :'(

Seith

  • Trade Count: (0)
  • Full Member
  • ***
  • Offline Offline
  • Posts: 402
  • Last login:September 08, 2018, 10:50:41 am
Re: The Smash Pad - The MDF dust must flow
« Reply #44 on: May 13, 2012, 10:15:31 pm »
More pics!

some pictures of the television, with accompanying LCD pictures for comparison:


here it is booting up.  got the splash screen changed, not sure i will be sticking with this, will have to look into making a custom one.

x

Samurai Shodown 1 CRT intro vs. LCD intro... look at Haohmaru's hair!  It looks so much better on the CRT, I couldn't be happier.

x

SFII intro fighter.  the shading around his head and cheekbones looks much better on a CRT than it does on an LCD screen.

x

Galaga ship.  Sure you can see more colours on the LCD screen, but the ship looks more like I remember it on the CRT.
« Last Edit: May 13, 2012, 10:17:15 pm by Seith »

Seith

  • Trade Count: (0)
  • Full Member
  • ***
  • Offline Offline
  • Posts: 402
  • Last login:September 08, 2018, 10:50:41 am
Re: The Smash Pad - The MDF dust must flow
« Reply #45 on: May 13, 2012, 10:24:03 pm »


The sides clamped up after being attached to the bottom.  We are using dowels and glue to assemble the body, this is just a test fit with the CP box to feel for height.


We will be using a rotating window latch to secure the CP lid to the box from behind.  If I need to get in, I can just turn the latch and swing it open.


Here's where we're having some trouble... we don't want to permanently screw the CP box to the body here, rather we want a way to unlatch it from the body to bring down the width of the cab in case it ever needs to be moved.  We cannot seem to find a good solution for how to do this at a hardware store.  One store suggested an eye and hook, but that would definitely not be secure enough.  Someone else suggested a doorhinge and whenever we want to detach the box from the cab, we just pull the pin on the hinge and transport it that way, but that seems like a lot of work just to detach a box.  Any suggestions?
« Last Edit: May 13, 2012, 10:29:44 pm by Seith »

Seith

  • Trade Count: (0)
  • Full Member
  • ***
  • Offline Offline
  • Posts: 402
  • Last login:September 08, 2018, 10:50:41 am
Re: The Smash Pad - The MDF dust must flow
« Reply #46 on: May 13, 2012, 10:33:18 pm »


The man's been hard at work again... here we are marking the 1/4" recess for the kickplate.


We have dowel holes drilled into the bottom of the kickplate, currently filled with metal dowel hole plugs (the kind that have a pointy end on one side).  After this picture was taken we took a scrap piece of wood and tapped on the top to create imprints on the bottom board:


The imprints left by the dowel hole plugs.  Perfect as guides for the drill.

JayB

  • Trade Count: (0)
  • Full Member
  • ***
  • Offline Offline
  • Posts: 160
  • Last login:January 25, 2013, 06:11:59 pm
Re: The Smash Pad - The MDF dust must flow
« Reply #47 on: May 14, 2012, 05:46:14 am »
On my Mortal Kombat machine the control panel is hinged at the front and inside has two bolts with large washer rings that fix it to a wood bar the runs the width of the cabinet under the panel. I can unscrew them with just my fingers so not massively tight but it doesn't move. It did have two clasps inside that stopped you opening the panel up (customers tampering), I removed them and by its own weight never lifts up. Maybe that could solve you problem

Seith

  • Trade Count: (0)
  • Full Member
  • ***
  • Offline Offline
  • Posts: 402
  • Last login:September 08, 2018, 10:50:41 am
Re: The Smash Pad - The MDF dust must flow
« Reply #48 on: May 14, 2012, 08:01:05 am »
Thanks Equinox, that  may be doable... I am going to have a look at this other solution my father was talking about and see if it's feasible or not but in the meantime, if anyone else has suggestions please let me know!

elkameleon

  • Trade Count: (+1)
  • Full Member
  • ***
  • Offline Offline
  • Posts: 528
  • Last login:August 20, 2014, 08:31:00 pm
Re: The Smash Pad - The MDF dust must flow
« Reply #49 on: May 14, 2012, 05:21:25 pm »
I have nearly the same tv sitting in my garage ready to be transplanted. Mine is the home theater version though, its got a built in audio amp. 27" RCA though... I'm gonna buy one of them universal arcade chassis from 8liners for the tube, since I can't bear to go from component (what I use now) to s-video (the best this tv has available).

Seith

  • Trade Count: (0)
  • Full Member
  • ***
  • Offline Offline
  • Posts: 402
  • Last login:September 08, 2018, 10:50:41 am
Re: The Smash Pad - The MDF dust must flow
« Reply #50 on: May 15, 2012, 08:09:23 am »
I have nearly the same tv sitting in my garage ready to be transplanted. Mine is the home theater version though, its got a built in audio amp. 27" RCA though... I'm gonna buy one of them universal arcade chassis from 8liners for the tube, since I can't bear to go from component (what I use now) to s-video (the best this tv has available).

Yeah, s-video is what i'm running on for those screenshots.

JayB

  • Trade Count: (0)
  • Full Member
  • ***
  • Offline Offline
  • Posts: 160
  • Last login:January 25, 2013, 06:11:59 pm
Re: The Smash Pad - The MDF dust must flow
« Reply #51 on: May 15, 2012, 09:46:49 am »
I use S-Video also with a Sony TV and the picture looks great. To me it looks authentic. Can't remember what graphics card it is but, it's a few years old. Do people say s-video isn't very good then?

JayB

  • Trade Count: (0)
  • Full Member
  • ***
  • Offline Offline
  • Posts: 160
  • Last login:January 25, 2013, 06:11:59 pm
Re: The Smash Pad - The MDF dust must flow
« Reply #52 on: May 15, 2012, 09:53:11 am »
Thanks Equinox, that  may be doable... I am going to have a look at this other solution my father was talking about and see if it's feasible or not but in the meantime, if anyone else has suggestions please let me know!

No problem. I reckon it'll be easy enough to do, yours looks very similar to a MKII cab. Even if you had a wood bar running the width and then put two screws through the base of the CP. Take a few seconds to unscrew any time you needed it removed.

It's quite interesting these little details you have to think about when building these cabs. On the face of it when you start it's like yeah its a box, easy  :lol

Seith

  • Trade Count: (0)
  • Full Member
  • ***
  • Offline Offline
  • Posts: 402
  • Last login:September 08, 2018, 10:50:41 am
Re: The Smash Pad - The MDF dust must flow
« Reply #53 on: May 18, 2012, 12:13:44 pm »
More pics!


Sanding the CP box smooth.


The lid actually lines up with the box lip once the box is clamped together.  When it is glued-and-doweled that extra lip overhang will be gone.

Seith

  • Trade Count: (0)
  • Full Member
  • ***
  • Offline Offline
  • Posts: 402
  • Last login:September 08, 2018, 10:50:41 am
Re: The Smash Pad - In Like A Lion, Out Like A Laminate
« Reply #54 on: May 18, 2012, 12:25:13 pm »
Put my order in at t-molding.com for 40' of Bright Red 3/4" t-molding.  Threw in the bit I needed as well.  The next step now is to go shopping for laminate.

jmike

  • Trade Count: (+10)
  • Full Member
  • ***
  • Offline Offline
  • Posts: 1018
  • Last login:May 03, 2024, 09:26:46 pm
Re: The Smash Pad - In Like A Lion, Out Like A Laminate
« Reply #55 on: May 18, 2012, 01:32:33 pm »
Looking good. Did you install the hinge on CP? Just asking cause the front of the control panel doesn't look flush to the base in the front   ???
Also if you're installing T-molding on the top of the CP you might want to curve the corners.
 
(Of course if you're moving the CP a bit forward you'll have room to curve the corners)

 :dizzy:

Hopefully I didn't confuse you.

 :cheers:

Seith

  • Trade Count: (0)
  • Full Member
  • ***
  • Offline Offline
  • Posts: 402
  • Last login:September 08, 2018, 10:50:41 am
Re: The Smash Pad - In Like A Lion, Out Like A Laminate
« Reply #56 on: May 18, 2012, 01:39:21 pm »
Looking good. Did you install the hinge on CP? Just asking cause the front of the control panel doesn't look flush to the base in the front   ???
Also if you're installing T-molding on the top of the CP you might want to curve the corners.
 
(Of course if you're moving the CP a bit forward you'll have room to curve the corners)

 :dizzy:

Hopefully I didn't confuse you.

 :cheers:

Those pics are from the rear of the CP.  The hinge is connected to the front lip of the CP, so that the top swings up toward the player.  The reason there looks to be a lip is because the box has not been glued.  When clamped it sits flush with the edge, and that will be how it will be when glued.

The CP top will be somewhat rounded when it is done, I am doing an angled cut on each front edge.

As for the t-molding, I will be cutting off some of the under-running to allow for it to bend around the corners.

Seith

  • Trade Count: (0)
  • Full Member
  • ***
  • Offline Offline
  • Posts: 402
  • Last login:September 08, 2018, 10:50:41 am
Re: The Smash Pad - In Like A Lion, Out Like A Laminate
« Reply #57 on: June 04, 2012, 02:33:58 pm »
Got the sides flush trimmed to be identical:


Me straightening the piece of the wood that will be going above the monitor glass:


Drilling dowel holes in center boards (i believe this one was the board that will be housing the speakers and the bottom of the marquee)


Seith

  • Trade Count: (0)
  • Full Member
  • ***
  • Offline Offline
  • Posts: 402
  • Last login:September 08, 2018, 10:50:41 am
Re: The Smash Pad - My Name Is Seith And I Am Addicted To Slots
« Reply #58 on: June 04, 2012, 02:42:31 pm »
Bought a 1-player coindoor from divemaster127 (no coin mech yet, looking for a site online that sells .25$CDN mechs cheap), got to cutting out the hole for that on the kickplate.

First, we took some rough measurements and jotted them down:


We used the cap from a can of spraypaint to rough out the edges:


Then we drilled a pilot hole for the jigsaw to go into:


After using the jigsaw around the edges (and having to bring them out some), we got the hole to the size we needed for the coindoor to fit snugly:


We also got the casters on the bottom piece:


And then, just to get a feel for the height difference 2.5" makes, we clamped it up real quick to see:


So... anyone know of somewhere I can get canadian quarter coinmechs online for cheap?
« Last Edit: June 04, 2012, 02:51:51 pm by Seith »

Seith

  • Trade Count: (0)
  • Full Member
  • ***
  • Offline Offline
  • Posts: 402
  • Last login:September 08, 2018, 10:50:41 am
Re: The Smash Pad - My Name Is Seith And I Am Addicted To Slots
« Reply #59 on: June 04, 2012, 02:50:40 pm »
Last weekend we got to put a few more hours of work in on the project...


I had received my t-molding in the mail from http://www.t-molding.com/ :


So it was time to cut slots with my handy-dandy 1/16" slot cutter from the same website I got the t-molding from:


My first thought was just to run the router along the sides of the wood with the slot cutter (after adjusting it to where we wanted it to be and testing it on some scrap pieces of course) but my dad suggested we should run the wood along the router instead.  He then proceeded to rig the router up sitting upside down on two planks clamped to an endtable like so:


More pics to follow...

Seith

  • Trade Count: (0)
  • Full Member
  • ***
  • Offline Offline
  • Posts: 402
  • Last login:September 08, 2018, 10:50:41 am
Re: The Smash Pad - My Name Is Seith And I Am Addicted To Slots
« Reply #60 on: June 05, 2012, 07:55:06 am »
Anybody know of a place I can get canadian quarter coinmechs for cheap?  I am also still looking for a good and sturdy way to fasten the control panel to the main body while still being able to unlatch and remove it if need be.

mcseforsale

  • Trade Count: (0)
  • Full Member
  • ***
  • Offline Offline
  • Posts: 1471
  • Last login:April 09, 2024, 03:07:41 pm
  • Creepy Mario Dude
Re: The Smash Pad - My Name Is Seith And I Am Addicted To Slots
« Reply #61 on: June 05, 2012, 11:27:13 am »
Here's what I did.  First, I got the CP box put on the cabinet exactly where I wanted it...

Then, I scribed on the bottom where the CP bottom rested on the sides of the cabinet.  I flipped it over and drilled a 1/4" hole on each side.  

I then flipped it over and put it back EXACTLY where I had it on the cabinet sides and, using the holes I just drilled, I drilled about 1" into the sides of the cabinet on both sides.  Next, using a quality hardwood dowel and some GOOD, non expanding wood glue (I used Gorilla glue), I glue a dowel into the hole on the cabinet side and leave about 5/8" above the edge so that the CP box will slide onto the pins.:


I use a small latch under the CP box.  It is behind the front crossbrace, visible just under the CP bottom (only one latch is needed):


I also attached my CP top this way.  Basically, I drilled out the CP top:


I use 1/4" hardwood dowels to use as the locating pins.  I profiled them just a little so that when the top comes down with the hinges, it slides right onto the pins:


Once painted, it's hardly noticeable inside the CP box, but its' clear to see when you're putting it back together after a move, etc...

The art will cover the holes on the top of the CP and on the bottom, you can see that the hinges just lower the top back down onto the dowels.  Since they're hardwood, the MDF will break before they do...:


Now...how sturdy is it?  Well, a dude came over to the house a week ago and my wife showed him the cabinet.  He's not my favorite dude, so I really just wanted him to go.  So, he starts telling us how bada$$ he is with Galaga, etc etc.  Asking me if I built this from a kit, etc..even after my wife telling him I cut every piece of wood and built every thing on it, he still seem skeptical.  He didn't understand that MAME runs the ACTUAL game, yada yada yada.  So, she boots it up and lets him try.  He proceeds to get a whopping 23000 on Galaga excusing himself because it's been a couple of months since he's played (He plays in a band at a bar with a bunch of arcade games).  All the while he was NOTICABLY trying to manhandle the machine.  Its on wheels and he was moving it all over the place....fat bastard...

Anyway, nothing moved, it's solid and you can't believe how sturdy it is...


And, if it can take the abuse that this MANIMAL can dish out, it's gotta be strong:  :applaud: :laugh2:


AJ


Anybody know of a place I can get canadian quarter coinmechs for cheap?  I am also still looking for a good and sturdy way to fasten the control panel to the main body while still being able to unlatch and remove it if need be.
« Last Edit: June 05, 2012, 11:35:06 am by mcseforsale »

Seith

  • Trade Count: (0)
  • Full Member
  • ***
  • Offline Offline
  • Posts: 402
  • Last login:September 08, 2018, 10:50:41 am
Re: The Smash Pad - My Name Is Seith And I Am Addicted To Slots
« Reply #62 on: June 05, 2012, 12:02:58 pm »
Nice!  I'm just checking out your build thread... some great ideas in there!  I really like how you've managed to mount your monitor/TV.  I think I may use that method.

I didn't see the type of latch you used on the underside of the CP.  Got a link?

mcseforsale

  • Trade Count: (0)
  • Full Member
  • ***
  • Offline Offline
  • Posts: 1471
  • Last login:April 09, 2024, 03:07:41 pm
  • Creepy Mario Dude
Re: The Smash Pad - My Name Is Seith And I Am Addicted To Slots
« Reply #63 on: June 05, 2012, 12:18:17 pm »
Yeah, it's not easy to get pics.  The strike plate is on the underside of the CP box and the actual latch is attached to the back of that front brace.  These latches can go 90 degrees or flat.

http://na.suzohapp.com/amusement/acesor/49005900.htm

These things are pretty big, so have it in hand before you plan on where it goes.  :D

Thanks for looking at the build.  I had to do everything on the cheap or free, so I hope I can save you some scratch.

AJ


Nice!  I'm just checking out your build thread... some great ideas in there!  I really like how you've managed to mount your monitor/TV.  I think I may use that method.

I didn't see the type of latch you used on the underside of the CP.  Got a link?

Seith

  • Trade Count: (0)
  • Full Member
  • ***
  • Offline Offline
  • Posts: 402
  • Last login:September 08, 2018, 10:50:41 am
Re: The Smash Pad - My Name Is Seith And I Am Addicted To Slots
« Reply #64 on: June 05, 2012, 01:13:43 pm »
Yeah, it's not easy to get pics.  The strike plate is on the underside of the CP box and the actual latch is attached to the back of that front brace.  These latches can go 90 degrees or flat.

http://na.suzohapp.com/amusement/acesor/49005900.htm

These things are pretty big, so have it in hand before you plan on where it goes.  :D

Thanks for looking at the build.  I had to do everything on the cheap or free, so I hope I can save you some scratch.

AJ


Nice!  I'm just checking out your build thread... some great ideas in there!  I really like how you've managed to mount your monitor/TV.  I think I may use that method.

I didn't see the type of latch you used on the underside of the CP.  Got a link?

Perfect!  I need to make one more purchase on the Suzo-Happ site anyway, for the Coin Mech, so I can toss one of those onto the list for my next order.  Thanks again :)

More pics to follow soon...

Seith

  • Trade Count: (0)
  • Full Member
  • ***
  • Offline Offline
  • Posts: 402
  • Last login:September 08, 2018, 10:50:41 am
Re: The Smash Pad - My Name Is Seith And I Am Addicted To Slots
« Reply #65 on: June 09, 2012, 05:22:40 pm »
So when we last left off, our intrepid heroes had acquired the T-Molding and were about to begin cutting slots.  Their initial rig-up for the router looked like this:


A few problems with this:

1.  Very little flat surface space
2.  Clamps in the way of routing along the edges of larger pieces (like the sides)
3.  Router literally not secured to anything and will probably go flying once wood is put to it

This simply would not do.  So we got to work building a makeshift router table:

First we marked the center of an old piece of chipboard.


Then we drilled the screw holes as well as a pilot hole for the bit to stick up through.


We counter-sunk the screws by taking the drill to the edges of the hole on the other side of the chipboard at a diagonal until they fit flush.  Then we screwed those badboys in.  It didn't have to look pretty, only functional.


The bit would not come up high enough to make it to 3/8" from the surface, so we had to router out 1/4" from the underside of the 3/4" thick chipboard.


Much better.


After fine-tuning the router depth and cutting scrap pieces to test fit the t-molding sample I had, we finally got it to where we wanted it:


Our next step was to cut the edges off of the CP top, a simple jigsaw + orbital sander job:


Then it was time to make the first actual project slot.  My dad left it up to me.  Of course, I didn't watch the back-end of the board hanging off of our small router table and ended up with this:

 :banghead: :banghead: :banghead: :banghead: :banghead: :banghead: :banghead:

Oh well, the t-molding should cover this up.  May need to use some woodglue to hold it in.  Just glad I didn't pierce a surface (actually the wayward cut headed towards the underside of the CP top, which is fortunate.)

A shot of the cut with the 3/4" t-molding sample in it (the top will be covered with 1/8" plexiglass)


More pics to come, tomorrow's work will be continuing our slot-cutting.

Seith

  • Trade Count: (0)
  • Full Member
  • ***
  • Offline Offline
  • Posts: 402
  • Last login:September 08, 2018, 10:50:41 am
Re: The Smash Pad - My Name Is Seith And I Am Addicted To Slots
« Reply #66 on: June 10, 2012, 10:48:03 pm »
Got the rest of my slot-cutting done today (well, almost... still have to do the edges above/below the marquee area).


Also got the last of the dowelling done:

Seith

  • Trade Count: (0)
  • Full Member
  • ***
  • Offline Offline
  • Posts: 402
  • Last login:September 08, 2018, 10:50:41 am
Re: The Smash Pad - My Name Is Seith And I Am Addicted To Slots
« Reply #67 on: June 10, 2012, 11:14:58 pm »
Created monitor brackets for the inside of the cab as well.  Took cues from mcseforsale's "The Blue Pill... Morpheus Lied" cab and adapted them to our project. 


It became quite clear we weren't going to have the internal clearance necessary to do our monitor mounting solution the same way he did, so we came up with an alternate solution.


The plan was to route a channel in the bracket surface for the metal clips on the sides of the monitor to travel down, and slotting into grooves at the end of the channel.  We marked our lines on the wood and adjusted the router so that the slot cutting bit reached up high enough, then made two passes per slot ending up with roughly 1/8" slot width for the clips:


Then we test-fitted it... and found it wasn't taking in enough of the clips:


After removing some plastic wire-holding clips from the side, we got it somewhat closer, but now the wood was butting up against the raised metal that the plastic clips were clipped into:


My dad and I discussed what to do to get the wood as close to the television edge as possible.  My first thought was to extend the metal clips out so that they went deeper into the grooves, but there was no really sturdy way of doing that that we could come up with.  My dad suggested we grind the metal bumps off of the side of the television.  I was apprehensive about doing that at first, as it was awfully close to the tube and the slightest mess-up could wind us up with a dead TV at best, and a huge discharge of electricity at worst.  I threw out the alternative:  why not just route channels into the wood for the bumps to go into?  They wouldn't have to be load-bearing, just enough to have the surface of the wood be clear of them so that it could butt up closer to the television.  He thought about it, and said it would be easier if we just took the grinder to the metal edges and sheared them off.  My dad is a metal worker by trade, so it was at that point that I decided to follow his suggestion.  He has been doing this his whole life, so he wouldn't suggest an option like that unless he was sure it was the best one.

With that out of the way, I went back outside to finish the routing of the clip channels in the bracket:


The finished products:


I need to go a little faster with my straight bit so I don't end up burning wood  :laugh2: :


A sneak peek of next week's work...


And bonus pics of our resident expert lending her helping hands (paws?)


mcseforsale

  • Trade Count: (0)
  • Full Member
  • ***
  • Offline Offline
  • Posts: 1471
  • Last login:April 09, 2024, 03:07:41 pm
  • Creepy Mario Dude
Re: The Smash Pad - My Name Is Seith And I Am Addicted To Slots
« Reply #68 on: June 11, 2012, 12:01:46 am »
Hey man,
I'm going to put up my completed build video sometime tomorrow.  It's long though, so I'm thinking I may break it up into sections.  But, I highlight the way that I attach the CP top to the CP box and the entire CP to the cabinet.

Keep an eye out..
AJ

Seith

  • Trade Count: (0)
  • Full Member
  • ***
  • Offline Offline
  • Posts: 402
  • Last login:September 08, 2018, 10:50:41 am
Re: The Smash Pad - My Name Is Seith And I Am Addicted To Slots
« Reply #69 on: June 11, 2012, 07:39:33 am »
Thanks!

Seith

  • Trade Count: (0)
  • Full Member
  • ***
  • Offline Offline
  • Posts: 402
  • Last login:September 08, 2018, 10:50:41 am
Re: The Smash Pad - My Name Is Seith And I Am Addicted To Slots
« Reply #70 on: June 13, 2012, 01:57:32 pm »
Fiancee offered to work on some sketches for potential artwork for the control panel, as well as a rework of the marquee.  Can't wait to see her work!

Also, going to be taking exacto knife to laminate (hopefully) tonight.

sharpfork

  • Trade Count: (0)
  • Full Member
  • ***
  • Offline Offline
  • Posts: 618
  • Last login:April 07, 2023, 12:43:42 pm
    • KADE
Re: The Smash Pad - My Name Is Seith And I Am Addicted To Slots
« Reply #71 on: June 13, 2012, 03:06:57 pm »
Nice!  I'm just checking out your build thread... some great ideas in there!  I really like how you've managed to mount your monitor/TV.  I think I may use that method.

I used a similar method to get a 27" CRT squeezed into a Dynamo cabinet.  To put the crt in, I angle the bottom into a slot that it rests on then tilt it back.  The top of the plywood has two bolts that hold it in. 
It is sturdy as hell.
more pics in this gallery: http://imgur.com/a/ps64D#32

Seith

  • Trade Count: (0)
  • Full Member
  • ***
  • Offline Offline
  • Posts: 402
  • Last login:September 08, 2018, 10:50:41 am
Re: The Smash Pad - My Name Is Seith And I Am Addicted To Slots
« Reply #72 on: June 13, 2012, 07:28:00 pm »
Thanks sharpfork!  I was thinking about an all-around solution like what you came up with... we will have to try the one we're doing now and if it doesn't look like it's going to work, that may be plan b...


I noticed you discharged your television screen... we still have not done this.  I pitched it to my dad but he said it would be fine because we are not pulling on the suction cup at all, but I still remain cautious... just curious (and I know this is probably different across different picture tubes) but how "on there" is that cup when you go to take it off?  And what is involved in putting it back on once you're done?  Any chance the TV will not work once the cup is back on?

sho

  • Trade Count: (0)
  • Full Member
  • ***
  • Offline Offline
  • Posts: 47
  • Last login:February 10, 2022, 10:44:00 am
Re: The Smash Pad - My Name Is Seith And I Am Addicted To Slots
« Reply #73 on: June 14, 2012, 12:00:18 pm »
In my TV servicing days of yore, you only really discharged the tube to avoid shock from the components.  CRTs have extremely high voltages, that while mostly harmless can give you a nasty jolt.
If you plan to be lugging the decased CRT around or mounting it in a tight space it might be advisable.
If you trust yourself to not touch any exposed components meanwhile. there should be no need to.

Removing and replacing the suction cup should pose no problem, it's basically a prong that goes into the anode of the tube.
Bubble Bobble YAWN

mcseforsale

  • Trade Count: (0)
  • Full Member
  • ***
  • Offline Offline
  • Posts: 1471
  • Last login:April 09, 2024, 03:07:41 pm
  • Creepy Mario Dude
Re: The Smash Pad - My Name Is Seith And I Am Addicted To Slots
« Reply #74 on: June 18, 2012, 12:57:33 am »
Seith,
Here's a better explanation of my CP install and box interfaces.  Enjoy!

http://forum.arcadecontrols.com/index.php?topic=117977.msg1265003#msg1265003

AJ

Seith

  • Trade Count: (0)
  • Full Member
  • ***
  • Offline Offline
  • Posts: 402
  • Last login:September 08, 2018, 10:50:41 am
Re: The Smash Pad - Formica-pable
« Reply #75 on: June 25, 2012, 11:54:53 am »
Started work laminating over the course of this past weekend and the weekend before, getting closer to completion as the weeks go by, which feels good!   :afro:

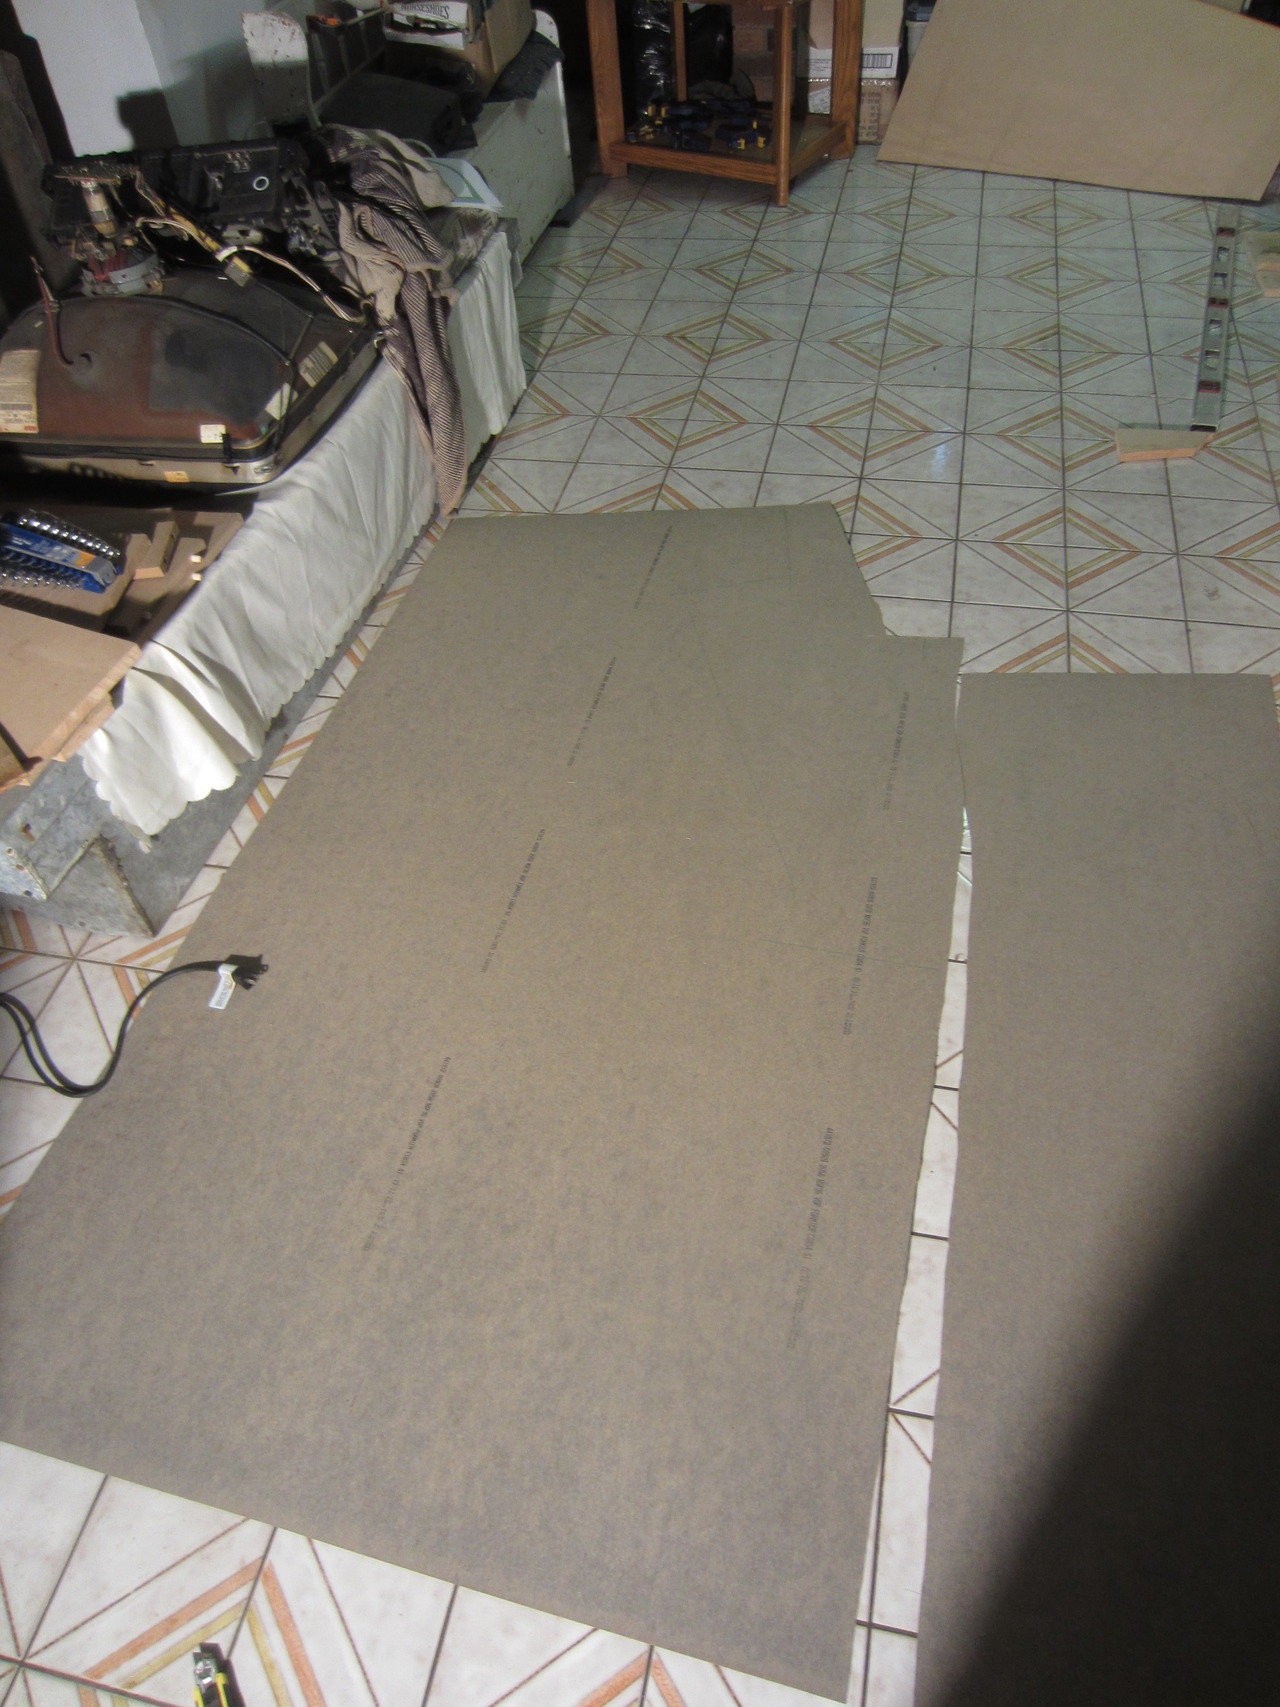
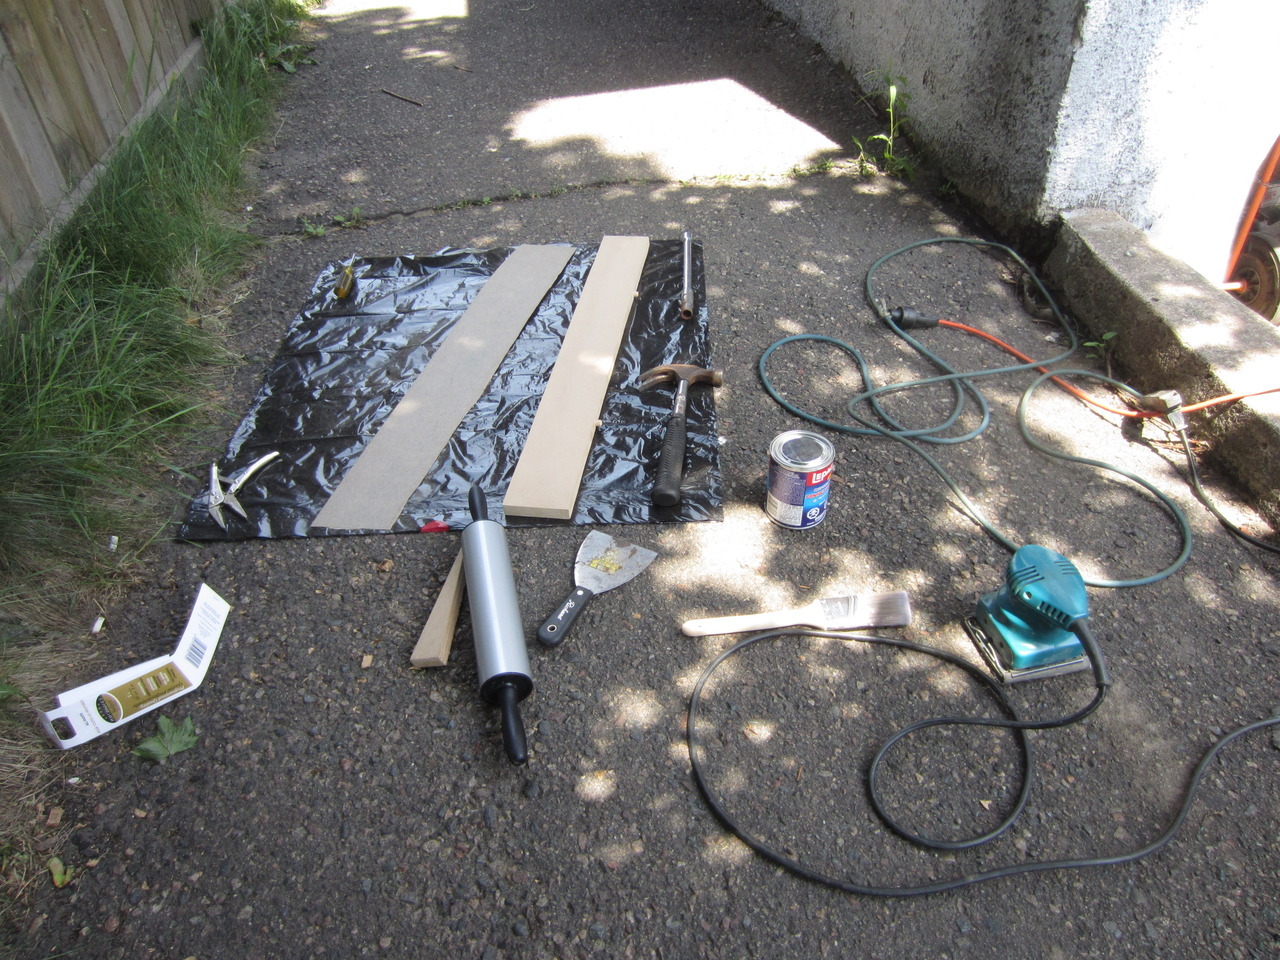
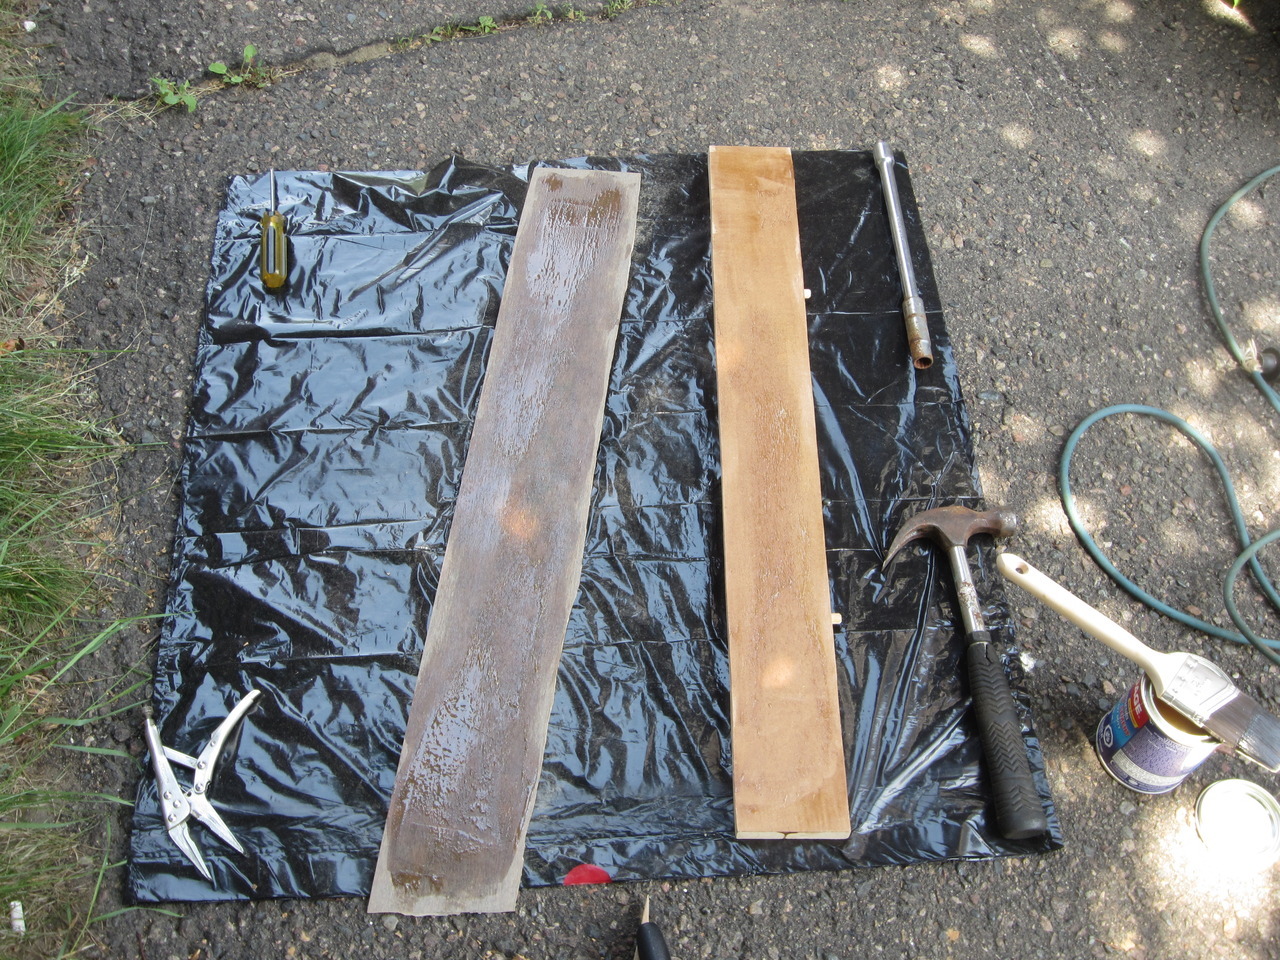
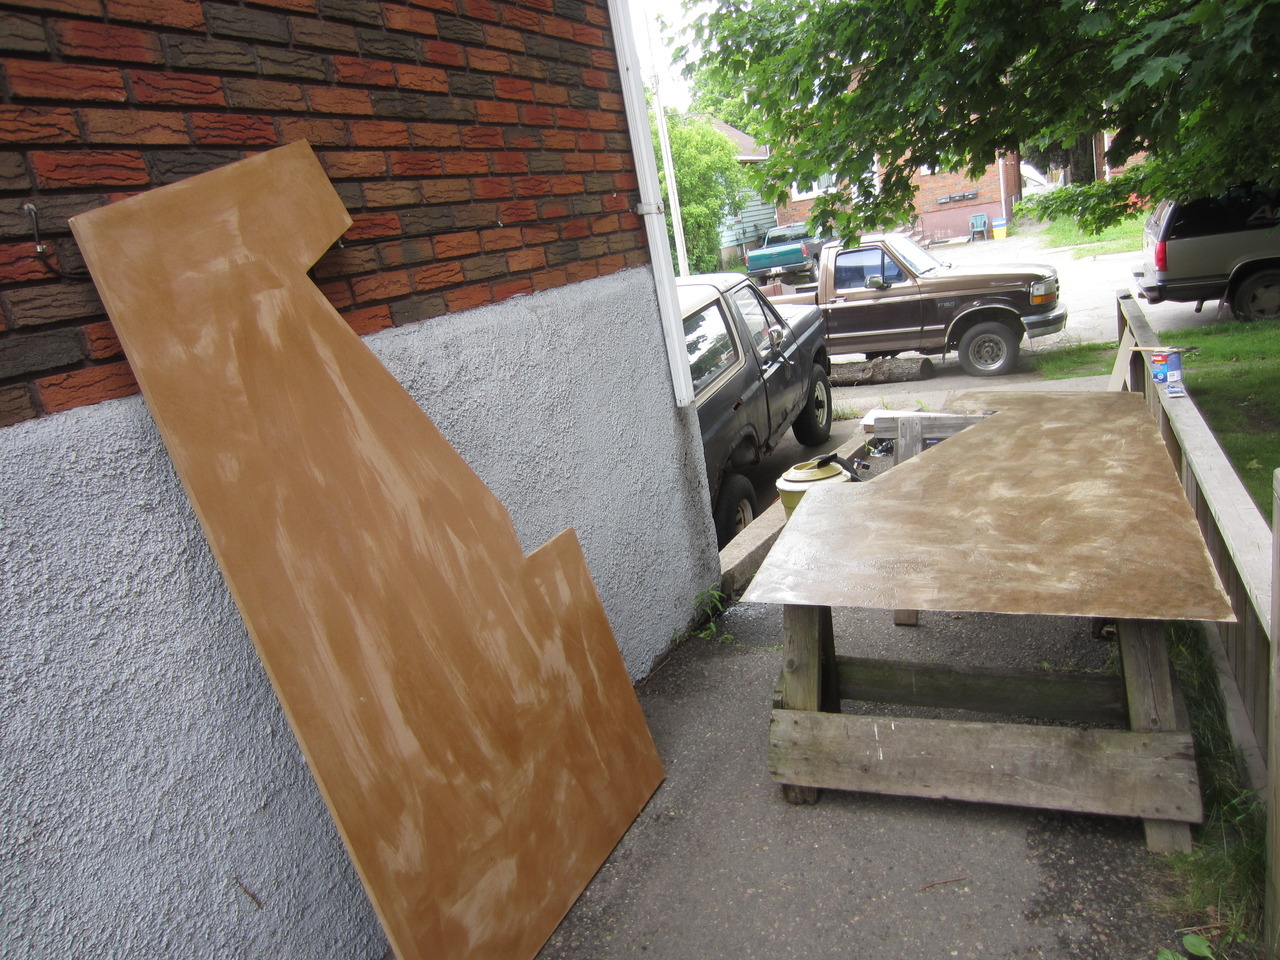
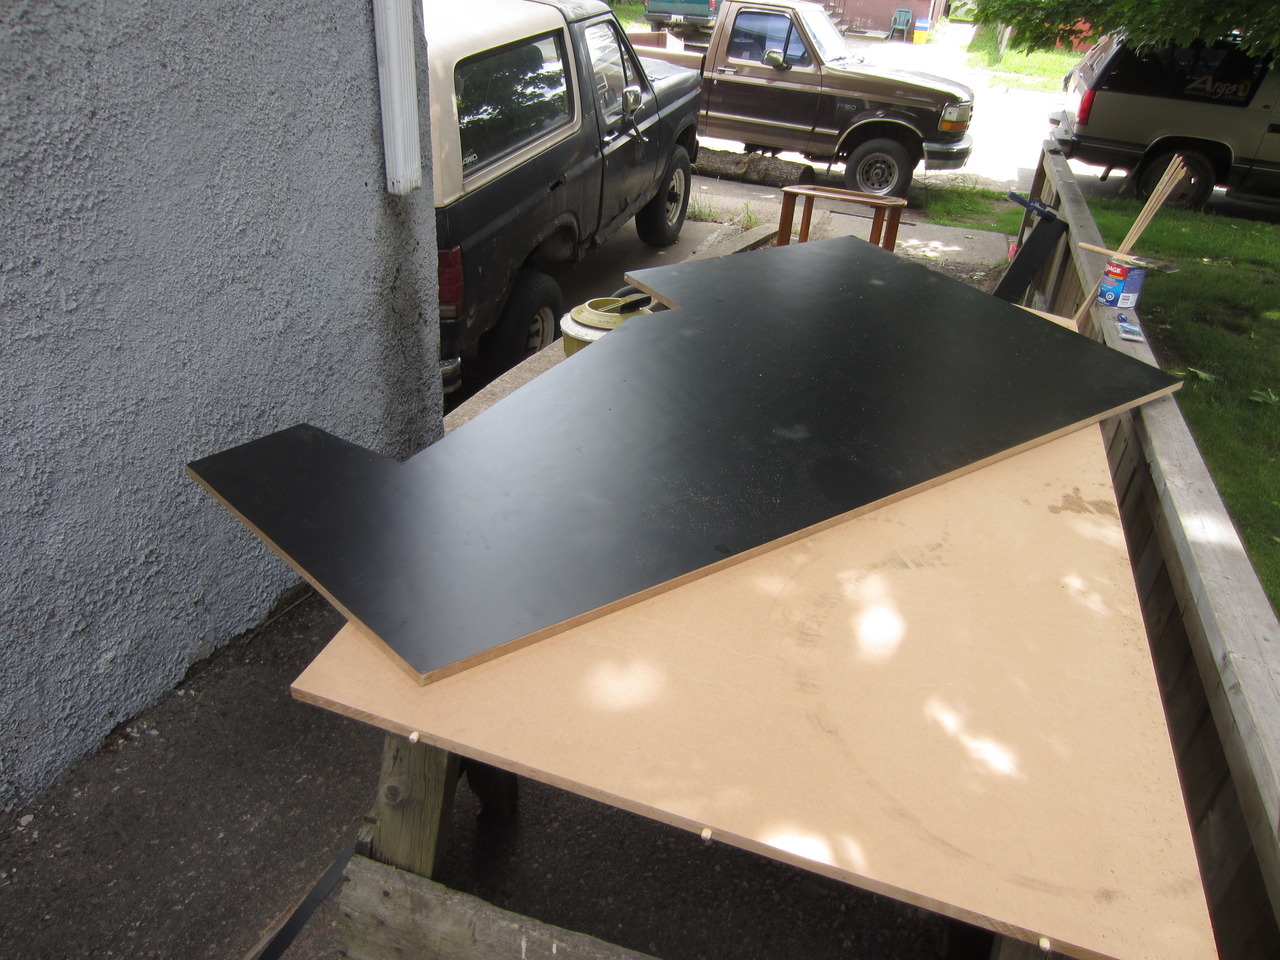
Laid out the two side pieces on a sheet of 5'x12' Formica in Matte Black:


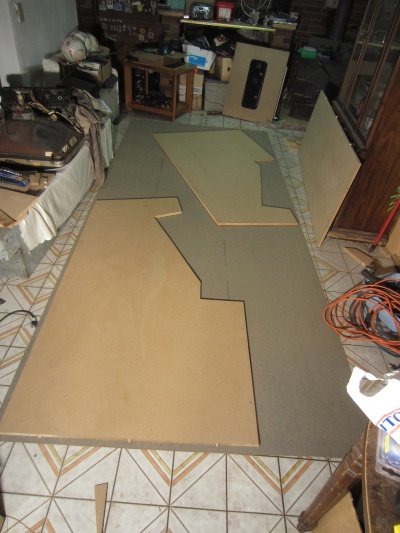
Used the edge of a bubble leveller to trace out the overhang for the pieces:


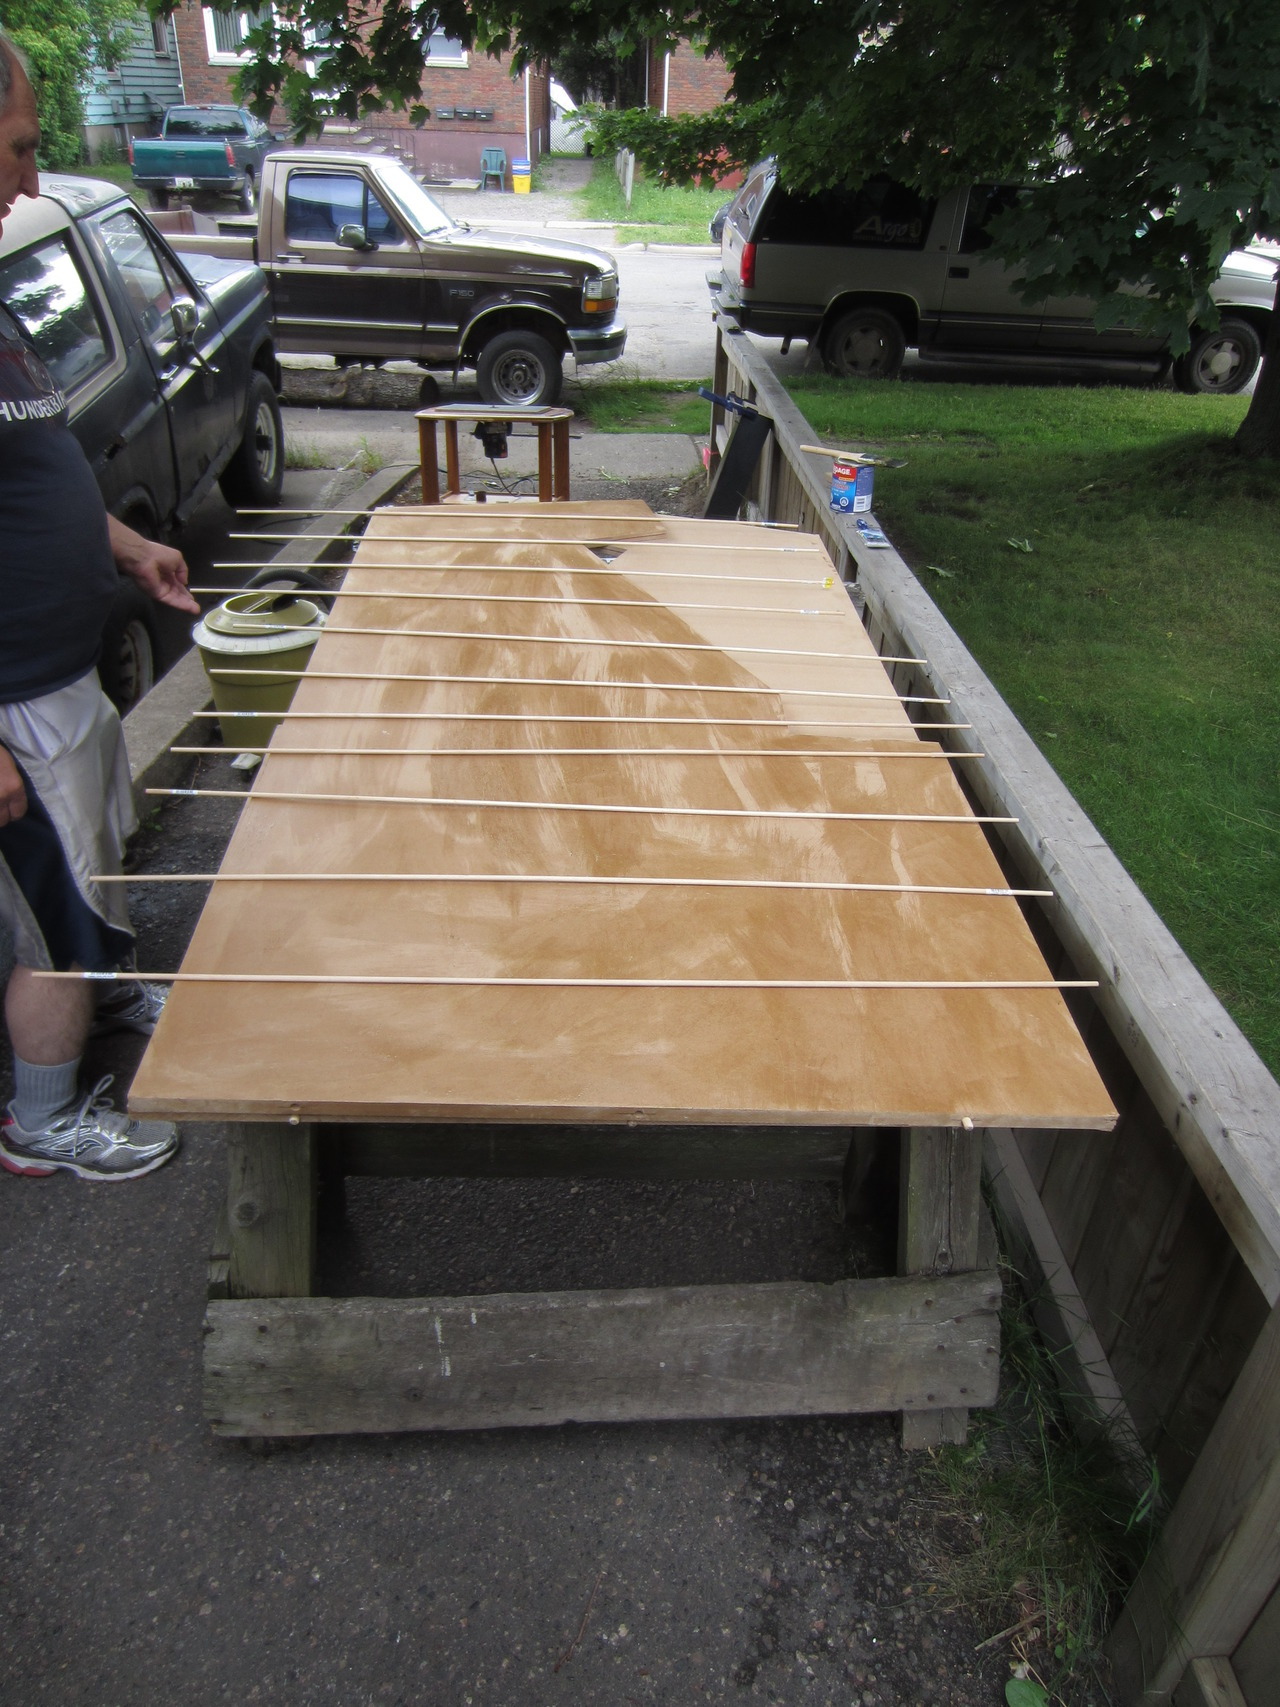
Rough cut the pieces, planning on routering the excess off from the inner edges for later use instead of trying to get all fancy with the exacto knife.  This stuff is very brittle and can be hard to work with, don't want to take any chances:


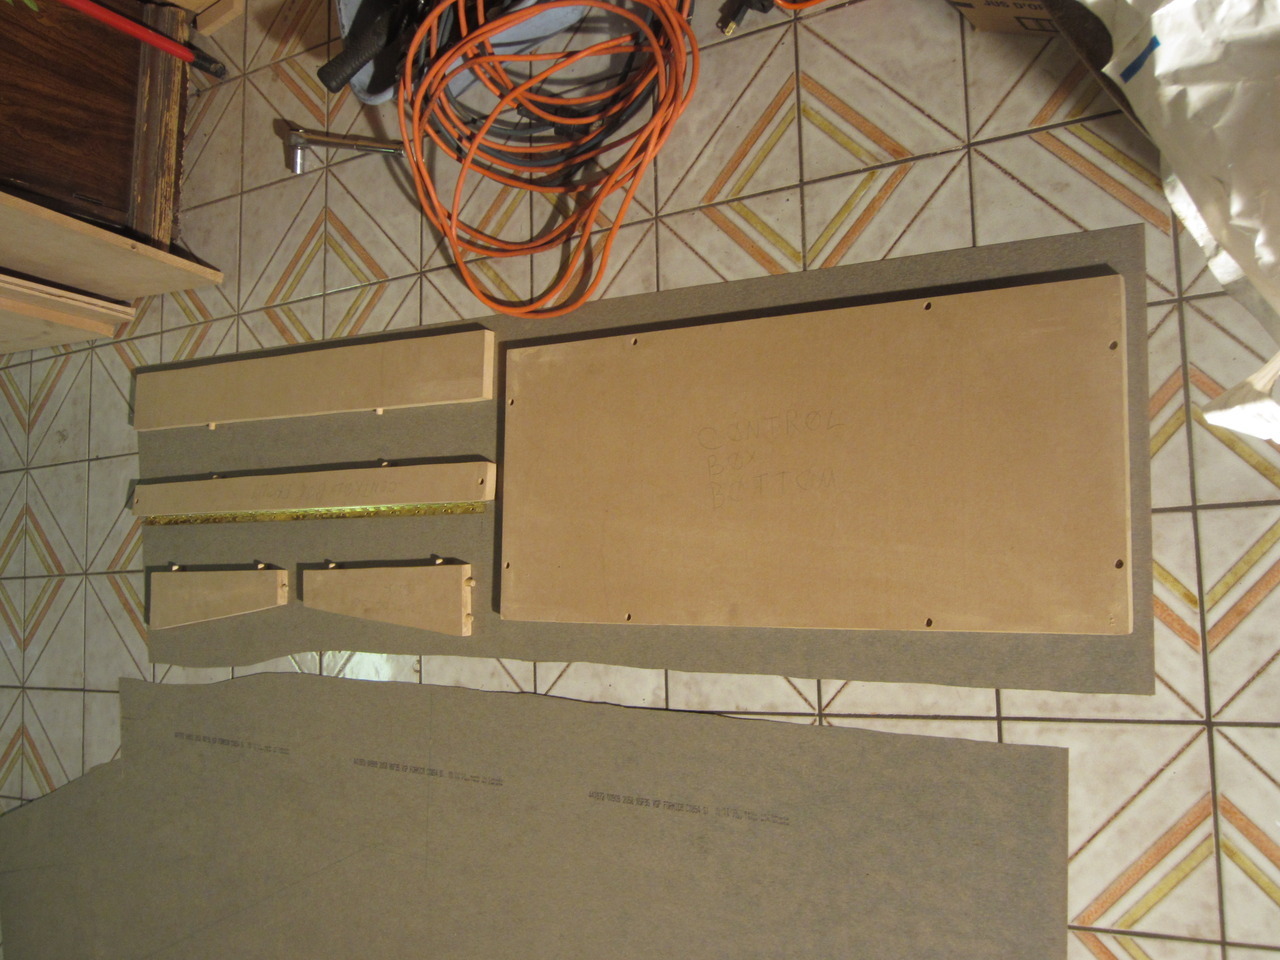
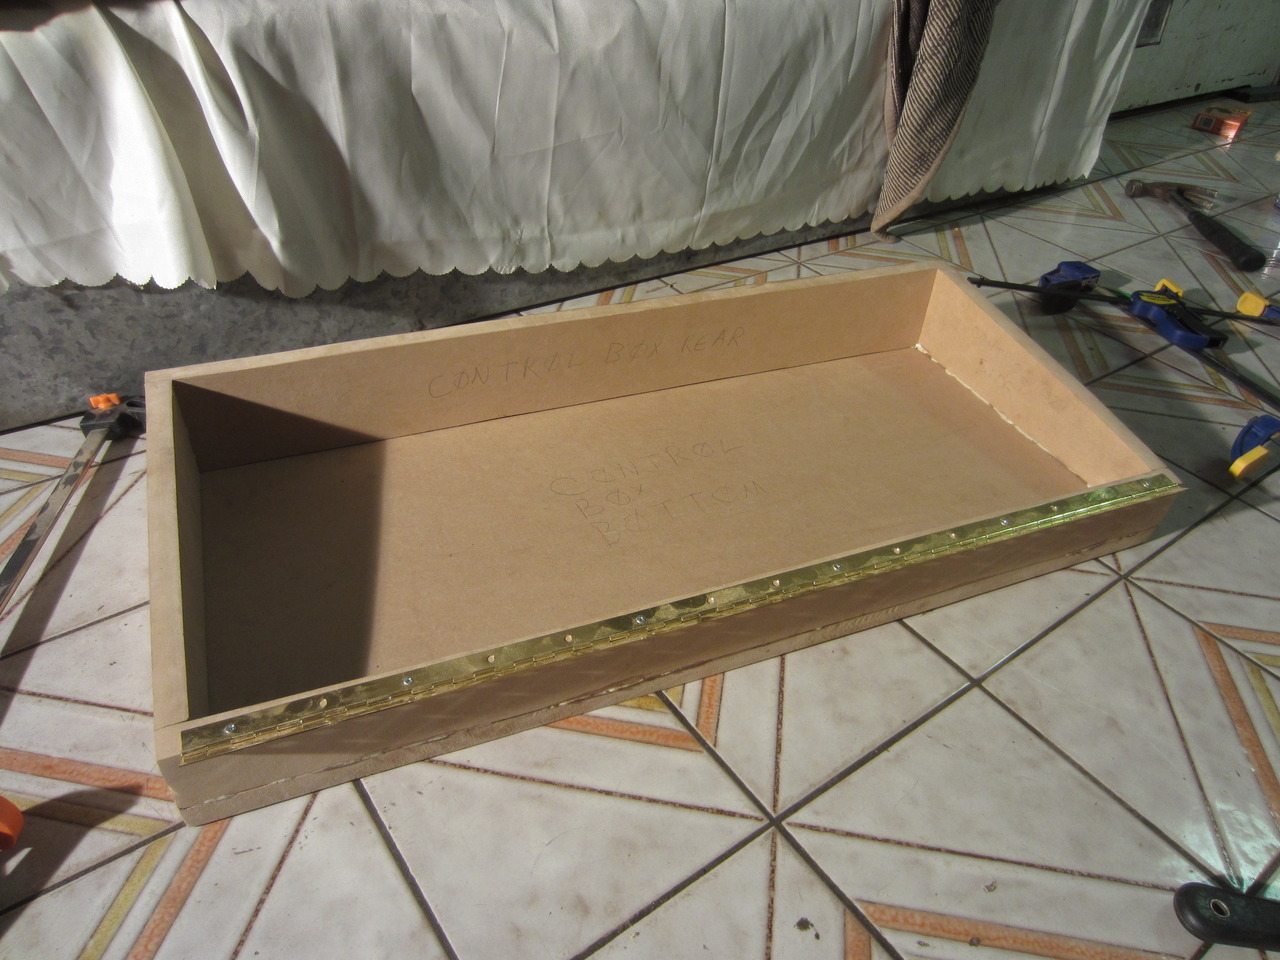
Also dismantled the CP box to laminate, found a scrap piece from the side cuts that fit all four pieces perfectly:


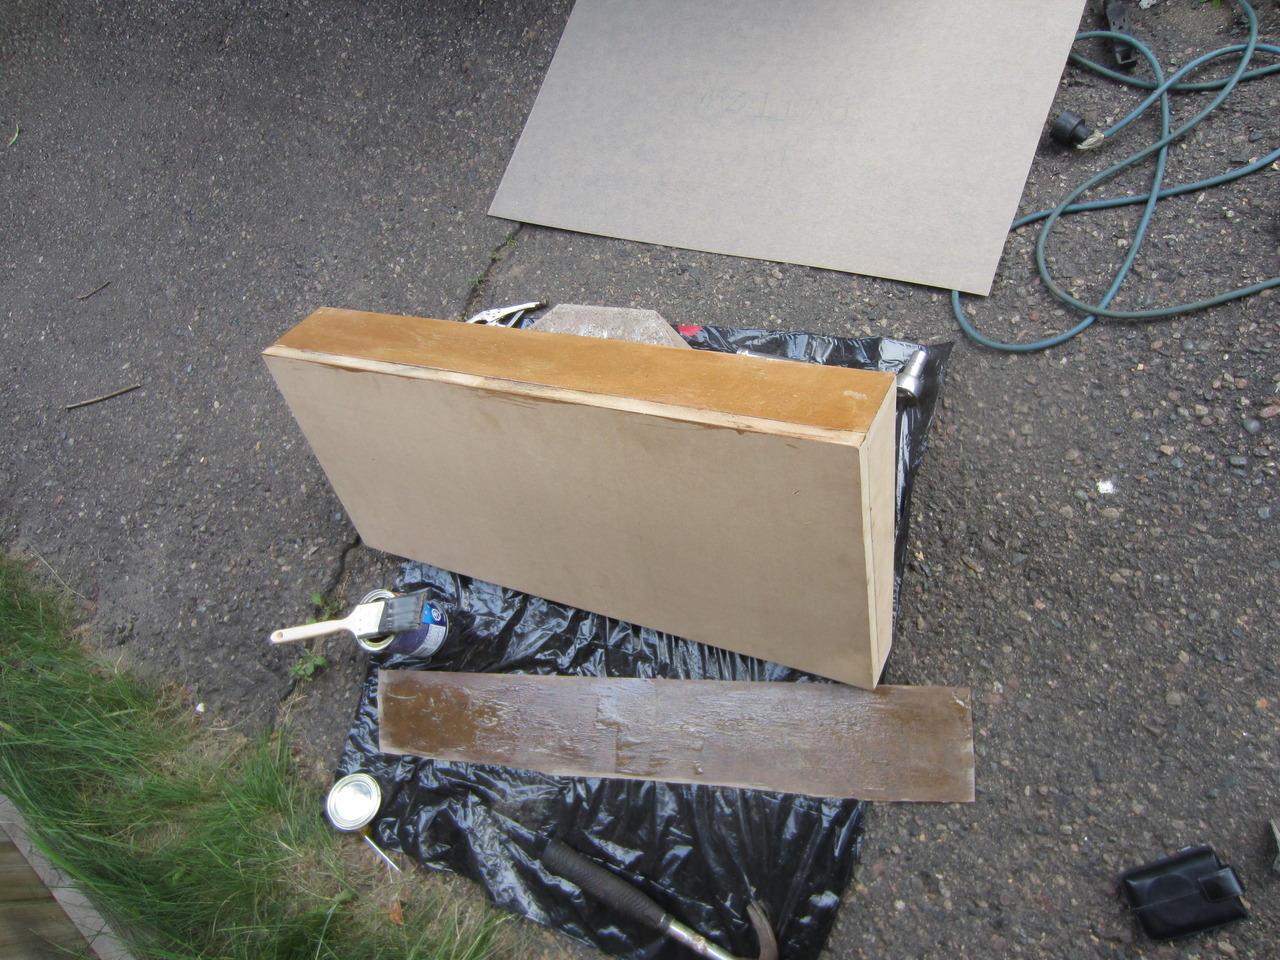
Cut the piece of Formica that was to go onto the back wall of the CP box, brought it outside and set up shop with the contact cement:


It was only AFTER I finished coating both surfaces with the contact cement that I realized that it would be pointless to fit the laminate on now, as the box would need to be glued together before laminating could occur!   :banghead: :banghead: :banghead: Stupid mistake #1...

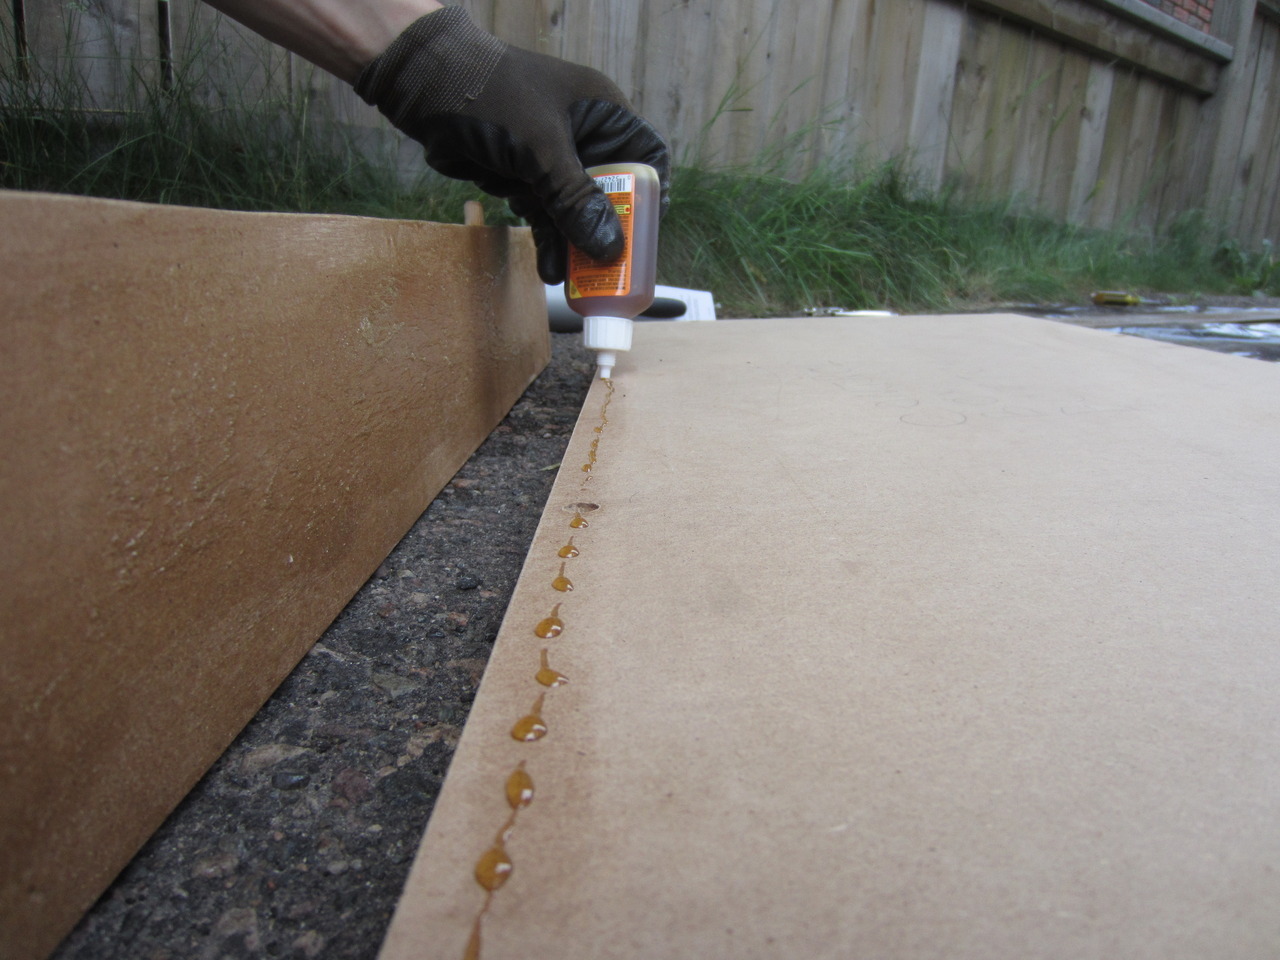
I grabbed a sponge and wet the surface of the base of the box and the edge of the back wall as was instructed on the back of the bottle of Gorilla Glue:


Dropped small dabs of glue along the edge and into the dowel holes:


...then realized the walls would have to be assembled first and THEN placed onto the base of the box, otherwise there would be no way to fit them onto the dowels.  It should be noted that I did not realize this until I had the back wall clamped up onto the base for about 1 1/2 minutes!   :banghead: :banghead: :banghead: Stupid mistake #2...

So I unclamped the back wall and applied wetness to all joint locations on all walls, glued them up, and got the base ready for further gluing:


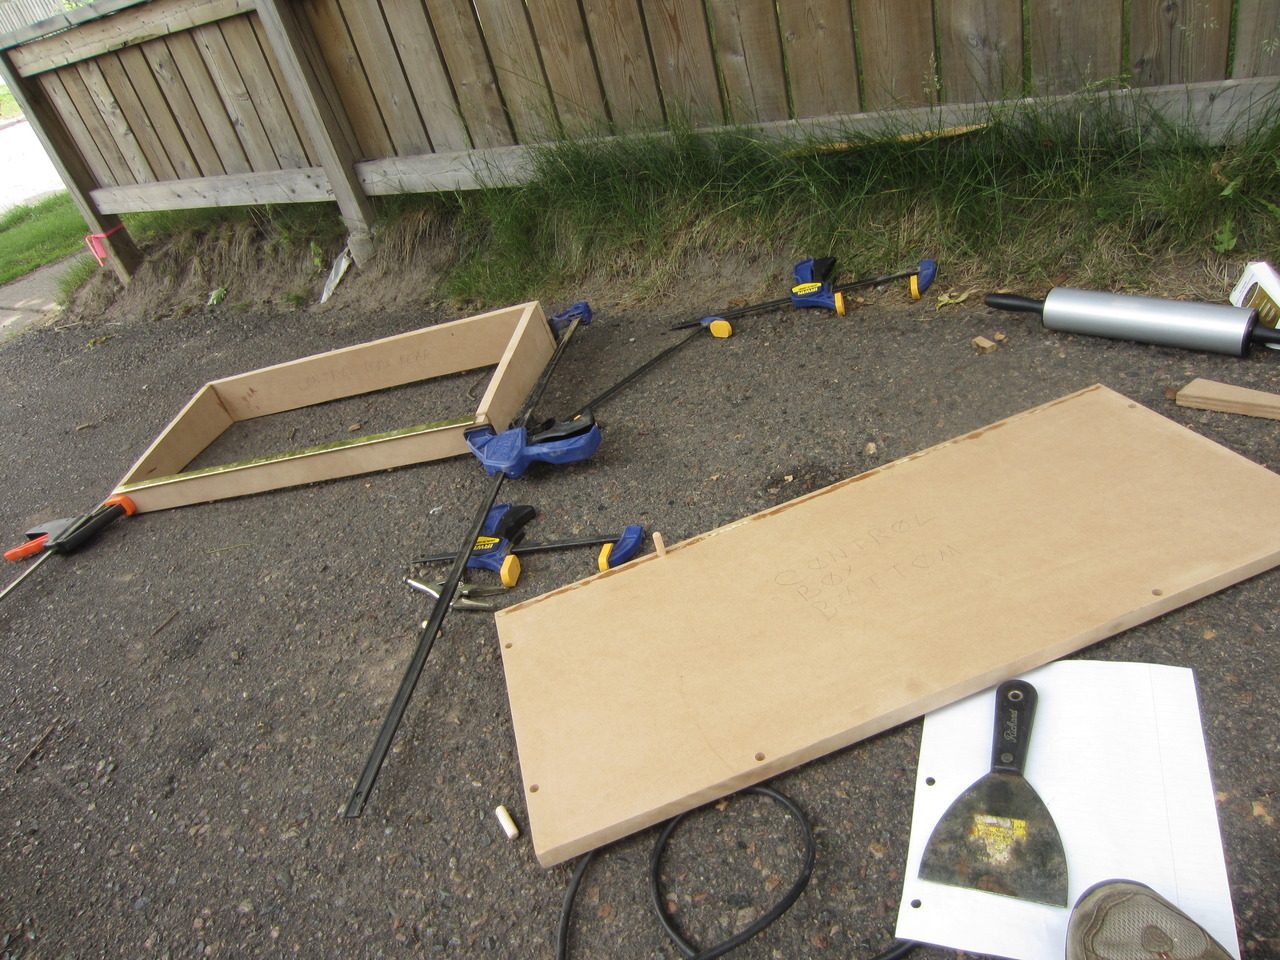
The result after 2 1/2 hours and a dinner:


The good news?  That contact cement that I had put on earlier dries in 15 minutes but any drying time longer than an hour just requires a fresh coat on both surfaces to "refresh" the product and allow for proper hold.

Re-coated the surfaces:


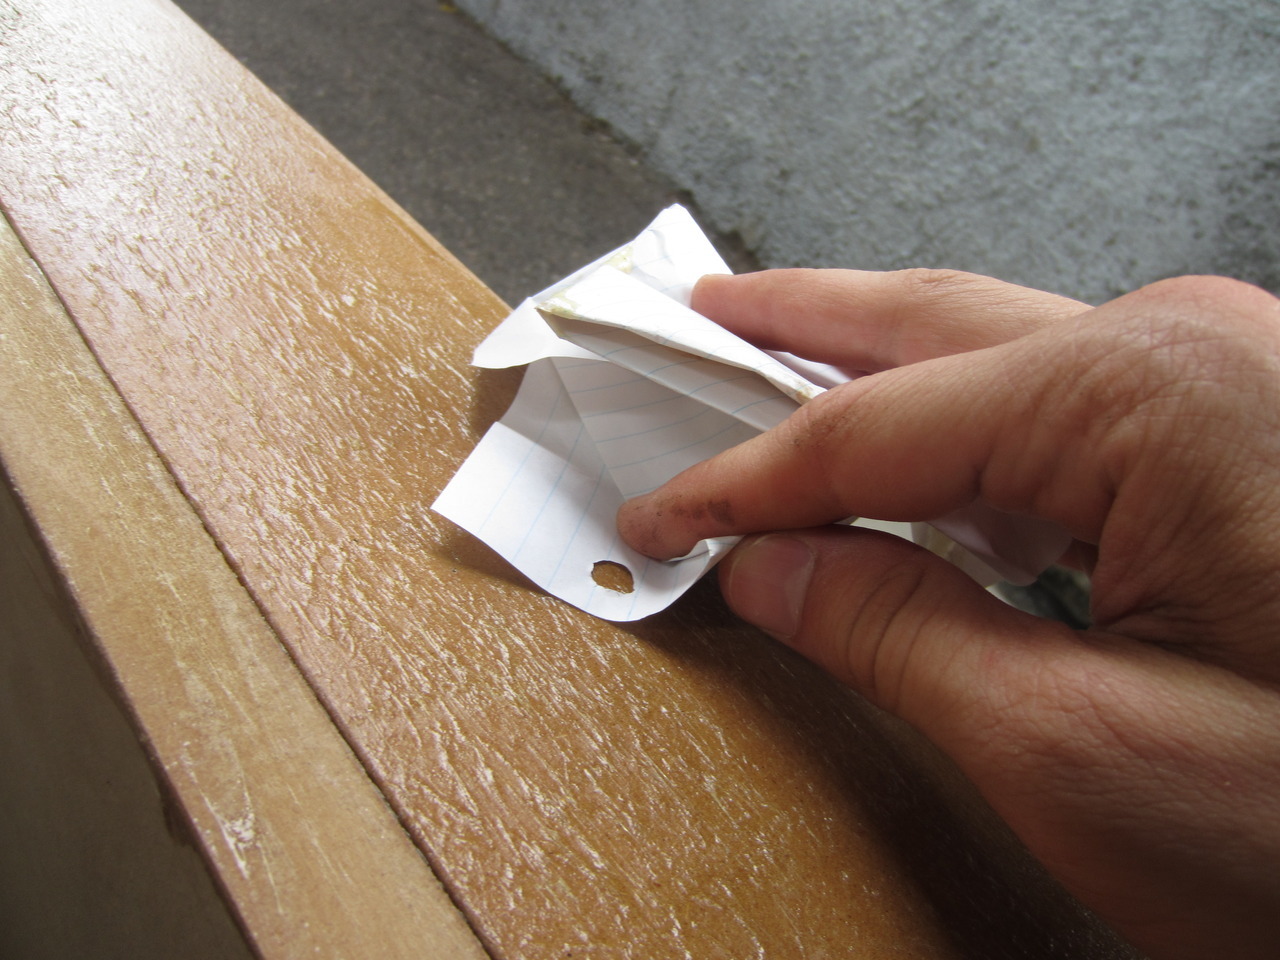
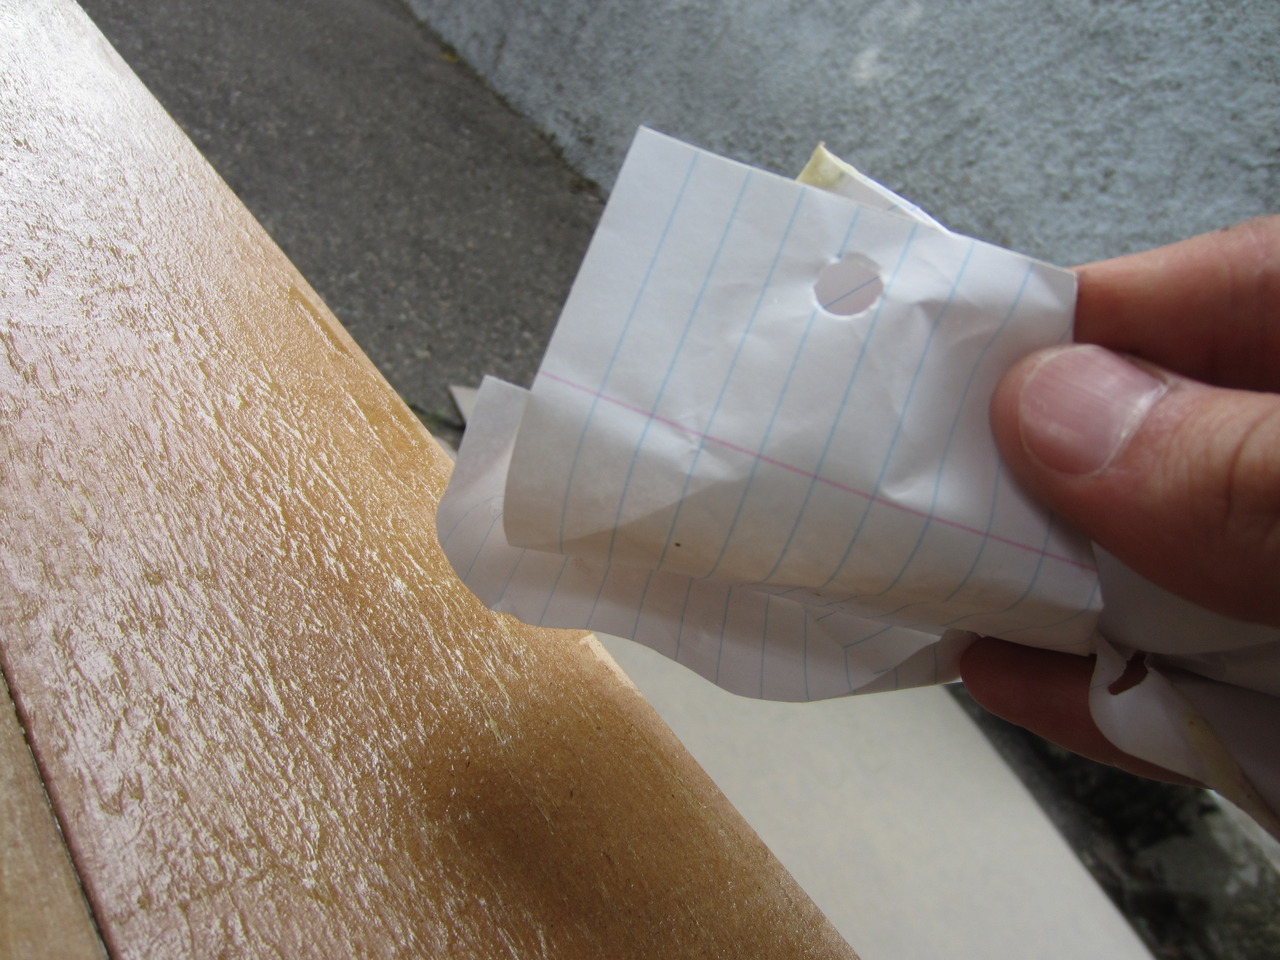
After waiting for 20 minutes for the product to dry, it should be non-gummy or sticky to the touch.  So, to test, took a clean piece of paper and dabbed it:


Looks good!  Onto application, I draped an extension cable over the surface to lay the Formica on:


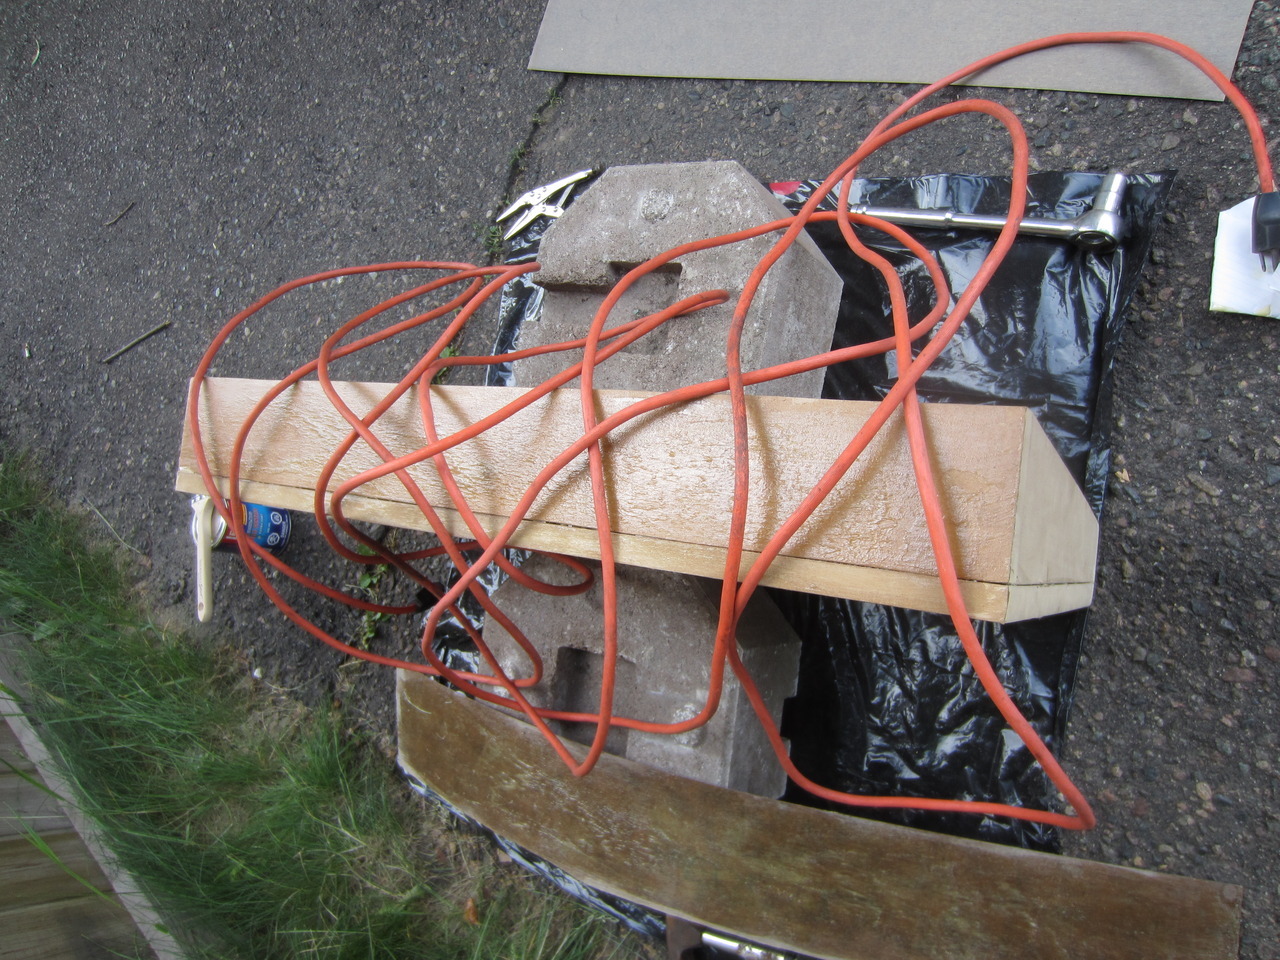
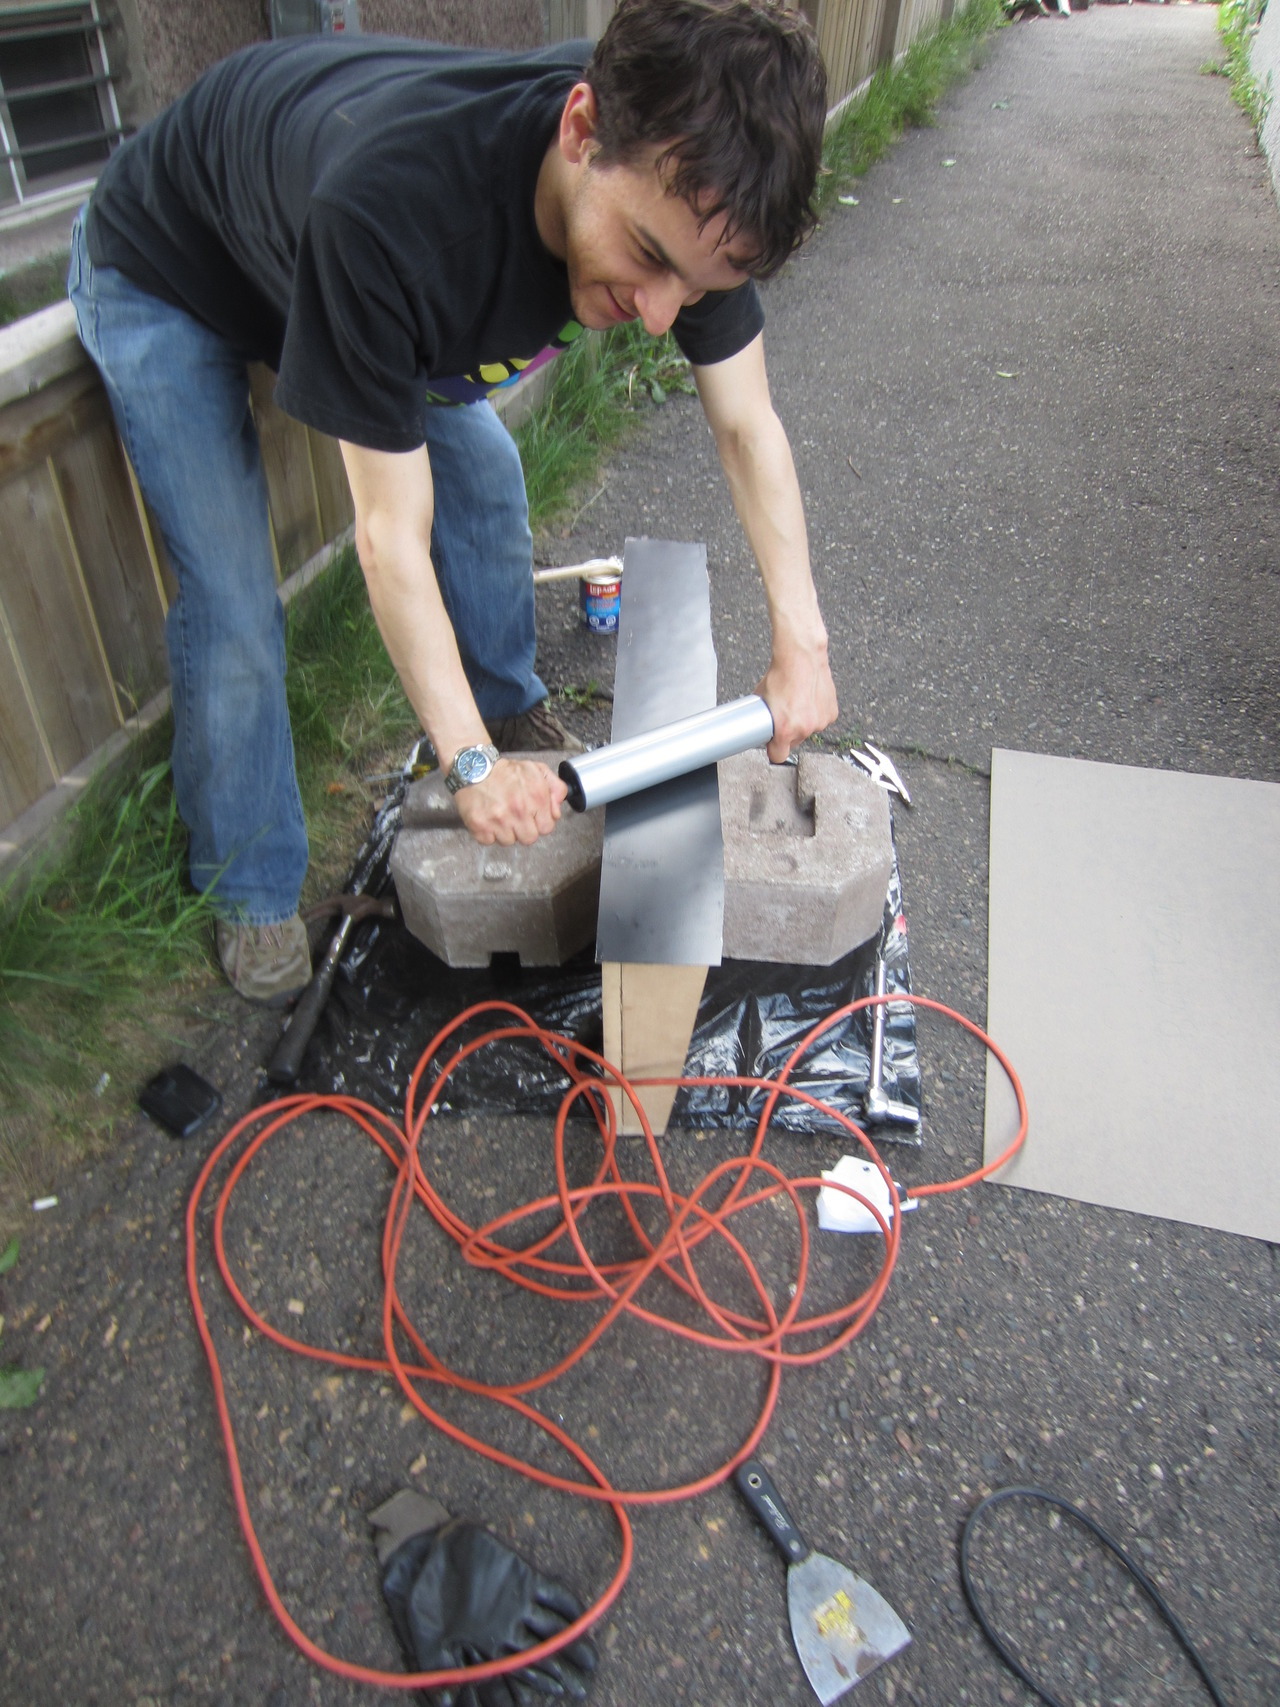
Pulled out the cable while applying pressure from one end to the other, then gave it a good solid rollering using a rolling pin:


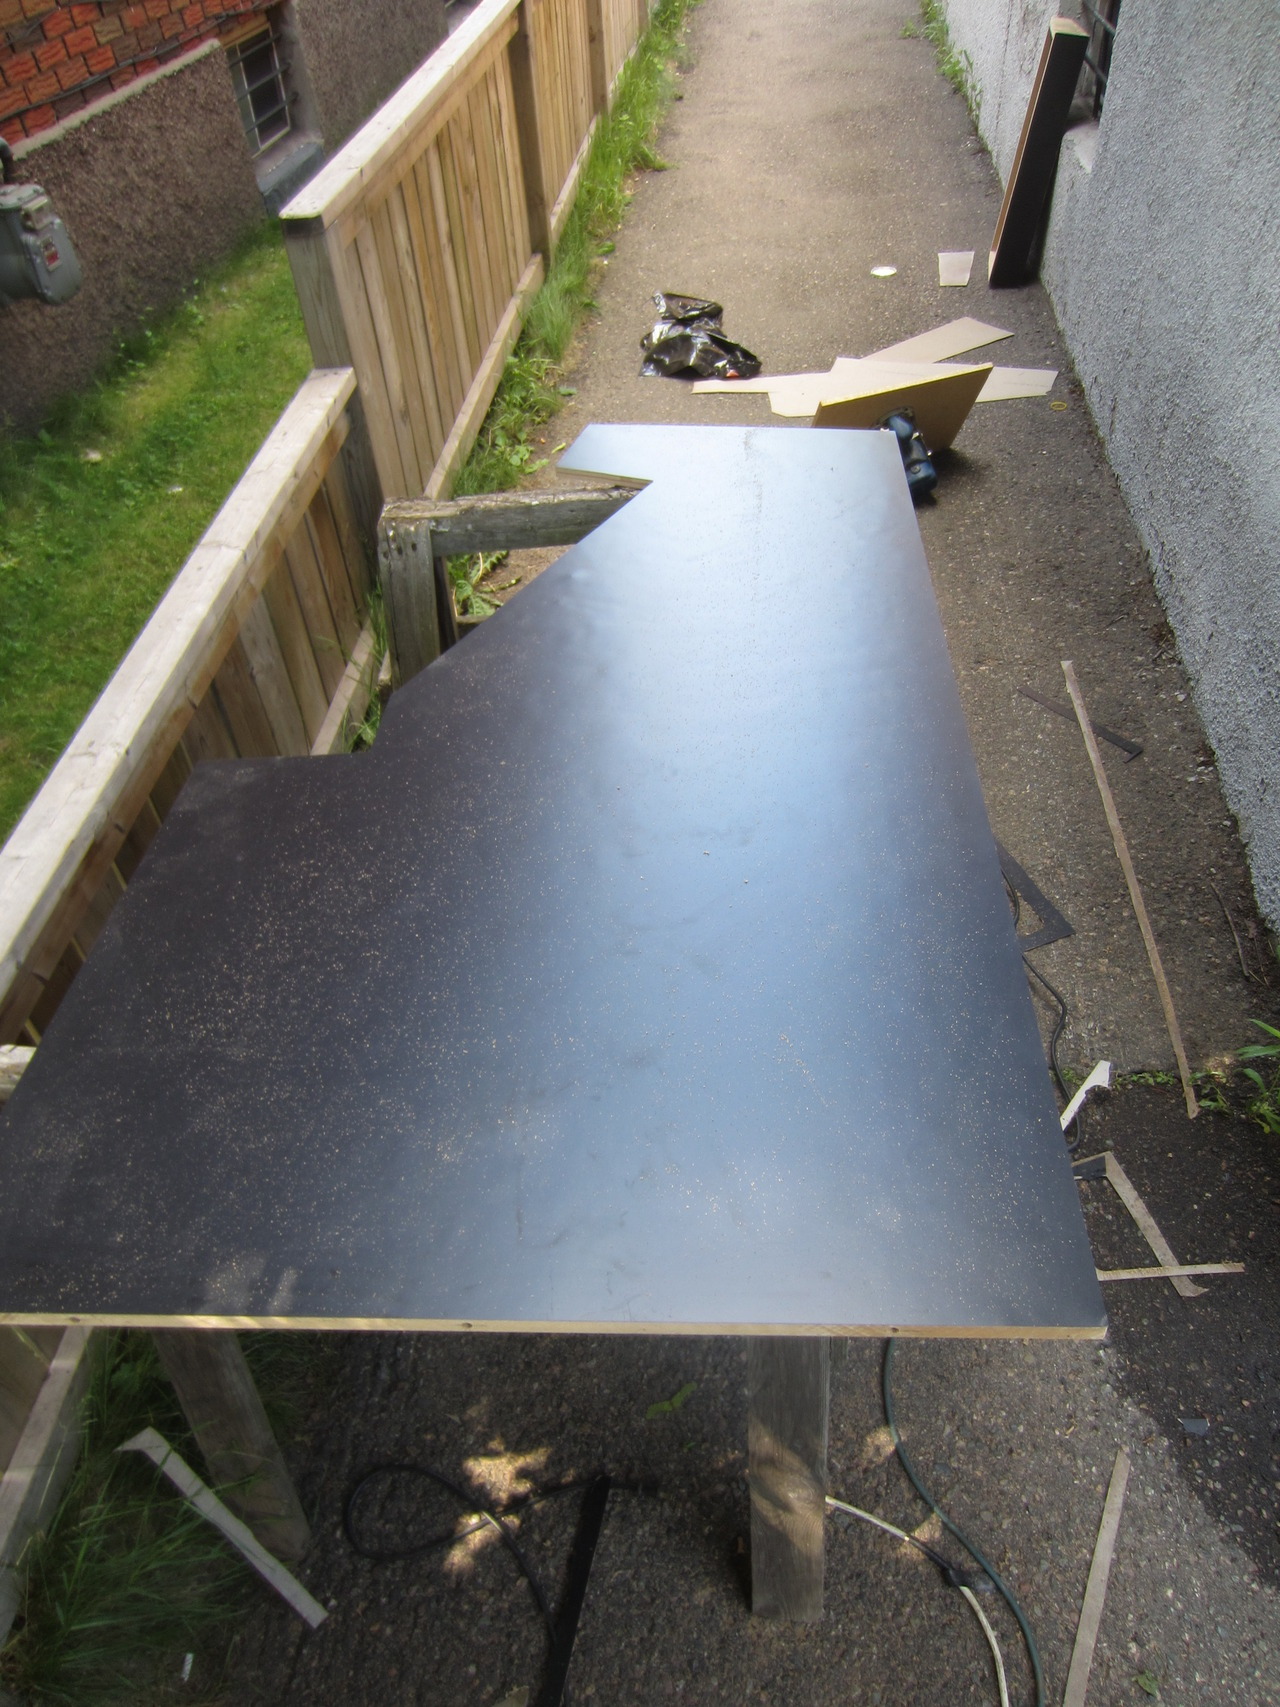
Applying the side laminate:


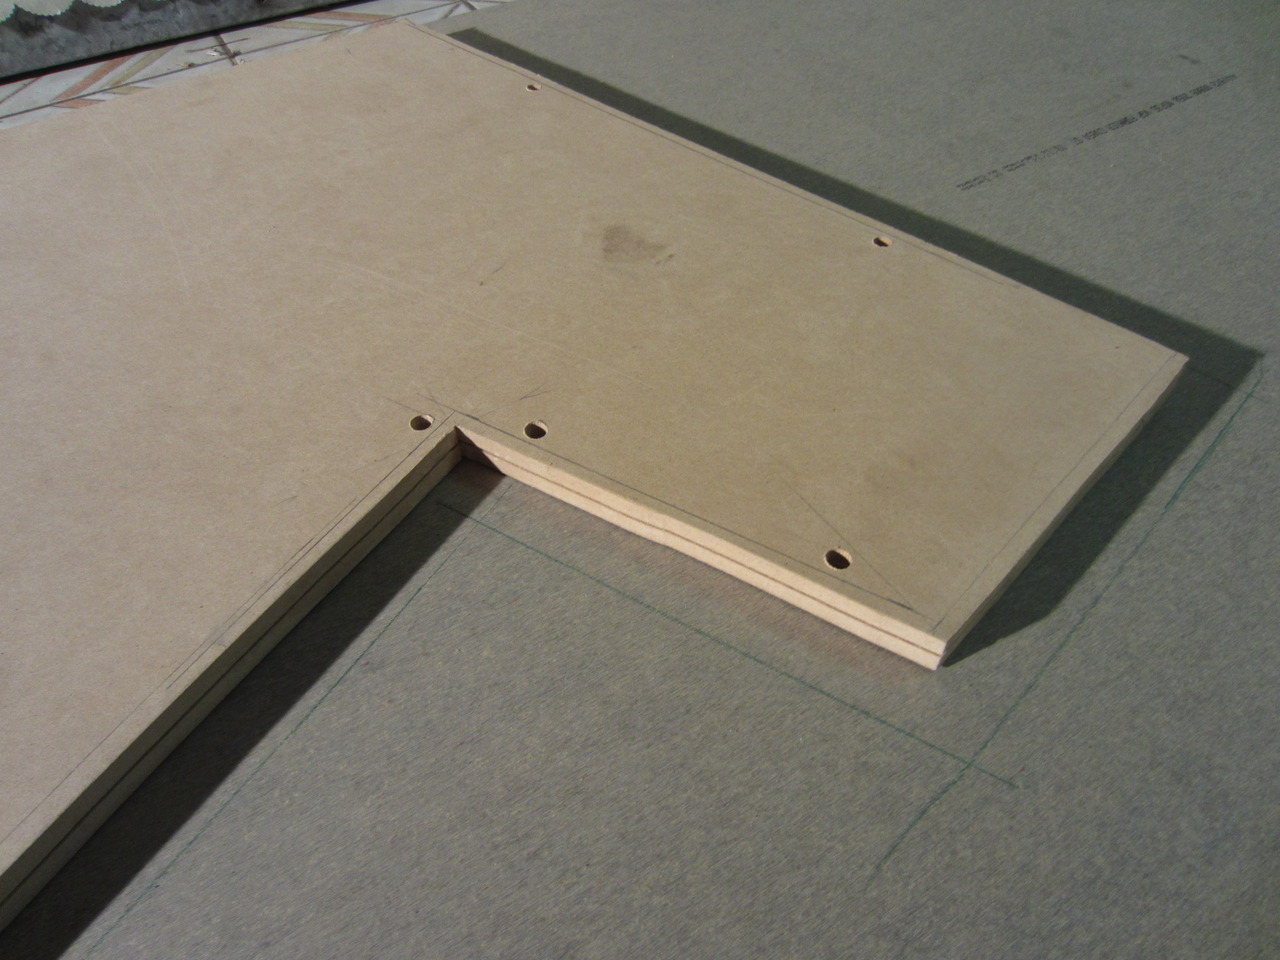
After routering using the flush trim bit:


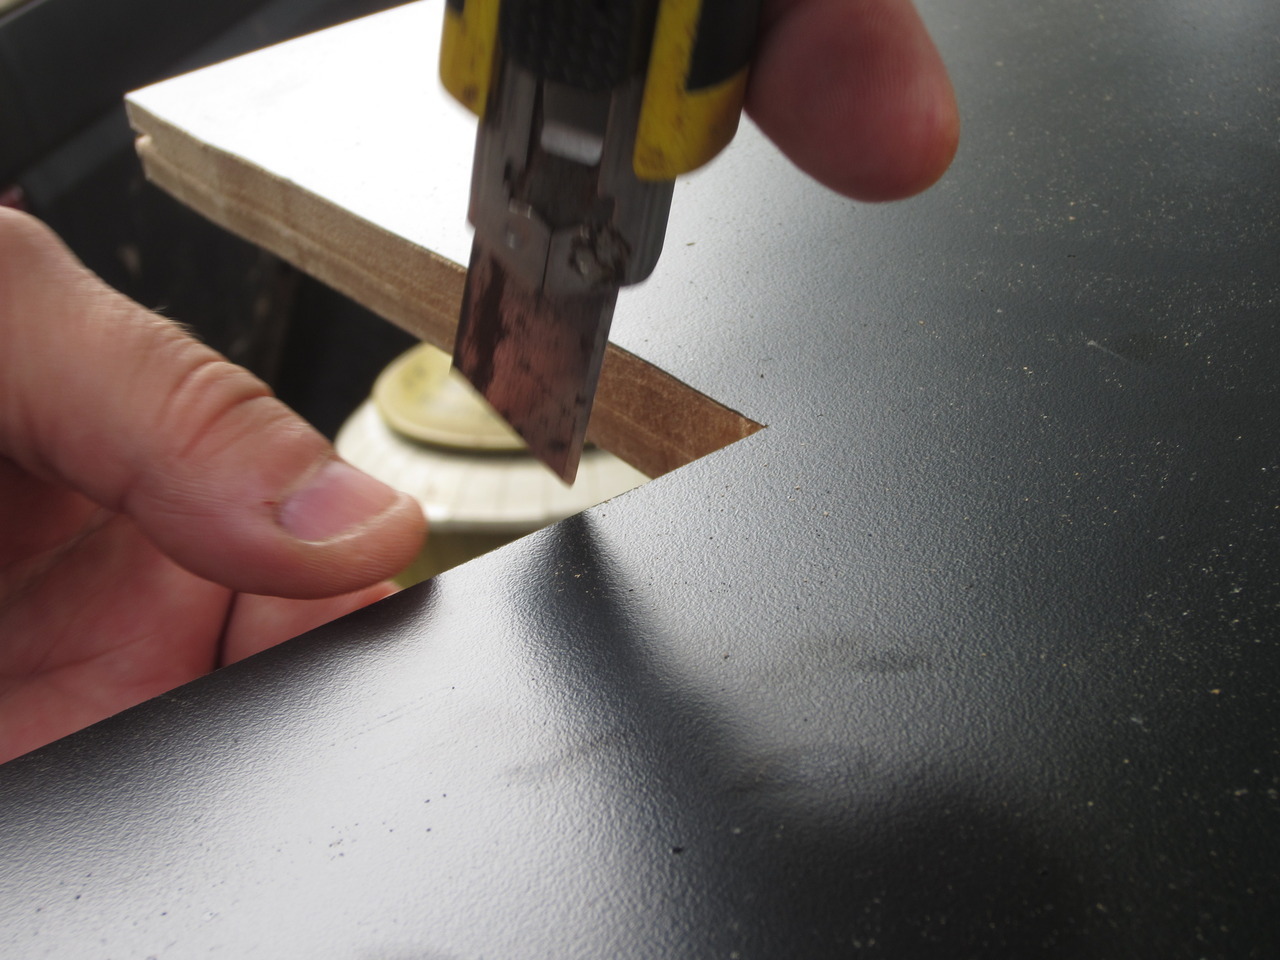
Cleaned up the inner edges that the router could not reach using a box cutter:


And also did the other side:


While laminating the rest of the CP box, I ran into an issue where I was going too slow with the router taking the excess Formica off:


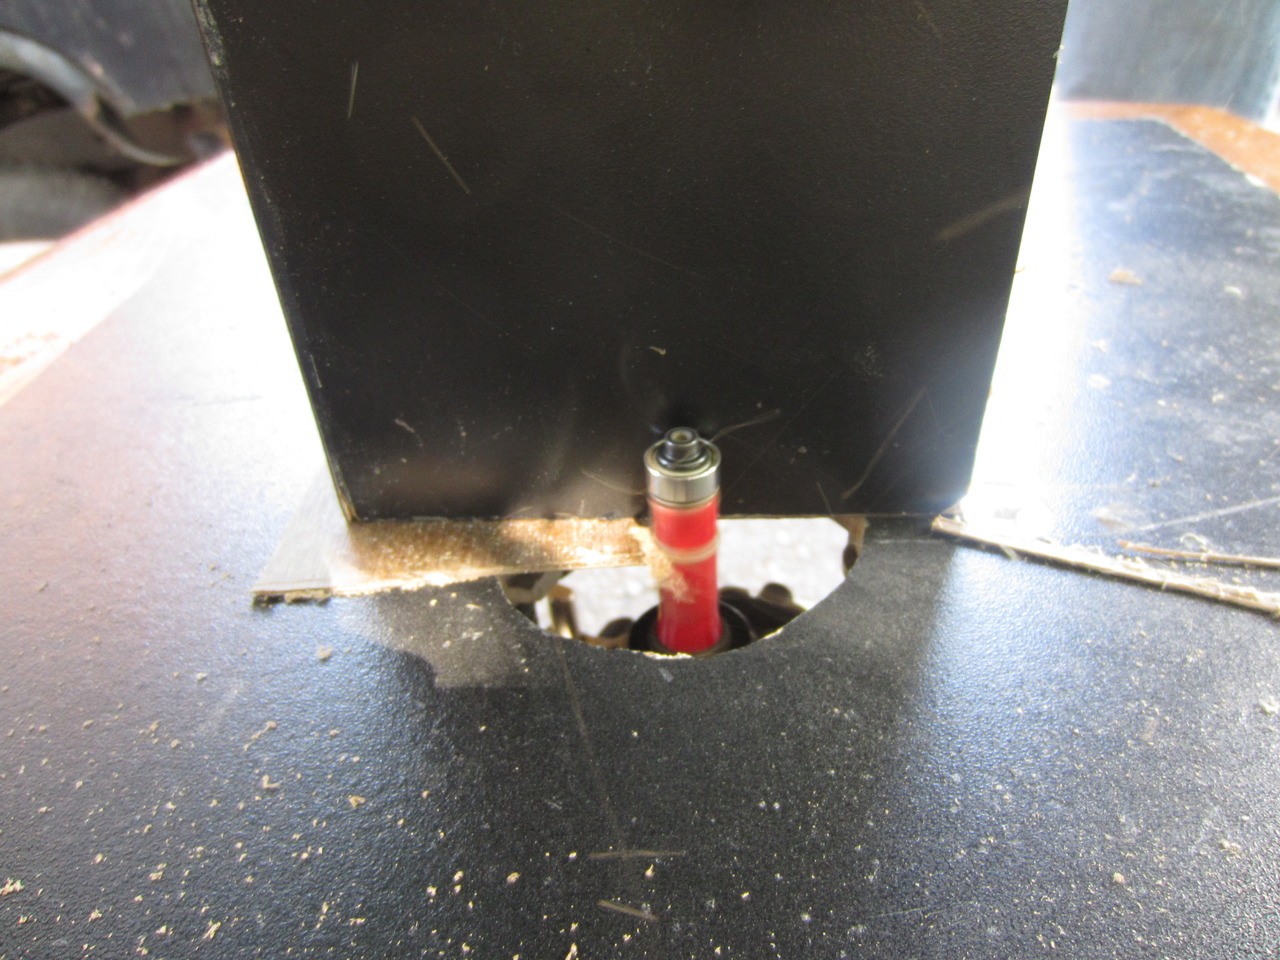
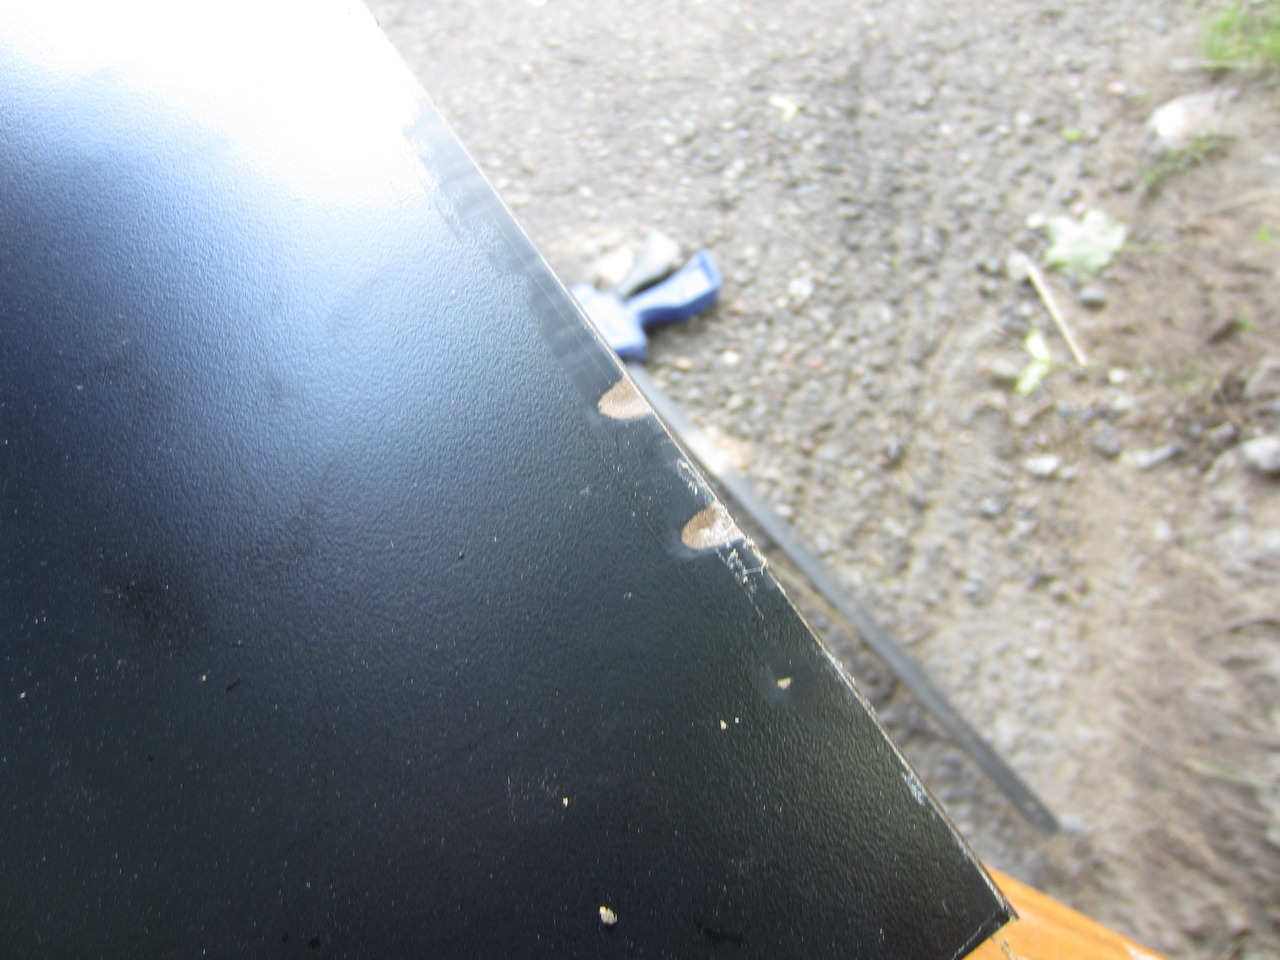
Some of the black of the laminate got scraped off by the flush trim bit, either due to overheating or the box tipping in the wind... not too worried as this will not be noticeable as it is on the underside of the box.  Need to be more careful in the future.  Also had another issue with my own impatience being my undoing... while laminating the sides, I had them up on old sawhorses.  I suppose there were some nails sticking up somewhere on them, as when I went to go remove the side panels by myself without going to get help, I scraped the inner walls of one of them:


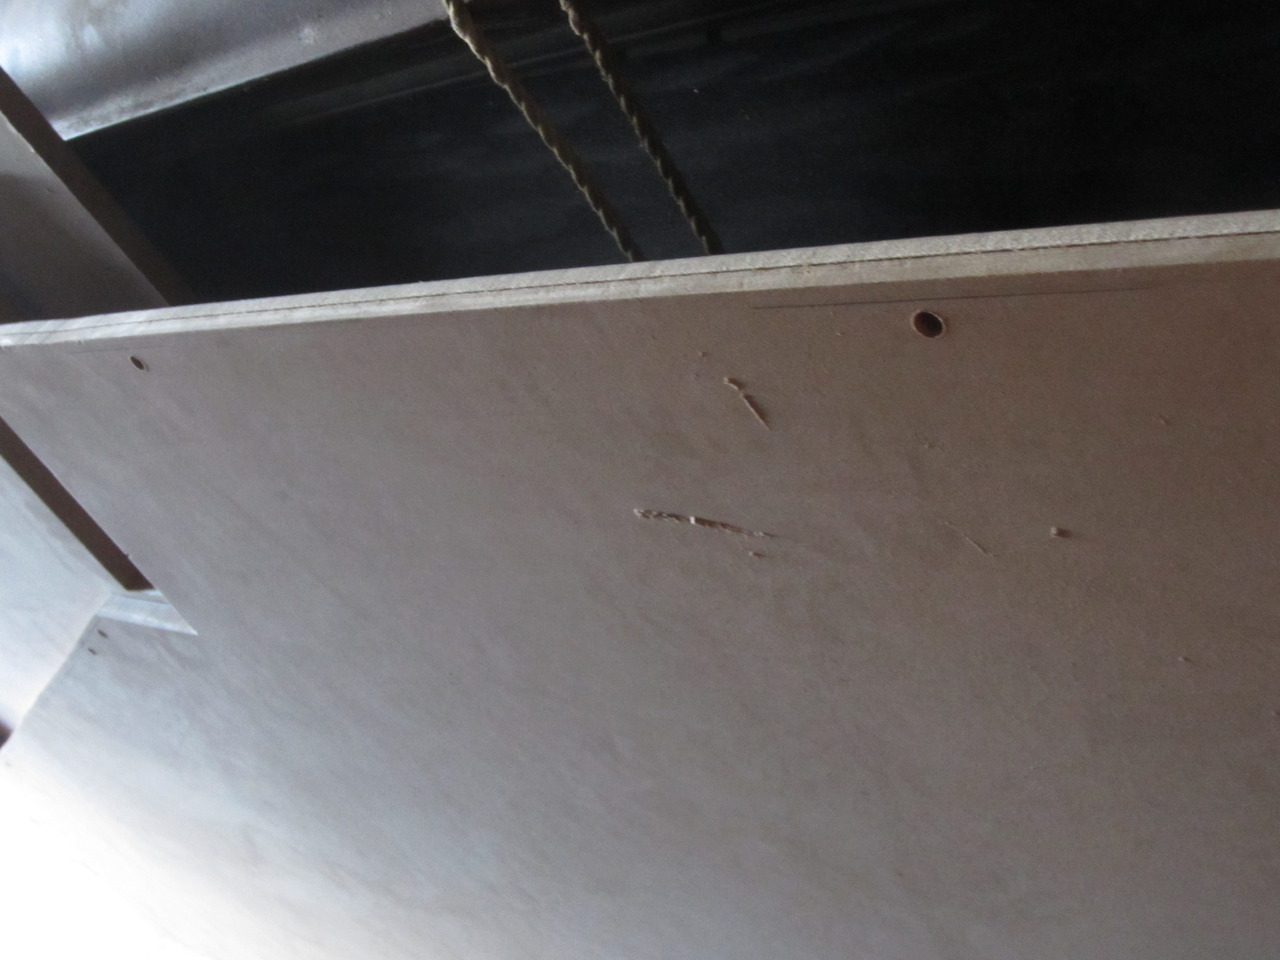
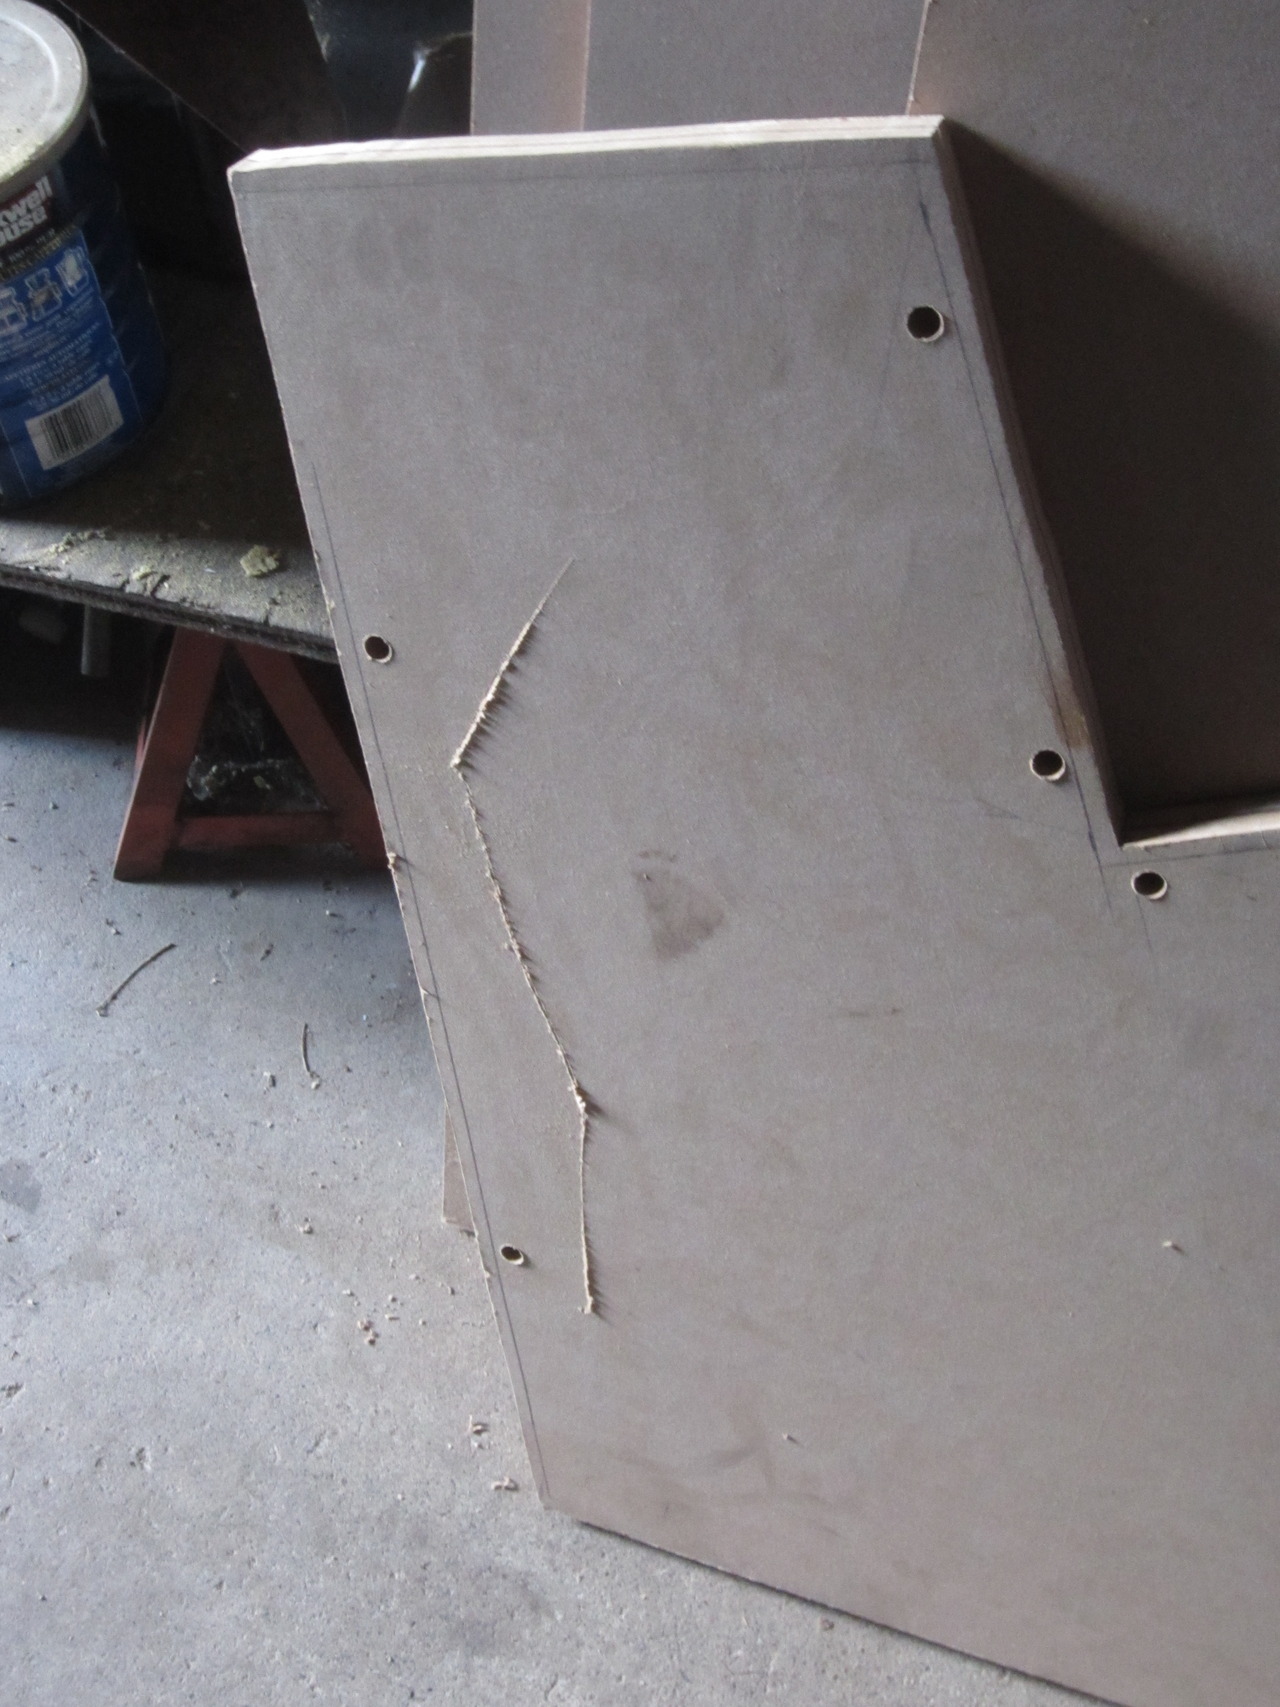
Sanded these down some, and much like bottom of the CP box, the mistakes will be hidden.

Seith

  • Trade Count: (0)
  • Full Member
  • ***
  • Offline Offline
  • Posts: 402
  • Last login:September 08, 2018, 10:50:41 am
Re: The Smash Pad - Formica-pable
« Reply #76 on: June 25, 2012, 12:11:22 pm »
Brought out my Logitech Z3000 speakers for measuring:


The plan is to mount the volume controls on the kickplate right under where the CP overhang is, hidden from view yet easily accessible.

First, remove the knobs:


Sanded them to allow for better spraypainting:


An hour and a half later:


Not sure if I am happy with this... may do a second coat.

Also brought the side panels back out for some inner-wall priming.  Using a water-based enamel primer:


Two coats (with sanding in-between) later:


While doing that, my dad got to work on cutting the holes for the speaker panel:


Right now the speakers sit in the holes as a friction fit.  They are really tight in there, but my plan is to cover the holes with metal speaker grill as mountain did with his Fantasy cab and Martijn did with his two cabs in the past.  More on that once the grill arrives.

Some more pics of the finished laminate work... sides:


CP Box:


Kickplate (with coindoor fitted from happ controls):


Looking for a good source for a different 25-cent graphic to replace the default one with in the coin slot... I remember there being a website someone posted that had these to print out.

Seith

  • Trade Count: (0)
  • Full Member
  • ***
  • Offline Offline
  • Posts: 402
  • Last login:September 08, 2018, 10:50:41 am
Re: The Smash Pad - Formica-pable
« Reply #77 on: June 28, 2012, 09:35:32 am »
Anybody have a place I could go online to find the "25¢" graphic insert printable?

PL1

  • Global Moderator
  • Trade Count: (+1)
  • Full Member
  • *****
  • Online Online
  • Posts: 9408
  • Last login:Today at 12:55:42 am
  • Designated spam hunter

Seith

  • Trade Count: (0)
  • Full Member
  • ***
  • Offline Offline
  • Posts: 402
  • Last login:September 08, 2018, 10:50:41 am
Re: The Smash Pad - Speaker Given Lip By Overzealous Gamer
« Reply #79 on: July 03, 2012, 10:59:23 pm »
So I covered the speaker panel with Formica, and even covered right over the holes.  Why?  Well, I wanted to add a speaker grille to the holes instead of just having the speakers poke out bare like they were in the previous pics.  My thought was that we already had a hole cut that friction-fitted the speakers, so instead of routing the Formica to the edges of the existing holes, then routing out a lip on the underside for the grill to attach to, why not leave the hole as it is and route out a lip in the Formica over the hole? 

First we butted up a scrap piece of wood for the drill to create a pilot hole into:


Making the pilot holes big enough for the flush trim bit to fit through by using the thinner straight bit:


It seemed like an easy enough thing to do when talking about it, but when it came time to formulate a plan of action, we were stuck.  Our first thought was to extend the flush trim bit up high enough to reach a guide piece we could clamp to the top of the panel:


But then we'd have a clamp on the bottom of the panel, which made it next to impossible to move around on the router table.

Our next thought was to leave the flush trim bit plunged enough to touch the edge of the speaker hole, but to make the bearing 1/8" thicker so that it would run along the edge, creating the perfect cut for us.  To do this, we used the one thing you'll find in every Canadian home... Hockey Tape:


..........


....


..


This didn't work to our expectations.  Luckily my dad's steady hands made sure not to cut into the laminate we wanted to use for our lip.

Finally, we figured "we can't make a guide along the top, why not make a guide outside the hole entirely?"  This worked far better than our first two attempts:


We did this for all four lengthwise cuts into the laminate, and hand-guided the panel through the vertical cuts as steadily as we could, as we couldn't create an edge butt for the sides of the panel due to the size of our makeshift router table.  We ended up cleaning up those cuts with some sandpaper, and the result was actually pretty good:


Maybe a little more sanding before applying the grill.

Also painted the inner edges with Spray On Rust-Oleum Matte Black:


Not the prettiest paintjob these boards have seen, but i'm happy with it, as it's only going to be a 1/4" overhang against any boards.  I am sure nobody will bat an eye at it (nobody i'm concerned with anyway!)

And, while waiting for the paint to dry, re-coated the volume knobs after being unhappy with the first coat:

After a light sanding:


And the result:


Much better...  :)