Main Restorations Software Audio/Jukebox/MP3 Everything Else Buy/Sell/Trade
Project Announcements Monitor/Video GroovyMAME Merit/JVL Touchscreen Meet Up Retail Vendors
Driving & Racing Woodworking Software Support Forums Consoles Project Arcade Reviews
Automated Projects Artwork Frontend Support Forums Pinball Forum Discussion Old Boards
Raspberry Pi & Dev Board controls.dat Linux Miscellaneous Arcade Wiki Discussion Old Archives
Lightguns Arcade1Up Try the site in https mode Site News

Unread posts | New Replies | Recent posts | Rules | Chatroom | Wiki | File Repository | RSS | Submit news


Author Topic: My First Project: Big Buck Hunter Cabinet  (Read 5437 times)

0 Members and 1 Guest are viewing this topic.

gonzalma

  • Trade Count: (0)
  • Full Member
  • ***
  • Offline Offline
  • Posts: 37
  • Last login:April 03, 2020, 09:07:02 pm
My First Project: Big Buck Hunter Cabinet
« on: June 29, 2012, 03:27:55 pm »
I have been looking to have a MAME cabinet for a few years now.  Now and again, I would search Craigslist and such looking for an old broken Arcade Cabinet to convert.  I finally managed to aquire this by sheer luck. 


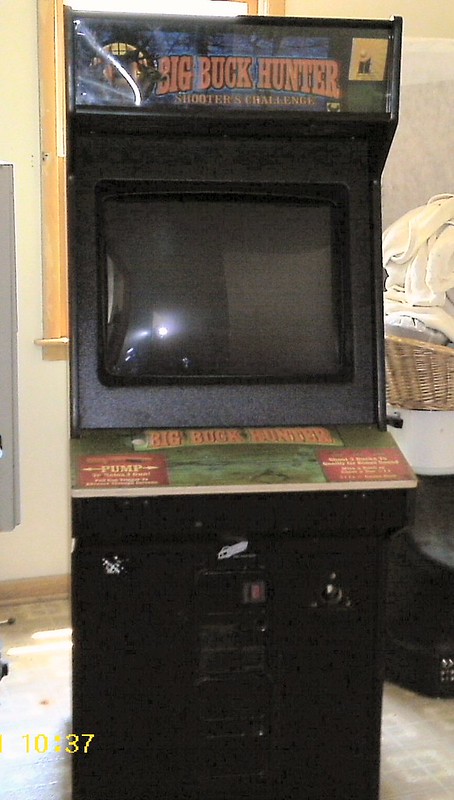
Just was in the right place at the right time.  Unworking machine partially gutted and the owner needed the space it was taking up.  I only paid $25 for it plus I gave him an extra $15 as he delivered it to my house (only a mile or so away).  He knew that the game didnt work (and they took the board out a long time ago anyway) but he didnt know if the 27" monitor worked or not.  I havent tried testing it yet but either way it is a steal.  Awesome if it works but should still be cheaper to get it fixed then the cost of a new LCD.


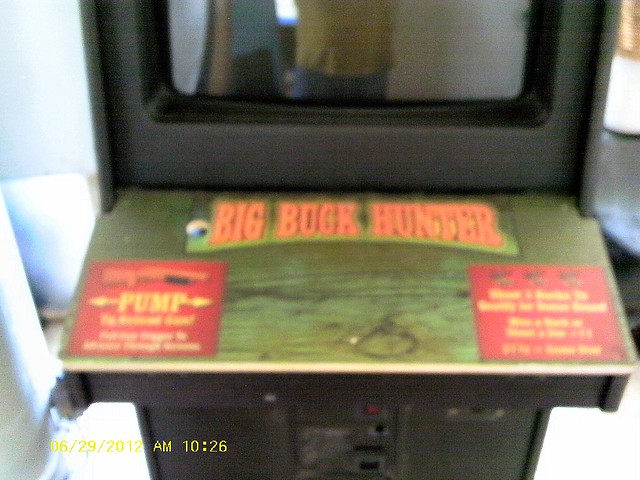
The control panel is fairly clean with only one button hole which I have already taken into account in my CP overlay design.  I decided to go with a Mortal Kombat II theme (sorry for being unoriginal) but one of my all time fav Arcade game.  The cabinet is in great shape.  Just needs to be wiped down touch painted in a couple of spots.


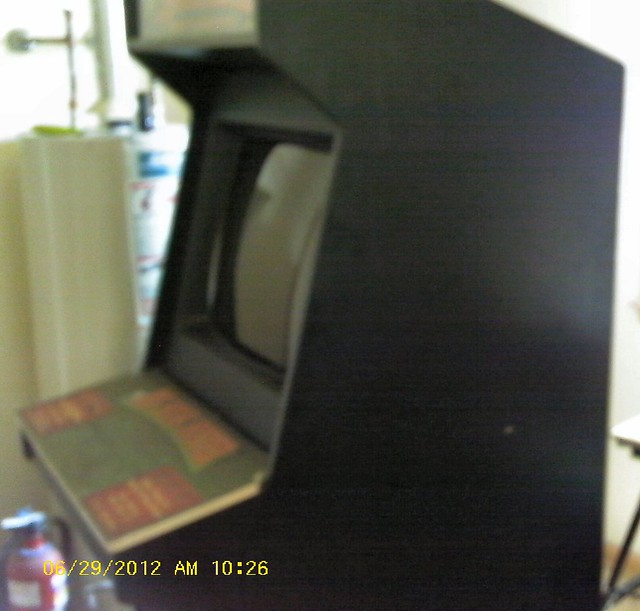
No artwork on the sides (one less thing to scrape off and touch up).  I will definitely add something down the road.  Not sure if I will go with the original Raiden as I never quite cared for the washed out look but I will figure something out.  My goal is to get a working machine first and then work out the final details later.  My first step is the get the monitor working, then the control panel hooked upped.  My control panel artwork is already almost done and I will have the Marquee done at the same time.  I work a lot this time of year so dont know how much I am going to be able to work on it and update this thread but it wouldnt be much of a hobby if it could be done overnight.
The Beatings will continue until Moral Improves...

gonzalma

  • Trade Count: (0)
  • Full Member
  • ***
  • Offline Offline
  • Posts: 37
  • Last login:April 03, 2020, 09:07:02 pm
Re: My First Project: Big Buck Hunter Cabinet
« Reply #1 on: July 04, 2012, 01:50:33 am »
Minor update:

Artwork for the control panel and marquee are done.


Overall I am happy with how they came out (you will have to forgive my crappy camera as they look much better then the pictures show).  I had them printed out on vinyl at the local Office Max.  I did have to have the marquee laminated as well so that it was stiff enough to stay upright in the top of the cabinet.  I have to fix the back lighting but look forward to seeing how it looks lit up.  The next step is to drill out the joystick and button holes.  I also got my trackball in the mail today, I just have to figure out the best way to mount it.

Well the monitor is not working but it does power on just doesn't display an image.  Gonna have to pick up a cap kit and switch all those out and hope that fixes it.  I got a lot of learning to do but this and similar websites have been invaluable resources.  And I thank everyone who have shared their knowledge and experiences.
« Last Edit: July 04, 2012, 01:58:10 am by gonzalma »
The Beatings will continue until Moral Improves...

gonzalma

  • Trade Count: (0)
  • Full Member
  • ***
  • Offline Offline
  • Posts: 37
  • Last login:April 03, 2020, 09:07:02 pm
Re: My First Project: Big Buck Hunter Cabinet
« Reply #2 on: July 28, 2012, 05:50:19 am »
So went with two 8 way joysticks both with 6 button layouts and a four way joystick on top and a trackball in the middle.  My control panel is fairly small so I had to go with a lower profile trackball.


Was tricky to mount but was able to make my own mounting plate.


Didn't come out perfect but a good first effort.  Learned a lot and next time I will do a few things different.  I will probably redo the whole panel down the road, similar layout but bigger and roomier. 
The Beatings will continue until Moral Improves...

gonzalma

  • Trade Count: (0)
  • Full Member
  • ***
  • Offline Offline
  • Posts: 37
  • Last login:April 03, 2020, 09:07:02 pm
Re: My First Project: Big Buck Hunter Cabinet
« Reply #3 on: July 31, 2012, 01:49:52 am »
Another minor update...

Well after replacing almost 30 capacitors and buying a different Video Card off of ebay, I finally got the monitor working.  Wow cant even count the amount of hours I put into getting this to work.  Almost threw in the towel several times.  The monitor/video board here was invaluable as well as several youtube videos.  I learned a ton.   


Well still need to finish wiring the control panel.  I am experimenting with different frontends but will probably go with Maximus Arcade.  I have a ton of games that will need to be configured and that will take who knows how many countless hours.
The Beatings will continue until Moral Improves...

Yenome

  • Trade Count: (0)
  • Full Member
  • ***
  • Offline Offline
  • Posts: 547
  • Last login:April 12, 2024, 01:03:06 am
  • Punch a fish. Make a wish
Re: My First Project: Big Buck Hunter Cabinet
« Reply #4 on: July 31, 2012, 02:26:22 am »
man im jelly i wish i could find a nice cab even without a monitor in that good of shape for 25bucks. i got a big one but i want the smaller mk style. only things i would change with this layout is the button colors i like the rest of it might have to copy that for my arcade stick. id use black for coin buttons and with the mk id get the button colors to match the mk layout. yellow for run white for block etc. but keep it laid out like you have it now.
My Gf made me put a sig up. /whipped

gonzalma

  • Trade Count: (0)
  • Full Member
  • ***
  • Offline Offline
  • Posts: 37
  • Last login:April 03, 2020, 09:07:02 pm
Re: My First Project: Big Buck Hunter Cabinet
« Reply #5 on: July 31, 2012, 04:24:42 am »
Glad you like here is the thread where I requested and later posted my CP layout in case you are interested.

http://forum.arcadecontrols.com/index.php/topic,111348.0.html
The Beatings will continue until Moral Improves...

Yenome

  • Trade Count: (0)
  • Full Member
  • ***
  • Offline Offline
  • Posts: 547
  • Last login:April 12, 2024, 01:03:06 am
  • Punch a fish. Make a wish
Re: My First Project: Big Buck Hunter Cabinet
« Reply #6 on: July 31, 2012, 03:33:13 pm »
i think i might have seen that thread before. im curious to the dimentions of the CP been thinking bout making a control panel to house everything now. and to later be put on a cab
My Gf made me put a sig up. /whipped

Seith

  • Trade Count: (0)
  • Full Member
  • ***
  • Offline Offline
  • Posts: 402
  • Last login:September 08, 2018, 10:50:41 am
Re: My First Project: Big Buck Hunter Cabinet
« Reply #7 on: July 31, 2012, 03:37:46 pm »
+1 on the modified MKII artwork :)

Also, nice turnaround time on getting this machine to where it is right now  :applaud:

Do you plan on putting glass up over the bezel/screen?

gonzalma

  • Trade Count: (0)
  • Full Member
  • ***
  • Offline Offline
  • Posts: 37
  • Last login:April 03, 2020, 09:07:02 pm
Re: My First Project: Big Buck Hunter Cabinet
« Reply #8 on: July 31, 2012, 10:14:29 pm »
The dimensions for the Control Panel overly is 28" X 11.75.  I can post the psd file to a host but it is almost 85 MB so I was waiting for someone to ask before taking the time.  I had a pretty good advantage as the control panel for Big Buck Hunter was very clean and only had one button hole cut.  So I didn't have to build a panel from scratch but that also explains the weird dimensions.  I am happy with how it all came out, now a couple of months from now, I will probably want to redo a lot of things.  For sure down the road, I will do the led buttons that light up depending on whether or not they are used for a particular game.  And I still have to figure out what kind of artwork I want to put on the sides.

I haven't decided whether or not I am going to add glass over the screen.  Most likely I wont, but I haven't ruled it out.  I still have to redo the marquee.  The laminated vinyl looks really good but the materal is too thick and does not light up.  So I will have to send it out to one of the online places.
The Beatings will continue until Moral Improves...

Yenome

  • Trade Count: (0)
  • Full Member
  • ***
  • Offline Offline
  • Posts: 547
  • Last login:April 12, 2024, 01:03:06 am
  • Punch a fish. Make a wish
Re: My First Project: Big Buck Hunter Cabinet
« Reply #9 on: August 02, 2012, 05:02:17 am »
yea thats close to what i was thinking for my cp i was thinking 38x15 but that would be for my showcase cab i plan on building. also i have to say that after having one cab with the glass i prefer the look of something covering the monitor/bezel. and would go with glass or plexi. Its funny cause i saw two big game hunter cabs today. one wasnt working the monitor was doing its own self test with disconnect showing. yea easy fix right. but alas i didnt think to ask if they owned the cab or it was rented might of talked them off of it for cheap. love the overlay tho im more an umk3 fan. i finally got mk for the ps3 tonight havnt played it enough to go online yet.
My Gf made me put a sig up. /whipped