Main Restorations Software Audio/Jukebox/MP3 Everything Else Buy/Sell/Trade
Project Announcements Monitor/Video GroovyMAME Merit/JVL Touchscreen Meet Up Retail Vendors
Driving & Racing Woodworking Software Support Forums Consoles Project Arcade Reviews
Automated Projects Artwork Frontend Support Forums Pinball Forum Discussion Old Boards
Raspberry Pi & Dev Board controls.dat Linux Miscellaneous Arcade Wiki Discussion Old Archives
Lightguns Arcade1Up Try the site in https mode Site News

Unread posts | New Replies | Recent posts | Rules | Chatroom | Wiki | File Repository | RSS | Submit news


Author Topic: Multigame build # 2  (Read 4504 times)

0 Members and 1 Guest are viewing this topic.

gatordad

  • Trade Count: (+11)
  • Full Member
  • ***
  • Offline Offline
  • Posts: 828
  • Last login:July 10, 2025, 10:17:29 am
  • This is your brain on games.
Multigame build # 2
« on: October 20, 2009, 11:28:48 pm »
It's late but I just uploaded some shots of the second multigame I did, this one turned out better than the first.
Hopefully it will contribute nicely toward a Christmas pinball game for my family.
I will put the pic's on here and make some comments about the build or really conversion of this game soon.

As always let me know what you think.
GD

Online album is HERE
« Last Edit: October 20, 2009, 11:31:18 pm by gatordad »

gatordad

  • Trade Count: (+11)
  • Full Member
  • ***
  • Offline Offline
  • Posts: 828
  • Last login:July 10, 2025, 10:17:29 am
  • This is your brain on games.
Re: Multigame build # 2
« Reply #1 on: October 21, 2009, 01:25:52 pm »
Small conversion project
Here is how it went

I picked up a non working shanghi game in a nice condition 19 inch dynamo cut corner cab.
Knowing full well in advance how wildly popular this game was  :laugh:
I bought it without even opening it up as the price was right.

First thing I do when I get it home is see what works and what does not.

Neck board was hanging with a few bent pins on the monitor, no problem I straighten the pins and reattach the neck board
She has a blown fuse by the in line filter, so it must of taken a surge of some sort, replaced it and now it plays blind.

I pull the neckboard off to reinspect the monitor and I notice that the very tip of the tube is broken, I stripped the yoke, purity rings, chassis and frame for later and trashed the tube. It was a shame as it did not have any burn.

So now I know I have a working harness and power supply.

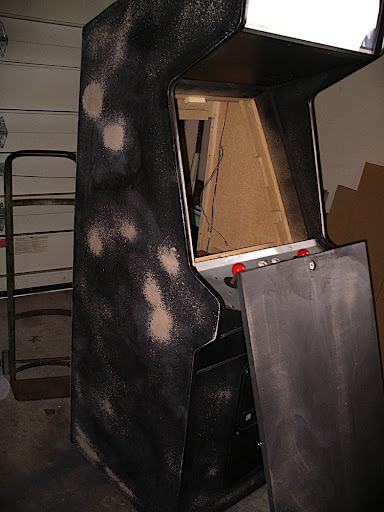
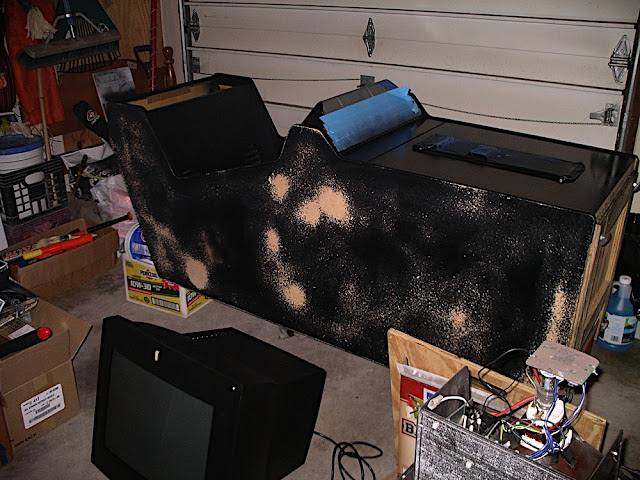
I started with the body work.

I sanded down all the areas that had scratches, nothing really need any extensive repair so I was pretty fortunate in that regard.


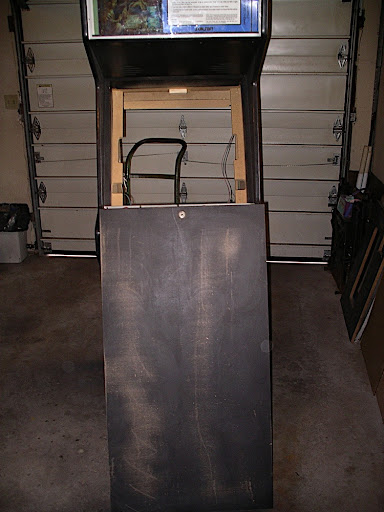
Then I taped off the coin door as it was already in great shape and I did not need to refinish that at all.


I picked up a 21 inch computer monitor off of my local craigslist for 20.00
When I finished sanding everything I rolled 2 coats of rustoleoum satin black on the cab


After rolling the 2 coats I was able to see too many roller marks even though I thinned the paint 2 to 1 with acetone as instructed.

Here are the roller marks


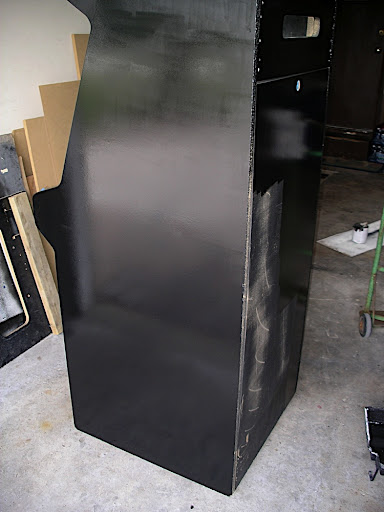
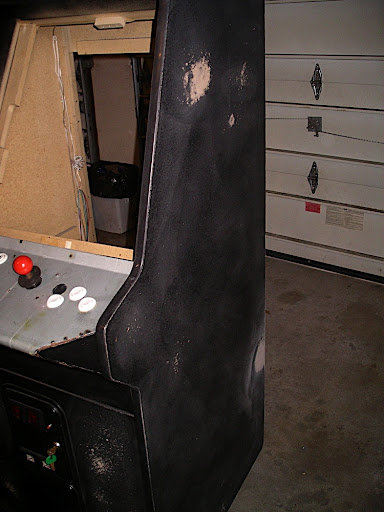
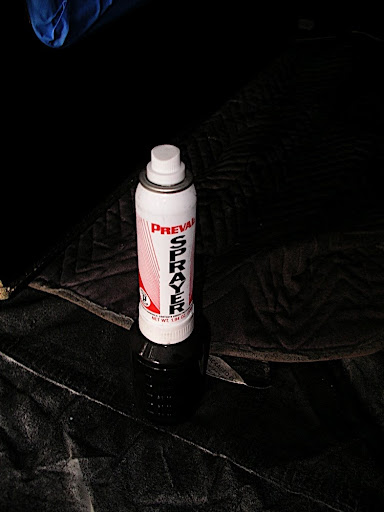
Being the anal retentive guy that I am I lightly sanded the roller marks off and broke out the prevail sprayer, it cost me about 40 bucks in power cells to do the whole cab with 2 additional coats of sprayed paint.

I can't say enough about those little sprayers, what a great job they do. If you don't have the room or the cash for a compressor powered system this is the way to go.

Here is what the sprayer looks like


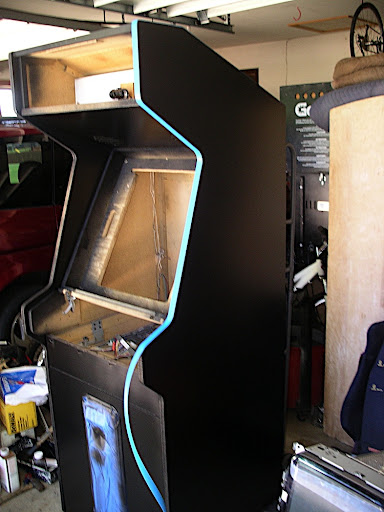
Now it looks a whole lot better


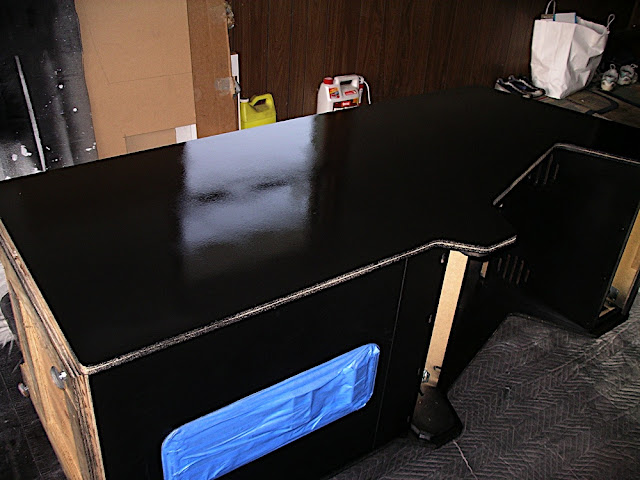
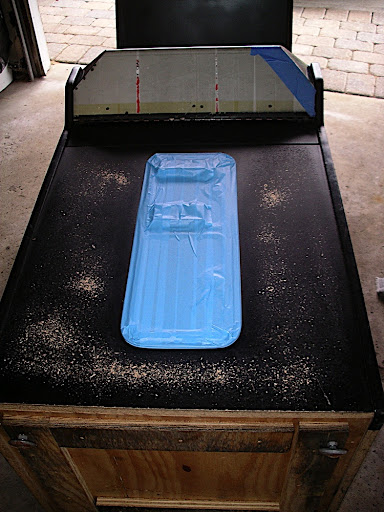
I had a theme and artwork package in mind when I started so I installed new blue t-molding


I used a few staples to keep it from coming loose


saleem

  • Trade Count: (0)
  • Full Member
  • ***
  • Offline Offline
  • Posts: 437
  • Last login:February 07, 2012, 08:03:39 am
Re: Multigame build # 2
« Reply #2 on: October 21, 2009, 01:35:54 pm »
the cab looks similar to the supreme video cabinet i got here,we get quite a few of them here in uk in different configs.must have been a popular jamma cab in them days although the one i own is laminated,same tilt cp principle,mine just has different coin door (basicly the lower front).
http://forum.arcadecontrols.com/index.php?topic=95345.0
it looks different now as i got a shroud round the monitor and its playing vertical 60in1 jamma board.i take it that is what your aiming at?
:)

IG-88

  • Trade Count: (+7)
  • Full Member
  • ***
  • Offline Offline
  • Posts: 2042
  • Last login:July 06, 2025, 09:21:45 am
  • Posts: 48,764
Re: Multigame build # 2
« Reply #3 on: October 21, 2009, 02:23:46 pm »
Very nice. A couple questions:

1. How did you power up your 60 - 1 board?

2. Does it plug right into the PC monitor?

thanks
"I know what a HAL 9000 is... I was wondering if HAL 7600 was his retarded cousin or something..."
-HarumaN

gatordad

  • Trade Count: (+11)
  • Full Member
  • ***
  • Offline Offline
  • Posts: 828
  • Last login:July 10, 2025, 10:17:29 am
  • This is your brain on games.
Re: Multigame build # 2
« Reply #4 on: October 21, 2009, 02:39:08 pm »
Very nice. A couple questions:

1. How did you power up your 60 - 1 board?

2. Does it plug right into the PC monitor?

thanks

Power to the board comes from the jamma harness
Yes there is a vga plug on the board itself, a dip switch changes the board from cga (thru the jamma harness) to the vga or 15 pin regular old computer monitor cable.

As for power to the monitor, I just snipped the 3 pin prong off of the cord and butt spliced them off the lines coming from the power supply.

gatordad

  • Trade Count: (+11)
  • Full Member
  • ***
  • Offline Offline
  • Posts: 828
  • Last login:July 10, 2025, 10:17:29 am
  • This is your brain on games.
Re: Multigame build # 2
« Reply #5 on: October 21, 2009, 03:13:46 pm »
Here is a pic of the de-cased monitor and cab with the t-molding completed


I did not take any pictures of when I did the monitor mount (I was on a roll) but what I basically did was this

I needed to widen the wooden frame slightly that the monitor mounts to on this cab. I broke out the jigsaw and took about 1/4 inch off each vertical side to allow the monitor to fit as it was just a little too tight and would not fit flush without being modified.

Since its a computer monitor not an arcade monitor the frame for this is different and there is no rabbit ears for bolts to mount the monitor onto the wood, so what to do?

I looked threw my garage for ideas and came across a few 4 way electrical box's with covers that I had laying around.
A quick change of blades on the jig and I cut one of the electrical box covers into 4 diagonials, think of a peanut butter and jelly sandwich cut twice corner to corner.

Perfect..... I drilled and tapped a few holes into the pbj sliced box cover pieces mounted them onto the monitor and now I had a way to mount the monitor, complete with 4 little rabbit ears onto the wood.

Then I moved onto the control panel
I bought some new wire brushes for my drill and cleaned it up, the operator that had this game installed packing tape directly on the control panel so the original cpo came off very easily.


Before


After


Spray painted this with a rattle can of satin black


Ordered art this time from Arcade Overlays LLC
some of it installed


a different shot


Side art installed

the other side


Now just waiting on my button order to finish her up.

I want another pinball for the basement
What kind of cash do you think I should sell this for?  ;)


IG-88

  • Trade Count: (+7)
  • Full Member
  • ***
  • Offline Offline
  • Posts: 2042
  • Last login:July 06, 2025, 09:21:45 am
  • Posts: 48,764
Re: Multigame build # 2
« Reply #6 on: October 21, 2009, 03:20:33 pm »
Very nice. A couple questions:

1. How did you power up your 60 - 1 board?

2. Does it plug right into the PC monitor?

thanks

Power to the board comes from the jamma harness


Can you describe how you did that?

As for selling price I thought $750 - $1k. How much you got in it?

Also what did you do to fill that extra hole in the CP?


"I know what a HAL 9000 is... I was wondering if HAL 7600 was his retarded cousin or something..."
-HarumaN

gatordad

  • Trade Count: (+11)
  • Full Member
  • ***
  • Offline Offline
  • Posts: 828
  • Last login:July 10, 2025, 10:17:29 am
  • This is your brain on games.
Re: Multigame build # 2
« Reply #7 on: October 21, 2009, 03:33:30 pm »
Very nice. A couple questions:

1. How did you power up your 60 - 1 board?

2. Does it plug right into the PC monitor?

thanks

Power to the board comes from the jamma harness


Can you describe how you did that?


Bob does it better than I ever could here
http://www.therealbobroberts.net/jh.html

The extra hole was already filled, if I had to do it I would have used bondo but this looked like some kind of plastic or epoxy of some kind.  :dunno


IG-88

  • Trade Count: (+7)
  • Full Member
  • ***
  • Offline Offline
  • Posts: 2042
  • Last login:July 06, 2025, 09:21:45 am
  • Posts: 48,764
Re: Multigame build # 2
« Reply #8 on: October 21, 2009, 03:38:12 pm »
Very nice! I've never seen that before.
"I know what a HAL 9000 is... I was wondering if HAL 7600 was his retarded cousin or something..."
-HarumaN

gatordad

  • Trade Count: (+11)
  • Full Member
  • ***
  • Offline Offline
  • Posts: 828
  • Last login:July 10, 2025, 10:17:29 am
  • This is your brain on games.
Re: Multigame build # 2
« Reply #9 on: October 27, 2009, 12:26:30 am »
Buttons came the other day and I wired it up


I had an idea since the joystick for player 1 cut out almost the entire face of Kong I carefully cut the circle out saving the face and applied it to the dustwasher came out ok I think


Peach for the other side


A few shots of it a finished up


This was the fastest game I ever sold
It sold in less than 4 hours
Guy gave me 4 bills to hold it till he brings the rest of the cash and a truck on Wednesday
He looked like he a kid again playing out a few games in garage, I couldn't help but smile as I watched him.


I now have or soon will have enough cash to buy another pin before the holiday parties at our house, time to start looking,
with the left over cash I want to add some bling to my mame cab.

My next project is a Multiwilliams in a Defender cab.................

BobA

  • Trade Count: (+14)
  • Full Member
  • ***
  • Offline Offline
  • Posts: 5943
  • Last login:July 11, 2018, 09:52:14 pm
  • What Me Worry?
Re: Multigame build # 2
« Reply #10 on: October 27, 2009, 12:30:48 am »
It probably sold fast because it looked great.   Nice cab  :applaud: :applaud: :applaud:

Gamester

  • Trade Count: (0)
  • Full Member
  • ***
  • Offline Offline
  • Posts: 483
  • Last login:March 01, 2019, 03:00:10 pm
Re: Multigame build # 2
« Reply #11 on: October 27, 2009, 01:18:43 am »
Very nice job!

I saw your post earlier soliciting thoughts on how much to ask for it... if I'm not prying too much, how much did you end up selling it for?  What was your cost breakdown for the restoration?
Current Project:                                                       First Project:
  

gatordad

  • Trade Count: (+11)
  • Full Member
  • ***
  • Offline Offline
  • Posts: 828
  • Last login:July 10, 2025, 10:17:29 am
  • This is your brain on games.
Re: Multigame build # 2
« Reply #12 on: October 27, 2009, 09:48:03 am »
I had about about 400 or 450 into it plus my time and labor, sold it for 1000.
I Probably could have gotten a few more bucks out of it ( I had 1200 in mind) but it went to someone in my neighborhood, so I was feeling neighborly I guess. The local market has sucked pretty bad lately so all in all I'm satisfied, and he got a good deal, compared to the other slap a board in and do nothing else multi's that are everywhere on CL.

Shortbus

  • Trade Count: (0)
  • Full Member
  • ***
  • Offline Offline
  • Posts: 194
  • Last login:August 26, 2023, 03:20:00 pm
Re: Multigame build # 2
« Reply #13 on: October 31, 2009, 08:36:04 am »
very nice work, thats a fair price, your right, probably could have gotten another $200, but you did the right thing for a neighbor, but be careful. I sold my riding lawnmower to a neighbor for a decent price, while looking on craigslist for another one, I saw he was selling (and sold) my mower for $400 more than i gave it to him for.....not cool...

I like the work, great pics & descriptions.....thank you