Time for some updates, had problems with the last camera I was using so am missing a few in between pics. Don't ask

After finishing the other side I thought I would move on to the marquee (sorry no pic but looked similar to below). I had no thumbs left to do any more hard work and thought it would be fun to light up some marquee artwork

Firstly the artwork, the customer requirements (missus

) were going to be strict here, as you can see from below post this was the first bit of art going on the cab. I figured there were enough examples out there so I got her to sit in front of a few sites one night and tell me what she liked. Bear in mind we were aiming for fifties style and duck egg blue, cream, possibly brown or white colours to match the kitchen.
A few bits from different marquees made us a list but then we found
this on
Local Arcade and we knew it was already close to what we wanted. This was a huge bonus because creating new artwork is not something I am good at. However, copying it, or modifying it in Photoshop or Illustrator I can do all day long.

Thought about changing the wording slightly, arcader, etc but in the end stuck with arcades to keep it as close to the original as possible.
So I found the original .AI file and went to work in Illustrator modifying it to our needs. We liked the curves in the writing, something art deco about that. The straight perspective lines is very retro so it was a nice combination, change some colours and tweak a bit and we should be there.
I did post a question over on the main forum to see if anyone knew where the marquee came from as I would have been interested to see the other artwork but no one had any ideas, the thinking was that it was just from a generic cabinet, so I may be trying to keep to the original artwork that never made it to a cab but nevermind, at least trying to be true to the owner.
The finished result, removed 'Electronic', changed the colours, changed the perspective on the lines on the left, removed the extra top line, completly did a new S at the end so the sides were even.

I tried a few things to print this on,
- Tracing paper, did not really work as colours were not bright, however paper did give the desired effect of 'clouding' the back so you won't be able to see the backlight. Of course you can't print white so the white was actually tracing paper colour!
- Very thin vinyl, came up real bright and when backlit looked very good. But after a while the vinyl seems to stick to the glass, it is not stuck but it looks like it is if you know what i mean. Anyway, thought at first maybe damp or something, but no amount of cleaning did the trick.
- Paper, yet to try but expect this will do the job.
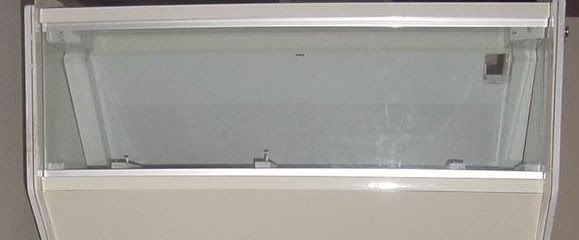
I had some toughened glass made up for the monitor glass and two pieces for the marquee. The idea being to sandwich a print between the two. This works fine, and looks great because it is real glass, only down side is that they put a little watermark in the bottom corner to say it is toughened - annoying

Pic of the glass, not that interesting but shows the mount for the light. I used a standard flourescent light, 18 inches long and removed the diffuser it came with to get as much light from it as possible. Added a mini rocker switch
on the back for separate control.
And so to a pic of the finished article. I managed to reduce the dpi to 72 just before I printed it, doh!, so up close does not look brilliant but will soon correct that when I print on paper. Will try and get a backlit photo.
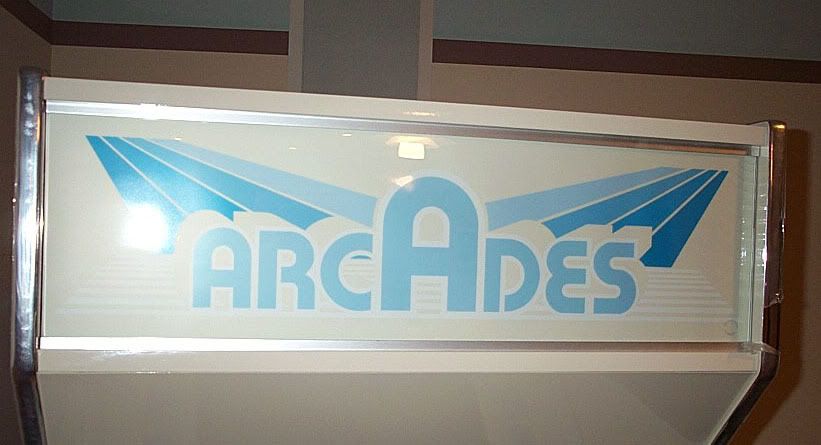
Anyway, very pleased with the result and now gives something to work with for the rest of the artwork. In the words of Gordon Ramsey, "Marquee, done", well almost


 Home
Home Help
Help Search
 Login
Login Register

 Send this topic
 Print
Print Topic: EX's Kitchen Cab (so has to match the kitchen!) (Read 9775 times)


