Greetings fellow arcade lovers! I have been researching, querying, studying, and observing your work on these forums during the past 5 months while I've been building my cabinet. Now it's time to give a little bit back and tell my story, in the hopes it may help someone else down the road.
Chapter 1: How it all beganAt one of the kids' birthday parties back in April, my cousin tells me we should build a MAME cabinet. I said "A what?" A few google searches later and after seeing what others were doing on this site, I knew it had to be done.
Chapter 2: Formulating the planOnce I was committed, the obsession began. I loved all the decisions that needed to be made...each required thought, reason, and planning. How many controls would I build on my panel? Use a CRT or LCD? What pc hardware would I use? What speaker system? What software/emulators? What games?
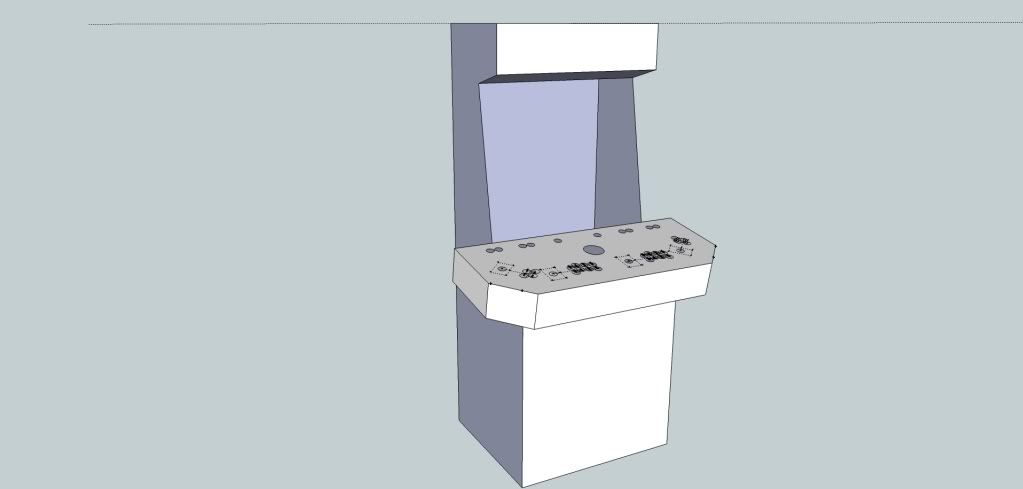
After much deliberation, I decided to build a 4 player upright cabinet with a 32" widescreen LCD. I've got 3 kids, so I figured they could all play with me for years to come. I wanted it slim, but not too slim...I didn't want to mess with any potential balance issues. I knew I wanted 4/8 way switchable joysticks, a good number of buttons (8 for P1/2 and 4 for P3/4), and a trackball. From the moment I saw hyperspin, I knew that'd be my FE. I focused on games that I remembered playing on consoles or in arcades, trying to keep my list manageable. I knew I wanted to emulate MAME, NES, SNES, N64, Genesis, Dreamcast, Daphne, C64, Gamecube, PSX, PS2, Atari2600, Super Street Figher 4 for Windows, and Mortal Kombat Komplete for Windows. I also have a networked TV tuner that works through windows media center, so I'd want to hook that into hyperspin so I could watch tv or play music on the cab too.
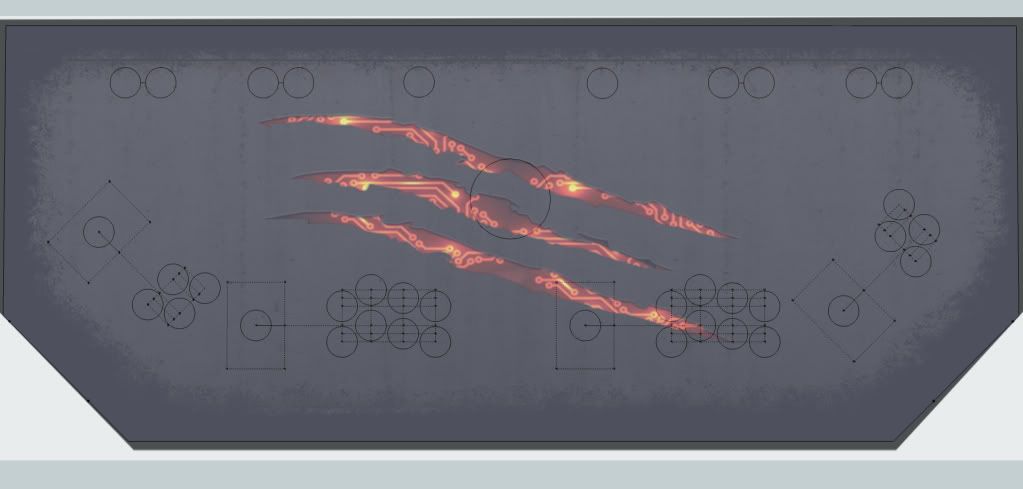
I downloaded google sketchup and started messing around with dimensions to see what this sucker would look like. My cousin designed the panel and marquee art for me (and stopped by numerous times to assist). Thanks, Lean...great job.

I also worked with the wife to come up with a proposed budget, which was approved. We all know budgets are best case scenarios though...

Finally, I formulated an approach on what order I'd do things. First, I'd build the PC and make sure I could make it do what I wanted it to. Get the emulators, front end, games, etc. working. Second, build the control panel to make sure I could control the PC how I wanted to. Finally, build a cabinet for it all to fit inside.
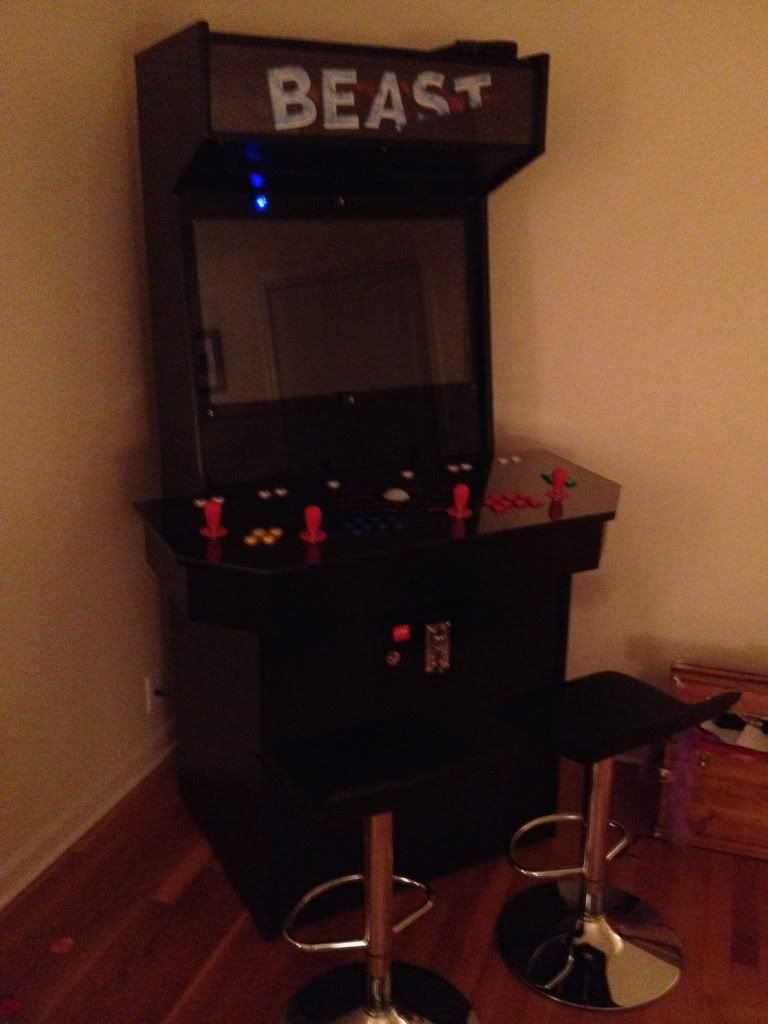
This project needed a name and we decided on BEAST (Bada$$ Emulation Arcade SysTem)...
Chapter 3: The PCI had read that many have used old computers to use in their cabs. Since there were a few modern games on my list (ie SSF4), I decided that I wanted to have some horsepower, but within a reasonable budget. Here's what I ended up with:
- Cooler Master Elite 120 Mini ITX case with long graphics card support
- Asrock H77M-ITX Motherboard
- Intel Core i5-3470 Processor
- Mushkin Chronos Deluxe 240GB SSD
- Kingston HyperX Blu 4GB 1600 DDR3 Memory
- ATI Radeon HD6670 Graphics Card
- The rest was scrap parts I had laying around...power supply, keyboard/mouse, cables, etc.
Once I received the parts, I assembled the PC and began configuring the emulators and hyperspin.
 Chapter 4: The Control Panel
 This is where I started to get outside of my comfort zone...time for construction and power tools. I looked at many control panels before I got started and began laying out what I wanted to do. Again, I used google sketchup and a large piece of cardboard to visualize the real estate. Four player panels are usually pretty big. I wanted to make sure my players weren't cramped, but I didn't want a massive panel either. I settled on a design 44" wide at the back resting on a box of the same shape, but with a 3/4" overhang. I went with 3/4" MDF, 1/8" plexiglass, black tmolding, and a piano hinge on the front edge. The joy/button layouts on slagcoin were totally clutch, too.
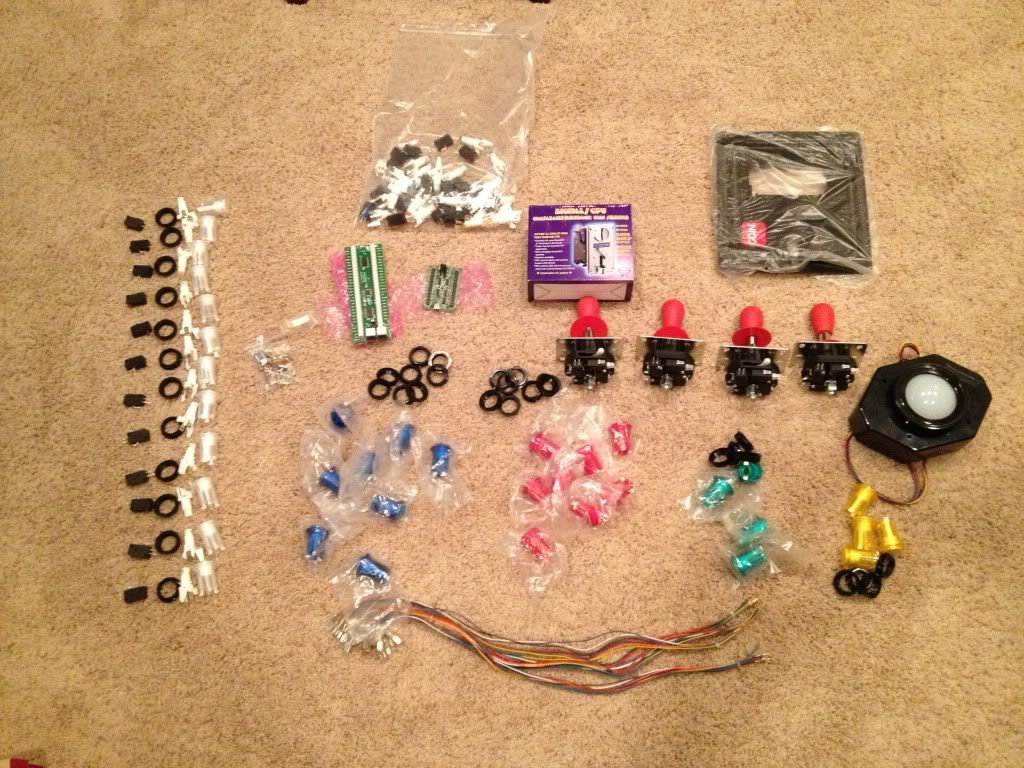
At this point, it was time to order the controls and buttons for the panel. Andy from Ultimarc was awesome to deal with...bought the following from him:
- Coin Door, Coin Mech, and Lock
- 4 red Mag Stik Plus joysticks
- iPac4 Interface
- PacLED64 LED Controller
- UTrak Trackball, Flush Mount kit, and RGB Illumination kit
- 12 White Ultralux Translucent Buttons
- 4 Yellow Ultralux Translucent Buttons
- 8 Red Ultralux Translucent Buttons
- 8 Blue Ultralux Translucent Buttons
- Some miscellaneous odds and ends for wiring and mounting
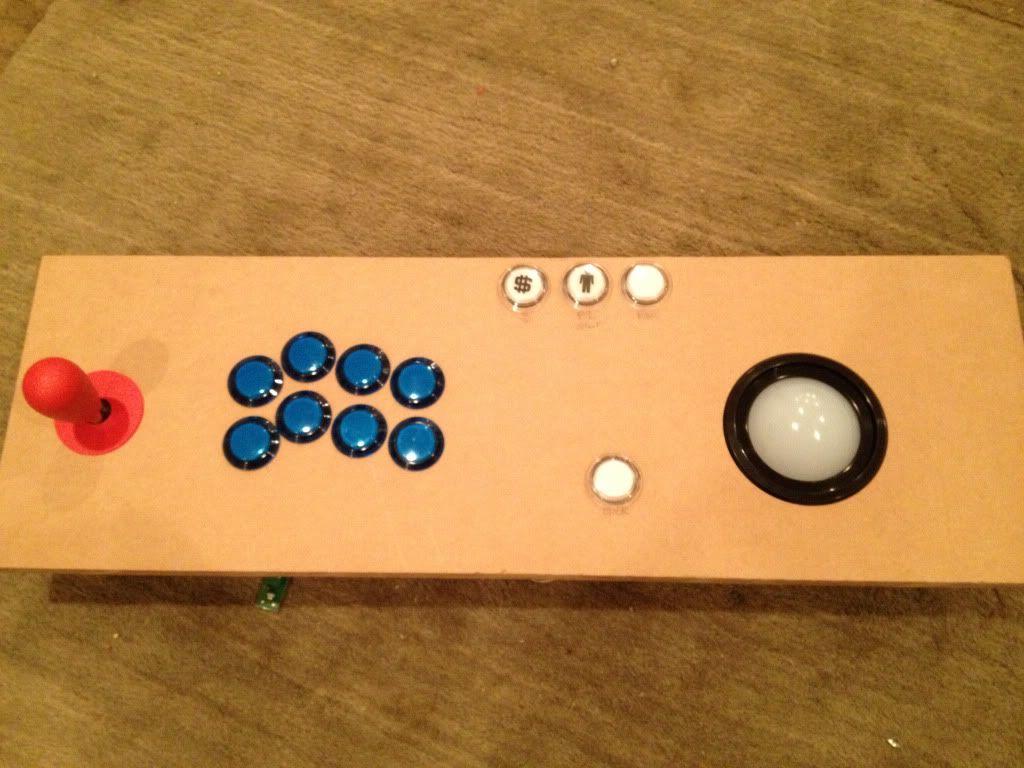
I wanted to create a simple rudimentary single player panel to test things out (and I also wanted to start playing some games).
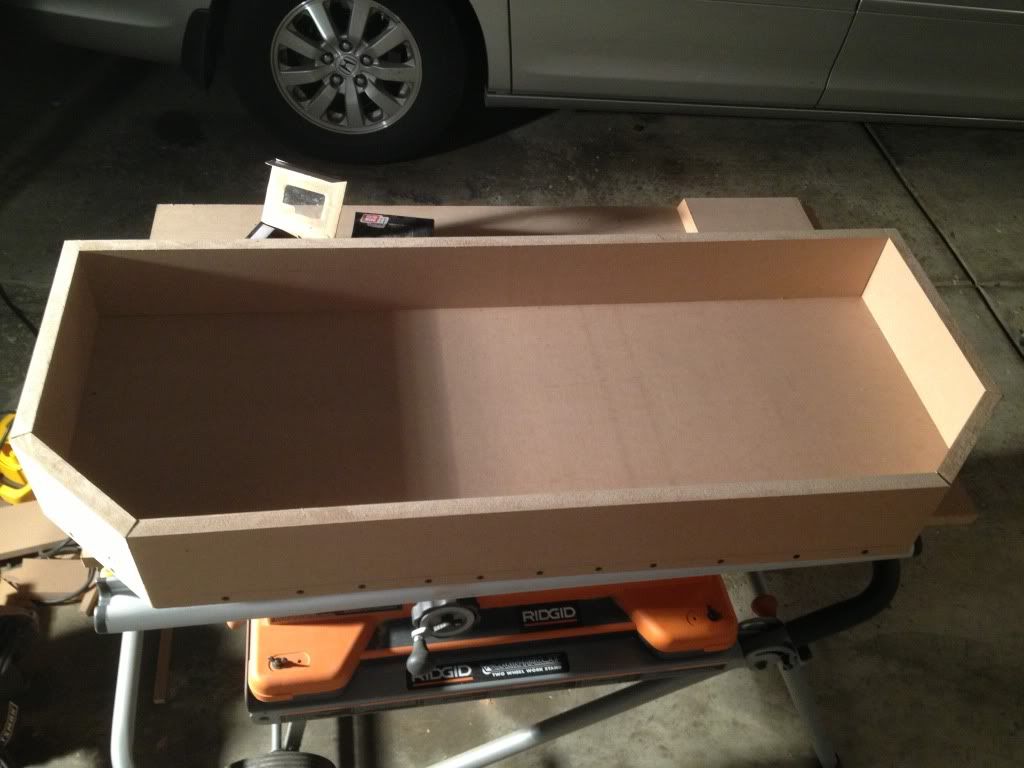
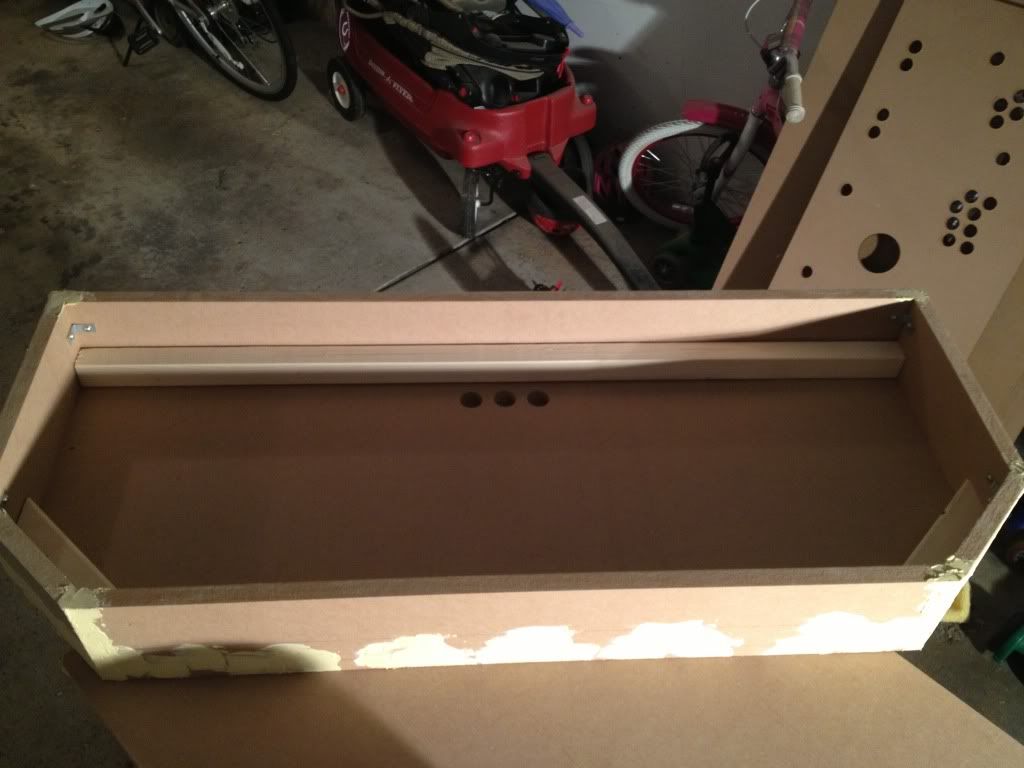
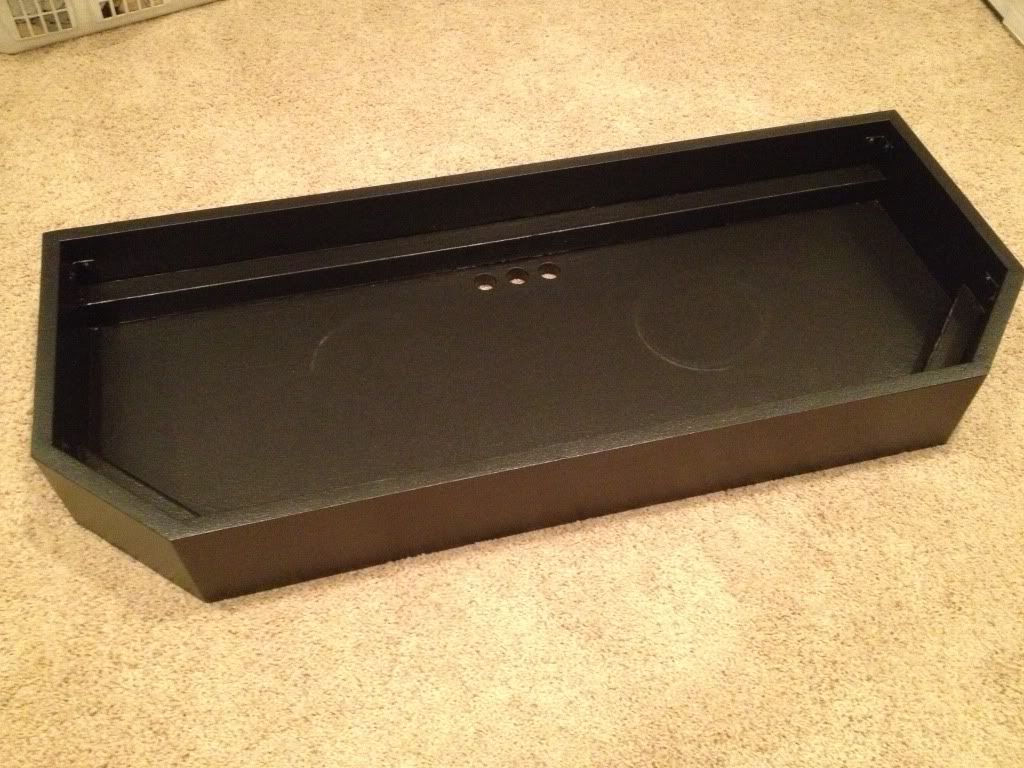
And so, the construction began. I started by building the box bottom. I tried to make my angles "easy" by using 45 degree cuts, which worked pretty well. I cut a base, back, front, and 4 side panels. The box was assembled using drywall screws. I braced the insides with 2x2's on the front and back, as I knew the top panel would have some weight to it. The holes and seams were filled and sanded, then I primed and painted the box black.
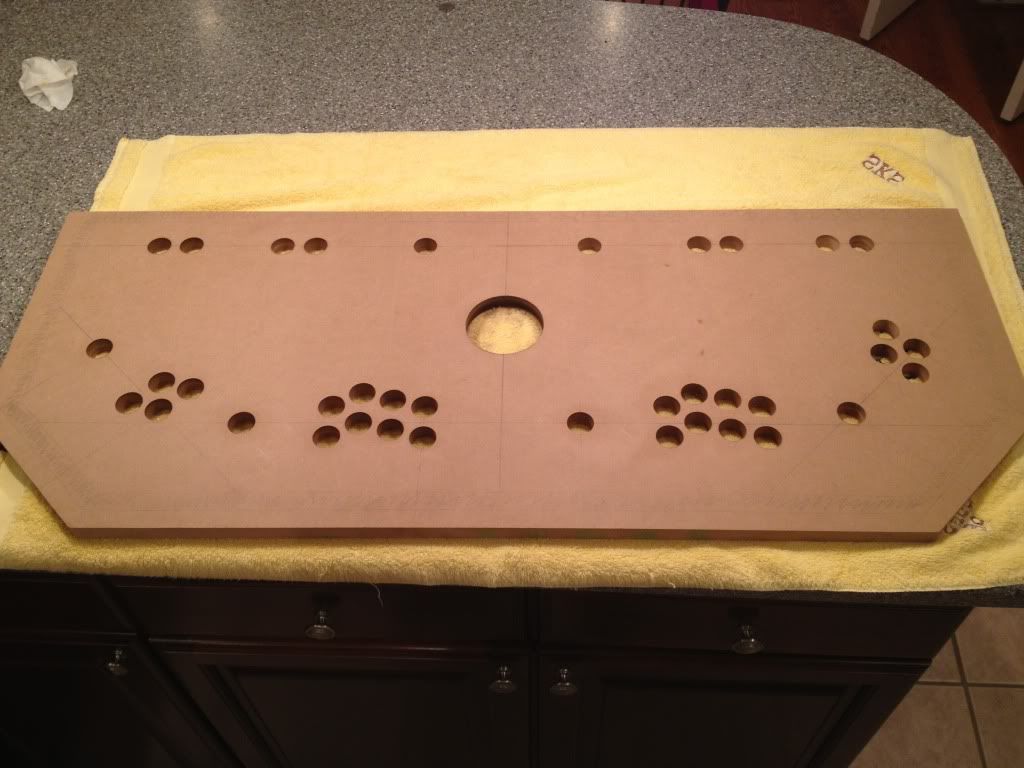
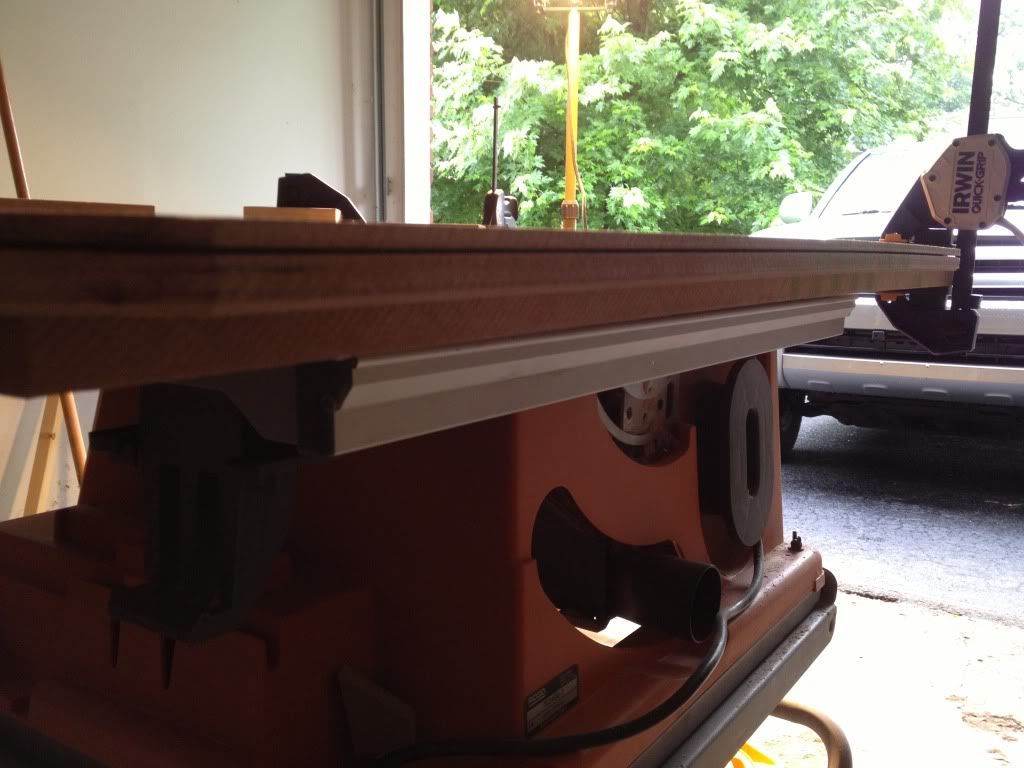
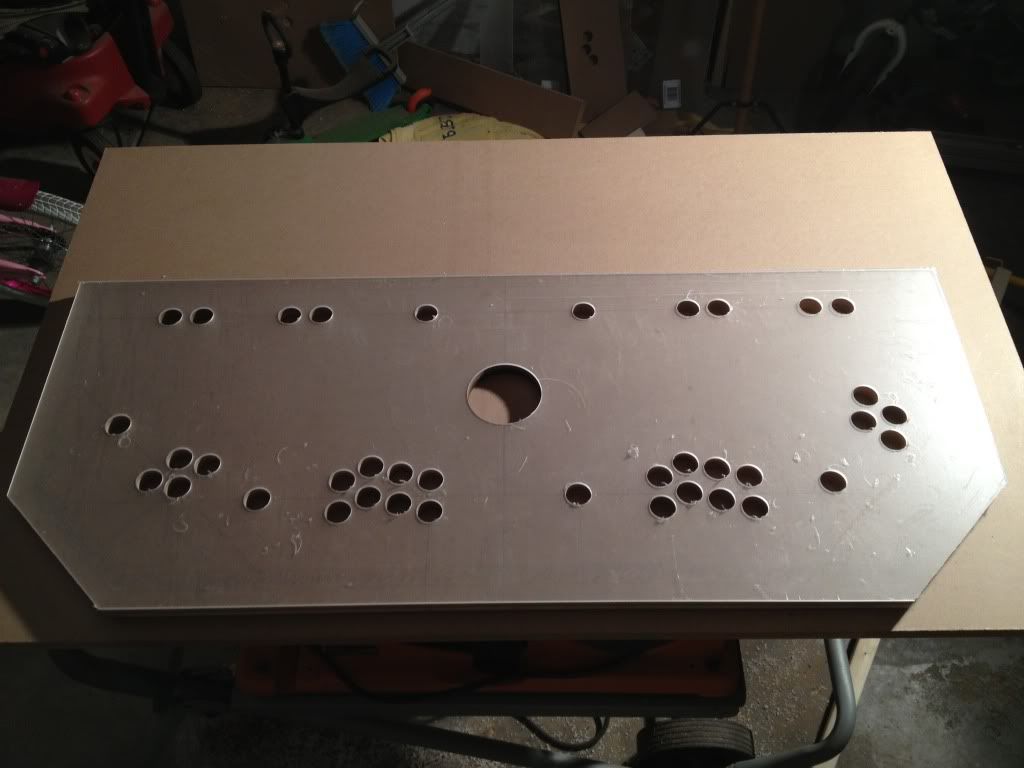
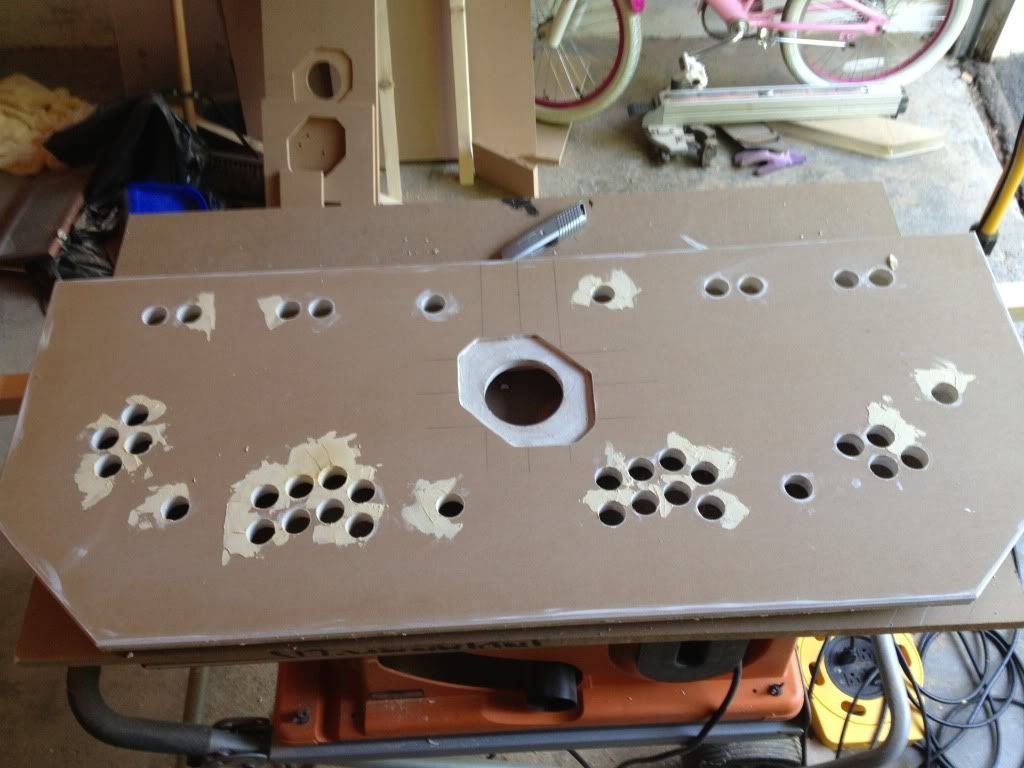
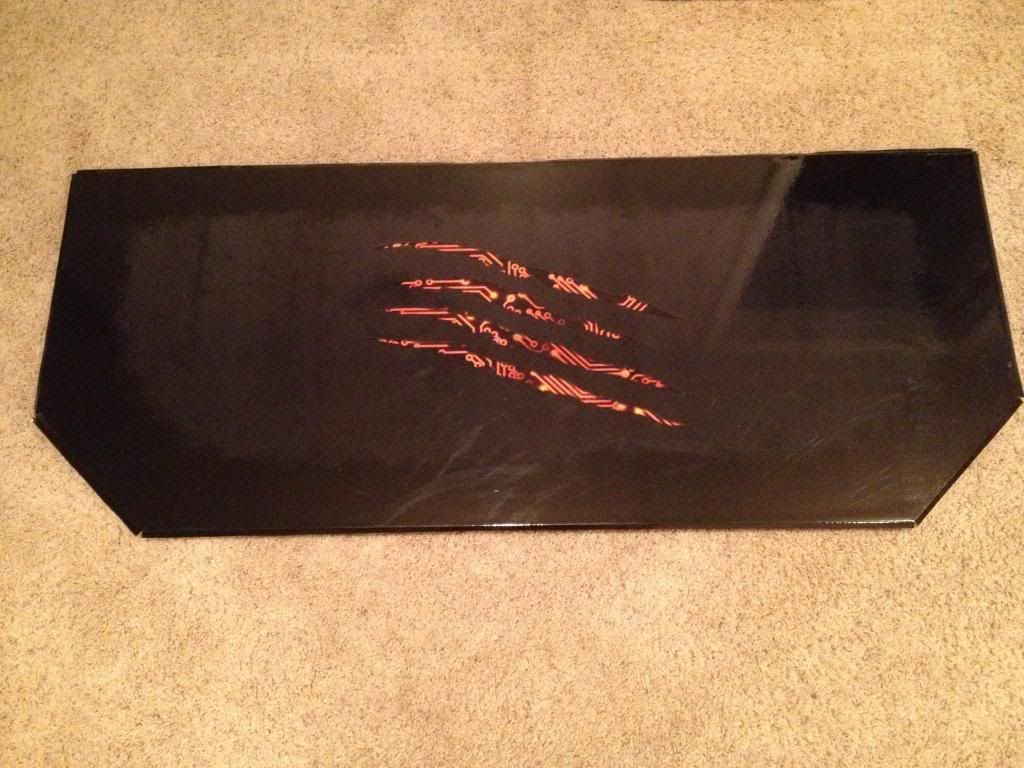
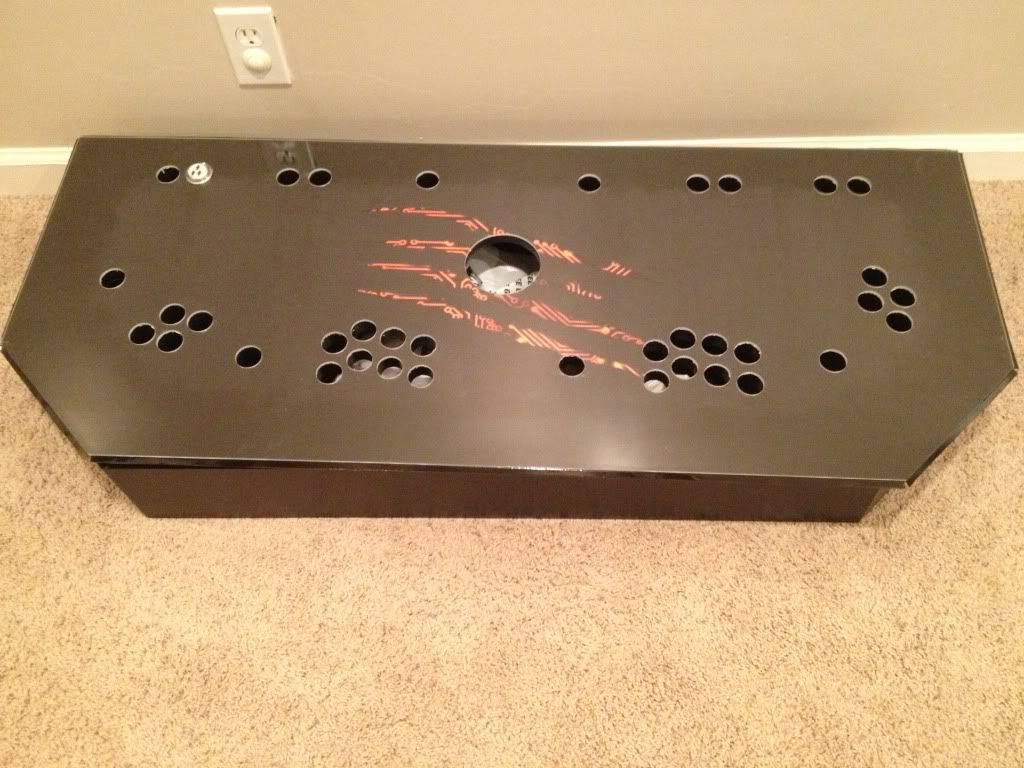
Next up was the panel top. Once the piece was cut, I taped on the slagcoin drawings in the proper spots. My cousin's husband has a drill press so I brought the piece over to his place along with my 1 1/8" Forstner bit and we drilled the holes. Actually, he did. No permanent damage was done but there was some blood at this point in the project...sorry about that Gramps. For the trackball, I used a hole saw, which is not nearly as fun as the Forstner bit. Since the panel was 3/4" and 1/8" plexi was to be added, I needed a way to make sure the tmolding would look right. I decided to chamfer the bottom edge of the panel with the router, which I was pretty pleased with. Also, I cut the slot for the tmolding. Now it was time to make the plexiglass top. I decided to use Acrylic (not lexan), and picked up a sheet at the local hardware store. I left the protective sheeting on both sides and clamped it in several spots to the panel. Pilot holes were very carefully drilled in each of the button, joystick, and trackball holes. The flush trim bit and router worked wonders on the holes and around the edges of the panel...it was a perfect match of the panel underneath. Also, I built a jig so I could recess the trackball slightly so it would sit flush on the top of the plexiglass. There was minimal tear-out from the button and joystick holes, so I repaired those spots, sanded, primed, and painted.
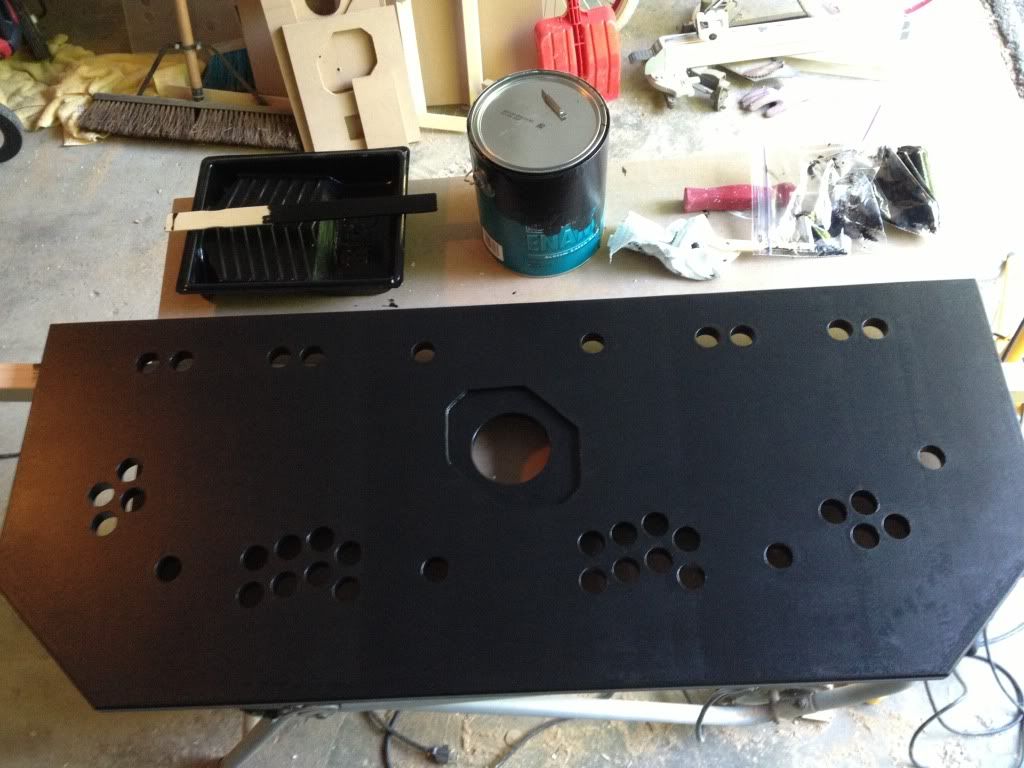
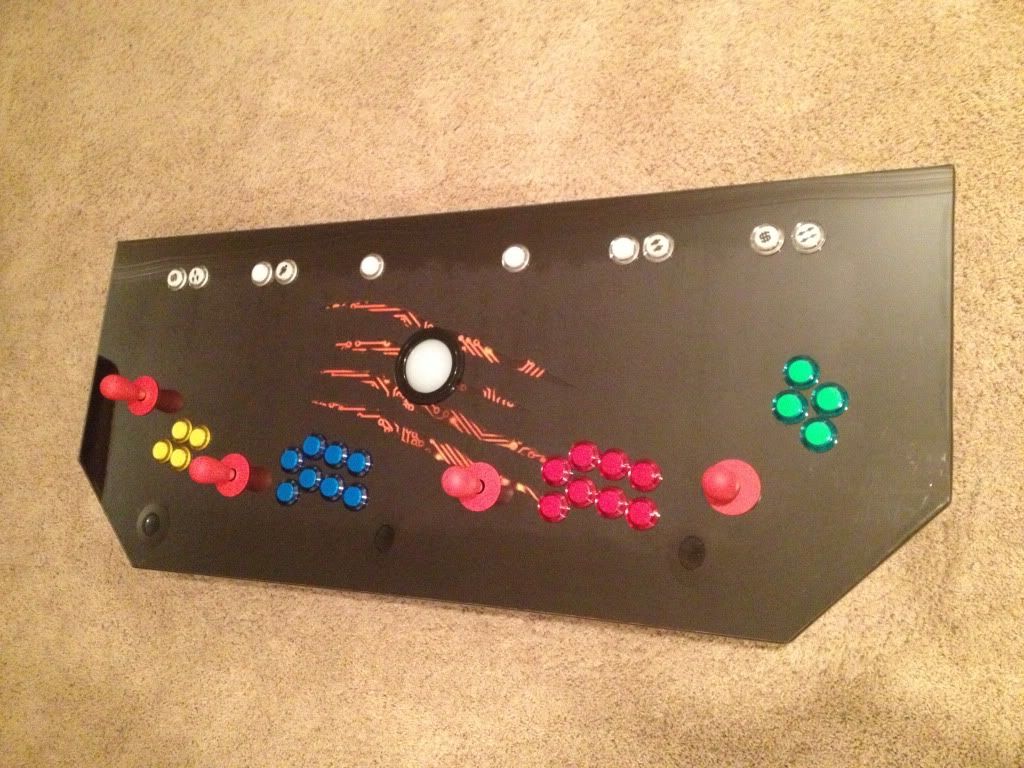
My cousin designed some panel art and I had it printed on laminated adhesive vinyl at a local print shop. It came out very nice. They even helped me apply it. Once on, I trimmed the edges and button holes with a hobby knife, installed the hinge, put the plexi in place with a few buttons, and put in the tmolding. My joysticks and trackball were mounted from underneath, so no visible screws or recesses on top. Once all of the controls were in place, I wired that baby up! That took quite some time, I tried to keep things as neat as possible.
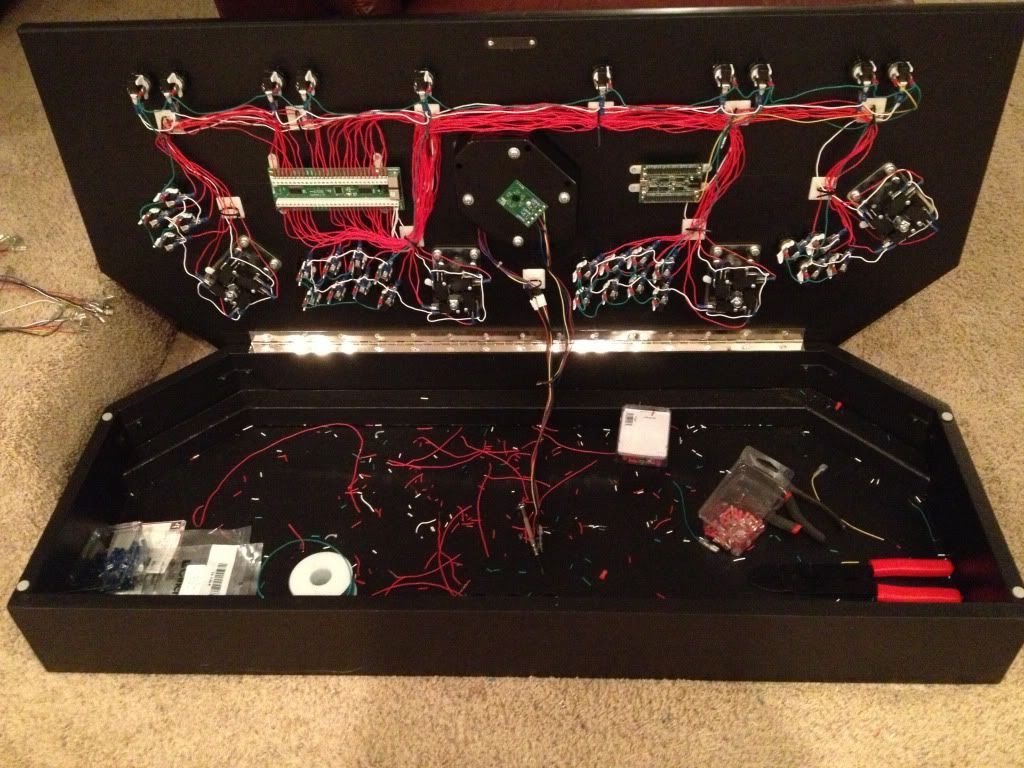
Once wiring was complete, it was time to hook up the panel to the PC. I remapped the keys on the ipac and configured them in all of the emulators and purchased a copy of LEDBlinky so I could animate the LED's. The system is now playable!
Chapter 5: The CabinetI knew the cabinet part of the project would be time consuming, so I delayed the start until I was sure I had the time to devote to it. You'll notice that most of my pics are taken at night, after the kids went to bed. I hope I didn't wake up the neighbors with that router.
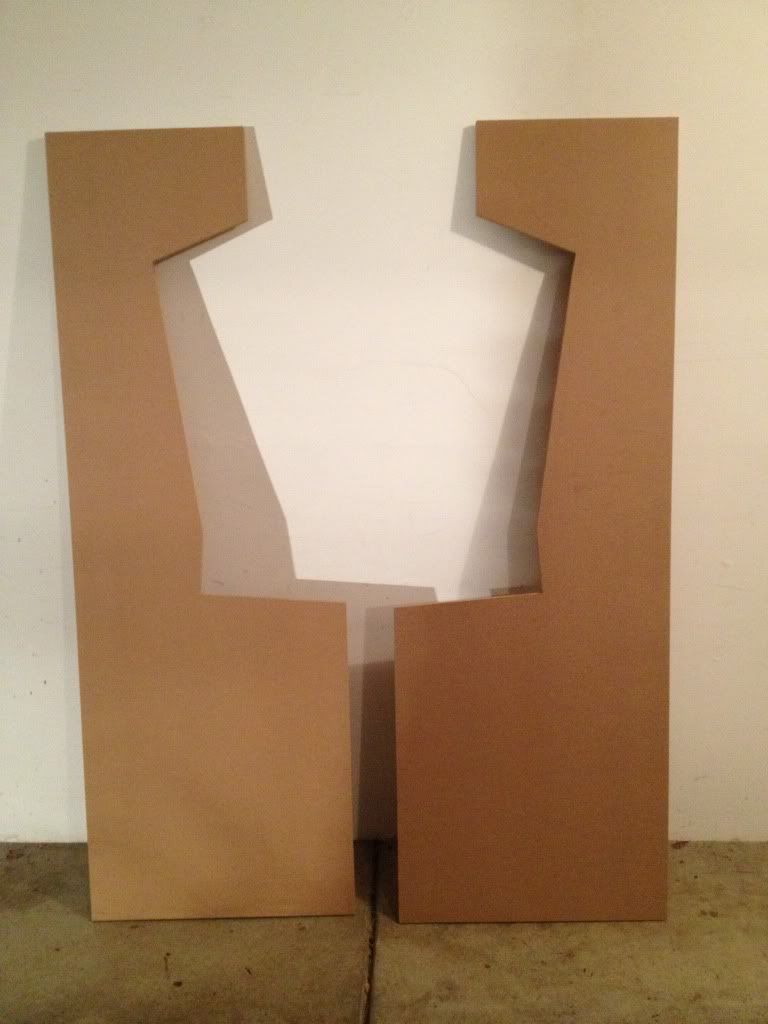
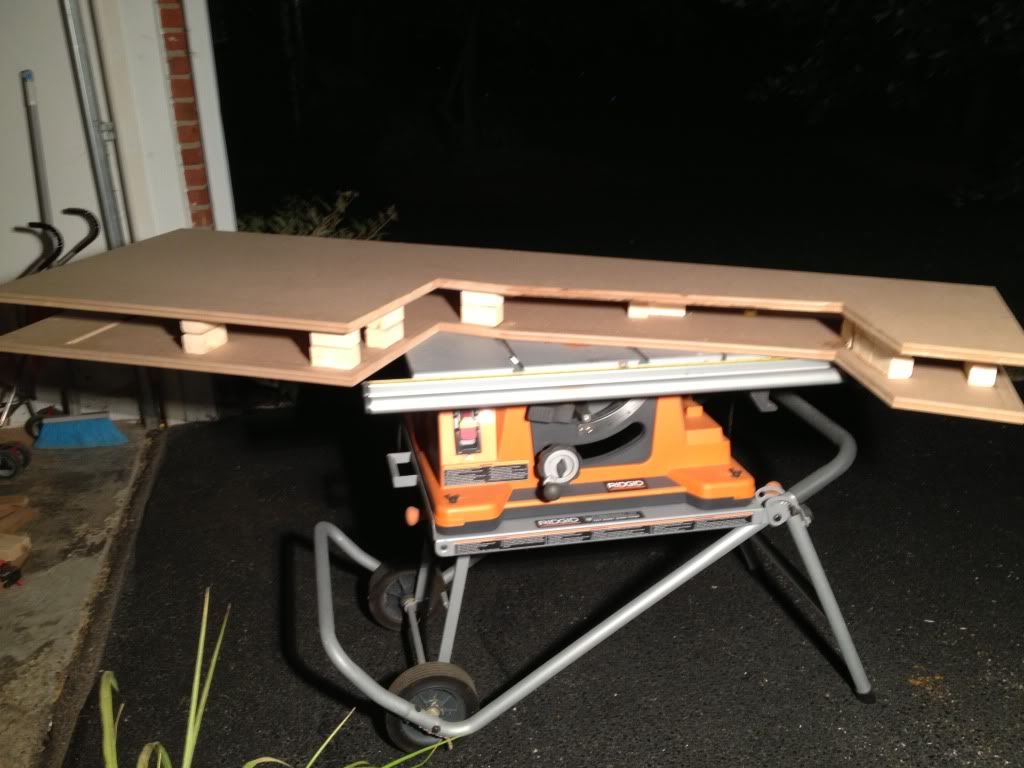
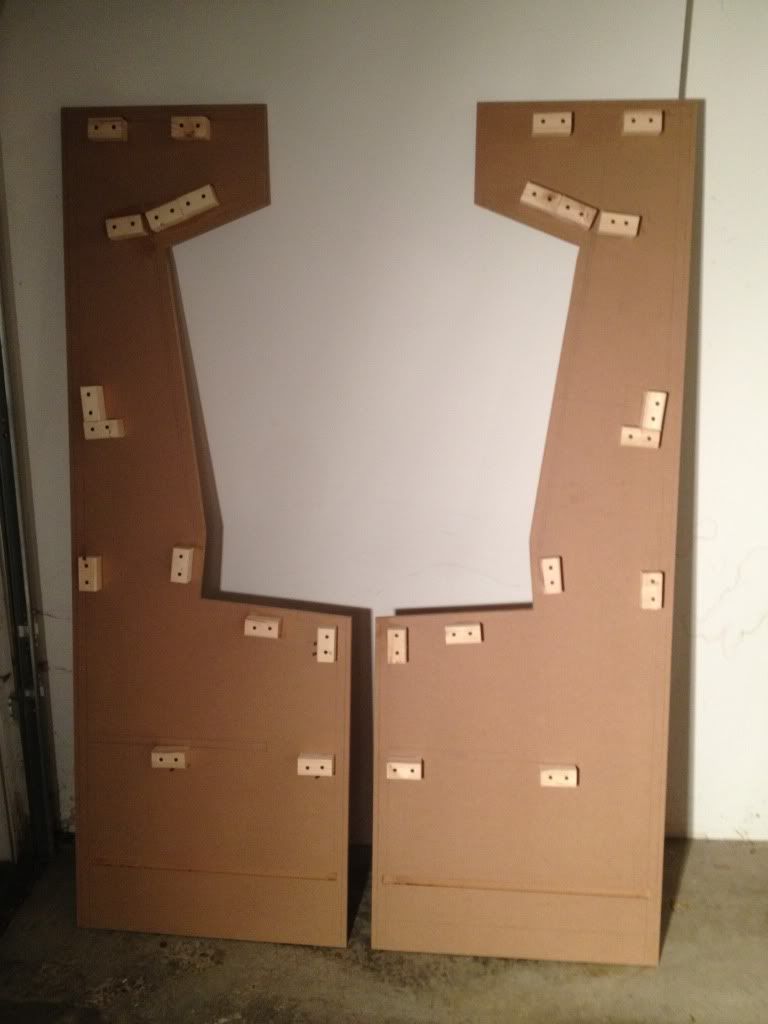
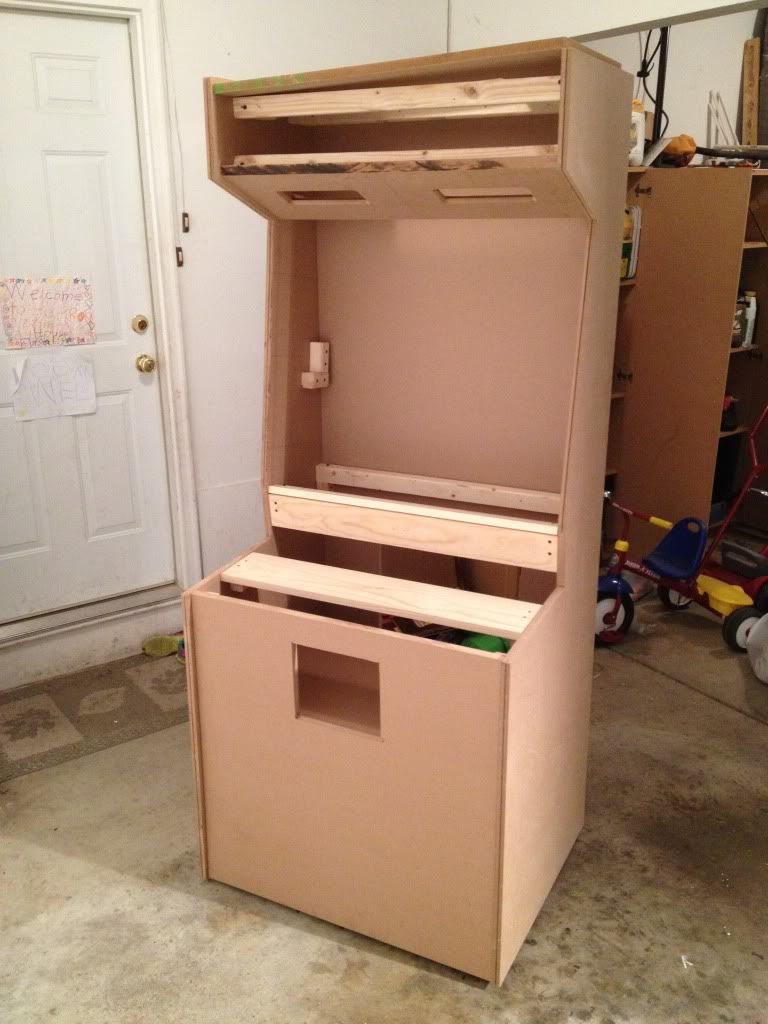
The first step was to cut the sides. I used the sketchup drawing to mark my lines and cut the first side. Then, I marked the other piece of MDF and rough cut to within about 1/2" with a jigsaw. Then, the flush trim bit and orbital sander both ensured I had two identical pieces. The tmolding slot was cut on all edges but the bottom edge.
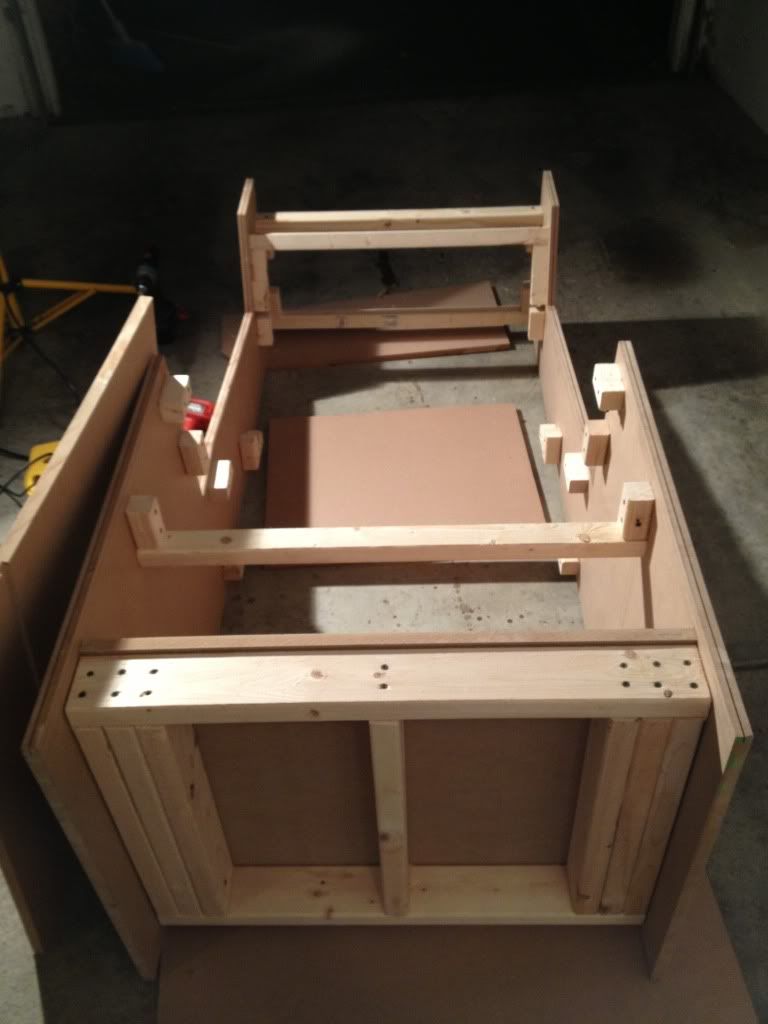
Next, I built a base. It turned out quite a bit more "substantial" than I thought because of where the casters needed to be mounted.

I wanted my casters to be mostly covered up by all 4 cabinet sides. I did not want the bottom of the cabinet to be more than about an inch off the ground, yet the casters were 3" tall. To accomplish this, I needed to be sure that the base was securely attached to the sides and the entire weight of the cabinet was not on a few screws around the base, since the cabinet could not truly rest on the base itself. Dado joints were the answer to that. I made a very basic jig to use on each piece around the base and cut the dado using a 3/4" router straight bit. Also, there needed to be an overhang on the base to slip into the dado joint on each side.
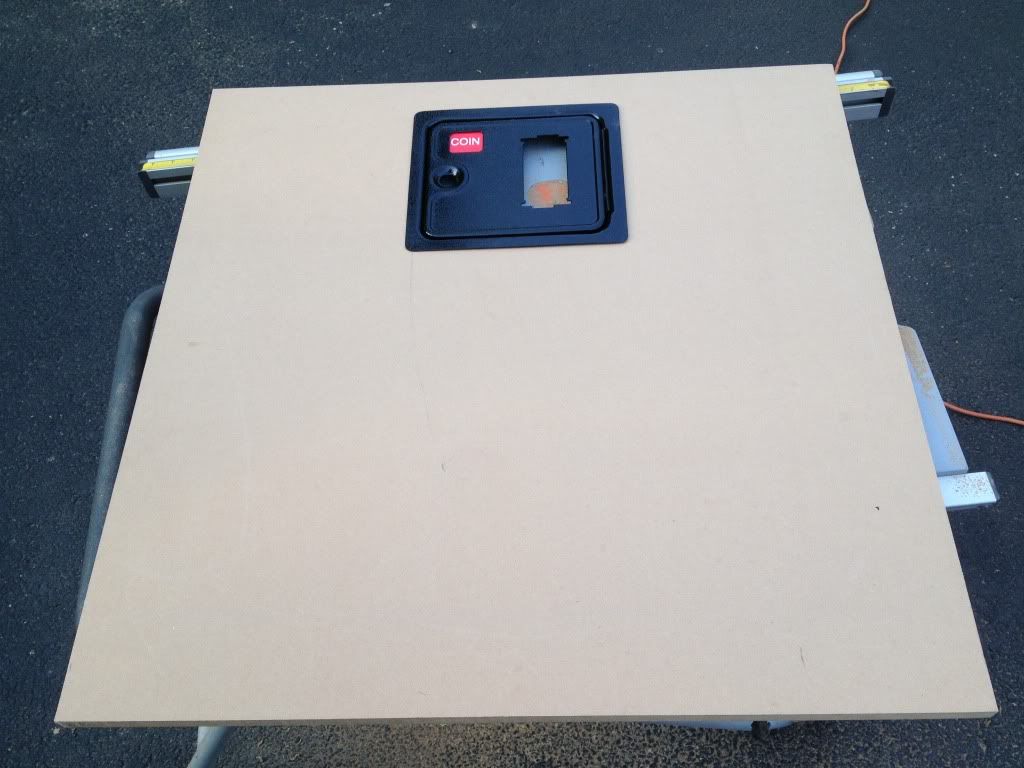
I made the front panel and cut a hole for the coin door.
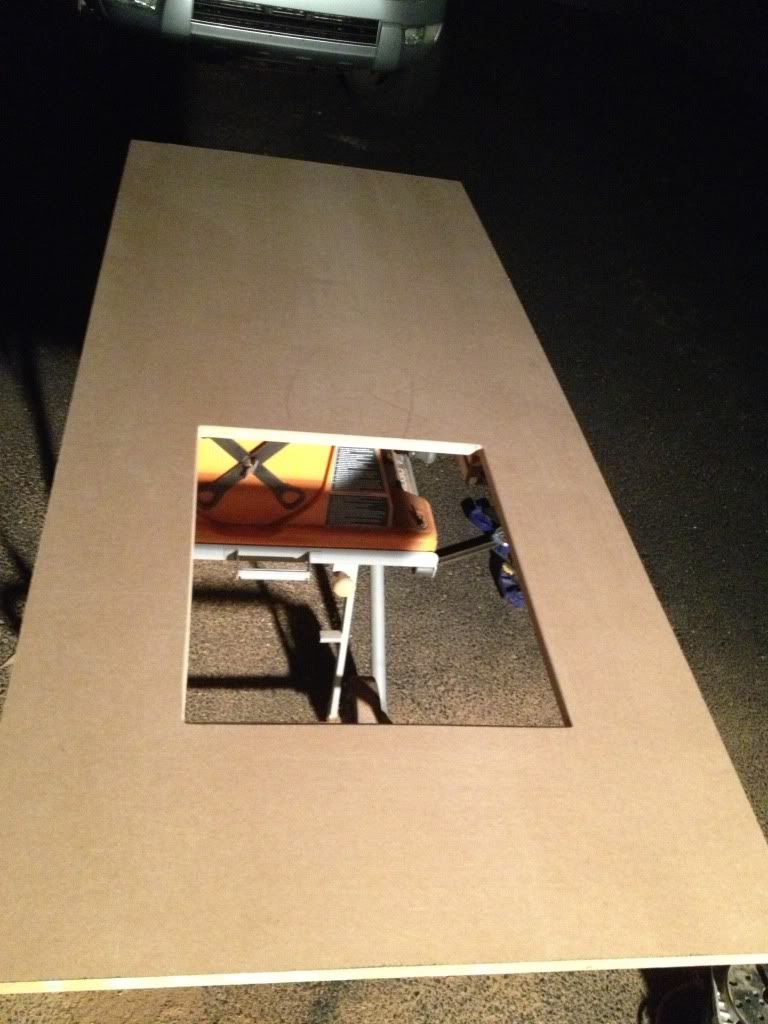
I made the back panel and left an open hole so I could access the PC and also for ventilation purposes.
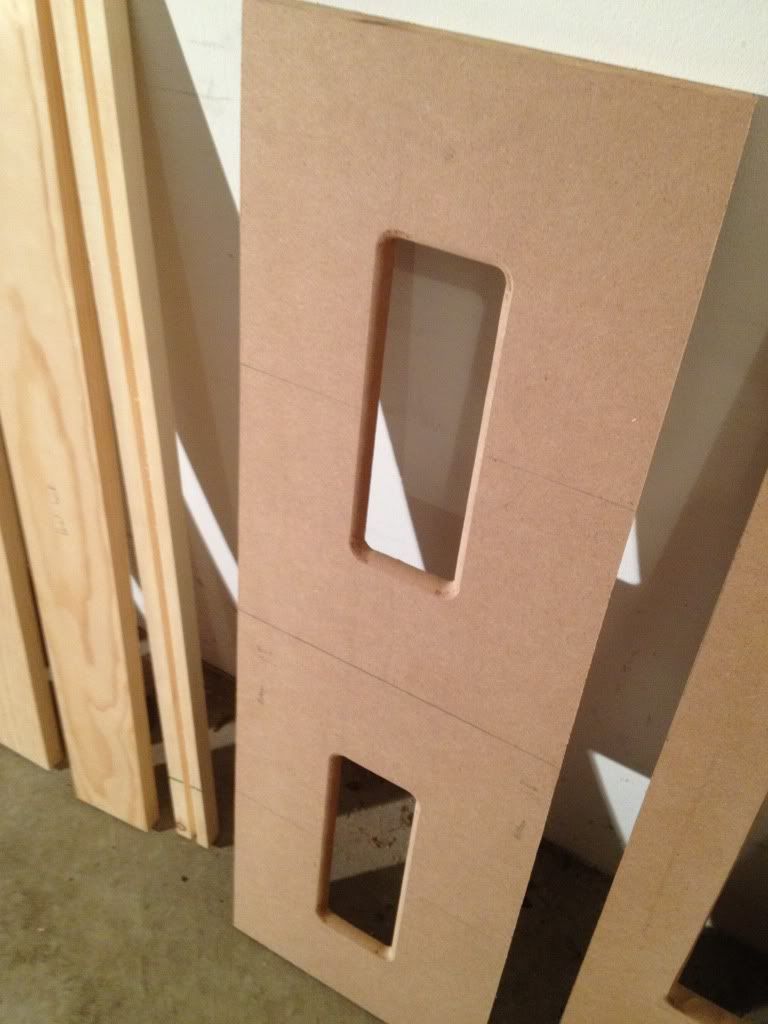
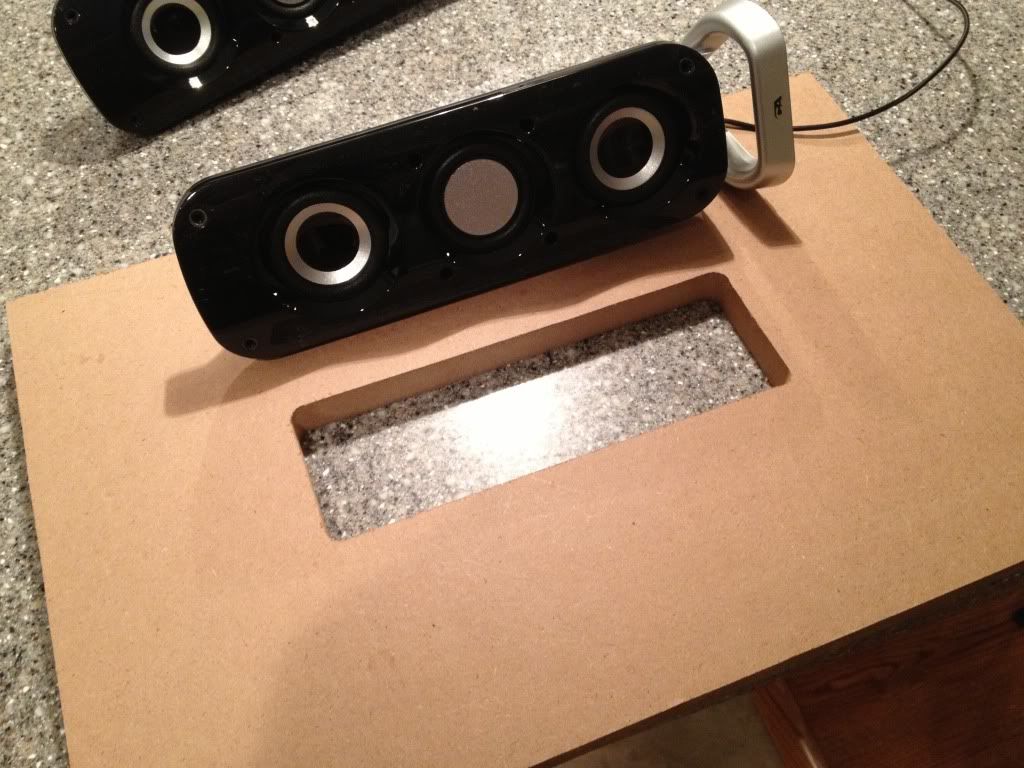
The top was pretty straight forward, but I did cut an opening (which I later covered with speaker mesh) for ventilation. The speaker panel had a few interesting twists. Both the front and back edge were angled. The speaker cutouts were recessed in the back and finished with a roundover bit on the front. I would later cover them with speaker mesh. The recess was made with a straight bit and a jig.
Next, 2x2 blocks were glued and screwed identically to each side. I did one side first, clamped them together and marked the spots, then did the other side.
At this point, all of the pieces were ready to be assembled. I used glue and screws only from the inside of the cabinet to make finishing easy.
Once it was assembled and upright, I sanded, primed, and painted it in the garage. 1 primer and 2 regular coats were required for sufficient coverage. Also, I should note that I decided to roll the paint on...don't own a sprayer or a good place to do it. I was pleased with the finish. The primer was oil based and the paint was latex, fyi.
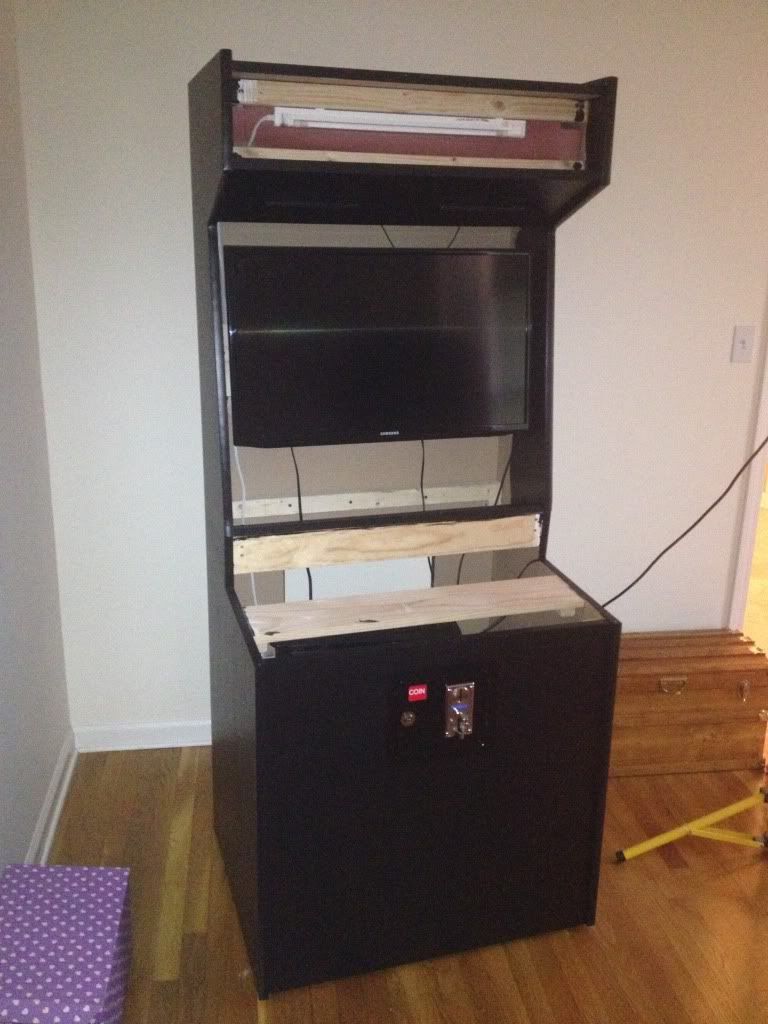
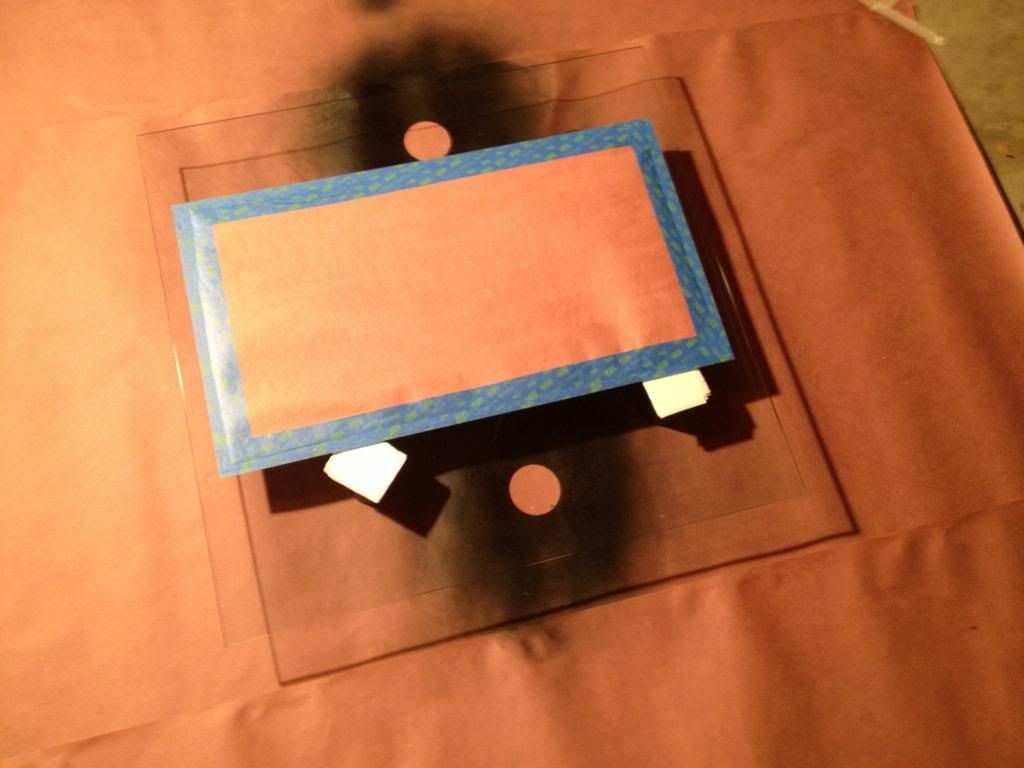
The BEAST was IN THE HOUSE (literally and figuratively speaking) at this point! Once there, I was able to install t-molding, mount the television, attach the marquee light, strap in the speakers, put in the smart strip, coin door, etc. The speaker openings were covered with black speaker mesh from a local fabric store. It was a bit more see-thru than desired, so we folded it back over itself a few times and stapled it in place. The screen glass is tempered 1/4" glass resting in a grooved 1x2 and sandwiched in between blocks at the top. The wife helped tape off the screen area and I used black spray primer and paint to cover the back of the glass.
The only other part I can think to talk about was the marquee. For this part, I went to kinko's and had them print the artwork on their paper they use for light boxes. I cut a template out of MDF for the marquee opening size and made 2 1/16" plexi pieces using the flush trim bit. The bottom and top retainers are the L-shaped aluminum strips that can be found at any hardware store. I cut the aluminum down to size and spray painted it black.
With the marquee and screen glass in place, I was ready to call it done.
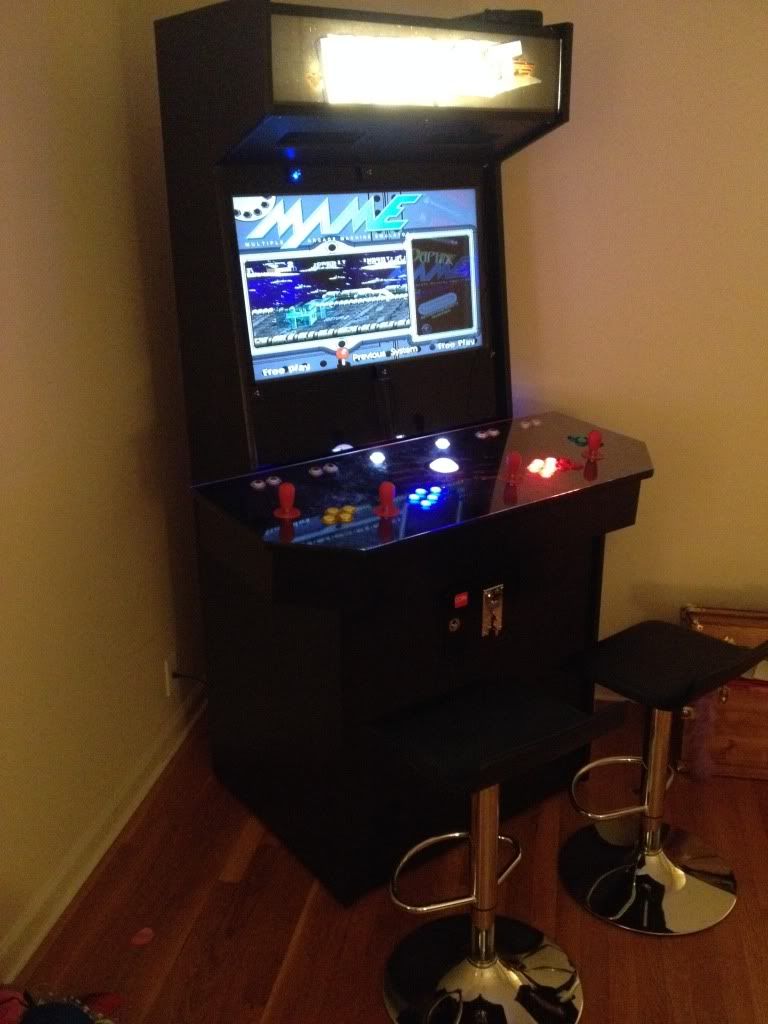
Chapter 6: BEAST lives!Here are a couple of pictures of the cabinet all finished...yes, that is our former living room (now referred to as the "Arcade room".
Here is a video of the cabinet in action
[coming soon]


 Home
Home Help
Help Search
 Login
Login Register

 Send this topic
 Print
Print Topic: A new BEAST is born...32" slim/wide scratch build w PICS (Read 3762 times)


